一、整合步骤
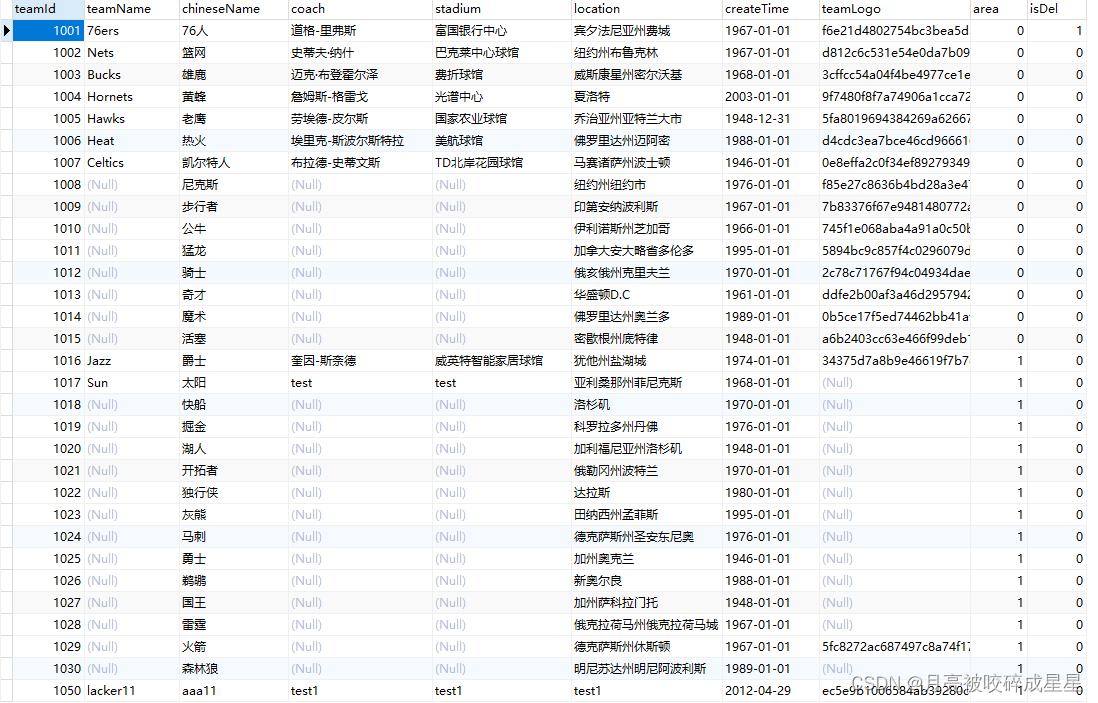
1.1 数据表的介绍
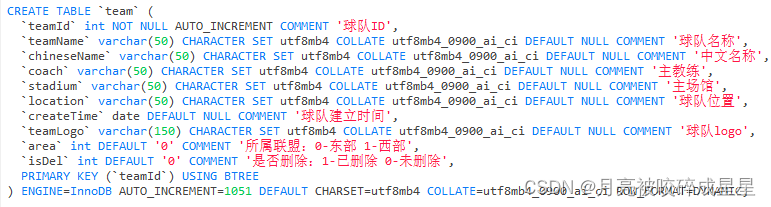
team表:
player表:


1.2 创建maven项目
1.3 pom.xml引入jar依赖
<?xml version="1.0" encoding="UTF-8"?>
<project xmlns="http://maven.apache.org/POM/4.0.0"
         xmlns:xsi="http://www.w3.org/2001/XMLSchema-instance"
         xsi:schemaLocation="http://maven.apache.org/POM/4.0.0 http://maven.apache.org/xsd/maven-4.0.0.xsd">
    <modelVersion>4.0.0</modelVersion>

    <groupId>com.lxy</groupId>
    <artifactId>myssm_test</artifactId>
    <version>1.0-SNAPSHOT</version>

    <packaging>war</packaging>

    <!--SSM整合 spring mybatis mysql等 -->
    <!-- 集中定义依赖版本号 一定要注意版本号 避免踩坑 -->
    <properties>
        <spring.version>5.2.13.RELEASE</spring.version>
        <mybatis.version>3.5.6</mybatis.version>
        <mybatis.spring.version>1.3.3</mybatis.spring.version>
        <pagehelper.version>5.1.10</pagehelper.version>
        <mysql.version>8.0.23</mysql.version>
        <druid.version>1.2.3</druid.version>
        <servlet-api.version>4.0.1</servlet-api.version>
        <jackson.version>2.9.6</jackson.version>
        <log4j.version>1.2.17</log4j.version>
        <junit.version>4.12</junit.version>
        <maven.compiler.source>11</maven.compiler.source>
        <maven.compiler.target>11</maven.compiler.target>
    </properties>
    <dependencies>
        <!-- spring -->
        <dependency>
            <groupId>org.springframework</groupId>
            <artifactId>spring-webmvc</artifactId>
            <version>${spring.version}</version>
        </dependency>
        <dependency>
            <groupId>org.springframework</groupId>
            <artifactId>spring-tx</artifactId>
            <version>${spring.version}</version>
        </dependency>
        <dependency>
            <groupId>org.springframework</groupId>
            <artifactId>spring-jdbc</artifactId>
            <version>${spring.version}</version>
        </dependency>
        <dependency>
            <groupId>org.springframework</groupId>
            <artifactId>spring-aspects</artifactId>
            <version>${spring.version}</version>
        </dependency>
        <!--文件上传-->
        <dependency>
            <groupId>commons-fileupload</groupId>
            <artifactId>commons-fileupload</artifactId>
            <version>1.3.1</version>
        </dependency>
        <!-- Mybatis -->
        <dependency>
            <groupId>org.mybatis</groupId>
            <artifactId>mybatis</artifactId>
            <version>${mybatis.version}</version>
        </dependency>
        <!--Mybatis spring整合需要的jar-->
        <dependency>
            <groupId>org.mybatis</groupId>
            <artifactId>mybatis-spring</artifactId>
            <version>${mybatis.spring.version}</version>
        </dependency>
        <!-- 分页插件 -->
        <dependency>
            <groupId>com.github.pagehelper</groupId>
            <artifactId>pagehelper</artifactId>
            <version>${pagehelper.version}</version>
        </dependency>
        <!-- MySql -->
        <dependency>
            <groupId>mysql</groupId>
            <artifactId>mysql-connector-java</artifactId>
            <version>${mysql.version}</version>
        </dependency>
        <!-- 连接池 -->
        <dependency>
            <groupId>com.alibaba</groupId>
            <artifactId>druid</artifactId>
            <version>${druid.version}</version>
        </dependency>
        <!-- servlet -->
        <dependency>
            <groupId>javax.servlet</groupId>
            <artifactId>javax.servlet-api</artifactId>
            <version>${servlet-api.version}</version>
            <scope>provided</scope>
        </dependency>
        <!-- Jackson Json处理工具包 -->
        <dependency>
            <groupId>com.fasterxml.jackson.core</groupId>
            <artifactId>jackson-databind</artifactId>
            <version>${jackson.version}</version>
        </dependency>
        <!-- log4j -->
        <dependency>
            <groupId>log4j</groupId>
            <artifactId>log4j</artifactId>
            <version>${log4j.version}</version>
        </dependency>
        <!-- junit -->
        <dependency>
            <groupId>junit</groupId>
            <artifactId>junit</artifactId>
            <version>${junit.version}</version>
            <scope>test</scope>
        </dependency>
        <dependency>
            <groupId>org.springframework</groupId>
            <artifactId>spring-test</artifactId>
            <version>${spring.version}</version>
        </dependency>
        <!--@Resource注解的依赖-->
        <dependency>
            <groupId>javax.annotation</groupId>
            <artifactId>javax.annotation-api</artifactId>
            <version>1.3.2</version>
        </dependency>
    </dependencies>
    <!-- 插件配置 -->
    <build>
        <resources>
            <resource>
                <directory>src/main/java</directory><!--所在的目录-->
                <includes><!--包括目录下的.properties,.xml 文件都会被扫描到-->
                    <include>**/*.properties</include>
                    <include>**/*.xml</include>
                </includes>
                <filtering>false</filtering>
            </resource>
        </resources>
        <plugins>
            <!-- 设置项目的编译版本 -->
            <plugin>
                <groupId>org.apache.maven.plugins</groupId>
                <artifactId>maven-compiler-plugin</artifactId>
                <configuration>
                    <source>1.8</source>
                    <target>1.8</target>
                    <encoding>UTF-8</encoding>
                </configuration>
            </plugin>
            <!-- 设置tomcat插件 -->
            <plugin>
                <groupId>org.apache.tomcat.maven</groupId>
                <artifactId>tomcat7-maven-plugin</artifactId>
                <version>2.2</version>
                <configuration>
                    <!-- 指定端口 -->
                    <port>80</port>
                    <!-- 请求路径 -->
                    <path>/</path>
                    <uriEncoding>UTF-8</uriEncoding>
                </configuration>
            </plugin>
            <!--反向生成插件-->
            <plugin>
                <groupId>org.mybatis.generator</groupId>
                <artifactId>mybatis-generator-maven-plugin</artifactId>
                <version>1.3.5</version>
                <configuration>
                    <!--配置文件的路径-->
                    <configurationFile>src/main/resources/generatorConfig.xml</configurationFile>
                    <overwrite>true</overwrite>
                </configuration>
                <dependencies>
                    <dependency>
                        <groupId>org.mybatis.generator</groupId>
                        <artifactId>mybatis-generator-core</artifactId>
                        <version>1.3.5</version>
                    </dependency>
                </dependencies>
            </plugin>
        </plugins>
    </build>
</project>
1.4 编写Mybatis的配置文件
Mybatis的配置文件mybatis.xml
<?xml version="1.0" encoding="UTF-8" ?>
<!DOCTYPE configuration
        PUBLIC "-//mybatis.org//DTD Config 3.0//EN"
        "http://mybatis.org/dtd/mybatis-3-config.dtd">
<configuration>
    <settings>
        <setting name="logImpl" value="LOG4J" />
    </settings>
    <!--spring 接管其他的工作 数据源 映射文件注册 插件-->
</configuration>
日志配置文件文件log4j.properties:
# Global logging configuration info warning error
log4j.rootLogger=DEBUG,stdout
# Console output...
log4j.appender.stdout=org.apache.log4j.ConsoleAppender
log4j.appender.stdout.layout=org.apache.log4j.PatternLayout
log4j.appender.stdout.layout.ConversionPattern=%5p [%t] - %m%n
1.5 编写Spring的配置文件spring.xml
连接数据库的参数配置文件jdbc.properties
jdbc.driver=com.mysql.cj.jdbc.Driver
jdbc.url=jdbc:mysql://localhost:3306/myssm_kkb?useUnicode=true&characterEncoding=utf-8&useSSL=false&serverTimezone=GMT
jdbc.username=root
jdbc.password=linda198721
这里数据库的版本是Mysql8
spring.xml:
<?xml version="1.0" encoding="UTF-8"?>
<beans xmlns="http://www.springframework.org/schema/beans"
       xmlns:xsi="http://www.w3.org/2001/XMLSchema-instance"
       xmlns:context="http://www.springframework.org/schema/context"
       xmlns:tx="http://www.springframework.org/schema/tx"
       xsi:schemaLocation="http://www.springframework.org/schema/beans http://www.springframework.org/schema/beans/spring-beans.xsd
        http://www.springframework.org/schema/context http://www.springframework.org/schema/context/spring-context.xsd
        http://www.springframework.org/schema/tx http://www.springframework.org/schema/tx/spring-tx.xsd">

    <!--这些包中添加注解之后对象的创建权限就交给spring容器-->
    <context:component-scan base-package="com.lxy.mapper,com.lxy.service"/>

    <!--spring整合mybatis-->
    <context:property-placeholder location="classpath*:jdbc.properties"/>
    <bean id="dataSource" class="com.alibaba.druid.pool.DruidDataSource">
        <!--驱动可以省略,根据url推断-->
        <property name="driverClassName" value="${jdbc.driver}"/>
        <property name="url" value="${jdbc.url}"/>
        <property name="username" value="${jdbc.username}"/>
        <property name="password" value="${jdbc.password}"/>
    </bean>
    <bean id="sqlSessionFactory" class="org.mybatis.spring.SqlSessionFactoryBean">
        <!--如果有mybatis的单独的配置文件,需要在此引入-->
        <property name="configLocation" value="classpath:mybatis.xml"/>
        <property name="dataSource" ref="dataSource"/>
        <!--配置别名-->
        <property name="typeAliasesPackage" value="com.lxy.pojo"/>
        <!--映射文件-->
        <!--<property name="mapperLocations" value="com/kkb/mapper/*.xml"/>-->
        <!--插件-->
        <property name="plugins">
            <array>
                <!--分页 拦截器-->
                <bean class="com.github.pagehelper.PageInterceptor">
                    <property name="properties">
                        <value>
                            reasonable=true
                        </value>
                    </property>
                </bean>
            </array>
        </property>
    </bean>
    <bean class="org.mybatis.spring.mapper.MapperScannerConfigurer">
        <property name="basePackage" value="com.lxy.mapper"/>
        <property name="sqlSessionFactoryBeanName" value="sqlSessionFactory"/>
    </bean>

    <!--通过注解方式实现事务-->
    <tx:annotation-driven transaction-manager="transactionManager"/>
    <bean id="transactionManager" class="org.springframework.jdbc.datasource.DataSourceTransactionManager">
        <property name="dataSource" ref="dataSource"/>
    </bean>
</beans>
1.6 编写SpringMVC的配置文件springmvc.xml
<?xml version="1.0" encoding="UTF-8"?>
<beans xmlns="http://www.springframework.org/schema/beans"
       xmlns:xsi="http://www.w3.org/2001/XMLSchema-instance"
       xmlns:context="http://www.springframework.org/schema/context"
       xmlns:mvc="http://www.springframework.org/schema/mvc"
       xsi:schemaLocation="http://www.springframework.org/schema/beans http://www.springframework.org/schema/beans/spring-beans.xsd
       http://www.springframework.org/schema/context http://www.springframework.org/schema/context/spring-context.xsd
       http://www.springframework.org/schema/mvc http://www.springframework.org/schema/mvc/spring-mvc.xsd">

    <!--springmvc的配置文件:控制器的bean对象都在这里扫描-->
    <context:component-scan base-package="com.lxy.controller"/>
    <mvc:annotation-driven/>
    <!--视图解析器-->
    <bean id="internalResourceViewResolver" class="org.springframework.web.servlet.view.InternalResourceViewResolver">
        <property name="prefix" value="/pages/"/>
        <property name="suffix" value=".html"/>
    </bean>
    <!--静态资源处理-->
    <mvc:resources mapping="/img/**" location="/img/"/>
    <mvc:resources mapping="/js/**" location="/js/"/>
    <mvc:resources mapping="/css/**" location="/css/"/>
    <mvc:resources mapping="/fonts/**" location="/fonts/"/>
    <mvc:resources mapping="/static/**" location="/static/"/>
    <mvc:resources mapping="/pages/**" location="/pages/"/>
    <!--文件上传-->
    <bean id="multipartResolver" class="org.springframework.web.multipart.commons.CommonsMultipartResolver">
    </bean>
</beans>
1.7 导入静态页面
如果您也想要这个项目的话,可以在下发评论,我私信发送给您
1.8 编写web.xml配置文件
<?xml version="1.0" encoding="UTF-8"?>
<web-app xmlns="http://xmlns.jcp.org/xml/ns/javaee"
         xmlns:xsi="http://www.w3.org/2001/XMLSchema-instance"
         xsi:schemaLocation="http://xmlns.jcp.org/xml/ns/javaee http://xmlns.jcp.org/xml/ns/javaee/web-app_4_0.xsd"
         version="4.0">
    <welcome-file-list>
        <welcome-file>/pages/index.html</welcome-file>
    </welcome-file-list>

    <!--spring的配置-->
    <context-param>
        <!--contextConfigLocation:表示用于加载 Bean的配置文件
			classpath和classpath*区别:
                classpath:只会到你的class路径中查找找文件。
                classpath*:不仅包含class路径,还包括jar文件中(class路径)进行查找。
		-->
        <param-name>contextConfigLocation</param-name>
        <param-value>classpath*:spring.xml</param-value>
    </context-param>
    <listener>
        <listener-class>org.springframework.web.context.ContextLoaderListener</listener-class>
    </listener>
    <!--SpringMVC的配置-->
    <servlet>
        <servlet-name>dispatcherServlet</servlet-name>
        <servlet-class>org.springframework.web.servlet.DispatcherServlet</servlet-class>
        <!-- 创建前端控制器的时候读取springmvc配置文件启动ioc容器 -->
        <init-param>
            <param-name>contextConfigLocation</param-name>
            <param-value>classpath*:springmvc.xml</param-value>
        </init-param>
        <!-- Tomcat启动就创建此对象 -->
        <load-on-startup>1</load-on-startup>
    </servlet>
    <!-- 配置拦截路径url,所有请求都会被前端控制器拦截处理 -->
    <servlet-mapping>
        <servlet-name>dispatcherServlet</servlet-name>
        <url-pattern>/</url-pattern>
    </servlet-mapping>

    <!-- 使用Rest风格的URI 将页面普通的post请求转为指定的delete或者put请求
    原理:在Ajax中发送post请求后,带_method参数,将其修改为PUT,或者DELETE请求-->
    <filter>
        <filter-name>httpMethodFilter</filter-name>
        <filter-class>
            org.springframework.web.filter.HiddenHttpMethodFilter
        </filter-class>
    </filter>
    <filter-mapping>
        <filter-name>httpMethodFilter</filter-name>
        <url-pattern>/*</url-pattern>
    </filter-mapping>

    <!--注册字符集过滤器:post请求中文乱码问题的解决方案-->
    <filter>
        <filter-name>characterEncodingFilter</filter-name>
        <filter-class>org.springframework.web.filter.CharacterEncodingFilter</filter-class>
        <!--指定字符集-->
        <init-param>
            <param-name>encoding</param-name>
            <param-value>UTF-8</param-value>
        </init-param>
        <!--强制request使用字符集encoding-->
        <init-param>
            <param-name>forceRequestEncoding</param-name>
            <param-value>true</param-value>
        </init-param>
        <!--强制response使用字符集encoding-->
        <init-param>
            <param-name>forceResponseEncoding</param-name>
            <param-value>true</param-value>
        </init-param>
    </filter>
    <filter-mapping>
        <filter-name>characterEncodingFilter</filter-name>
        <url-pattern>/*</url-pattern>
    </filter-mapping>
</web-app>
1.8 测试
启动项目,浏览器访问http://localhost:8088/。看到如图所示页面表示项目整合成功。

二、使用mybatis反向生成实体类、dao和映射文件
2.1 反向生成配置文件generatorConfig.xml
<?xml version="1.0" encoding="UTF-8"?>
<!DOCTYPE generatorConfiguration
PUBLIC "-//mybatis.org//DTD MyBatis Generator Configuration 1.0//EN"
"http://mybatis.org/dtd/mybatis-generator-config_1_0.dtd">
<!-- 配置生成器 -->
<generatorConfiguration>
<!--1、数据库驱动jar:添加自己的jar路径 -->
<classPathEntry
location="D:\repository\mysql\mysql-connector-java\8.0.23\mysql-connector-java-8.0.23.jar" />
<context id="MyBatis" targetRuntime="MyBatis3">
<!--去除注释 -->
<commentGenerator>
<property name="suppressAllComments" value="true" />
</commentGenerator>
<!--2、数据库连接 -->
<jdbcConnection driverClass="com.mysql.cj.jdbc.Driver"
connectionURL="jdbc:mysql://localhost:3306/myssm_kkb?useUnicode=true&characterEncoding=utf8&useSSL=false&serverTimezone=GMT"
userId="a"
passwor="a">
</jdbcConnection>
<!-- 默认false,把JDBC DECIMAL 和 NUMERIC 类型解析为 Integer;
为 true时把JDBC DECIMAL和NUMERIC类型解析为java.math.BigDecimal -->
<javaTypeResolver>
<property name="forceBigDecimals" value="false" />
</javaTypeResolver>
<!--3、生成实体类 指定包名 以及生成的地址 (可以自定义地址,但是路径不存在不会自动创建
使用Maven生成在target目录下,会自动创建) -->
<javaModelGenerator targetPackage="com.lxy.pojo"
targetProject="src\main\java">
<property name="trimStrings" value="true" />
</javaModelGenerator>
<!--4、生成SQLmapper.xml映射文件 -->
<sqlMapGenerator targetPackage="com.lxy.mapper"
targetProject="src\main\resources">
</sqlMapGenerator>
<!--5、生成Dao(Mapper)接口文件,-->
<javaClientGenerator type="XMLMAPPER"
targetPackage="com.lxy.mapper"
targetProject="src\main\java">
</javaClientGenerator>
<!--6、要生成哪些表(更改tableName和domainObjectName就可以) -->
<!-- tableName:要生成的表名
enableCountByExample:Count语句中加入where条件查询,默认为true开启
enableUpdateByExample:Update语句中加入where条件查询,默认为true开启
enableDeleteByExample:Delete语句中加入where条件查询,默认为true开启
enableSelectByExample:Select多条语句中加入where条件查询,默认为true开启
selectByExampleQueryId:Select单个对象语句中加入where条件查询,默认为true开启
-->
<table tableName="Team">
<property name="useActualColumnNames" value="true"/>
</table>
<table tableName="Player">
<property name="useActualColumnNames" value="true"/>
</table>
<table tableName="game">
<property name="useActualColumnNames" value="true"/>
</table>
<table tableName="GameType">
<property name="useActualColumnNames" value="true"/>
</table>
<table tableName="Admins">
<property name="useActualColumnNames" value="true"/>
</table>
<table tableName="AdminRole">
<property name="useActualColumnNames" value="true"/>
</table>
</context>
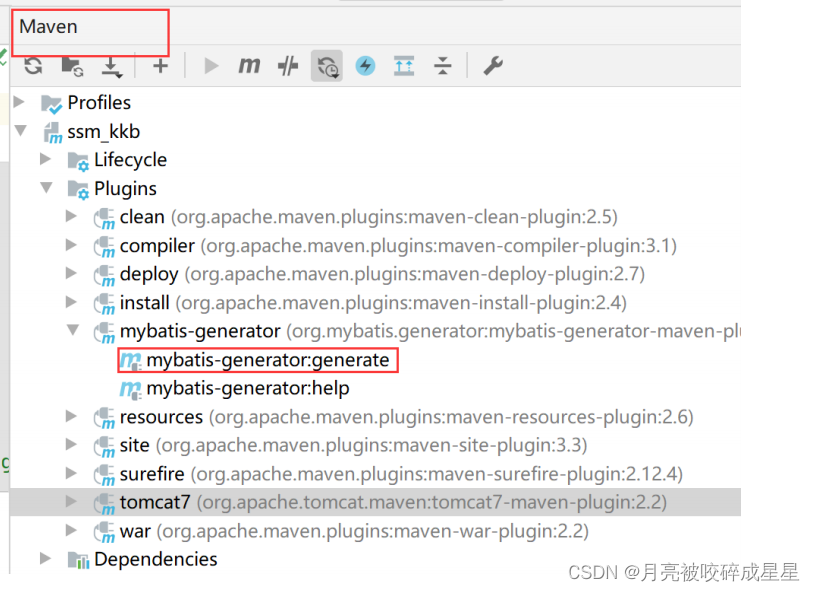
</generatorConfiguration>2.2运行插件
注意只能运行一次,运行完毕显示BUILD SUCCESS即为成功。
2.3 测试
package com.lxy.test;

import com.lxy.mapper.TeamMapper;
import com.lxy.pojo.Team;
import org.junit.Test;
import org.junit.runner.RunWith;
import org.springframework.test.context.ContextConfiguration;
import org.springframework.test.context.junit4.SpringJUnit4ClassRunner;

import javax.annotation.Resource;

@RunWith(SpringJUnit4ClassRunner.class)
@ContextConfiguration(locations = {"classpath:spring.xml"})
public class TestMapper {

    @Resource
    private TeamMapper teamMapper;
    @Test
    public void test01(){
        Team team = teamMapper.selectByPrimaryKey(1001);
        System.out.println(team);
    }
}
三、案例--使用多条件分页查询
3.1 业务逻辑层
编写一个QueryVO类,存储查询条件
package com.lxy.vo;

import org.springframework.format.annotation.DateTimeFormat;

import java.util.Date;

public class QueryVO {
    private String teamName;
    private String chineseName;
    private String coach;
    //@DateTimeFormat(pattern = "yyyy-MM-dd")
    private Date beginDate;
    //@DateTimeFormat(pattern = "yyyy-MM-dd")
    private Date endDate;
    private Integer area;

    @Override
    public String toString() {
        return "QueryVO{" +
                "teamName='" + teamName + '\'' +
                ", chineseName='" + chineseName + '\'' +
                ", coach='" + coach + '\'' +
                ", beginDate=" + beginDate +
                ", endDate=" + endDate +
                ", area=" + area +
                '}';
    }

    public String getTeamName() {
        return teamName;
    }

    public void setTeamName(String teamName) {
        this.teamName = teamName;
    }

    public String getChineseName() {
        return chineseName;
    }

    public void setChineseName(String chineseName) {
        this.chineseName = chineseName;
    }

    public String getCoach() {
        return coach;
    }

    public void setCoach(String coach) {
        this.coach = coach;
    }

    public Date getBeginDate() {
        return beginDate;
    }

    public void setBeginDate(Date beginDate) {
        this.beginDate = beginDate;
    }

    public Date getEndDate() {
        return endDate;
    }

    public void setEndDate(Date endDate) {
        this.endDate = endDate;
    }

    public Integer getArea() {
        return area;
    }

    public void setArea(Integer area) {
        this.area = area;
    }
}
编写service层代码,用来条件分页查询
package com.lxy.service;

import com.github.pagehelper.PageHelper;
import com.github.pagehelper.PageInfo;
import com.lxy.mapper.TeamMapper;
import com.lxy.pojo.Team;
import com.lxy.pojo.TeamExample;
import com.lxy.vo.QueryVO;
import org.springframework.stereotype.Service;

import javax.annotation.Resource;
import java.util.List;

@Service
public class TeamService {
    @Resource
    private TeamMapper teamMapper;

    public PageInfo<Team> queryByPage(Integer pageNum, Integer pageSize, QueryVO vo){
        TeamExample example = new TeamExample();
        //创建条件的容器
        TeamExample.Criteria criteria = example.createCriteria();
        if (vo!=null){
            if (vo.getTeamName()!=null&&!"".equals(vo.getTeamName().trim())){
                criteria.andTeamNameLike("%"+vo.getTeamName().trim()+"%");
            }
            if(vo.getChineseName()!=null && !"".equals(vo.getChineseName().trim()) ){
                criteria.andChineseNameLike("%"+vo.getChineseName().trim()+"%");
            }
            if(vo.getCoach()!=null && !"".equals(vo.getCoach().trim())){
                criteria.andCoachLike("%"+vo.getCoach().trim()+"%");
            }
            if(vo.getBeginDate()!=null){
                criteria.andCreateTimeGreaterThanOrEqualTo(vo.getBeginDate());
            }
            if(vo.getEndDate()!=null){
                criteria.andCreateTimeLessThanOrEqualTo(vo.getEndDate());
            }
            if(vo.getArea()!=null && vo.getArea()!=-1){
                criteria.andAreaEqualTo(vo.getArea());
            }
        }
        //分页
        PageHelper.startPage(pageNum,pageSize);
        List<Team> list = teamMapper.selectByExample(example);
        return new PageInfo<>(list);
    }
}
编写测试类:
package com.lxy.test;

import com.github.pagehelper.PageInfo;
import com.lxy.mapper.TeamMapper;
import com.lxy.pojo.Team;
import com.lxy.service.TeamService;
import org.junit.Test;
import org.junit.runner.RunWith;
import org.springframework.test.context.ContextConfiguration;
import org.springframework.test.context.junit4.SpringJUnit4ClassRunner;

import javax.annotation.Resource;

@RunWith(SpringJUnit4ClassRunner.class)
@ContextConfiguration(locations = {"classpath:spring.xml"})
public class TestMapper {

    @Resource
    private TeamMapper teamMapper;

    @Resource
    private TeamService teamService;

    @Test
    public void test02(){
        PageInfo<Team> teamPageInfo = teamService.queryByPage(1, 5, null);
        System.out.println(teamPageInfo);
    }
    @Test
    public void test01(){
        Team team = teamMapper.selectByPrimaryKey(1001);
        System.out.println(team);
    }
}
测试结果:
 3.2 控制器层
3.2.1 返回值的初始写法
编写controller代码:
package com.lxy.controller;

import com.github.pagehelper.PageInfo;
import com.lxy.pojo.Team;
import com.lxy.service.TeamService;
import com.lxy.vo.QueryVO;
import org.springframework.stereotype.Controller;
import org.springframework.web.bind.annotation.RequestMapping;
import org.springframework.web.bind.annotation.ResponseBody;

import javax.annotation.Resource;

@Controller
@RequestMapping("team")
@ResponseBody
public class TeamController {

    @Resource
    private TeamService teamService;

    @RequestMapping("list")
    public PageInfo<Team> queryByPage(Integer pageNum, Integer pageSize, QueryVO vo){
        if (pageNum==null || pageNum<=0){
            pageNum=1;
        }
        if (pageSize==null || pageSize<=0){
            pageSize=5;
        }
        PageInfo<Team> teamPageInfo = teamService.queryByPage(pageNum, pageSize, vo);
        return teamPageInfo;
    }
}
这样返回给前端是返回的json格式的,包括时间,如果我们要返回正常的时间,需要在Team实体类中的时间字段上添加
@JsonFormat(pattern = "yyyy-MM-dd",timezone = "GMT+8")这样显示的时间正常。
启动程序来测试一下:

这样可以看到返回的json数据正常
3.2.2 返回值的高级写法
将返回值封装为ResultVO,既能返回一个pageInfo,还能返回一个对象,一个集合,以及一条消息。
更改controller代码:
package com.lxy.controller;

import com.github.pagehelper.PageInfo;
import com.lxy.pojo.Team;
import com.lxy.service.TeamService;
import com.lxy.vo.QueryVO;
import com.lxy.vo.ResultVO;
import org.springframework.stereotype.Controller;
import org.springframework.web.bind.annotation.RequestMapping;
import org.springframework.web.bind.annotation.ResponseBody;

import javax.annotation.Resource;

@Controller
@RequestMapping("team")
@ResponseBody
public class TeamController {

    @Resource
    private TeamService teamService;

    @RequestMapping("list")
    public ResultVO<Team> queryByPage(Integer pageNum, Integer pageSize, QueryVO vo){
        if (pageNum==null || pageNum<=0){
            pageNum=1;
        }
        if (pageSize==null || pageSize<=0){
            pageSize=5;
        }
        PageInfo<Team> teamPageInfo = teamService.queryByPage(pageNum, pageSize, vo);
        return new ResultVO<>(teamPageInfo);
    }
}
启动程序测试:

3.2.3 日期类型解决方案
如果此时想访问localhost的主页面来获取数据,很抱歉目前还获取不到。
因为如果通过主页面来获取条件,初始时时间数据为空,那么程序会想把空指转换为日期类型,所以我们必须要在QueryVO中日期属性上加上日期格式化的注解 如下--
//如果实体类中的日期类型需要从页面获取数据,避免NULL转换为Date类型出现问题
//解决方案2:@InitBinder
//解决方案1:实体类的日期类型属性上添加注解
方案一:
日期格式化:
package com.lxy.vo;

import org.springframework.format.annotation.DateTimeFormat;

import java.util.Date;

public class QueryVO {
    private String teamName;
    private String chineseName;
    private String coach;
    @DateTimeFormat(pattern = "yyyy-MM-dd")
    private Date beginDate;
    @DateTimeFormat(pattern = "yyyy-MM-dd")
    private Date endDate;
    private Integer area;

    @Override
    public String toString() {
        return "QueryVO{" +
                "teamName='" + teamName + '\'' +
                ", chineseName='" + chineseName + '\'' +
                ", coach='" + coach + '\'' +
                ", beginDate=" + beginDate +
                ", endDate=" + endDate +
                ", area=" + area +
                '}';
    }

    public String getTeamName() {
        return teamName;
    }

    public void setTeamName(String teamName) {
        this.teamName = teamName;
    }

    public String getChineseName() {
        return chineseName;
    }

    public void setChineseName(String chineseName) {
        this.chineseName = chineseName;
    }

    public String getCoach() {
        return coach;
    }

    public void setCoach(String coach) {
        this.coach = coach;
    }

    public Date getBeginDate() {
        return beginDate;
    }

    public void setBeginDate(Date beginDate) {
        this.beginDate = beginDate;
    }

    public Date getEndDate() {
        return endDate;
    }

    public void setEndDate(Date endDate) {
        this.endDate = endDate;
    }

    public Integer getArea() {
        return area;
    }

    public void setArea(Integer area) {
        this.area = area;
    }
}
这样就可以访问到主页面了:
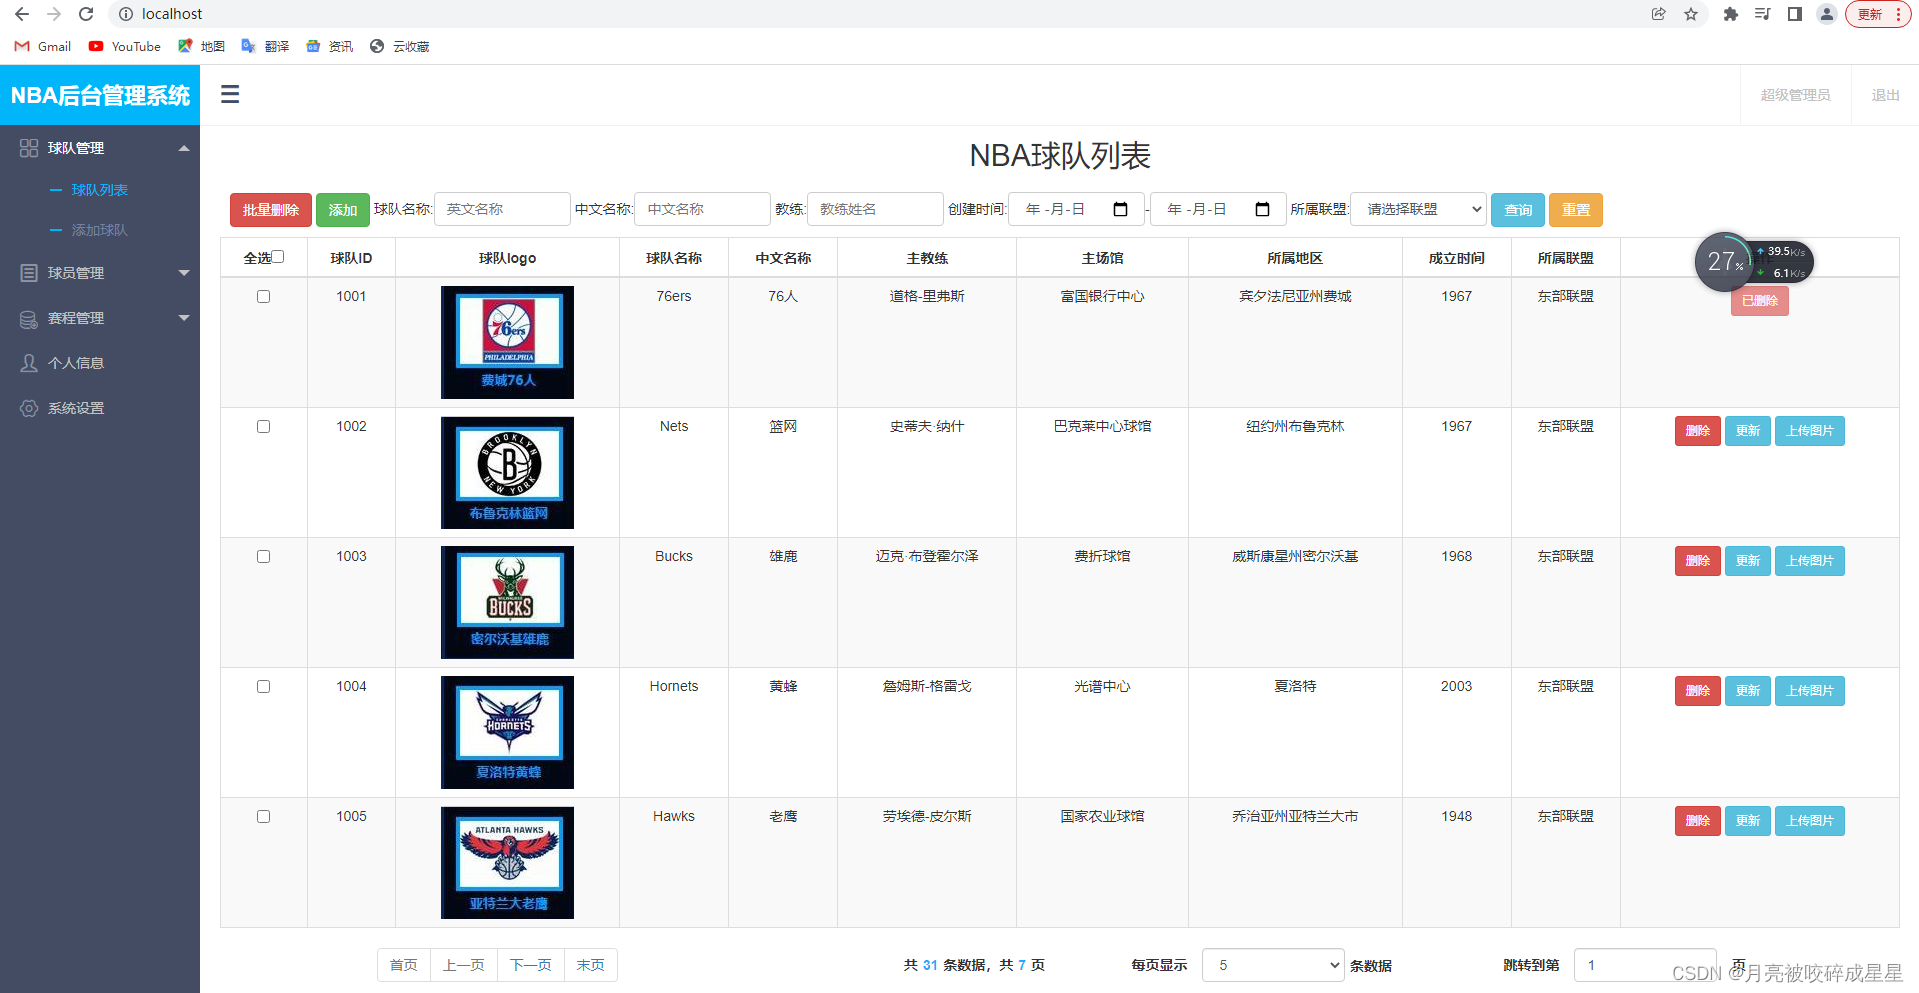
方案二:
在controller中添加注解方法:
    @InitBinder
    protected void initDateFormatBinder(WebDataBinder binder){
        SimpleDateFormat dateFormat = new SimpleDateFormat("yyyy-MM-dd");
        binder.registerCustomEditor(Date.class,new CustomDateEditor(dateFormat,true));
    }
添加这个方法后,实体类中可不添加注解
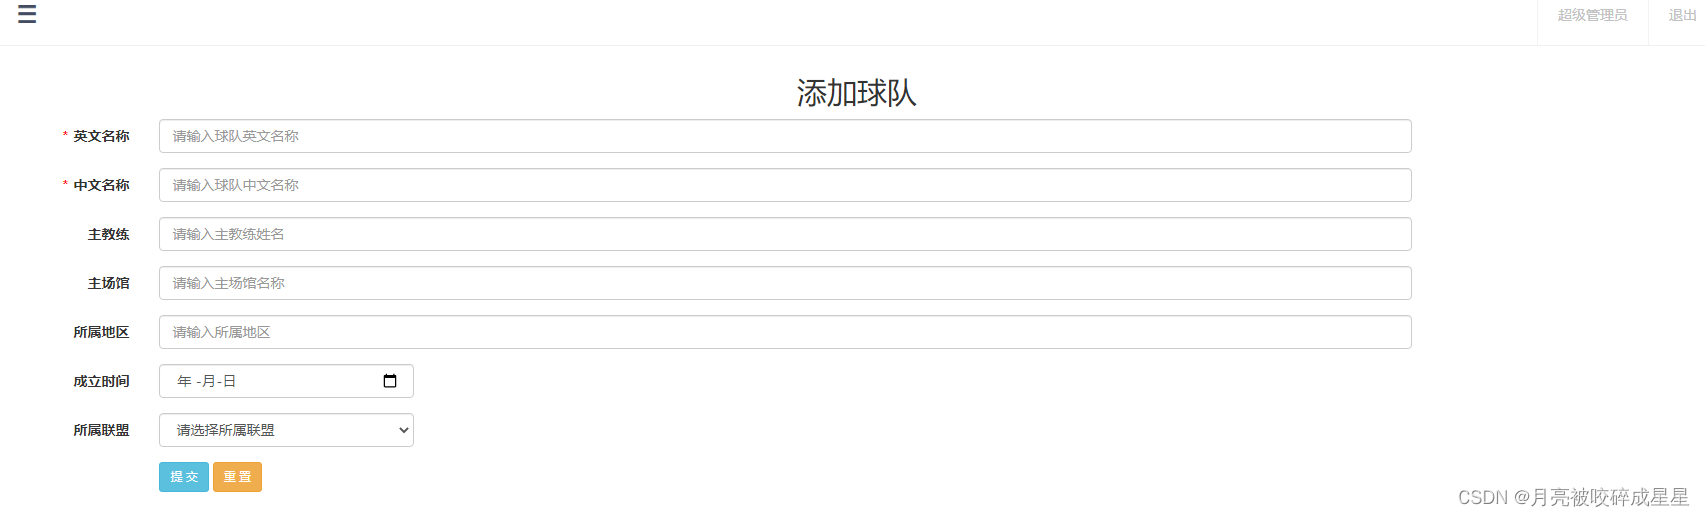
四、添加操作
teamService添加代码:
package com.lxy.service;

import com.github.pagehelper.PageHelper;
import com.github.pagehelper.PageInfo;
import com.lxy.mapper.TeamMapper;
import com.lxy.pojo.Team;
import com.lxy.pojo.TeamExample;
import com.lxy.vo.QueryVO;
import org.springframework.stereotype.Service;
import org.springframework.transaction.annotation.Propagation;
import org.springframework.transaction.annotation.Transactional;

import javax.annotation.Resource;
import java.util.List;

@Service
public class TeamService {
    @Resource
    private TeamMapper teamMapper;

    @Transactional(propagation = Propagation.REQUIRED,readOnly = true)
    public PageInfo<Team> queryByPage(Integer pageNum, Integer pageSize, QueryVO vo){
        TeamExample example = new TeamExample();
        //创建条件的容器
        TeamExample.Criteria criteria = example.createCriteria();
        if (vo!=null){
            if (vo.getTeamName()!=null&&!"".equals(vo.getTeamName().trim())){
                criteria.andTeamNameLike("%"+vo.getTeamName().trim()+"%");
            }
            if(vo.getChineseName()!=null && !"".equals(vo.getChineseName().trim()) ){
                criteria.andChineseNameLike("%"+vo.getChineseName().trim()+"%");
            }
            if(vo.getCoach()!=null && !"".equals(vo.getCoach().trim())){
                criteria.andCoachLike("%"+vo.getCoach().trim()+"%");
            }
            if(vo.getBeginDate()!=null){
                criteria.andCreateTimeGreaterThanOrEqualTo(vo.getBeginDate());
            }
            if(vo.getEndDate()!=null){
                criteria.andCreateTimeLessThanOrEqualTo(vo.getEndDate());
            }
            if(vo.getArea()!=null && vo.getArea()!=-1){
                criteria.andAreaEqualTo(vo.getArea());
            }
        }
        //分页
        PageHelper.startPage(pageNum,pageSize);
        List<Team> list = teamMapper.selectByExample(example);
        return new PageInfo<>(list);
    }

    //添加操作,再添加一个事务用来回滚
    @Transactional(propagation = Propagation.REQUIRED,rollbackFor = {Exception.class})
    public int addTeam(Team team){
        return teamMapper.insertSelective(team);
    }
}
teamController添加代码:
package com.lxy.controller;

import com.github.pagehelper.PageInfo;
import com.lxy.pojo.Team;
import com.lxy.service.TeamService;
import com.lxy.vo.QueryVO;
import com.lxy.vo.ResultVO;
import org.springframework.stereotype.Controller;
import org.springframework.web.bind.annotation.RequestMapping;
import org.springframework.web.bind.annotation.RequestMethod;
import org.springframework.web.bind.annotation.ResponseBody;

import javax.annotation.Resource;

@Controller
@RequestMapping("team")
@ResponseBody
public class TeamController {

    @Resource
    private TeamService teamService;

    @RequestMapping(value = "list",method = RequestMethod.GET)
    public ResultVO<Team> queryByPage(Integer pageNum, Integer pageSize, QueryVO vo){
        if(pageNum==null || pageNum<=0){
            pageNum=1;
        }
        if(pageSize==null || pageSize<=0){
            pageSize=5;
        }
        PageInfo<Team> teamPageInfo = teamService.queryByPage(pageNum, pageSize, vo);
        return new ResultVO<>(teamPageInfo);
    }

    //添加操作
    @RequestMapping(value = "",method = RequestMethod.POST)
    public ResultVO<Team> addTeam(Team team){
        int i = teamService.addTeam(team);
        if (i==1){
            return new ResultVO<>();
        }
        return new ResultVO<>(500,"服务器内部异常,请稍后再试!");
    }
}
五、更新操作
5.1 更新步骤
第一步:点击更新按钮时,首先应该根据此条数据的id来返回整条数据,让数据达到一种回显的效果
第二步:等所有数据都修改之后,再次点击提交时才是真正的更新
5.1.1 第一步:
teamService添加代码:
    /**
     * 根据主键查询
     * @param teamId
     * @return
     */
    @Transactional(propagation = Propagation.REQUIRED,readOnly = true)
    public Team queryById(Integer teamId){
        return teamMapper.selectByPrimaryKey(teamId);
    }
teamController添加代码:
    //根据主键查询
    @RequestMapping(value = "{id}",method =RequestMethod.GET)
    public ResultVO<Team> update(@PathVariable("id") Integer teamId){
        Team team = teamService.queryById(teamId);
        return new ResultVO<>(team);
    }
5.1.2 第二步:
teamService添加代码:
    /**
     * 更新 根据主键更新
     * @param team
     * @return
     */
    @Transactional(propagation = Propagation.REQUIRED,rollbackFor = {Exception.class})
    public int updateTeam(Team team){
        return teamMapper.updateByPrimaryKeySelective(team);
    }
teamController添加代码:
@RequestMapping(value = "{id}",method = RequestMethod.PUT)
public ResultVO<Team> updateTeam(@PathVariable("id") Integer teamId,Team team){
team.setTeamId(teamId);
int i = teamService.updateTeam(team);
if(i==1){
return new ResultVO<Team>();
}
return new ResultVO<>(500,"服务器内部异常,请稍后再试!");
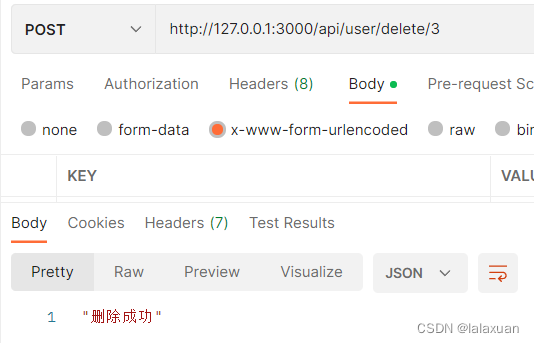
}六、删除操作
此删除功能也应该为逻辑删除,即删除时不是数据直接消失,而是数据在显示状态但不能操作。
teamService添加代码:
    /**
     * 根据主键删除 逻辑删除
     * @param teamId
     * @return
     */
    @Transactional(propagation = Propagation.REQUIRED,rollbackFor = {Exception.class})
    public int deleteTeam(Integer teamId){
        Team team = teamMapper.selectByPrimaryKey(teamId);
        team.setIsDel(1);
        return teamMapper.updateByPrimaryKeySelective(team);
    }
teamController添加代码:
@RequestMapping(value = "{id}",method = RequestMethod.DELETE)
public ResultVO<Team> delete(@PathVariable("id") Integer teamId){
int delete = teamService.deleteTeam(teamId);
if (delete==1){
return new ResultVO<>();
}
return new ResultVO<>(500,"服务器内部异常,请稍后再试!");
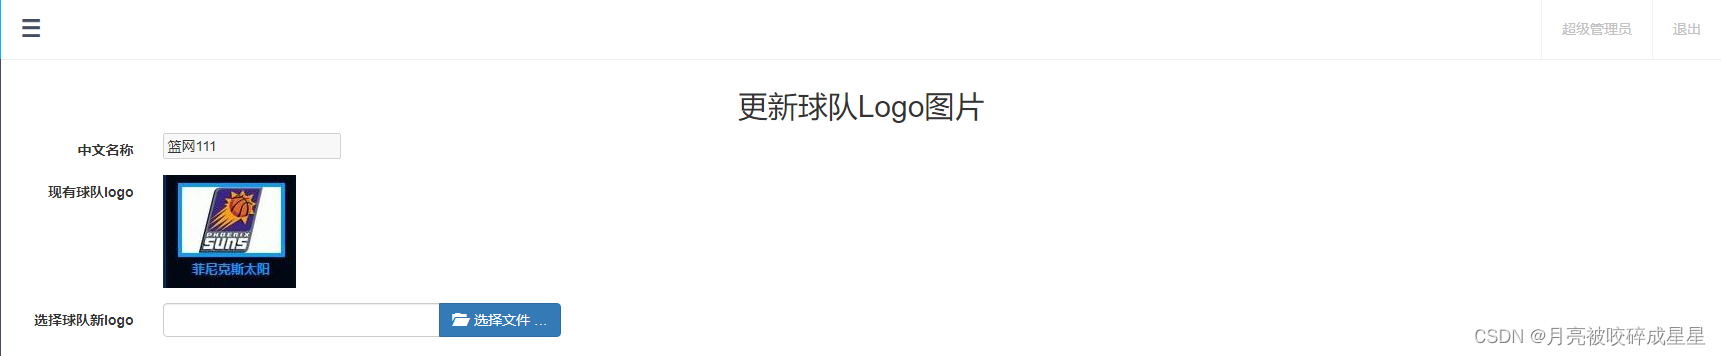
} 七、文件上传
teamController添加代码:
    @RequestMapping(value = "{id}",method = RequestMethod.POST)
    public ResultVO<Team> uploadLogo(@RequestParam("logo") MultipartFile myFile, HttpServletRequest request,
                                     @PathVariable("id") Integer teamId){
        //文件上传到指定位置
        String path = request.getServletContext().getRealPath("/img/uploadFile");
        //获取原始文件的名称
        String originalFilename = myFile.getOriginalFilename();
        //定义文件的新名称:随机名称+原有的后缀名
        String randomName= UUID.randomUUID().toString().replace("-","");
        int index = originalFilename.lastIndexOf(".");
        String hz = originalFilename.substring(index);
        String logoName=randomName+hz;
        int num=0;
        try {
            myFile.transferTo(new File(path+"/"+logoName));
            System.out.println("上传成功!"+path+"/"+logoName);
            Team team = new Team();
            team.setTeamId(teamId);
            team.setTeamLogo(logoName);
            num = teamService.updateTeam(team);
            if(num==1){
                return new ResultVO<Team>();
            }else {
                return new ResultVO<>(500,"服务器内部异常,请稍后再试!");
            }

        } catch (IOException e) {
            e.printStackTrace();
            return new ResultVO<>(500,"图片上传出现问题!"+e.getMessage());
        }
    }
至此SSM整合完毕,如果你想要此项目来练习一下,请给我一个三连并在下发评论,我会及时联系你给你发前端素材和后端源码,感谢观看!!!