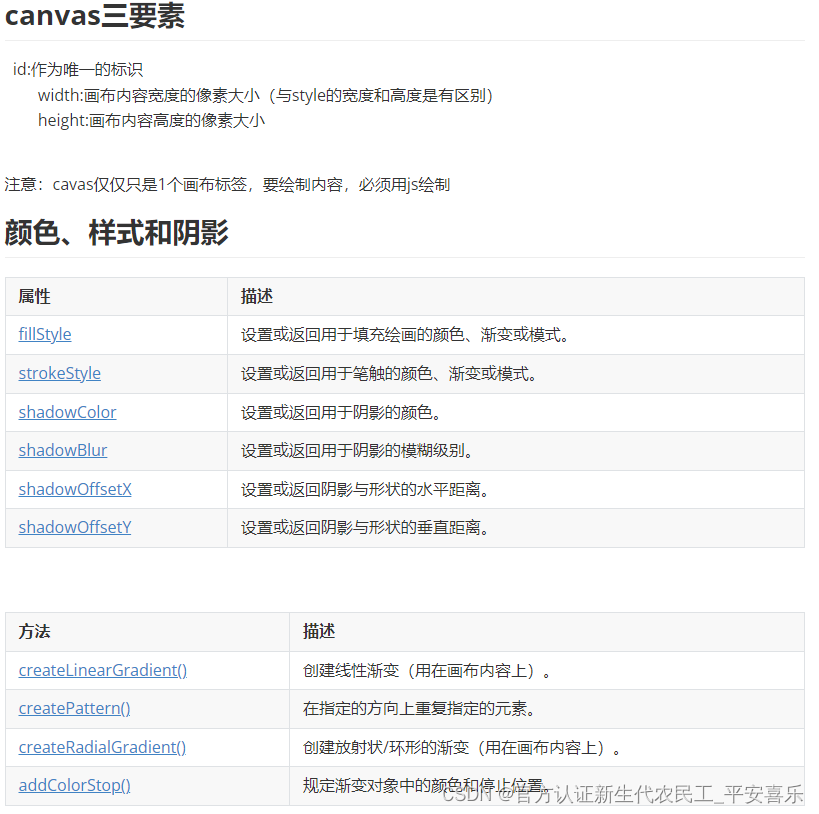
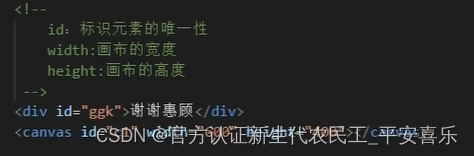
canvas 是一块画布,可以设置宽高 ,默认 300 * 150
使用方式
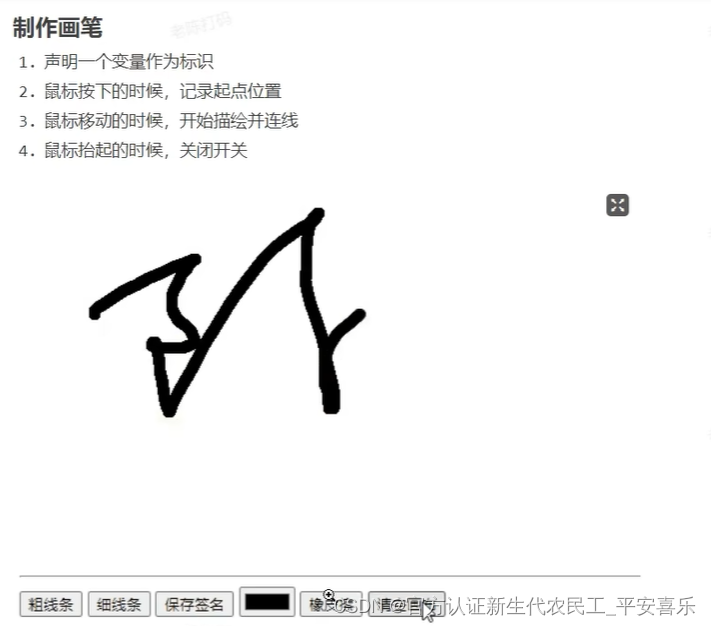
1. 声明书写 canvas标签
2. 拿到canvas的dom
3. 调用方法 getContext (注意 此方法在prototype上)
方法集合:
填充:
1. fillStyle, 设置填充颜色 ,不设置默认为黑色
2. fillRect , 4个参数 x y 宽 高
画笔:
3. strokeStyle 设置画笔的颜色
4. strokeRect 4个参数 x y 宽 高的颜色 // 绘制被填充的矩形
5. rect 4个参数 x y 宽 高 // 创建矩形,没有画上
6. ctx.stroke() // 画上去
7. fill 把图形画到画布上
8. closePath() // 闭合
9. arc(300, 100, 50, 0, Math.PI * 2, false ) // 6个参数 x y 圆心坐标,半径 起始角度 3.14*2 ,false为顺时针, true 逆时针
10 arcTo(150,20,150,70,50) // 起始坐标 终止坐标 半径
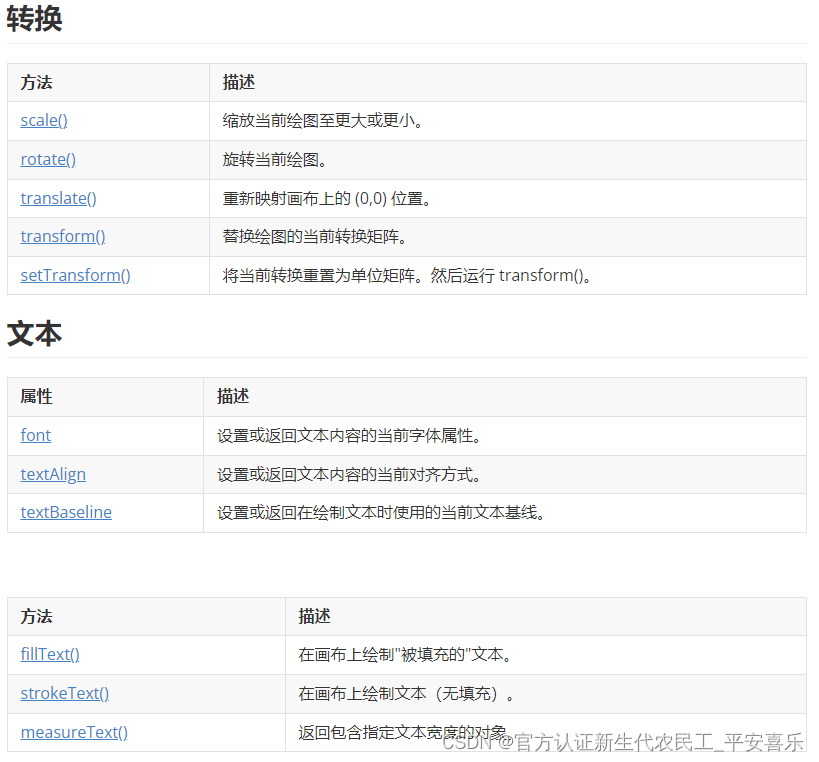
11 translate (300,300)设置基准点
 <canvas id="canvas" width="600" height="300"></canvas>
  <script>
// 获取元素
let canvas = document.querySelector('#canvas')
// 创建绘画环境

const ctx = canvas.getContext('2d')
// console.log(ctx);
// ctx.fillStyle = "#0000ff" // 设置填充颜色
// ctx.fillRect(0, 20, 150, 100) // 绘制被填充的矩形

// ctx.strokeStyle = '#00ff11' // 设置画笔的颜色
// ctx.strokeRect(0, 20, 150, 100) // 绘制被填充的矩形

// ctx.rect(50,50,100,100) // 创建矩形,没有画上
// ctx.strokeStyle = '#00ff11'
// ctx.stroke() // 画上去s

// ctx.rect(50, 50, 100, 100) // 创建一个矩形
// ctx.fillStyle = "#0000ff"
// ctx.fill() // 把矩形画到画布上

// 抬笔画路径
// ctx.beginPath()
// ctx.moveTo(0, 0) // 从10 移动到20 可以理解为从x y 偏移
// ctx.lineTo(100, 100) // 画直线从100 - 100
// ctx.strokeStyle = 'blue'
// ctx.lineWidth = 5 // 设置宽度
// ctx.stroke()

// ctx.beginPath()
// ctx.moveTo(200, 50)
// ctx.lineTo(150, 150)
// ctx.closePath() // 闭合
// ctx.lineWidth = 10 // 设置宽度
// ctx.strokeStyle = 'red'
// ctx.stroke()

// 画圆
// ctx.beginPath()
// ctx.strokeStyle = 'blue'
// ctx.arc(300, 100, 50, 0, Math.PI * 2, false ) // 6个参数  x y 圆心坐标,半径  起始角度 3.14*2  ,false为顺时针, true 逆时针
// ctx.stroke()

// 弧度
// ctx.beginPath()
// ctx.moveTo(100,100)
// // ctx.lineTo(100,100)
// ctx.strokeStyle = 'blue'
// ctx.arcTo(150,20,150,70,50) // 起始坐标 终止坐标  半径
// ctx.stroke()
//  </script>
小时钟案例
---------------------------
老陈讲解

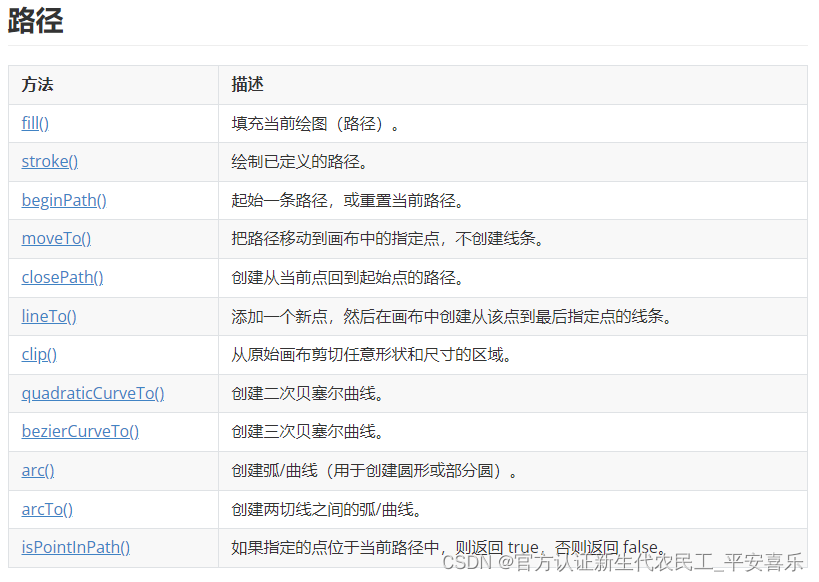
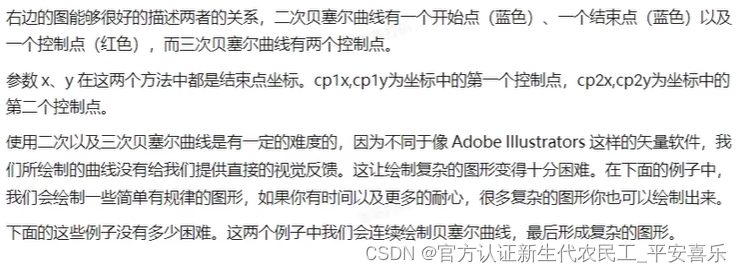
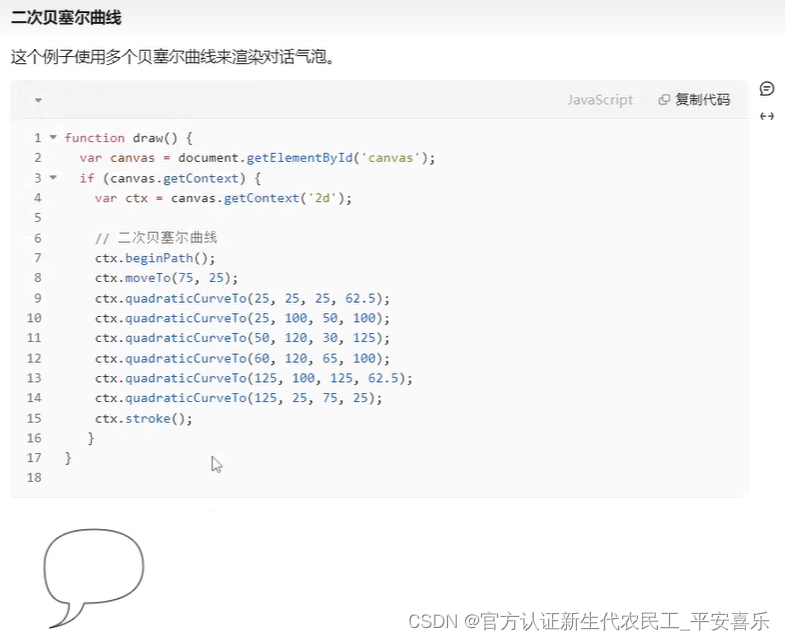
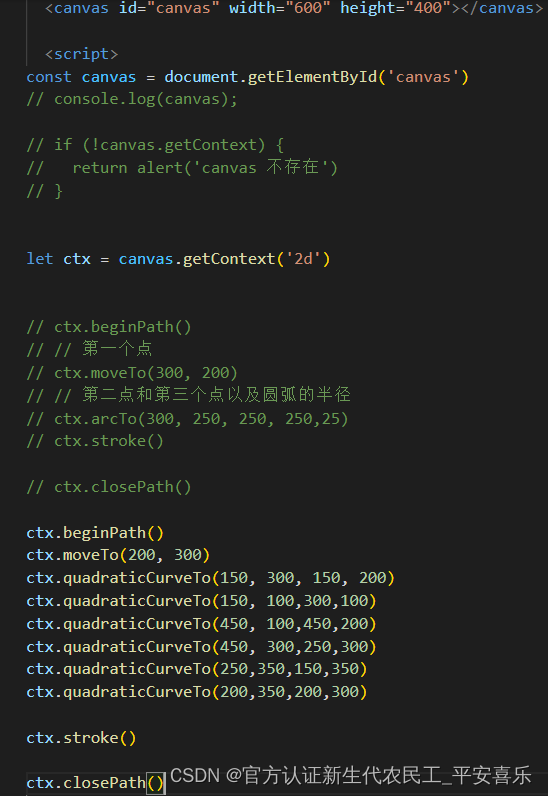
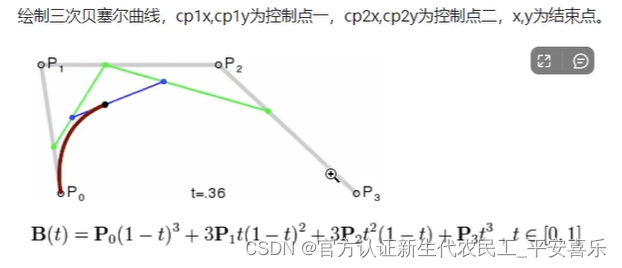
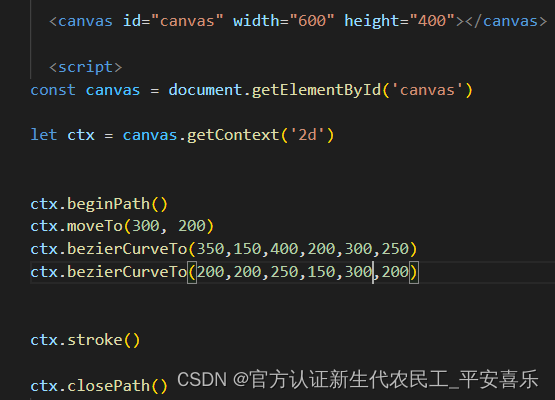
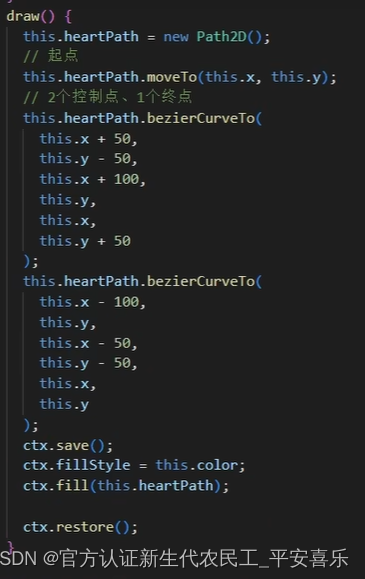
二次贝塞尔曲线和三次贝塞尔曲线

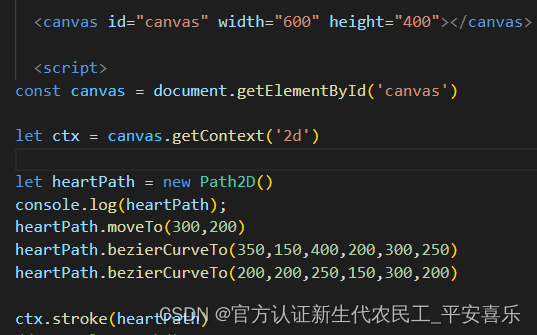
Path2D
样式和颜色控制

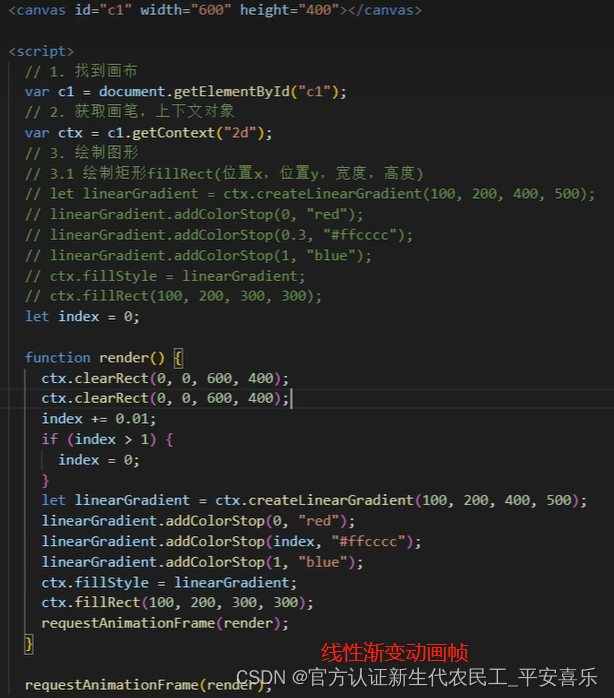
线性渐变
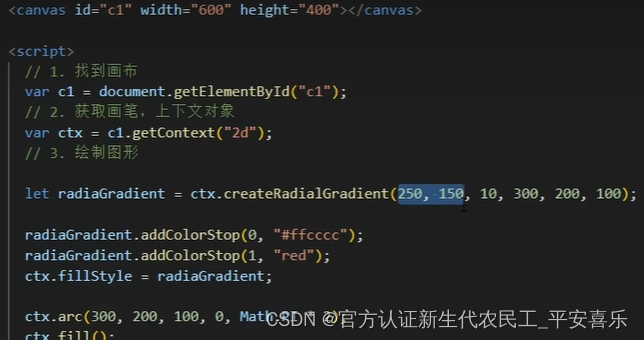
径向渐变
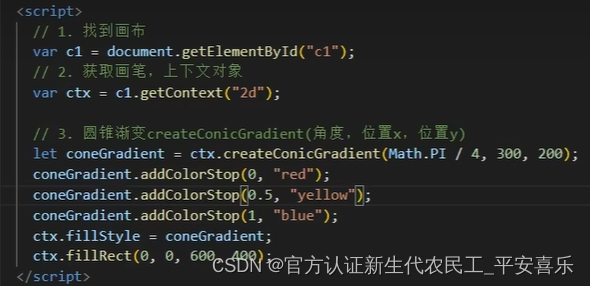
圆锥渐变
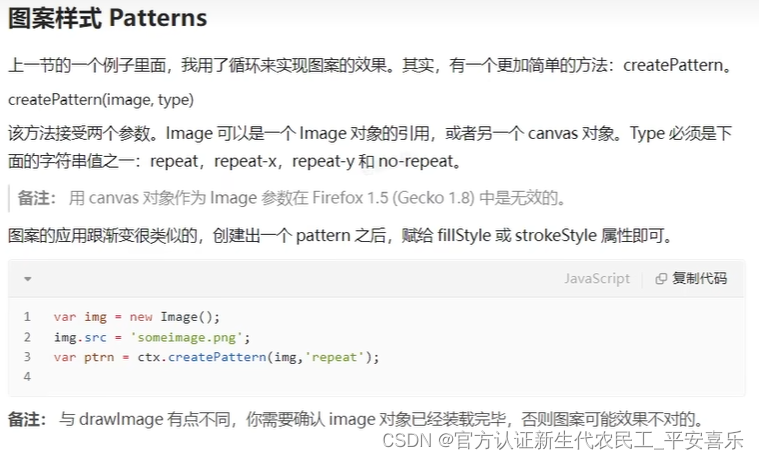
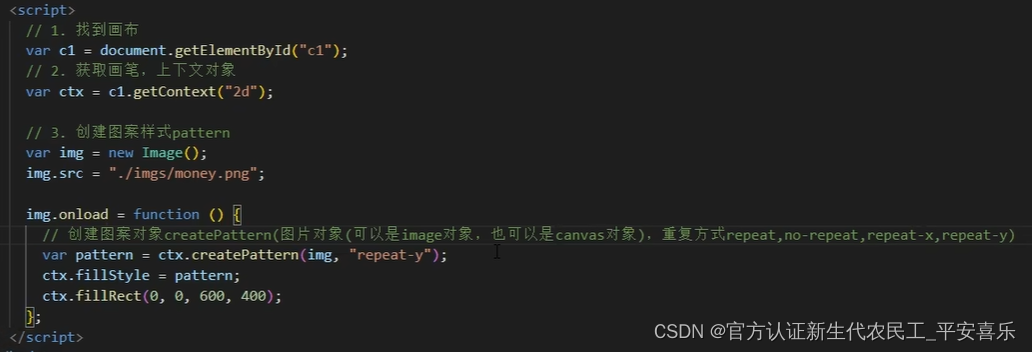
图案样式 Patterns
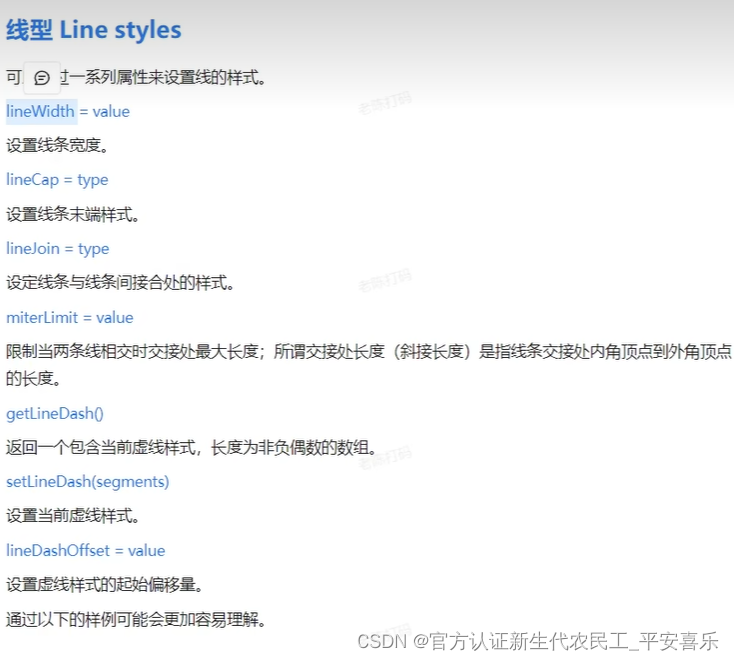
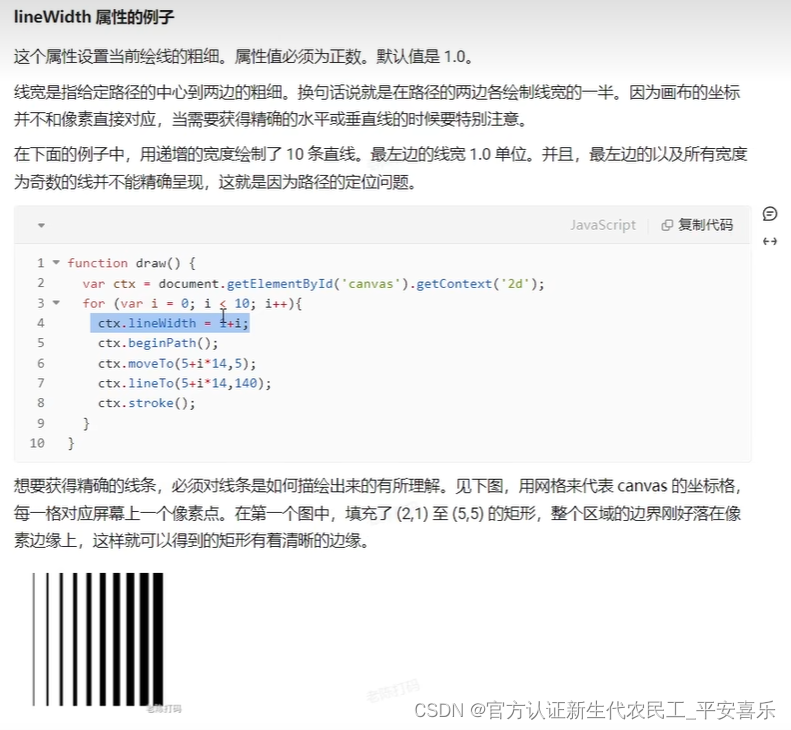
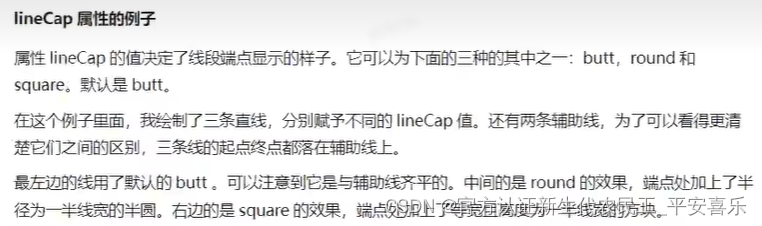
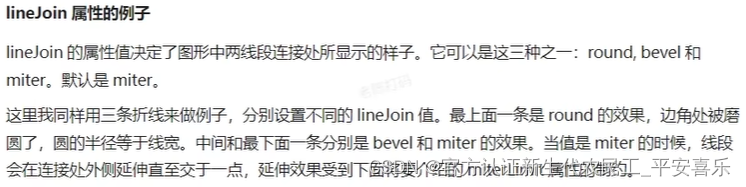
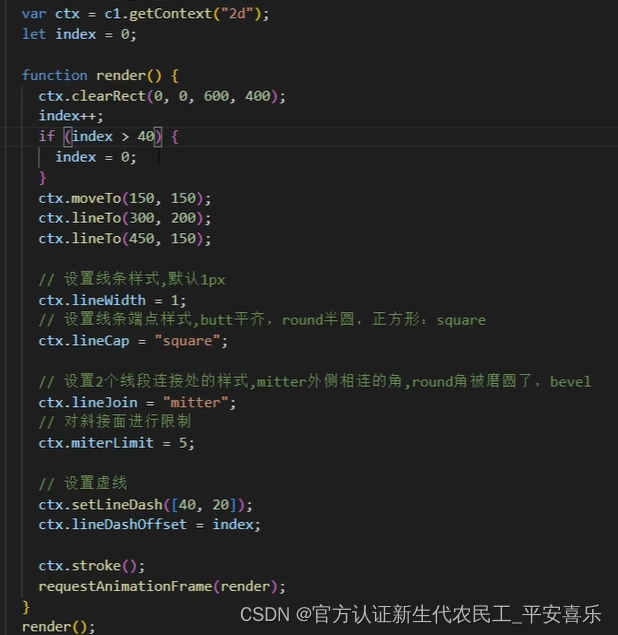
 线段和虚线样式设置
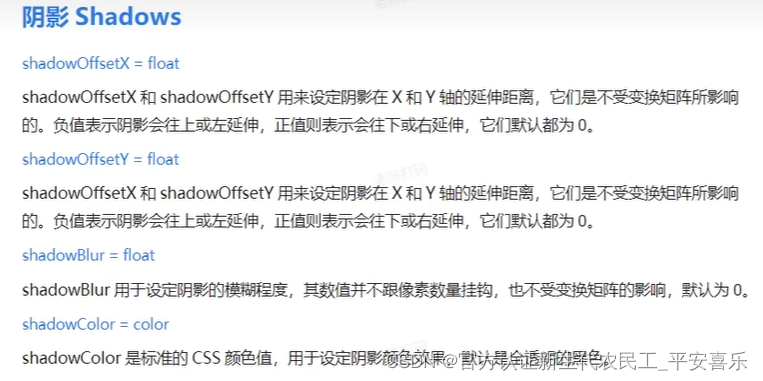
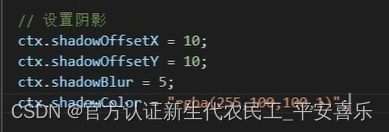
阴影
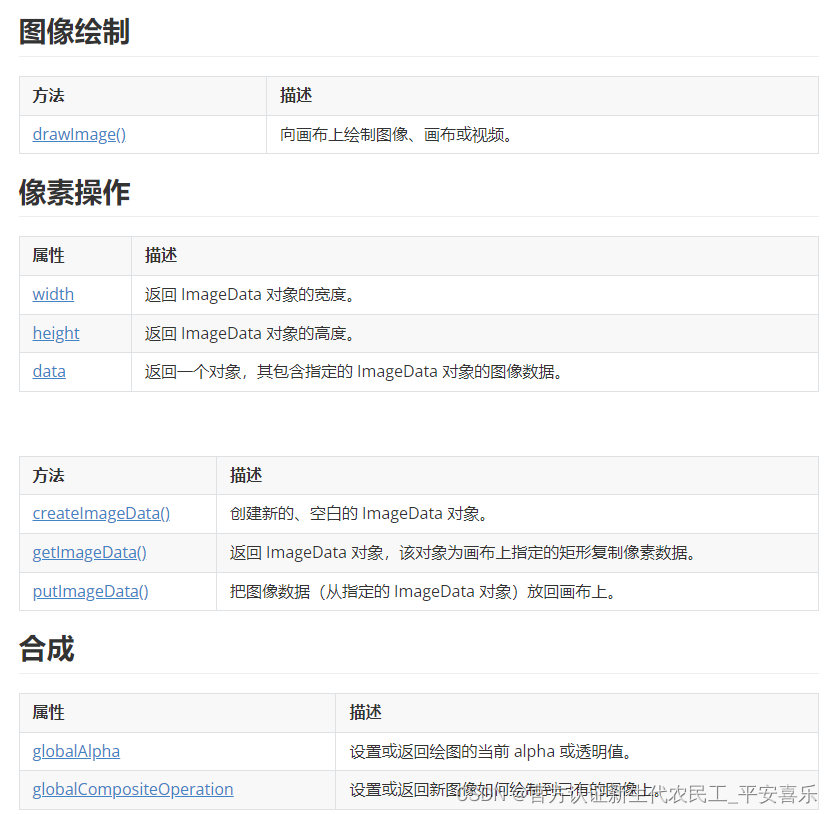
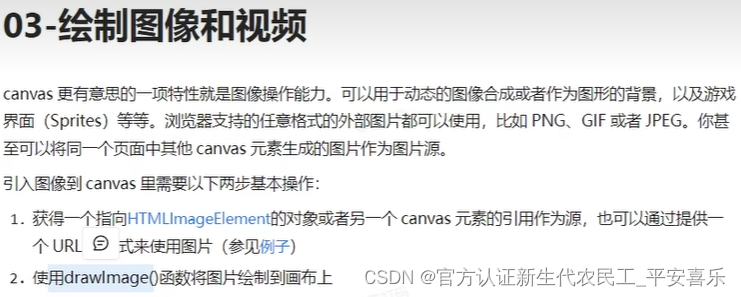
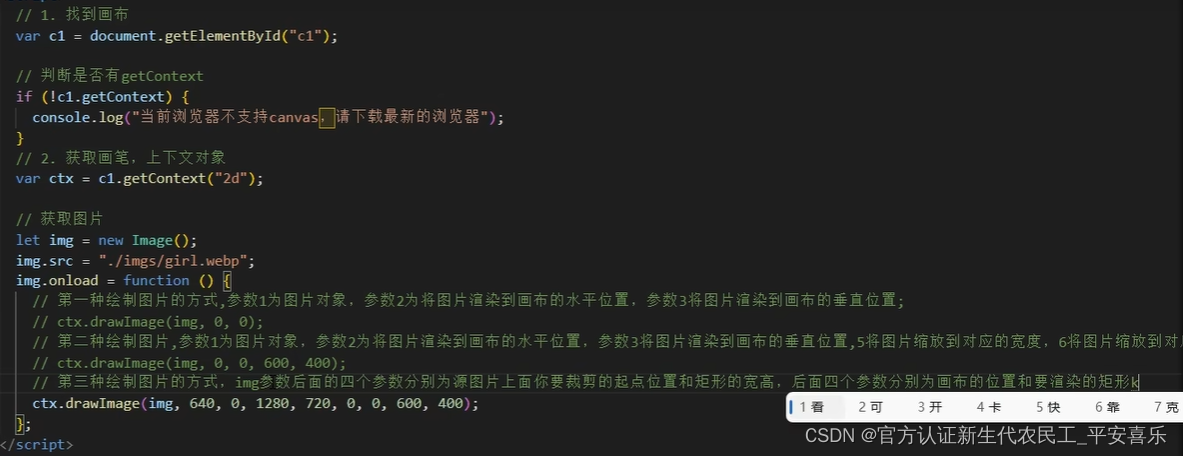
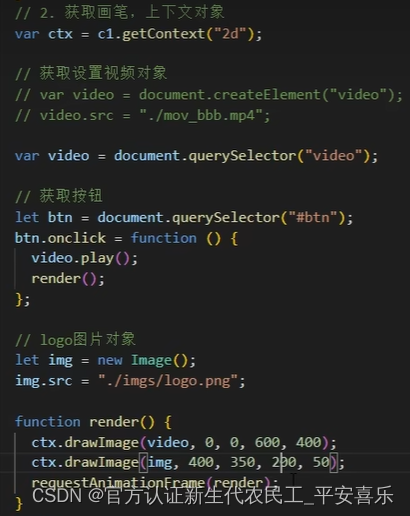
绘制图像和视频
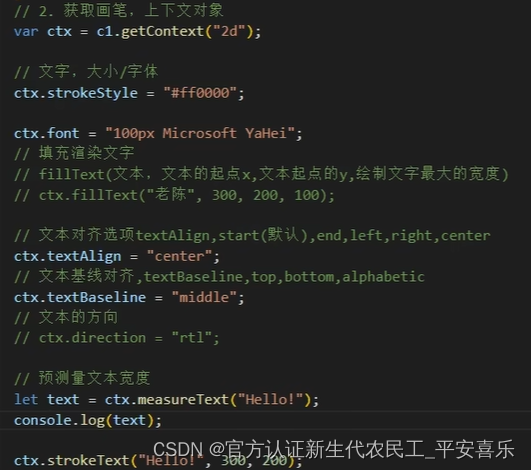
文字绘制与对齐
移动TRanslating
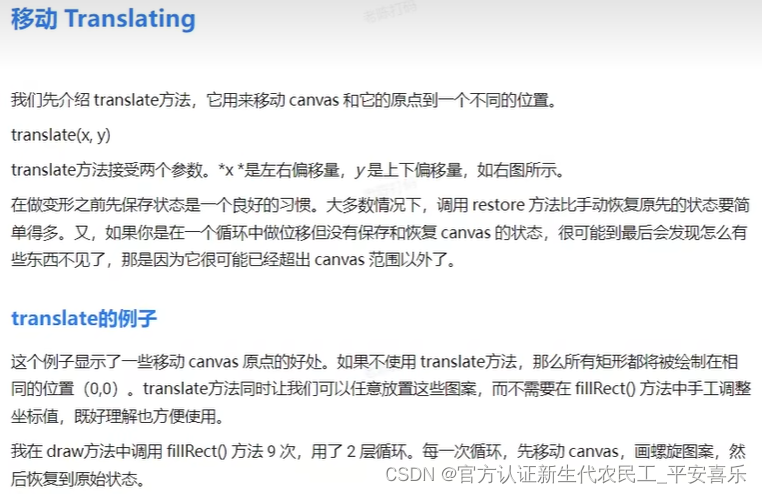
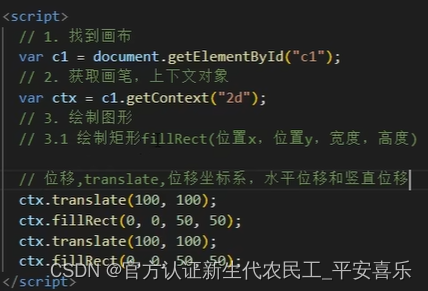
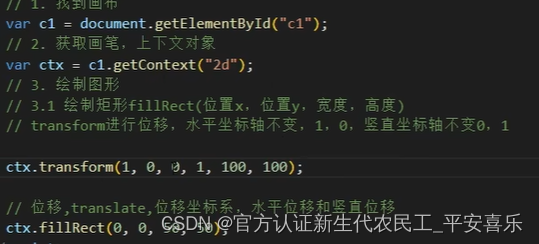
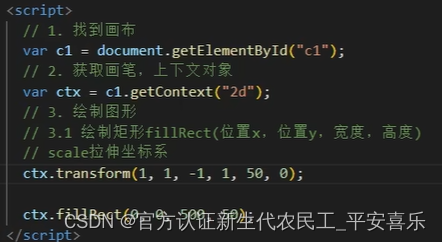
变形 Transforms

位移
旋转
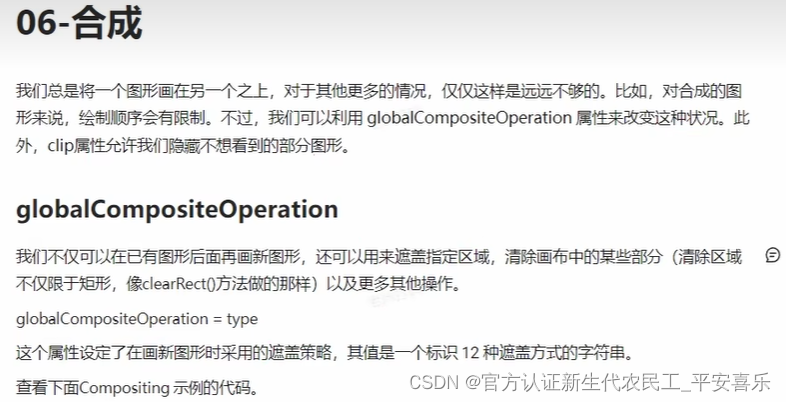
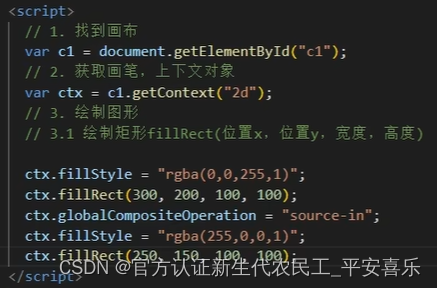
合成
具体查文档
HTML 5 Canvas 参考手册
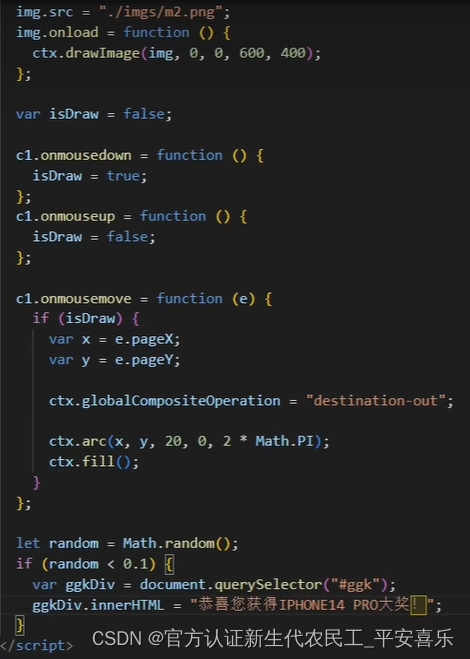
刮刮卡
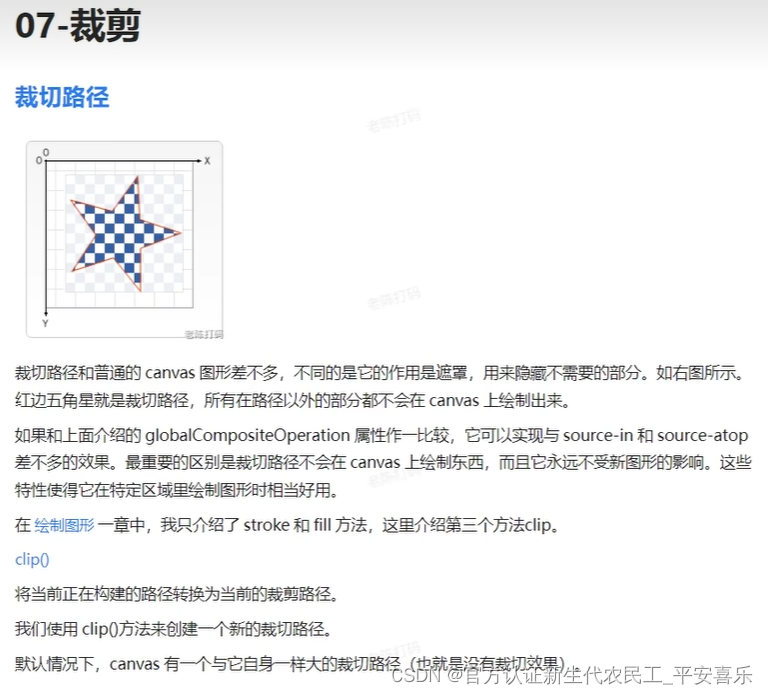
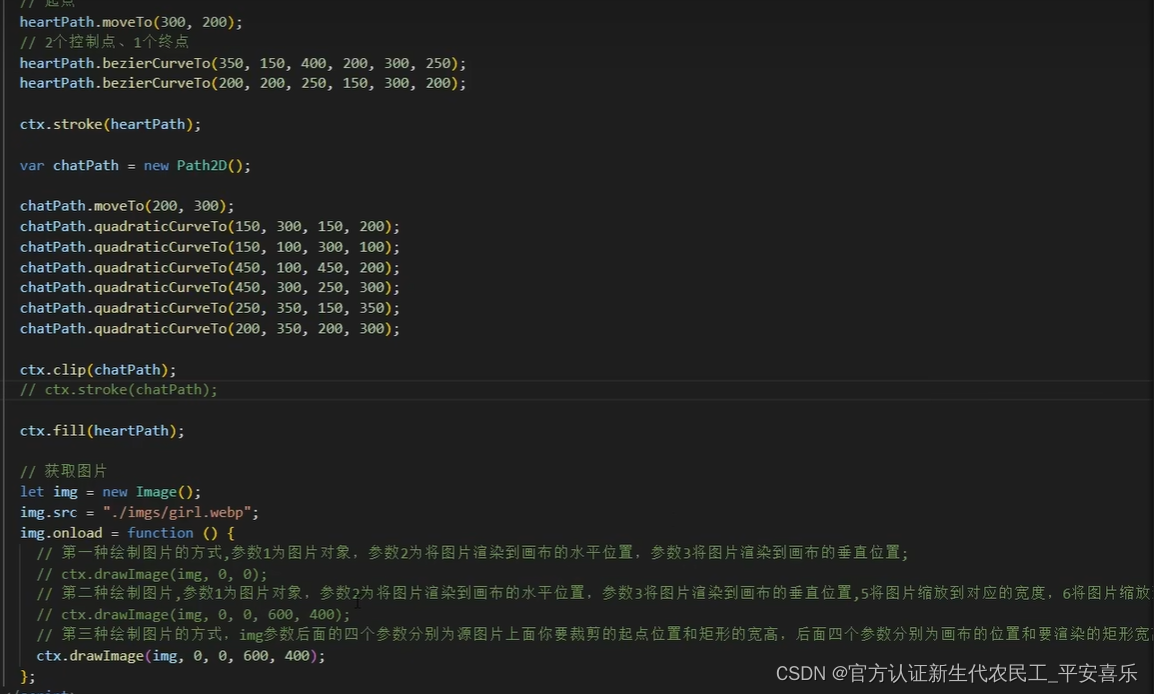
裁剪
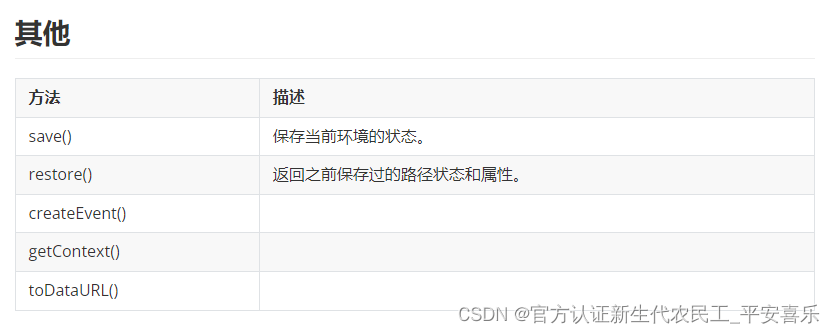
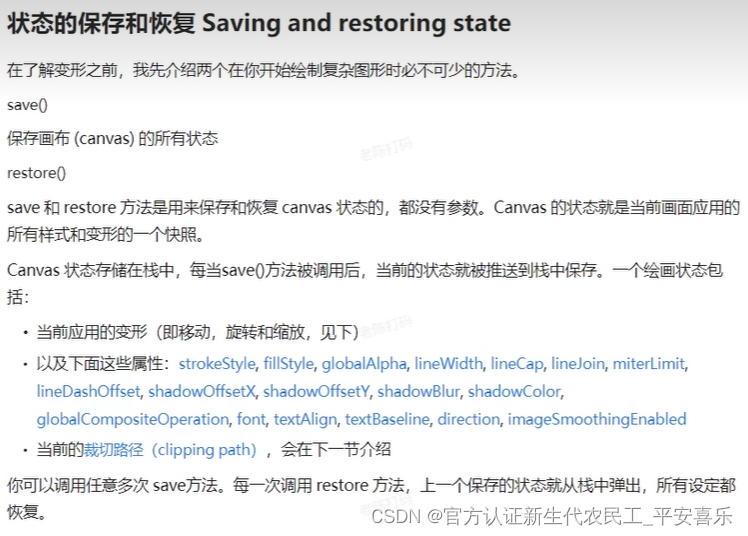
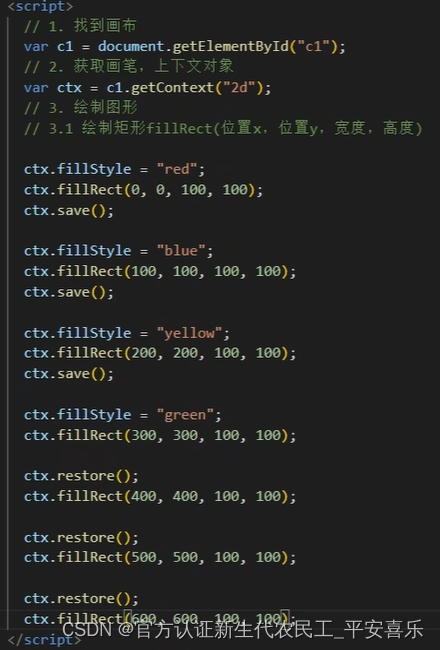
状态的保存和恢复
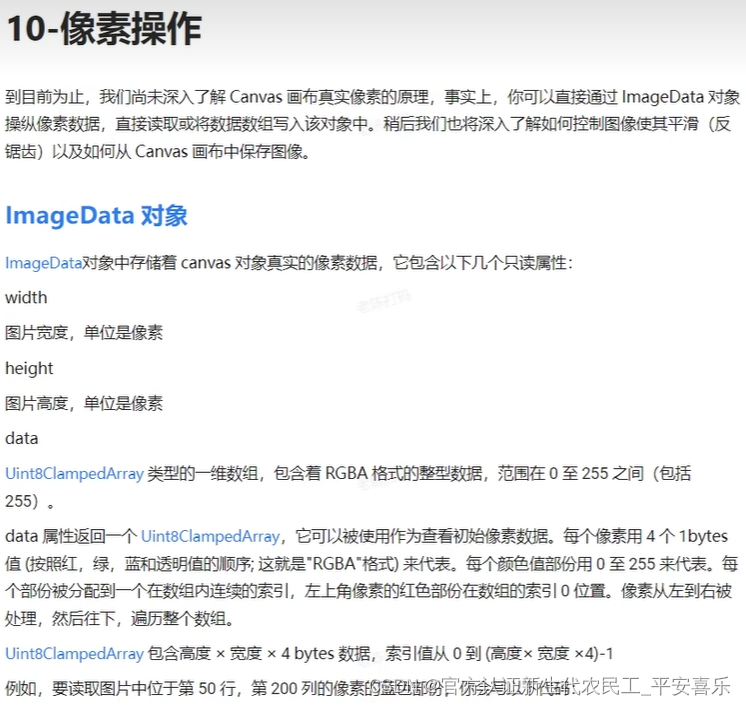
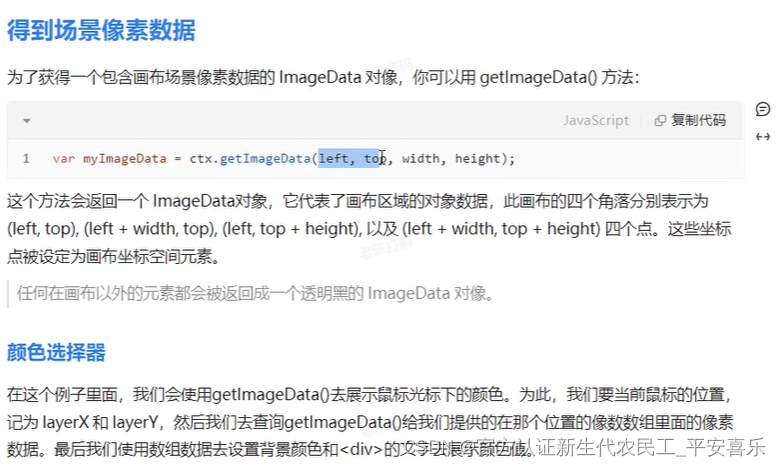
像素操作
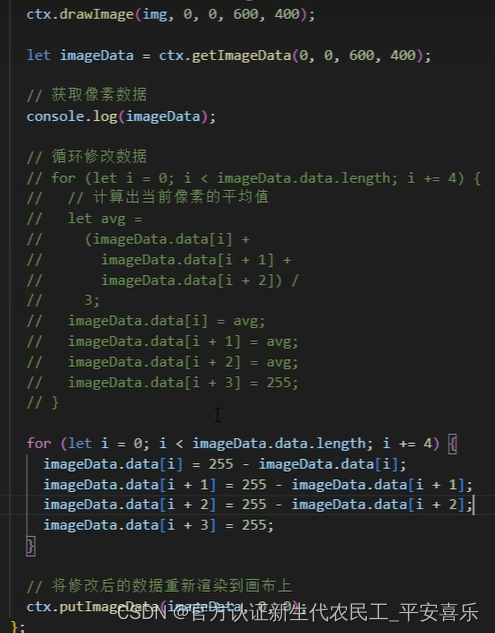
所有参数

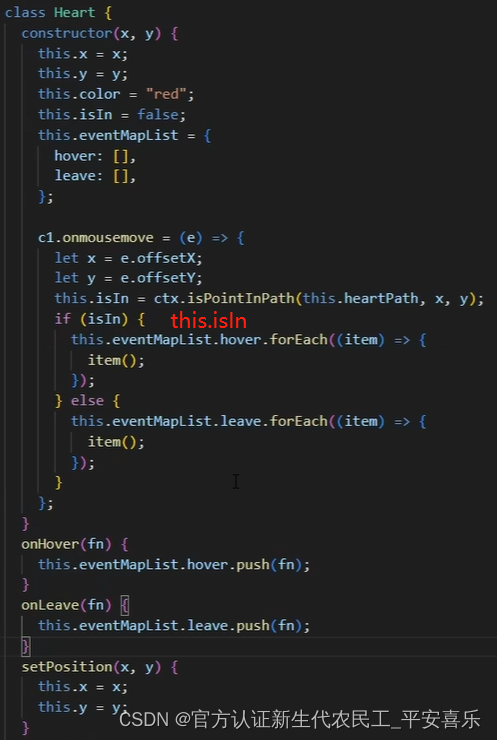
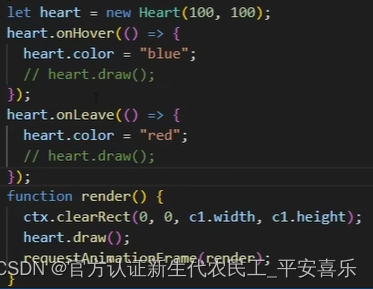
高级封装绘制元素和实现元素交互
通过class类进行封装
canvas实现在线画板
<!DOCTYPE html>
<html lang="en">

<head>
  <meta charset="UTF-8">
  <meta http-equiv="X-UA-Compatible" content="IE=edge">
  <meta name="viewport" content="width=device-width, initial-scale=1.0">
  <title>Document</title>
  <style>
.active {
  color: #fff;
  background-color: orangered;
  border: 1px solid transparent;
}
  </style>
</head>

<body>
  <canvas id="c1" width="800" height="600"></canvas>
  <hr>
  <button id="boldBtn">粗线条</button>
  <button id="thinBtn">细线条</button>
  <button id="saveBtn">保存签名</button>
  <input type="color" id="color" />
  <button class="clearBtn">橡皮擦</button>
  <button id="nullBtn">清空画布</button>

  <script>
// 获取画布
const canvas = document.querySelector('#c1')
const ctx = canvas.getContext('2d')
// 连接处圆润
ctx.lineJoin = 'round'
// 开端和结束端也是圆的
ctx.lineCap = 'round'

// 获取按钮
const boldBtn = document.querySelector('#boldBtn')
const thinBtn = document.querySelector('#thinBtn')
const saveBtn = document.querySelector('#saveBtn')
const inputColor = document.querySelector('#color')
const clearBtn = document.querySelector('.clearBtn')
const nullBtn = document.querySelector('#nullBtn')

// 设置变量确认是否开始绘画
let isDraw = false

// 鼠标按下
canvas.onmousedown = () => {
  isDraw = true
  ctx.beginPath()
  let x = event.pageX - canvas.offsetLeft
  let y = event.pageY - canvas.offsetTop
  ctx.moveTo(x, y)
}

// 鼠标移动
canvas.onmousemove = () => {
  if (isDraw) {
    let x = event.pageX - canvas.offsetLeft
    let y = event.pageY - canvas.offsetTop
    ctx.lineTo(x, y)
    ctx.stroke()
  }
}

// 鼠标离开
canvas.onmouseleave = () => {
  isDraw = false
  ctx.closePath()
}

// 鼠标弹起
canvas.onmouseup = () => {
  isDraw = false
  ctx.closePath()
}

// 设置按钮方法
boldBtn.onclick = () => {
  ctx.globalCompositeOperation = 'source-over'
  ctx.lineWidth = 20
  boldBtn.classList.add('active')
  thinBtn.classList.remove('active')
  clearBtn.classList.remove('active')
}

thinBtn.onclick = () => {
  ctx.globalCompositeOperation = 'source-over'
  ctx.lineWidth = 2
  thinBtn.classList.add('active')
  boldBtn.classList.remove('active')
  clearBtn.classList.remove('active')
}

clearBtn.onclick = () => {
  ctx.globalCompositeOperation = 'destination-out'
  ctx.lineWidth = 30
  clearBtn.classList.add('active')
  boldBtn.classList.remove('active')
  thinBtn.classList.remove('active')
}

nullBtn.onclick = () => {
  ctx.clearRect(0, 0, 800, 600)
}

saveBtn.onclick = () => {
  let urlData = canvas.toDataURL()
  let img = new Image()
  img.src = urlData
  document.body.appendChild(img)

  let downLoadA = document.createElement('a')
  downLoadA.setAttribute('download', '酷炫签名')
  downLoadA.href = urlData
  downLoadA.click()
  document.remove(downLoadA)
}

inputColor.onchange = () => {
  ctx.strokeStyle = inputColor.value
}
  </script>
</body>

</html>
绘制时钟
<!DOCTYPE html>
<html lang="en">

<head>
  <meta charset="UTF-8">
  <meta http-equiv="X-UA-Compatible" content="IE=edge">
  <meta name="viewport" content="width=device-width, initial-scale=1.0">
  <title>Document</title>
  <style>
* {
  margin: 0;
  padding: 0;
}

body {
  display: flex;
  justify-content: center;
}

canvas {
  margin-top: 30px;
  border: 1px solid black;
}

.active {
  color: #fff;
  background-color: orangered;
  border: 1px solid transparent;
}
  </style>
</head>

<body>
  <canvas id="c1" width="800" height="600"></canvas>


  <script>
// 获取画布
const canvas = document.querySelector('#c1')
const ctx = canvas.getContext('2d')

function render() {
  ctx.clearRect(0, 0, 800, 600)
  // 存档,保存当前坐标位置和上下文对象的状况
  ctx.save()
  ctx.translate(400, 300)
  ctx.rotate(-Math.PI / 2)

  ctx.save()
  for (let i = 0; i < 12; i++) {
    // 绘制小时的刻度
    ctx.beginPath()
    ctx.moveTo(170, 0)
    ctx.lineTo(190, 0)
    ctx.lineWidth = 8
    ctx.strokeStyle = 'gray'
    ctx.stroke()
    ctx.closePath()
    ctx.rotate(Math.PI * 2 / 12)
  }

  ctx.restore()
  ctx.save()
  for (let i = 0; i < 60; i++) {
    // 绘制分钟的刻度
    ctx.beginPath()
    ctx.moveTo(180, 0)
    ctx.lineTo(190, 0)
    ctx.lineWidth = 2
    ctx.strokeStyle = 'gray'
    ctx.stroke()
    ctx.closePath()
    ctx.rotate(Math.PI * 2 / 60)
  }
  ctx.restore()
  ctx.save()

  // 获取当前时间
  let time = new Date()
  let hour = time.getHours()
  let min = time.getMinutes()
  let sec = time.getSeconds()
  hour = hour >= 12 ? hour - 12 : hour

  // 绘制秒针
  ctx.rotate(Math.PI * 2 / 60 * sec)
  ctx.beginPath()
  ctx.moveTo(-30, 0)
  ctx.lineTo(190, 0)
  ctx.lineWidth = 2
  ctx.strokeStyle = 'red'
  ctx.stroke()
  ctx.closePath()
  ctx.restore()
  ctx.save()

  // 绘制分针
  ctx.rotate(Math.PI * 2 / 60 * min + Math.PI * 2 / 60 / 60 * sec)
  ctx.beginPath()
  ctx.moveTo(-20, 0)
  ctx.lineTo(130, 0)
  ctx.lineWidth = 4
  ctx.strokeStyle = '#888'
  ctx.stroke()
  ctx.closePath()
  ctx.restore()
  ctx.save()

  // 绘制时针
  ctx.rotate(Math.PI * 2 / 12 * hour + Math.PI * 2 / 12 / 60 * min + Math.PI * 2 / 12 / 60 / 60 *
    sec)
  ctx.beginPath()
  ctx.moveTo(-15, 0)
  ctx.lineTo(110, 0)
  ctx.lineWidth = 8
  ctx.strokeStyle = '#333'
  ctx.stroke()
  ctx.closePath()
  ctx.restore()

  ctx.restore()
  requestAnimationFrame(render)
}
render()
  </script>
</body>

</html>