目录
一、前言:
二、网站页面分析
三、开发步骤
(一)、安装element
(二)、安装使用svg插件
(三)、编写主界面框架代码
(四)、编写菜单栏
(五)、新建页面及路由
(六)、定制页面标签栏
第一步:
第二步:
(七)、修改封装菜单栏
(八)、添加面包屑
四、结尾
一、前言:
先上图,项目模板成品截图:
开源的vue管理后台模板很多,如需快速开发一个后台管理可搜索“vue管理后台模板”查找,本文旨在熟悉vue开发过程实践,适合vue刚入门的小伙伴阅读和动手实践,内容偏长,只想要代码的同学可直接点击 源代码。通过本章博客你可以学到:
(1)、element UI组件库的使用。
(2)、如何自定义组件。
(3)、路由的熟练使用。
(4)、vue项目开发思想的提升。
(5)、……
本项目在上一章节集成项目基础上开发,可先点击下方链接阅读。(如阅读本章无障碍请忽略)
vue系列(二)——vue3基础项目(集成框架)搭建_萧萧风的博客-CSDN博客目录一、新建项目二、集成路由三、安装配置axios(网络请求库)四、使用vuex(暂无)五、结尾打开编辑器新建项目,填写项目名称,点击创建,之后等待项目加载完成就可以了。我的Hbuilder X 版本是3.4.14新建的项目目录下面是vue项目加载页面的形式,单页渲染,所有的内容展示都是在index.html页面上进行渲染,而App.vue是index.html里面最外层的组件容器、包含全局的js代码css样式。所有的页面的渲染是在App.vue容器里面进行文件main.js:入口js文件,所有全局文件的引https://blog.csdn.net/xxfen_/article/details/125327388?spm=1001.2014.3001.5501
二、网站页面分析
网站由登录页、主界面、内容页组成。
主界面整体模块是由:
(1)、导航栏;
(2)、左测导航菜单栏;
(3)、页面标签卡栏;
(4)、内容栏(展示页面)。
组成。
菜单栏的点击切换改变的只是内容栏的内容,由此得出:
登录页和主界面是一级路由,内容页是主界面下的嵌套路由。
三、开发步骤
(一)、安装element
官网: 一个 Vue 3 UI 框架 | Element Plus。
首先安装国内npm镜像,这样下载资源包速度会更快
npm install cnpm -g --registry=https://registry.npmmirror.com
然后,安装element
npm install element-plus --save
引入项目,在main.js文件中加入以下代码
import ElementPlus from 'element-plus'
import 'element-plus/dist/index.css'
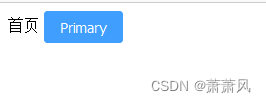
app.use(ElementPlus)测试一下引入是否成功,在home.vue中加入按钮组件
<el-button type="primary">Primary</el-button>

运行项目:npm run dev
运行效果如下,说明引入成功:
(二)、安装使用svg插件
- 安装:
npm i vite-plugin-svg-icons -D
- 在src下新建存放svg目录:
- 在components目录下新建组件:SvgIcon.vue
<template>
  <svg aria-hidden="true">
    <use :xlink:href="symbolId" />
  </svg>
</template>

<script>
  import { defineComponent, computed } from 'vue';

  export default defineComponent({
    name: 'SvgIcon',
    props: {
      prefix: {
        type: String,
        default: 'icon',
      },
      name: {
        type: String,
        required: true,
      },
    },
    setup(props) {
      const symbolId = computed(() => `#${props.prefix}-${props.name}`);
      return { symbolId };
    },
  });
</script>- 在vite.config.js中配置:
import { defineConfig } from 'vite'
import vue from '@vitejs/plugin-vue'
import { createSvgIconsPlugin } from 'vite-plugin-svg-icons'
import path from 'path'
// https://vitejs.dev/config/
export default defineConfig({
  plugins: [
  	vue(),
	createSvgIconsPlugin({
	        // 指定需要缓存的图标文件夹
	        iconDirs: [path.resolve(process.cwd(), 'src/icons/svg')],
	        // 指定symbolId格式
	        symbolId: '[name]',
	      })
  ]
})
- 在main.js中引入,添加代码:
//导入Svg图片插件,可以在页面上显示Svg图片
import 'virtual:svg-icons-register'
import SvgIcon from "./components/SvgIcon.vue";
app.component('SvgIcon',SvgIcon)
- 到了这里,运行项目出现报错:没有找到fast-glob。就需要安装fast-glob。
npm i fast-glob
- 测试使用
打开Icon 图标 | Element Plus

点击图标复制svg内容
在新建的svg目录下新建svg文件,名称格式:icon-“图标名称”,粘贴内容保存

在页面中使用:
<SvgIcon name="aim" class="icon-svg" />
(三)、编写主界面框架代码
- 先搭建一个整体框架,home.vue 代码
<template v-slot:default>
	<div :class="['content',isCollapse?'menu--fold':'menu--unfold']">
		<!-- 侧边菜单栏 -->
		<div class="menuLeft">
			<div class="menu-nav-header">
				<span>{{isCollapse?'控制台':'管理控制台'}}</span>
			</div>
             <!--todo 菜单栏组件 -->
		</div>
		<!-- 右边内容 -->
		<div class="content-main">
			<div class="navTop horizontalView">
				<div class="nav_tools horizontalView">
					<SvgIcon :name="isCollapse?'expand':'fold'" class="icon-svg" @click="isCollapse=!isCollapse" />
				</div>
			</div>
			<!-- todo 内容组件 -->
		</div>
	</div>
</template>

<script>
export default {
		components: {

		},
		data: function() {
			return {
				isCollapse: false

			}
		}
}
</script>

<style>
	@import url('../assets/css/home.css');
</style>
- 编写css样式

通用的放在base.css中,页面独有的放在home.css
- base.css代码:
.content {
	width: 100%;
	height: 100%;
	font-family: "Helvetica Neue", Helvetica, "PingFang SC", "Hiragino Sans GB", "Microsoft YaHei", "微软雅黑", Arial, sans-serif;
}

/* 水平布局 居中*/
.horizontalView {
	position: relative;
	flex-direction: row;
	display: flex;
	align-items: center;
}

/* 垂直布局居中 */
.verticalView {
	position: relative;
	flex-direction: column;
	display: flex;
	align-items: center;
}

/* 居中 */
.center {
	position: absolute;
	top: 50%;
	left: 50%;
	font-size: 28px;
	transform: translate(-50%, -50%);
}

.w100 {
	width: 100%;
}

.h100 {
	height: 100%;
}
.icon-svg {
	width: 1.4rem;
	height: 1.4rem;
	fill: currentColor;
	overflow: hidden;
}
- home.css代码:
/* -------侧边栏 折叠 */
.menu--fold .menuLeft {
	width: 64px;
}

.menu--fold .content-main {
	margin-left: 64px;
}

/* --------------------- */

/* ---------侧边栏 展开 */
.menu--unfold .menuLeft {
	width: 230px;
}

.menu--unfold .content-main {
	margin-left: 230px;
}

/* ------------- */

.navTop {
	position: relative;
	width: 100%;
	height: 50px;
	z-index: 100;
	box-shadow: 0 2px 4px rgba(0, 0, 0, 0.08);
	box-sizing: border-box;
	background: white;
}

.nav_tools {
	height: 100%;
}

.nav_tools .icon-svg {
	margin-left: 10px;
	color: #5b5b5b;
}

.menuLeft {
	position: fixed;
	top: 0;
	left: 0;
	bottom: 0;
	z-index: 1020;
	overflow: hidden;
	background-color: #263238;
}

.content-main {
	position: relative;
	background: #f1f4f5;
	height: 100%;

}
.menu-nav-header {
	color: white;
	height: 50px;
	line-height: 50px;
	text-align: center;
	font-size: 20px;
	font-weight: bold;
	/* background-color: #9fbea7; */
	background-color: #566f7e;
}

/* 动画 */
.nav_tools,
.menuLeft,
.content-main {
	transition: inline-block 0.3s, left 0.3s, width 0.3s, margin-left 0.3s, font-size 0.3s;
}
- base.css放在app.vue
@import url("./assets/css/base.css");
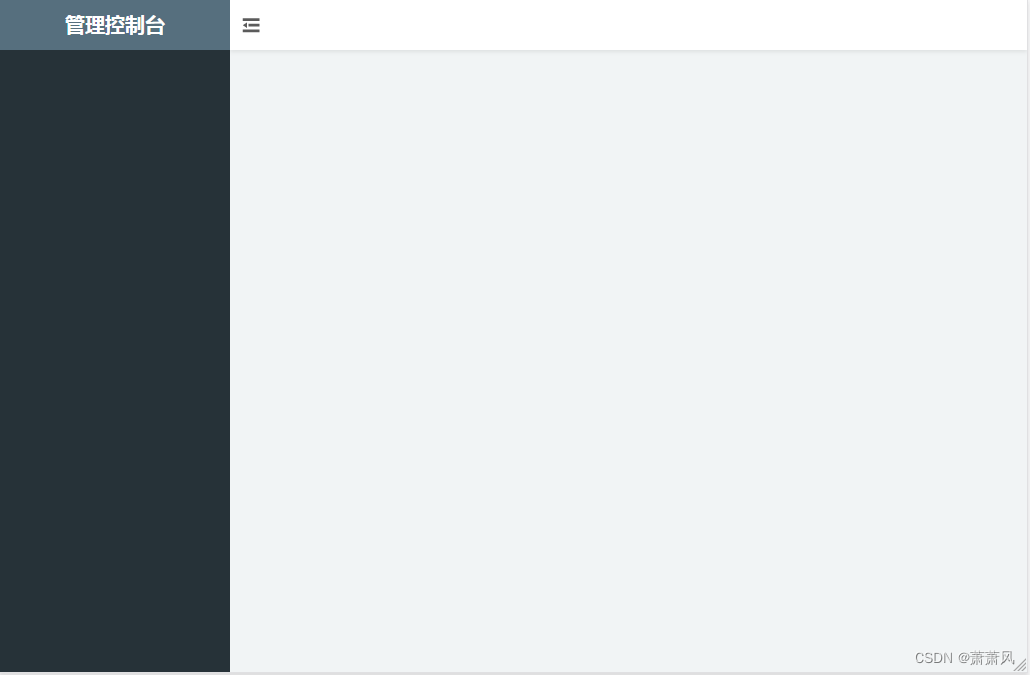
- 看看页面效果:
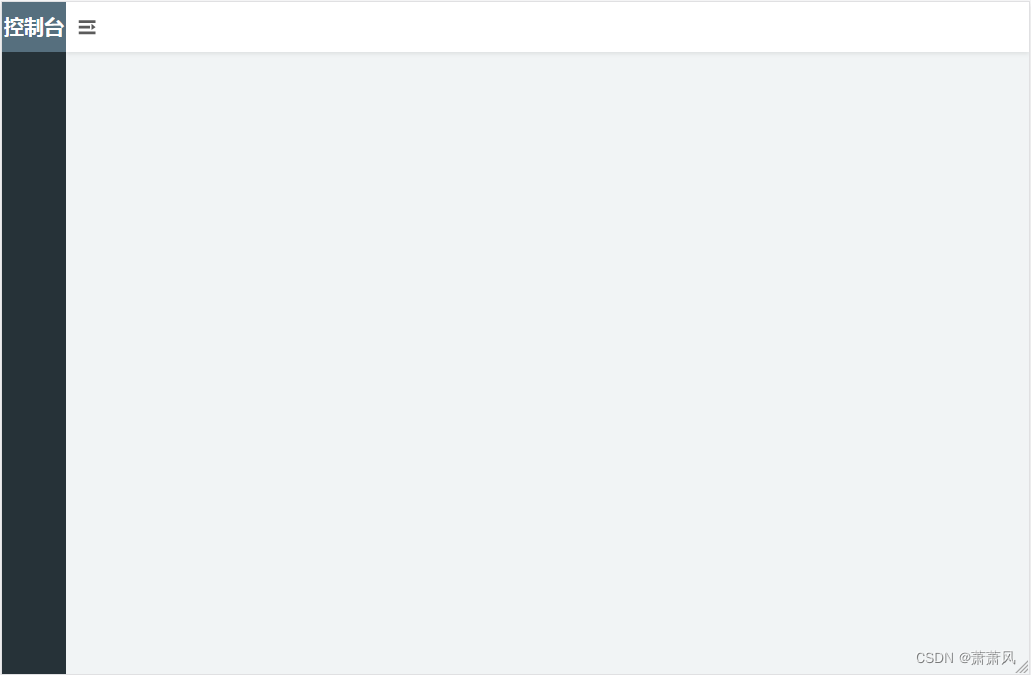
- 点击上边折叠按钮
(四)、编写菜单栏
请先去了解组件使用文档:Menu 菜单 | Element Plus
复制实例代码自定义内容属性及样式,关闭组件提供的折叠动画,自定义动画样式
- 在home.vue中加入修改菜单组件代码
<!--todo 菜单栏组件 -->
<el-menu active-text-color="#fff" background-color="#263238" class="el-menu-vertical-demo"
:collapse-transition="false" default-active="2" text-color="#96a4ab " @open="handleOpen"
@close="handleClose" :collapse="isCollapse">
<el-menu-item index="1">
<SvgIcon name="home" class="icon-svg" />
<span slot=""> 首页</span>
</el-menu-item>
<el-sub-menu index="2">
<template #title>
<SvgIcon name="img" class="icon-svg" />
<span> 图片管理</span>
</template>
<el-menu-item index="1-1">
<SvgIcon name="img" class="icon-svg" />
<span> 图片1</span>
</el-menu-item>
<el-menu-item index="1-2">
<SvgIcon name="img" class="icon-svg" />
<span> 图片2</span>
</el-menu-item>
<el-sub-menu index="1-4">
<template #title>
<SvgIcon name="img" class="icon-svg" />
<span> 图片3</span>
</template>
<el-menu-item index="1-4-1">
<SvgIcon name="img" class="icon-svg" />
<span> 图片三级子菜单</span>
</el-menu-item>
</el-sub-menu>
</el-sub-menu>
<el-sub-menu index="3">
<template #title>
<SvgIcon name="collection" class="icon-svg" />
<span> 收藏管理</span>
</template>
<el-menu-item index="3">
<SvgIcon name="collection" class="icon-svg" />
<span class="icon-text"> 收藏</span>
</el-menu-item>
</el-sub-menu>
<el-menu-item index="4">
<SvgIcon name="about" class="icon-svg" />
<span> 设置</span>
</el-menu-item>
</el-menu>- home.css 中加入修改样式代码
/* 修改菜单栏样式样式 */

.menuLeft .el-menu {
	border-right: none;
}

.el-menu-vertical-demo:not(.el-menu--collapse) {
	border-right: none;
	width: 230px;
}

.el-menu .icon-text {
	margin-left: 10px;
}
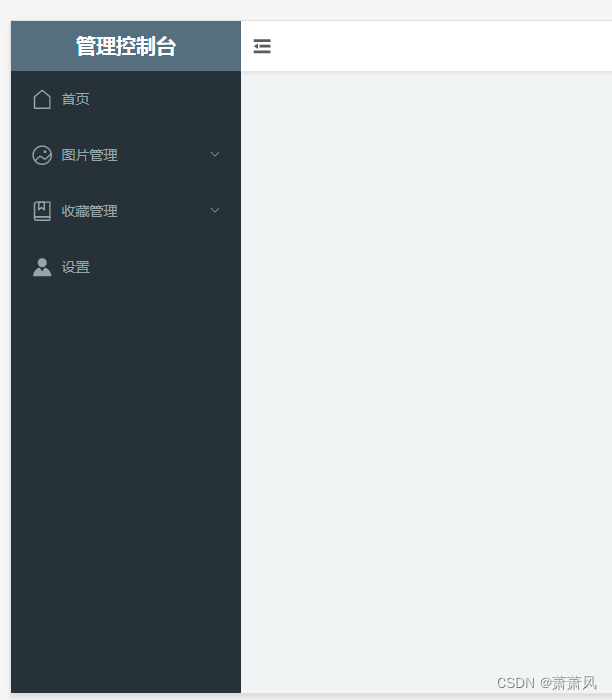
- 页面效果:
菜单栏编写到这还没完呢,上面这种写法是每次添加、修改或删除菜单都要在页面中找到位置再修改有点繁琐,在页面代码多了或菜单项好多时去编辑修改更是麻烦的一比,所以等后面再来优化代码,把菜单封装成菜单数据集合,然后再在页面中for循环展示。
(五)、新建页面及路由
- 新建页面:
index.vue,img1.vue,collect.vue,set.vue 。并在页面内加上页面标识文字。
- 配置路由:
router目录下index.js代码:
// import Vue from 'vue'   //引入Vue
import {
	createRouter,
	createWebHashHistory
} from 'vue-router' //引入vue-router
// Vue.use(Router)  //Vue全局使用Router

import home from '../views/home.vue'
import login from '../views/login.vue'
import index from '../views/index.vue'
import collect from '../views/collect.vue'
import set from '../views/set.vue'
import img1 from '../views/img1.vue'

const routes = [{
		path: '',
		redirect: "home"
	}, {
		path: '/',
		redirect: "home"
	},
	{
		path: '/login',
		name: 'login',
		component: login,
		meta: {
			title: '登录'
		}
	},
	{
		path: '/home',
		name: 'home',
		component: home,
        /* 子路由 */
		children: [{
				path: '/',
				redirect: "index"
			},{
				path: '',
				redirect: "index"
			}, {
				path: '/index',
				name: 'index',
				component: index,
				meta: {
					title: '首页',
				}
			},
			{
				path: '/collect',
				name: 'collect',
				component: collect,
				meta: {
					title: '收藏',
					isTab: true
				}
			},
			{
				path: '/img1',
				name: 'img1',
				component: img1,
				meta: {
					title: '图片1',
					isTab: true
				}
			},
			{
				path: '/set',
				name: 'set',
				component: set,
				meta: {
					title: '设置',
					isTab: true
				}
			}
		]
	}
];

// 导航守卫
// 使用 router.beforeEach 注册一个全局前置守卫,判断用户是否登陆
/* router.beforeEach((to, from, next) => {
	if (to.path === '/login') {
		next();
	} else {
		let token = localStorage.getItem('Authorization');

		if (token === null || token === '') {
			next('/login');
		} else {
			next();
		}
	}
}); */
const router = createRouter({
	history: createWebHashHistory(),
	routes
})
export default router;
- 在home.vue中加入路由组件测试一下路由跳转:
<router-view />

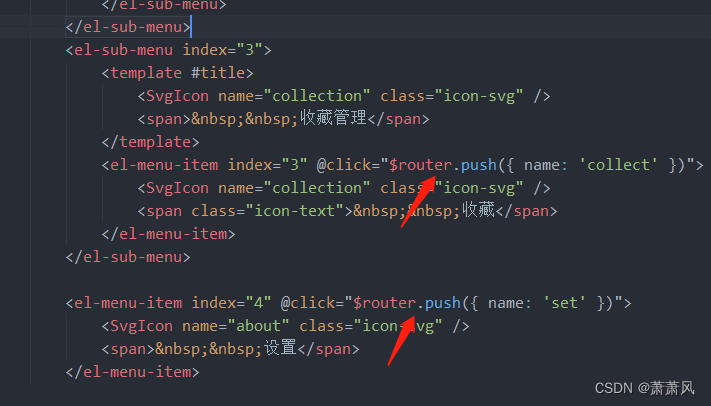
- 在菜单项中加入跳转路由代码
在“首页”菜单项加上点击跳转路由代码:@click="$router.push({ name: 'index' })"

同理,在其它菜单项上加入相应代码。
- 测试效果
点击“设置”

点击“收藏”
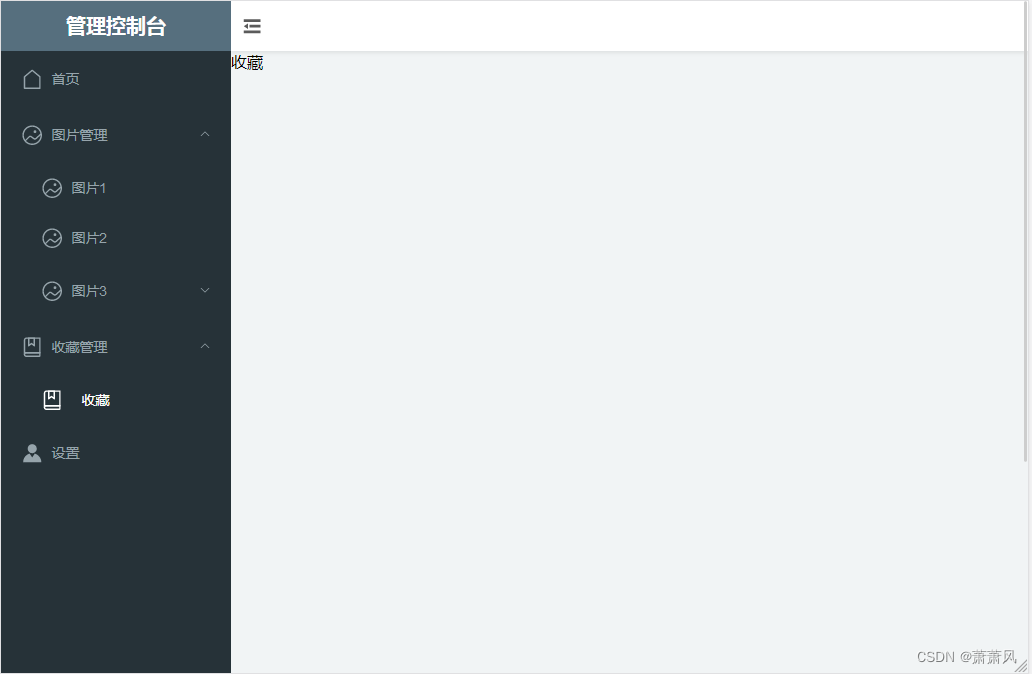
ok,路由配置成功!
(六)、定制页面标签栏
二步走:
(1)、监听路由的切换,存储跳转的路由的name(或path)集合,并存储当前的路由name。
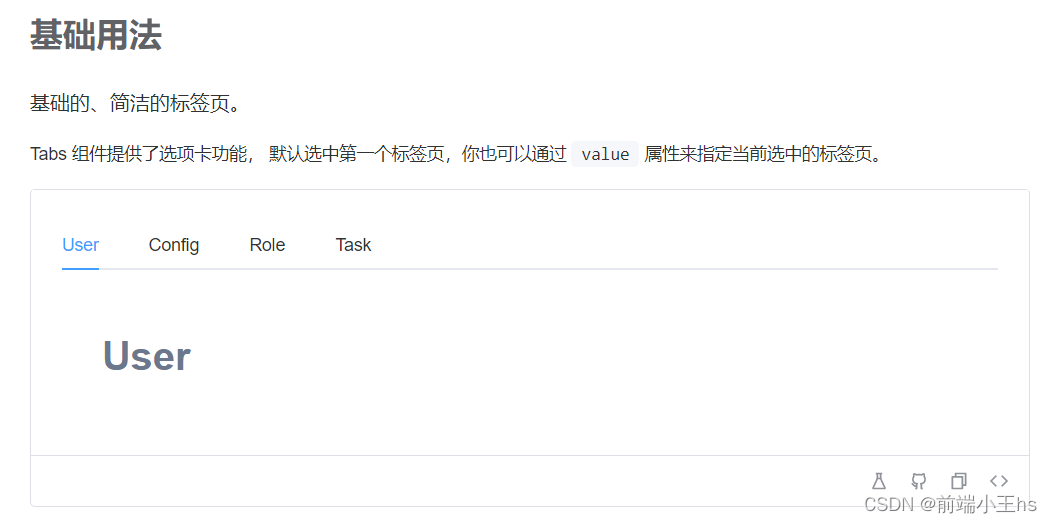
(2)、使用 el-tabs标签页组件Tabs 标签页 | Element Plus,自定义样式,编写内容组件。
第一步:
- 监听路由变化,watch与data同层:
watch: {
			$route: {
				handler(to, from) {
					if (to.path != from.path) {
						// 处理路由
						this.routeHandle(to);
					}
				}
			}
},- 算了,直接放js全部代码吧:
<script>
export default {
components: {
},
data: function() {
return {
isCollapse: false,
mainTabs: [],
mainTabsActiveName: '',
menuActiveName: '',
menus: []
}
},
created() {
let that = this;
that.routeHandle(that.$route);
},
// 监听路由变化
watch: {
$route: {
handler(to, from) {
if (to.path != from.path) {
// 处理路由
this.routeHandle(to);
}
}
}
},
methods: {
resetDocumentClientHeight: function() {
this.documentClientHeight = document.documentElement['clientHeight'];
window.onresize = () => {
this.documentClientHeight = document.documentElement['clientHeight'];
this.loadSiteContentViewHeight();
};
},
loadSiteContentViewHeight: function() {
let height = this.documentClientHeight - 52; //减去导航栏高度50
console.log(this.$route.meta.isTab)
if (this.$route.meta.isTab) {
height -= 70; //减去tab栏高度40,减去上下边距30
/* this.siteContentViewHeight = {
'min-height': height + 'px'
}; */
this.siteContentViewHeight = height;
} else {
height -= 30;
//给内容区设置高度
this.siteContentViewHeight = height;
}
},
routeHandle: function(route) {
//每次切换页面,重新计算页面高度和内容区高度
this.resetDocumentClientHeight();
this.loadSiteContentViewHeight();
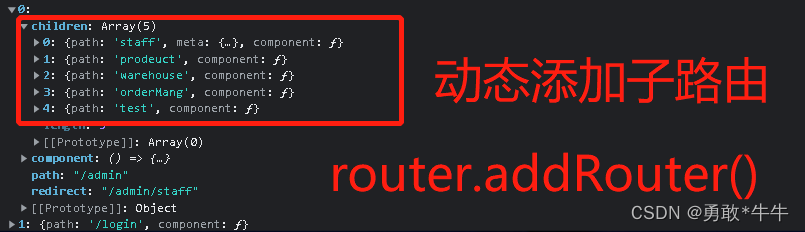
if (route.meta.isTab) {
// tab选中, 不存在先添加
var tab = this.mainTabs.filter(item => item.name === route.name)[0];
if (!tab) {
if (route.meta.isDynamic) {
route = this.dynamicMenuRoutes.filter(item => item.name === route.name)[0];
if (!route) {
return console.error('未能找到可用标签页!');
}
}
tab = {
menuId: route.meta.menuId || route.name,
name: route.name,
title: route.meta.title,
iframeUrl: route.meta.iframeUrl || '',
params: route.params,
query: route.query
};
this.mainTabs = this.mainTabs.concat(tab);
}
this.menuActiveName = tab.menuId + '';
this.mainTabsActiveName = tab.name;
}
},
mounted: function() {
let that = this;
that.resetDocumentClientHeight();
that.loadSiteContentViewHeight();
}
}
}
</script>第二步:
- 编写组件
<!-- todo 内容组件 -->
			<el-tabs v-if="$route.meta.isTab" v-model="mainTabsActiveName" :closable="true"
				@tab-click="selectedTabHandle" @tab-remove="removeTabHandle">

				<el-scrollbar ref="scroll" :height="siteContentViewHeight+32+'px'" @scroll="scroll">
					<el-tab-pane v-for="item in mainTabs" :label="item.title" :name="item.name">
						<el-card :style="'min-height:'+siteContentViewHeight + 'px'">

							<router-view v-if="item.name === mainTabsActiveName" />

						</el-card>
					</el-tab-pane>
				</el-scrollbar>
			</el-tabs>
			<div v-else>
				<el-scrollbar ref="scroll" :height="siteContentViewHeight+32+'px'" @scroll="scroll">
					<!-- 主入口标签页 e -->
					<el-card :style="'min-height:'+ siteContentViewHeight + 'px'">
						<router-view />
					</el-card>
				</el-scrollbar>
</div>- 修改样式:
/* 修改标签栏样式 */
.content-main .el-tabs .el-tabs__header {
	z-index: 90;
	padding: 0 55px 0 15px;
	box-shadow: 0 2px 4px 0 rgba(0, 0, 0, 0.12), 0 0 6px 0 rgba(0, 0, 0, 0.04);
	background-color: #fff;
}

.content-main .el-tabs .el-tabs__nav-wrap::after {
	width: 0px;
}

.content-main .el-scrollbar .el-card {
	margin: 15px 15px;

}
.content-main .el-tabs .el-tabs__header{
	margin: unset;
}
.content-main .el-tabs .el-tab-pane{
}- 在methods中添加函数方法
selectedTabHandle: function(tab, e) {
tab = this.mainTabs.filter(item => item.name === tab.paneName);
if (tab.length >= 1) {
this.$router.push({
name: tab[0].name,
query: tab[0].query,
params: tab[0].params
});
}
},
removeTabHandle: function(tabName) {
this.mainTabs = this.mainTabs.filter(item => item.name !== tabName);
if (this.mainTabs.length >= 1) {
// 当前选中tab被删除
if (tabName === this.mainTabsActiveName) {
var tab = this.mainTabs[this.mainTabs.length - 1];
this.$router.push({
name: tab.name,
query: tab.query,
params: tab.params
},
() => {
this.mainTabsActiveName = this.$route.name;
}
);
}
} else {
this.menuActiveName = '';
this.$router.push({
name: 'Home'
});
}
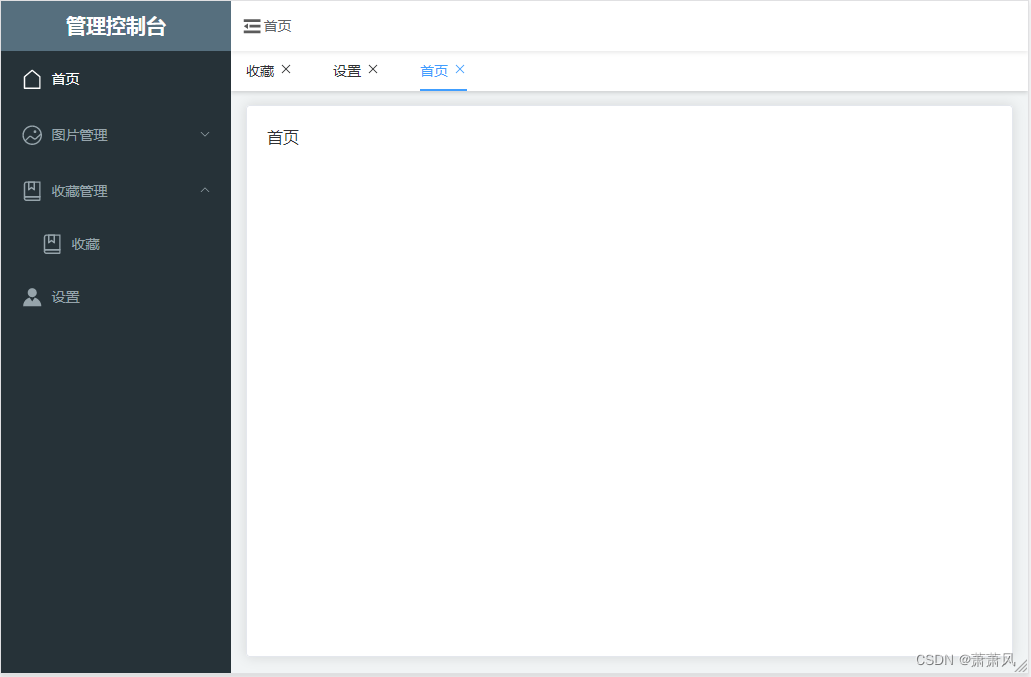
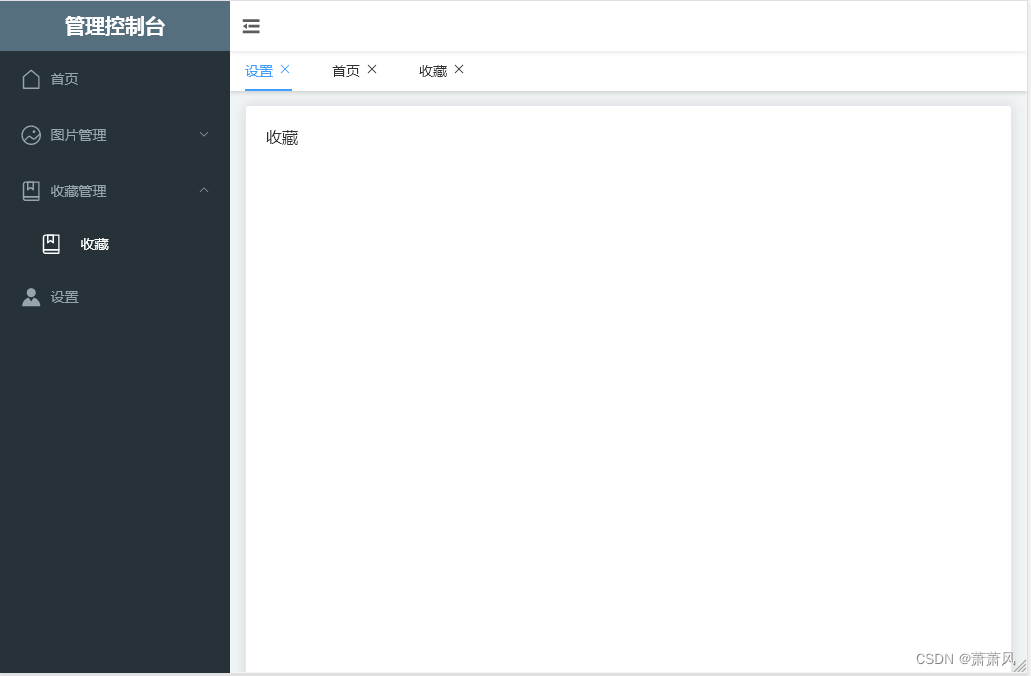
},- 效果:
(七)、修改封装菜单栏
- 在router文件下新建文件

- menu.js文件代码:
var mu = {
	longTitle: '管理控制台',
	littleTitle: '控制台',
	items: [{
			iconName: 'home',
			name: '首页',
			routerName: 'index',
			disabled: false
		}, {
			iconName: 'img',
			name: '图片管理',
			submenu: [{
				iconName: 'img',
				name: '图片一',
				routerName: 'img1',
				disabled: false
			}, {
				iconName: 'img',
				name: '图片二',
				routerName: 'img2',
				disabled: false
			}, {
				iconName: 'img',
				name: '图片三管理',
				submenu: [{
					iconName: 'img',
					name: '图片三',
					routerName: 'img1',
					disabled: true
				}]

			}]
		},
		{
			iconName: 'collection',
			name: '收藏管理',
			submenu: [{
				iconName: 'collection',
				name: '收藏',
				routerName: 'collect',
				disabled: false
			}]
		},
		{
			iconName: 'about',
			name: '设置',
			routerName: 'set',
			disabled: false
		}

	]
}
export default mu;
- 重新写菜单组件:
<div class="menu-nav-header">
<span>{{isCollapse?littleTitle:longTitle}}</span>
</div>
<el-menu active-text-color="#fff" background-color="#263238" class="el-menu-vertical-demo"
:collapse-transition="false" text-color="#96a4ab " @open="handleOpen"
@close="handleClose" :collapse="isCollapse">
<template v-for="(item,index) in menus">
<el-menu-item v-if="!item.submenu" :index="index" @click="$router.push({ name: item.routerName })" :disabled="item.disabled">
<SvgIcon :name="item.iconName" class="icon-svg" />
<span slot=""> {{item.name}}</span>
</el-menu-item>
<el-sub-menu v-else :index="index">
<template #title>
<SvgIcon :name="item.iconName" class="icon-svg" />
<span slot=""> {{item.name}}</span>
</template>
<template v-for="(submenuItem,submenuIndex) in item.submenu">
<el-menu-item v-if="!submenuItem.submenu" :index="index+'-'+submenuIndex" :disabled="submenuItem.disabled"
@click="$router.push({ name: submenuItem.routerName })">
<SvgIcon :name="submenuItem.iconName" class="icon-svg" />
<span slot=""> {{submenuItem.name}}</span>
</el-menu-item>
<el-sub-menu v-else :index="index+'-'+submenuIndex">
<template #title>
<SvgIcon :name="submenuItem.iconName" class="icon-svg" />
<span slot=""> {{submenuItem.name}}</span>
</template>
<el-menu-item v-for="(item3,index3) in submenuItem.submenu" :index="index" :disabled="item3.disabled"
@click="$router.push({ name: item3.routerName })">
<SvgIcon :name="item3.iconName" class="icon-svg" />
<span slot=""> {{item3.name}}</span>
</el-menu-item>
</el-sub-menu>
</template>
</el-sub-menu>
</template>
</el-menu>只嵌套了三级子菜单,如果有更多级子菜单,需要在组件中再嵌套多个for循环即可。
- script代码中首先导入menu
import mu from '../router/menu/menu.js';
- 在created中调用
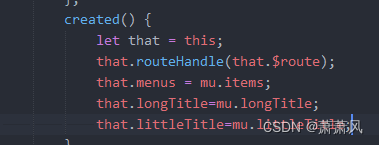
这样,修改菜单栏就只需要在menu.js进行编辑了,不再需要修改页面代码。
(八)、添加面包屑
- 页面中加入面包屑组件:
<el-breadcrumb separator="/">
					<el-breadcrumb-item v-if="!breadcrumbList.size && breadcrumbList[0]!='首页'" :to="{ name: 'index' }">
						首页
					</el-breadcrumb-item>
					<el-breadcrumb-item v-for="it in breadcrumbList">{{it}}</el-breadcrumb-item>
</el-breadcrumb>- 在created中,将菜单栏集合做下处理,处理成下面格式:
{
"首页":["首页"],
"图片一":["图片管理","图片一"],
......
}- 代码:
    //菜单项层级处理,做一个面包屑集合保存
            var mus=that.menus
            for (let i1 of mus) {
                if (i1.submenu) {
                    for (let i2 of i1.submenu) {
                        if (i2.submenu) {
                            for (let i3 of i2.submenu) {
                                if (!i3.submenu) {
                                    that.breadcrumbObj[i3.name] = [i1.name, i2.name, i3.name];
                                }
                            }
                        } else {
                            that.breadcrumbObj[i2.name] = [i1.name, i2.name];
                            console.log(i2.name)
                        }
                    }
                } else {
                    that.breadcrumbObj[i1.name] = [i1.name];
                    console.log(i1.name)
                }
            }
路由发生变化时赋值,在watch中加入:
this.breadcrumbList = this.breadcrumbObj[to.meta.title]
注意:路由中的name要与菜单中的name保持一致。
四、结尾
到这里,一个简单的管理后台基础模板就完成了,源代码拿走不谢,码字不易,既然看到了这里,点个赞再走吧。