隶书文章:Java高级 | (二十二)Java常用类库-CSDN博客
系列文章:Java高级 | 【实验一】Springboot安装及测试 |最新-CSDN博客
Java高级 | 【实验二】Springboot 控制器类+相关注解知识-CSDN博客
Java高级 | 【实验三】Springboot 静态资源访问-CSDN博客
Java高级 | 【实验四】Springboot 获取前端数据与返回Json数据-CSDN博客
目录
一、创建数据库和表
二、创建spring工程
三、添加依赖
四、编写代码
4.1 创建Student实体类
4.2 创建Mapper接口
4.3创建mapper配置文件
4.4 编写Service层
4.5编写Controller层
4.6 配置数据库
4.7启动类配置
4.8运行结果
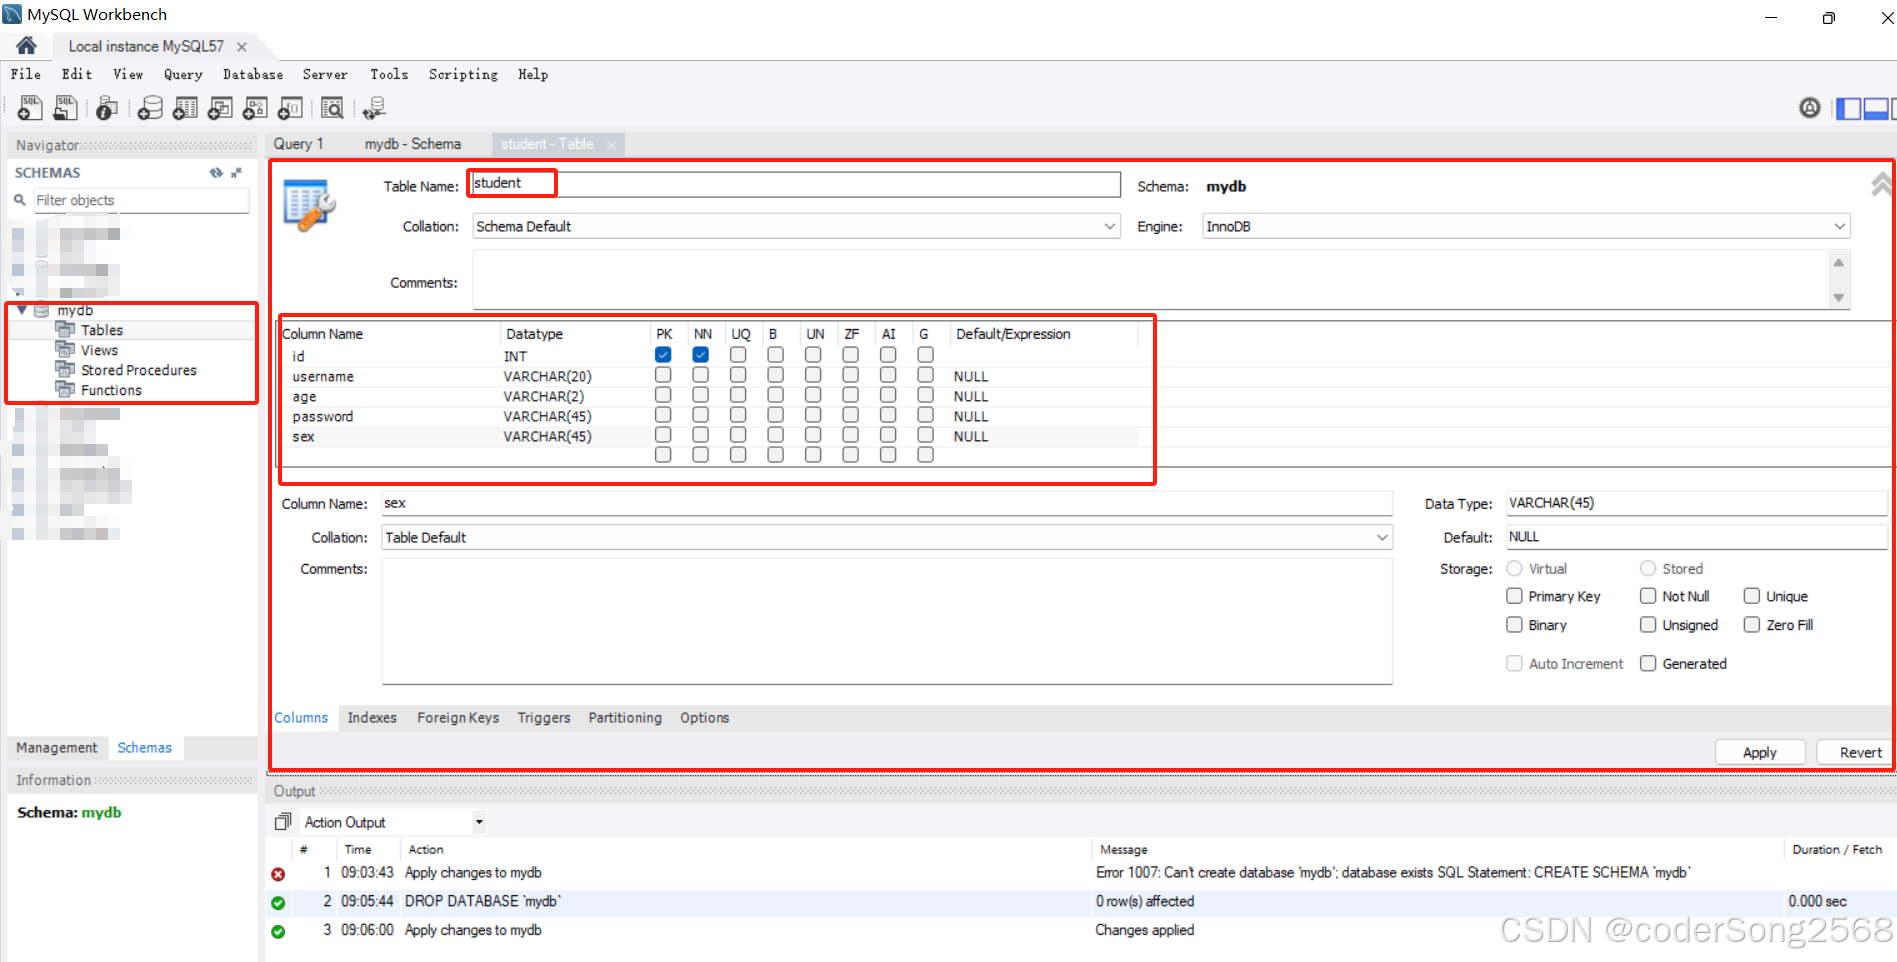
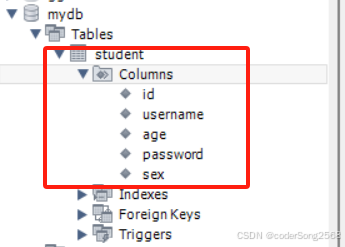
一、创建数据库和表
在workbench中创建mydb数据库和student表
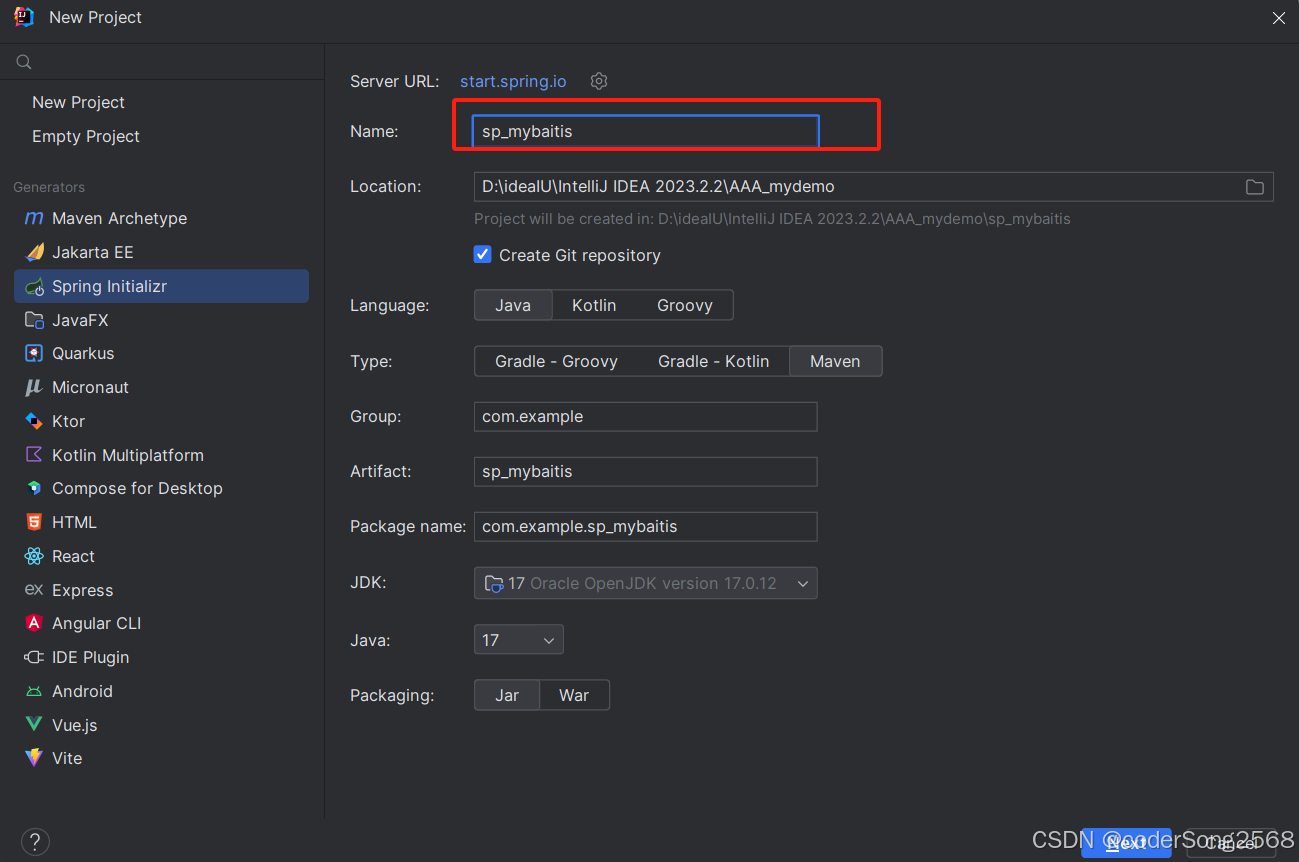
二、创建spring工程
工程名称为“sp_mybaitis”, 在创建项目时,勾选Spring Web和Lombok。
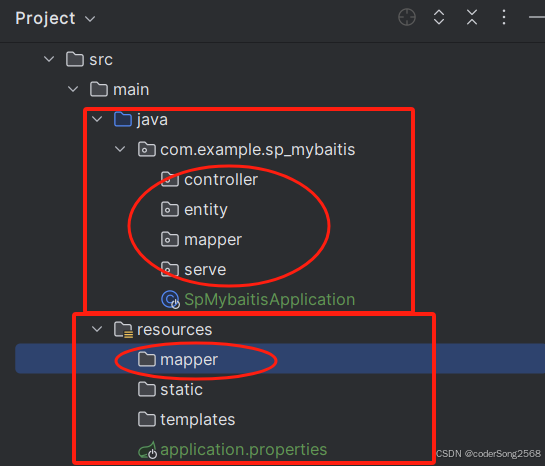
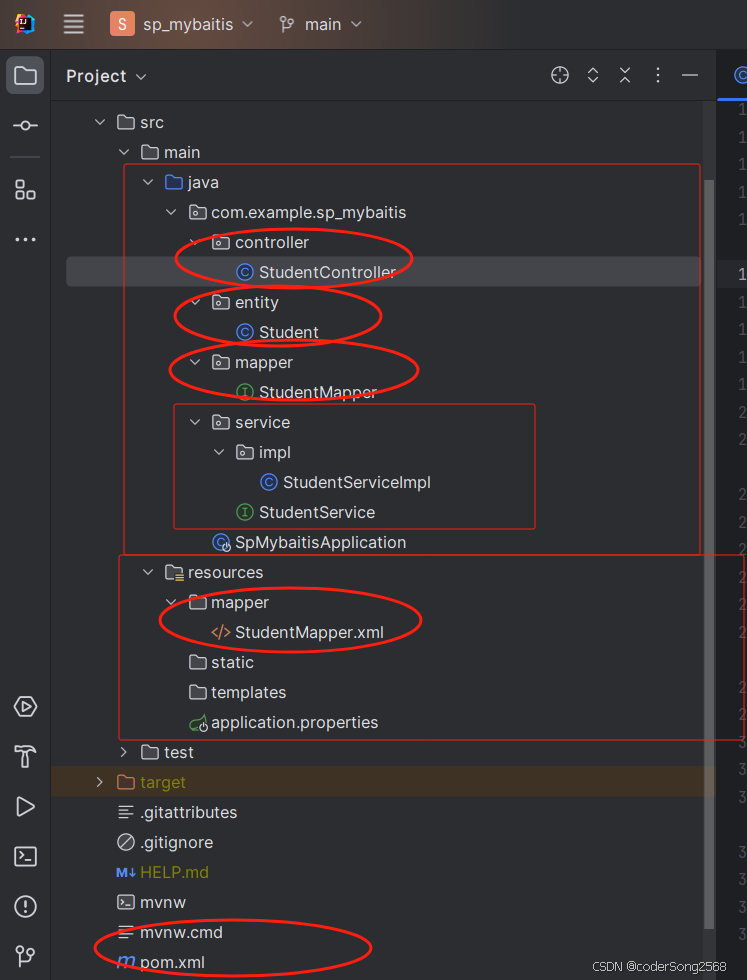
 本项目需要在”com.example.sp_mybaitis“包下创建controller、entity、mapper、servic四个包。
在resources文件夹中创建mapper文件夹。
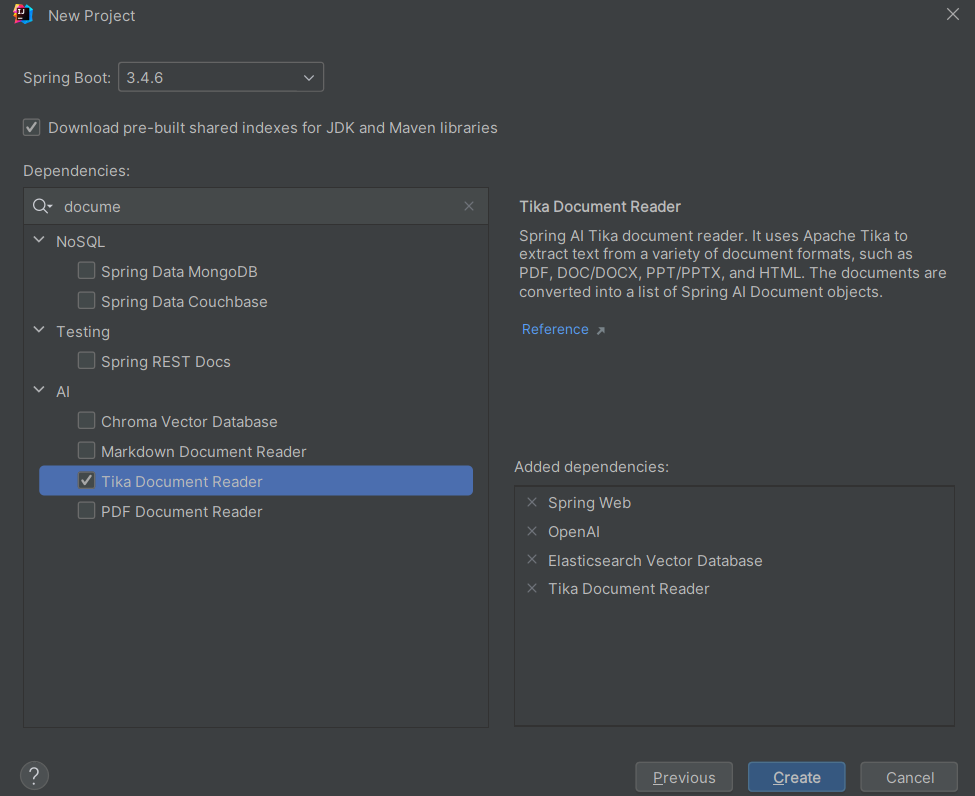
三、添加依赖
本实验需要添加两个依赖。一个是MySQL Driver,用于连接MySQL数据库;一个是MyBatis Framework,即mybatis框架。
我们直接在pom.xml中添加如下代码:
<!--添加依赖-->
        <dependency>
            <groupId>org.mybatis</groupId>
            <artifactId>mybatis</artifactId>
            <version>3.5.9</version>
        </dependency>
        <dependency>
            <groupId>mysql</groupId>
            <artifactId>mysql-connector-java</artifactId>
            <version>8.0.31</version>
        </dependency>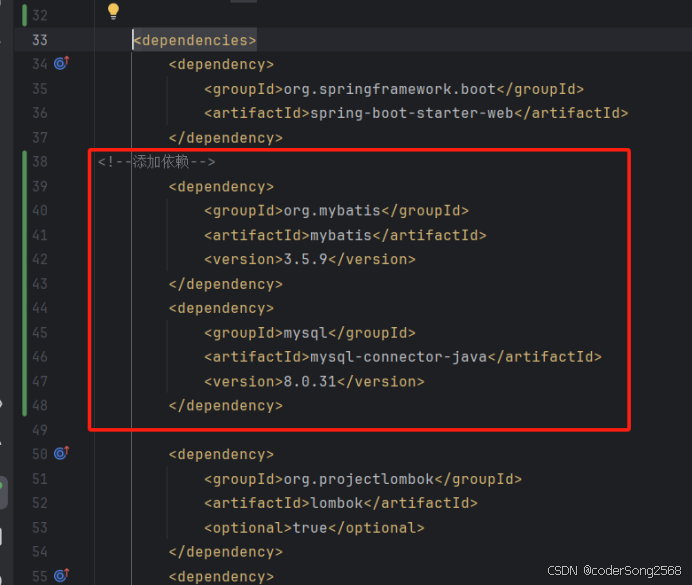
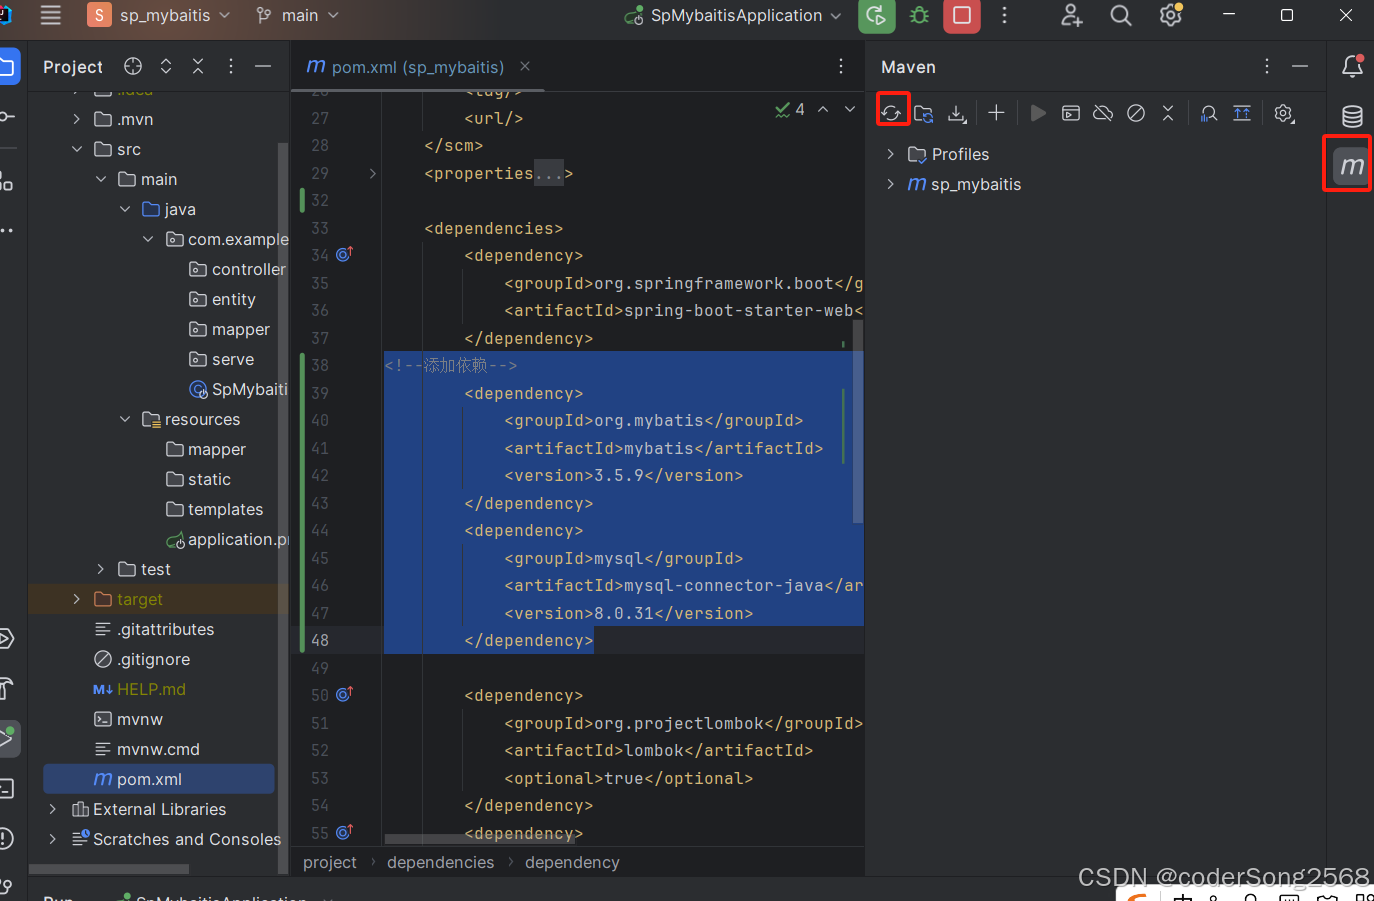
注意:添加上述依赖后需要刷新maven。
四、编写代码
4.1 创建Student实体类
Student类的属性对应student数据库表的字段。Mybatis就是把数据库表的记录映射到Student类的对象中。
package com.example.sp_mybaitis.entity;

import lombok.Data;
import lombok.ToString;
@Data
@ToString
public class Student {
    private int id;
    private String username;
    private String password;
    private String sex;
    private int age;
}4.2 创建Mapper接口
Mapper接口通常定义操作数据库的方法。本项目定义的操作数据库的接口名称为“StudentMapper”。
package com.example.sp_mybaitis.mapper;
import com.example.sp_mybaitis.entity.Student;
import org.apache.ibatis.annotations.Mapper;
import java.util.List;
@Mapper
public interface StudentMapper {
    //返回所有学生实体
    List<Student> queryStudentList();
    //通过id查询student方法
    Student searchStudentById(int id);
    //通过id删除student方法
    int deleteStudentById(int id);
    //通过id增加student方法
    int insertStudent(Student student);
    //通过id修改student方法
    int updateStudent(Student student);
}
4.3创建mapper配置文件
在resources->mapper文件夹中创建一个名为StudentMapper .xml文件。
<?xml version="1.0" encoding="UTF-8"?>
<!DOCTYPE mapper
        PUBLIC "-//mybatis.org//DTD Mapper 3.0//EN"
        "http://mybatis.org/dtd/mybatis-3-mapper.dtd">
<mapper namespace="com.example.sp_mybaitis.mapper.StudentMapper">
    <resultMap id="BaseResultMap" type="com.example.sp_mybaitis.entity.Student">
        <result column="id" jdbcType="INTEGER" property="id"/>
        <result column="userName" jdbcType="VARCHAR" property="username"/>
        <result column="passWord" jdbcType="VARCHAR" property="password"/>
        <result column="sex" jdbcType="VARCHAR" property="sex"/>
        <result column="age" jdbcType="INTEGER" property="age"/>
    </resultMap>
    <select id="queryStudentList" resultType="Student">
        SELECT *
        FROM student
    </select>

    <select id="searchStudentById" parameterType="java.lang.Integer" resultType="Student">
        select *
        from student
        where id = #{id}
    </select>
    <delete id="deleteStudentById" parameterType="java.lang.Integer">
        delete
        from student
        where id = #{id}
    </delete>
    <insert id="insertStudent">
        insert into student (id, username, password, sex, age)
        values (#{id}, #{username}, #{password}, #{sex}, #{age})
    </insert>
    <update id="updateStudent">
        update student
        set username=#{username},
            password=#{password},
            sex=#{sex},
            age=#{age}
        where id = #{id}
    </update>
</mapper>
4.4 编写Service层
服务层主要是定义接口以及接口的实现类。先在Servic包中创建包impl,然后创建一个名为“StudentService”的接口。
package com.example.sp_mybaitis.service;
import com.example.sp_mybaitis.entity.Student;
import java.util.List;
public interface StudentService {
    //所有学生实体
    List<Student> queryStudentList();
    //通过id查询student方法
    Student searchStudentById(int id);
    //通过id删除student方法
    int deleteStudentById(int id);
    //通过id增加student方法
    String insertStudent(Student student);
    //通过id修改student方法
    String updateStudent(Student student);
}
在impl包中创建一个名为StudentServiceImpl 的类,该类主要是实现StudentService接口的方法。
package com.example.sp_mybaitis.service.impl;
import com.example.sp_mybaitis.service.StudentService;
import com.example.sp_mybaitis.entity.Student;
import com.example.sp_mybaitis.mapper.StudentMapper;
import org.springframework.beans.factory.annotation.Autowired;
import org.springframework.stereotype.Service;
import java.util.List;
@Service
public class StudentServiceImpl implements StudentService {
    @Autowired
    private StudentMapper studentMapper;
    @Override
    public List<Student> queryStudentList()
    {
        return studentMapper.queryStudentList();
    }
    //
    //通过id查找
    @Override
    public Student searchStudentById(int id) {
        return studentMapper.searchStudentById(id);
    }
    //删除
    @Override
    public int deleteStudentById(int id) {
        int result1 = studentMapper.deleteStudentById(id);
        if (result1 == 1) {
            return 1;
        } else {
            return 0;
        }
    }
    //添加
    @Override
    public String insertStudent(Student student)
    {
        int result2=studentMapper.insertStudent(student);
        if(result2==1)
        {
            return "添加成功!";
        }
        else
        {
            return "添加失败!";
        }
    }
    //修改
    @Override
    public String updateStudent(Student student) {
        int result3 = studentMapper.updateStudent(student);
        if (result3 == 1) {
            return "修改成功!";
        } else {
            return "修改失败!";
        }
    }
}4.5编写Controller层
控制层用于与前端进行交互。在controller包中创建一名为“StudentController”的java类
package com.example.sp_mybaitis.controller;
import com.example.sp_mybaitis.service.StudentService;
import com.example.sp_mybaitis.entity.Student;
import org.springframework.beans.factory.annotation.Autowired;
import org.springframework.web.bind.annotation.GetMapping;
import org.springframework.web.bind.annotation.PathVariable;
import org.springframework.web.bind.annotation.RequestMapping;
import org.springframework.web.bind.annotation.RestController;
import java.util.List;
@RestController
@RequestMapping("student")
public class StudentController {
    @Autowired
    private StudentService studentService;
    @GetMapping("/query")
    public List<Student> queryStudentList()
    {
        List <Student> students=studentService.queryStudentList();
        return students;
    }
    //
    @RequestMapping("/query/{id}")
    public String searchStudentById(@PathVariable("id") int id)
    {
        Student student=studentService.searchStudentById(id);
        return student.toString();
    }
    @RequestMapping("/delete/{id}")
    public int deleteStudentById(@PathVariable("id") int id)
    {
        return studentService.deleteStudentById(id);
    }
    @RequestMapping("/insert")
    public String insertStudent(Student student){
        return studentService.insertStudent(student);
    }
    @RequestMapping("/update")
    public String updateStudent(Student student)
    {
        return studentService.updateStudent(student);
    }
}
4.6 配置数据库
在application.properties文件中配置数据库等信息。
spring.application.name=sp_mybaitis
spring.datasource.url=jdbc:mysql://localhost:3306/mydb?serverTimezone=Asia/Shanghai&useSSL=false&userUnicode=true&characterEncoding=utf-8
spring.datasource.username=root
spring.datasource.password=123456
spring.datasource.driver-class-name=com.mysql.cj.jdbc.Driver
#entity
mybatis.type-aliases-package=com.example.sp_mybaitis.entity
#mapper.xml
mybatis.mapper-locations=classpath:mapper/*.xml
4.7启动类配置
在启动类中配置springboot要扫描的包。
package com.example.sp_mybaitis;
import org.mybatis.spring.annotation.MapperScan;
import org.springframework.boot.SpringApplication;
import org.springframework.boot.autoconfigure.SpringBootApplication;
@SpringBootApplication
@MapperScan("com.example.sp_mybaitis.mapper")
public class SpMybaitisApplication {
    public static void main(String[] args) {
        SpringApplication.run(SpMybaitisApplication.class, args);
    }
}
注意: 如果@SpringScan报错,检查pom.xml
<!-- mybatisplus @MapperScan等注解需要的依赖-->
        <dependency>
            <groupId>com.baomidou</groupId>
            <artifactId>mybatis-plus-extension</artifactId>
            <version>3.4.3.1</version>
        </dependency>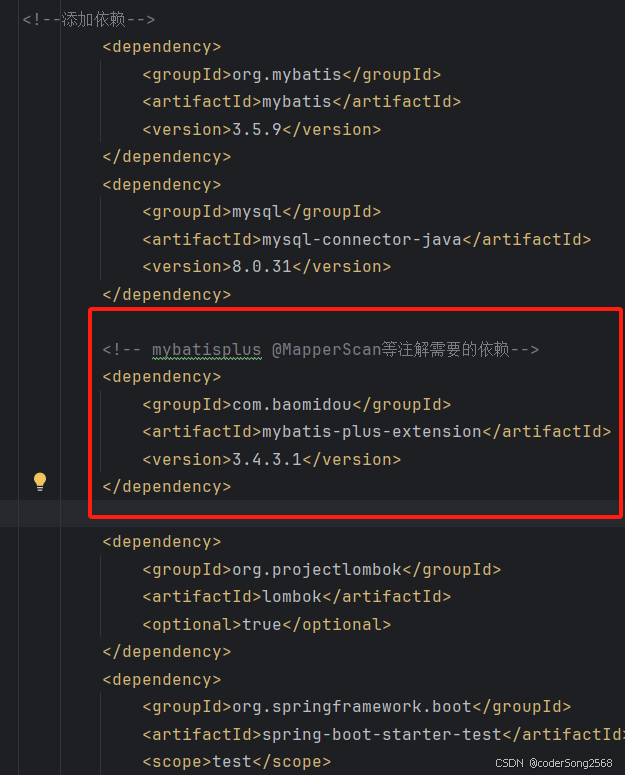
4.8运行结果
启动项目,在浏览器或postman中测试。
1、测试返回所有学生信息
在浏览器中的测试结果如下图所示:

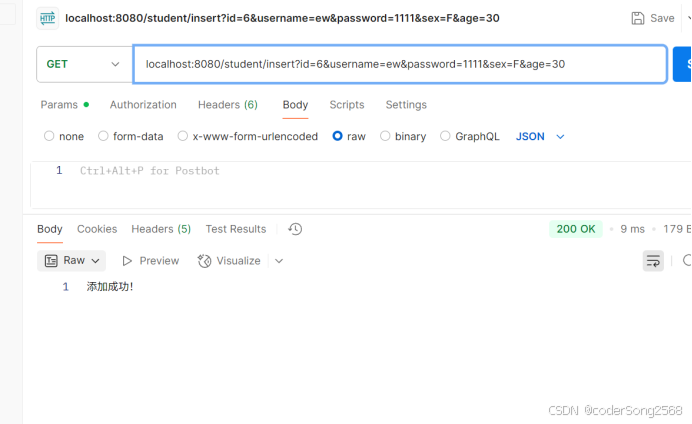
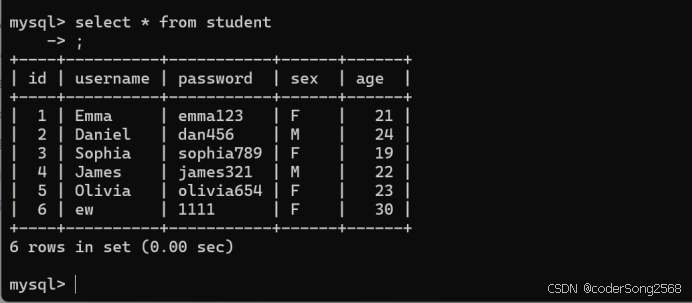
2、测试增加一个学生信息
在postman中测试结果如下图所示:
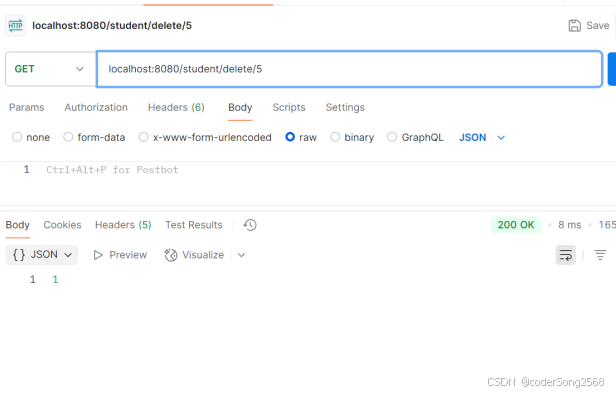
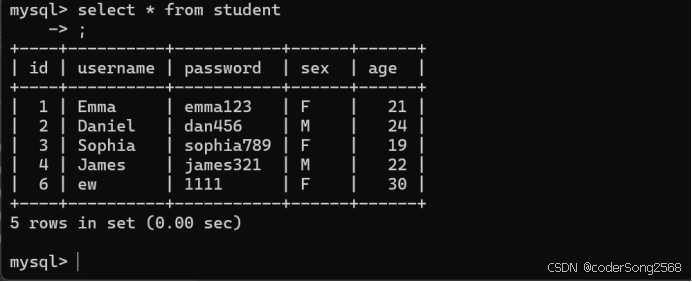
3、删除一个学生数据
在postman中测试,结果如下:
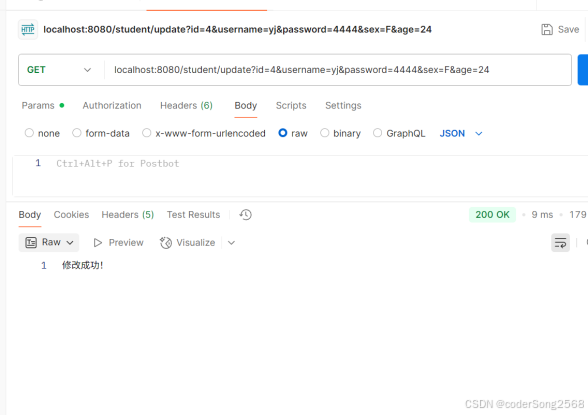
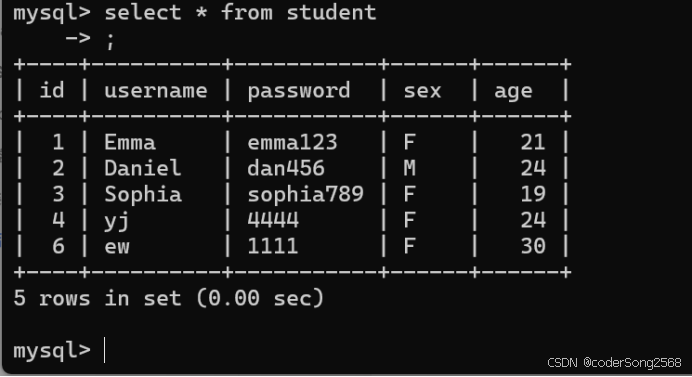
4、修改学生信息
在postman中测试,结果如下:
5、按id查询学生信息
测试结果如下所示: