主要思想:随机增加ROI区域的深度,模拟物体处在不同位置的形态。
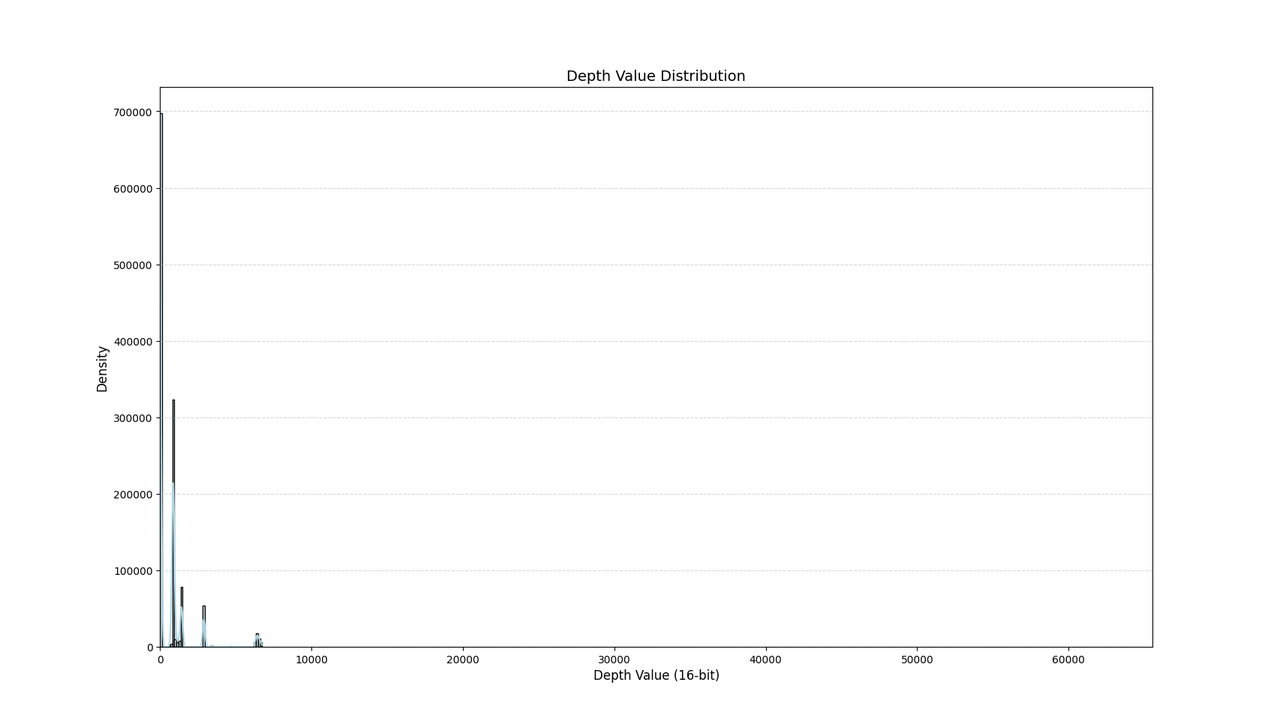
首先打印一张深度图中的深度信息分布:
import cv2
import matplotlib.pyplot as plt
import numpy as np
import seaborn as sns

def plot_grayscale_histogram(image_path):
    # 读取图像(保留16位深度)
    img = cv2.imread(image_path, cv2.IMREAD_UNCHANGED)
    print(img)

    if img is None:
        print("错误:无法读取图像,请检查文件路径")
        return

    # 验证图像格式
    if len(img.shape) != 2 or img.dtype != np.uint16:
        print("警告:非单通道16位图像,当前形状:", img.shape, "数据类型:", img.dtype)

    # 创建带KDE的直方图
    plt.figure(figsize=(10, 6))

    # 使用展平后的图像数据
    sns.histplot(
        x=img.flatten(),  # 将二维数组展平为一维
        bins=50,          # 增加bins数量以更好显示16位数据分布
        color="lightblue",
        edgecolor="black",
        kde=True,
        # stat="density"    # 将计数转换为密度概率
    )

    # 设置标题和标签
    plt.title("Depth Value Distribution", fontsize=14)
    plt.xlabel("Depth Value (16-bit)", fontsize=12)
    plt.ylabel("Density", fontsize=12)

    # 添加网格和格式优化
    plt.grid(axis="y", linestyle="--", alpha=0.5)
    plt.xlim(0, 65535)  # 设置16位数据范围

    # 显示图形
    plt.show()

    # 显示原始深度图的归一化预览
    normalized = cv2.normalize(img, None, 0, 255, cv2.NORM_MINMAX, dtype=cv2.CV_8U)
    cv2.imshow('Normalized Preview', normalized)
    cv2.waitKey(0)
    cv2.destroyAllWindows()

if __name__ == "__main__":
    image_path = "C:/pyprojects/yolo11/Dataset_depth/images/train/1112_0-rgb.png"
    plot_grayscale_histogram(image_path)
结果如下:
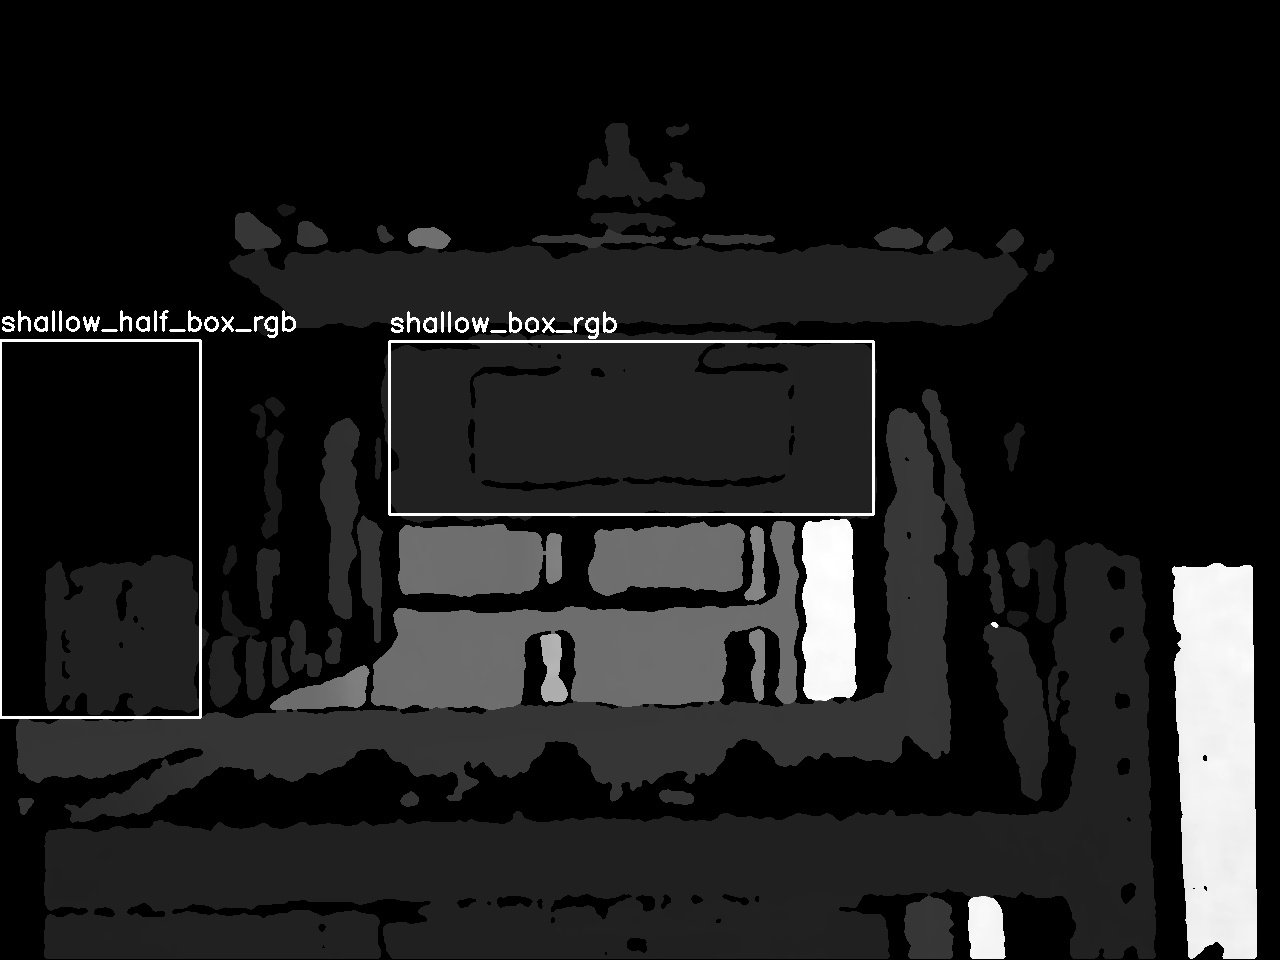
然后我们单独画一下中间的ROI区域:
img = img[342:515, 389:873]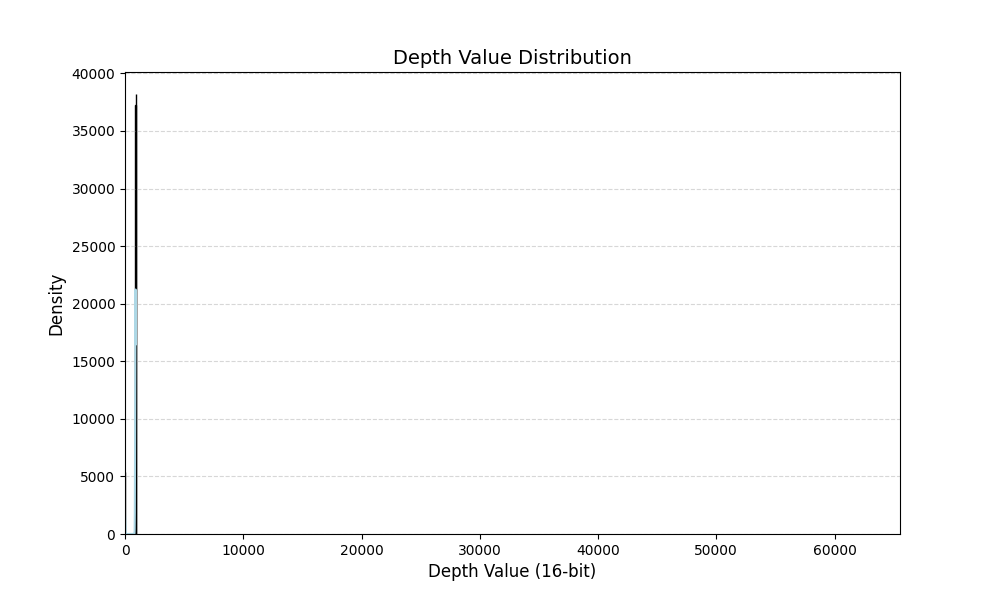
现在随机增加ROI区域的深度,模拟不同纵向的位置:
# 本数据集生成的代码
# 数据增强方法:随机增加ROI区域的深度,模拟箱子在不同纵向位置摆放
# 训练集:76665张,测试集:18975张

import cv2
import os
import numpy as np
import shutil

image_file_dir = "C:/pyprojects/yolo11/fheiaunjk/images"
min_val = 0  # 最小偏移量
max_val = 500   # 最大偏移量
output_dir = "C:/pyprojects/yolo11/output"

# 正确拼接输出路径
img_output_path = os.path.join(output_dir, "images")  # 正确写法
label_output_path = os.path.join(output_dir, "labels")  # 正确写法

# 直接创建目标目录(无需使用 os.path.dirname)
os.makedirs(img_output_path, exist_ok=True)    # 创建 output/images
os.makedirs(label_output_path, exist_ok=True)  # 创建 output/labels

for filename in os.listdir(image_file_dir):
    # 1. 构建图片完整路径
    image_file_path = os.path.join(image_file_dir, filename)

    # 2. 构建标签文件路径
    labels_dir = image_file_dir.replace("images", "labels")
    base_name = os.path.splitext(filename)[0]  # 去掉文件扩展名
    label_file_path = os.path.join(labels_dir, f"{base_name}.txt")  # 正确路径

    # 3. 检查标签文件是否存在
    if not os.path.exists(label_file_path):
        print(f"警告:标签文件 {label_file_path} 不存在")
        continue

    # 4. 读取图片并检查有效性
    image = cv2.imread(image_file_path, cv2.IMREAD_UNCHANGED)
    if image is None:
        print(f"错误:无法读取图片 {image_file_path}")
        continue

    # 5. 获取图像尺寸(兼容单通道/多通道)
    if len(image.shape) == 2:  # 单通道(H, W)
        image_height, image_width = image.shape
        print(f"图像尺寸:{image_width}x{image_height}")
    else:  # 多通道(H, W, C)
        print(f"错误:图片 {image_file_path} 不是深度图")
        continue

    with open(label_file_path, 'r') as f:
        lines = f.readlines()

    i = 0

    # 绘制每个检测框
    for k, line in enumerate(lines):
        parts = line.strip().split()
        if len(parts) < 5:
            continue

        # 解析YOLO格式数据
        class_id = int(parts[0])
        x_center = float(parts[1]) * image_width
        y_center = float(parts[2]) * image_height
        width = float(parts[3]) * image_width
        height = float(parts[4]) * image_height

        # 计算坐标
        x1 = int(x_center - width/2)
        y1 = int(y_center - height/2)
        x2 = int(x_center + width/2)
        y2 = int(y_center + height/2)

        # --- 生成单个随机数 ---
        for m in range(5):
            i = k * 5 + m
            random_offset = np.random.randint(min_val, max_val + 1)  # 生成一个随机整数
            region = image[y1 : y2, x1 : x2]
            modified_region = np.clip(region.astype(np.int32) + random_offset, 0, 65535).astype(np.uint16)
            image[y1 : y2, x1 : x2] = modified_region
            image_output_path = os.path.join(img_output_path, f"{base_name}_{i}.png")
            cv2.imwrite(image_output_path, image)  # 写入图片

            # 拷贝标签
            output_label_path = os.path.join(label_output_path, f"{base_name}_{i}.txt")
            print(output_label_path)
            shutil.copy2(label_file_path, output_label_path)
0523更新:增加ROI区域边缘平滑功能,避免边缘出现明显的锯齿或突变:
# 本数据集生成的代码
# 数据增强方法:随机增加ROI区域的深度,模拟不同纵向位置摆放

import cv2
import os
import numpy as np
import shutil

image_file_dir = "Dataset_depth/images/val"
min_val = 0  # 最小偏移量
max_val = 500   # 最大偏移量
output_dir = "/home/hary/ctc/ultralytics-main/output"

# 正确拼接输出路径
img_output_path = os.path.join(output_dir, "images")  # 正确写法
label_output_path = os.path.join(output_dir, "labels")  # 正确写法

# 直接创建目标目录(无需使用 os.path.dirname)
os.makedirs(img_output_path, exist_ok=True)    # 创建 output/images
os.makedirs(label_output_path, exist_ok=True)  # 创建 output/labels

for filename in os.listdir(image_file_dir):
    # 1. 构建图片完整路径
    image_file_path = os.path.join(image_file_dir, filename)

    # 2. 构建标签文件路径
    labels_dir = image_file_dir.replace("images", "labels")
    base_name = os.path.splitext(filename)[0]  # 去掉文件扩展名
    label_file_path = os.path.join(labels_dir, f"{base_name}.txt")  # 正确路径

    # 3. 检查标签文件是否存在
    if not os.path.exists(label_file_path):
        print(f"警告:标签文件 {label_file_path} 不存在")
        continue

    # 4. 读取图片并检查有效性
    image = cv2.imread(image_file_path, cv2.IMREAD_UNCHANGED)
    if image is None:
        print(f"错误:无法读取图片 {image_file_path}")
        continue

    # 5. 获取图像尺寸(兼容单通道/多通道)
    if len(image.shape) == 2:  # 单通道(H, W)
        image_height, image_width = image.shape
        print(f"图像尺寸:{image_width}x{image_height}")
    else:  # 多通道(H, W, C)
        print(f"错误:图片 {image_file_path} 不是深度图")
        continue

    with open(label_file_path, 'r') as f:
        lines = f.readlines()

    i = 0

    # 绘制每个检测框
    for k, line in enumerate(lines):
        parts = line.strip().split()
        if len(parts) < 5:
            continue

        # 解析YOLO格式数据
        class_id = int(parts[0])
        x_center = float(parts[1]) * image_width
        y_center = float(parts[2]) * image_height
        width = float(parts[3]) * image_width
        height = float(parts[4]) * image_height

        # 计算坐标
        x1 = int(x_center - width/2)
        y1 = int(y_center - height/2)
        x2 = int(x_center + width/2)
        y2 = int(y_center + height/2)

        # --- 生成单个随机数 ---
        for m in range(1):
            i = k * 1 + m
            random_offset = np.random.randint(min_val, max_val + 1)  # 生成一个随机整数

            # 保存原始ROI区域
            original_roi = image[y1:y2, x1:x2].copy()

            # 生成随机偏移后的ROI
            modified_roi = np.clip(original_roi.astype(np.int32) + random_offset, 0, 65535).astype(np.uint16)

            # 创建羽化遮罩(核心修改部分)
            height, width = original_roi.shape[:2]
            mask = np.zeros((height, width), dtype=np.float32)

            # 创建椭圆渐变遮罩(比实际区域稍小)
            cv2.ellipse(mask,
                    (int(width/2), int(height/2)),
                    (int(width/2*0.8), int(height/2*0.8)),  # 控制羽化范围
                    0, 0, 360, 1.0, -1)

            # 添加高斯模糊柔化边缘
            mask = cv2.GaussianBlur(mask, (0, 0), sigmaX=width/8, sigmaY=height/8)
            mask = mask / np.max(mask)  # 归一化到[0,1]

            # 混合原始和修改后的区域
            blended_roi = original_roi.astype(np.float32) * (1 - mask) + \
                        modified_roi.astype(np.float32) * mask

            # 写回图像并保持数据类型
            image[y1:y2, x1:x2] = np.clip(blended_roi, 0, 65535).astype(np.uint16)

            image_output_path = os.path.join(img_output_path, f"{base_name}_{i}.png")
            cv2.imwrite(image_output_path, image)  # 写入图片

            # 拷贝标签
            output_label_path = os.path.join(label_output_path, f"{base_name}_{i}.txt")
            print(f"{output_label_path} has created!")
            shutil.copy2(label_file_path, output_label_path)


![[项目总结] 基于Docker与Nginx对项目进行部署](https://i-blog.csdnimg.cn/direct/6b5052373d614e808bf978ad806d818c.png)