最近自己所做的项目使用到这个Velocity模板引擎,分享一下在互联网找的学习资料,仅供学习使用,不参与任何商业活动。
一. VelocityTools介绍
1.1 VelocityTools简介
Velocity Tools 是 Velocity模板引擎的一个子项目,用于将 Velocity 与 Web开发环境集成的工具包。
1.2 VelocityTools的组成
VelocityTools项目分为两个部分:GenericTools和VelocityView .
-
GenericTools :
GenericTools是一组类,它们提供在标准Velocity项目中使用工具的基本基础结构,以及在通用Velocity模板中使用的一组工具。例如 : DateTool、NumberTool和RenderTool很多其他可用的工具 -
Velocity view : 包括所有的通用工具结构和在web应用程序的视图层中使用Velocity的专用工具。这包括用于处理Velocity模板请求的
VelocityViewServlet或VelocityLayoutServlet、用于在JSP中嵌入Velocity的VelocityViewTag和用于在Velocity模板中嵌入JSP标记库的Maven插件。这里流行的工具是LinkTool和ParameterTool。
二. GenericTools使用
2.1 GenericTools介绍
GenericTools : GenericTools是一组类,它们提供在标准Velocity项目中使用工具的基本基础结构,以及在通用Velocity模板中使用的一组工具。
简单来说, GenericTools就是Velocity官方提供的一组可以在模板中使用的工具类库
2.2 GenericTools环境搭建
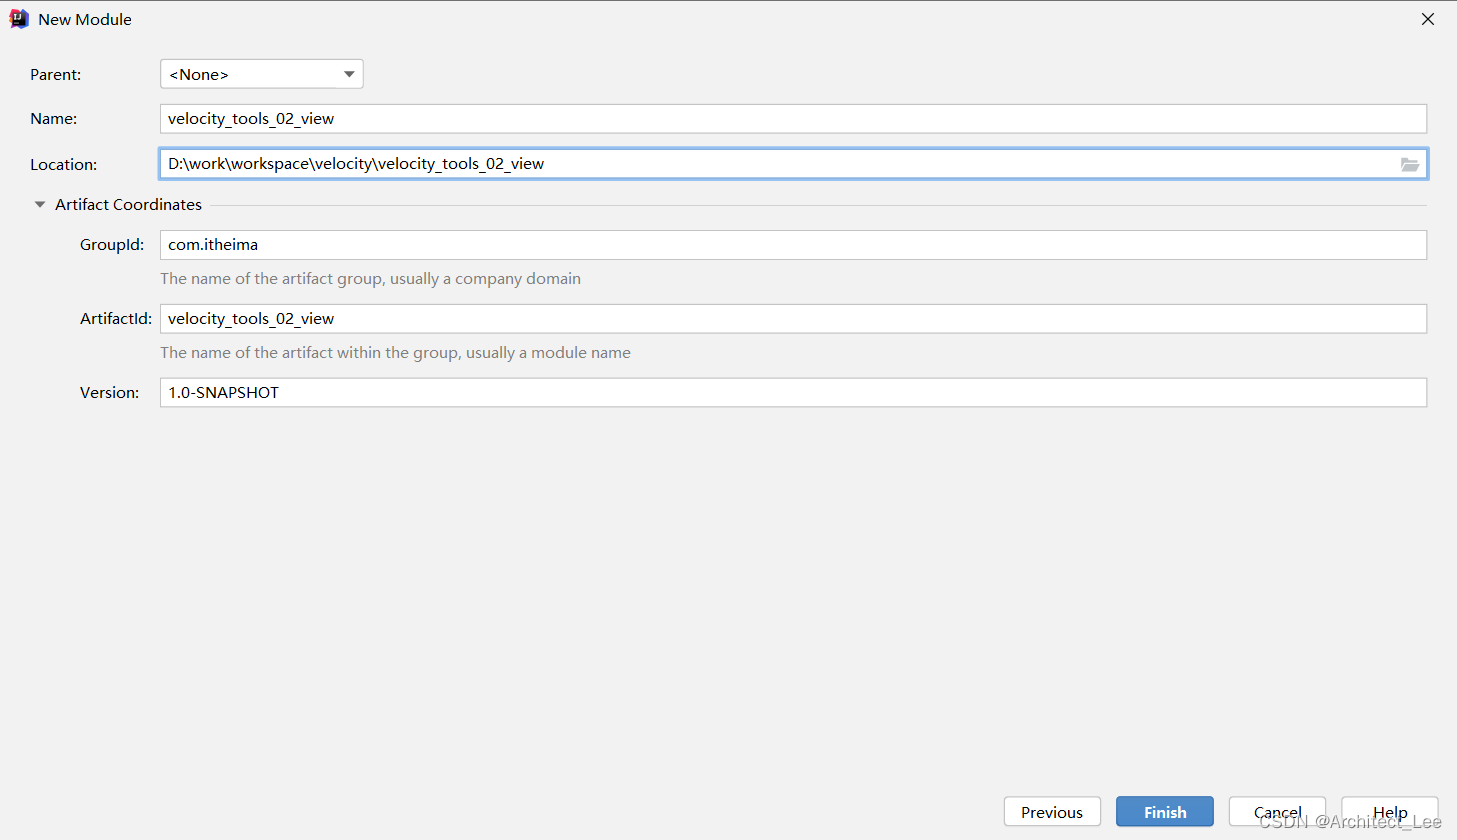
2.2.1 创建项目

2.2.2 导入依赖
<dependencies>
    <dependency>
        <groupId>org.apache.velocity</groupId>
        <artifactId>velocity-engine-core</artifactId>
        <version>2.2</version>
    </dependency>
    <dependency>
        <groupId>org.apache.velocity.tools</groupId>
        <artifactId>velocity-tools-generic</artifactId>
        <version>3.0</version>
    </dependency>
    <dependency>
        <groupId>junit</groupId>
        <artifactId>junit</artifactId>
        <version>4.12</version>
        <scope>test</scope>
    </dependency>
</dependencies>

<build>
    <plugins>
        <plugin>
            <groupId>org.apache.maven.plugins</groupId>
            <artifactId>maven-compiler-plugin</artifactId>
            <version>3.8.1</version>
            <configuration>
                <source>11</source>
                <target>11</target>
                <encoding>utf-8</encoding>
            </configuration>
        </plugin>
    </plugins>
</build>
2.2.3 创建模板
<!DOCTYPE html>
<html lang="en">
<head>
    <meta charset="UTF-8">
    <title>Title</title>
</head>
<body>
当前时间 : $date.get('yyyy-MM-dd HH:mm:ss')
</body>
</html>
2.2.4 编写配置
<?xml version="1.0" encoding="UTF-8"?>
<tools>
    <toolbox scope="application">
        <tool class="org.apache.velocity.tools.generic.DateTool"></tool>
    </toolbox>
</tools>
2.2.5 输出数据
@Test
public void test1() throws IOException {
    // 创建引擎
    VelocityEngine ve = new VelocityEngine();
    // 设置模板加载路径,这里设置的是class下
    ve.setProperty(Velocity.RESOURCE_LOADER, "class");
    ve.setProperty("class.resource.loader.class", "org.apache.velocity.runtime.resource.loader.ClasspathResourceLoader");
    // 进行初始化操作
    ve.init();

    // 加载toolbox
    ToolManager manager = new ToolManager();
    manager.configure("configuration.xml");

    // 加载模板,设定模板编码
    Template tpl = ve.getTemplate("vms/demo1.vm", "UTF-8");

    // 设置初始化数据
    Context context = manager.createContext();
    context.put("now", new Date());

    FileWriter fw  = new FileWriter("D:\\work\\workspace\\velocity\\velocity_tools_01\\src\\main\\resources\\html\\demo1.html");
    //合并数据到模板
    tpl.merge(context, fw);
    //释放资源
    fw.close();
}
2.3 工具类及案例
格式化工具类的主要作用就是对数据进行格式化之后输出 , 例如 : 日期格式化 , 数字格式化等 , GenericTools提供的工具类有很多 , 随着时间的推移很多工具类已经过期, 有更好更安全的替代方案, 这里我们仅仅介绍一些常用工具类
2.3.1 DateTool
DateTool用于访问和格式化日期以及格式化Date和Calendar对象。该工具还可以用于在各种日期类型之间进行转换。
模板
<!DOCTYPE html>
<html lang="en">
<head>
    <meta charset="UTF-8">
    <title>Title</title>
</head>
<body>
年 : $date.getYear()
月: $date.getMonth()
日: $date.getDay()

当前时间 : $date.format($now)
当前时间 : $date.format("yyyy-MM-dd HH:mm:ss",$now)
当前时间 : $date.get('yyyy-MM-dd HH:mm:ss')
</body>
</html>
配置
<toolbox scope="application">
    <tool  key="date" class="org.apache.velocity.tools.generic.DateTool" format="yyyy-MM-dd"></tool>
</toolbox>
格式基本上是固定的 , <toolbox>代表配置一个工具盒 , 里面可以配置很多个工具<tool> , 这些表情上的属性有很多
-
scope : 此工具的作用范围 ,
request,session或application。 -
key : 此工具映射到的上下文键。列入当前key是date , 那么在模板中既要使用
$date来使用工具 , 从VelocityTools 2开始,工具箱可以根据其类名自动确定工具的key。一个名为org.com.FooTool的工具将在模板中分配键$foo,名为org.com.FooBarTool的工具为$ fooBar,一个名为org.com.FooBar的工具也为$ fooBar。 -
class : 指定工具类的完全限定路径
-
format : 在使用DateTool工具的时候, 指定时间日期格式化得格式
2.3.2 NumberTool
NumberTool用于访问和格式化任意数值类型对象。该工具还可以用于检索NumberFormat实例或与各种数字类型进行相互转换。
模板
<!DOCTYPE html>
<html lang="en">
<head>
    <meta charset="UTF-8">
    <title>Title</title>
</head>
<body>
原始数据 : $myNumber
格式化 : $number.format($myNumber)
取整 : $number.integer($myNumber)
</body>
</html>
配置
<toolbox scope="application">
    <tool key="number" class="org.apache.velocity.tools.generic.NumberTool" />
</toolbox>
2.3.3 MathTool
MathTool用于在Velocity中执行数学运算。
模板
<!DOCTYPE html>
<html lang="en">
<head>
    <meta charset="UTF-8">
    <title>Title</title>
</head>
<body>

num1+num2 : $math.add($num1,$num2);
num1-num2 : $math.sub($num1,$num2);
num1*num2 : $math.mul($num1,$num2);
num1/num2 : $math.div($num1,$num2);
向上取整 : $math.ceil($math.div($num1,$num2))
向下取整 : $math.floor($math.div($num1,$num2))
四舍五入 : $math.roundTo(2,$math.div($num1,$num2))  ## 第一个参数保留的位数 , 第二个参数运算的值


</body>
</html>
配置
<toolbox scope="application">
    <tool key="math" class="org.apache.velocity.tools.generic.MathTool" />
</toolbox>
2.3.4 DisplayTool
用于控制数据显示和隐藏 , 以及数据格式的处理
模板
<!DOCTYPE html>
<html lang="en">
<head>
    <meta charset="UTF-8">
    <title>Title</title>
</head>
<body>

## list方法用于展示数据或集合中的数据 , 默认的展示格式为 A, B and C
默认输出格式 : $display.list($list)
使用,分割输出 : $display.list($list,",")

## truncate方法用于字符串截取 , 默认截取30个长度
字符串截取, 默认30个长度 : $display.truncate("truncate方法用于字符串截取默认截取30个长度")
字符串截取, 给定20个长度 : $display.truncate("truncate方法用于字符串截取默认截取30个长度",20)
字符串截取, 给定20个长度 : $display.truncate("truncate方法用于字符串截取默认截取30个长度",20,"")

## alt方法用于判断给定的数据是否为空 , 如果为空展示第二个参数 , 如果不为空展示数据本身
不为空:$display.alt($num1,"num1不为空")
为空:$display.alt($num3,"num3为空")

</body>
</html>
2.3.5 EscapeTool
用于对一些特殊字符进转义处理 , 例如 $ , #, & 等...
模板
<!DOCTYPE html>
<html lang="en">
<head>
    <meta charset="UTF-8">
    <title>Title</title>
</head>
<body>

    $velocity
    $esc.velocity($velocity)

    $html
    $esc.html($html)

    $url
    $esc.url($url)
    $esc.unurl($esc.url($url))

    $esc.dollar     ## $
    $esc.d          ## $

    $esc.hash       ## #
    $esc.h          ## #

    $esc.backslash  ## \
    $esc.b          ## \

    $esc.quote      ## "
    $esc.q          ## "

    $esc.singleQuote    ## '
    $esc.s              ## '

    $esc.exclamation    ## !
    $esc.e              ## !

</body>
</html>
配置
<toolbox scope="application">
    <tool key="esc" class="org.apache.velocity.tools.generic.EscapeTool"/>
</toolbox>
2.3.6 FieldTool
用于访问类中定义的静态常量
常量类
定义MyConstants常量类
package com.itheima.constants;

public class MyConstants {

    public static  String COUNTER_NAME = "COUNTER";
}定义Counter常量类
public class Counter {
   public static Integer MAX_VALUE = 100 ;
   public static Integer MIN_VALUE = 100 ;
}
模板
<!DOCTYPE html>
<html lang="en">
<head>
    <meta charset="UTF-8">
    <title>Title</title>
</head>
<body>

## 访问在配置中定义的静态常量
获取MyConstants中的常量 : $field.COUNTER_NAME

## 通过一个类中的常量
获取Counter类中的量 : $field.in("com.itheima.counter.Counter").MAX_VALUE

## 传入一个对象的实例 , 通过对象的实例获取其类中定义的常量
获取日历对象中的YEAR常量 : $field.in($calender).YEAR

## 默认情况下, 当我们查找了一个类的常量之后, 这个类回保存在FieldTool工具中, 可以直接获取下一个常量
获取日历对象中的DATE常量 : $field.DATE  ## 因为之前已经获取过 , 所以可以直接获取

</body>
</html>
配置
<toolbox scope="application">
    <tool key="field"  class="org.apache.velocity.tools.generic.FieldTool" include="com.itheima.constants.MyConstants"/>
</toolbox>
include属性可以引入一些类, 引入之后想要获取其中的常量, 直接使用 $field.常量字段名称即可 ! 引入多个类以,分割
2.3.7 ClassTool
ClassTool用于访问一个类的Class对象信息以及其Filed , Method , Constructor等信息 , 它的设计没有考虑到代码的反射执行,因此无法通过反射执行代码。
模板
<!DOCTYPE html>
<html lang="en">
<head>
    <meta charset="UTF-8">
    <title>Title</title>
</head>
<body>

## 获取要查看的类上的所以注解 , 只有运行时期的注解才能够获取到
注解 : $class.getAnnotations()
构造方法 :
#foreach($constructor in $class.getConstructors())
    $constructor
#end
属性 :
#foreach($f in $class.getFields())
    $f
#end
方法 :
#foreach($m in $class.getMethods())
    $m
#end
包名 : $class.getPackage()
类名 : $class.getName()

## 也可以不通过配置文件 , 自己指定一个要查找的类
包名 : $class.inspect("java.lang.String").getPackage()
类名 : $class.inspect("java.lang.String").getName()
构造方法 :
#foreach($constructor in $class.inspect("java.lang.String").getConstructors())
    $constructor
#end
</body>
</html>
配置
<toolbox scope="application">
    <tool class="org.apache.velocity.tools.generic.ClassTool" inspect="com.itheima.utils.Result" ></tool>
</toolbox>
inspect : 指定一个需要查找的类
2.3.8 ContextTool
用于获取Context中保存的数据和元数据
模板
<!DOCTYPE html>
<html lang="en">
<head>
    <meta charset="UTF-8">
    <title>Title</title>
</head>
<body>

context中的所有key :
#foreach( $key in $context.keys )
    $key
#end
<br>

context中的所有value :
#foreach( $value in $context.values )
    $value
#end

<br>

context中的所有key-value :
#foreach( $key in $context.keys )
    $key = $context.get($key)
#end

</body>
</html>
2.3.9 RenderTool
Render用于将给定的字符串当作VTL秩序
模板
<!DOCTYPE html>
<html lang="en">
<head>
    <meta charset="UTF-8">
    <title>Title</title>
</head>
<body>
#set($list = [1,2,3] )
#set($object = '$list' )
#set($method = 'size()' )
## 将字符串当作VTL秩序
$render.eval("${object}.$method")


## 使用当前上下文递归地评估包含VTL的字符串,并将结果作为字符串返回。
#macro(say_hi)
    hello world!
#end

#set($foo = "#say_hi()")
#set($bar = "$foo" )
$render.recurse($bar)

</body>
</html>
配置
<toolbox scope="request">
    <tool key="render" class="org.apache.velocity.tools.generic.RenderTool"></tool>
</toolbox>
2.3.10 SortTool
SortTool用于对集合和数组数据进行排序 , 在排序操作期间,通过调用compareTo() 来进行比较,但要调用compareToIgnoreCase()的字符串除外。将集合数据转化为合适的类型后 , 通过调用Collections.sort()来执行排序
模板
<!DOCTYPE html>
<html lang="en">
<head>
    <meta charset="UTF-8">
    <title>Title</title>
</head>
<body>

简单类型排序 :
#set($strList = $sorter.sort($strs))
#foreach($str in $strList)
    $str
#end

对象类型排序 - 单个字段 :
#set($users = $sorter.sort($userList,"age:asc"))
#foreach($user in $users)
    $user.name : $user.age  :  $user.sex
#end

对象类型排序 - 多字段 :
#set($users = $sorter.sort($userList,["sex:desc","age:asc"]))
#foreach($user in $users)
    $user.name : $user.age  :  $user.sex
#end
</body>
</html>
配置
<toolbox scope="application">
    <tool key="sorter" class="org.apache.velocity.tools.generic.SortTool"/>
</toolbox>
SortTool已经被标注为过期, 建议使用下面CollectionTool的排序方法
2.3.11 CollectionTool
CollectionTool允许用户对集合中包含的对象公开的任意任意属性集对集合(或数组,迭代器等)进行排序,并通过拆分字符串来生成数组。
模板
<!DOCTYPE html>
<html lang="en">
<head>
    <meta charset="UTF-8">
    <title>Title</title>
</head>
<body>

简单类型排序 :
#set($strList = $collection.sort($strs))
#foreach($str in $strList)
    $str
#end

对象类型排序 - 单个字段 :
#set($users = $collection.sort($userList,"age:asc"))
#foreach($user in $users)
    $user.name : $user.age  :  $user.sex
#end

对象类型排序 - 多字段 :
#set($users = $collection.sort($userList,["sex:desc","age:asc"]))
#foreach($user in $users)
    $user.name : $user.age  :  $user.sex
#end

拆分字符串 :
#set($str="hello word , how are you !")
#foreach($s in $collection.split($str))
    $s
#end


</body>
</html>
配置
<tool key="collection" class="org.apache.velocity.tools.generic.CollectionTool" stringsDelimiter=" ">
</tool>
stringsDelimiter : 指定进行字符串分割时的分割符 , 默认是,
2.3.12 XmlTool
XmlTool用于读取和浏览XML文件。它底层使用dom4j为遍历XML文件提供完整的XPath支持。
xml
<?xml version="1.0" encoding="UTF-8"?>
<users>
    <user id="1" name="杨过" sex="男" age="18" > 喜欢看书 </user>
    <user id="2" name="小龙女" sex="男" age="18" > 喜欢睡觉 </user>
    <user id="3" name="郭靖" sex="男" age="18" > 喜欢玩游戏 </user>
    <user id="4" name="黄蓉" sex="男" age="18" > 喜欢喝酒 </user>
</users>
模板
<!DOCTYPE html>
<html lang="en">
<head>
    <meta charset="UTF-8">
    <title>Title</title>
</head>
<body>

$xml.find("//user[@id='1']")
$xml.find("//user[@id='1']").attr("name")
$xml.find("//user[@id='1']").text


</body>
</html>
配置
<toolbox scope="application">
	<tool key="xml" class="org.apache.velocity.tools.generic.XmlTool"  resource="xml/user.xml"/>
</toolbox>
resource : 加载类路径下的XML资源
source : 加载一个URL路径下的XML资源
三. VelocityView使用
3.1 VelocityView介绍
VelocityView包含所有GenericTools并添加了用于在Web应用程序(Java EE项目)的视图层中使用Velocity的基础结构和专用工具。这包括用于处理Velocity模板请求的VelocityViewServlet或VelocityLayoutServlet,以及用于将Velocity嵌入JSP中的VelocityViewTag。
3.2 案例环境搭建
3.2.1 创建项目
3.2.2 导入依赖
<dependencies>
        <dependency>
            <groupId>org.apache.velocity</groupId>
            <artifactId>velocity-engine-core</artifactId>
            <version>2.2</version>
        </dependency>
        <dependency>
            <groupId>org.apache.velocity.tools</groupId>
            <artifactId>velocity-tools-generic</artifactId>
            <version>3.0</version>
        </dependency>
        <dependency>
            <groupId>org.apache.velocity.tools</groupId>
            <artifactId>velocity-tools-view</artifactId>
            <version>3.0</version>
        </dependency>
        <dependency>
            <groupId>junit</groupId>
            <artifactId>junit</artifactId>
            <version>4.12</version>
            <scope>test</scope>
        </dependency>
        <dependency>
            <groupId>org.apache.tomcat</groupId>
            <artifactId>tomcat-api</artifactId>
            <version>9.0.10</version>
            <scope>provided</scope>
        </dependency>
    </dependencies>

    <build>
        <plugins>
            <plugin>
                <groupId>org.apache.maven.plugins</groupId>
                <artifactId>maven-compiler-plugin</artifactId>
                <version>3.8.1</version>
                <configuration>
                    <source>11</source>
                    <target>11</target>
                    <encoding>utf-8</encoding>
                </configuration>
            </plugin>
            <plugin>
                <groupId>org.apache.tomcat.maven</groupId>
                <artifactId>tomcat7-maven-plugin</artifactId>
                <version>2.2</version>
                <configuration>
                    <path>/</path>
                    <port>8080</port>
                    <uriEncoding>utf-8</uriEncoding>
                </configuration>
            </plugin>
        </plugins>
    </build>
3.2.3 配置Servlet
在web.xml中配置整合VelocityViewServlet
<?xml version="1.0" encoding="UTF-8"?>
<web-app
        version="3.0"
        xmlns="http://java.sun.com/xml/ns/javaee"
        xmlns:xsi="http://www.w3.org/2001/XMLSchema-instance"
        xsi:schemaLocation="http://java.sun.com/xml/ns/javaee http://java.sun.com/xml/ns/javaee/web-app_3_0.xsd">

    <servlet>
        <servlet-name>velocity</servlet-name>
        <servlet-class>org.apache.velocity.tools.view.VelocityViewServlet</servlet-class>
        <init-param>
            <param-name>org.apache.velocity.toolbox</param-name>
            <param-value>/WEB-INF/tools.xml</param-value>
        </init-param>
    </servlet>

    <servlet-mapping>
        <servlet-name>velocity</servlet-name>
        <url-pattern>*.vm</url-pattern>
    </servlet-mapping>
</web-app>
该配置表示拦截所有的vm结尾的请求 , vm就是velocity模板文件的扩展名
3.2.4 引入配置文件
在web.xml中可以引入的配置文件有两个 :
-
tools.xml : 配置页面使用的一些工具
-
velocity.properties : 配置一些日志, 编码, 宏等一些配置
如果要引入配置文件, 官方建议将配置文件放置在web项目的/WEB-INF目录下
tools.xml
<?xml version="1.0" encoding="UTF-8"?>
<tools>
    <toolbox scope="application">
        <tool key="date" class="org.apache.velocity.tools.generic.DateTool" format="yyyy-MM-dd"></tool>
        <tool key="number" class="org.apache.velocity.tools.generic.NumberTool" />
        <tool key="math" class="org.apache.velocity.tools.generic.MathTool" />
        <tool key="display" class="org.apache.velocity.tools.generic.DisplayTool"/>
        <tool key="esc" class="org.apache.velocity.tools.generic.EscapeTool"/>
        <tool key="field"  class="org.apache.velocity.tools.generic.FieldTool" include="com.itheima.constants.MyConstants"/>
        <tool key="class" class="org.apache.velocity.tools.generic.ClassTool" inspect="com.itheima.utils.Result" ></tool>
        <tool key="sorter" class="org.apache.velocity.tools.generic.SortTool"/>
        <tool key="collection" class="org.apache.velocity.tools.generic.CollectionTool" stringsDelimiter=" "></tool>
        <tool key="xml" class="org.apache.velocity.tools.generic.XmlTool"  resource="xml/user.xml"/>
    </toolbox>

    <toolbox scope="request">
        <tool key="context" class="org.apache.velocity.tools.generic.ContextTool"/>
        <tool key="render" class="org.apache.velocity.tools.generic.RenderTool"></tool>
    </toolbox>
</tools>这里我们配置tools.xml即可, velocity.properties配置文件的相关配置可以查阅 官方文档
3.3 使用VelocityView
当我们配置好了之后使用VelocityView非常简单 , 只需要将数据保存在web项目的域中 , 在velocity模板中就可以直接获取数据展示了
3.3.1 展示基础数据
编写模板
在web项目下创建user-info.vm模板文件
<!DOCTYPE html>
<html lang="en">
<head>
    <meta charset="UTF-8">
    <title>Title</title>
</head>
<body>
欢迎您: $name
</body>
</html>
创建Servlet
public class UserInfoServlet extends HttpServlet {

    protected void doPost(HttpServletRequest request, HttpServletResponse response) throws ServletException, IOException {
        doGet(request, response);
    }

    protected void doGet(HttpServletRequest request, HttpServletResponse response) throws ServletException, IOException {
    	//在request域保存数据
        request.setAttribute("name",request.getParameter("name"));
        //设置响应数据格式以及字符集
        response.setContentType("text/html;charset=utf-8");
        request.getRequestDispatcher("/vms/user-info.vm").forward(request,response);
    }
}
配置Servlet
<servlet>
    <servlet-name>UserInfoServlet</servlet-name>
    <servlet-class>com.itheima.servlet.UserInfoServlet</servlet-class>
</servlet>
<servlet-mapping>
    <servlet-name>UserInfoServlet</servlet-name>
    <url-pattern>/user/info</url-pattern>
</servlet-mapping>
访问Servlet
打开浏览器输入 : http://localhost:8080/user/info?name=zhangsan
3.3.2 展示列表数据
编写模板
在项目下创建user-list.vm用于展示列表数据
<!DOCTYPE html>
<html lang="en">
<head>
    <meta charset="UTF-8">
    <title>Title</title>
</head>
<body>

<table>
    <tr>
        <td>编号</td>
        <td>姓名</td>
        <td>性别</td>
        <td>年龄</td>
        <td>操作</td>
    </tr>
    #foreach($user in $userList)
        <tr>
            <td>$foreach.index</td>
            <td>$user.name</td>
            <td>$user.sex</td>
            <td>$user.age</td>
            <td>
                <a href="">编辑</a>
                <a href="">删除</a>
            </td>
        </tr>
    #end

</table>

</body>
</html>
创建Servlet
public class UserListServlet extends HttpServlet {

    protected void doPost(HttpServletRequest request, HttpServletResponse response) throws ServletException, IOException {
        doGet(request, response);
    }

    protected void doGet(HttpServletRequest request, HttpServletResponse response) throws ServletException, IOException {
        List<User> userList = new ArrayList<User>();
        userList.add(new User("吕布",38,"man"));
        userList.add(new User("貂蝉",16,"woman"));
        userList.add(new User("刘备",28,"man"));
        userList.add(new User("关羽",25,"man"));
        userList.add(new User("张飞",20,"man"));
        userList.add(new User("甄宓",21,"woman"));

        request.setAttribute("userList",userList);

        response.setContentType("text/html;charset=utf-8");
        request.getRequestDispatcher("/vms/user-list.vm").forward(request,response);
    }
}
配置Servlet
<servlet>
    <servlet-name>UserListServlet</servlet-name>
    <servlet-class>com.itheima.servlet.UserListServlet</servlet-class>
</servlet>
<servlet-mapping>
    <servlet-name>UserListServlet</servlet-name>
    <url-pattern>/user/list</url-pattern>
</servlet-mapping>
访问Servlet
打开浏览器输入 : http://localhost:8080/user/list
3.3.3 使用Tools工具
因为我们在配置VelocityViewServlet的时候已经加载了tools.xml配置文件 , 所以直接在模板文件中使用工具即可
例如 : 列表页面我们展示编号使用的是$foreach.index , 是从0开始的, 现在想让编号从1开始 , 可以使用MathTool , 在index的基础上+1
<!DOCTYPE html>
<html lang="en">
<head>
    <meta charset="UTF-8">
    <title>Title</title>
</head>
<body>

<table>
    <tr>
        <td>编号</td>
        <td>姓名</td>
        <td>性别</td>
        <td>年龄</td>
        <td>操作</td>
    </tr>
    #foreach($user in $userList)
        <tr>
            <td>$math.add($foreach.index,1)</td>
            <td>$user.name</td>
            <td>$user.sex</td>
            <td>$user.age</td>
            <td>
                <a href="">编辑</a>
                <a href="">删除</a>
            </td>
        </tr>
    #end

</table>

</body>
</html>
3.4 工具类及案例
VelocityView包含所有GenericTools并添加了用于在Web应用程序(Java EE项目)的视图层中使用Velocity的基础结构和专用工具 , 例如 :
-
CookieTool
-
BrowserTool
-
ParameterTool
-
ViewContextTool
3.4.1 CookieTool
CookieTool用于获取和创建Cookie
模板
<!DOCTYPE html>
<html lang="en">
<head>
    <meta charset="UTF-8">
    <title>Title</title>
</head>
<body>

$cookie.username ## 获取指定名称的cookie值
$cookie.add("phone",'18917009089')	## 创建并设置cookie

</body>
</html>
配置
<toolbox scope="request">
    <tool key="cookie" class="org.apache.velocity.tools.view.CookieTool"/>
</toolbox>
Servlet
public class CookieToolServlet extends HttpServlet {
    protected void doPost(HttpServletRequest request, HttpServletResponse response) throws ServletException, IOException {
        doGet(request, response);
    }

    protected void doGet(HttpServletRequest request, HttpServletResponse response) throws ServletException, IOException {
        Cookie cookie = new Cookie("username", "zhangsan");
        cookie.setPath("/");
        response.addCookie(cookie);

        response.sendRedirect(request.getContextPath()+"/vms/tool-cookie.vm");
    }
}
<servlet>
<servlet-name>CookieToolServlet</servlet-name>
<servlet-class>com.itheima.servlet.CookieToolServlet</servlet-class>
</servlet>
<servlet-mapping>
<servlet-name>CookieToolServlet</servlet-name>
<url-pattern>/user/cookie</url-pattern>
</servlet-mapping>测试
打开浏览器输入 : http://localhost:8080/user/cookie
3.4.2 BrowserTool
BrowserTool用于获取客户端浏览器,操作系统,设备,语言等信息。
模板
<!DOCTYPE html>
<html lang="en">
<head>
    <meta charset="UTF-8">
    <title>Title</title>
</head>
<body>

设备信息 :   $browser.device <br>
用户客户端 : $browser.userAgentString   <br>
渲染引擎 : $browser.renderingEngine.name<br>
操作系统 : $browser.operatingSystem.name<br>
IP地址 : $browser.iPAddress<br>

</body>
</html>
配置
<toolbox scope="session">
    <tool key="browser" class="org.apache.velocity.tools.view.BrowserTool"  />
</toolbox>可以定义在在request和session范围 , 建议在session范围使用
Servlet
public class BrowserToolServlet extends HttpServlet {
    protected void doPost(HttpServletRequest request, HttpServletResponse response) throws ServletException, IOException {
        doGet(request, response);
    }

    protected void doGet(HttpServletRequest request, HttpServletResponse response) throws ServletException, IOException {
        response.setContentType("text/html;charset=utf-8");
        request.getRequestDispatcher("/vms/tool-browser.vm").forward(request,response);
    }
}
<servlet>
<servlet-name>BrowserToolServlet</servlet-name>
<servlet-class>com.itheima.servlet.BrowserToolServlet</servlet-class>
</servlet>
<servlet-mapping>
<servlet-name>BrowserToolServlet</servlet-name>
<url-pattern>/user/browser</url-pattern>
</servlet-mapping>测试
打开浏览器输入 : http://localhost:8080/user/browser
3.4.3 ParameterTool
ParameterTool用户获取请求中的参数
模板
<!DOCTYPE html>
<html lang="en">
<head>
    <meta charset="UTF-8">
    <title>Title</title>
</head>
<body>

## 获取所有的请求参数
#set($parameters = $params.all)
#foreach($entry in $parameters.entrySet())
    $entry.key : $entry.value  <br>
#end

<hr>

## 获取一个key对应一个值的参数
name : $params.getString("username") <br>

## 获取一个key对应多个值得参数
hobby : $params.getStrings("hobby")

</body>
</html>
配置
<toolbox scope="request">
    <tool key="params" class="org.apache.velocity.tools.view.ParameterTool"/>
</toolbox>
测试
打开浏览器 , 输入 : http://localhost:8080/vms/tool-parameter.vm?username=zhangsan&password=123&hobby=eat&hobby=drink&hobby=play
3.4.4 ViewContextTool
ViewContextTool是GenericTools中ContextTool的扩展 , 可以Velocity容器中的所有数据 , 包括HttpServletRequest, HttpSession and ServletContext中的数据.
模板
<!DOCTYPE html>
<html lang="en">
<head>
    <meta charset="UTF-8">
    <title>Title</title>
</head>
<body>

## 获取velocity容器中的所有数据
#foreach( $key in $context.keys )
    $key = $context.get($key)   <br>
#end

</body>
</html>
配置
<toolbox scope="request">
   <!-- <tool key="context" class="org.apache.velocity.tools.generic.ContextTool"/>-->
    <tool key="context" class="org.apache.velocity.tools.view.ViewContextTool"/>
</toolbox>
Servlet
public class ViewContextToolServlet extends HttpServlet {
    protected void doPost(HttpServletRequest request, HttpServletResponse response) throws ServletException, IOException {
        doGet(request, response);
    }

    protected void doGet(HttpServletRequest request, HttpServletResponse response) throws ServletException, IOException {

        //向reqest域保存数据
        request.setAttribute("xxx","hello request");
        //向session域保存数据
        request.getSession().setAttribute("yyy","hello session");
        //向ServletContext域保存数据
        request.getServletContext().setAttribute("servletContext","hello servletContext");

        response.setContentType("text/html;charset=utf-8");
        request.getRequestDispatcher("/vms/tool-viewContext.vm").forward(request,response);
    }
}
测试
打开浏览器, 访问 http://localhost:8080/user/context
四. 自定义tools工具类
VelocityTools中定义了很多Tools供我们使用 , 如果官方提供的还不能满足我们的需求, 我们也可以自己定义工具类 , 自定义工具类有一些要求 , 如下 :
-
工具类必须声明为public
-
工具类中必须提供公共的无参构造方法
下面我们可以定义一个字符串的Tools类, 帮助我们对字符串进行特殊的处理 , 主要有二个功能
-
判断字符串是否为Null或者""
-
随机生成一个指定位数的数字字符串
4.1 编写工具类
package com.itheima.tools;

import org.apache.commons.lang3.RandomStringUtils;
import org.apache.velocity.tools.config.DefaultKey;
import org.apache.velocity.tools.config.InvalidScope;
import org.apache.velocity.tools.config.ValidScope;

@DefaultKey("strings")
@ValidScope({"application","request","session"})
public class StringsTools {

    /**
     * 判断字符串是否为空
     * @param str
     * @return
     */
    public boolean isEmpty(String str){
        if(str==null || "".equals(str)){
            return true ;
        }
        return false ;
    }

    /**
     * 生成一个指定位数的随机字符串
     * @param count
     * @return
     */
    public String randomNumeric(int count){
        return RandomStringUtils.randomNumeric(count) ;
    }

}
@DefaultKey : 用于指定默认的key
@ValidScope : 用于指定可用的作用范围
4.2 配置工具类
<toolbox scope="application">
    <tool key="strings" class="com.itheima.tools.StringsTools"  />
</toolbox>
4.3 使用工具类
<!DOCTYPE html>
<html lang="en">
<head>
    <meta charset="UTF-8">
    <title>Title</title>
</head>
<body>
判断字符串是否为空   :   $strings.isEmpty("") <br>
随机生成数字字符串   :   $strings.randomNumeric(6);
</body>
</html>
4.4 编写Serlvet
public class StringsToolServlet extends HttpServlet {
    protected void doPost(HttpServletRequest request, HttpServletResponse response) throws ServletException, IOException {
        doGet(request, response);
    }

    protected void doGet(HttpServletRequest request, HttpServletResponse response) throws ServletException, IOException {

        response.setCharacterEncoding("utf-8");

        request.getRequestDispatcher("/vms/tool-strings.vm").forward(request,response);
    }
}
其实直接访问就可以, 但是我们模板中有中文, 需要在serlvet中设置响应数据的字符集 , 否则会有乱码
4.5 访问测试
打开浏览器 , 输入 : http://localhost:8080/tools/strings
五. SpringMVC中使用
我们之前已经在Servlet中使用velocity作为我们的视图展示数据 , 但是在开发过程中我们一般会使用框架来进行web开发, 提高我们的开发效率 , 所以下面我们来说一说在SpringMVC框架中如何使用Velocity作为视图展示数据
5.1 步骤分析
在SpringMVC中使用Velocity非常简单 , 主要有以下步骤
-
搭建springmvc开发环境
-
引入velocity依赖
-
配置Velocity开发环境
-
编写Velocity模板
-
编写springmvc控制器
5.2 代码实现
5.2.1 搭建springmvc开发环境
创建项目

添加依赖
<dependencies>
    <dependency>
        <groupId>org.springframework</groupId>
        <artifactId>spring-context</artifactId>
        <version>5.2.5.RELEASE</version>
    </dependency>
    <dependency>
        <groupId>org.springframework</groupId>
        <artifactId>spring-web</artifactId>
        <version>5.2.5.RELEASE</version>
    </dependency>
    <dependency>
        <groupId>org.springframework</groupId>
        <artifactId>spring-webmvc</artifactId>
        <version>5.2.5.RELEASE</version>
    </dependency>

    <dependency>
        <groupId>junit</groupId>
        <artifactId>junit</artifactId>
        <version>4.12</version>
        <scope>test</scope>
    </dependency>

    <dependency>
        <groupId>org.apache.tomcat</groupId>
        <artifactId>tomcat-api</artifactId>
        <version>7.0.37</version>
        <scope>provided</scope>
    </dependency>
</dependencies>

<build>
    <plugins>
        <plugin>
            <groupId>org.apache.maven.plugins</groupId>
            <artifactId>maven-compiler-plugin</artifactId>
            <version>3.8.1</version>
            <configuration>
                <source>11</source>
                <target>11</target>
                <encoding>utf-8</encoding>
            </configuration>
        </plugin>
        <plugin>
            <groupId>org.apache.tomcat.maven</groupId>
            <artifactId>tomcat7-maven-plugin</artifactId>
            <version>2.2</version>
            <configuration>
                <path>/</path>
                <port>8080</port>
                <uriEncoding>utf-8</uriEncoding>
            </configuration>
        </plugin>
    </plugins>
</build>
配置web.xml配置
<filter>
    <filter-name>characterEncodingFilter</filter-name>
    <filter-class>org.springframework.web.filter.CharacterEncodingFilter</filter-class>
    <init-param>
        <param-name>encoding</param-name>
        <param-value>UTF-8</param-value>
    </init-param>
    <init-param>
        <param-name>forceRequestEncoding</param-name>
        <param-value>true</param-value>
    </init-param>
    <init-param>
        <param-name>forceResponseEncoding</param-name>
        <param-value>true</param-value>
    </init-param>
</filter>
<filter-mapping>
    <filter-name>characterEncodingFilter</filter-name>
    <url-pattern>/*</url-pattern>
</filter-mapping>


<servlet>
    <servlet-name>dispatcherServlet</servlet-name>
    <servlet-class>org.springframework.web.servlet.DispatcherServlet</servlet-class>
    <init-param>
        <param-name>contextConfigLocation</param-name>
        <param-value>classpath:springmvc.xml</param-value>
    </init-param>

    <load-on-startup>1</load-on-startup>
</servlet>
<servlet-mapping>
    <servlet-name>dispatcherServlet</servlet-name>
    <url-pattern>/</url-pattern>
</servlet-mapping>
配置springmvc.xml
<?xml version="1.0" encoding="UTF-8"?>
<beans xmlns="http://www.springframework.org/schema/beans"
       xmlns:xsi="http://www.w3.org/2001/XMLSchema-instance"
       xmlns:context="http://www.springframework.org/schema/context"
       xmlns:mvc="http://www.springframework.org/schema/mvc"
       xsi:schemaLocation="http://www.springframework.org/schema/beans http://www.springframework.org/schema/beans/spring-beans.xsd http://www.springframework.org/schema/context https://www.springframework.org/schema/context/spring-context.xsd http://www.springframework.org/schema/mvc https://www.springframework.org/schema/mvc/spring-mvc.xsd">

    <!--开启组件扫描-->
    <context:component-scan base-package="com.itheima"></context:component-scan>

    <!--开启注解驱动-->
    <mvc:annotation-driven></mvc:annotation-driven>


</beans>
5.2.2 SpringMVC整合Velocity
引入velocity依赖
<dependency>
    <groupId>org.apache.velocity</groupId>
    <artifactId>velocity-engine-core</artifactId>
    <version>2.2</version>
</dependency>
<dependency>
    <groupId>org.apache.velocity.tools</groupId>
    <artifactId>velocity-tools-generic</artifactId>
    <version>3.0</version>
</dependency>
<dependency>
    <groupId>org.apache.velocity.tools</groupId>
    <artifactId>velocity-tools-view</artifactId>
    <version>3.0</version>
</dependency>
这个需要根据项目中使用的工具自己配置, 目前入门案例我们简单配置几个即可
配置web.xml配置
在
web.xml中配置VelocityViewServlet
<servlet>
    <servlet-name>velocity</servlet-name>
    <servlet-class>org.apache.velocity.tools.view.VelocityViewServlet</servlet-class>
    <init-param>
        <param-name>org.apache.velocity.toolbox</param-name>
        <param-value>/WEB-INF/tools.xml</param-value>
    </init-param>
</servlet>

<servlet-mapping>
    <servlet-name>velocity</servlet-name>
    <url-pattern>*.vm</url-pattern>
</servlet-mapping>
配置视图解析器
因为我们现在使用velocity充当SpringMVC的视图解析器 , 所以需要配置视图解析器, 指定视图模板文件的位置及扩展名
<bean id="internalResourceViewResolver" class="org.springframework.web.servlet.view.InternalResourceViewResolver">
    <property name="prefix" value="/vms/"></property>
    <property name="suffix" value=".vm"></property>
</bean>
5.2.3 编写Velocity模板
在/vms/目录下创建user-list.vm模板文件 , 用于展示列表数据
<!DOCTYPE html>
<html lang="en">
<head>
    <meta charset="UTF-8">
    <title>Title</title>
</head>
<body>

<table>
    <tr>
        <td>编号</td>
        <td>姓名</td>
        <td>性别</td>
        <td>年龄</td>
        <td>操作</td>
    </tr>
    #foreach($user in $userList)
        <tr>
            <td>$math.add($foreach.index,1)</td>
            <td>$user.name</td>
            <td>$user.sex</td>
            <td>$user.age</td>
            <td>
                <a href="">编辑</a>
                <a href="">删除</a>
            </td>
        </tr>
    #end

</table>

</body>
</html>
5.2.4 创建实体类
package com.itheima.pojo;

public class User {

    private String name ;
    private Integer age ;
    private String sex ;

    public User() {
    }

    public User(String name, Integer age, String sex) {
        this.name = name;
        this.age = age;
        this.sex = sex;
    }

    public String getName() {
        return name;
    }

    public void setName(String name) {
        this.name = name;
    }

    public Integer getAge() {
        return age;
    }

    public void setAge(Integer age) {
        this.age = age;
    }

    public String getSex() {
        return sex;
    }

    public void setSex(String sex) {
        this.sex = sex;
    }
}
5.2.5 编写springmvc控制器
@Controller
@RequestMapping(path = "/user")
public class UserController {

    @RequestMapping(path = "/list")
    public String list(Model model){
        List<User> userList = new ArrayList<User>();
        userList.add(new User("吕布",38,"man"));
        userList.add(new User("貂蝉",16,"woman"));
        userList.add(new User("刘备",28,"man"));
        userList.add(new User("关羽",25,"man"));
        userList.add(new User("张飞",20,"man"));
        userList.add(new User("甄宓",21,"woman"));

        model.addAttribute("userList",userList);
        return "user-list";
    }
}
因为我们配置了SpringMVC的视图解析器 , 所以控制方法返回视图名称字符串即可, 视图解析器会自动拼接完整视图路径 , 展示数据
5.2.6 访问测试
打开浏览器 , 输入 : http://localhost:8080/user/list
六. VelocityTools案例
上面我们已经学习了Velocity的基本使用, 下面我们使用SSM+Velocity来实现用户数据增删改查
6.1 环境准备
数据库准备
create database velocity; -- 创建数据库
use velocity; 			   -- 使用数据库
create table user(   -- 创建表
     id int primary key auto_increment,
     name varchar(20) not null,
     gender varchar(5),
     age int,
     address varchar(32),
     qq    varchar(20),
     email varchar(50)
);


insert  into `user`(`id`,`name`,`gender`,`age`,`address`,`qq`,`email`) values (1,'杨过','男',13,'扬州','12345','yangguo@itcast.cn');
insert  into `user`(`id`,`name`,`gender`,`age`,`address`,`qq`,`email`) values (2,'小龙女','女',15,'古墓','88888','xiaolongnv@itcast.cn');
insert  into `user`(`id`,`name`,`gender`,`age`,`address`,`qq`,`email`) values (3,'郭靖','女',40,'桃花岛','88888','guojing@itcast.cn');
insert  into `user`(`id`,`name`,`gender`,`age`,`address`,`qq`,`email`) values (4,'黄蓉','女',35,'桃花岛','88888','huangrong@itcast.cn');
创建项目
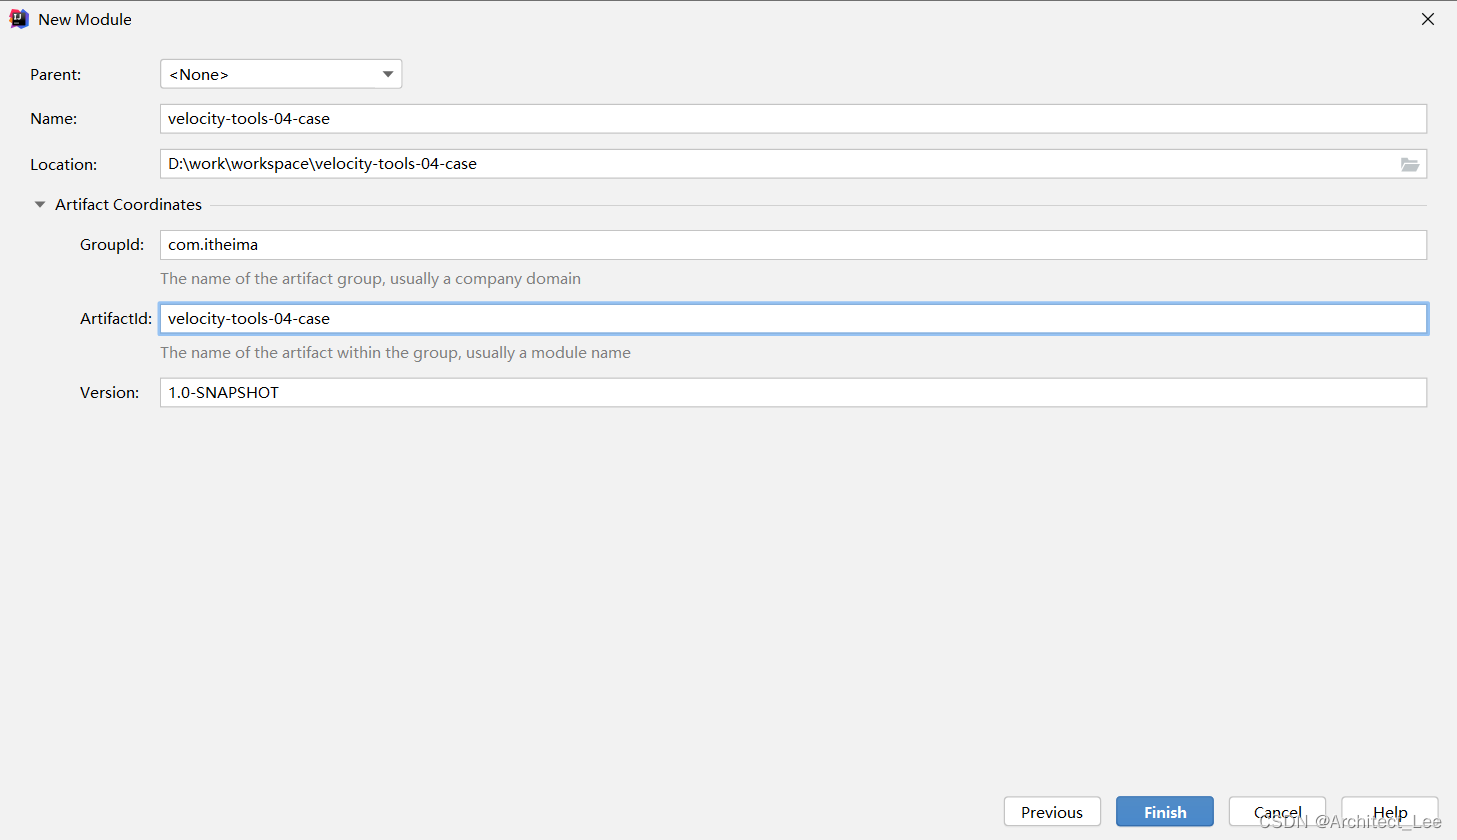
引入依赖
<?xml version="1.0" encoding="UTF-8"?>
<project xmlns="http://maven.apache.org/POM/4.0.0"
xmlns:xsi="http://www.w3.org/2001/XMLSchema-instance"
xsi:schemaLocation="http://maven.apache.org/POM/4.0.0 http://maven.apache.org/xsd/maven-4.0.0.xsd">
<modelVersion>4.0.0</modelVersion>
<groupId>com.itheima</groupId>
<artifactId>velocity_tools_04_case</artifactId>
<version>1.0-SNAPSHOT</version>
<packaging>war</packaging>
<dependencies>
<dependency>
<groupId>org.springframework</groupId>
<artifactId>spring-context</artifactId>
<version>5.2.5.RELEASE</version>
</dependency>
<dependency>
<groupId>org.springframework</groupId>
<artifactId>spring-web</artifactId>
<version>5.2.5.RELEASE</version>
</dependency>
<dependency>
<groupId>org.springframework</groupId>
<artifactId>spring-webmvc</artifactId>
<version>5.2.5.RELEASE</version>
</dependency>
<dependency>
<groupId>org.springframework</groupId>
<artifactId>spring-jdbc</artifactId>
<version>5.2.5.RELEASE</version>
</dependency>
<dependency>
<groupId>org.springframework</groupId>
<artifactId>spring-tx</artifactId>
<version>5.2.5.RELEASE</version>
</dependency>
<dependency>
<groupId>org.mybatis</groupId>
<artifactId>mybatis</artifactId>
<version>3.5.3</version>
</dependency>
<dependency>
<groupId>org.mybatis</groupId>
<artifactId>mybatis-spring</artifactId>
<version>2.0.3</version>
</dependency>
<dependency>
<groupId>tk.mybatis</groupId>
<artifactId>mapper</artifactId>
<version>4.1.5</version>
</dependency>
<dependency>
<groupId>javax.persistence</groupId>
<artifactId>persistence-api</artifactId>
<version>1.0</version>
</dependency>
<dependency>
<groupId>junit</groupId>
<artifactId>junit</artifactId>
<version>4.12</version>
<scope>test</scope>
</dependency>
<dependency>
<groupId>org.apache.tomcat</groupId>
<artifactId>tomcat-api</artifactId>
<version>7.0.37</version>
<scope>provided</scope>
</dependency>
<dependency>
<groupId>org.apache.velocity</groupId>
<artifactId>velocity-engine-core</artifactId>
<version>2.2</version>
</dependency>
<dependency>
<groupId>org.apache.velocity.tools</groupId>
<artifactId>velocity-tools-generic</artifactId>
<version>3.0</version>
</dependency>
<dependency>
<groupId>org.apache.velocity.tools</groupId>
<artifactId>velocity-tools-view</artifactId>
<version>3.0</version>
</dependency>
<dependency>
<groupId>mysql</groupId>
<artifactId>mysql-connector-java</artifactId>
<version>8.0.17</version>
</dependency>
<dependency>
<groupId>com.alibaba</groupId>
<artifactId>druid</artifactId>
<version>1.1.20</version>
</dependency>
</dependencies>
<build>
<plugins>
<plugin>
<groupId>org.apache.maven.plugins</groupId>
<artifactId>maven-compiler-plugin</artifactId>
<version>3.8.1</version>
<configuration>
<source>11</source>
<target>11</target>
<encoding>utf-8</encoding>
</configuration>
</plugin>
<plugin>
<groupId>org.apache.tomcat.maven</groupId>
<artifactId>tomcat7-maven-plugin</artifactId>
<version>2.2</version>
<configuration>
<path>/</path>
<port>8080</port>
<uriEncoding>utf-8</uriEncoding>
</configuration>
</plugin>
</plugins>
</build>
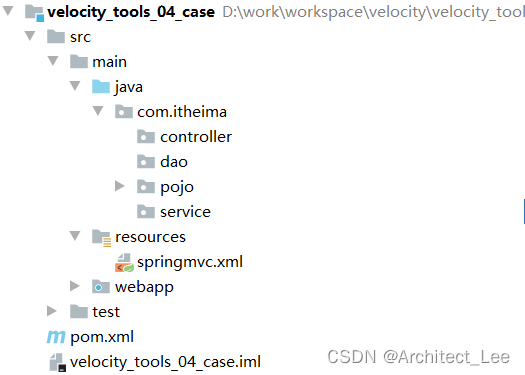
</project>创建包结构
创建实体类
package com.itheima.pojo;

import tk.mybatis.mapper.annotation.KeySql;

import javax.persistence.Id;
import javax.persistence.Table;

@Table(name = "user")
public class User {
    @Id
    @KeySql(useGeneratedKeys = true)
    private Integer id ;
    private String name ;
    private String gender;
    private Integer age;
    private String address;
    private String qq;
    private String email;

    public Integer getId() {
        return id;
    }

    public void setId(Integer id) {
        this.id = id;
    }

    public String getName() {
        return name;
    }

    public void setName(String name) {
        this.name = name;
    }

    public String getGender() {
        return gender;
    }

    public void setGender(String gender) {
        this.gender = gender;
    }

    public Integer getAge() {
        return age;
    }

    public void setAge(Integer age) {
        this.age = age;
    }

    public String getAddress() {
        return address;
    }

    public void setAddress(String address) {
        this.address = address;
    }

    public String getQq() {
        return qq;
    }

    public void setQq(String qq) {
        this.qq = qq;
    }

    public String getEmail() {
        return email;
    }

    public void setEmail(String email) {
        this.email = email;
    }

    public String getUsername() {
        return username;
    }

    public void setUsername(String username) {
        this.username = username;
    }

}
编写配置文件
web.xml
<?xml version="1.0" encoding="UTF-8"?>
<web-app
        version="3.0"
        xmlns="http://java.sun.com/xml/ns/javaee"
        xmlns:xsi="http://www.w3.org/2001/XMLSchema-instance"
        xsi:schemaLocation="http://java.sun.com/xml/ns/javaee http://java.sun.com/xml/ns/javaee/web-app_3_0.xsd">

    <context-param>
        <param-name>contextConfigLocation</param-name>
        <param-value>classpath:applicationContext.xml</param-value>
    </context-param>

    <listener>
        <listener-class>org.springframework.web.context.ContextLoaderListener</listener-class>
    </listener>

    <filter>
        <filter-name>characterEncodingFilter</filter-name>
        <filter-class>org.springframework.web.filter.CharacterEncodingFilter</filter-class>
        <init-param>
            <param-name>encoding</param-name>
            <param-value>UTF-8</param-value>
        </init-param>
        <init-param>
            <param-name>forceRequestEncoding</param-name>
            <param-value>true</param-value>
        </init-param>
        <init-param>
            <param-name>forceResponseEncoding</param-name>
            <param-value>true</param-value>
        </init-param>
    </filter>
    <filter-mapping>
        <filter-name>characterEncodingFilter</filter-name>
        <url-pattern>/*</url-pattern>
    </filter-mapping>


    <servlet>
        <servlet-name>dispatcherServlet</servlet-name>
        <servlet-class>org.springframework.web.servlet.DispatcherServlet</servlet-class>
        <init-param>
            <param-name>contextConfigLocation</param-name>
            <param-value>classpath:springmvc.xml</param-value>
        </init-param>

        <load-on-startup>1</load-on-startup>
    </servlet>
    <servlet-mapping>
        <servlet-name>dispatcherServlet</servlet-name>
        <url-pattern>/</url-pattern>
    </servlet-mapping>

    <servlet>
        <servlet-name>velocity</servlet-name>
        <servlet-class>org.apache.velocity.tools.view.VelocityViewServlet</servlet-class>
        <init-param>
            <param-name>org.apache.velocity.toolbox</param-name>
            <param-value>/WEB-INF/tools.xml</param-value>
        </init-param>
    </servlet>

    <servlet-mapping>
        <servlet-name>velocity</servlet-name>
        <url-pattern>*.vm</url-pattern>
    </servlet-mapping>

</web-app>
tools.xml
<?xml version="1.0" encoding="UTF-8"?>
<tools>
    <toolbox scope="application">
        <tool key="date" class="org.apache.velocity.tools.generic.DateTool" format="yyyy-MM-dd"></tool>
        <tool key="number" class="org.apache.velocity.tools.generic.NumberTool" />
        <tool key="math" class="org.apache.velocity.tools.generic.MathTool" />
    </toolbox>

    <toolbox scope="request">
        <tool key="context" class="org.apache.velocity.tools.view.ViewContextTool"/>
    </toolbox>
</tools>
springmvc.xml
<?xml version="1.0" encoding="UTF-8"?>
<beans xmlns="http://www.springframework.org/schema/beans"
       xmlns:xsi="http://www.w3.org/2001/XMLSchema-instance"
       xmlns:context="http://www.springframework.org/schema/context"
       xmlns:mvc="http://www.springframework.org/schema/mvc"
       xsi:schemaLocation="http://www.springframework.org/schema/beans http://www.springframework.org/schema/beans/spring-beans.xsd http://www.springframework.org/schema/context https://www.springframework.org/schema/context/spring-context.xsd http://www.springframework.org/schema/mvc https://www.springframework.org/schema/mvc/spring-mvc.xsd">

    <!--开启组件扫描-->
    <context:component-scan base-package="com.itheima"></context:component-scan>

    <!--开启注解驱动-->
    <mvc:annotation-driven></mvc:annotation-driven>

    <!--配置视图解析器-->
    <bean id="internalResourceViewResolver" class="org.springframework.web.servlet.view.InternalResourceViewResolver">
        <property name="prefix" value="/"></property>
        <property name="suffix" value=".vm"></property>
    </bean>

    <!--释放静态资源-->
    <mvc:default-servlet-handler></mvc:default-servlet-handler>

</beans>
applicationContext.xml
<?xml version="1.0" encoding="UTF-8"?>
<beans xmlns="http://www.springframework.org/schema/beans"
       xmlns:xsi="http://www.w3.org/2001/XMLSchema-instance"
       xmlns:context="http://www.springframework.org/schema/context"
       xmlns:mvc="http://www.springframework.org/schema/mvc"
       xsi:schemaLocation="http://www.springframework.org/schema/beans http://www.springframework.org/schema/beans/spring-beans.xsd http://www.springframework.org/schema/context https://www.springframework.org/schema/context/spring-context.xsd http://www.springframework.org/schema/mvc https://www.springframework.org/schema/mvc/spring-mvc.xsd">

    <bean id="dataSource" class="com.alibaba.druid.pool.DruidDataSource">
        <property name="driverClassName" value="com.mysql.cj.jdbc.Driver"></property>
        <property name="url" value="jdbc:mysql://118.25.197.221:3306/velocity"></property>
        <property name="username" value="root"></property>
        <property name="password" value="root"></property>
    </bean>


    <bean id="sessionFactoryBean" class="org.mybatis.spring.SqlSessionFactoryBean">
        <property name="dataSource" ref="dataSource"></property>
    </bean>

    <bean class="tk.mybatis.spring.mapper.MapperScannerConfigurer">
        <property name="basePackage" value="com.itheima.dao"/>
    </bean>

</beans>
引入静态资源

注意 :
-
复制完成后将静态资源扩展名修改为
.vm, 后期我们将以这些静态文件为基础编写我们的模板文件 -
因为我们开发过程中不可避免的会涉及到页面的跳转, 为了避免相对路径的变化导致
JS以及CSS加载不到 , 我们可以先将各个模板文件中的资源引入路径修改为绝对路径 , 在velocity中获取项目的动态虚拟路径可以使用$context.request.contextPath, 如下:
<!-- 1. 导入CSS的全局样式 -->
<link href="$context.request.contextPath/css/bootstrap.min.css" rel="stylesheet">
<!-- 2. jQuery导入,建议使用1.9以上的版本 -->
<script src="$context.request.contextPath/js/jquery-2.1.0.min.js"></script>
<!-- 3. 导入bootstrap的js文件 -->
<script src="$context.request.contextPath/js/bootstrap.min.js"></script>$context代表ViewContextTool , 使用ViewContextTool可以获取到request, session等对象
6.2 查询学生
6.2.1 页面修改
修改index.vm的超链接, 点击查询用户列表
<!DOCTYPE html>
<html lang="zh-CN">
  <head>
    <meta charset="utf-8"/>
    <meta http-equiv="X-UA-Compatible" content="IE=edge"/>
    <meta name="viewport" content="width=device-width, initial-scale=1"/>
    <title>首页</title>

    <!-- 1. 导入CSS的全局样式 -->
    <link href="$context.request.contextPath/css/bootstrap.min.css" rel="stylesheet">
    <!-- 2. jQuery导入,建议使用1.9以上的版本 -->
    <script src="$context.request.contextPath/js/jquery-2.1.0.min.js"></script>
    <!-- 3. 导入bootstrap的js文件 -->
    <script src="$context.request.contextPath/js/bootstrap.min.js"></script>
    <script type="text/javascript">
    </script>
  </head>
  <body>
  <div align="center">
  	<a
            href="$context.request.contextPath/user/list" style="text-decoration:none;font-size:33px">
        查询所有用户信息
	</a>
  </div>
  </body>
</html>
6.2.2 表现层实现
package com.itheima.controller;

import com.itheima.pojo.User;
import com.itheima.service.UserService;
import org.springframework.beans.factory.annotation.Autowired;
import org.springframework.stereotype.Controller;
import org.springframework.ui.Model;
import org.springframework.web.bind.annotation.RequestMapping;

import java.util.List;

@Controller
@RequestMapping(path = "/user")
public class UserController {

    @Autowired
    private UserService userService ;

    @RequestMapping(path = "/list")
    public String list(Model model){
        List<User> userList = userService.list();
        model.addAttribute("userList",userList);
        return "list";
    }
}
6.2.3 业务层实现
接口
package com.itheima.service;

import com.itheima.pojo.User;

import java.util.List;

public interface UserService {

    List<User> list();

}
实现类
package com.itheima.service.impl;

import com.itheima.dao.UserDao;
import com.itheima.pojo.User;
import com.itheima.service.UserService;
import org.springframework.beans.factory.annotation.Autowired;
import org.springframework.stereotype.Service;

import java.util.List;

@Service
public class UserServiceImpl implements UserService {

    @Autowired
    private UserDao userDao ;

    @Override
    public List<User> list() {
        return userDao.selectAll();
    }
}
6.2.4 数据访问层
package com.itheima.dao;

import com.itheima.pojo.User;
import org.springframework.stereotype.Repository;
import tk.mybatis.mapper.common.Mapper;

@Repository
public interface UserDao extends Mapper<User> {

}
6.2.5 Velocity模板
把html页面扩展名改成.vm , 然后再模板中使用VTL展示数据即可 !
<!DOCTYPE html>
<!-- 网页使用的语言 -->
<html lang="zh-CN">
<head>
<!-- 指定字符集 -->
<meta charset="utf-8">
<!-- 使用Edge最新的浏览器的渲染方式 -->
<meta http-equiv="X-UA-Compatible" content="IE=edge">
<!-- viewport视口:网页可以根据设置的宽度自动进行适配,在浏览器的内部虚拟一个容器,容器的宽度与设备的宽度相同。
width: 默认宽度与设备的宽度相同
initial-scale: 初始的缩放比,为1:1 -->
<meta name="viewport" content="width=device-width, initial-scale=1">
<!-- 上述3个meta标签*必须*放在最前面,任何其他内容都*必须*跟随其后! -->
<title>用户信息管理系统</title>
<!-- 1. 导入CSS的全局样式 -->
<link href="$context.request.contextPath/css/bootstrap.min.css" rel="stylesheet">
<!-- 2. jQuery导入,建议使用1.9以上的版本 -->
<script src="$context.request.contextPath/js/jquery-2.1.0.min.js"></script>
<!-- 3. 导入bootstrap的js文件 -->
<script src="$context.request.contextPath/js/bootstrap.min.js"></script>
<style type="text/css">
td, th {
text-align: center;
}
</style>
</head>
<body>
<div class="container">
<h3 style="text-align: center">用户信息列表</h3>
<!--搜索栏-->
<div style="float: left;">
<form class="form-inline">
<div class="form-group">
<label for="exampleInputName2">姓名</label>
<input type="text" class="form-control" id="exampleInputName2" >
</div>
<div class="form-group">
<label for="exampleInputName3">籍贯</label>
<input type="text" class="form-control" id="exampleInputName3" >
</div>
<div class="form-group">
<label for="exampleInputEmail2">邮箱</label>
<input type="email" class="form-control" id="exampleInputEmail2" >
</div>
<button type="submit" class="btn btn-default">查询</button>
</form>
</div>
<!--按钮-->
<div style="float: right;margin: 5px;">
<a class="btn btn-primary" href="add.html">添加联系人</a>
<a class="btn btn-primary" href="add.html">删除选中</a>
</div>
<table border="1" class="table table-bordered table-hover">
<tr class="success">
<th>编号</th>
<th>姓名</th>
<th>性别</th>
<th>年龄</th>
<th>籍贯</th>
<th>QQ</th>
<th>邮箱</th>
<th>操作</th>
</tr>
#foreach($user in $userList)
<tr>
<td>$math.add($foreach.index,1) </td>
<td>$user.name</td>
<td>$user.gender</td>
<td>$user.age</td>
<td>$user.address</td>
<td>$user.qq</td>
<td>$user.email</td>
<td><a class="btn btn-default btn-sm" href="update.html">修改</a> <a class="btn btn-default btn-sm" href="">删除</a></td>
</tr>
#end
<tr>
<td colspan="8" align="center"><a class="btn btn-primary" href="add.html">添加联系人</a></td>
</tr>
</table>
</div>
</body>
</html>
6.3 添加学生
6.3.1 页面修改
用户点击添加联系人按钮跳转到添加页面 , 修改超链接路径 , 因为页面上不需要有动态数据展示, 直接跳到add.vm即可
<tr>
    <td colspan="8" align="center">
        <a class="btn btn-primary" href="$context.request.contextPath/add.vm">
        添加联系人
        </a>
    </td>
</tr>在add.vm模板文件中 , 确定各个输入项的参数名称是否和实体类对应 , 修改添加的表单的提交路径
<form action="$context.request.contextPath/user/add" method="post">
	表单具体内容省略....
</form>
6.3.2 表现层实现
 /**
  * 新增用户
  * @param user
  * @return
  */
 @RequestMapping(path = "/add")
 public String add(User user){
     userService.add(user);
     return "redirect:/user/list";
 }
6.3.3 业务层实现
接口
/**
 * 新增用户
 * @param user
 */
void add(User user);
实现类
@Override
public User findById(Integer id) {
    return userDao.selectByPrimaryKey(id);
}
数据访问层
因为是使用的通用Maper , 业务层直接调用selectByPrimaryKey方法接口即可 , 数据访问层不需要做其他的实现
Velocity模板
<!DOCTYPE html>
<!-- 网页使用的语言 -->
<html lang="zh-CN">
    <head>
       <base href="<%=basePath%>"/>
        <!-- 指定字符集 -->
        <meta charset="utf-8">
        <meta http-equiv="X-UA-Compatible" content="IE=edge">
        <meta name="viewport" content="width=device-width, initial-scale=1">
        <title>修改用户</title>

        <link href="$context.request.contextPath/css/bootstrap.min.css" rel="stylesheet">
        <script src="$context.request.contextPath/js/jquery-2.1.0.min.js"></script>
        <script src="$context.request.contextPath/js/bootstrap.min.js"></script>

    </head>
    <body>
        <div class="container" style="width: 400px;">
        <h3 style="text-align: center;">修改联系人</h3>
        <form action="$context.request.contextPath/user/update" method="post">
            <input type="hidden" name="id" value="$user.id">

          <div class="form-group">
            <label for="name">姓名:</label>
            <input type="text" value="$user.name" class="form-control" id="name" name="name"  readonly="readonly" placeholder="请输入姓名" />
          </div>

          <div class="form-group">
            <label>性别:</label>

              <input type="radio" name="gender" value="男"   #if($user.gender.equals('男')) checked #end  />男
              <input type="radio" name="gender" value="女"   #if($user.gender.equals('女')) checked #end />女
          </div>

          <div class="form-group">
            <label for="age">年龄:</label>
            <input type="text" class="form-control" id="age" value="$user.age"  name="age" placeholder="请输入年龄" />
          </div>

          <div class="form-group">
            <label for="address">籍贯:</label>
             <select name="address" class="form-control" >
                <option value="广东" #if($user.address.equals('广东')) selected #end >广东</option>
                <option value="广西" #if($user.address.equals('广西')) selected #end>广西</option>
                <option value="湖南" #if($user.address.equals('湖南')) selected #end>湖南</option>
            </select>
          </div>

          <div class="form-group">
            <label for="qq">QQ:</label>
            <input type="text" class="form-control" value="$user.qq" name="qq" placeholder="请输入QQ号码"/>
          </div>

          <div class="form-group">
            <label for="email">Email:</label>
            <input type="text" class="form-control" value="$user.email" name="email" placeholder="请输入邮箱地址"/>
          </div>

             <div class="form-group" style="text-align: center">
                <input class="btn btn-primary" type="submit" value="提交" />
                <input class="btn btn-default" type="reset" value="重置" />
                <input class="btn btn-default" type="button" value="返回"/>
             </div>
        </form>
        </div>
    </body>
</html>
6.4.2 需改数据
页面修改
用户修改完数据点击提交按钮, 需要把数据提交到服务器, 服务器需要根据用户修改数据的ID进行数据的更新 , 所以需要对表单的提交路径进行修改
<form action="$context.request.contextPath/user/update" method="post"></form>
表现层实现
/**
 * 更新用户信息
 * @param user
 * @return
 */
@RequestMapping(path = "/update")
public String update(User user){
    userService.update(user);
    return "redirect:/user/list";
}
业务层实现
接口
/**
 * 更新用户信息
 * @param user
 */
void update(User user);
实现
@Override
public void update(User user) {
    userDao.updateByPrimaryKey(user);
}
数据访问层
因为是使用的通用Maper , 业务层直接调用updateByPrimaryKey方法接口即可 , 数据访问层不需要做其他的实现
6.5 删除学生
6.5.1 页面修改
用户点击删除按钮, 需要将数据从数据删除(物理删除) , 所以首先需要修改删除按钮的链接路径
<a class="btn btn-default btn-sm" href="$context.request.contextPath/user/deleteById?id=$user.id">删除</a>6.5.2 表现层实现
/**
 * 删除用户信息 - 物理删除(慎用)
 * @param id
 * @return
 */
@RequestMapping(path = "/deleteById")
public String deleteById(Integer id){
    userService.deleteById(id);
    return "redirect:/user/list";
}
6.5.3 业务层实现
接口
/**
 * 删除用户信息 - 物理删除(慎用)
 * @param id
 */
void deleteById(Integer id);
实现
@Override
public void deleteById(Integer id) {
    userDao.deleteByPrimaryKey(id);
}
6.5.4 数据访问层
因为是使用的通用Maper , 业务层直接调用deleteByPrimaryKey方法接口即可 , 数据访问层不需要做其他的实现


![[CVPR 2020] Regularizing Class-Wise Predictions via Self-Knowledge Distillation](https://img-blog.csdnimg.cn/756c9d9f0d3c4ff38b6f26dd8998bb27.png#pic_center)