1.最终形式的形式
不用再去翻文档找对应的故障类型,采样率等信息了,所有的信息自包含在.json文件里,15个测试例,一个测试例对应一整个.json文件。
{
"dataset": {
"name": "XJTU-SY_Bearing_Datasets",
"memo": "PHM vibration dataset - bearing",
"author": "xjtu_sy",
"release_date": "2018",
"reference of dataset": "https://gr.xjtu.edu.cn/web/yaguolei",
"DOI": "10.1109/TR.2018.2882682"
},
"test_case": {
"tag": "35Hz12kN\\Bearing1_2",
"scale_of_sensor": "g",
"saps": 256000,
"len_of_saps": 32768,
"shaft_rotation_speed_in_hz": 35,
"load_rating_in_N": 12000,
"fault_reason": [
"Outer race"
],
"sample_cnt": 161
},
"sample_data_desc": {
"bin_data.desc": "[hexStrOfHorizon, hexStrOfVertical] or [hexStrOfSample]",
"sample_data_raw.bin_data.type": "float32",
"sample_data_raw.bin_data.storageType": "hex_in_8bytes_from_float32"
},
"aux_info": {
"auto_generated_date": "2025-05-28 18:32:50",
"auto_generated_by": "twicave",
"json_fmt_version": "1.0.20250528",
"key_word": [
"float32",
"g",
"hex",
"h",
"v",
"bearing"
]
},
"sample_data_raw": [
{
"time": "2018-02-15 08:00:00",
"bin_data": [
"3E20E6A2BE15A23D3E3CCB41BDA01B86",
"3E20E6A2BE15A23D3E3CCB41BDA01B86"
]
}
]
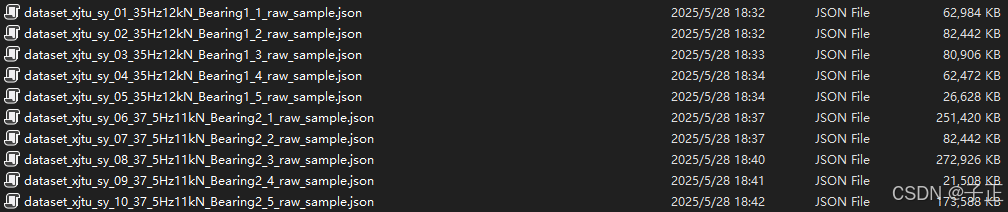
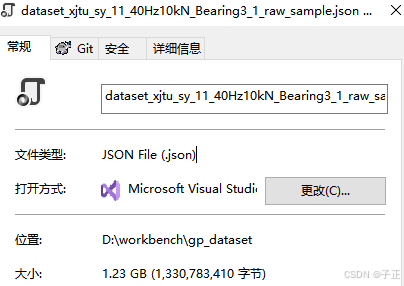
}1.1 额外的好处 - 占用空间更小
1.2 使用这个数据集
1.2.1 使用数据集 - 代码片段
import gp_dataset_xjtu_sy as xjtu_json
app = xjtu_json.gp_dataset_xjtu_sy()
y = app.get_record_of(13, 20, 'H')
y = y[0] #为了兼顾正交采样,返回的始终是一个数组
x = app.get_x_axis(y, self.get_saps_of(case_idxBase1))
plt.plot(x, y, label=memo)
plt.xlabel('time(s)')
plt.ylabel('acc(g)')
plt.legend()
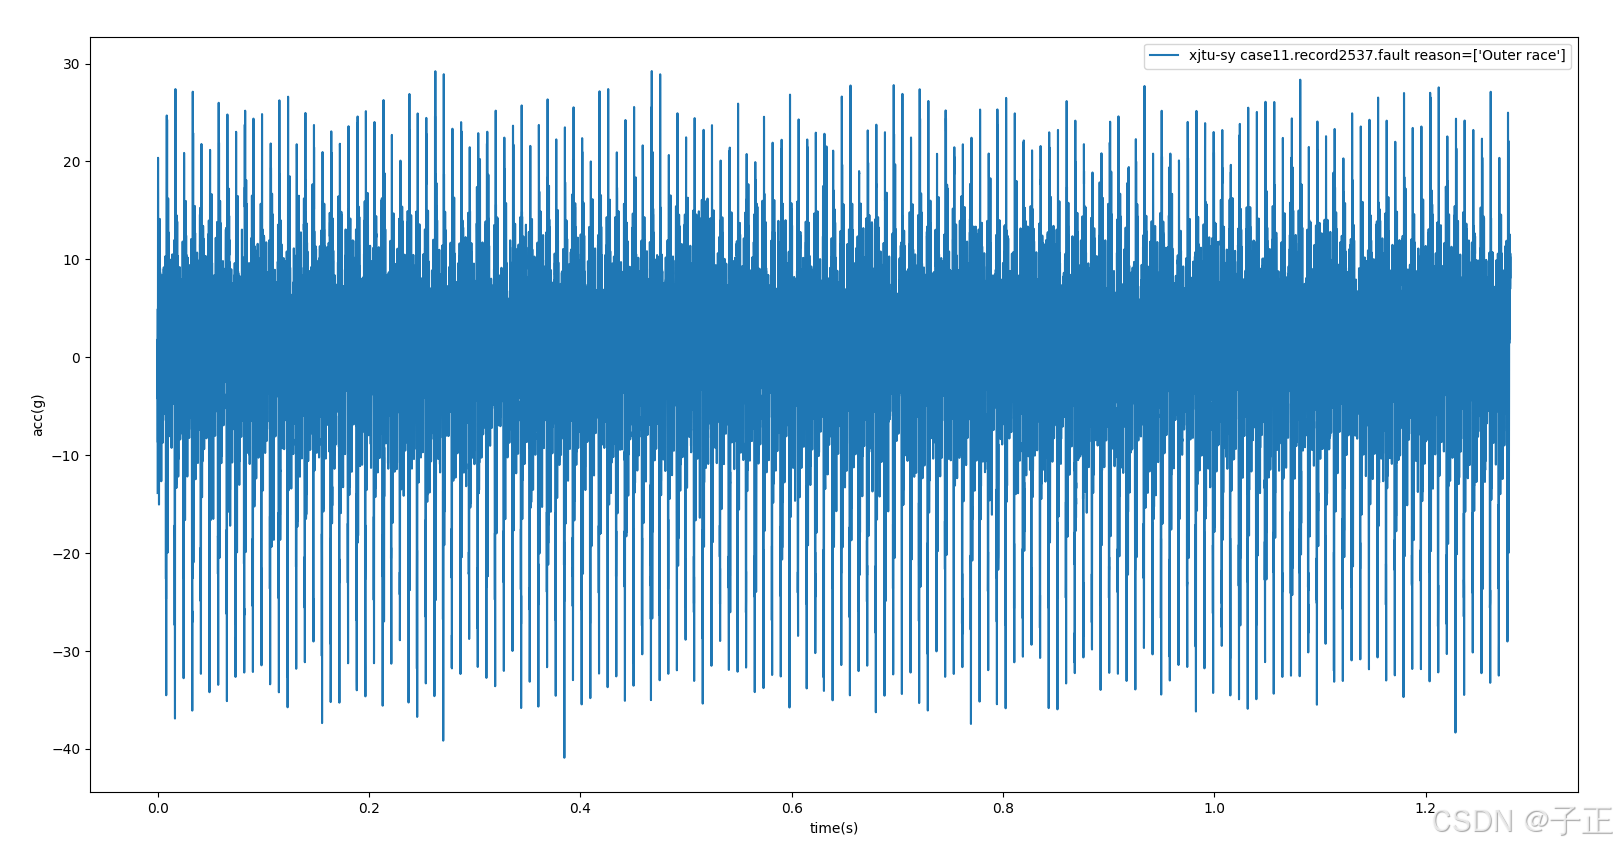
plt.show()1.2.2 简单的采样值显示
附录A 相关源码
留神saps,最早的发布错误地将其设置为256000,应该是25600
1.使用.json数据集 - 辅助函数
import json, pymysql
from tkinter import FIRST
import gp_dataset_define
import datetime
import copy
import csv
import os
import numpy as np
import re
import struct
import glog as log
import gp_dataset_import_xjtu_sy
import matplotlib.pyplot as plt

#.json格式数据集读取函数
class gp_dataset_xjtu_sy:
    #初始化 dataset_path = 15个.json文件所在目录,可以更少
    def __init__(self, dataset_path=r'D:\DataSet\Vibration\xjtu_sy_bearing_2018'):
        self.path_of_dataset = dataset_path
        self.gp_json_filenames= self.get_dataset_cases()
        self.jsonCases={}
        self.importer = gp_dataset_import_xjtu_sy.gp_dataset_importer()
        self.records={}

    #根据json文件名来对应到具体的通道
    def get_dataset_cases(self):
        arJsonFiles = {}
        folder_path = self.path_of_dataset
        json_count = len([f for f in os.listdir(folder_path) if f.endswith(".json")])
        # 文件名样例 dataset_xjtu_sy_02_35Hz12kN_Bearing1_2_raw_sample.json
        for f in os.listdir(folder_path):
            if not f.endswith(".json"):
                continue
            if not f.startswith("dataset_xjtu_sy_"):
                continue
            match = re.search(r'_(\d{2})_', f)
            sequence_number = int(match.group(1))  # 输出 4
            arJsonFiles[f'{sequence_number}'] = os.path.join(self.path_of_dataset, f)
        return arJsonFiles

    #得到某个测试案例,后续可自行按照json语法参照gp_dataset_define来访问里面的数据或相关配置,注释信息
    def get_case(self, case_idxBase1):
        caseSn = case_idxBase1
        chCase = f"{caseSn}"
        if chCase in self.jsonCases.keys():
            return self.jsonCases[chCase]
        if chCase in self.gp_json_filenames.keys():
            with open(self.gp_json_filenames[chCase], 'r') as f:
                content = ''.join([line for line in f if not re.match(r'\s*//', line)])
                jsonObj =  json.loads(content)
                self.jsonCases[chCase] = jsonObj
        if chCase in self.jsonCases.keys():
            return self.jsonCases[chCase]
        else:
            return {}

    #快捷方式,得到采样率
    def get_saps_of(self, case_idxBase1):
        chCase = self.get_case(case_idxBase1)
        return chCase["test_case"]["saps"]

    #快捷方式,得到某个测试的总records条数
    def get_records_cnt_of(self, case_idxBase1):
        chCase = self.get_case(case_idxBase1)
        return chCase["test_case"]["sample_cnt"]

    #快捷方式,得到某个测试的失效原因
    def get_phm_fault_reason_of(self, case_idxBase1):
        chCase = self.get_case(case_idxBase1)
        return chCase["test_case"]["fault_reason"]

    #得到一笔记录,返回值是float32
    def get_record_of(self, case_idxBase1, records_idxBase0, data_type="h"):
        keyOfRecords = f'{case_idxBase1}.{records_idxBase0}.{str.capitalize(data_type)}'
        if keyOfRecords in self.records.keys():
            return self.records[keyOfRecords]

        chCase = self.get_case(case_idxBase1)
        jsonRec = chCase["sample_data_raw"][records_idxBase0]
        hexRecords = []
        if str.capitalize(data_type)=="H":
            hexRecords.append(jsonRec["bin_data"][0])
        else:
           if str.capitalize(data_type)=="V":
                hexRecords.append(jsonRec["bin_data"][1])
           else:
               hexRecords.append(jsonRec["bin_data"][0])
               hexRecords.append(jsonRec["bin_data"][1])
        floatAr = []
        floatAr.append(self.importer.hex_to_float_array(hexRecords[0]))
        if len(hexRecords)>1 :
            floatAr.append(self.importer.hex_to_float_array(hexRecords[1]))
        self.records[keyOfRecords] = floatAr
        return floatAr

    #把特定通道 - 特定一次采样的数据绘制出来
    def draw_one_sample(self, case_idxBase1, records_idxBase0, memo, data_type="h"):
        y = self.get_record_of(case_idxBase1, records_idxBase0, data_type)
        y = y[0]
        x = self.get_x_axis(y, self.get_saps_of(case_idxBase1))

        plt.plot(x, y, label=memo)
        plt.xlabel('time(s)')
        plt.ylabel('acc(g)')
        plt.legend()
        plt.show()

    def get_x_axis(self, sample, saps):
        x = np.arange(len(sample))
        x = [i*1/saps for i in x]
        return x

    def unit_test(self):
        #测试例程:
        case = 11
        #显示地11通道第130个采样波形
        cnt = self.get_records_cnt_of(11)
        record = cnt-1
        memo = f'xjtu-sy case{case}.record{record}.fault reason={self.get_phm_fault_reason_of(case)}'
        self.draw_one_sample(11, cnt-1, memo)


app = gp_dataset_xjtu_sy()
app.unit_test()
2.将原始数据集转换程序
2.1 将原始分目录存放的.csv形式转换至.json格式
import json, pymysql
from tkinter import FIRST
import gp_dataset_define
import datetime
import copy
import csv
import os
import numpy as np
import re
import struct
import glog as log

class gp_dataset_importer:
    def __init__(self, dataset_path=r"D:\DataSet\Vibration\xjtu_sy_bearing_2018"):
        self.gp_dataset_template = gp_dataset_define.gp_dataset
        self.test_condition_desc = gp_dataset_define.test_condition_desc
        self.gp_bearing_info = gp_dataset_define.gp_bearing_info
        self.original_dataset_path = dataset_path
        self.time_of_begin_of_sample = datetime.datetime(2018, 2, 15, 8, 0, 0)
        self.timespan_of_sample = datetime.timedelta(minutes=1)

    def get_strOf_time(self, dt):
        formatted_time = dt.strftime("%Y-%m-%d %H:%M:%S")
        return formatted_time

    def sanitize_filename(self, input_str):
        # 匹配需要替换的字符:. , / \
        # 正则表达式模式解释:[.,/\\\\] 中四个反斜杠是为了匹配单个反斜杠(Python字符串转义+正则转义)
        pattern = r"[.,/\\\\]"
        return re.sub(pattern, "_", input_str)

    def float_array_to_hex(self, float_array, precision='single'):
        """
        将float数组转换为无分隔符的紧密十六进制字符串
        :param float_array: 输入的float数组
        :param precision: 'single'(4字节单精度)或 'double'(8字节双精度)
        :return: 十六进制字符串(无分隔符)
        """
        hex_str = ""
        fmt = '>f' if precision == 'single' else '>d'  # 大端序保证字节顺序一致性

        for num in float_array:
            # 将float转为字节序列
            byte_data = struct.pack(fmt, num)
            # 转换为十六进制并拼接
            hex_str += byte_data.hex().upper()  # 大写字母形式

        return hex_str

    def hex_to_float_array(self, hex_str, precision='single'):
        """
        将紧密排列的十六进制字符串转换为float数组
        :param hex_str: 输入的十六进制字符串(无分隔符)
        :param precision: 'single'(4字节单精度)或 'double'(8字节双精度)
        :return: 原始float数组
        """
        float_array = []

        # 确定每个浮点数的十六进制字符长度
        byte_length = 4 if precision == 'single' else 8
        hex_length = byte_length * 2  # 每个字节对应2个十六进制字符

        # 检查输入有效性
        if len(hex_str) % hex_length != 0:
            raise ValueError("Hex string length does not match precision")

        # 分割十六进制字符串
        chunks = [hex_str[i:i+hex_length] for i in range(0, len(hex_str), hex_length)]

        # 解包字节序列为浮点数
        fmt = '>f' if precision == 'single' else '>d'  # 大端序格式符
        for chunk in chunks:
            byte_data = bytes.fromhex(chunk)
            num = struct.unpack(fmt, byte_data)[0]
            float_array.append(num)

        return float_array

    # 示例log.info(float2hex(26.3, 'single'))  # 输出:41D26666(单精度)
    #log.info(float2hex(3.1415926535, 'double'))  # 输出:400921FB54442EEA(双精度)
    def float2hex(self, num, precision='single'):
        """
        将浮点数转换为十六进制字符串
        :param num: 输入的浮点数
        :param precision: 'single'(32位单精度) 或 'double'(64位双精度)
        :return: 十六进制字符串(不带前缀)
        """
        if precision == 'single':
            packed = struct.pack('>f', num)  # 大端序打包为单精度
            hex_str = packed.hex()
        elif precision == 'double':
            packed = struct.pack('>d', num)  # 大端序打包为双精度
            hex_str = packed.hex()
        else:
            raise ValueError("precision 必须是 'single' 或 'double'")
        return hex_str.upper()

    #log.info(hex2float('41D26666', 'single'))  # 输出:26.299999237060547(精度损失)
    def hex2float(self, hex_str, precision='single'):
        """
        将十六进制字符串转换为浮点数
        :param hex_str: 输入的十六进制字符串(不带前缀)
        :param precision: 'single' 或 'double'
        :return: 浮点数
        """
        byte_data = bytes.fromhex(hex_str)
        if precision == 'single':
            return struct.unpack('>f', byte_data)[0]
        elif precision == 'double':
            return struct.unpack('>d', byte_data)[0]
        else:
            raise ValueError("precision 必须是 'single' 或 'double'")

    # 自定义递归合并函数
    def deep_merge(self, source, overrides):
        for key, value in overrides.items():
            if isinstance(value, dict) and isinstance(source.get(key), dict):
                source[key] = deep_merge(source[key], value)
            else:
                source[key] = value
        return source

    def DealAllTestCase(self):
        log.info(f">>>>>start xjtu-sy bearing dataset transfer...{datetime.datetime.now()}")
        cntOftestCases = len(self.test_condition_desc["test_case"])
        for n in np.arange(cntOftestCases):
            self.DealOneTestCase(n)

    def DealOneTestCase(self, snOfTestCase):
        #get test case desc
        if snOfTestCase<0:
            return
        if snOfTestCase>=len(self.test_condition_desc["test_case"]):
            return
        testCase = self.test_condition_desc["test_case"][snOfTestCase]

        #遍历这个test_case,对所有的.csv依次得到h,v 分量
        folder_path = self.original_dataset_path
        csv_count = len([f for f in os.listdir(folder_path) if f.endswith(".csv")])
        samples = []
        timeAnchor = copy.deepcopy(self.time_of_begin_of_sample)
        lenOfRealSamples = csv_count
        #判断记录数和理论值是否一致
        log.info(f'开始转换 {subPathOfTest}....{self.get_strOf_time(datetime.datetime.now())}')
        log.info(f'理论记录数:{testCase["sample_cnt"]}, 实际数据条数:{lenOfRealSamples}, 数据完整:{lenOfRealSamples==testCase["sample_cnt"]}')

        for sn in np.arange(csv_count):
            csvFileName = os.path.join(folder_path, f"{sn+1}.csv")
            h,v = self.LoadOneSampleOfTestCase(csvFileName)
            oneSamples = {}
            oneSamples["time"] = self.get_strOf_time(timeAnchor)
            oneSamples["bin_data"] = [self.float_array_to_hex(h),self.float_array_to_hex(v)]
            samples.append(oneSamples)
            timeAnchor += self.timespan_of_sample
            log.info(f"{subPathOfTest}...{sn+1:04d}") #不换行
        log.info("") #换行

        #整理这个testCase
        jsonOut = copy.deepcopy(self.gp_dataset_template)
        jsonOut["aux_info"]["auto_generated_date"] = self.get_strOf_time(datetime.datetime.now())
        jsonOut["aux_info"]["auto_generated_by"] = "twicave"
        jsonOut["test_case"]["tag"] = os.path.join(subPathOfTest)

        mergedObj = self.deep_merge(jsonOut["test_case"], testCase)
        jsonOut["test_case"] = mergedObj
        jsonOut["sample_data_raw"] = samples

        #输出这个testCase
        memo = self.sanitize_filename(firstKeyName)

        with open(f'dataset_xjtu_sy_{snOfTestCase+1:02d}_{memo}_raw_sample.json', 'w') as f:
            json.dump(jsonOut, f)


    def LoadOneSampleOfTestCase(self, file_path_of_csv):
        horizontal_signals = []
        vertical_signals = []

        with open(file_path_of_csv, newline='') as csvfile:
            reader = csv.reader(csvfile)
            next(reader)  # 跳过标题行
            for row in reader:
                horizontal_signals.append(float(row[0]))
                vertical_signals.append(float(row[1]))

        return (horizontal_signals, vertical_signals)
2.2 转换过程中使用的参数
gp_bearing_info = {
"Type":"LDK UER204",
"Outer race diameter":39.80e-3,
"Inner race diameter":29.30e-3,
"Bearing mean diameter":34.55e-3,
"Ball diameter":7.92e-3,
"Number of Ball":8,
"Contact angle":0,
"Load rating(static)":6.65e3,
"Load rating(dynamic)":12.82e3
}
test_condition_desc = {"test_case":[
{"35Hz12kN\Bearing1_1":{"shaft_rotation_speed_in_hz":35, "load_rating_in_N":12e3, "fault_reason":["Outer race"], "sample_cnt":123}},
{"35Hz12kN\Bearing1_2":{"shaft_rotation_speed_in_hz":35, "load_rating_in_N":12e3, "fault_reason":["Outer race"], "sample_cnt":161}},
{"35Hz12kN\Bearing1_3":{"shaft_rotation_speed_in_hz":35, "load_rating_in_N":12e3, "fault_reason":["Outer race"], "sample_cnt":158}},
{"35Hz12kN\Bearing1_4":{"shaft_rotation_speed_in_hz":35, "load_rating_in_N":12e3, "fault_reason":["Cage"], "sample_cnt":122}},
{"35Hz12kN\Bearing1_5":{"shaft_rotation_speed_in_hz":35, "load_rating_in_N":12e3, "fault_reason":["Inner race", "Outer race"], "sample_cnt":52}},
{"37.5Hz11kN\Bearing2_1":{"shaft_rotation_speed_in_hz":37.5, "load_rating_in_N":11e3, "fault_reason":["Inner race"], "sample_cnt":491}},
{"37.5Hz11kN\Bearing2_2":{"shaft_rotation_speed_in_hz":37.5, "load_rating_in_N":11e3, "fault_reason":["Outer race"], "sample_cnt":161}},
{"37.5Hz11kN\Bearing2_3":{"shaft_rotation_speed_in_hz":37.5, "load_rating_in_N":11e3, "fault_reason":["Cage"], "sample_cnt":533}},
{"37.5Hz11kN\Bearing2_4":{"shaft_rotation_speed_in_hz":37.5, "load_rating_in_N":11e3, "fault_reason":["Outer race"], "sample_cnt":42}},
{"37.5Hz11kN\Bearing2_5":{"shaft_rotation_speed_in_hz":37.5, "load_rating_in_N":11e3, "fault_reason":["Outer race"], "sample_cnt":339}},
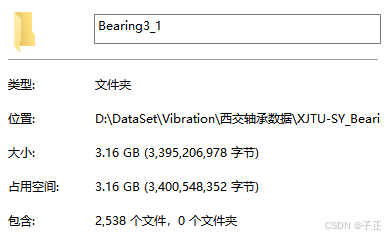
{"40Hz10kN\Bearing3_1":{"shaft_rotation_speed_in_hz":40, "load_rating_in_N":10e3, "fault_reason":["Outer race"], "sample_cnt":2538}},
{"40Hz10kN\Bearing3_2":{"shaft_rotation_speed_in_hz":40, "load_rating_in_N":10e3, "fault_reason":["Inner race", "Ball", "Cage","Outer race"], "sample_cnt":2496}},
{"40Hz10kN\Bearing3_3":{"shaft_rotation_speed_in_hz":40, "load_rating_in_N":10e3, "fault_reason":["Inner race"], "sample_cnt":371}},
{"40Hz10kN\Bearing3_4":{"shaft_rotation_speed_in_hz":40, "load_rating_in_N":10e3, "fault_reason":["Inner race"], "sample_cnt":1515}},
{"40Hz10kN\Bearing3_5":{"shaft_rotation_speed_in_hz":40, "load_rating_in_N":10e3, "fault_reason":["Outer race"], "sample_cnt":114}}
]}
gp_dataset = {
"dataset":
{
"name": "XJTU-SY_Bearing_Datasets",
"memo": "PHM vibration dataset - bearing",
"author": "xjtu_sy",
"release_date": "2018",
"reference of dataset": "https://gr.xjtu.edu.cn/web/yaguolei",
"DOI": "10.1109/TR.2018.2882682"
},
"test_case":
{
"tag":"35Hz12kN\\Bearing1_1",
"scale_of_sensor": "g",
"saps": 25600,
"len_of_saps": 32768,
"shaft_rotation_speed_in_hz": 35,
"load_rating_in_N": 12000.0,
"fault_reason": ["Outer race"],
"sample_cnt": 123
},
"sample_data_desc":
{
"bin_data.desc": "[hexStrOfHorizon, hexStrOfVertical] or [hexStrOfSample]",
"sample_data_raw.bin_data.type": "float32",
"sample_data_raw.bin_data.storageType": "hex_in_8bytes_from_float32"
},
"aux_info":
{
"auto_generated_date": "2025-05-28 17:49:13",
"auto_generated_by": "twicave",
"json_fmt_version": "1.0.20250528",
"key_word":["float32", "g", "hex", "h", "v", "bearing"]
},
"sample_data_raw":[{"time":"2025-05-28 15:23:00", "bin_data":[]}]
}2.3.转换过程截屏
I0528 18:37:03.843738 6128 gp_dataset_import_xjtu_sy.py:135] 37.5Hz11kN\Bearing2_1...0489
I0528 18:37:04.172952 6128 gp_dataset_import_xjtu_sy.py:135] 37.5Hz11kN\Bearing2_1...0490
I0528 18:37:04.488946 6128 gp_dataset_import_xjtu_sy.py:135] 37.5Hz11kN\Bearing2_1...0491
I0528 18:37:04.488946 6128 gp_dataset_import_xjtu_sy.py:136]
I0528 18:37:05.193193 6128 gp_dataset_import_xjtu_sy.py:124] 开始转换 37.5Hz11kN\Bearing2_2....2025-05-28 18:37:05
I0528 18:37:05.193193 6128 gp_dataset_import_xjtu_sy.py:125] 理论记录数:161, 实际数据条数:161, 数据完整:True
I0528 18:37:05.472151 6128 gp_dataset_import_xjtu_sy.py:135] 37.5Hz11kN\Bearing2_2...0001
I0528 18:37:05.752146 6128 gp_dataset_import_xjtu_sy.py:135] 37.5Hz11kN\Bearing2_2...0002
I0528 18:37:06.029141 6128 gp_dataset_import_xjtu_sy.py:135] 37.5Hz11kN\Bearing2_2...0003
I0528 18:37:06.312358 6128 gp_dataset_import_xjtu_sy.py:135] 37.5Hz11kN\Bearing2_2...0004