什么是IOC
IOC
IOC(Inversion of Control),是一种设计思想,在之前的SpringMVC里就在类上添加@RestController和@Controller注解就是使用了IOC,这两个注解就是在Spring中创建一个对象,并将注解下的类交给Spring管理,Spring框架启动时就会自己加载这个类,交给Spring管理的类我们统称为Bean。
IOC的意思就是控制反转,在之前我们的面向对象编程中,我们要使用一个对象需要自己new出来,但是现在使用IOC思想后,我们创建对象的时候,是通过容器来创建的,对象的创建过程由自己控制,变成了由第三方容器控制,而程序中只需要注入这个对象就行,就是控制反转了。所谓的控制反转就是对象控制权的反转。
控制反转这个词听起来很高大上其实就是一个很简单的思想,比如之前我们需要什么工具都要自己去找,这个工具可能在车库可能在卧室。而现在有了工具箱(IOC容器),我们就可以把这些工具放到工具箱里(使用注解交给Spring管理),想用的时候直接从工具箱中拿就行(依赖注入)。
代码演示IOC
以造一辆车来进行举例
传统开发方式
先设计轮子,然后根据轮子大小设计底盘,之后再根据底盘设计车身,最后根据车身设计好整个车。这里就存在一个很明显的依赖连,每创建一个对象都要依赖另一个对象。
public class Main {
    public static void main(String[] args) {
        Car car = new Car();
        car.run();
    }
}

class Car {
    private Framework framework;
    public Car() {
        framework = new Framework();
        System.out.println("car init");
    }
    public void run() {
        System.out.println("car run run!");
    }
}

//车身
class Framework {
    private Bottom bottom;
    public Framework() {
        bottom = new Bottom();
        System.out.println("Framework init");
    }
}

//底盘
class Bottom {
    private Tire tire;
    public Bottom() {
        tire = new Tire();
        System.out.println("bottom init");
    }
}

//轮子
class Tire {
    //轮子尺寸
    private int size;
    public Tire() {
        this.size = 25;
        System.out.println("tire init");
    }
}
如果此时有新的需求要求早造一个20的轮子,那么就要给Tire加一个有参构造方法,相应的要给上面所有有依赖关系类全部都加一个参数。
不过你可能会想,我一开始就给Tire一个有参的构造函数不就好了。
public class Main {
    public static void main(String[] args) {
        Car car = new Car(size);
        car.run();
    }
}

class Car {
    private Framework framework;
    public Car(int size) {
        framework = new Framework(size);
        System.out.println("car init");
    }
    public void run() {
        System.out.println("car run run!");
    }
}

//车身
class Framework {
    private Bottom bottom;
    public Framework(int size) {
        bottom = new Bottom(size);
        System.out.println("Framework init");
    }
}

//底盘
class Bottom {
    private Tire tire;
    public Bottom(int size) {
        tire = new Tire(size);
        System.out.println("bottom init");
    }
}

//轮子
class Tire {
    //轮子尺寸
    private int size;
    public Tire(int size) {
        this.size = size;
        System.out.println("tire init");
    }
}
确实如果一开始就设计好,的确可以解决这个问题,但是如果之后生产慢慢扩大,需求越来越多样化,还能一开始就设计好吗?如果我轮子加点东西,车身再加点东西,底盘再加点东西,那么要改的地方就太多工作量太大了而且也会出现大量冗余,这样牵一发而动全身的方法明显是不太合理的。
IOC开发
现在我们换一种思路,先提前设计车子的大概样子,然后根据车子的样子设计车身,根据车身设计底盘,最后根据底盘设计轮子。就相当于把一个汽车分为多个配件,把这个配件造完后再拼接到另一个配件上,最后就可以组装好一个汽车了,这样把每个配件单独造的方式就算每个配件之后的变化再大也不会影响其他配件。
public class Tire {
    private int size;

    public Tire(int size) {
        this.size = size;
        System.out.println("轮胎的尺寸为:" + this.size);
    }
}
public class Bottom {
    public Tire tire;

    public Bottom(Tire tire) {
        this.tire = tire;
        System.out.println("Bottom loading...");
    }
}
public class Framework {
    public Bottom bottom;

    public Framework(Bottom bottom) {
        this.bottom = bottom;
        System.out.println("bottom loading...");
    }
}
public class Car {
    public Framework framework;

    public Car(Framework framework) {
        this.framework = framework;
        System.out.println("car loading...");
    }
    public void run(){
        System.out.println("car is running...");
    }

    public static void main(String[] args) {
        Tire tire = new Tire(17);
        Bottom bottom = new Bottom(tire);
        Framework framework = new Framework(bottom);
        Car car = new Car(framework);
        car.run();
    }
}
之前我们把创建下级类的任务交给类本身,现在我们把创建下级类的任务交给Main去做,这样就达到了和其他类解耦合的效果,这里就可以把Main看作一个IOC容器。当我们需要使用某个对象时,只需要从IOC容器中取就好了,而且不用考虑其细节。Spring就是一种IOC容器,来帮助我们做这些资源管理。
DI(依赖注入)
DI就是依赖注入的意思,IOC是一种思想,DI是IOC的一种具体的实现方式,就是在创建对象的时候,把该对象依赖的对象注入给该对象,而不是由对象自己创建,这样做就可以很好的降低对象之间的耦合度。
注入这个词听起来可能有些抽象,我个人理解就是假如,对象A的创建依赖对象B,那么我不在对象A内部new对象B,而是在它外部提前把对象B创建好,然后通过某种方法传给对象A,这个过程就是注入,而这个"某种方法"可以有多种,刚刚的例子就是通过构造函数的方式,将依赖对象传递给要使用的对象中的。
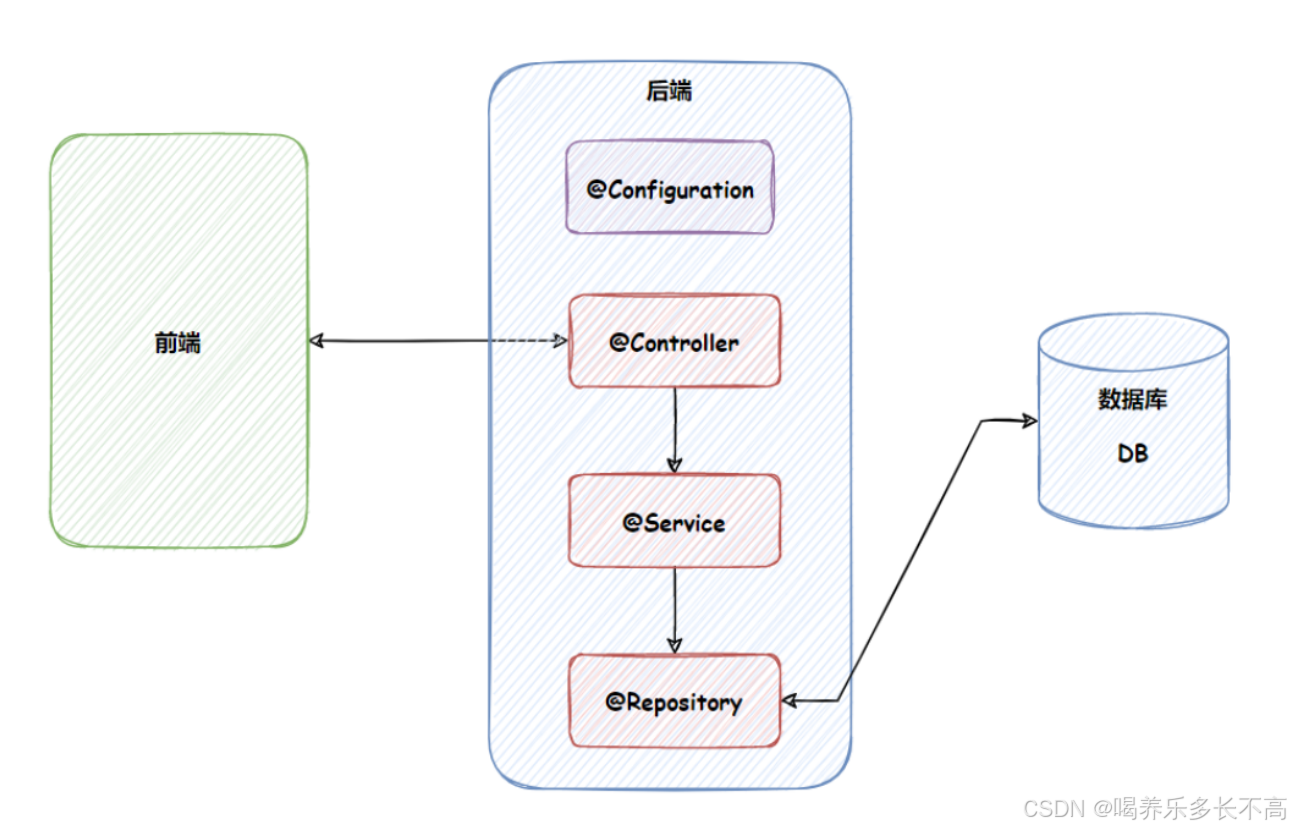
Spring中使用IOC和DI
IOC
既然Spring就是一种IOC容器,那么就应该具备向容器中存,和从容器中取得功能,Spring容器管理得主要是对象,这些被管理的对象我们称之为Bean。把这些对象交给Spring管理后,由Spring来负责对象得创建和销毁,我们只需要知道怎么存和怎么取就行。
Bean的存储
Spring为了更好的服务web应用程序,提供了很多注解
- 类注解:
- @Controller:用于标识一个SpringMVC中的控制器,负责处理用户请求,并返回响应。
- @Service:用于标注一个类作为业务层的组件处理具体的业务逻辑,通常标识Service层的类
- @Repository:用于标识数据访问层,也称为持久层(Dao层),负责数据访问操作。
- @Component:这是Spring中所有具体组件的通用注解,表示该类用作Spring容器管理,会被Spring自动加载,并可以通过依赖注入来使用该类。
- @Configuration:用于表示这是一个配置类,处理一些配置信息。
- 方法注解:
- @Bean:类注解是用来添加到某个类上的,这样就会有两个问题,使用外部包里的类没有办法对只读文件添加注解,一个类需要多个对象,但是我们类注解的对象只能创建一个时,此时就要使用@Bean
这些注解都有一个统一的功能就是将注解所修饰的类或方法,交给Spring管理,相当于一个存的操作。
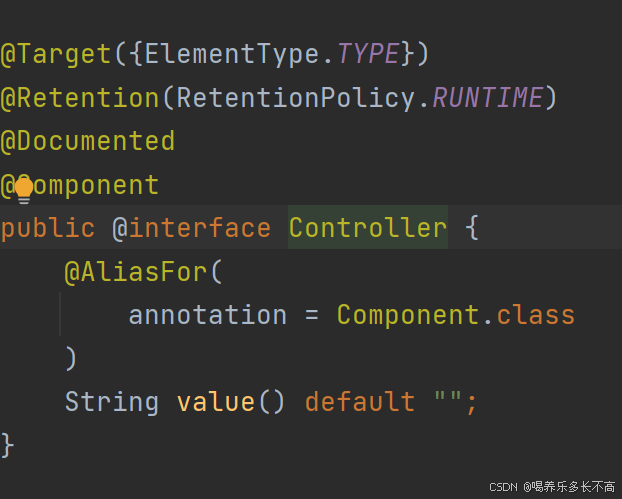
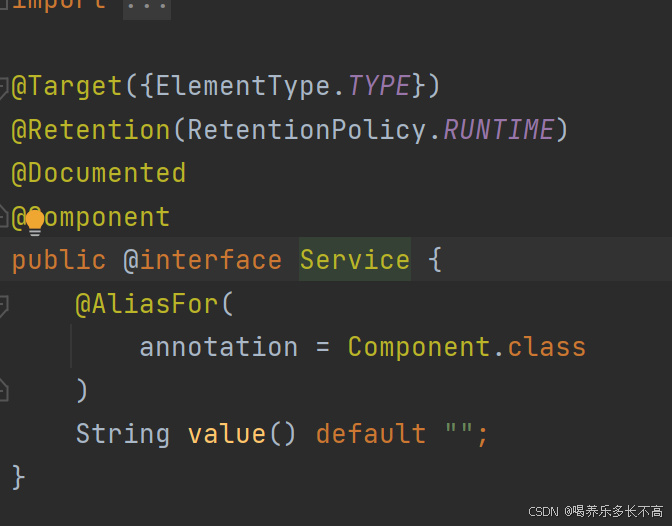
可以看到Controller和Service注解都封装了@component注解,而且不止这两个注解其他注解也是一样,所以这些类也可以称为@component的衍生注解
其实这些类在功能上差不多,主要是用来区分不同层的类,和我们程序的结构分层是对应的,当程序员看到这些注解标识的类,就知道这是哪个层的类主要负责什么功能。
因为这些注解的使用方法都一样所以就用@Controller来演示
@Controller//将对象存储交给Spring管理
public class HelloController {
    public void hello(){
        System.out.println("hello Spring-ioc");
    }
}
在类上面加上对应注解就可以把该类的对象交给Spring管理了,接下来我们从容器中拿取该对象
获取Bean
按照类型获取
//获取Spring上下文对象
ApplicationContext context = SpringApplication.run(DemoApplication.class,args);
		//根据类型查找
//从Spring上下文中获取对象
		HelloController bean = context.getBean(HelloController.class);
//调用对象方法
		System.out.println(bean);
        bean.hello();
通过这种方法就可以根据类型查找到我们需要的类对象。
这个ApplicationContext就是Spring的上下文,负责管理 Bean 的生命周期和配置信息,里面包含我们存储的Bean的信息。
不过上述代码是根据类型来查找对象,如果同一个类型存在多个Bean呢?ApplicationContext也提供了其他的获取Bean的方法,这些方法是ApplicationContext继承了BeanFactory类,实现了BeanFactory的getBean方法。
public interface BeanFactory {

 //以上省略...

 // 1. 根据bean名称获取bean
 Object getBean(String var1) throws BeansException;
 // 2. 根据bean名称和类型获取bean
 <T> T getBean(String var1, Class<T> var2) throws BeansException;
 // 3. 按bean名称和构造函数参数动态创建bean,只适⽤于具有原型(prototype)作⽤域的bean
 Object getBean(String var1, Object... var2) throws BeansException;
 // 4. 根据类型获取bean
 <T> T getBean(Class<T> var1) throws BeansException;
 // 5. 按bean类型和构造函数参数动态创建bean, 只适⽤于具有原型(prototype)作⽤域的
bean
 <T> T getBean(Class<T> var1, Object... var2) throws BeansException;

 //以下省略...
}
可以看到整个接口中提供了多种获取bean的方法
按照bean名称获取
//根据名字查找(小驼峰)
		HelloController bean2 = (HelloController) context.getBean("helloController");
		System.out.println(bean2);
		bean2.hello();
//传入的类名要是小驼峰,因为Spring会给管理的Bean按照小驼峰的方式命名
Spring官方有一个Bean的命名约定
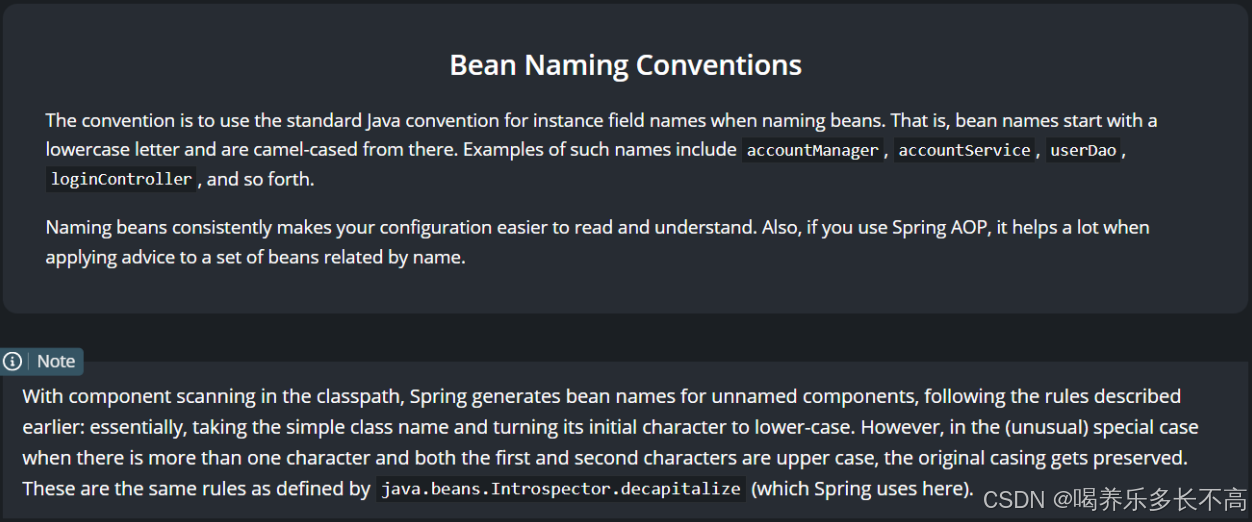
命名约定使用Java标准约定作为Bean的名字,也就是小驼峰比如
UserController -> bean名称:userController
不过也有特殊情况,就是类名的第一个和第二个都是大写时,将会保留原始大小写比如
Ucontroller -> bean名称:UController
通过Bean名称和类型获取Bean对象
//根据名字和类形查找
		HelloController bean3 = context.getBean("helloController",HelloController.class);
		System.out.println(bean3);
		bean3.hello();
这里我们查看一下运行结果(这是和上述两个例子一样的结果)
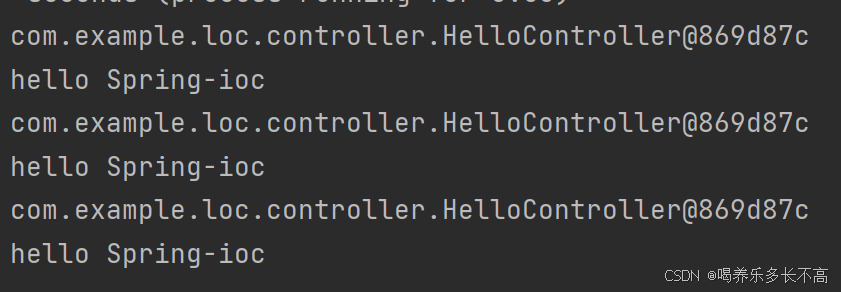 可以看到地址都是一样的,说明这三种方法获取到的是同一个对象,因为Spring管理的对象默认是单例的。
以上就是比较常用的方法,其他的博主在这里就不过多介绍了。
ApplicationContext和BeanFactory
- BeanFactory是在第一次请求获取Bean对象时才进行实例化,ApplicationContext是在容器启动时就一次性加载并初始化所有的Bean对象。
- ApplicationContext属于BeanFactory的子类,它继承了BeanFactory的所有功能之外,还扩展了很多其他功能,比如国际化处理,事件传播,AOP管理等。
- ApplicationContext和BeanFactory都负责管理Bean的生命周期,是Spring中的两个顶级接口
方法注解@Bean
使用方法和类注解一样,只不过@Bean是用来修饰方法,而且@Bean注解需要在类注解注解下的类中使用,返回一个想要交给Spring管理的对象
@Configuration
public class UserConfig {
    @Bean
    public Student student(){
        Student user = new Student();
        user.setName("zhangsan");
        user.setAge(18);
        return user;
    }

}
获取Bean对象
ApplicationContext context = SpringApplication.run(DemoApplication.class,args);
Student student = context.getBean(Student.class);
		System.out.println(student);
同一个类获取多个对象
@Configuration
public class UserConfig {
    @Bean
    public Student student1(){
        Student user = new Student();
        user.setName("zhangsan");
        user.setAge(18);
        return user;
    }
    @Bean
    public Student student2(){
        Student user = new Student();
        user.setName("李四");
        user.setAge(18);
        return user;
    }

}
当一个类有多个Bean注解时获取@Bean修饰的Bean对象不能只用类型的方法查找,因为这些对象的类型都一样,自然也就查找不到,使用就要用Bean名称的方法查找,@Bean修饰的Bean名称就是方法名(也可以名称+类型)。
Student student1 = (Student) context.getBean("student1");
Student student2 = (Student) context.getBean("student2");
System.out.println(student1);
System.out.println(student2);
System.out.println(student1 == student2);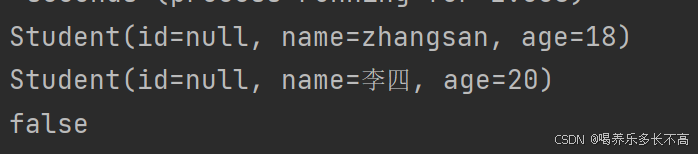 可以看到是两个不同的对象
也可以使用name参数比如@Bean(name = {"s1","student1"})的方式给Bean重命名
扫描路径
并不是所有加了注解的类都能被Spring管理,必须在Spring的扫描路径下的才行,Spring默认的扫描路径就是启动类所在的包路径
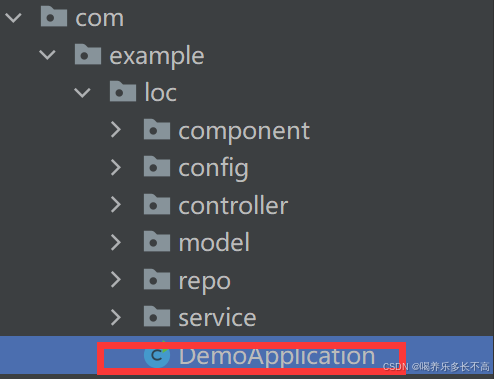
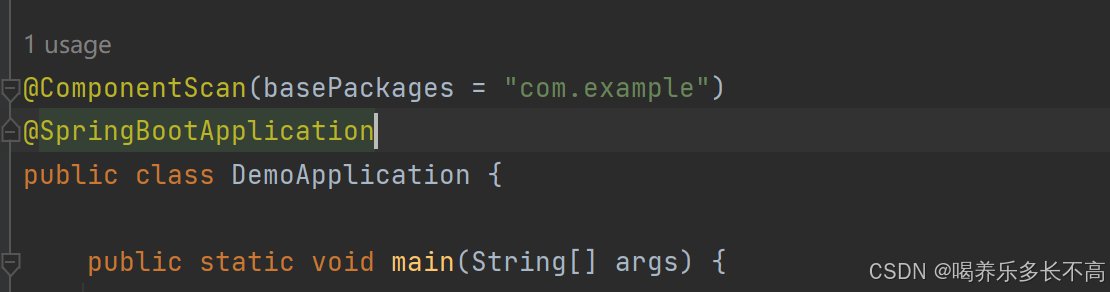
也就是必须在这个类的同级目录或者子目录才可以被Spring管理,如果不在Spring就扫描不到,不过也可以使用@ComponentScan注解手动添加扫描路径,相当于告诉Spring除了默认的路径,还要再额外加一些扫描路径。
DI
前面讲述的大多都是IOC,现在来讲讲DI(依赖注入)的细节,依赖注入就是,IOC容器在创建Bean时,去提供运行时所依赖的资源(对象),其实就是把Spring管理的对象取出来,放到某个类属性里,(可以使用@Autowired完成依赖注入操作)。
Spring给我们提供了三种依赖注入的方法
- 属性注入
- 构造方法注入
- Setter方法注入
这里将Service注入到Controller中
属性注入
Service
@Service
public class UserService {
    public void hello(){
        System.out.println("hello service");
    }
}
controller(借助@Autowired注解)
@Controller
public class HelloController {
//属性注入
@Autowired
private UserService service;
public void hello(){
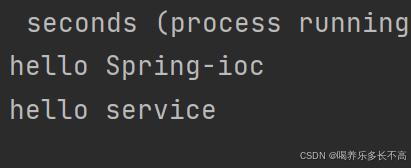
System.out.println("hello Spring-ioc");
service.hello();
}
}获取controller
ApplicationContext context = SpringApplication.run(DemoApplication.class,args);
		HelloController controller = context.getBean(HelloController.class);
		controller.hello();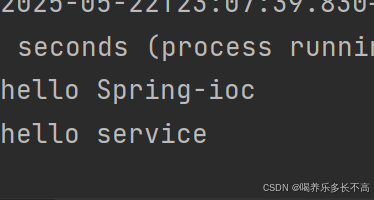
//这里的@Autowired作用就相当于给service属性赋值
构造方法注入
交给Spring管理的类,Spring会使用反射获取到对应类的构造方法来创建对象
controller
@Controller
public class HelloController {
    //属性注入

    private UserService service;
    @Autowired
    public HelloController(UserService service){
        this.service = service;
    }
    public void hello(){
        System.out.println("hello Spring-ioc");
        service.hello();
    }
}
//如果类只有⼀个构造方法,那么@Autowired注解可以省略;如果类中有多个构造方法, 那么需要添加上@Autowired来明确指定到底使用哪个构造方法
Setter方法注入
使用方法其实和用构造方法注入差不多
@Controller
public class HelloController {
    //属性注入

    private UserService service;
    @Autowired
    public void Setter(UserService userService){
        this.service = service;
    }
    public void hello(){
        System.out.println("hello Spring-ioc");
        service.hello();
    }
}
三种注入方法的优缺点
属性注入
- 优点:简洁,使用方便。
- 缺点:只能用于IoC容器,非IoC容器不可用,并且只有在使用的时候才会出现空指针异常,不能注入一个Final修饰的属性。
构造函数注入
优点:
- 可以注入final修饰的属性。
- 注入的对象不会被修改。
- 依赖对象在使用前一定会被完全初始化,因为依赖是在类的构造方法中执行的,而构造方法是在类加载阶段就会执行的方法。
- 通用性好,构造方法是JDK支持的,所以更换任何框架,它都是适用的。
缺点:
- 注入多个对象时,代码会比较繁琐。
Setter注入
- 优点:方便在类实例化之后,重新对该对象进行配置或者注入。
- 缺点:不能注入一个Final修饰的属性。
@Autowied存在的问题
当同⼀类型存在多个bean时,使用@Autowired会存在问题
controller
@Controller
public class HelloController {
    //属性注入
    @Autowired
    private Student student;
    @Autowired//通过注入获得student对象
    private UserService service;

    public void hello(){
        System.out.println("hello Spring-ioc");
        System.out.println(student);
    }
}
config
@Configuration
public class UserConfig {

    @Bean
    public Student student1(){
        Student user = new Student();
        user.setName("zhangsan");
        user.setAge(18);
        return user;
    }
    @Bean
    public Student student2(){
        Student user = new Student();
        user.setName("李四");
        user.setAge(20);
        return user;
    }

}
看以看到此时就报了一个错,显示是非唯一的Bean对象。使用@Autowired注入时,Spring会先根据对象的类型去寻找Bean对象,如果找到多个相同类型的Bean就根据名称再寻找。
解决方法
Spring提供了三种解决方法分别是@Primary,@Qualifier,@Resource。
@Primary:当存在多个相同类型的Bean时,可以通过@Primary注解来缺点默认bean的实现
@Configuration
public class UserConfig {
    @Primary
    @Bean
    public Student student1(){
        Student user = new Student();
        user.setName("zhangsan");
        user.setAge(18);
        return user;
    }
    @Bean
    public Student student2(){
        Student user = new Student();
        user.setName("李四");
        user.setAge(20);
        return user;
    }

}
通过这种方法Spring就会直接使用第一个加了@Primary注解的Bean。
@Qualifier:指定当前要注⼊的bean对象。在@Qualifier的value属性中,可以指定注入的bean 的名称。但是Qualifier必须和@Autowired一起使用
@Controller
public class HelloController {
    //属性注入
    @Qualifier("student2")
    @Autowired
    private Student student;
    @Autowired
    private UserService service;

    public void hello(){
        System.out.println("hello Spring-ioc");
        service.hello();
        System.out.println(student);
        student.hello();
    }
}
@Resource:是按照bean的名称进行注⼊。通过name属性指定要注⼊的bean的名称
@Controller
public class HelloController {
    //属性注入
    @Resource(name = "student2")
    private Student student;
    public void hello(){

        System.out.println(student);
        student.hello();
    }
}
@Autowird和@Resource的区别
- @Autowird是Spring框架提供的注解,而@Resource是JDK提供的注解
- @Autowired默认是按照类型注入,而@Resource是按照名称注入.相比于@Autowired来说,@Resource支持更多的参数设置,例如name设置,根据名称获取Bean.
@Autowird装配顺序