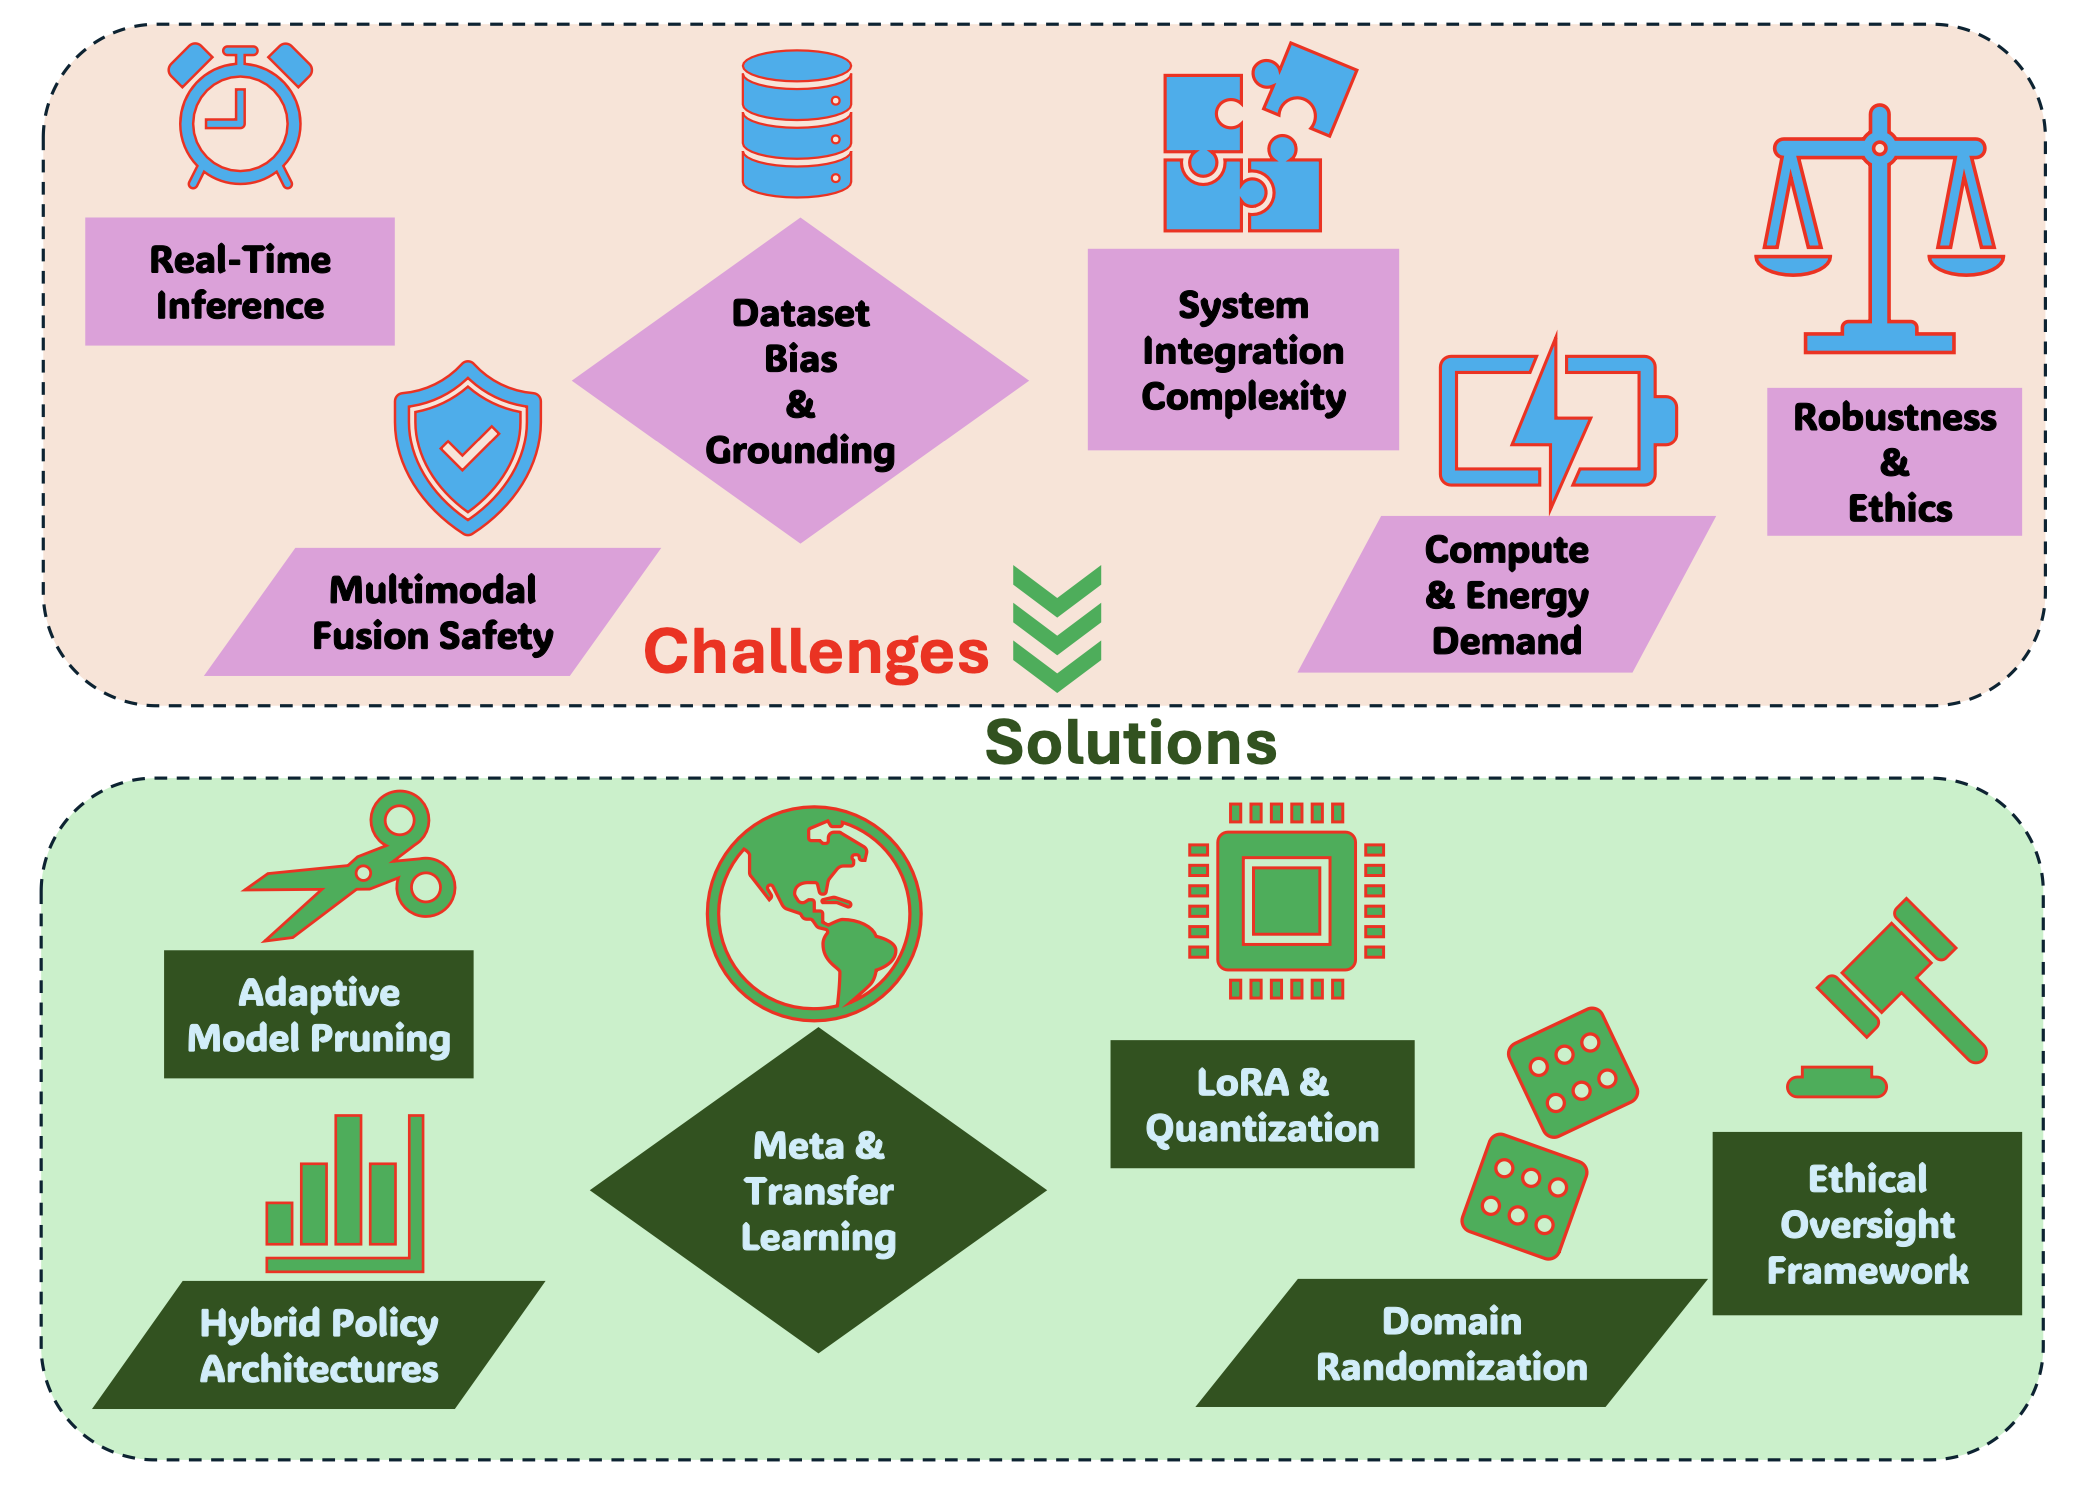
1. 项目背景
在现代Web应用中,高可用性和负载均衡是两个至关重要的需求。本项目旨在通过HAProxy实现流量分发,通过Keepalived实现高可用性,通过Nginx提供后端服务。该架构能够确保在单点故障的情况下,系统仍然能够正常运行,并且能够均衡地分配流量到多个后端服务器。
2. 环境准备
2.1 服务器配置
| 角色 | IP 地址 | 服务器名称 | 功能描述 |
|---|---|---|---|
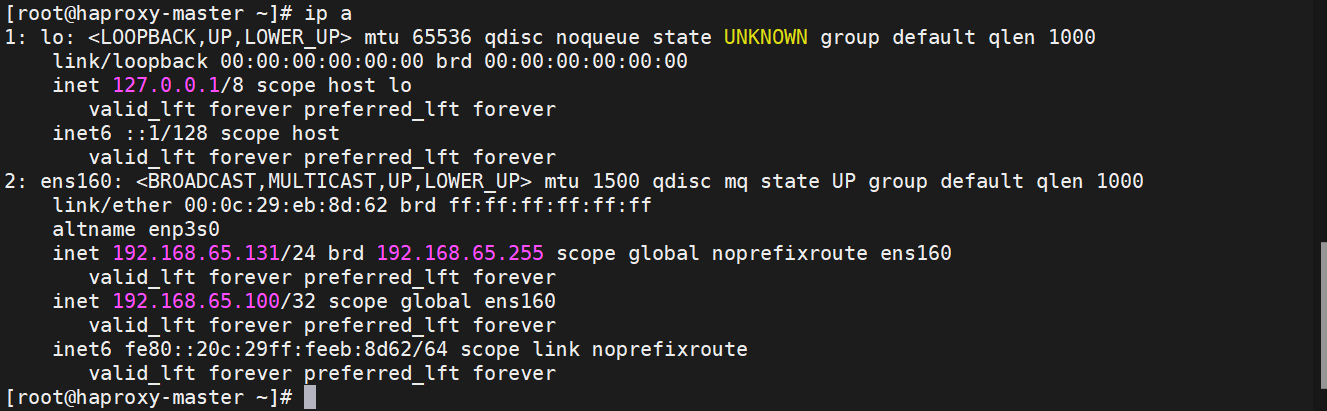
| HAProxy 主节点 | 192.168.65.131 | haproxy-master | 负载均衡器(主) |
| HAProxy 备节点 | 192.168.65.132 | haproxy-backup | 负载均衡器(备) |
| 后端 Web 服务器 1 | 192.168.65.133 | webserver1 | 提供 Web 服务 |
| 后端 Web 服务器 2 | 192.168.65.134 | webserver2 | 提供 Web 服务 |
| 虚拟 IP | 192.168.65.100 | - | 用于 Keepalived 高可用 |
2.2 软件需求
| 服务器角色 | 需要安装的软件 |
|---|---|
| HAProxy 主节点 | HAProxy, Keepalived |
| HAProxy 备节点 | HAProxy, Keepalived |
| 后端 Web 服务器 | Nginx |
3. 服务器网络环境配置
3.1 设置静态IP地址
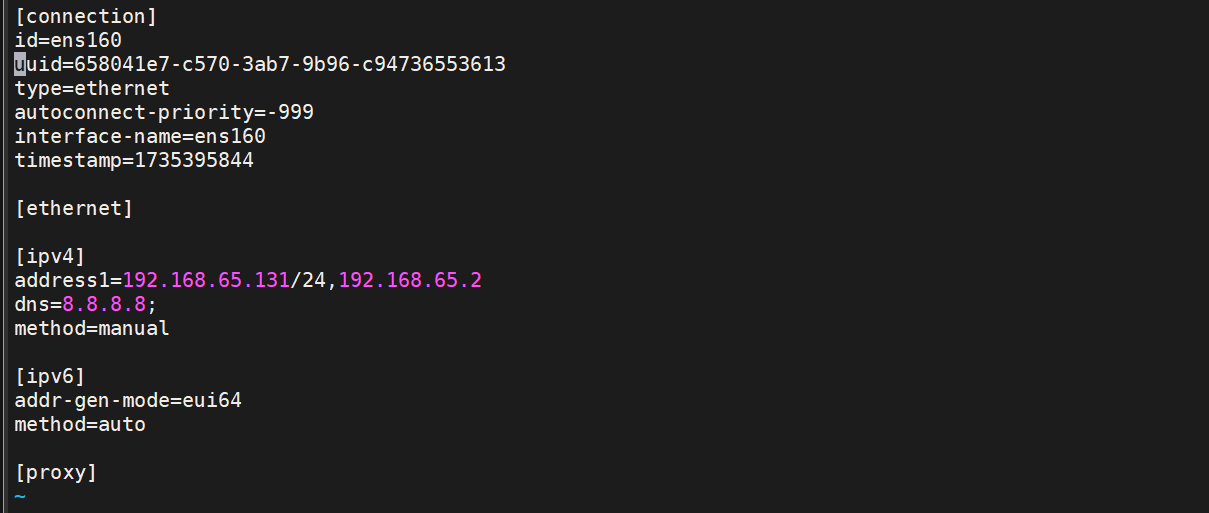
为确保服务器在重启后仍能保持固定的网络配置,在rhel9系统中,需要为每台服务器设置静态IP地址。编辑 /etc/NetworkManager/system-connections/ens160.nmconnection文件:
[ipv4]
address1=192.168.65.131/24,192.168.65.2
dns=8.8.8.8;
method=manual
3.2 配置主机名和主机映射
为便于在集群环境中快速识别和管理各服务器,需要为每台服务器配置主机名。
HAProxy 主节点(192.168.65.131)
-
设置主机名
sudo hostnamectl set-hostname haproxy-master -
更新
/etc/hosts文件sudo vi /etc/hosts添加以下内容:
127.0.0.1   haproxy-master
192.168.65.131 haproxy-master
192.168.65.132 haproxy-backup
192.168.65.133 webserver1
192.168.65.134 webserver2
HAProxy 备节点(192.168.65.132)
-
设置主机名
sudo hostnamectl set-hostname haproxy-backup -
更新
/etc/hosts文件sudo vi /etc/hosts添加以下内容:
127.0.0.1   haproxy-backup
192.168.65.131 haproxy-master
192.168.65.132 haproxy-backup
192.168.65.133 webserver1
192.168.65.134 webserver2
后端 Web 服务器 1(192.168.65.133)
-
设置主机名
sudo hostnamectl set-hostname webserver1 -
更新
/etc/hosts文件sudo vi /etc/hosts添加以下内容:
127.0.0.1   webserver1
192.168.65.131 haproxy-master
192.168.65.132 haproxy-backup
192.168.65.133 webserver1
192.168.65.134 webserver2
后端 Web 服务器 2(192.168.65.134)
-
设置主机名
sudo hostnamectl set-hostname webserver2 -
更新
/etc/hosts文件sudo vi /etc/hosts添加以下内容:
127.0.0.1   webserver2
192.168.65.131 haproxy-master
192.168.65.132 haproxy-backup
192.168.65.133 webserver1
192.168.65.134 webserver2
3.3 永久关闭selinux
sudo sed -i 's/^SELINUX=.*/SELINUX=disabled/' /etc/selinux/config重启并查看
reboot
getenforce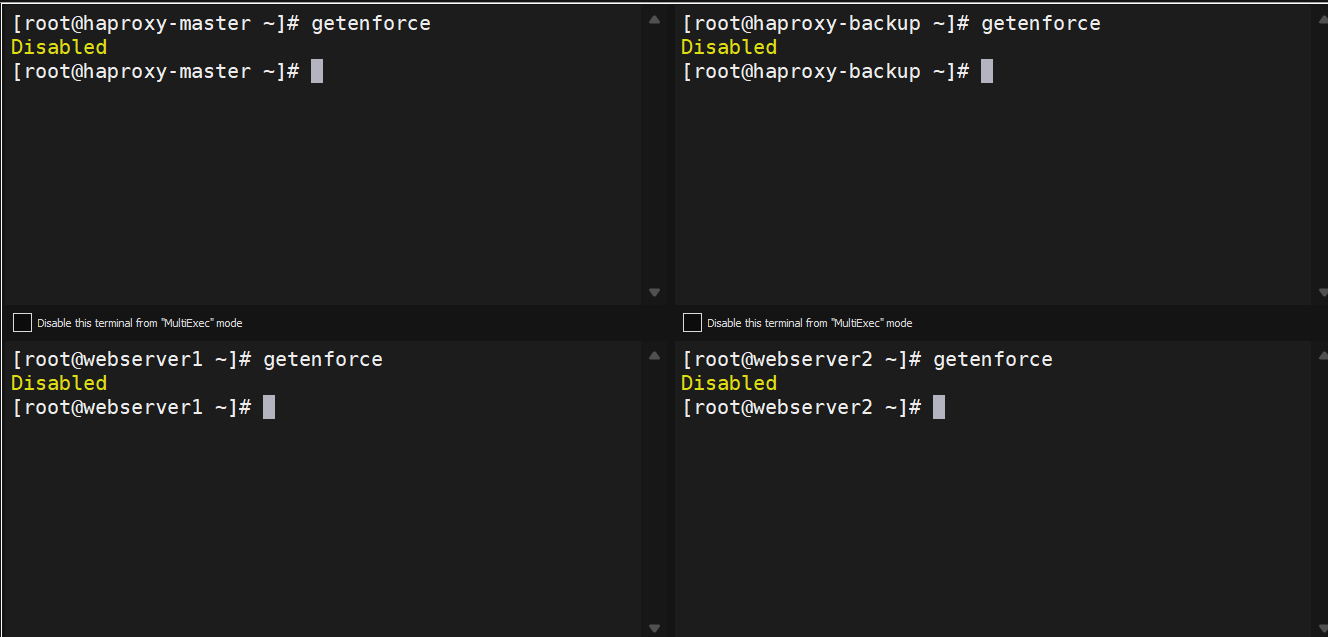
3.4 配置防火墙规则
为保障网络安全,需要优化防火墙规则,开启必要的服务端口,同时关闭不必要的端口。使用 firewalld 配置防火墙:
# 开启HAProxy的80端口
firewall-cmd --zone=public --add-port=80/tcp --permanent
firewall-cmd --reload

# 开启Keepalived的VRRP端口
firewall-cmd --zone=public --add-port=112/udp --permanent
firewall-cmd --reload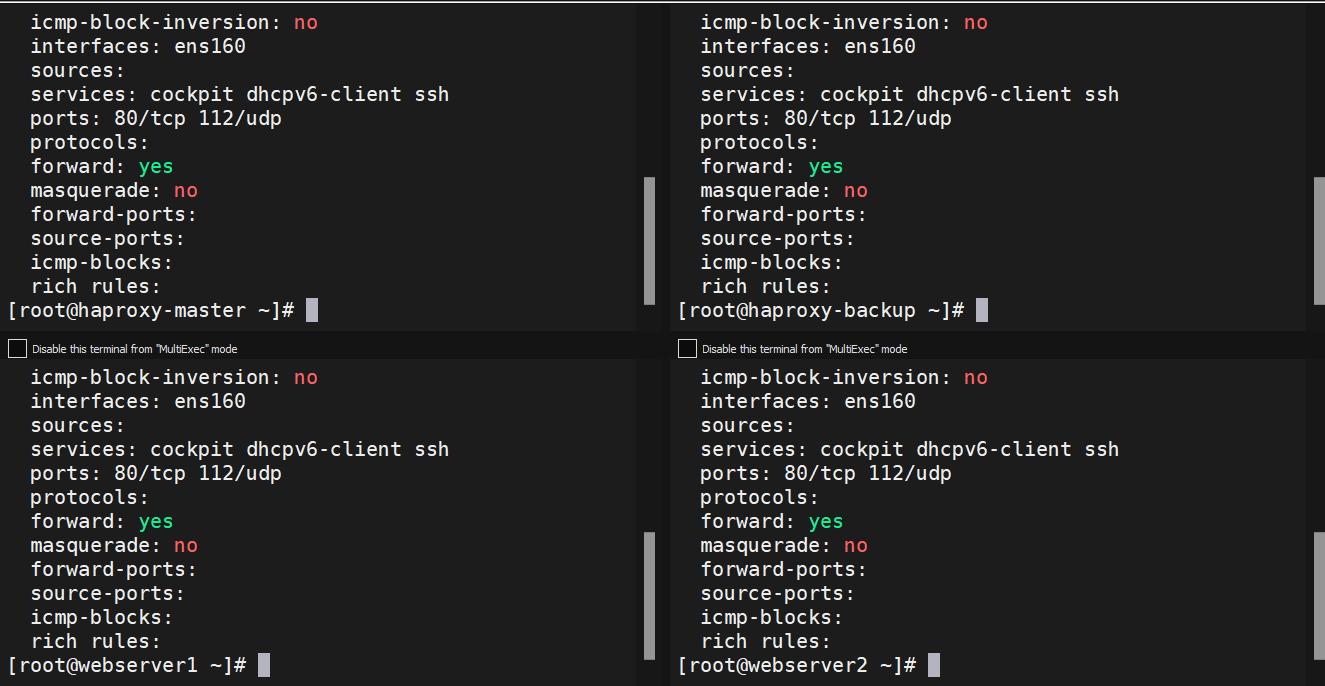
3.5 实现SSH免密登录
为提高运维效率并减少人为错误,需要实现SSH免密登录。生成SSH密钥对,并将公钥复制到所有服务器:
# 在主节点生成密钥对
ssh-keygen -t rsa

# 将公钥复制到其他服务器
ssh-copy-id haproxy-backup
ssh-copy-id webserver1
ssh-copy-id webserver2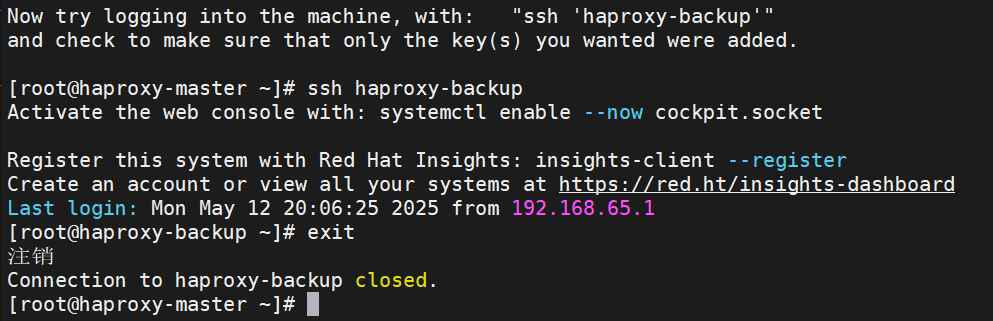
4. 软件安装与配置
4.1 HAProxy 主节点和备节点配置
4.1.1 安装 HAProxy 和 Keepalived
在HAProxy主节点和备节点上安装必要的软件:
yum install -y haproxy keepalived4.1.2 配置 HAProxy
编辑 /etc/haproxy/haproxy.cfg 文件,配置HAProxy以实现流量分发到后端Web服务器:
global
    log /dev/log local0
    log /dev/log local1 notice
    chroot /var/lib/haproxy
    user haproxy
    group haproxy
    daemon

defaults
    log     global
    mode    http
    option  httplog
    option  dontlognull
    timeout connect 5000
    timeout client  50000
    timeout server  50000

frontend http_front
    bind *:80
    default_backend http_back

backend http_back
    balance roundrobin
    server web1 192.168.65.133:80 check
    server web2 192.168.65.134:80 check
4.1.3 配置 Keepalived
编辑 /etc/keepalived/keepalived.conf 文件,配置Keepalived以实现主备切换,确保高可用性:
主节点(192.168.65.131):
global_defs {
     router_id SERVER1
}
vrrp_instance VI_1 {
      state MASTER
      interface ens160
      virtual_router_id 51
      priority 100
      advert_int 1
      authentication {
          auth_type PASS
          auth_pass 1234
      }
      virtual_ipaddress {
          192.168.65.100
      }
}备节点(192.168.65.132):
global_defs {
     router_id SERVER2
}
vrrp_instance VI_1 {
      state BACKUP
      interface ens160
      virtual_router_id 51
      priority 90
      advert_int 1
      authentication {
          auth_type PASS
          auth_pass 1234
      }
      virtual_ipaddress {
          192.168.65.100
      }
}
4.1.4 启动服务
启动并启用HAProxy和Keepalived服务,确保配置生效:
sudo systemctl enable haproxy
sudo systemctl start haproxy
sudo systemctl enable keepalived
sudo systemctl start keepalived
keepalived主节点(192.168.65.131):成功获取vip:192.168.100
 keepalived备节点(192.168.65.132):没有获取vip,正常
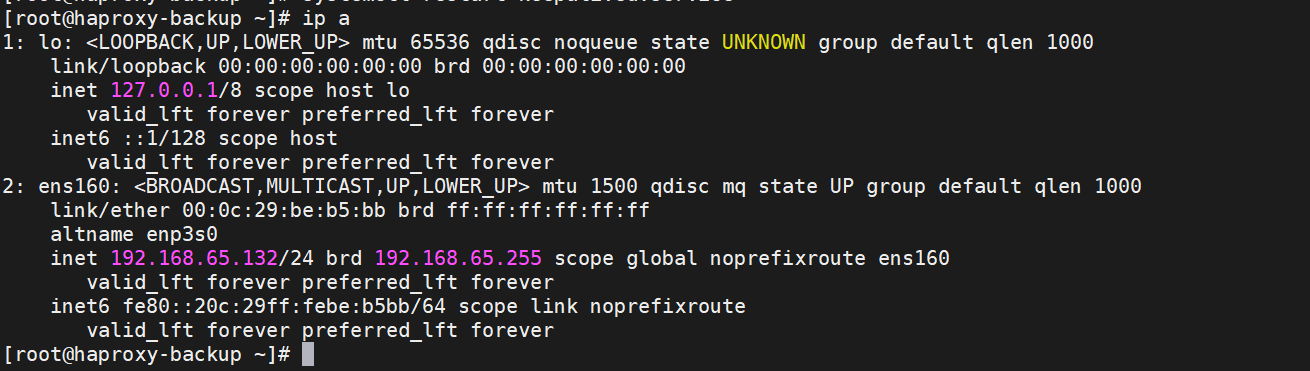
4.2 后端 Web 服务器配置
4.2.1 安装 Nginx
在后端Web服务器上安装Nginx,为用户提供Web服务:
sudo yum install -y nginx4.2.2 配置 Nginx
编辑 /etc/nginx/conf.d/test1.conf 和 /etc/nginx/conf.d/test2.conf 文件,配置Nginx以响应HTTP请求,并返回服务器标识信息:
Web服务器1(192.168.65.133):
server {
    listen 80;
    location / {
        return 200 "Welcome to Web Server webserver1\n";
    }
}Web服务器2(192.168.65.134):
server {
    listen 80;
    location / {
        return 200 "Welcome to Web Server webserver2\n";
    }
}
4.2.3 启动 Nginx并测试
启动并启用Nginx服务,确保其正常运行:
sudo systemctl enable nginx
sudo systemctl start nginx

5. 测试与验证
5.1 验证 HAProxy 和 Keepalived
5.1.1 正常访问测试
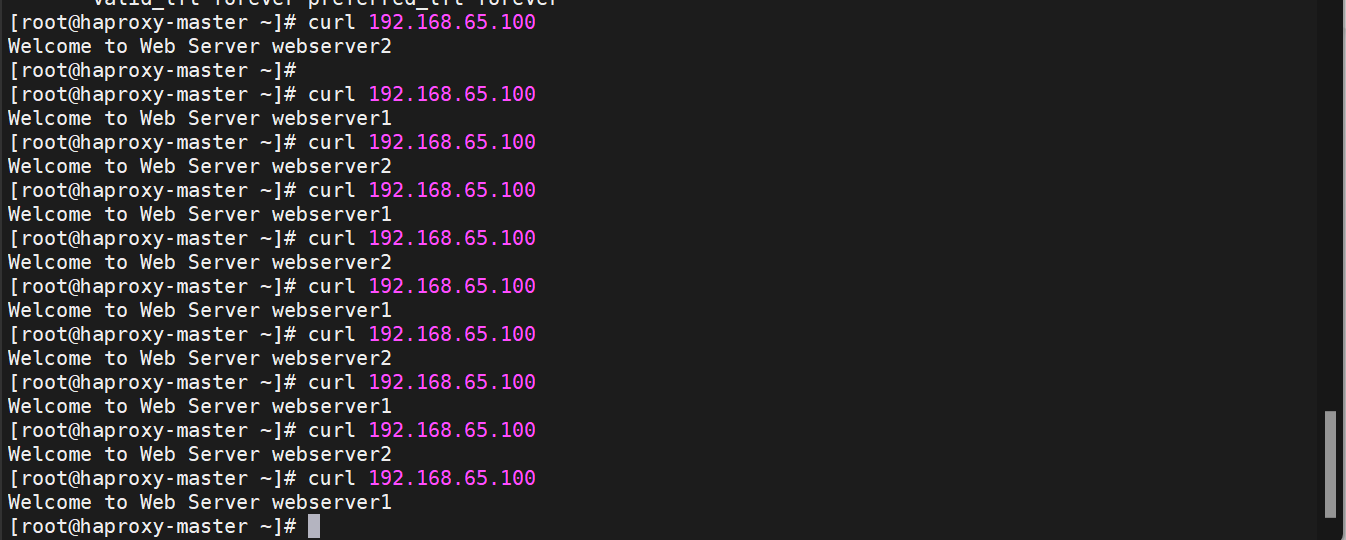
验证客户端是否能够通过虚拟IP正常访问后端服务器:
curl 192.168.65.100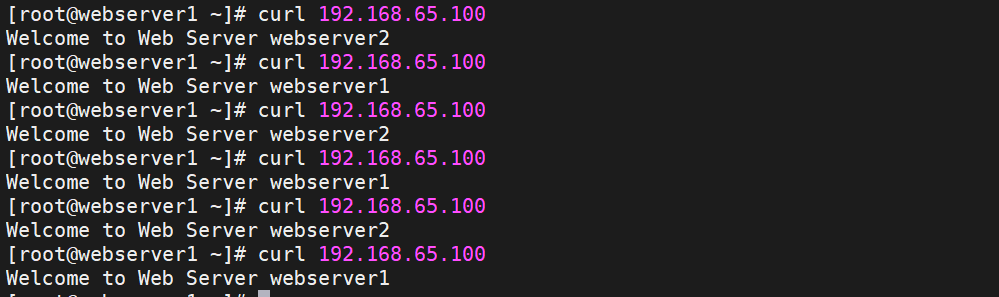
预期结果: 返回 Welcome to Web Server webserver1 或 Welcome to Web Server webserver2。
5.1.2 主节点故障模拟
验证在主节点故障时,备节点是否能够正常接管虚拟IP:
-
在主节点(192.168.65.131)上停止Keepalived服务
systemctl stop keepalived -
在客户端再次访问虚拟IP,观察响应内容。
预期结果: 备节点接管虚拟IP,客户端仍能正常访问后端服务器。
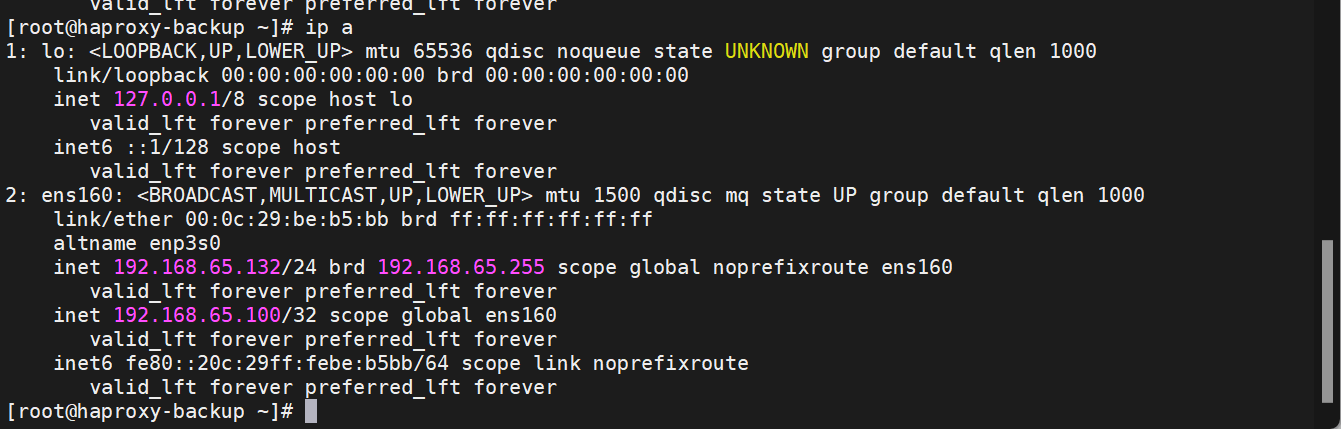
主节点(192.168.65.131)失去vip
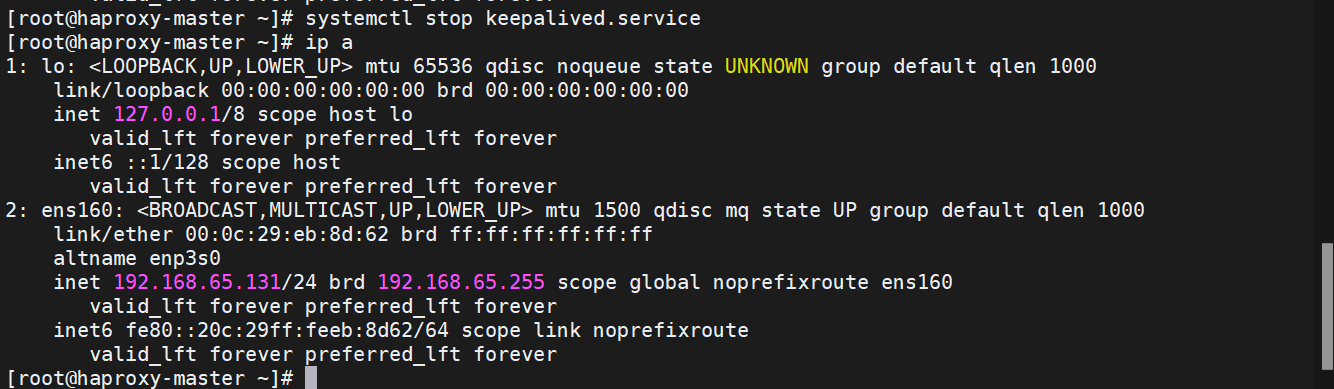
备用节点(192.168.65.132)成功获取vip
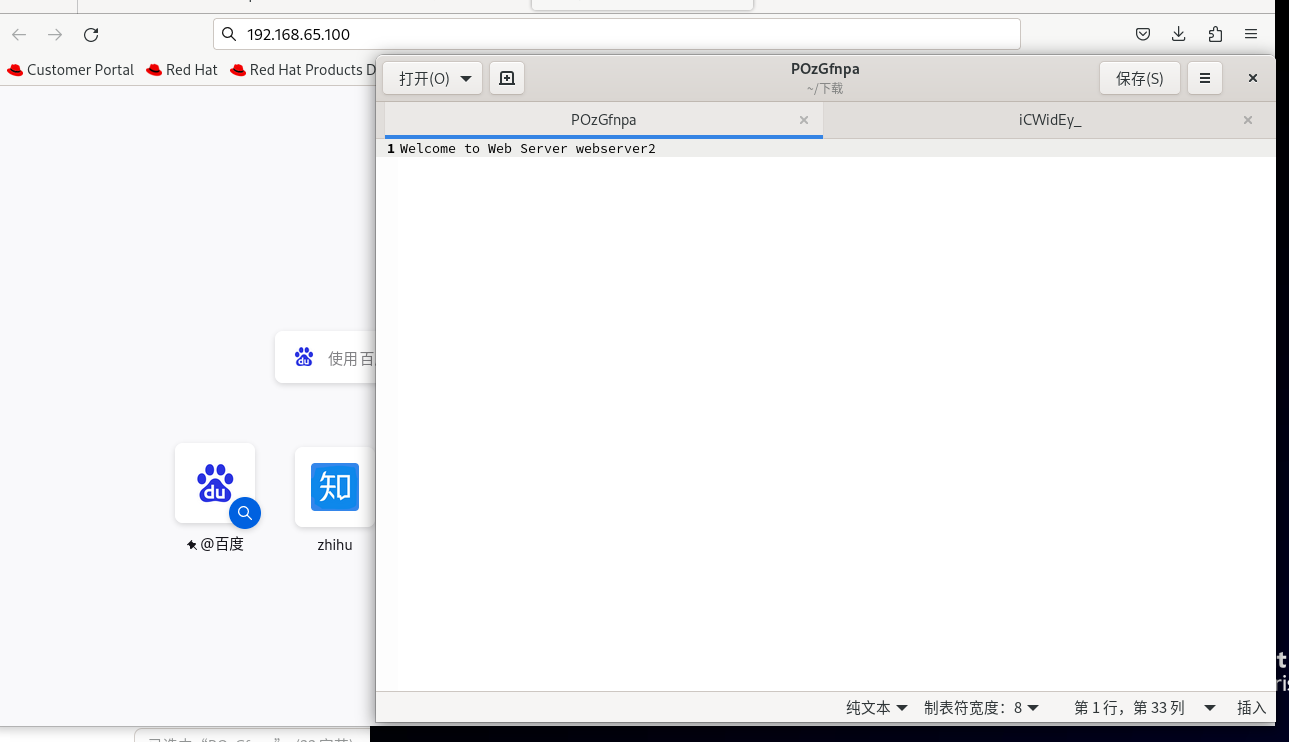
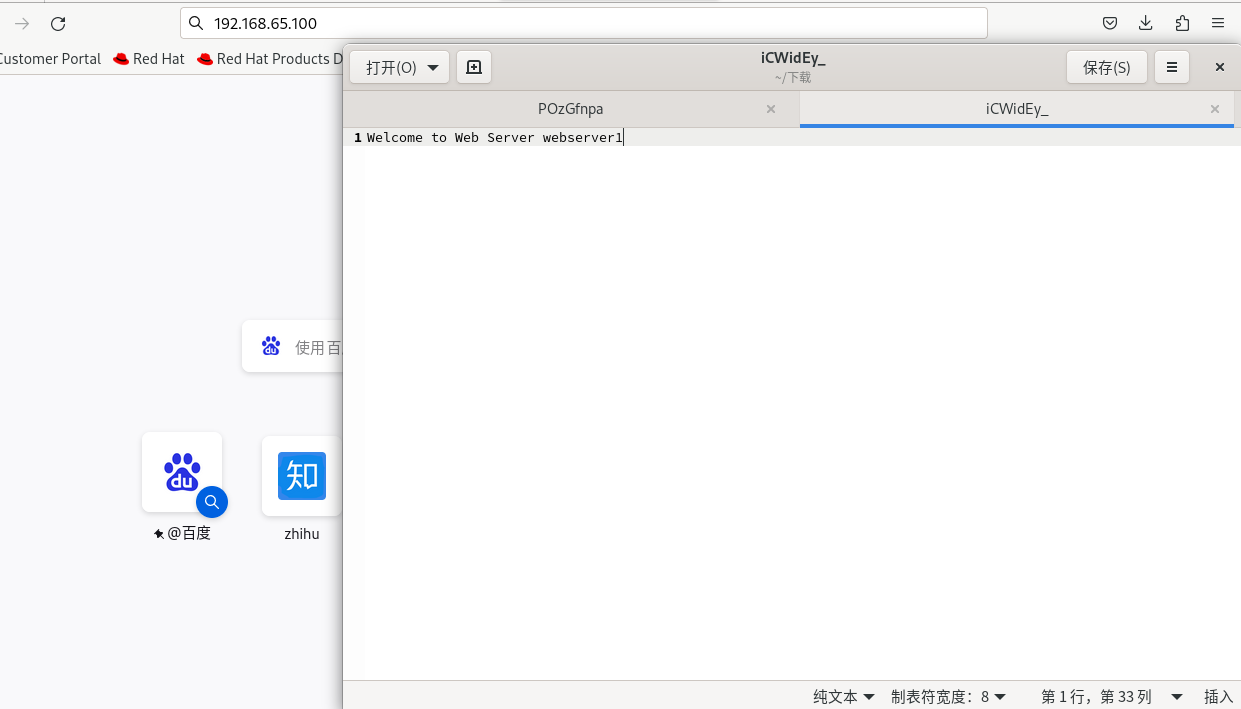
5.2 验证 Nginx
验证后端服务器的Nginx服务是否正常运行:
curl http://192.168.65.133
curl http://192.168.65.134预期结果: 分别返回 Welcome to Web Server webserver1和 Welcome to Web Server webserver2。