文章目录
- 1.概述
- 1.1 SpringMVC快速入门
- 2. 请求
- 2.1 加载控制
- 2.2 请求的映射路径
- 2.3 get和post请求发送
- 2.4 五种请求参数种类
- 2.5 传递JSON数据
- 2.6 日期类型参数传递
- 3.响应
- 3.1 响应格式
- 4.REST风格
- 4.1 介绍
- 4.2 RESTful快速入门
- 4.3 简化操作
1.概述
SpringMVC是一个基于Java的Web应用程序框架,用于构建灵活和可扩展的MVC(Model-View-Controller)架构的Web应用程序。
- 它是
Spring框架的一部分,旨在简化Web应用程序的开发过程。- SpringMVC技术与Servlet技术功能等同,属于
WEB层开发技术。SpringMVC优点:
- 简化WEB层开发;
- 与Spring、SpringBoot等框架集成;
- 提供强大的约定大于配置的契约式编程支持;
- 支持REST风格;
1.1 SpringMVC快速入门
步骤:
- 创建maven-web工程
- 添加spring-webmvc依赖
- 准备controller类(处理浏览器请求的接口)
- 创建配置文件
- 定义一个用于配置Servlet容器的初始化类,加载spring配置
- 启用测试
<project xmlns="http://maven.apache.org/POM/4.0.0" xmlns:xsi="http://www.w3.org/2001/XMLSchema-instance"
  xsi:schemaLocation="http://maven.apache.org/POM/4.0.0 http://maven.apache.org/maven-v4_0_0.xsd">
  <modelVersion>4.0.0</modelVersion>
  <groupId>com.imooc</groupId>
  <artifactId>springmvc-demo</artifactId>
  <packaging>war</packaging>
  <version>1.0-SNAPSHOT</version>

  <url>http://maven.apache.org</url>
  <dependencies>
    <dependency>
      <groupId>junit</groupId>
      <artifactId>junit</artifactId>
      <version>3.8.1</version>
      <scope>test</scope>
    </dependency>

    <dependency>
      <groupId>org.springframework</groupId>
      <artifactId>spring-webmvc</artifactId>
      <version>5.2.9.RELEASE</version>
    </dependency>

    <dependency>
      <groupId>javax.servlet</groupId>
      <artifactId>javax.servlet-api</artifactId>
      <version>3.1.0</version>
      <scope>provided</scope>
    </dependency>

  </dependencies>
  <build>
    <plugins>
      <plugin>
        <groupId>org.apache.tomcat.maven</groupId>
        <artifactId>tomcat7-maven-plugin</artifactId>
        <version>2.2</version>
        <configuration>
          <port>81</port>
          <path></path>
        </configuration>
      </plugin>
    </plugins>
  </build>
</project>
package it.controller;

import org.springframework.stereotype.Controller;
import org.springframework.web.bind.annotation.RequestMapping;
import org.springframework.web.bind.annotation.ResponseBody;
import org.springframework.web.servlet.ModelAndView;


//3.创建控制器(等同于servlet)
@Controller
public class MyController {
    //设置当前操作的请求路径
    @RequestMapping("/save")
    //设置当前操作的返回类型
    @ResponseBody
    public String save(){
        System.out.println("user saving...");
        return "{'info':'springmvc'}";
    }
}


-------------------------------------------------------------------------------------
package it.conf;

import org.springframework.context.annotation.ComponentScan;
import org.springframework.context.annotation.Configuration;

//4.创建springmvc的配置文件,加载controller对应的bean
@Configuration
@ComponentScan("it.controller")
public class SpringMvcConfig {
}

------------------------------------------------------------------------------------------------
package it.conf;

import org.springframework.web.context.WebApplicationContext;
import org.springframework.web.context.support.AnnotationConfigWebApplicationContext;
import org.springframework.web.servlet.support.AbstractDispatcherServletInitializer;

//
//5.定义一个用于配置Servlet容器的初始化类,加载spring配置
public class ServletContainersInitConfig extends AbstractDispatcherServletInitializer {
    //创建Servlet应用程序上下文,加载springmvc容器配置
    @Override
    protected WebApplicationContext createServletApplicationContext() {
        AnnotationConfigWebApplicationContext context = new AnnotationConfigWebApplicationContext();
        context.register(SpringMvcConfig.class);
        return context;
    }

    //配置DispatcherServlet映射的URL路径,设置哪些请求归属springmvc处理
    //{"/"}表示所有请求
    @Override
    protected String[] getServletMappings() {
        return new String[]{"/"};
    }

    //创建根应用程序上下文,加载spring容器配置
    @Override
    protected WebApplicationContext createRootApplicationContext() {
        return null;
    }
}

2. 请求
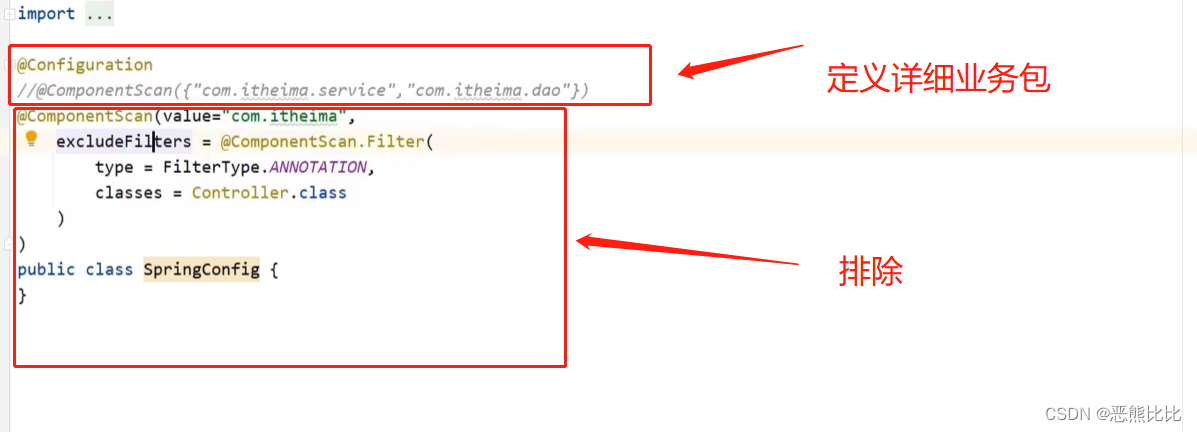
2.1 加载控制
Spring相关bean
- 业务bean(Service)
- 功能bean(DataSource)
SpringMVC相关bean
- 表现bean
不同的bean都是通过@controller 定义如何避免扫描混乱?
配置Servlet容器的初始化,并加载Spring和Spring MVC的配置的两种方式:
方法1:继承自AbstractDispatcherServletInitializer
package it.conf;

import org.springframework.web.context.WebApplicationContext;
import org.springframework.web.context.support.AnnotationConfigWebApplicationContext;
import org.springframework.web.servlet.support.AbstractDispatcherServletInitializer;

//
//定义一个用于配置Servlet容器的初始化类,加载spring配置
public class ServletContainersInitConfig extends AbstractDispatcherServletInitializer {
    //创建Servlet应用程序上下文,加载springmvc容器配置
    @Override
    protected WebApplicationContext createServletApplicationContext() {
        AnnotationConfigWebApplicationContext context = new AnnotationConfigWebApplicationContext();
        context.register(SpringMvcConfig.class);
        return context;
    }

    //配置DispatcherServlet映射的URL路径,设置哪些请求归属springmvc处理
    //{"/"}表示所有请求
    @Override
    protected String[] getServletMappings() {
        return new String[]{"/"};
    }

    //创建根应用程序上下文,加载spring容器配置
    @Override
    protected WebApplicationContext createRootApplicationContext() {
        AnnotationConfigWebApplicationContext context = new AnnotationConfigWebApplicationContext();
        context.register(SpringConfig.class);
        return context;
    }
}
方法2:继承自AbstractAnnotationConfigDispatcherServletInitializer类
package it.conf;

import org.springframework.web.context.WebApplicationContext;
import org.springframework.web.context.support.AnnotationConfigWebApplicationContext;
import org.springframework.web.servlet.support.AbstractAnnotationConfigDispatcherServletInitializer;
import org.springframework.web.servlet.support.AbstractDispatcherServletInitializer;

//
//定义一个用于配置Servlet容器的初始化类,加载spring配置
public class ServletContainersInitConfigg extends AbstractAnnotationConfigDispatcherServletInitializer {

    @Override
    protected Class<?>[] getRootConfigClasses() {
        return new Class[]{SpringConfig.class};
    }

    @Override
    protected Class<?>[] getServletConfigClasses() {
        return new Class[]{SpringMvcConfig.class};
    }

    @Override
    protected String[] getServletMappings() {
        return new String[]{"/"};
    }
}
2.2 请求的映射路径
避免不同控制器中有相同的请求映射,每个控制器类中要加应该请求路径前缀,用于区分不同的请求
@Controller
@RequestMapping("/book")   //请求路径的前缀
public class BookController {
    @RequestMapping("/save")  //请求映射
    @ResponseBody
    public String save(){
        System.out.println("book save");
        return "{'module':'book save'}";
    }

    @RequestMapping("/delete")
    @ResponseBody
    public String delete(){
        System.out.println("book delete");
        return "{'module':'book save'}";
    }
}

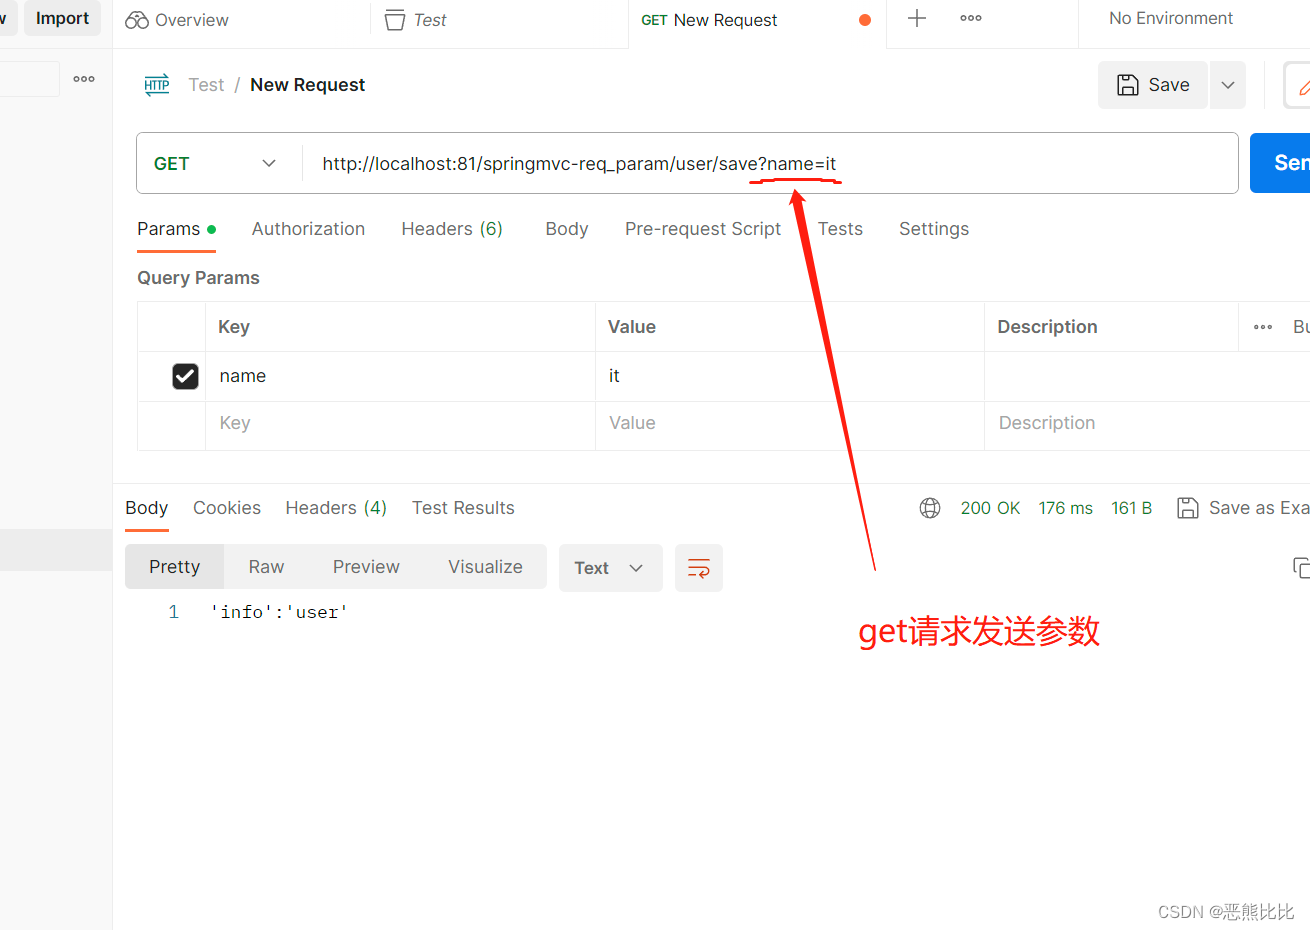
2.3 get和post请求发送
get请求
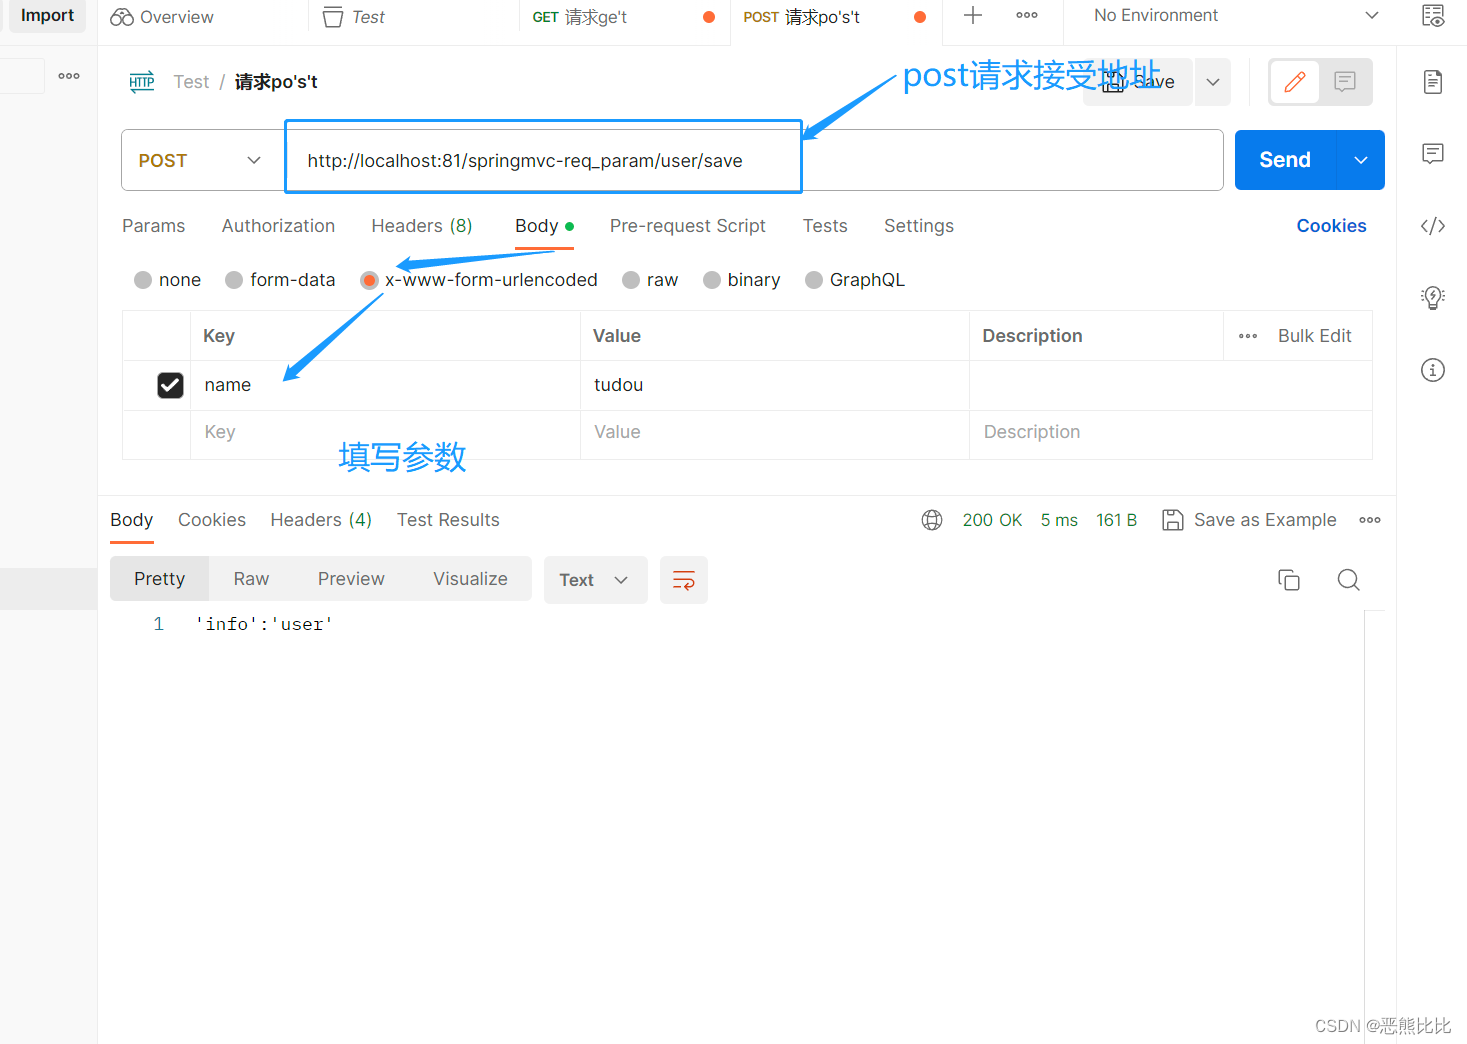
post请求
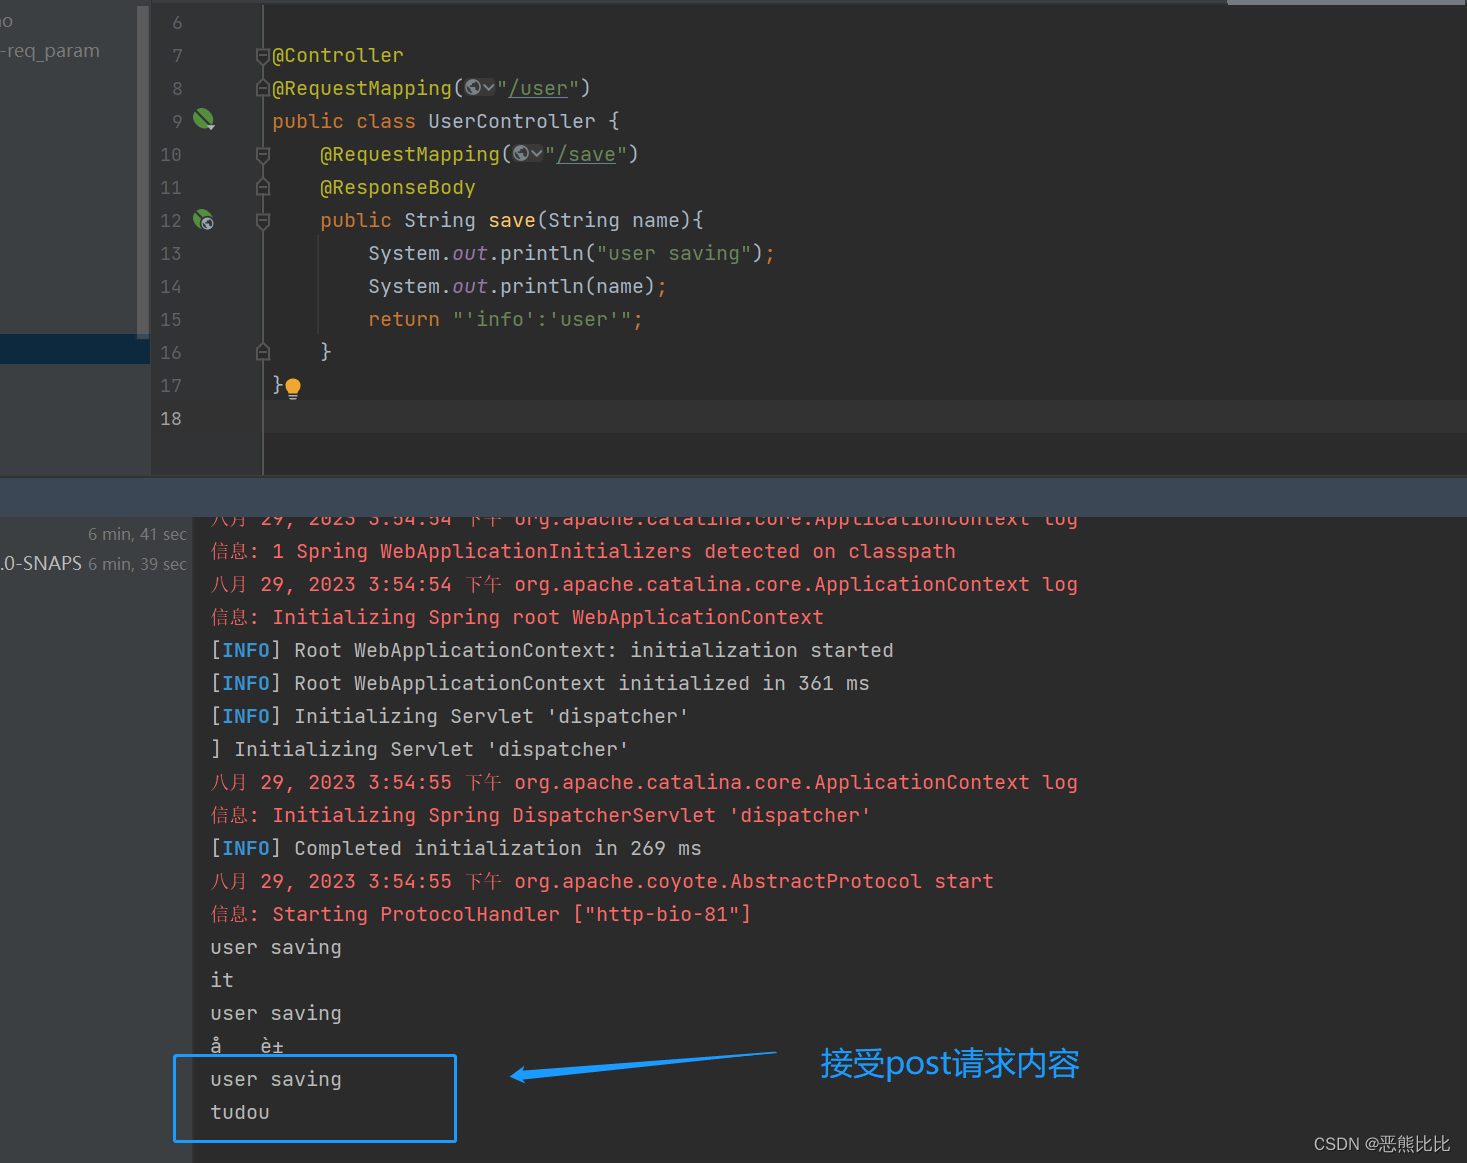
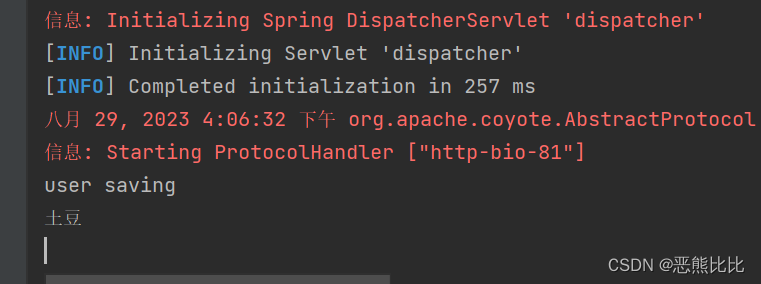
解决中文乱码问题
- 在Springmvc的Servlet容器配置中添加过滤器
@Override
    protected Filter[] getServletFilters() {
        CharacterEncodingFilter characterEncodingFilter = new CharacterEncodingFilter();
        characterEncodingFilter.setEncoding("utf-8");
        return new Filter[]{characterEncodingFilter};
    }
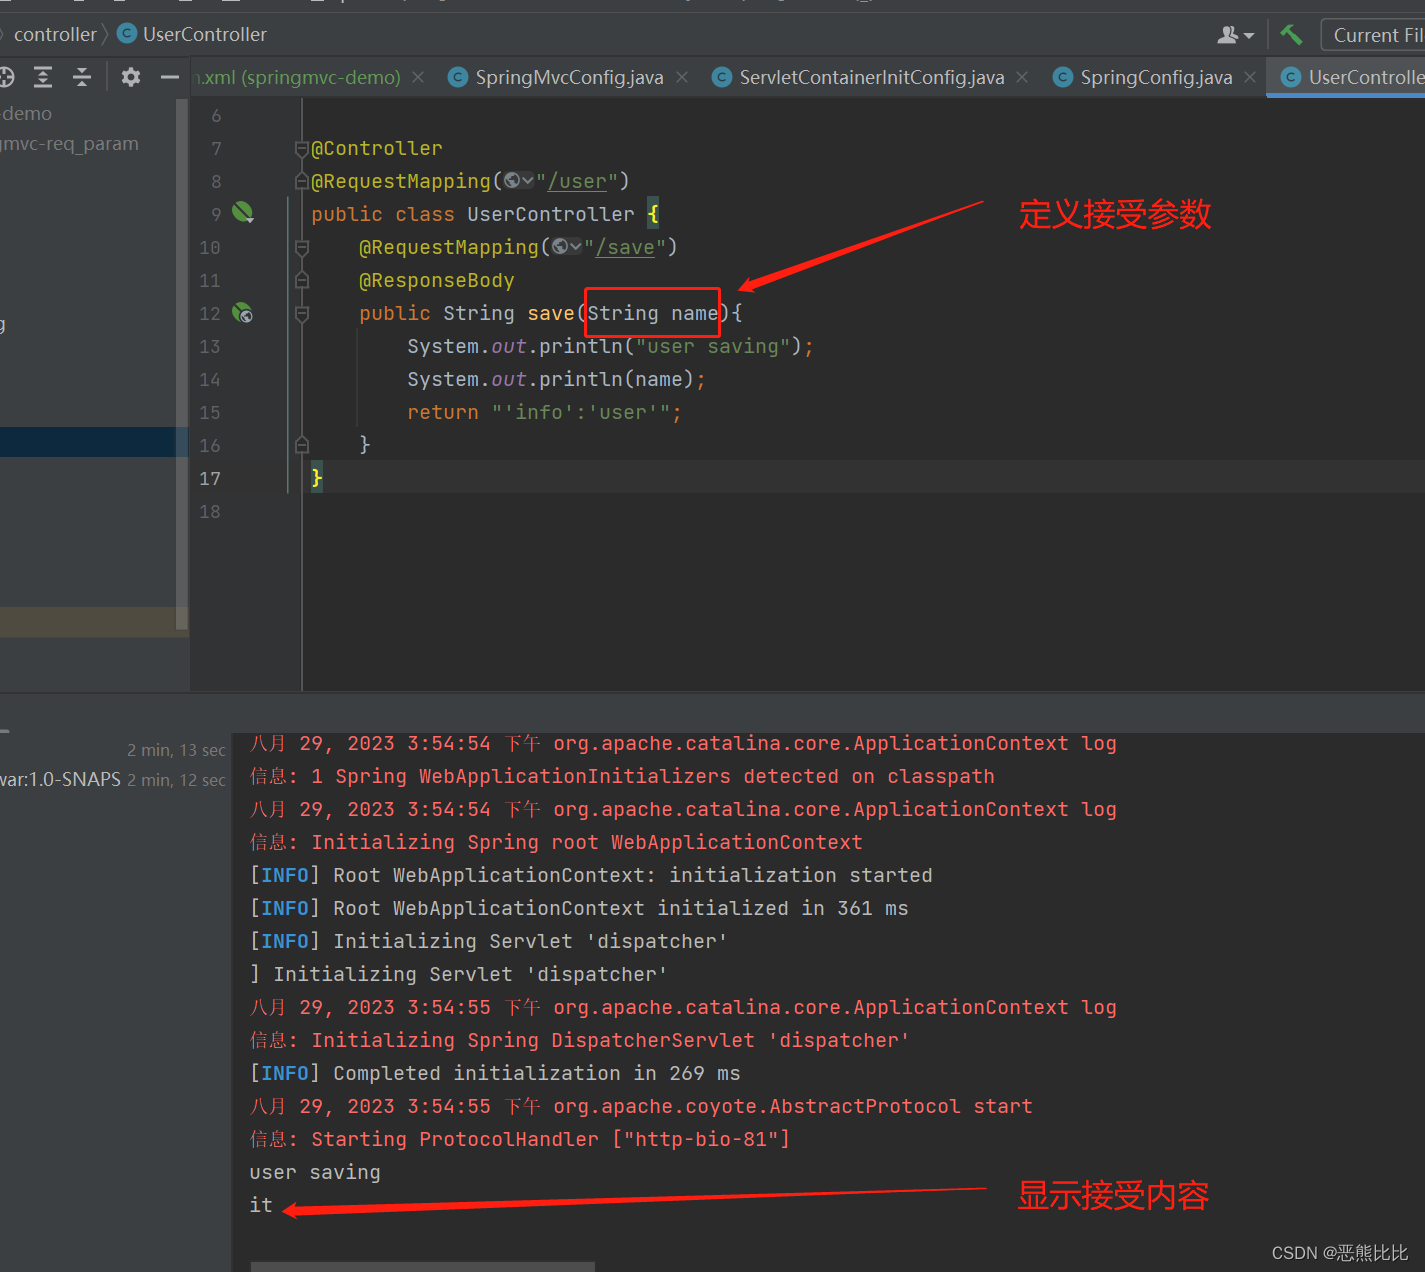
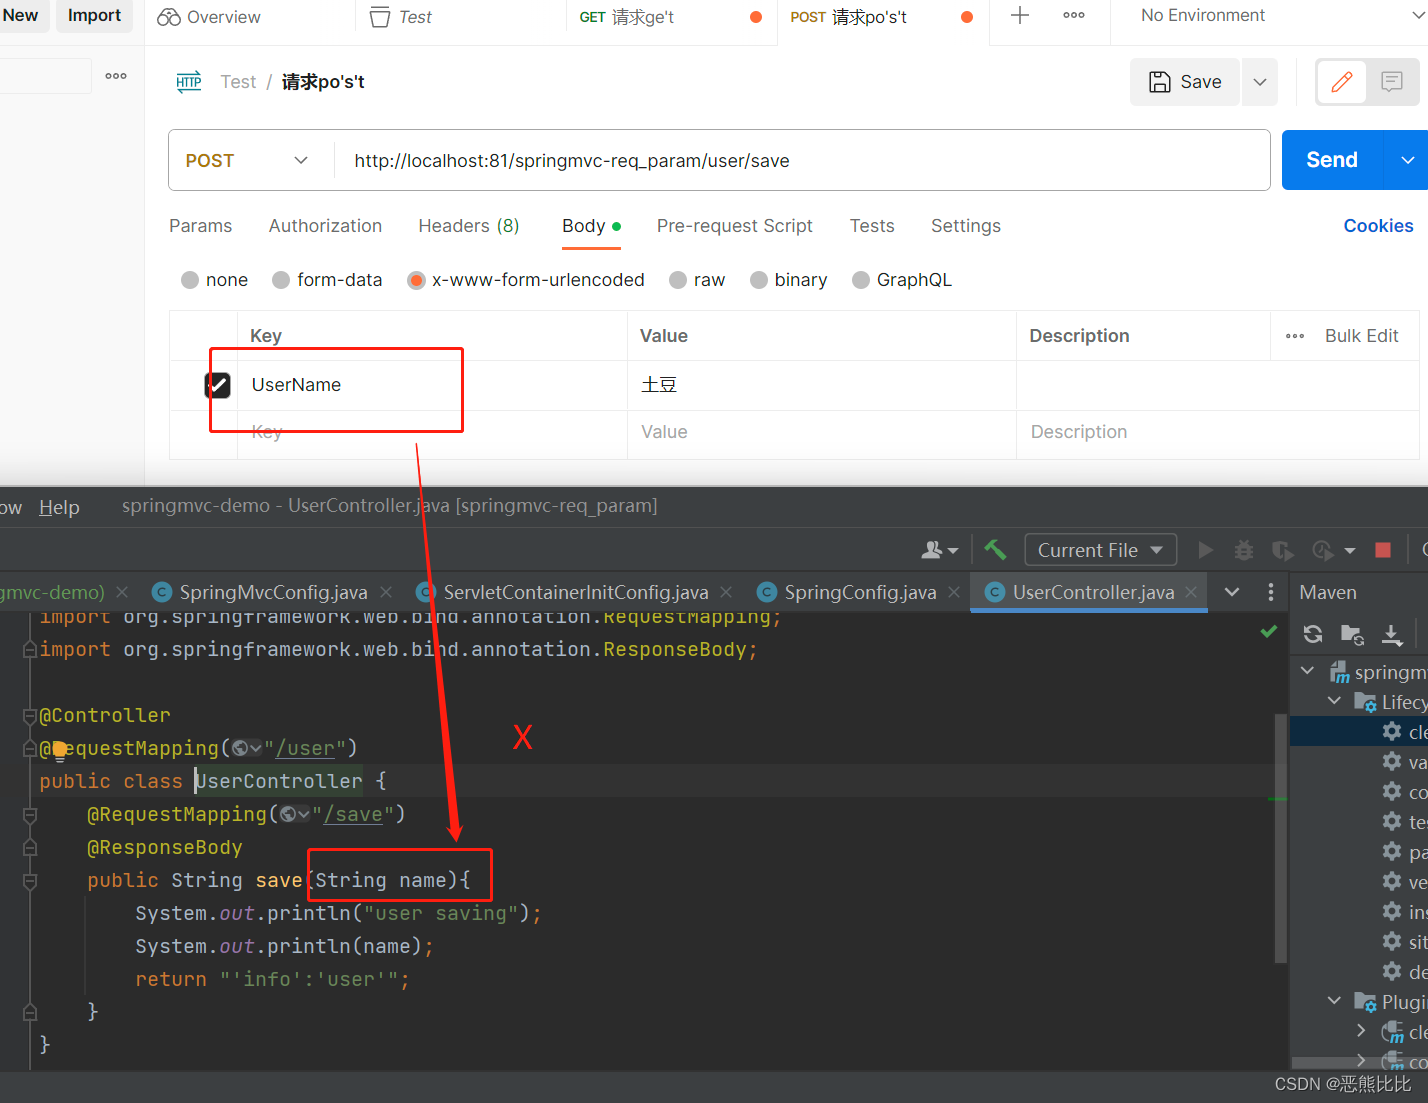
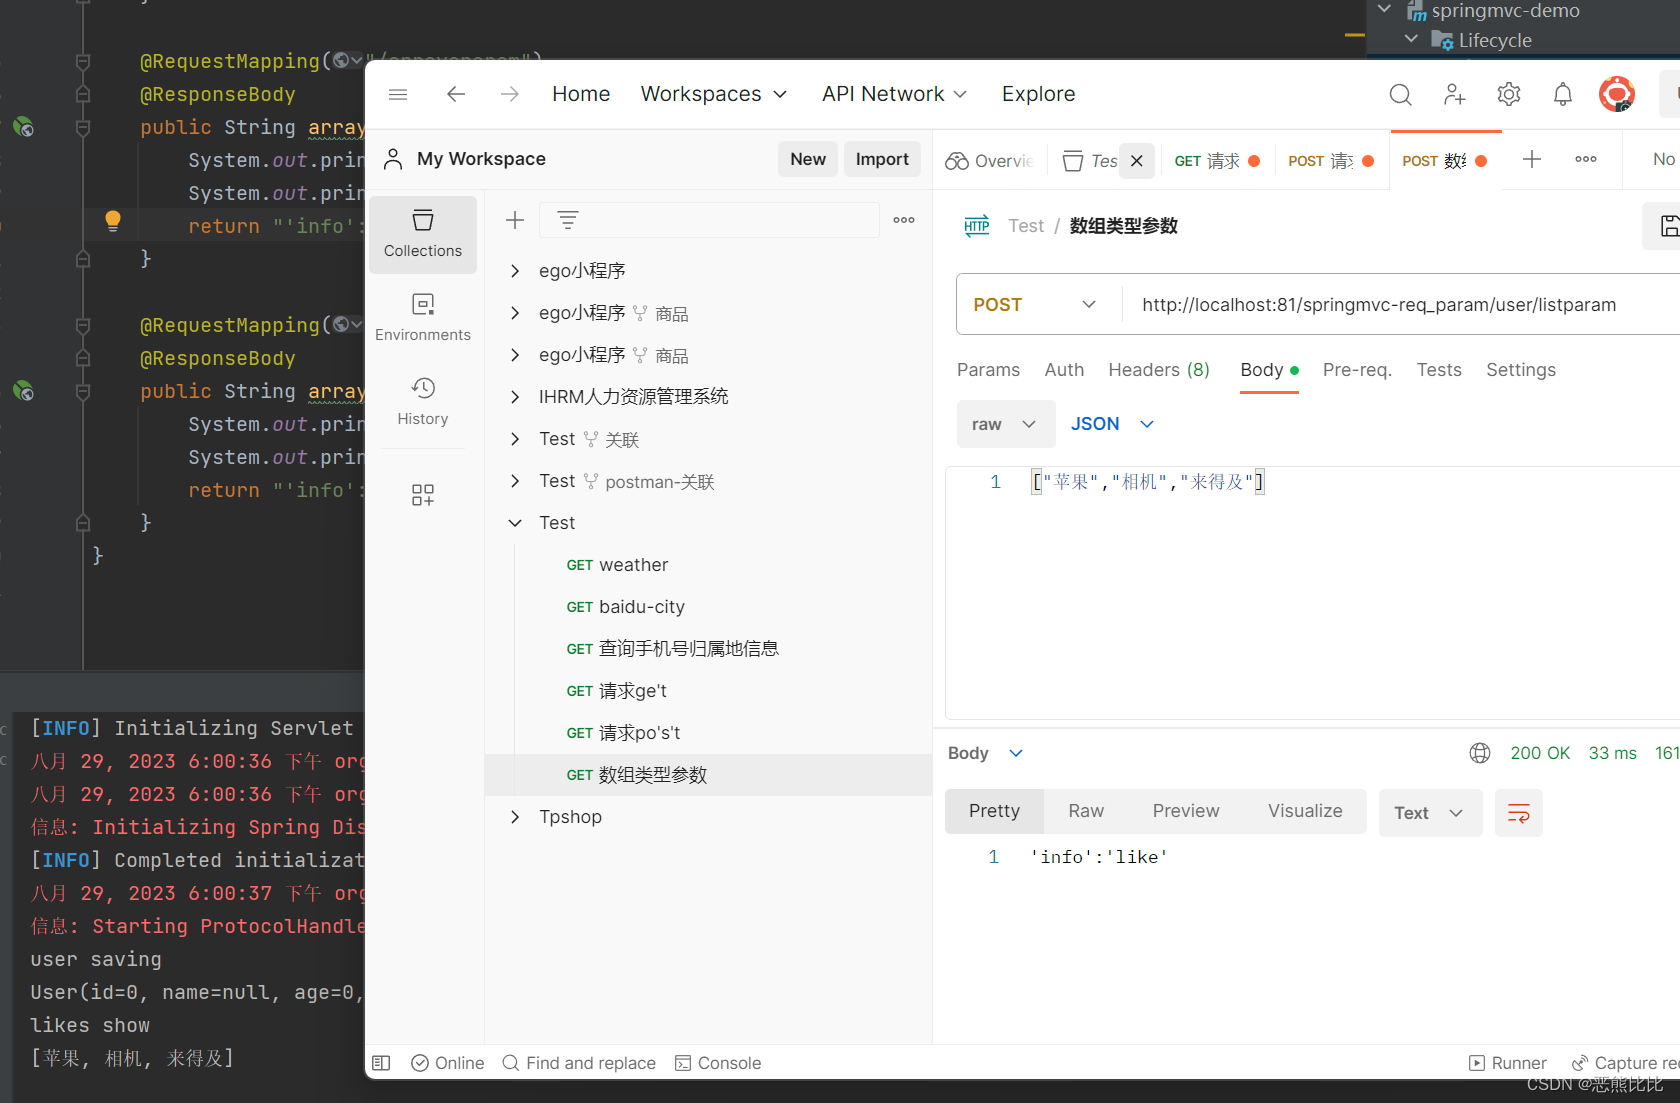
2.4 五种请求参数种类
参数类型:
- 普通参数
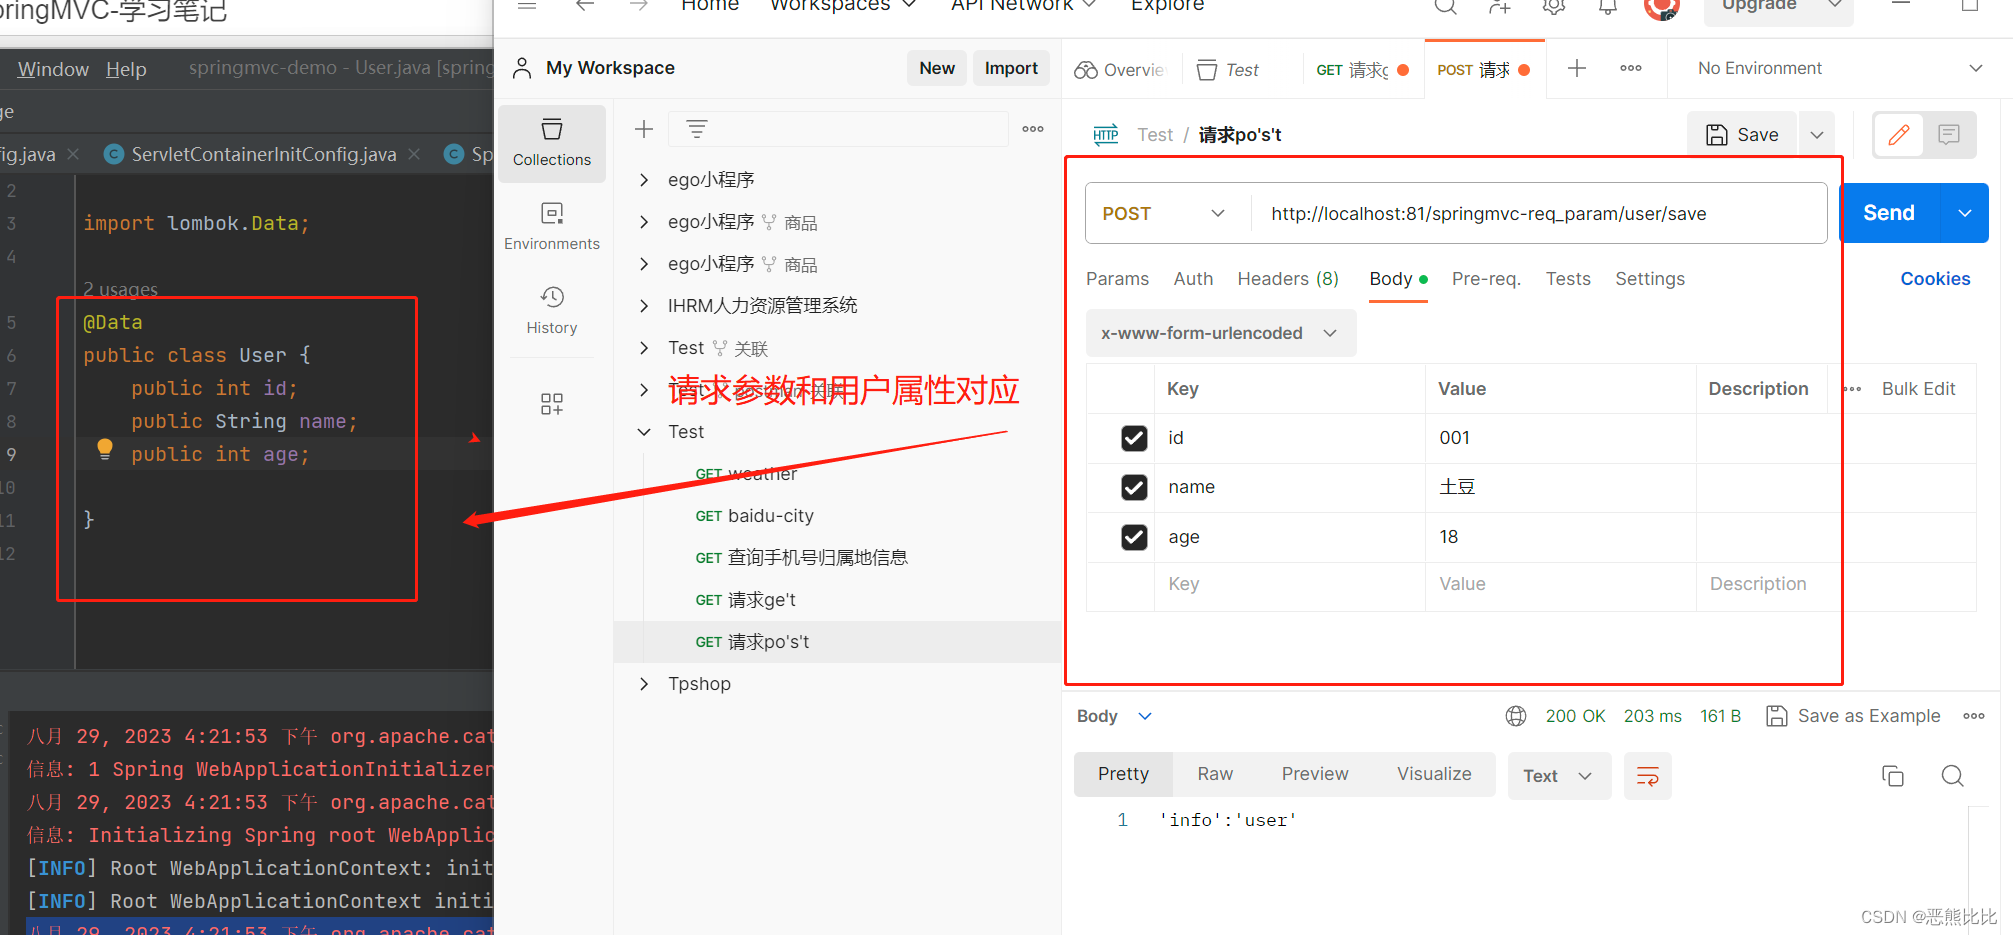
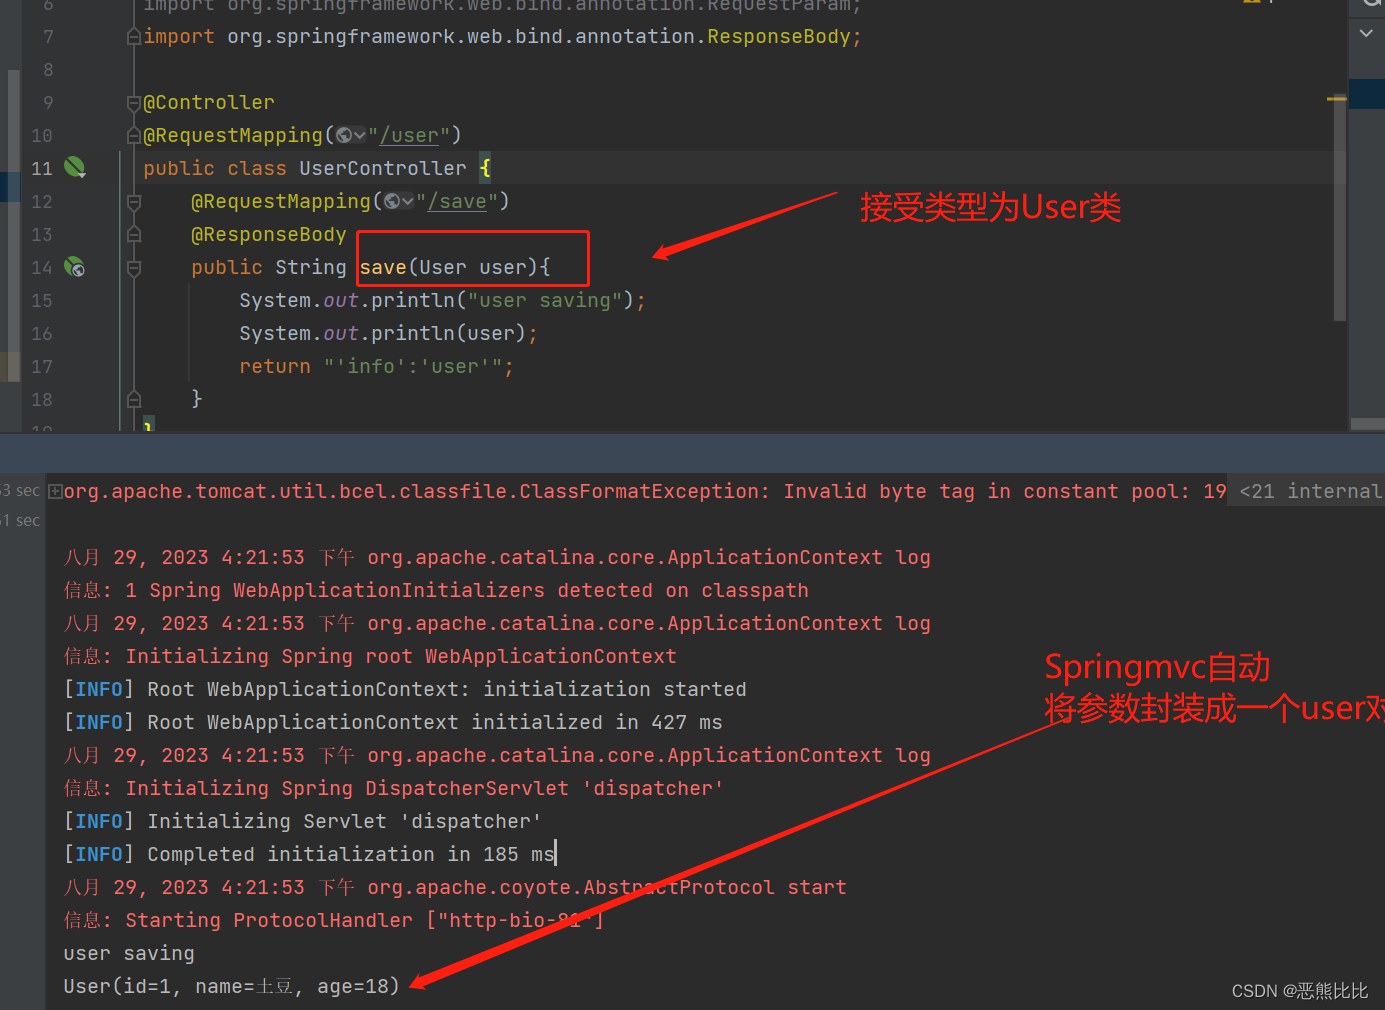
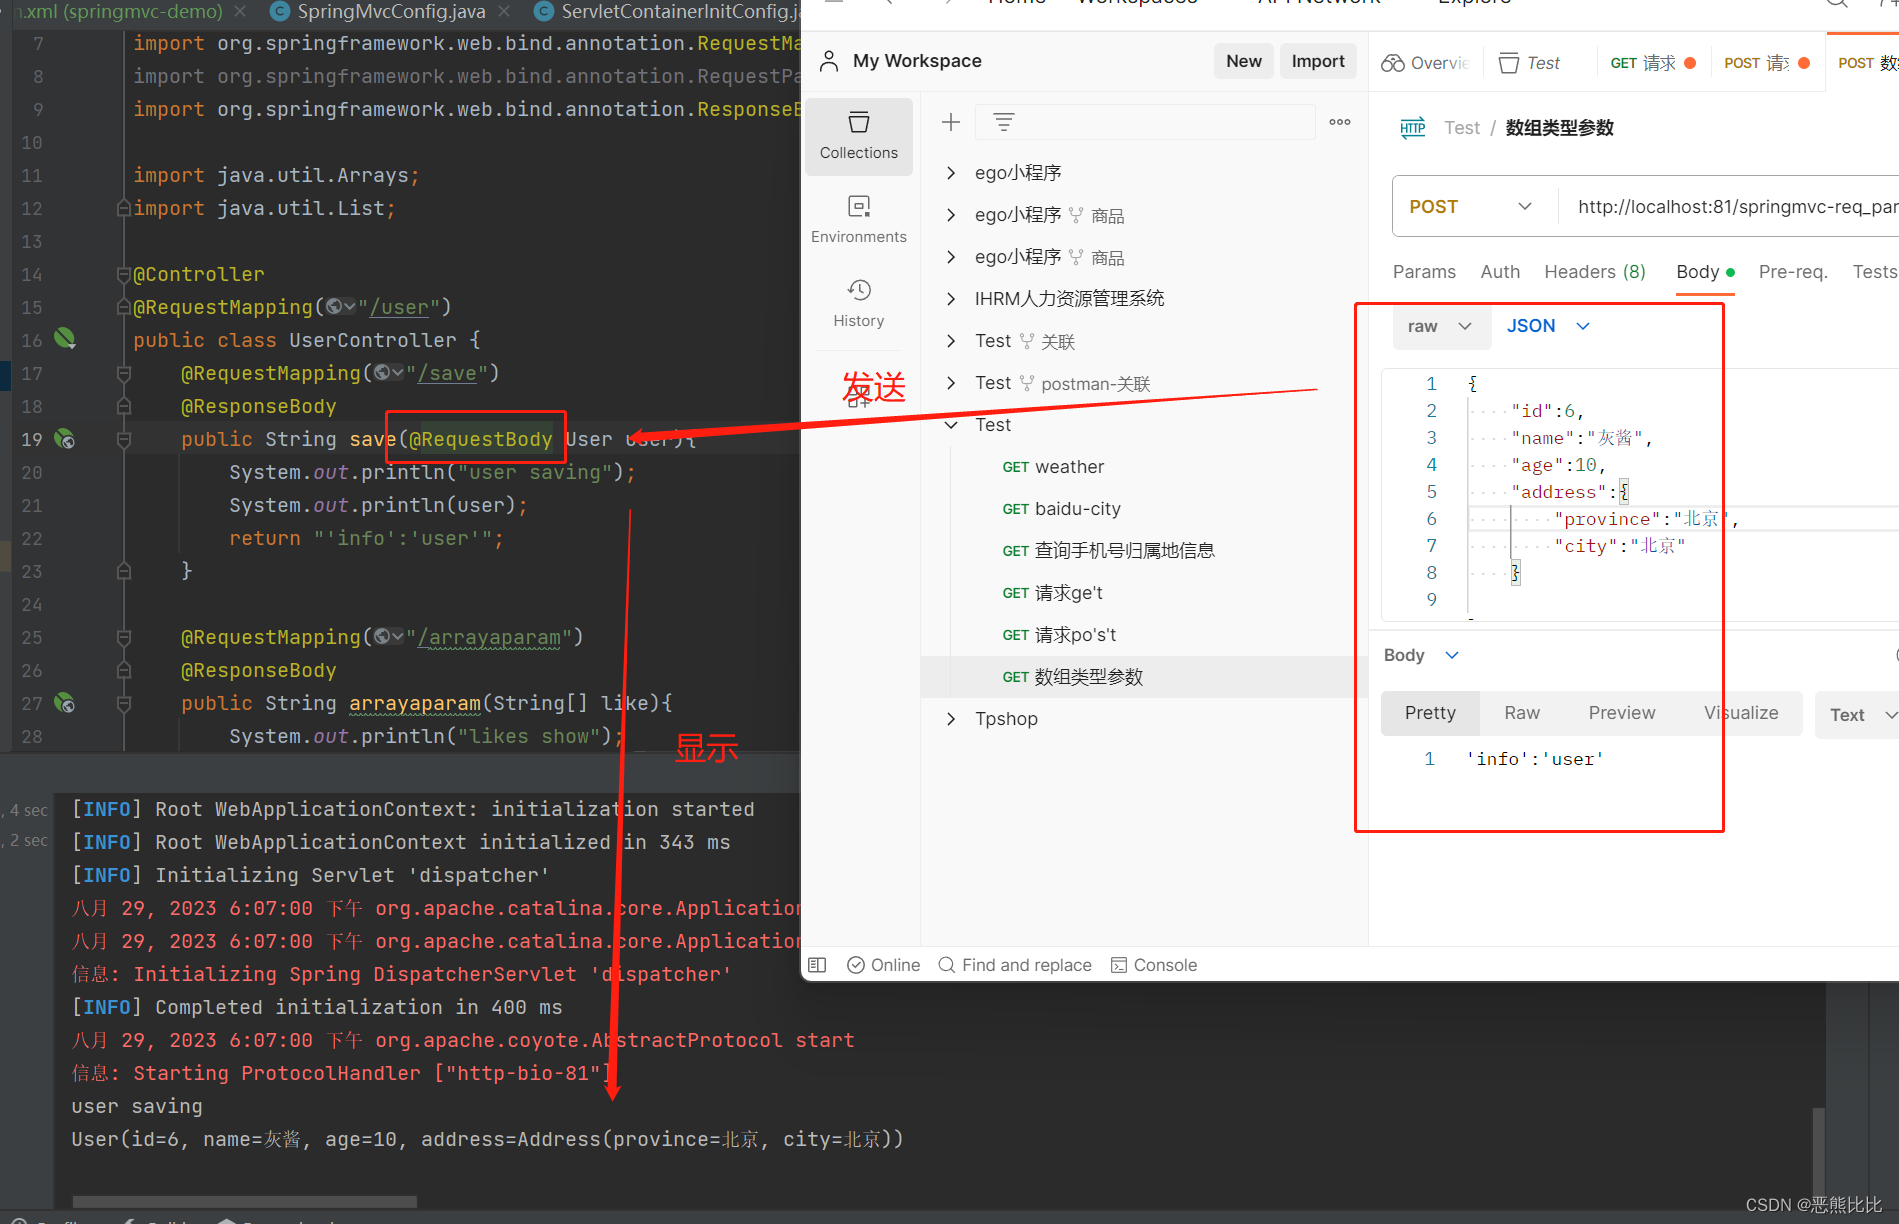
- POJO类型参数
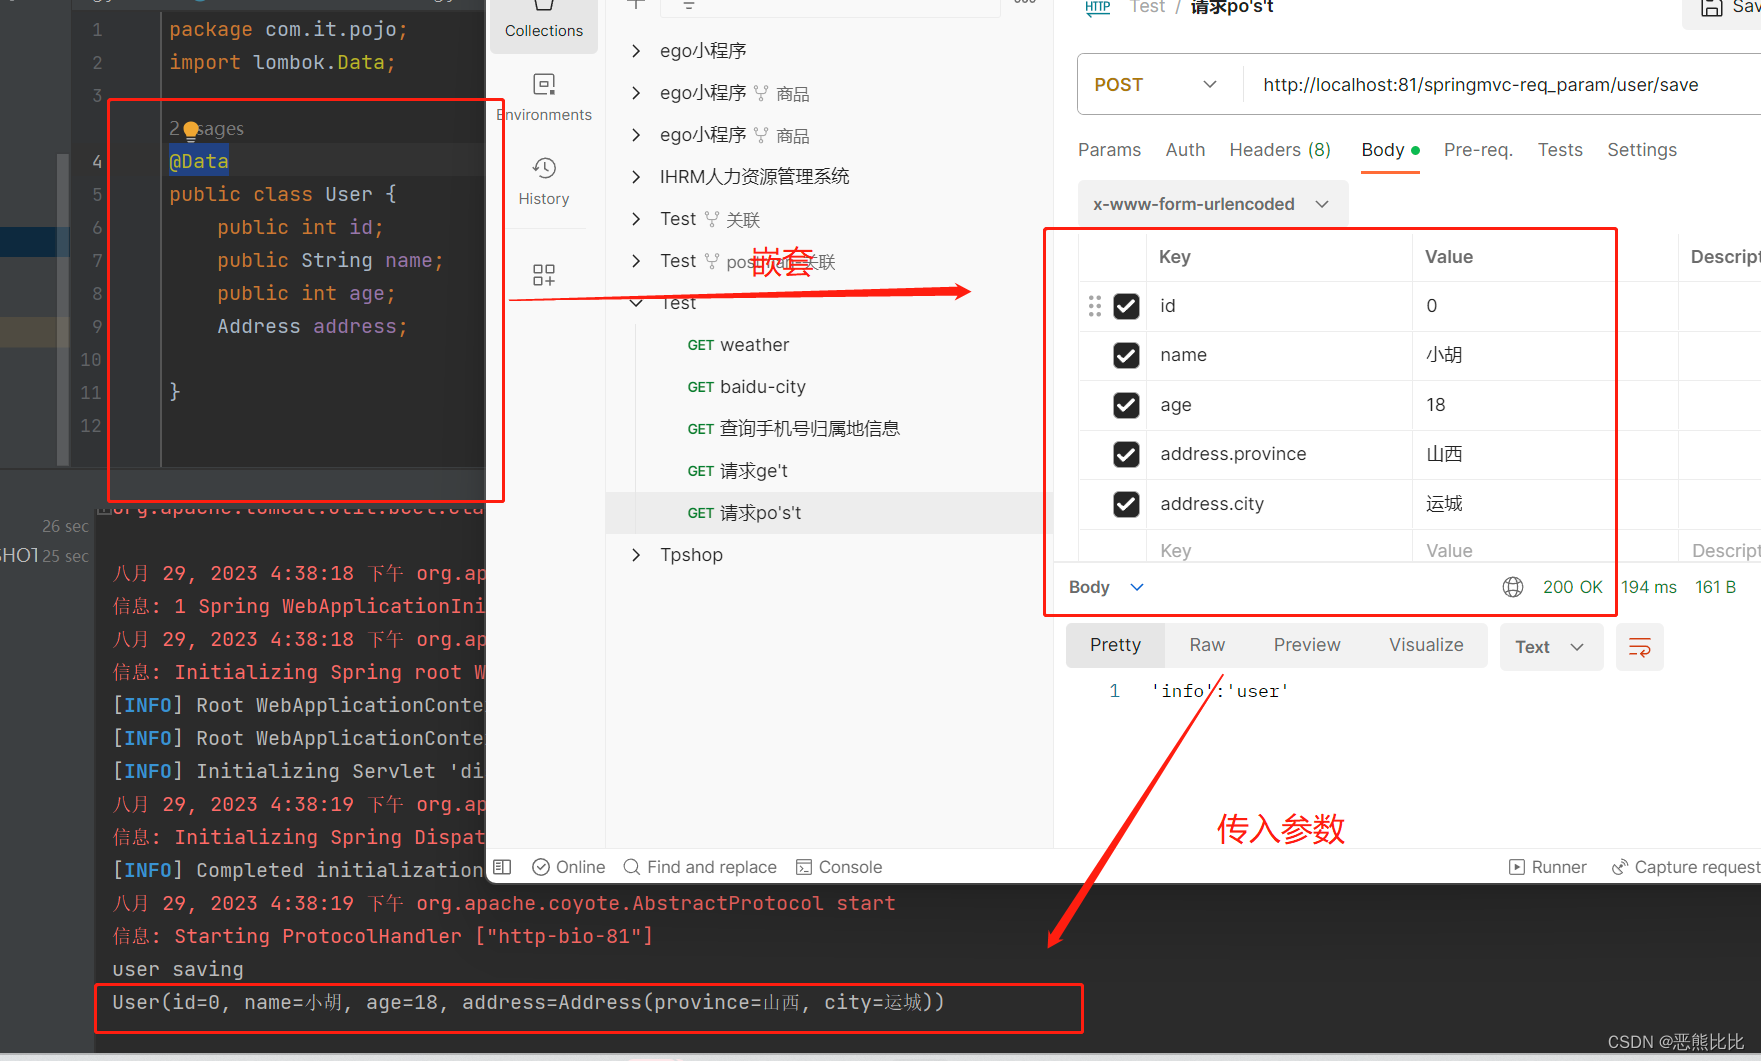
- 嵌套POJO
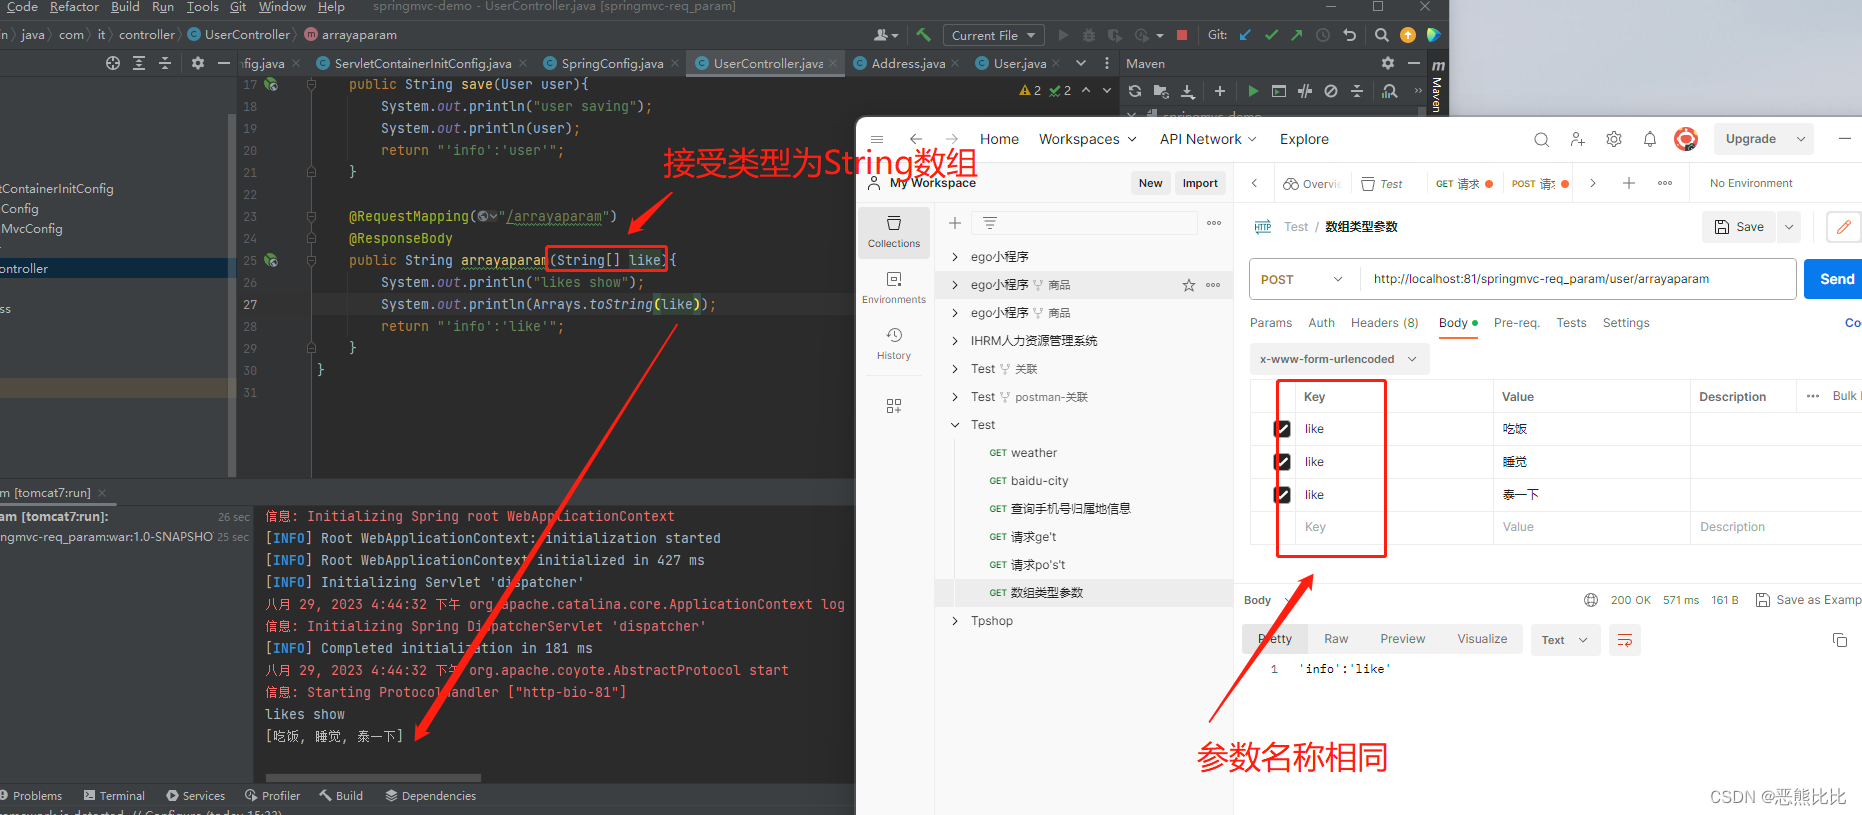
- 数组类型
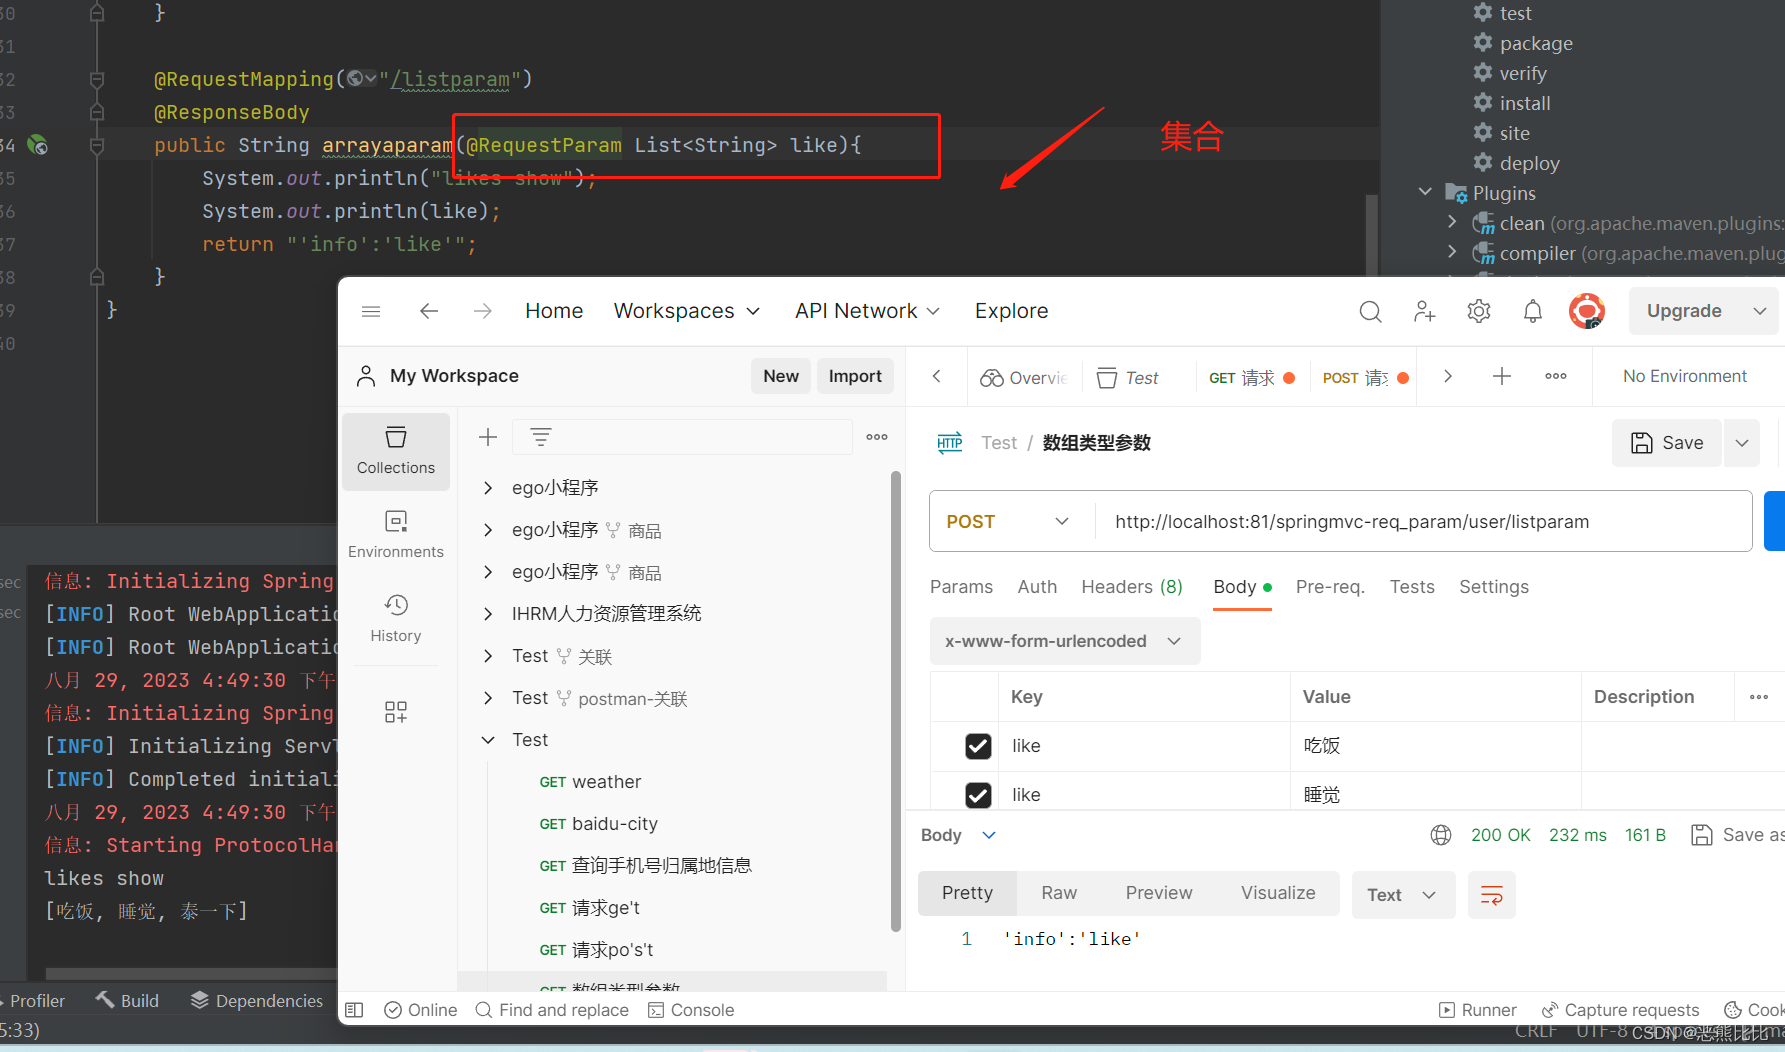
- 集合类型
@ResponseBody的作用
- 设置当前控制器方法响应内容为当前返回值,无需解析。
参数映射规则
- 客户端传递的参数名称需要和服务器端的参数名称对应,名称不对应无法接受。
- 解决:注解@RequestParam

2.实体类参数传递
3.嵌套POJO
4. 数组类型
5. 集合类型
2.5 传递JSON数据
添加json坐标
<dependency>
      <groupId>com.fasterxml.jackson.core</groupId>
      <artifactId>jackson-databind</artifactId>
      <version>2.9.0</version>
    </dependency>
在SpringMvcConfig配置文件中添加@EnableWebMvc开启Json转换功能
package com.it.config;

@Configuration
@ComponentScan("com.it.controller")
@EnableWebMvc
public class SpringMvcConfig{
}

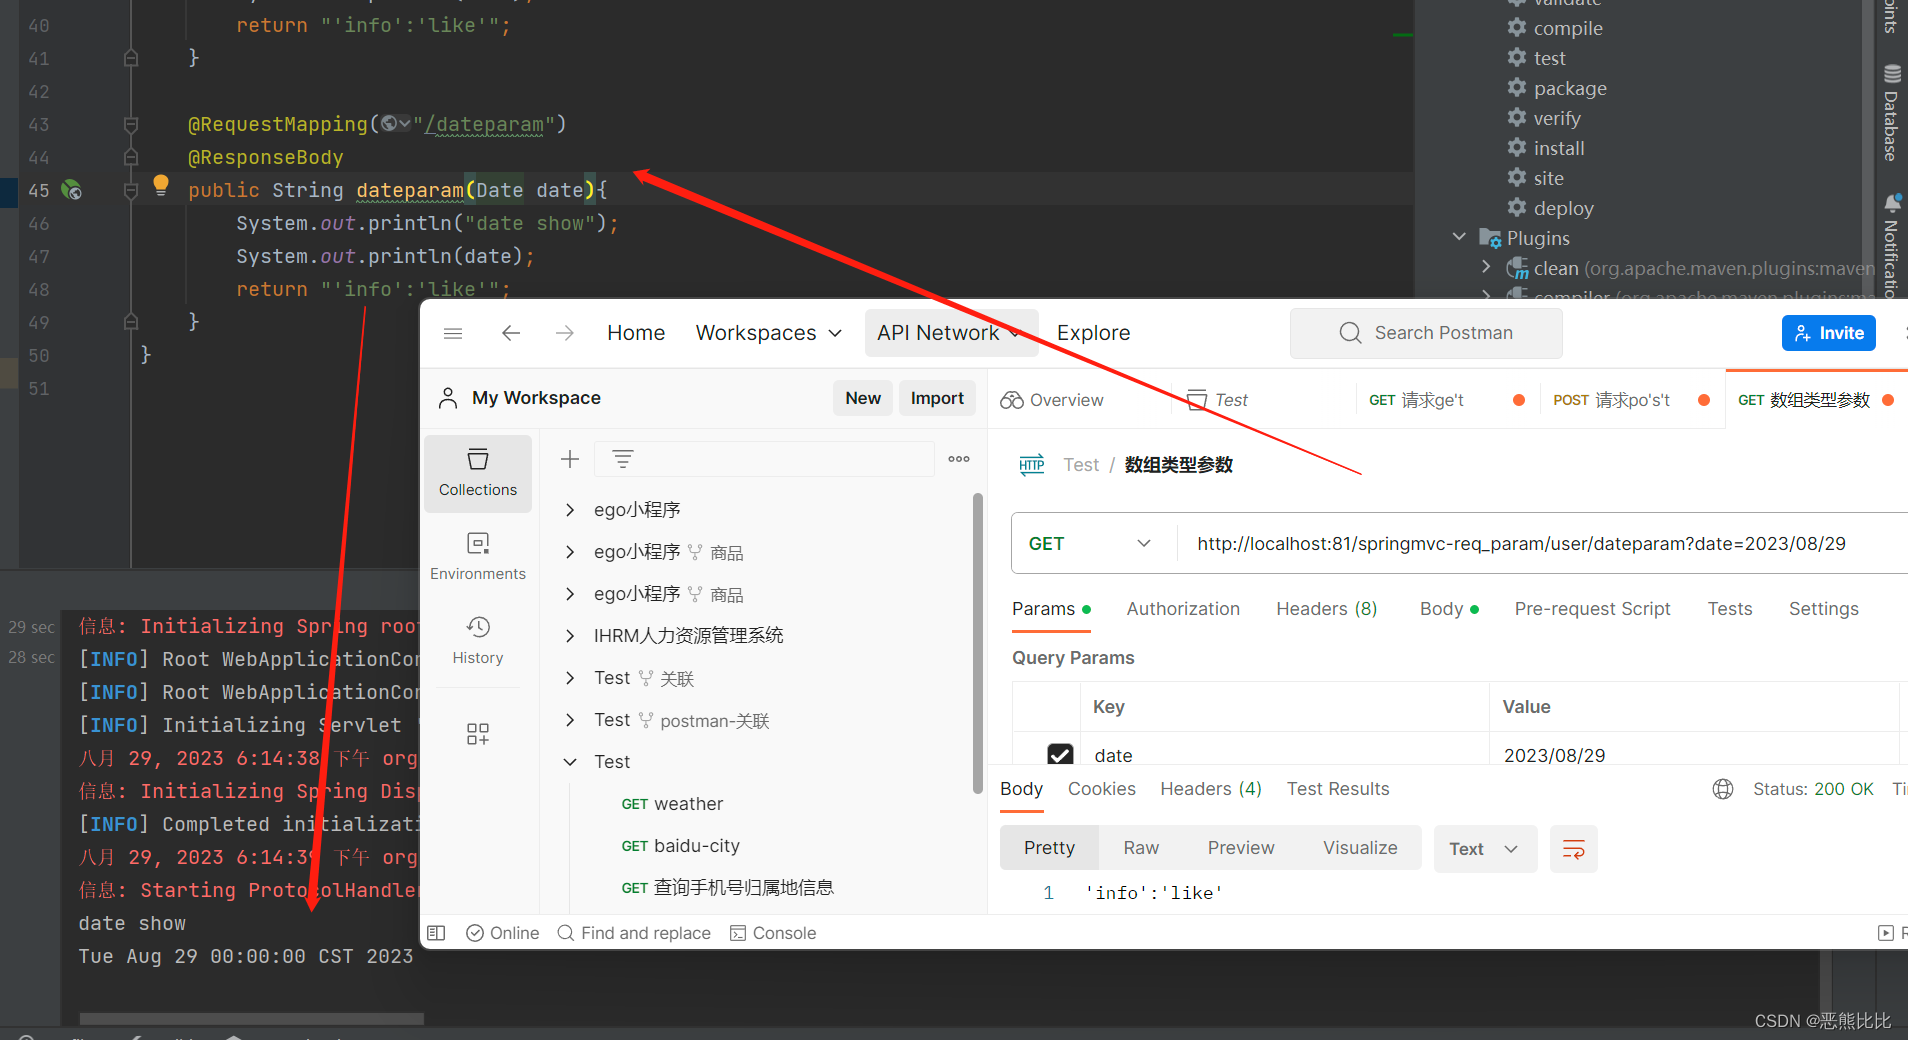
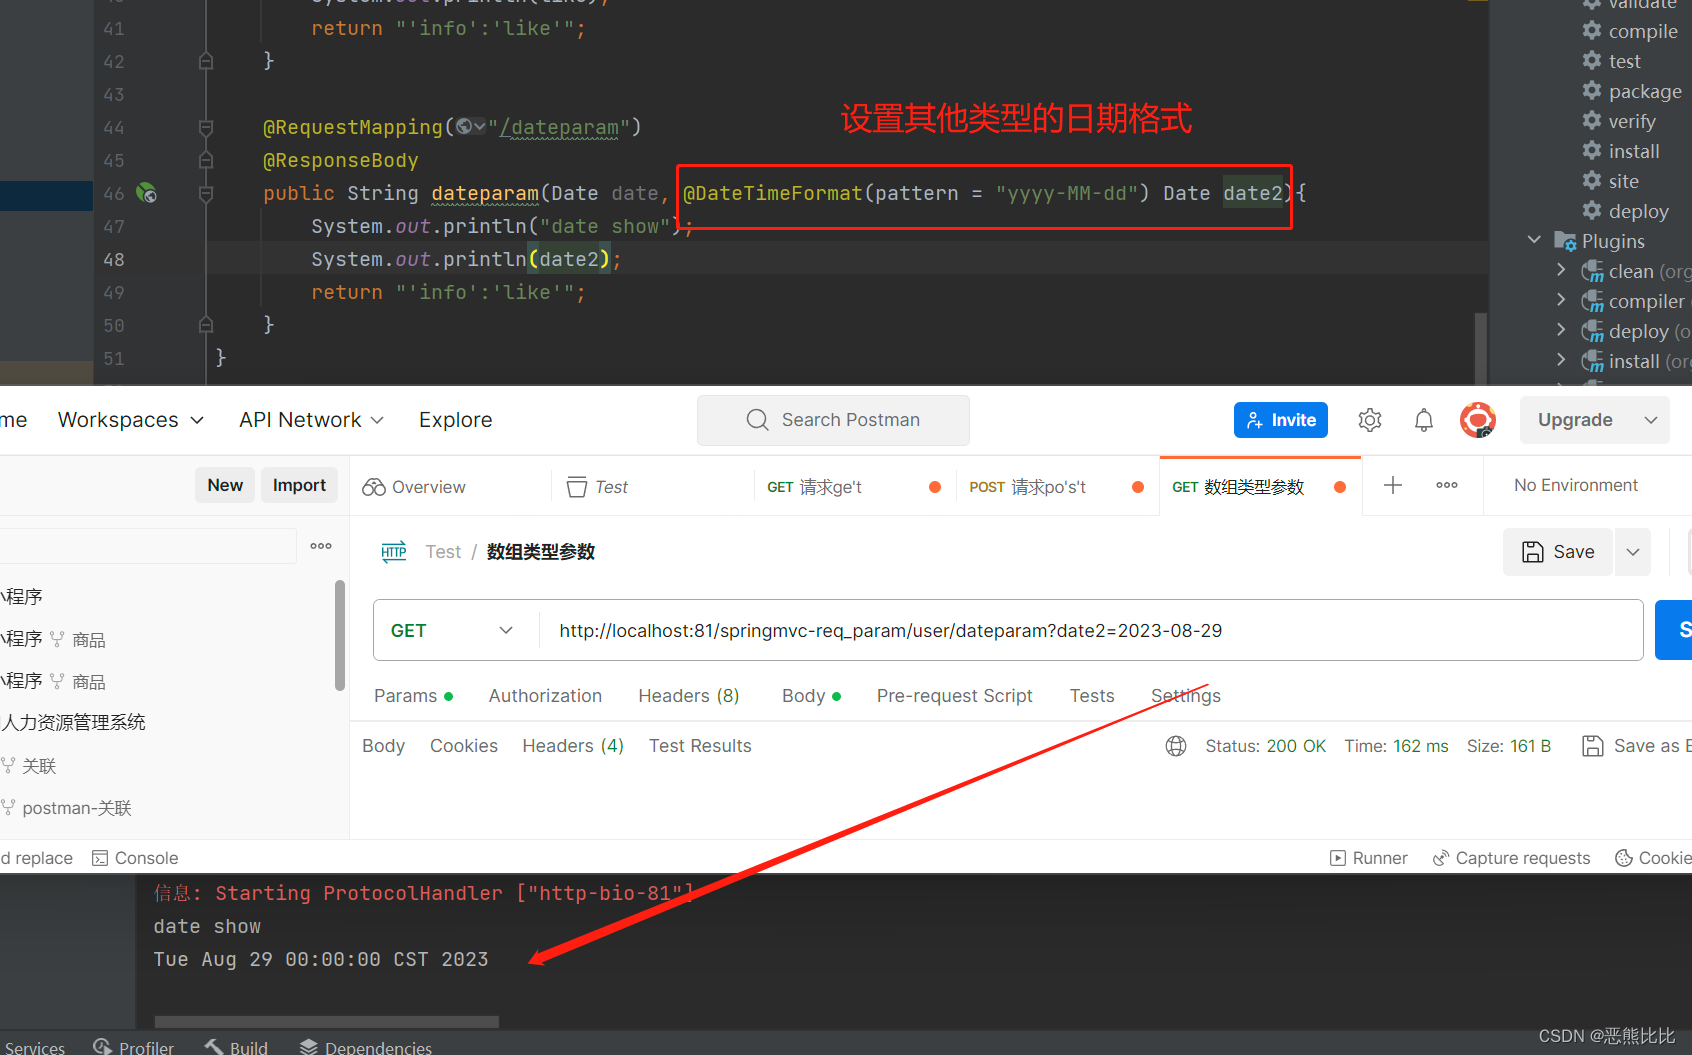
2.6 日期类型参数传递
日期格式:
- 2023-08-29
- 2023/08/29
- 08/23/2023
3.响应
3.1 响应格式
响应:将处理完的结果反馈给客户端(浏览器)
响应页面
响应数据
- 文本数据
- json数据
@ResponseBody的作用
- 设置当前控制器返回值作为响应体
- 对象->json 、list->json
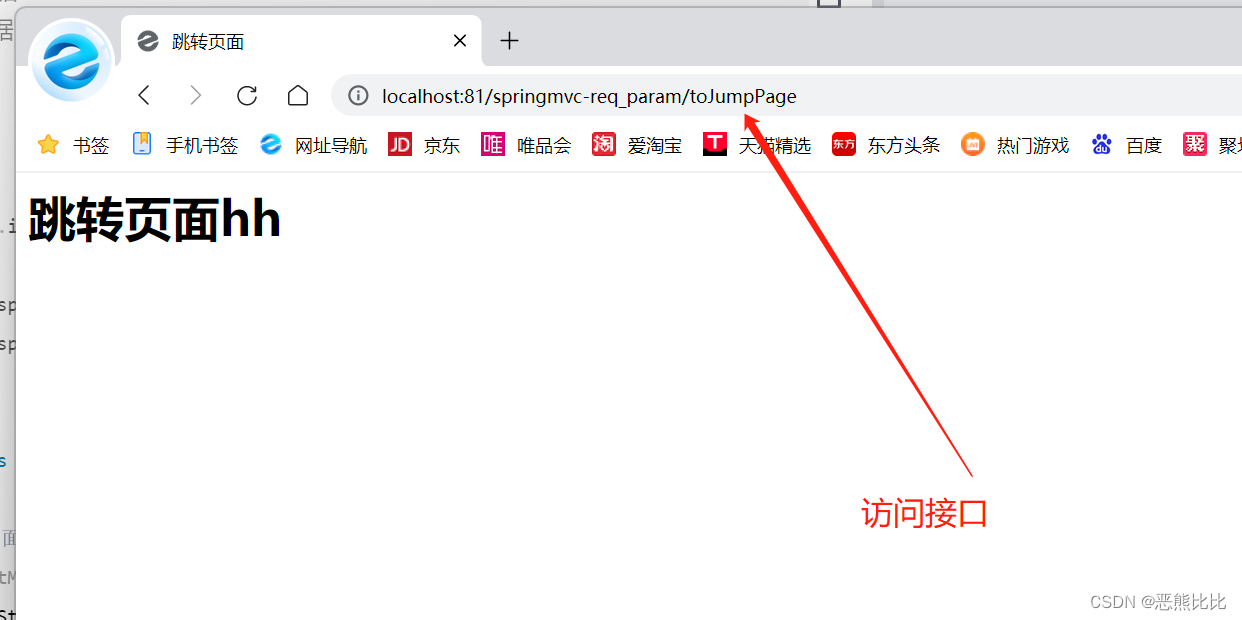
1.响应页面
package com.it.controller;

import org.springframework.stereotype.Controller;
import org.springframework.web.bind.annotation.RequestMapping;

@Controller
public class UserRespController {

    //响应页面
    @RequestMapping("/toJumpPage")
    public String toJumpPage(){
        System.out.println("跳转页面中");
        return "page.jsp";
    }
}
<%--
  Created by IntelliJ IDEA.
  User: 11445
  Date: 2023/8/29
  Time: 18:22
  To change this template use File | Settings | File Templates.
--%>
<%@ page contentType="text/html;charset=UTF-8" language="java" %>
<html>
<head>
    <title>跳转页面</title>
</head>
<body>
<h1>跳转页面hh</h1>
</body>
</html>
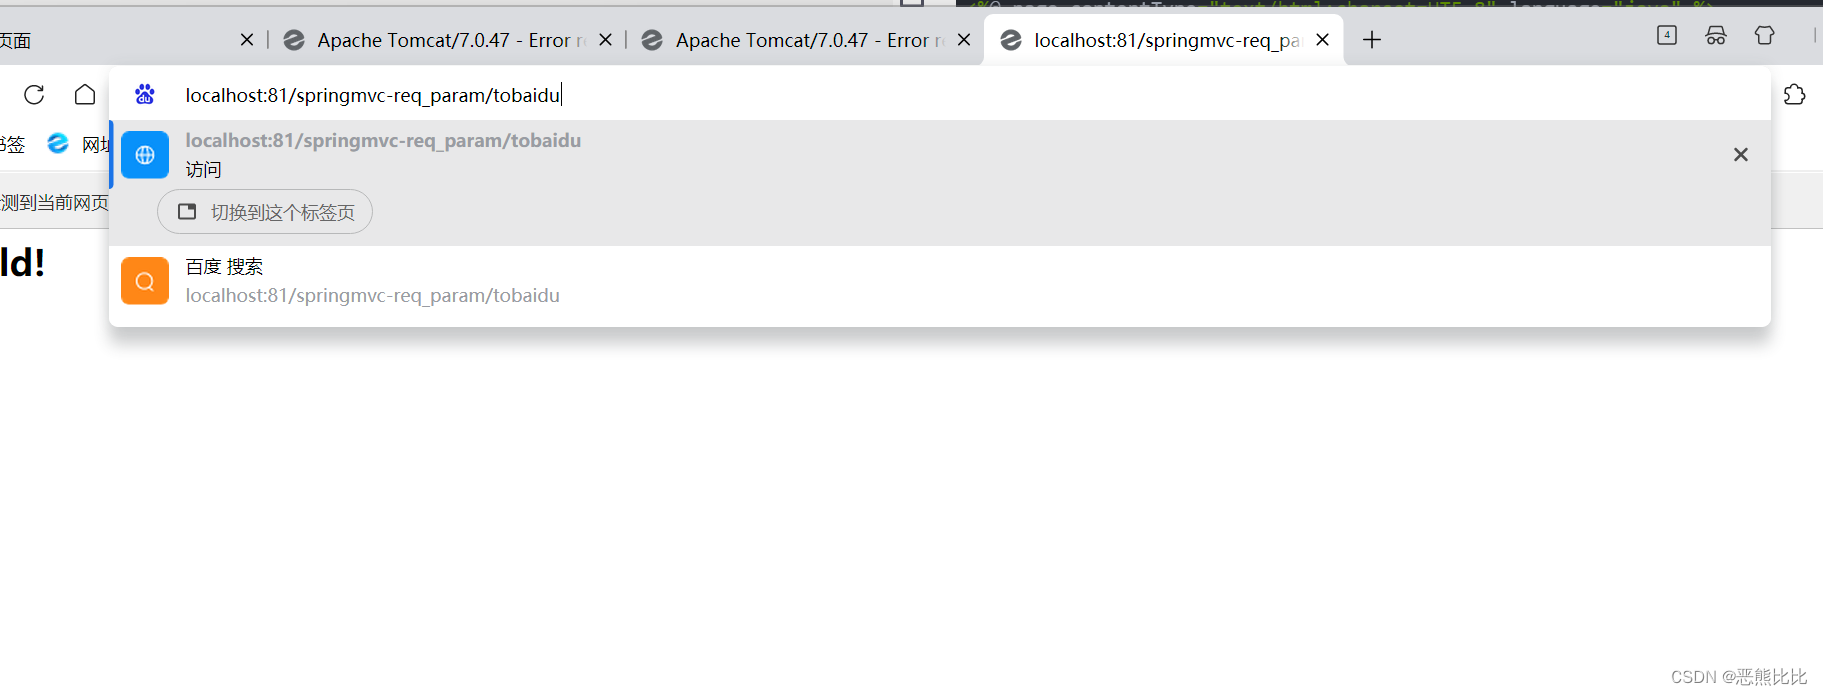
跳转到其他网站页面
将返回值改为 “redirect:https://www.baidu.com/”
//响应页面2
    @RequestMapping("/tobaidu")
    public String tobaidu(){
        System.out.println("跳转页面中");
        return "redirect:https://www.baidu.com/";
    }
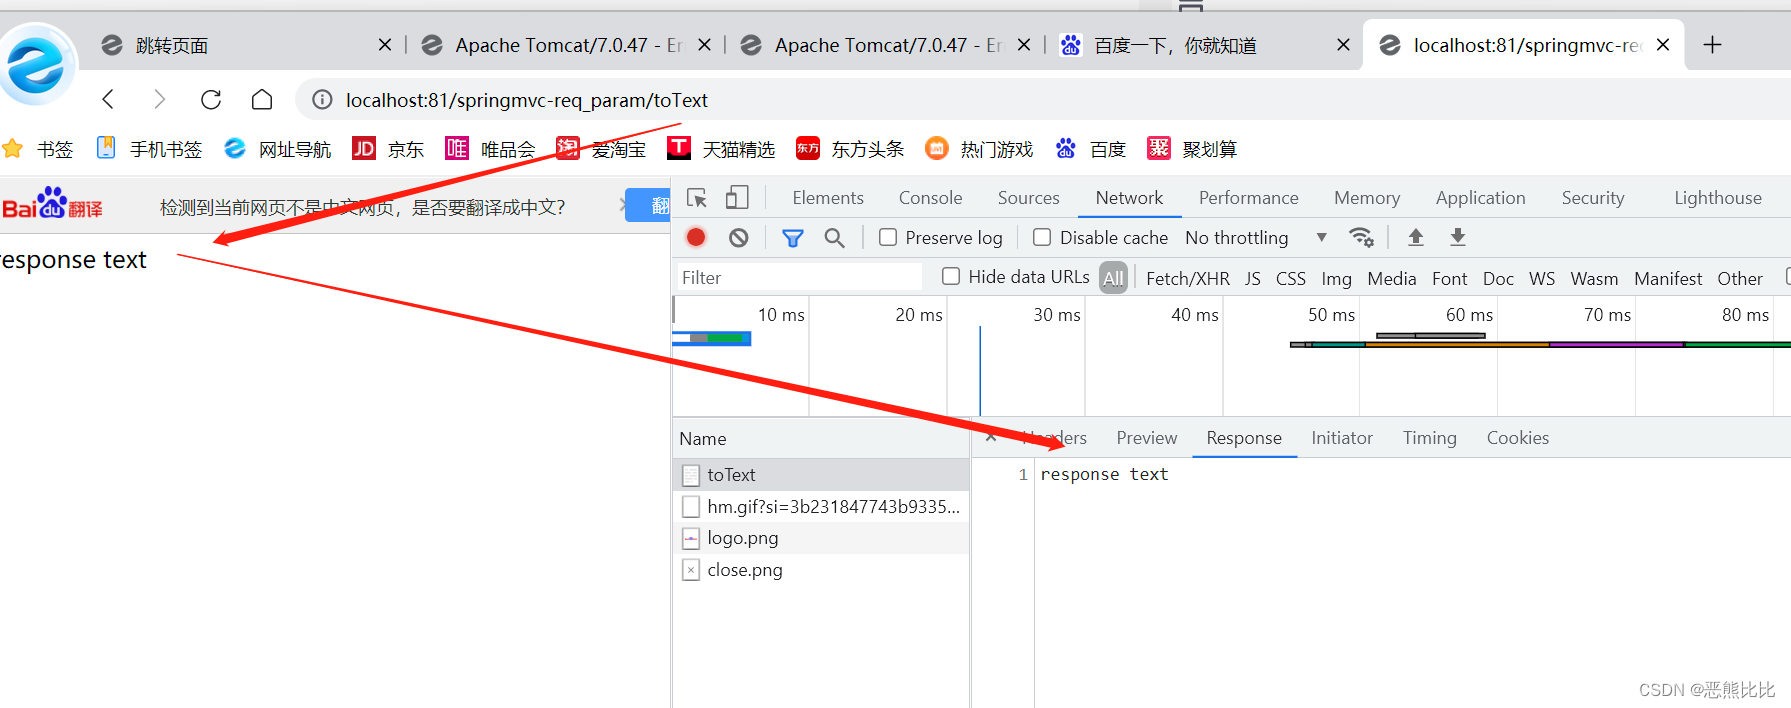
2.响应文本数据
//响应文本
    @RequestMapping("/toText")
    @ResponseBody
    public String toText(){
        System.out.println("响应文本");
        return "response text";
    }
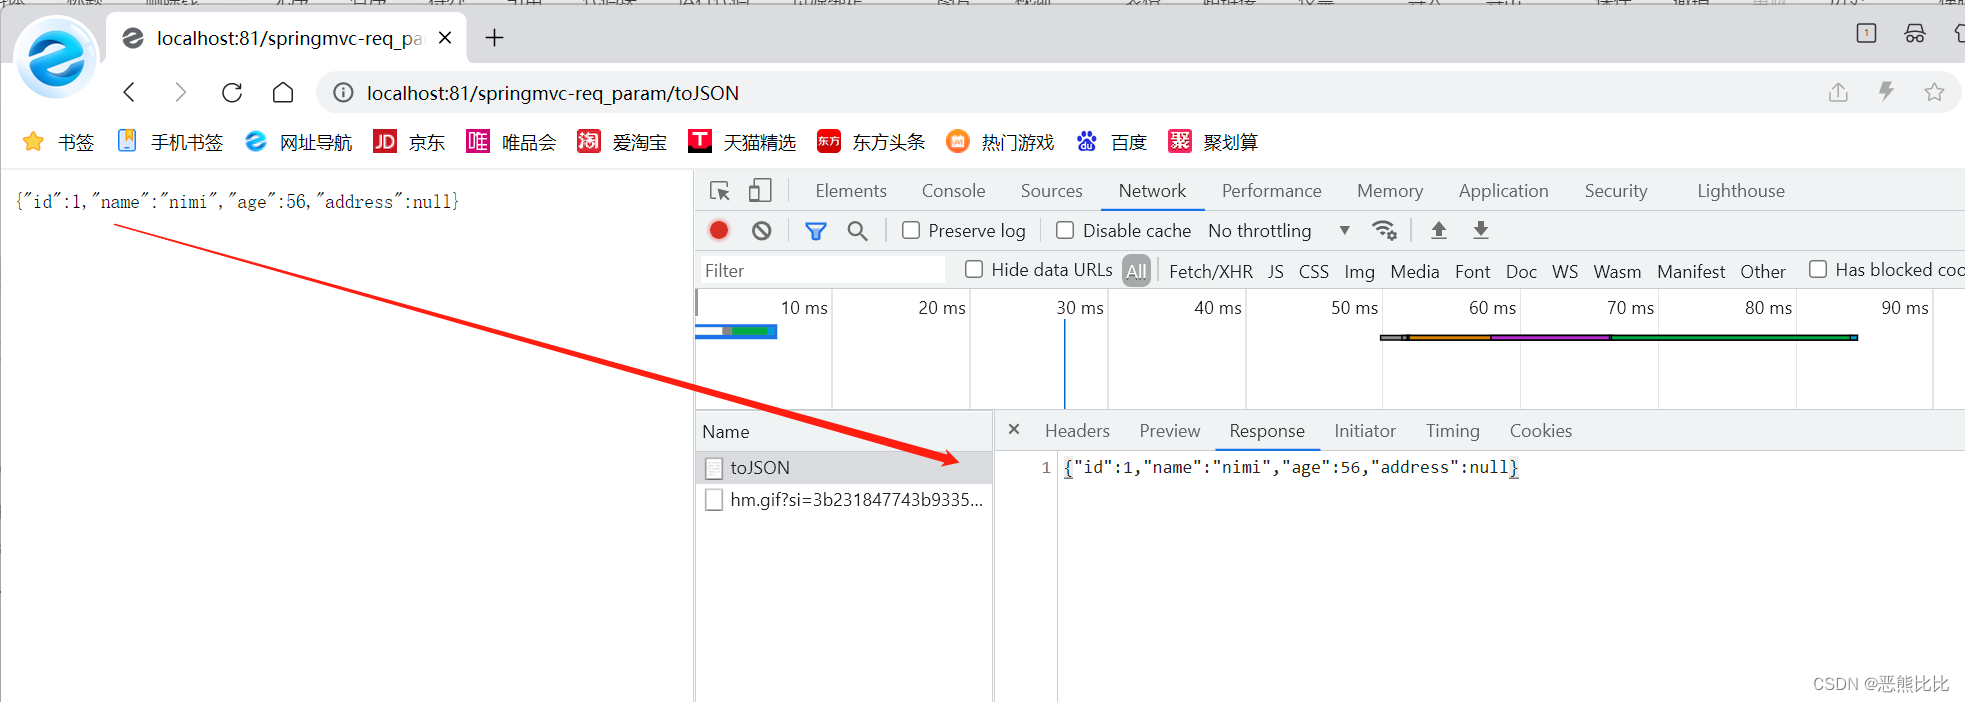
3.响应JSON数据
//响应JSON
    @RequestMapping("/toJSON")
    @ResponseBody
    public User toJSON(){
        System.out.println("响应JSON");
        User user = new User();
        user.setId(1);
        user.setAge(56);
        user.setName("nimi");
        return user;
    }
4.REST风格
4.1 介绍
REST(Representational State Transfer)表现形式转换
- 是一种
软件架构风格,用于设计网络应用程序的分布式系统。- 使用
统一的接口和基于资源的通信方式,通过HTTP协议进行通信。
REST风格的设计原则
- 基于资源:将应用程序的功能抽象为资源,每个资源通过唯一的URL进行标识。
- 使用HTTP方法:通过HTTP的不同方法(GET、POST、PUT、DELETE等)对资源进行操作。
- 无状态:服务器不保存客户端的状态信息,每个请求都包含足够的信息来完成请求。
- 统一接口:使用统一的接口定义资源的操作方式,包括资源的标识、操作方法和表示形式等。
- 可缓存性:对于不经常变化的资源,可以使用缓存机制提高性能。
- 分层系统:不同的组件可以通过中间层进行通信,提高系统的可伸缩性和灵活性。
与传统资源描述形式的区别
传统风格
http://localhost/user/getById?id=1
http://localhost/user/saveUser

REST
http://localhost/user/1
http://localhost/user
---------------------------------------------------------------------------

按照REST风格访问资源使用 -行为动作- 区分对资源进行何种操作

查全部用户 GET:http://localhost/user
查指定用户 GET:http://localhost/user/1
添加用户 POST:http://localhost/user
修改用户 PUT :http://localhost/user
删除用户 DELETE:http://localhost/user/1
优点
- 隐藏了资源的访问行为,无法通过地址得知对资源是何种操作
- 书写简化
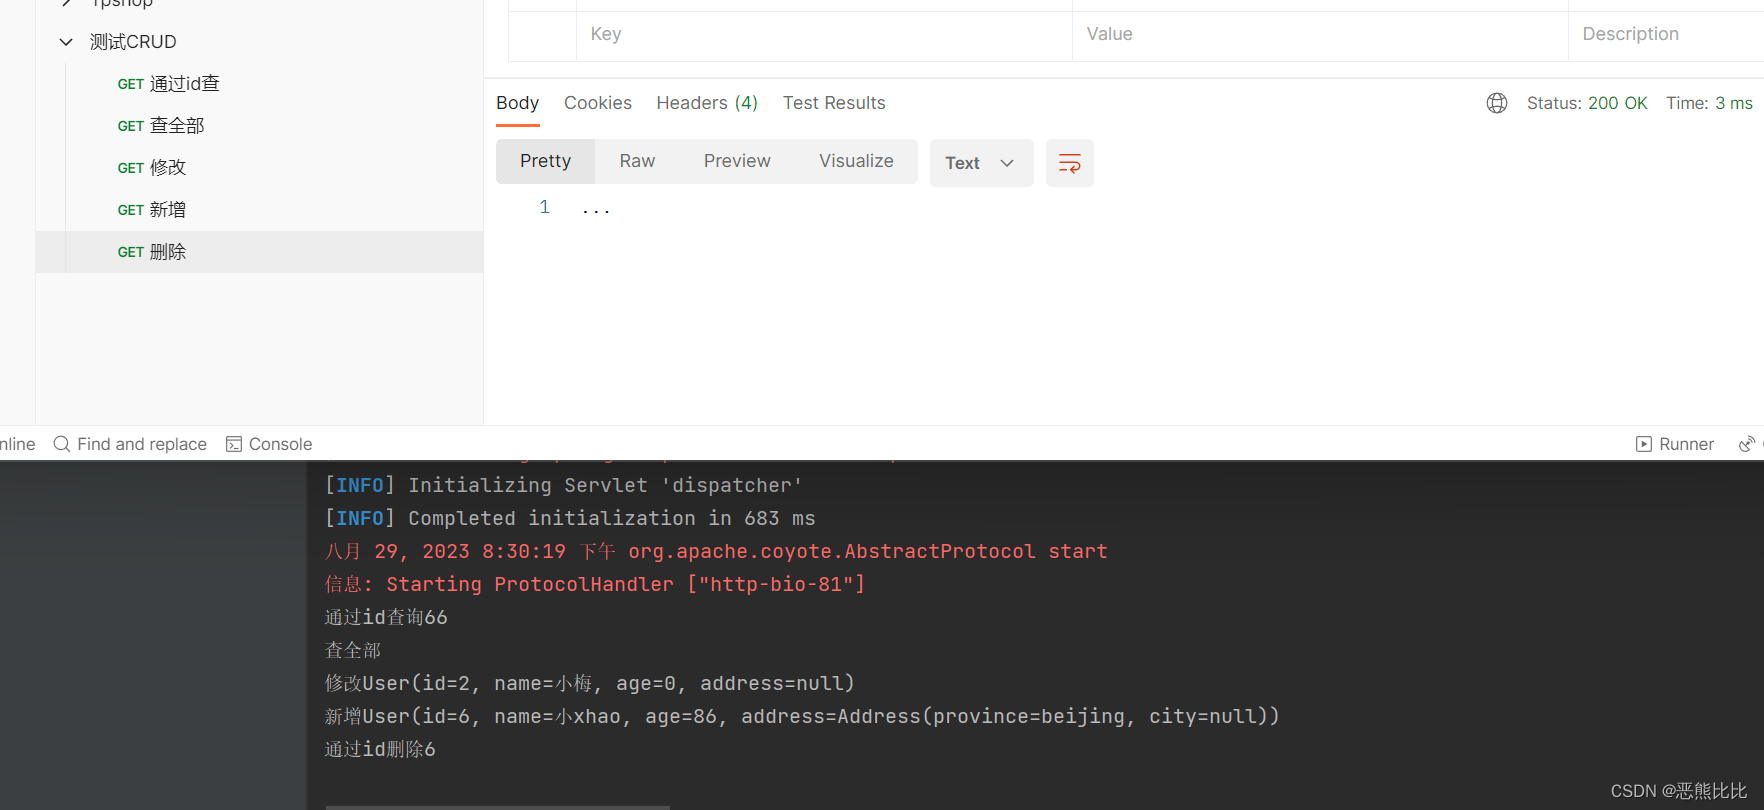
4.2 RESTful快速入门
package com.it.controller;

import com.it.pojo.User;
import org.springframework.stereotype.Controller;
import org.springframework.web.bind.annotation.*;

@Controller
public class UserRestController {

    //1通过id查
    @RequestMapping(value = "/user/{id}",method = RequestMethod.GET)
    @ResponseBody
    public String getById(@PathVariable Integer id){
        System.out.println("通过id查询"+id);
        return "...";
    }

    //查全部
    @RequestMapping(value = "/user",method = RequestMethod.GET)
    @ResponseBody
    public String getAll(){
        System.out.println("查全部");
        return "...";
    }

    //修改
    //@ResponseBody注解表示该方法的返回值将直接作为HTTP响应的body部分返回给客户端。
    // insert方法返回的字符串将作为响应的body返回给客户端。

    //@RequestBody注解表示该方法需要从请求的body部分获取数据,通常用于处理POST、PUT请求中的数据。
    // @RequestBody User user表示将请求的body中的数据转换为User对象,并作为参数传入insert方法中。
    @RequestMapping(value = "/user",method = RequestMethod.PUT)
    @ResponseBody
    public String update(@RequestBody User user){
        System.out.println("修改"+user);
        return "...";
    }

    //新增
    @RequestMapping(value = "/user",method = RequestMethod.POST)
    @ResponseBody
    public String insert(@RequestBody User user){
        System.out.println("新增"+user);
        return "...";
    }

    //删除
    //@PathVariable是Spring MVC中的注解,它的作用是将路径中的变量与方法参数进行绑定。
    // @PathVariable注解用于绑定路径中的{id}变量到方法参数id上,即通过{id}来获取请求路径中的id值。
    @RequestMapping(value = "/user/{id}",method = RequestMethod.DELETE)
    @ResponseBody
    public String delete(@PathVariable Integer id){
        System.out.println("通过id删除"+id);
        return "...";
    }
}
4.3 简化操作
package com.it.controller;

import com.it.pojo.User;
import org.springframework.web.bind.annotation.*;


@RestController //@Controller和@ResponseBody的合体
@RequestMapping("/user")

public class UserRestEasyController {

    //1通过id查
    @GetMapping("/{id}")
    public String getById(@PathVariable Integer id){
        System.out.println("通过id查询1"+id);
        return "...";
    }

    //查全部
    @GetMapping
    public String getAll(){
        System.out.println("查全部");
        return "...";
    }

    //修改
    @PutMapping
    public String update(@RequestBody User user){
        System.out.println("修改"+user);
        return "...";
    }

    //新增
    @PostMapping
    public String insert(@RequestBody User user){
        System.out.println("新增"+user);
        return "...";
    }

    //删除
    @DeleteMapping("/{id}")
    public String delete(@PathVariable Integer id){
        System.out.println("通过id删除"+id);
        return "...";
    }
}