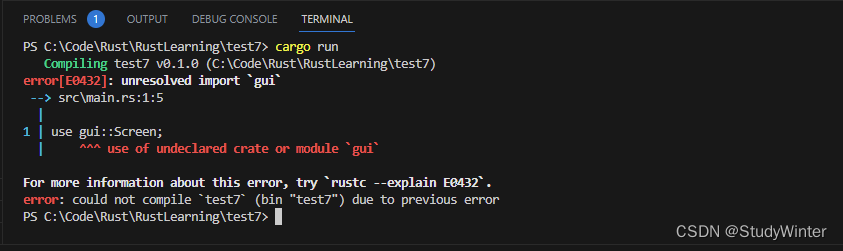
KDAB QML学习笔记Day3(5,6,7,8)
学习视频链接:Introduction to Qt / QML - all videos so far - YouTube
B站链接:Introduction to Qt / QML_哔哩哔哩_bilibili
Part05,06
示例代码
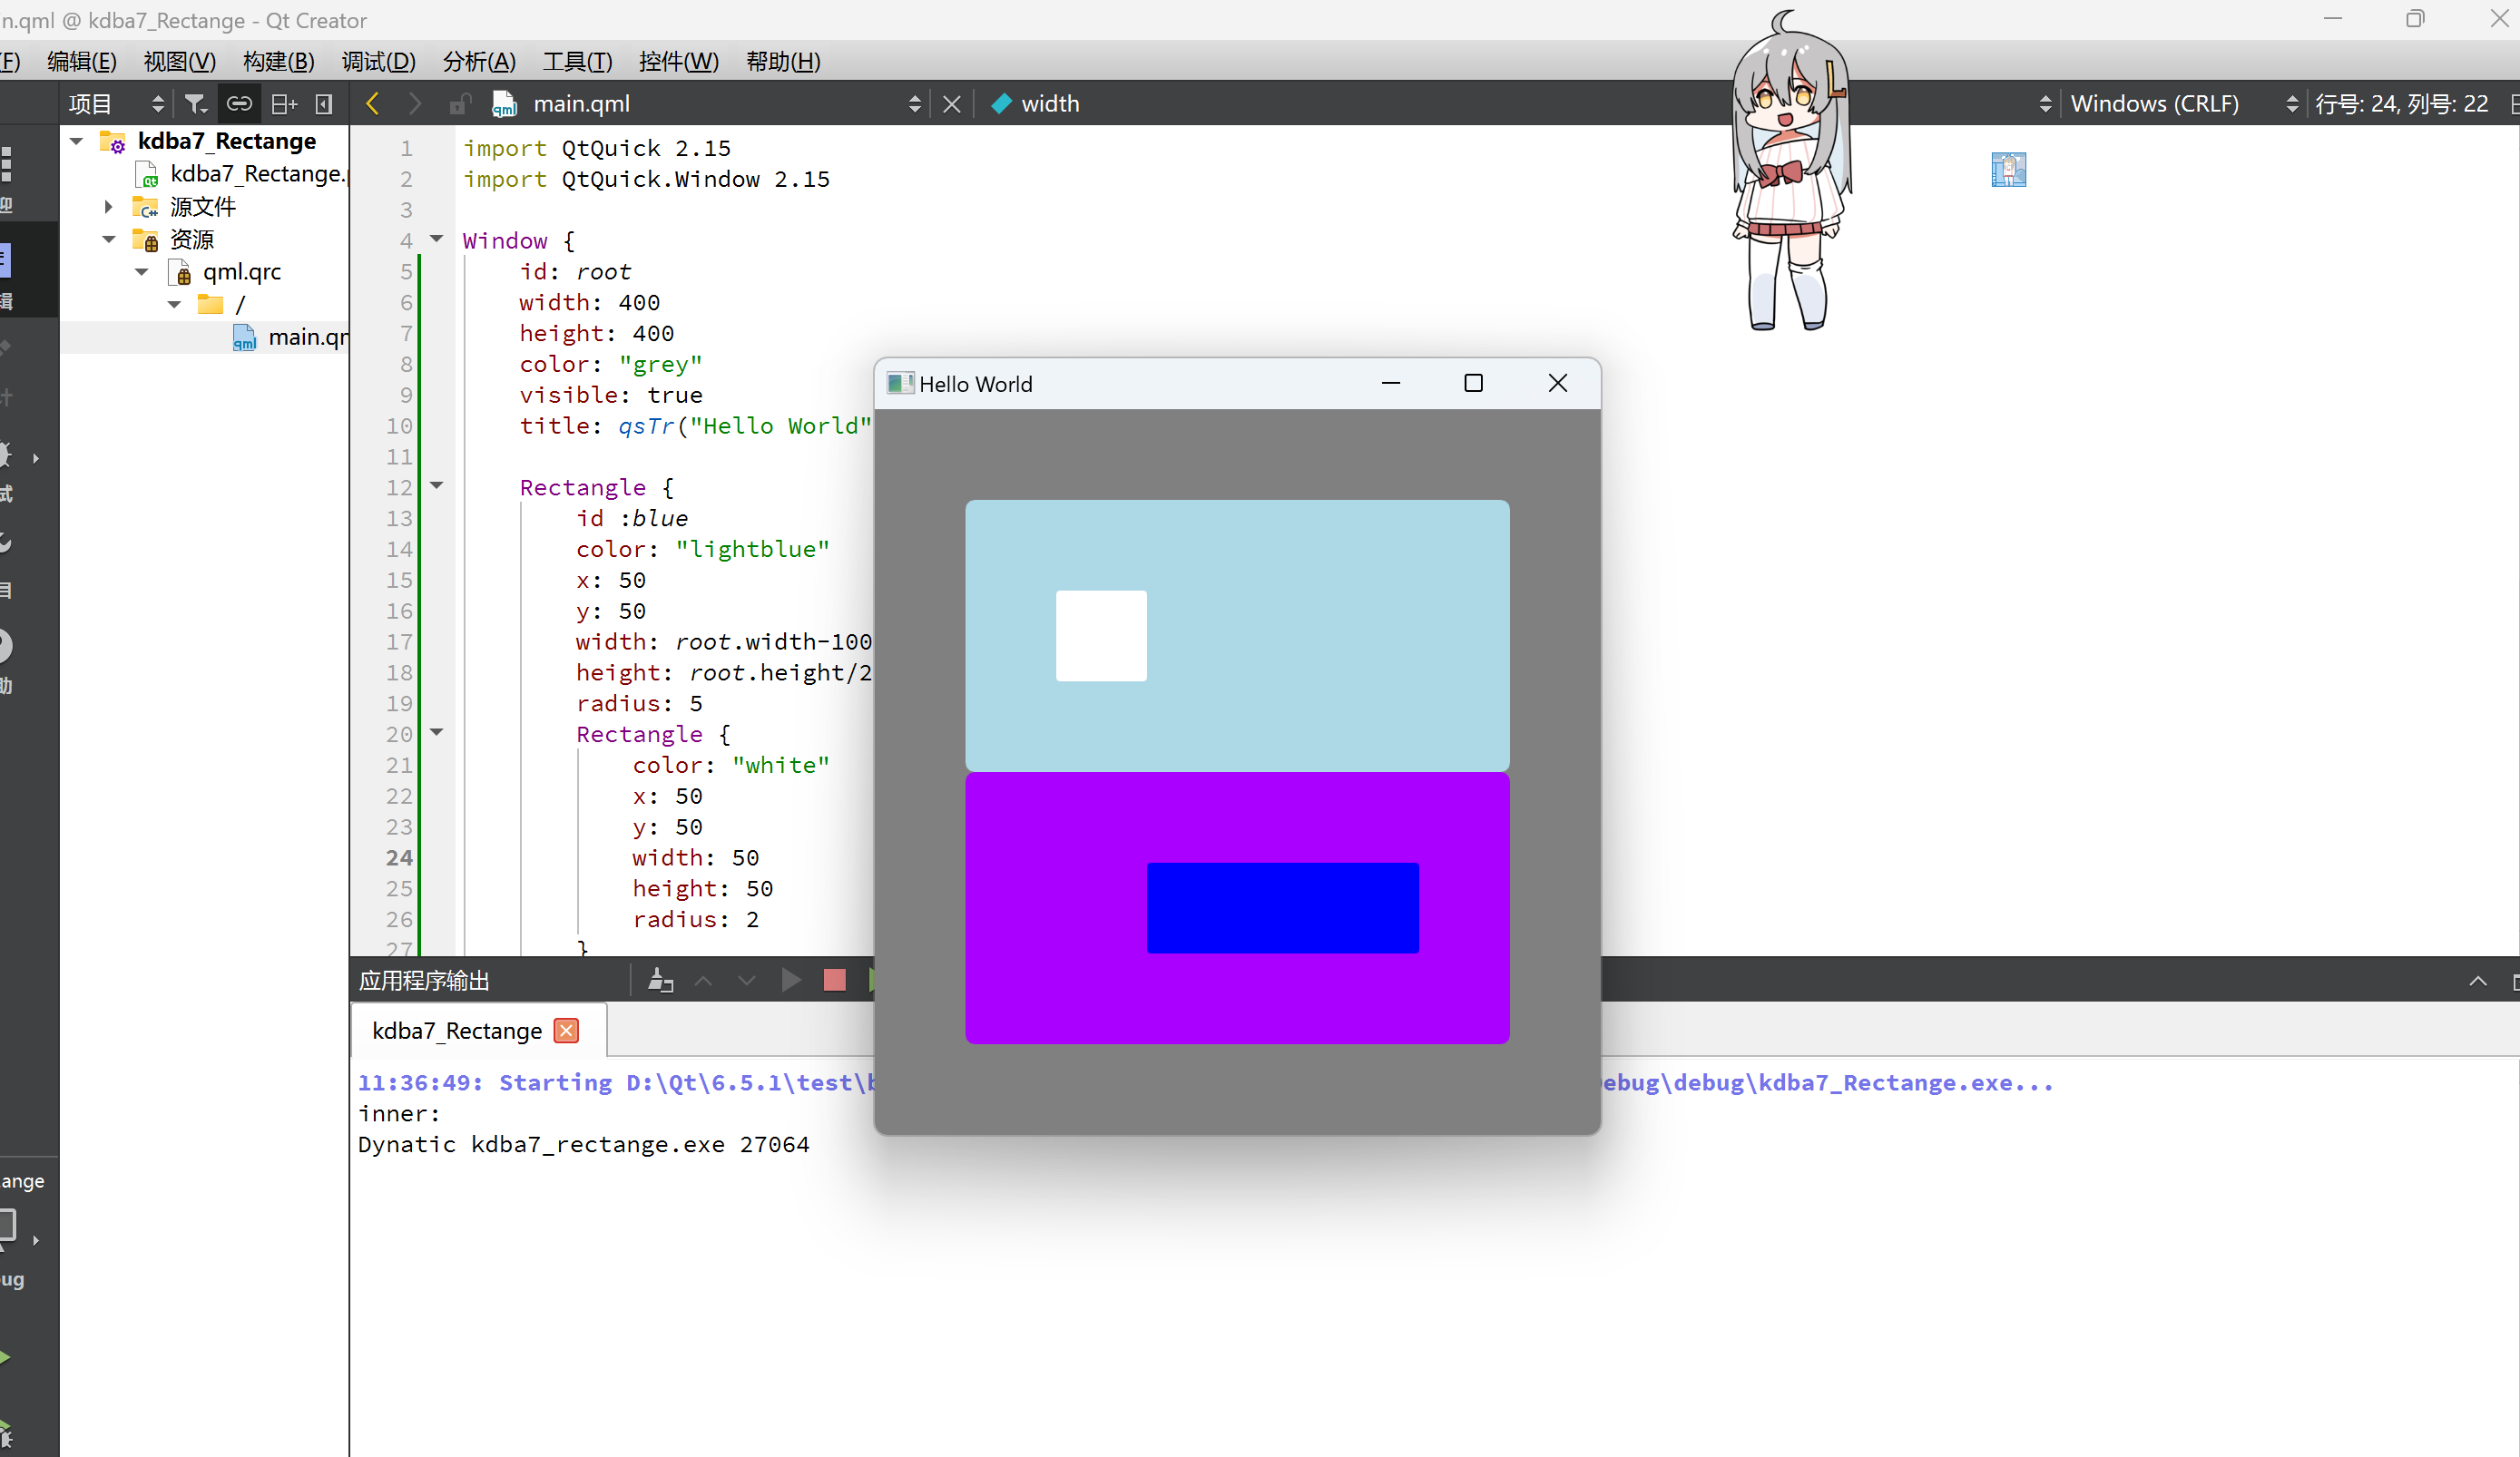
import QtQuick 2.15
import QtQuick.Window 2.15

Window {
    id: root
    width: 400
    height: 400
    color: "grey"
    visible: true
    title: qsTr("Hello World")

    Rectangle {
        id :blue
        color: "lightblue"
        x: 50
        y: 50
        width: root.width-100
        height: root.height/2-50
        radius: 5
        Rectangle {
            color: "white"
            x: 50
            y: 50
            width: 50
            height: 50
            radius: 2
        }
        z: 1
    }
    Rectangle {
        color: "#aa00ff"
        x: 50
        y: blue.x +blue.height
        width: 300
        height: 150
        radius: 5
        Rectangle {
            color: "blue"
            x: 100
            y: 50
            width: 150
            height: 50
            radius: 2
        }
    }
}
运行截图
Part07

使用图像的一部分创建边框。角(区域1,3,7,9)没有缩放。
水平边框(2和8)根据horizontalTileMode缩放。
垂直边框(4和6)根据verticalTileMode缩放。
中间区域(5)根据两种模式进行缩放。
有3种不同的比例模式:
拉伸:缩放图像以适合可用区域。
重复:平铺图像直到没有更多的空间。
圆形:像重复,但缩小图像确保最后一张图片没有被裁剪
代码示例
// requires Qt 5.9 or we'll hit https://bugreports.qt.io/browse/QTBUG-62913
import QtQuick 2.9

Rectangle {
    id: root
    width: 400; height: 350
    color: "#00a3fc"

//--> slide
    AnimatedImage {
        id: animation

        x: 100; y: 50
        width: 200; height: 200

        source: "../images/image-animated.gif"
    }
//<-- slide

    Rectangle {
        x: 100; y: 260; width: 200; height: 24
        color: "black"

        Rectangle {
            width: 4; height: 24
            color: "red"

            x: (parent.width - width) * animation.currentFrame / animation.frameCount
        }

        Text {
            text: "Frame %1 of %2".arg(animation.currentFrame).arg(animation.frameCount)
            color: "white"
            font.pixelSize: 18
        }
    }
}
示例图片资源

Part08
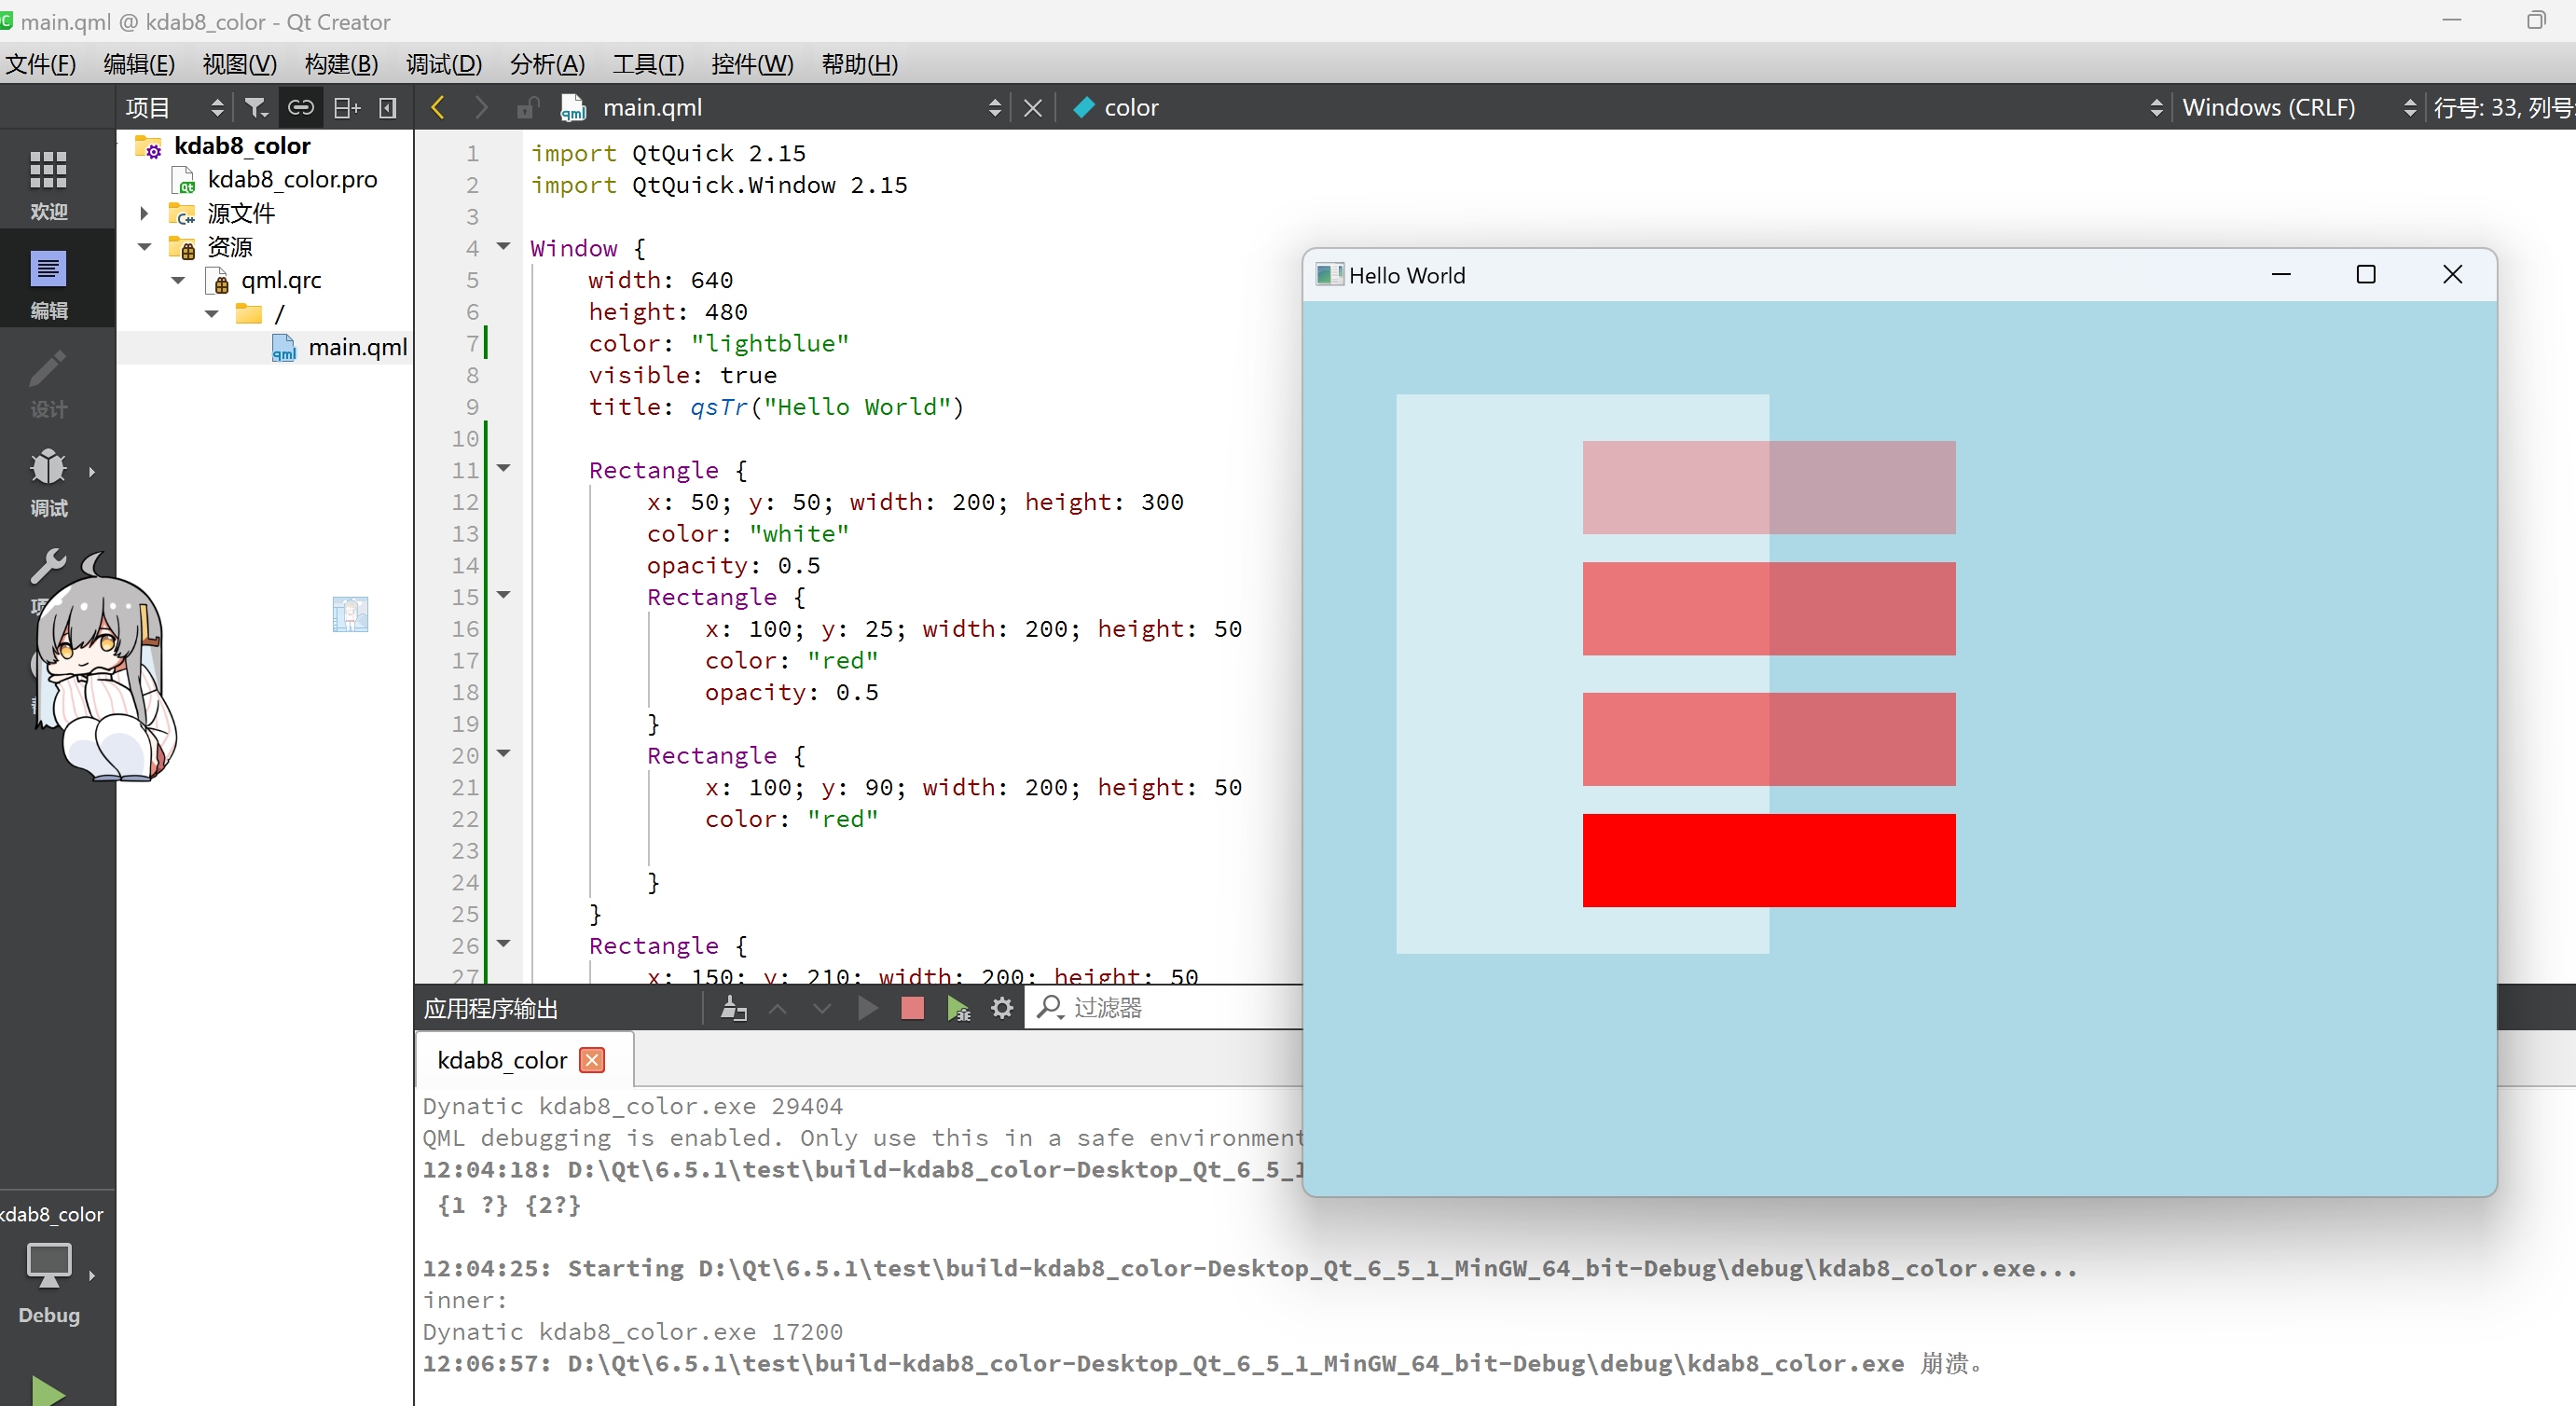
可以应用于任何项目类型吗像位置一样,
效果是相对于父节点的
控制属性:
不透明度:从0.0(透明)到1.0(不透明)的值
旋转:以度为单位的顺时针旋转角度
示例代码:
import QtQuick 2.15
import QtQuick.Window 2.15

Window {
    width: 640
    height: 480
    color: "lightblue"
    visible: true
    title: qsTr("Hello World")

    Rectangle {
        x: 50; y: 50; width: 200; height: 300
        color: "white"
        opacity: 0.5
        Rectangle {
            x: 100; y: 25; width: 200; height: 50
            color: "red"
            opacity: 0.5
        }
        Rectangle {
            x: 100; y: 90; width: 200; height: 50
            color: "red"

        }
    }
    Rectangle {
        x: 150; y: 210; width: 200; height: 50
        color: "red"
        opacity: 0.5
    }
    Rectangle {
        x: 150; y: 275; width: 200; height: 50
        color: "red"
    }
}


![[语音识别] 基于Python构建简易的音频录制与语音识别应用](https://img-blog.csdnimg.cn/7282dce02ace4c1bbffedde6c6a817e3.png)