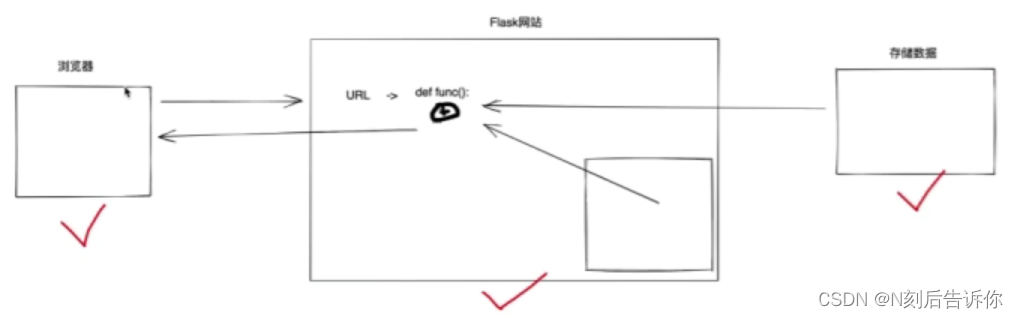
初识网站
- 默认编写的静态的效果
- 动态:需要用到Web框架的功能。
对于目前的我们来看,什么可以做数据存储: - txt文件
- excel文件
- 专业的软件:数据库管理系统
MySQL/Oracle/SQLServer/DB2/Access...

7 MysQL
7.1 安装MySQL
MySQL,本质上就是一个软件。
- 8.x
- 5.x
略
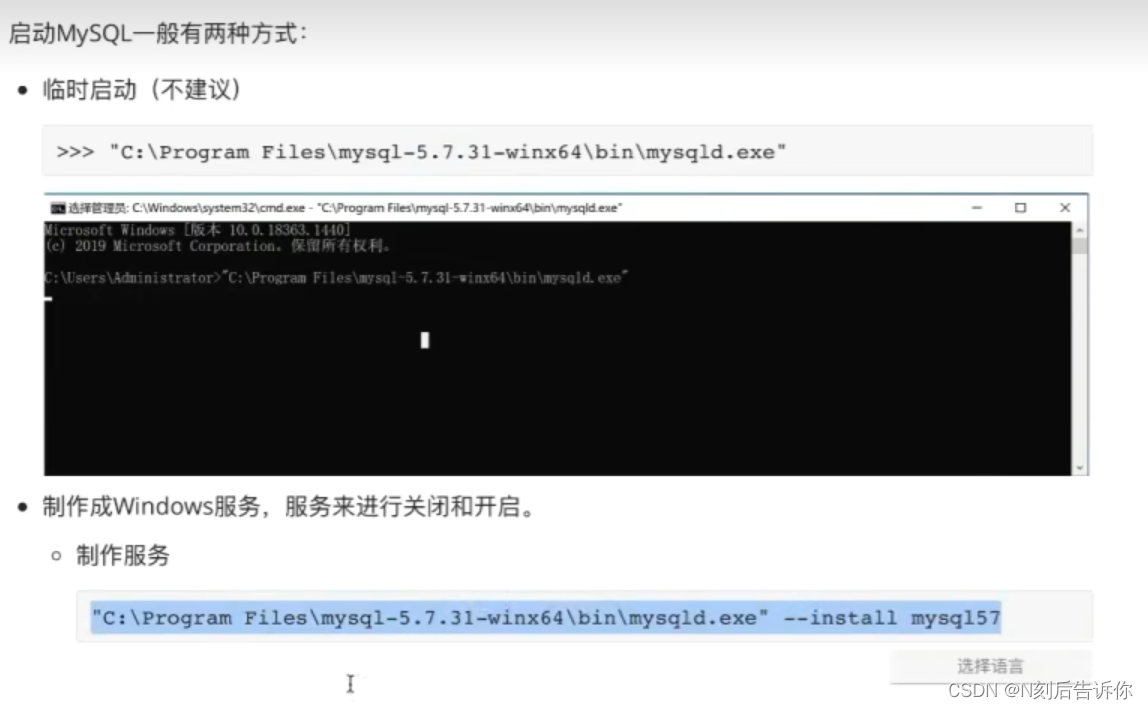
7.2 启动MySQL
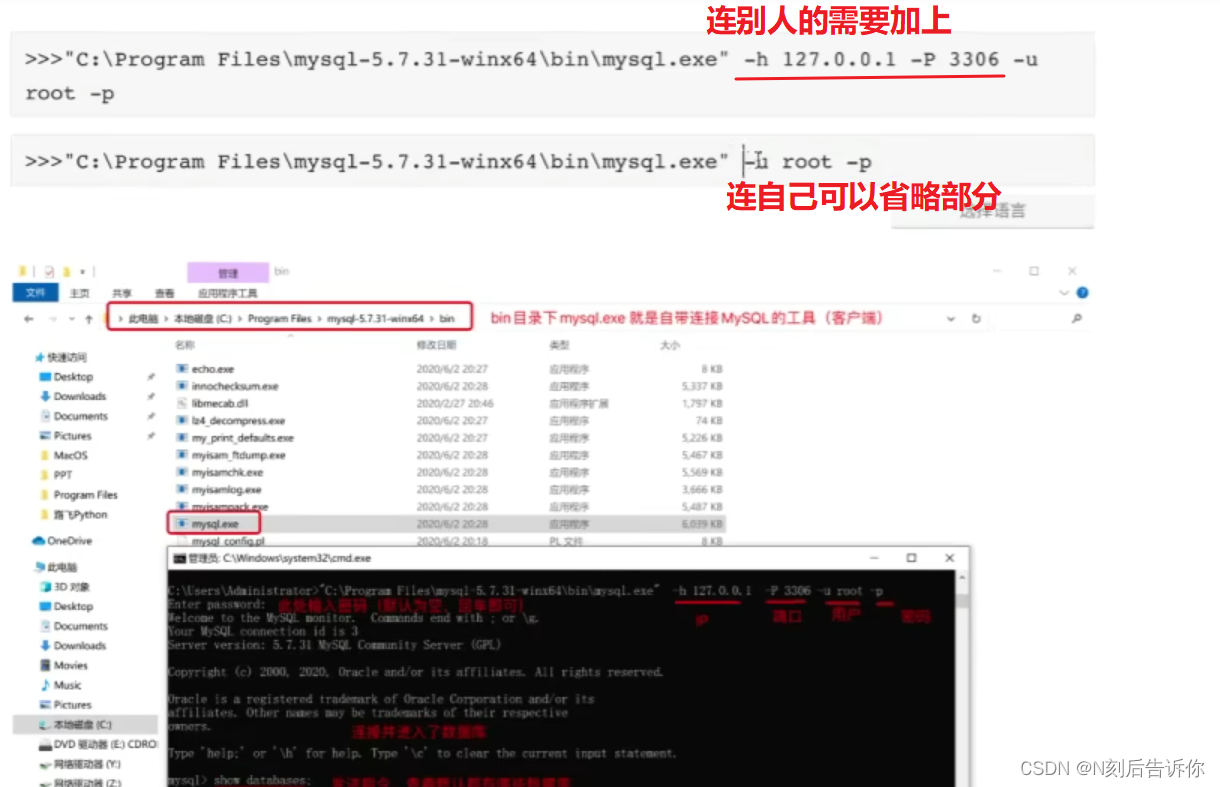
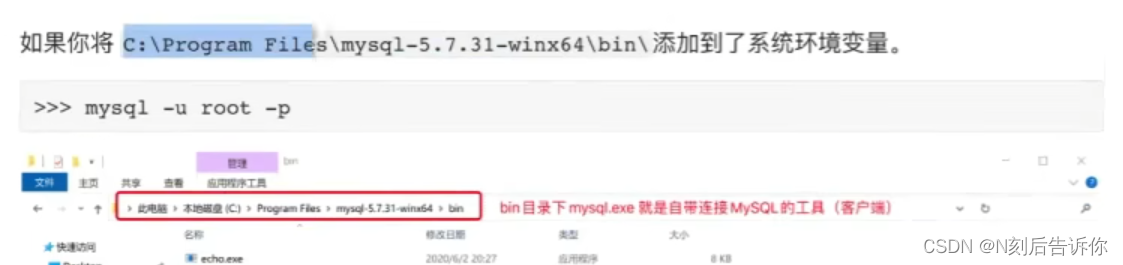
7.3 MySQL指令
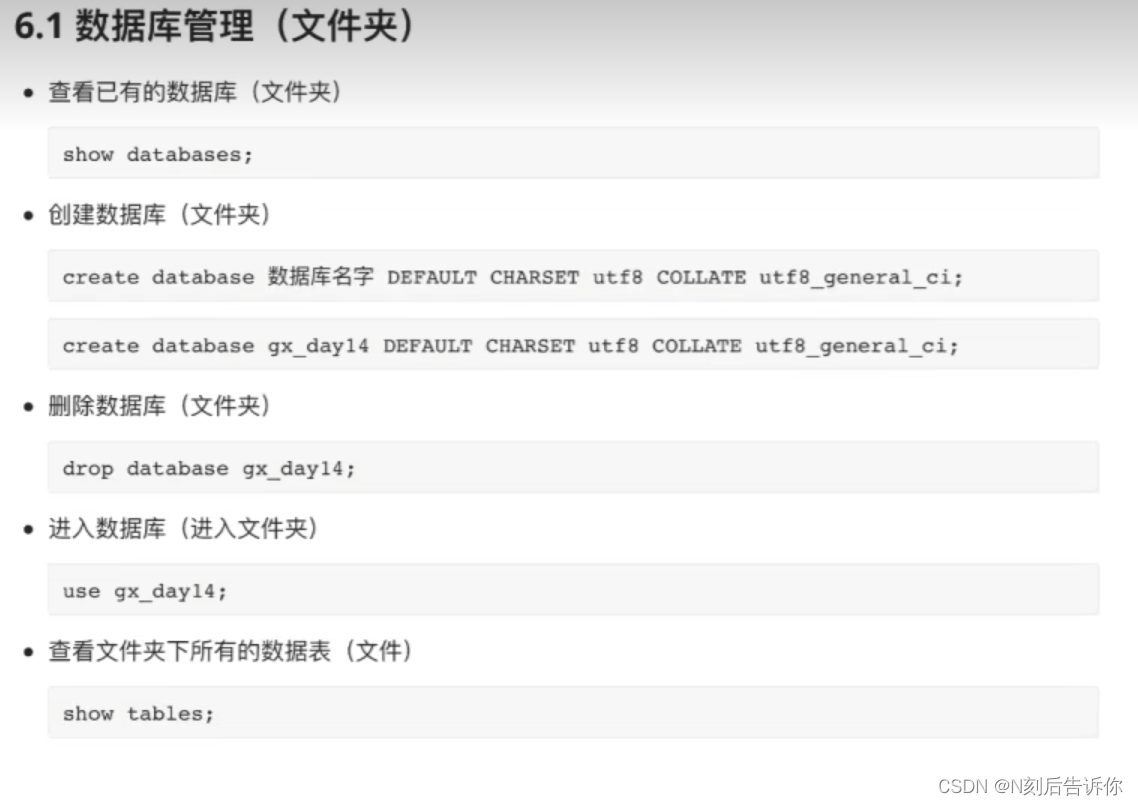
7.3.1 数据库管理(文件夹)
7.3.2 数据表的管理(文件)
略
char,速度快。varchar,节省空间。
7.4 案例:员工管理
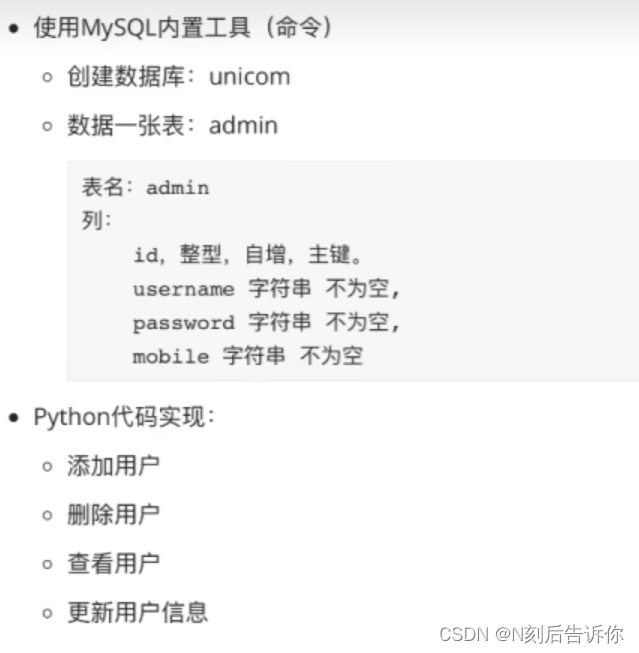
7.4.2 Python操作MySQL
创建连接,创建游标cursor,用游标execute执行sql语句,然后断开连接。
import pymysql
# 1.连接MySQL
conn = pymysql.connect(host="127.0.0.1", port=3306, user="root", passwd="xxxx", charset="utf8", db='unicom')
cursor = conn.cursor(cursor=pymysql.cursors.DictCursor)
# 2.发送指令
cursor.execute("insert into admin(username, password, mobile) values('张三', 'qwe123', '155555')")
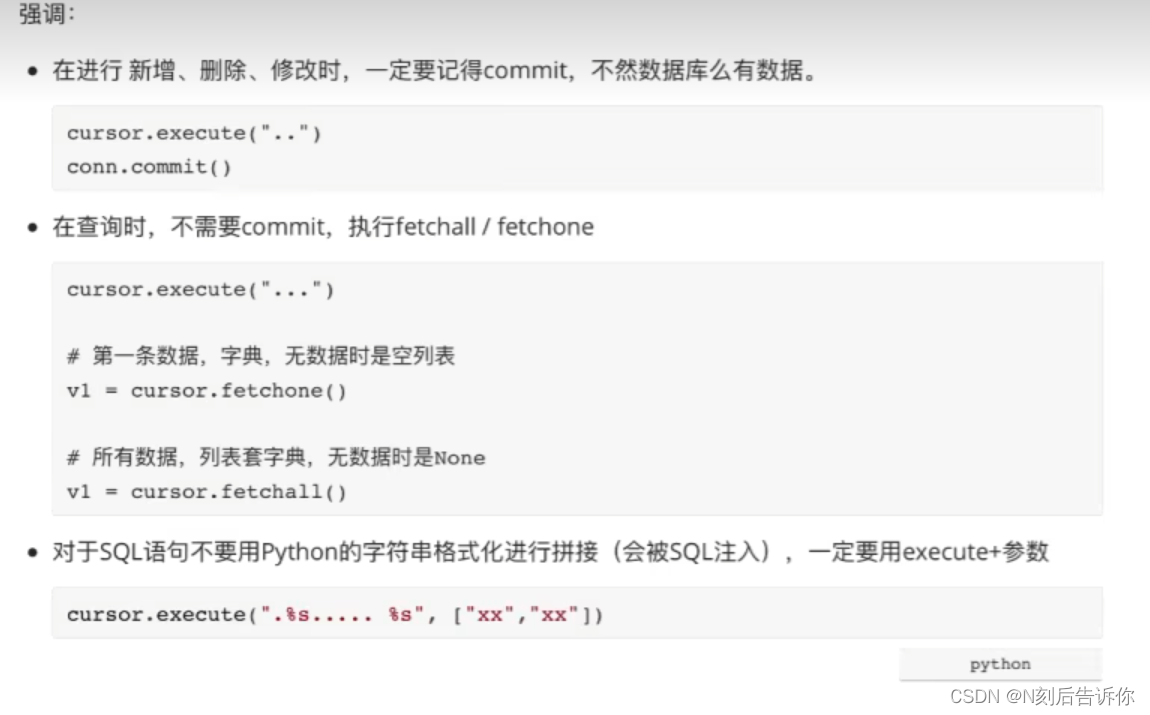
conn.commit()
# 3.关闭连接
cursor.close()
conn.close()
动态执行sql,千万不要用字符串格式化去做sql拼接,会有安全隐患SQL注入
sql = "insert into admin(username, password, mobile) values(%s, %s, %s)"
cursor.execute(sql, ["李四", "qwe123", "1999999"])

sql = "insert into admin(username, password, mobile) values(%(n1)s, %(n2)s, %(n3)s)"
cursor.execute(sql, {"n1": "王五",  "n2": "qwe123", "n3": "1999999"})
conn.commit()
- 查询数据
fetchall获取所有数据
fetchone获取符合条件的第一条数据
import pymysql

# 1.连接MySQL
conn = pymysql.connect(host="127.0.0.1", port=3306, user="root", passwd="xxxxx, charset="utf8", db='unicom')
cursor = conn.cursor(cursor=pymysql.cursors.DictCursor)

# 2.发送指令
sql = "select * from admin where id > 2 "
cursor.execute(sql)
datalist = cursor.fetchall()
for row_dict in datalist:
    print(row_dict)

# 3.关闭连接
cursor.close()
conn.close()
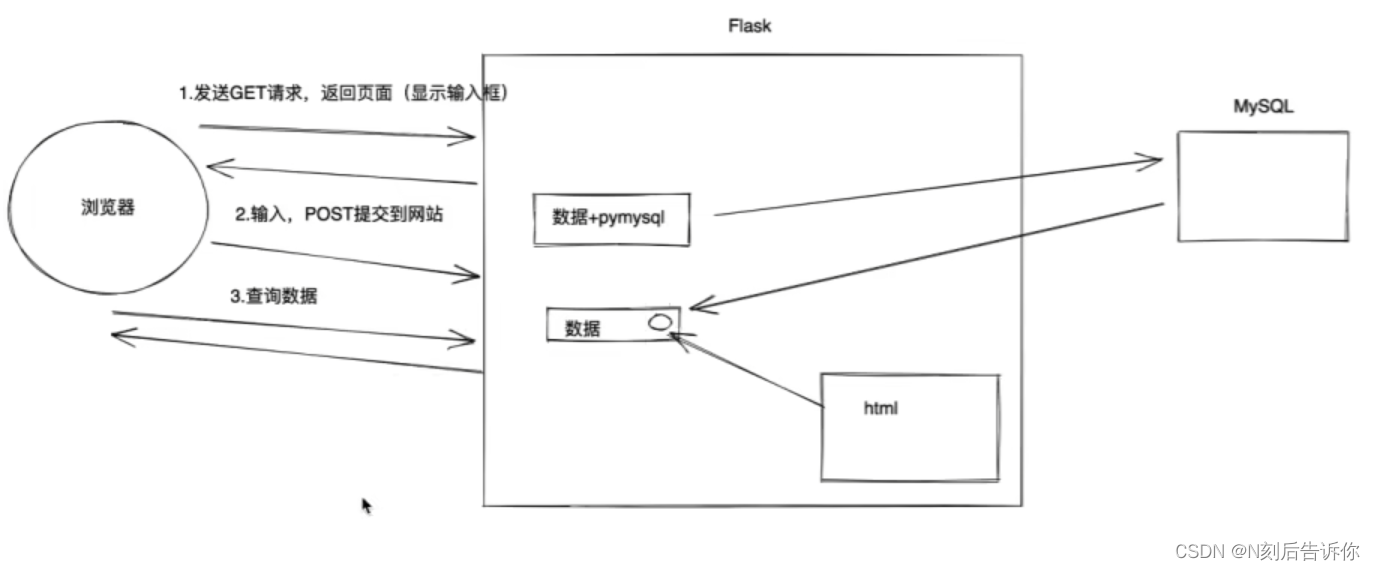
8.案例:Flask+MySQL
from flask import Flask, render_template, request
import pymysql

app = Flask(__name__)

@app.route("/add/user", methods=["GET", "POST"])
def add_user():
    if request.method == "GET":
        return render_template("add_user.html")

    username = request.form.get("user")
    password = request.form.get("pwd")
    mobile = request.form.get("mobile")

    # 1.连接MySQL
    conn = pymysql.connect(host="127.0.0.1", port=3306, user="root", password="xxxx", charset="utf8", db="unicom")
    cursor = conn.cursor(cursor=pymysql.cursors.DictCursor)
    # 2.执行SQL
    sql = "insert into admin(username, password, mobile) values(%s, %s, %s)"
    cursor.execute(sql, [username, password, mobile])
    conn.commit()
    # 3.关闭连接
    cursor.close()
    conn.close()

    return "添加成功"


@app.route("/show/user")
def show_user():
    # 1.连接MySQL
    conn = pymysql.connect(host="127.0.0.1", port=3306, user="root", password="xxxx", charset="utf8", db="unicom")
    cursor = conn.cursor(cursor=pymysql.cursors.DictCursor)
    # 2.执行SQL
    sql = "select * from admin"
    cursor.execute(sql)
    data_list = cursor.fetchall()
    # 3.关闭连接
    cursor.close()
    conn.close()

    print(data_list)
    return render_template("show_user.html", data_list=data_list)


if __name__ == '__main__':
    app.run()
9 初始Django
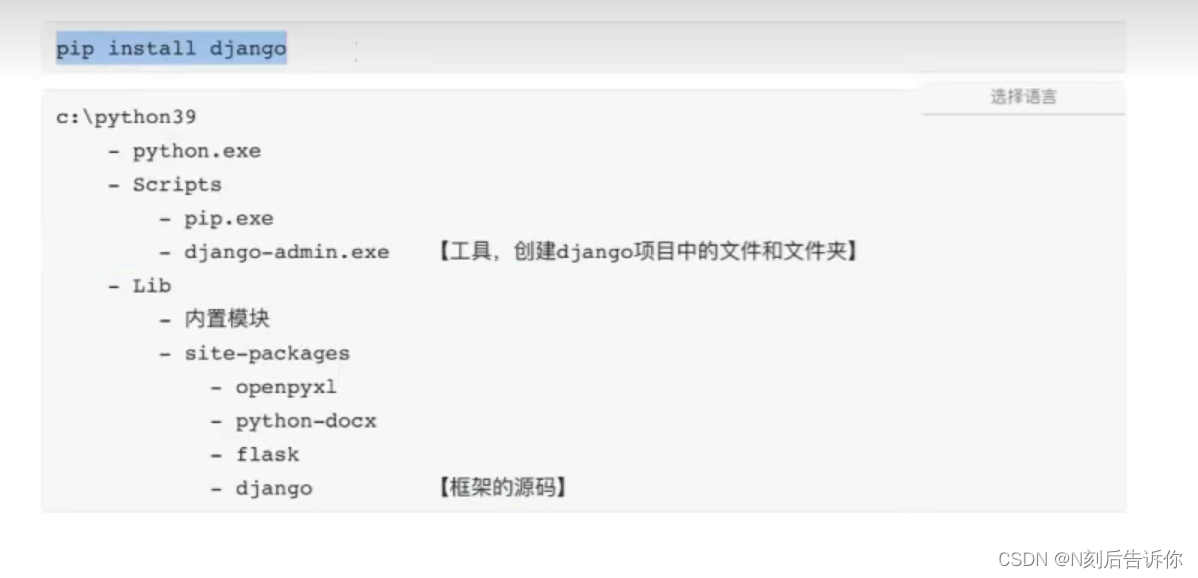
9.1 安装django
安装完会有django-amin.exe和django模块。
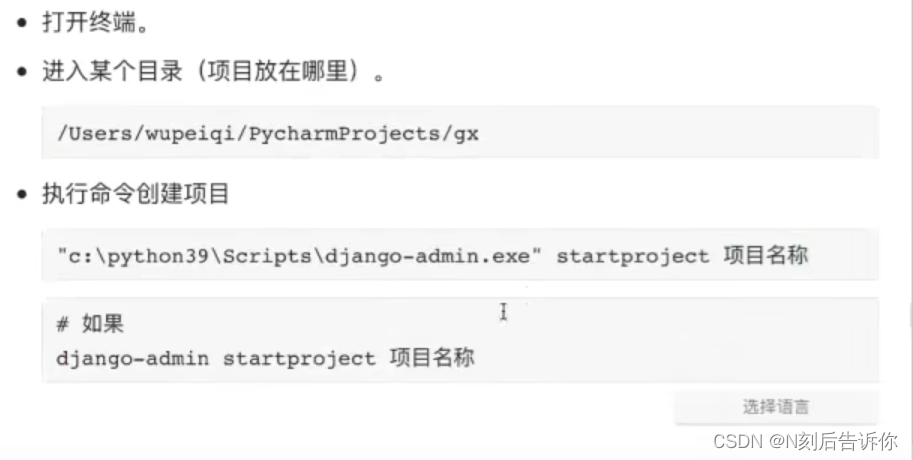
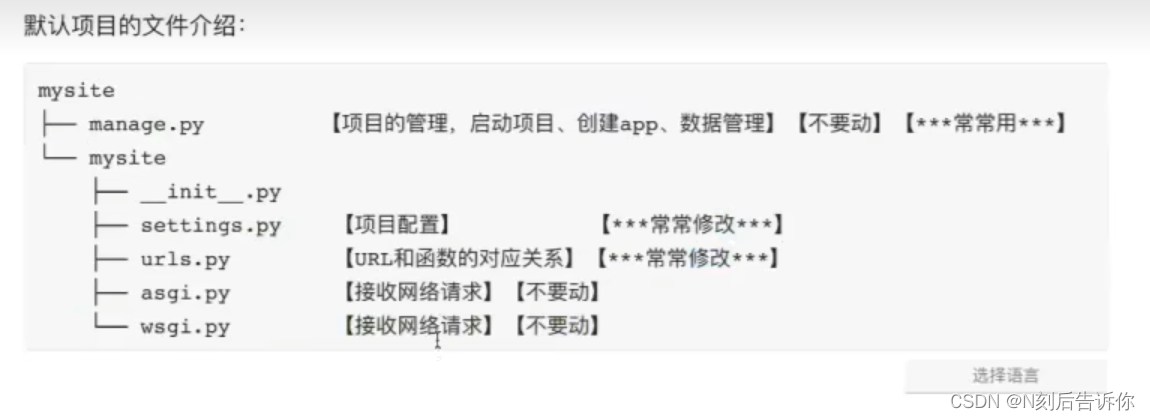
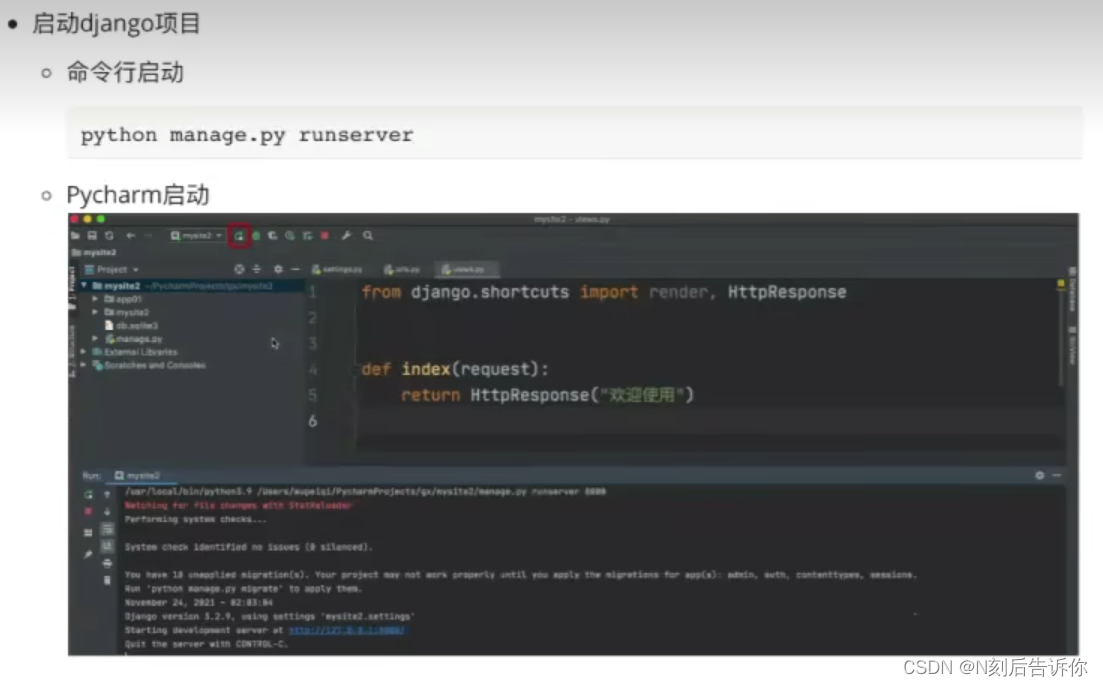
9.2 创建项目
9.2.1 在终端
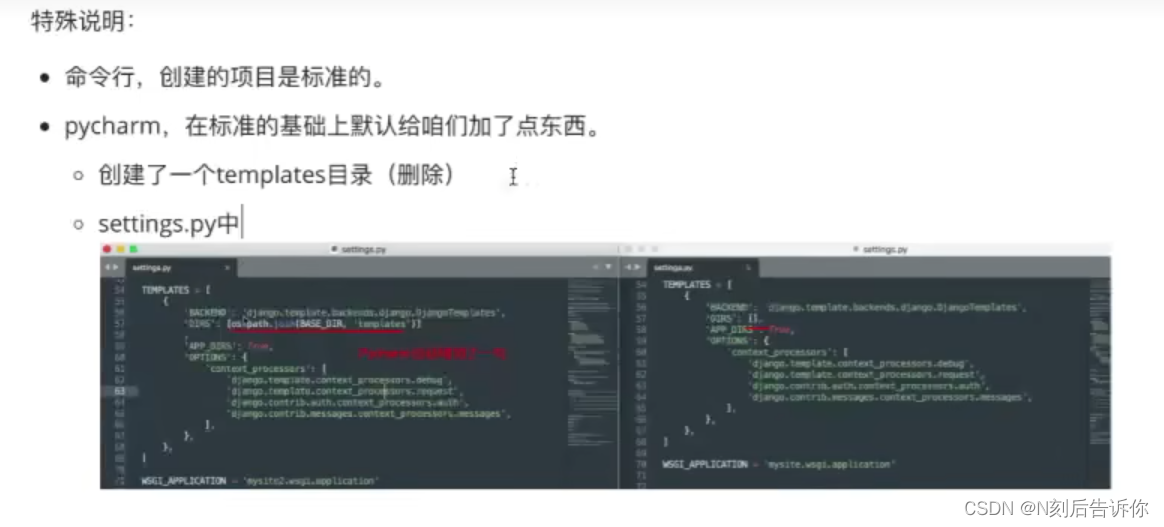
9.2.2 Pycharm
略
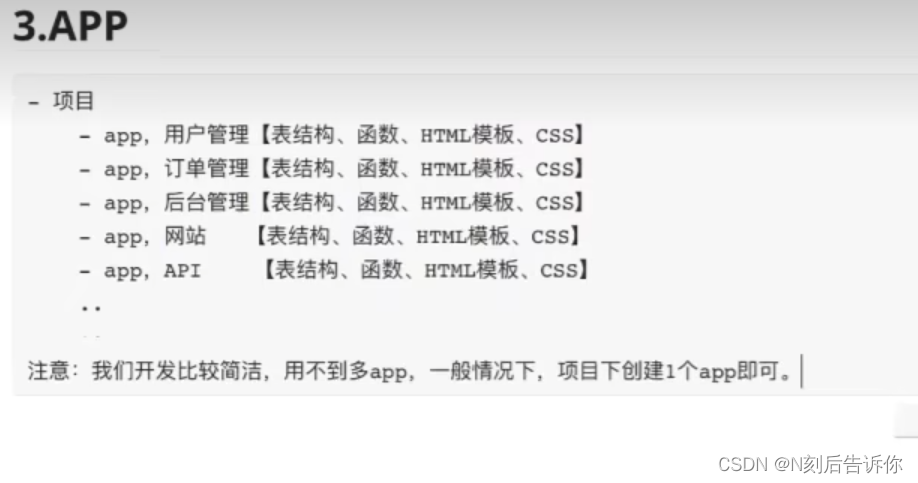
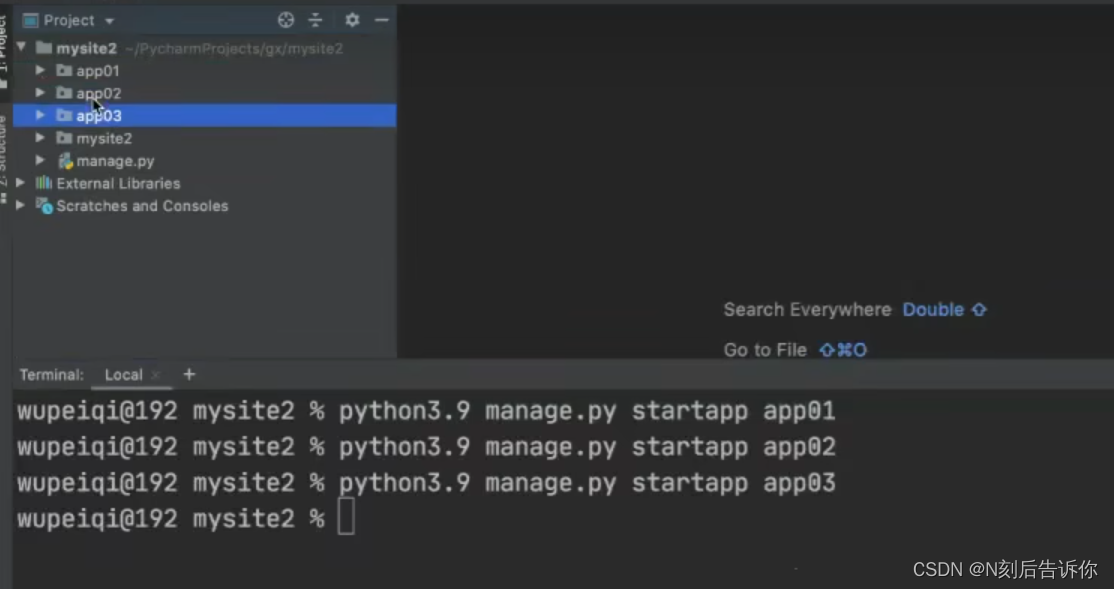
9.3 APP
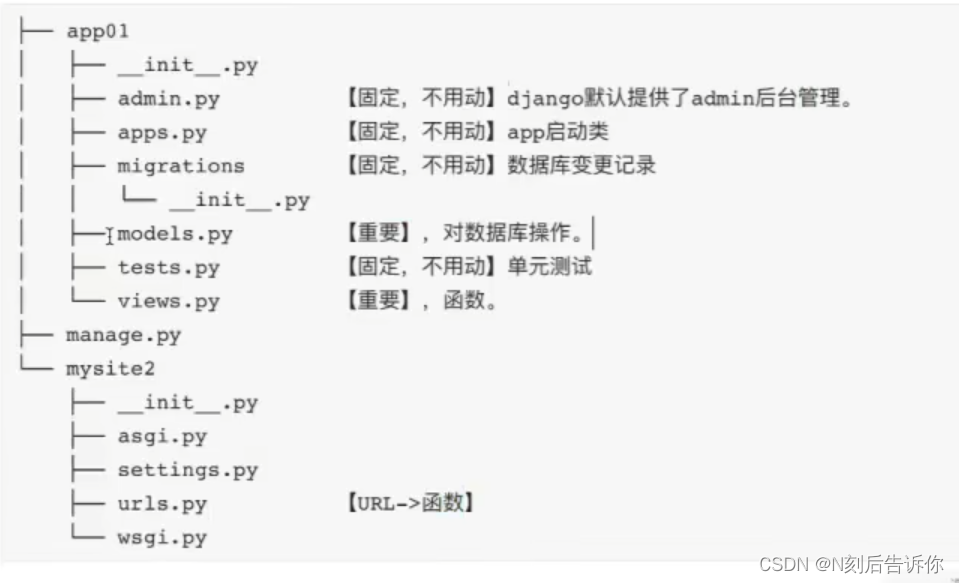
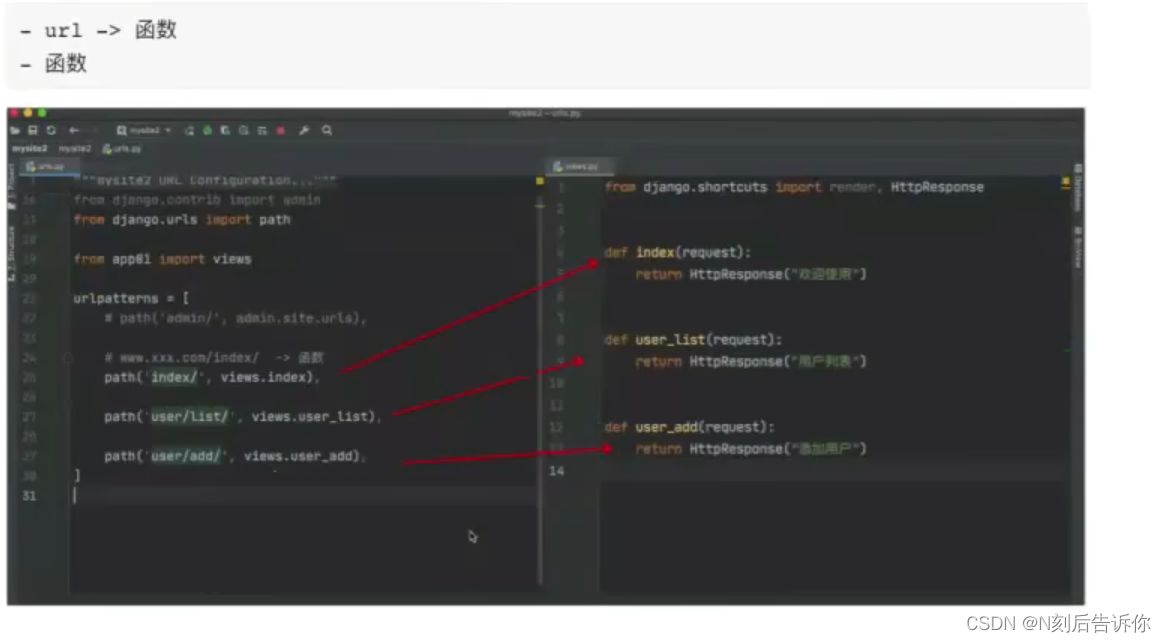
9.4 快速上手

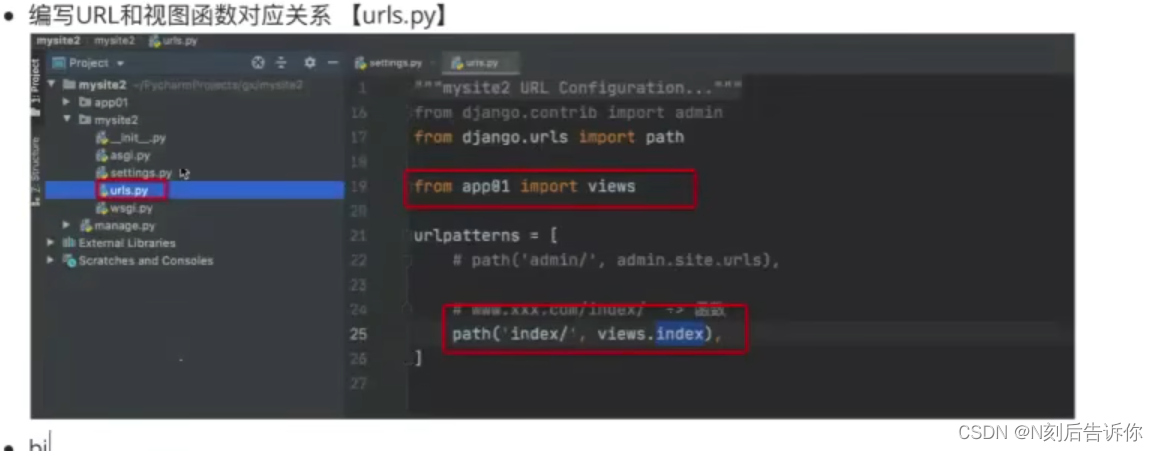
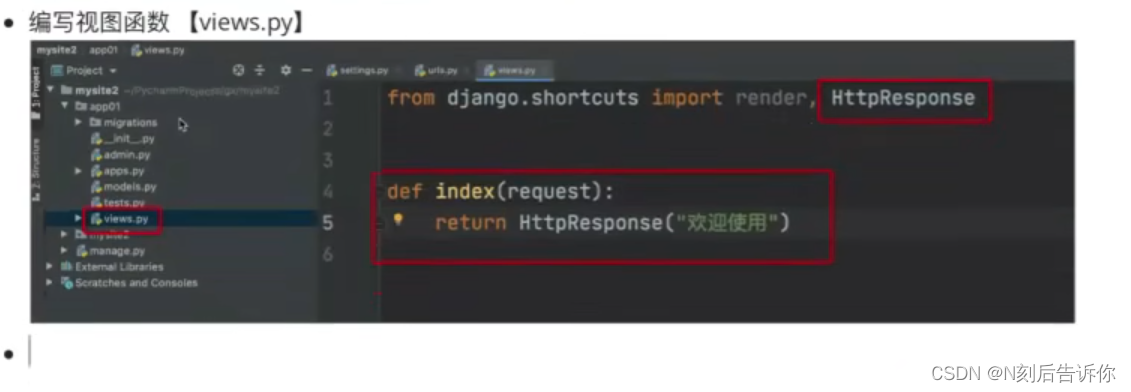
9.4.1 再写一个页面
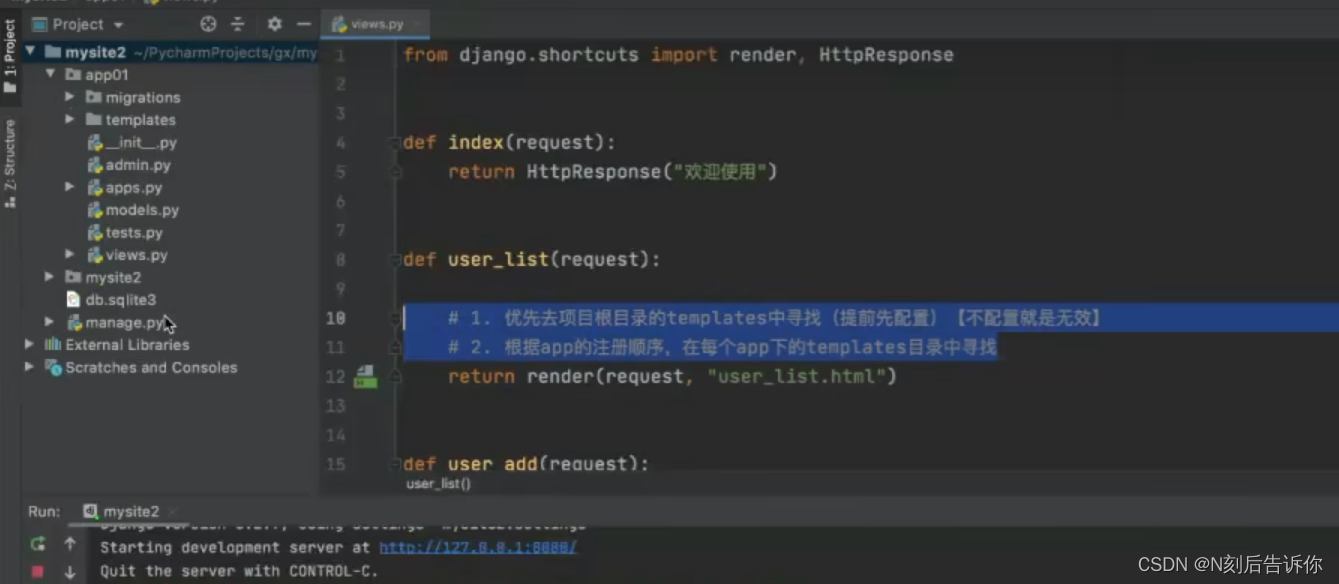
9.4.2 templates模板
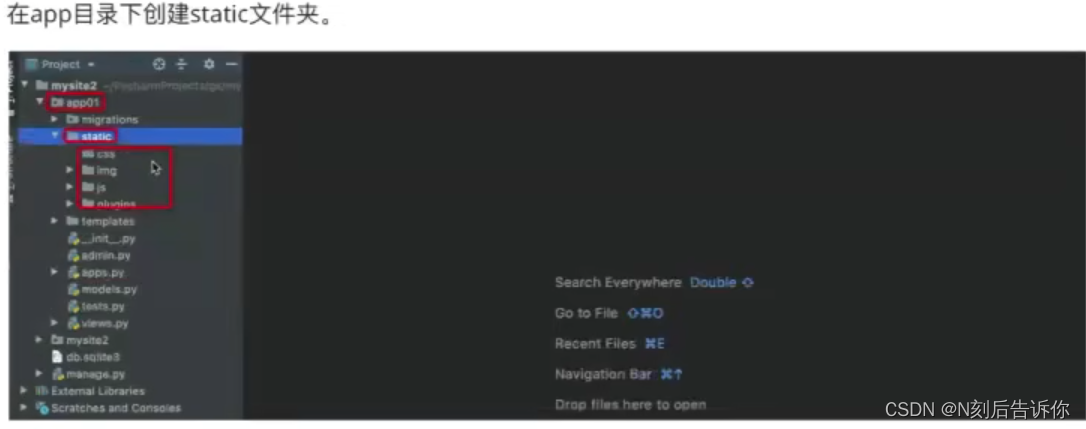
9.4.3 静态文件

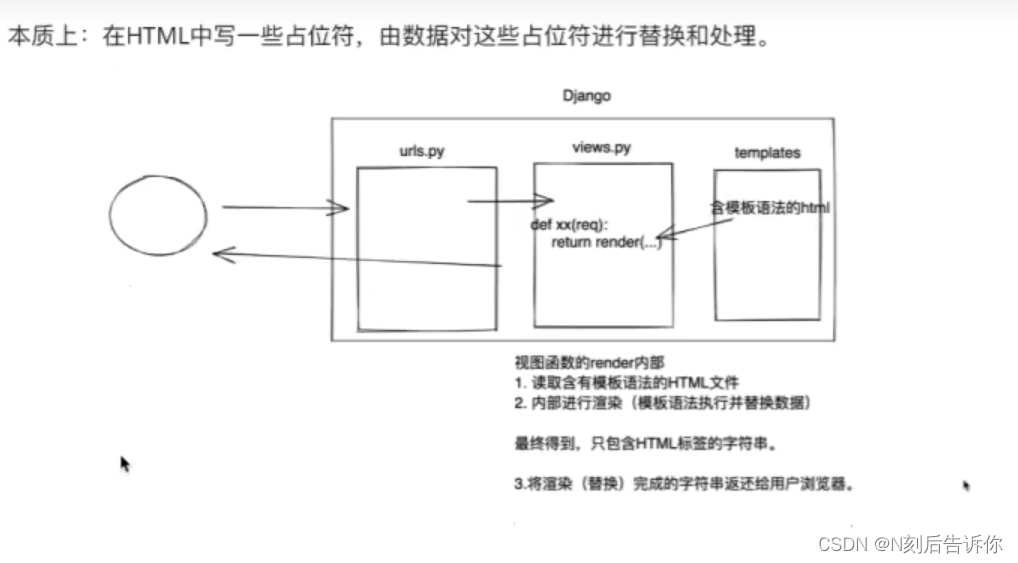
9.5 模板语法
<!DOCTYPE html>
<html lang="en">
<head>
    <meta charset="UTF-8">
    <title>Title</title>
</head>
<body>
<h1>模板语法的学习</h1>
<div>{{ n1 }}</div>
<div>{{ n2 }}</div>

<div>{{ n2.0 }}</div>
<div>{{ n2.1 }}</div>
<div>{{ n2.2 }}</div>

<div>
    {% for item in n2 %}
        <span>{{ item }}</span>
    {% endfor %}
</div>
<hr/>
<div>{{ n3 }}</div>

<div>{{ n3.name }}</div>
<div>{{ n3.salary }}</div>
<div>{{ n3.role }}</div>

<div>
    {% for k, v in n3.items %}
        <li>{{ k }} = {{ v }}</li>
    {% endfor %}
</div>
<hr>
{{ n4.1 }}
{{ n4.1.name }}
{% for item in n4 %}
    <div>{{ item.name }}{{ item.salary }}</div>
{% endfor %}

<hr>
{% if n1 == "韩超" %}
    <h1>哒哒哒</h1>
{% else %}
    <h1>嘟嘟嘟</h1>
{% endif %}

{% if n1 == "韩超" %}
    <h1>哒哒哒</h1>
{% elif n1 == "xxx" %}
    <h1>bibibi</h1>
{% else %}
    <h1>嘟嘟嘟</h1>
{% endif %}
</body>
</html>
案例:伪联通新闻中心
爬虫如果报错:Expecting value: line 1 column 1 (char 0)可以参考视频


![银河麒麟系统安装mysql数据库[mysql-5.7.28-linux-glibc2.12-x86_64]](https://img-blog.csdnimg.cn/img_convert/8a29e06240f2733cc3be95870b806925.png)