前言
本文适合具有springboot的基础的同学。
SpringBoot3改变&新特性
- 一、前置条件
- 二、自动配置包位置变化
- 1、Springboot2.X
- 2、Springboot3.X
- 三、jakata api迁移
- 1、Springboot2.X
- 2、Springboot3.X
- 3、SpringBoot3使用druid有问题,因为它引用的是旧的包
- 四 新特性 - 函数式接口
- 1、场景
- 2.、核心类
- 五、新特性Problemdetails
- 1、Problemdetails 是一种新的规范
- 2、详细说明
- 3、开启后的效果
- 3.1、先准备一个GET请求接口
- 3.2、使用Post请求该接口
- 3.3、添加problemdetails配置后再使用Post请求该接口
- 3.4、原理分析
- 六、支持GraalVM 与 AOT
- 1. AOT与JIT
- 2. GraalVM
- 1.1.GraalVM架构
- 1.2 安装 VisualStudio
- 1.3 安装 GraalVM
- 1.3安装 native-image 依赖
- 1.4测试
- 3、springboot整合graalvm
- 第一步:添加插件
- 第二步:生成native-image
- 常见问题
一、前置条件
-
Java 17或更高版本
-
Gradle 7.5+或Maven 3.5+
二、自动配置包位置变化
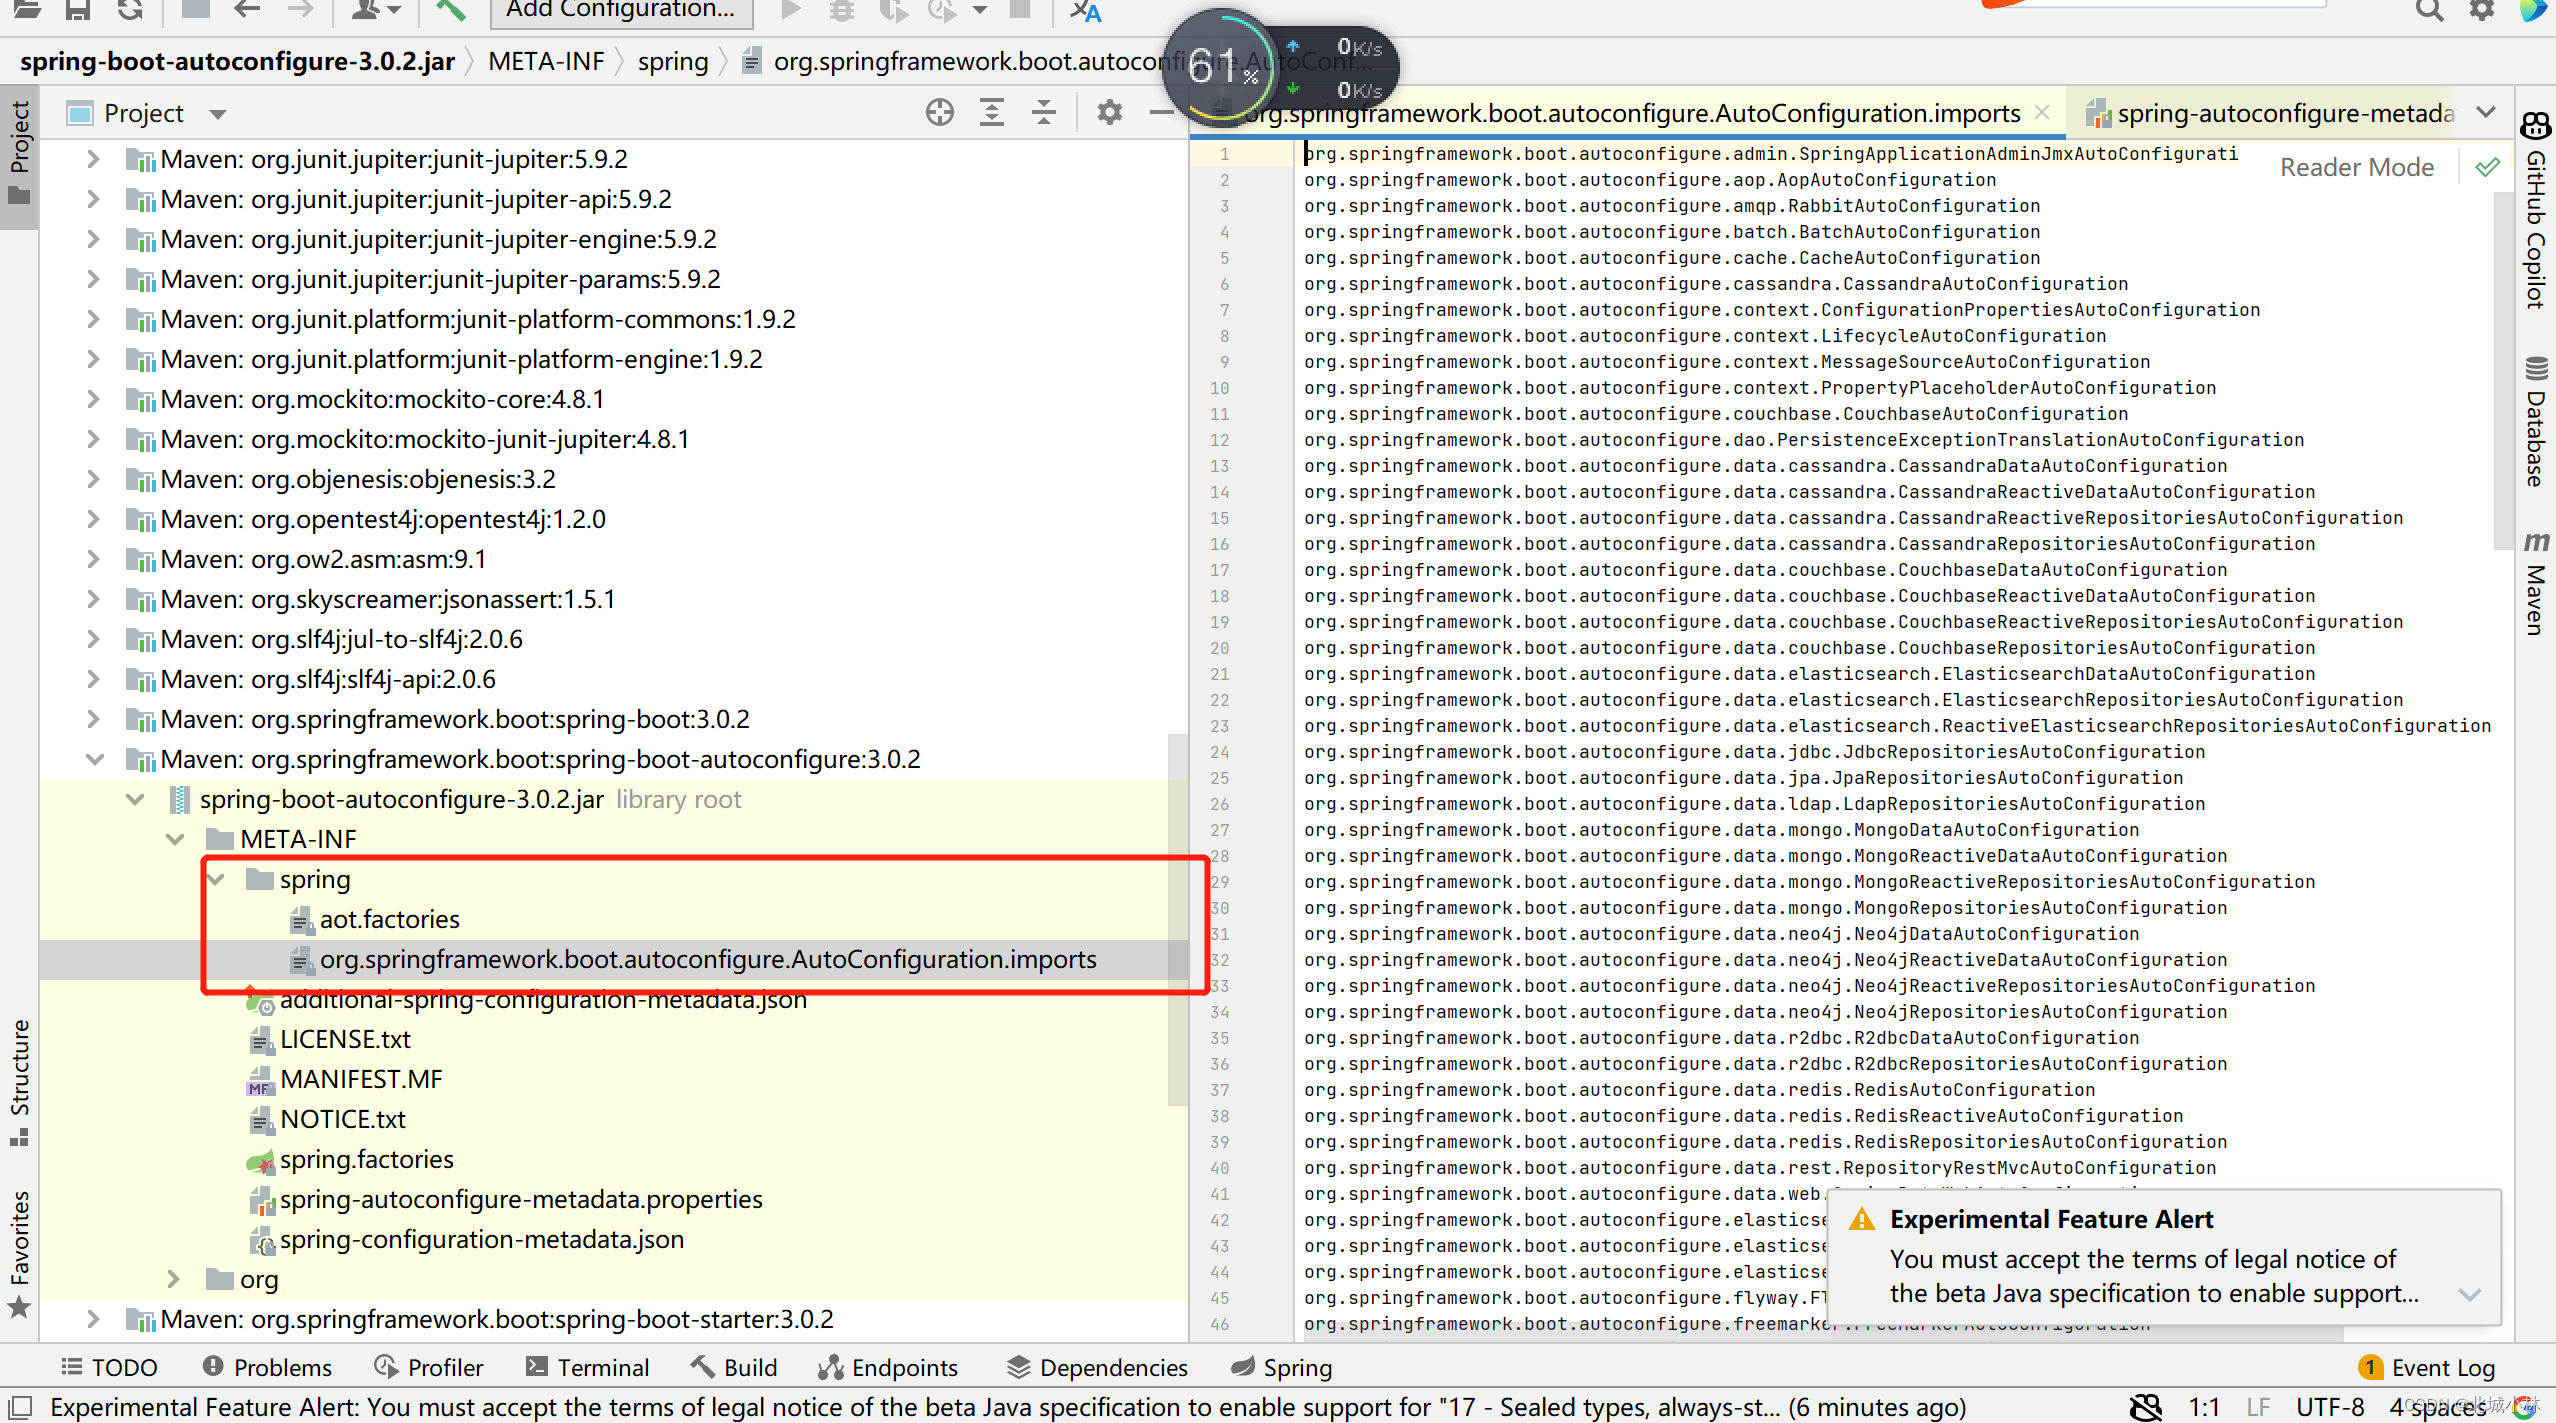
1、Springboot2.X
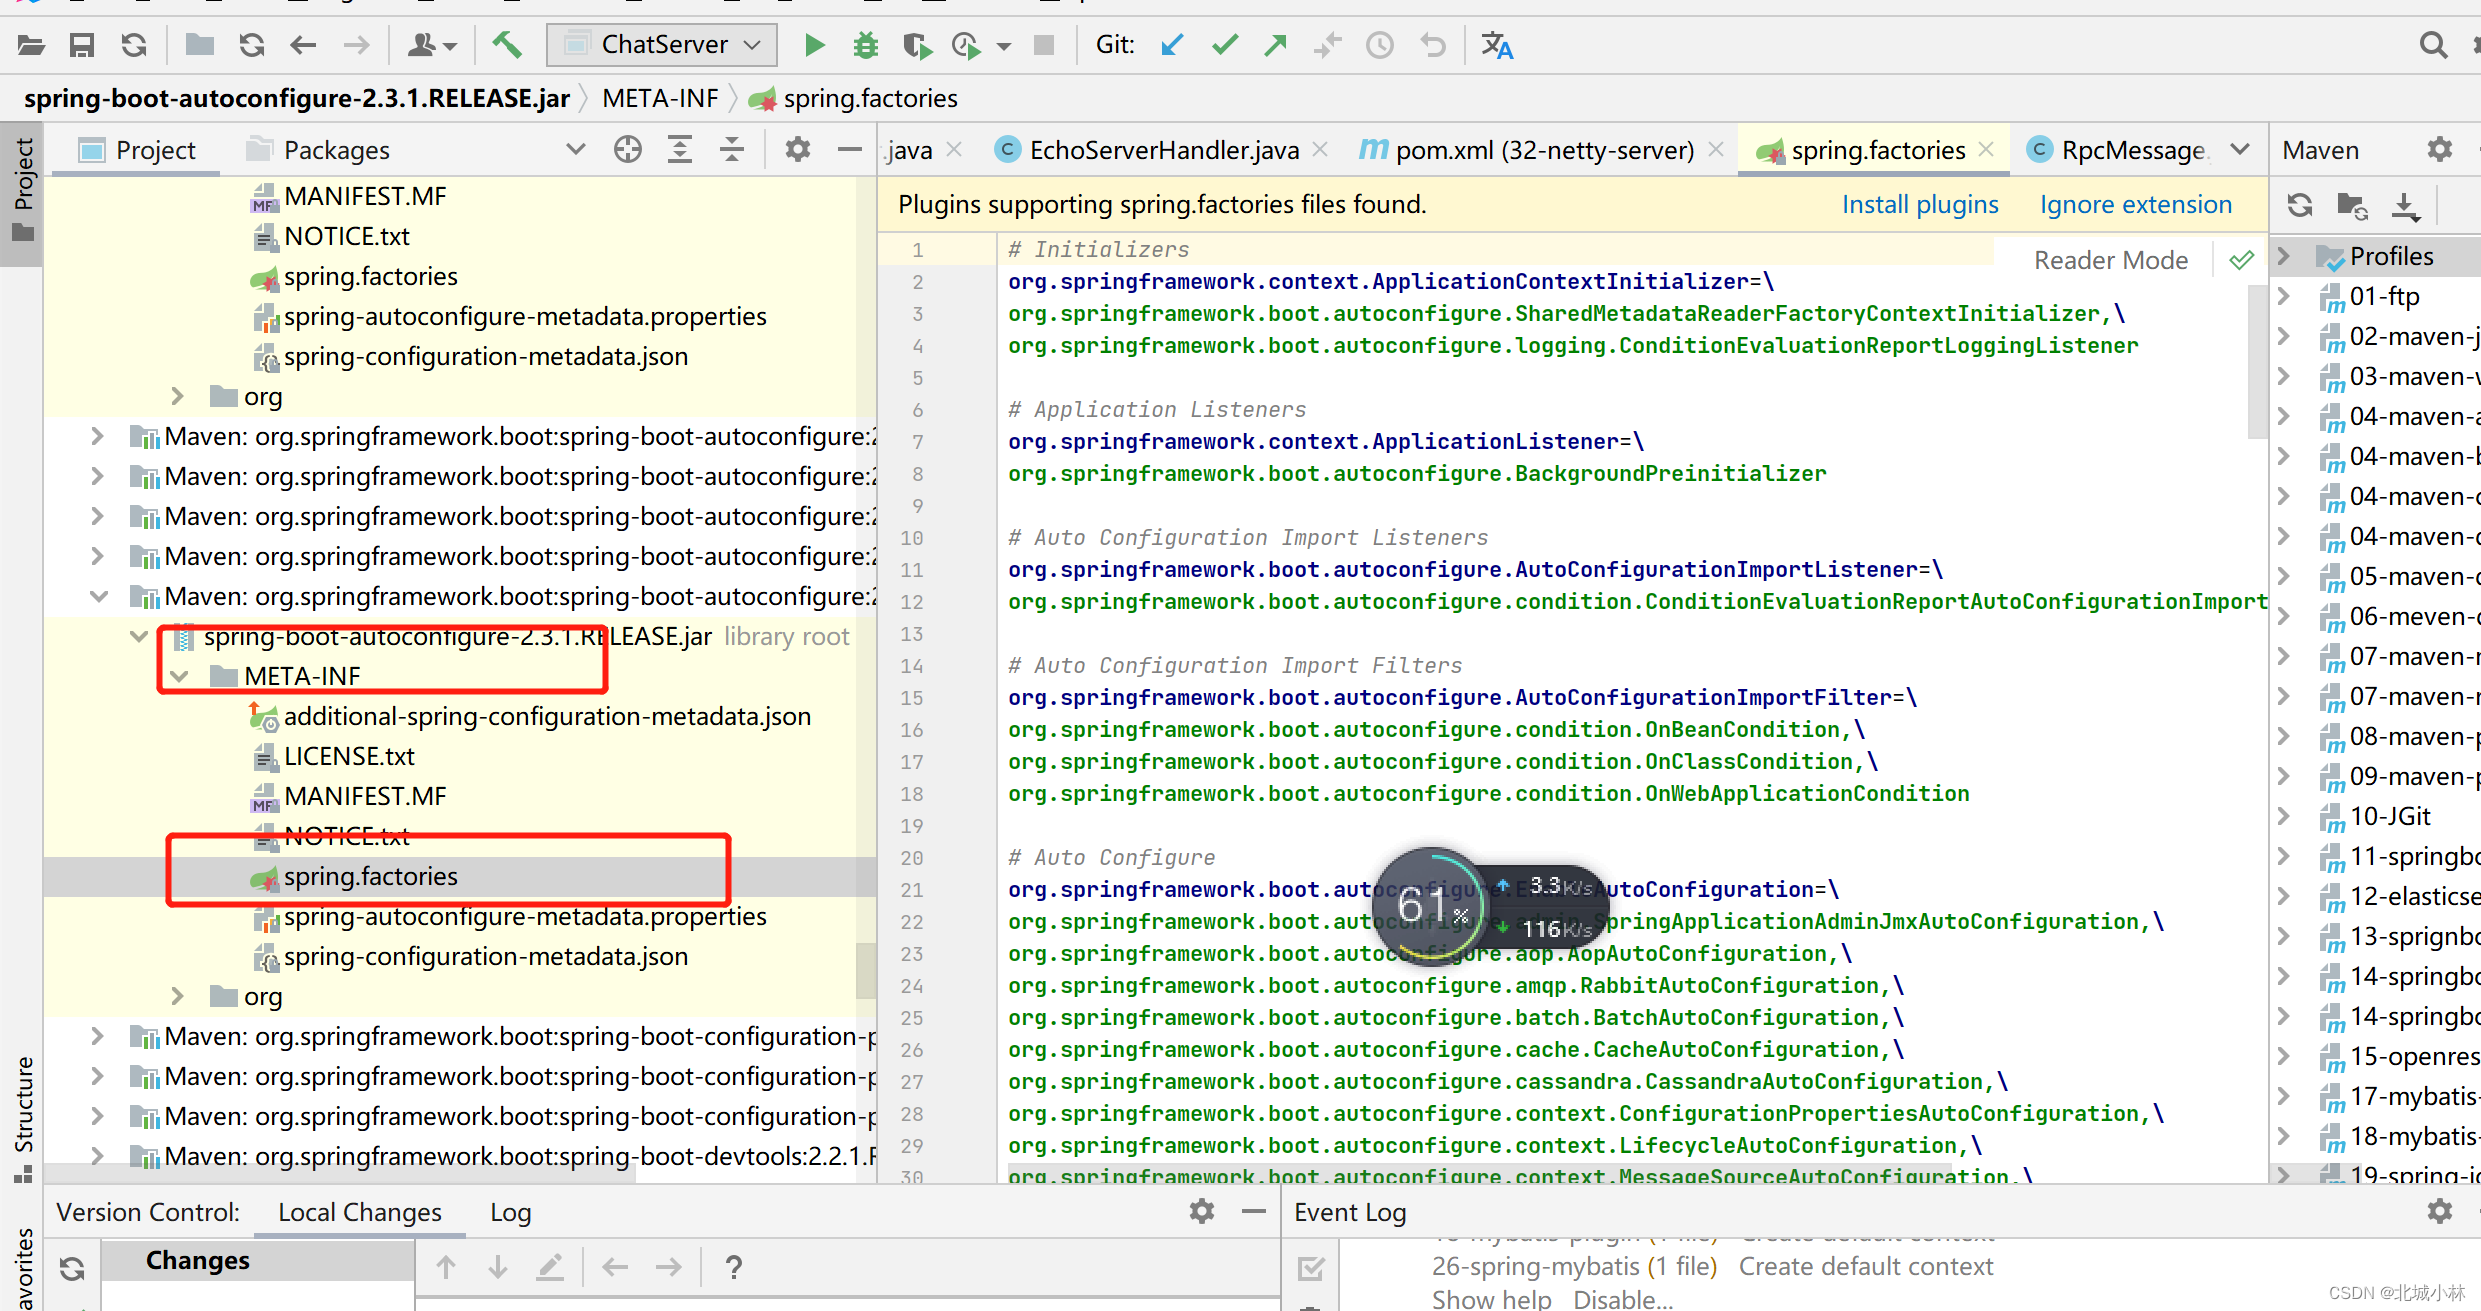
2、Springboot3.X
META-INF/spring/org.springframework.boot.autoconfigure.AutoConfiguration.imports
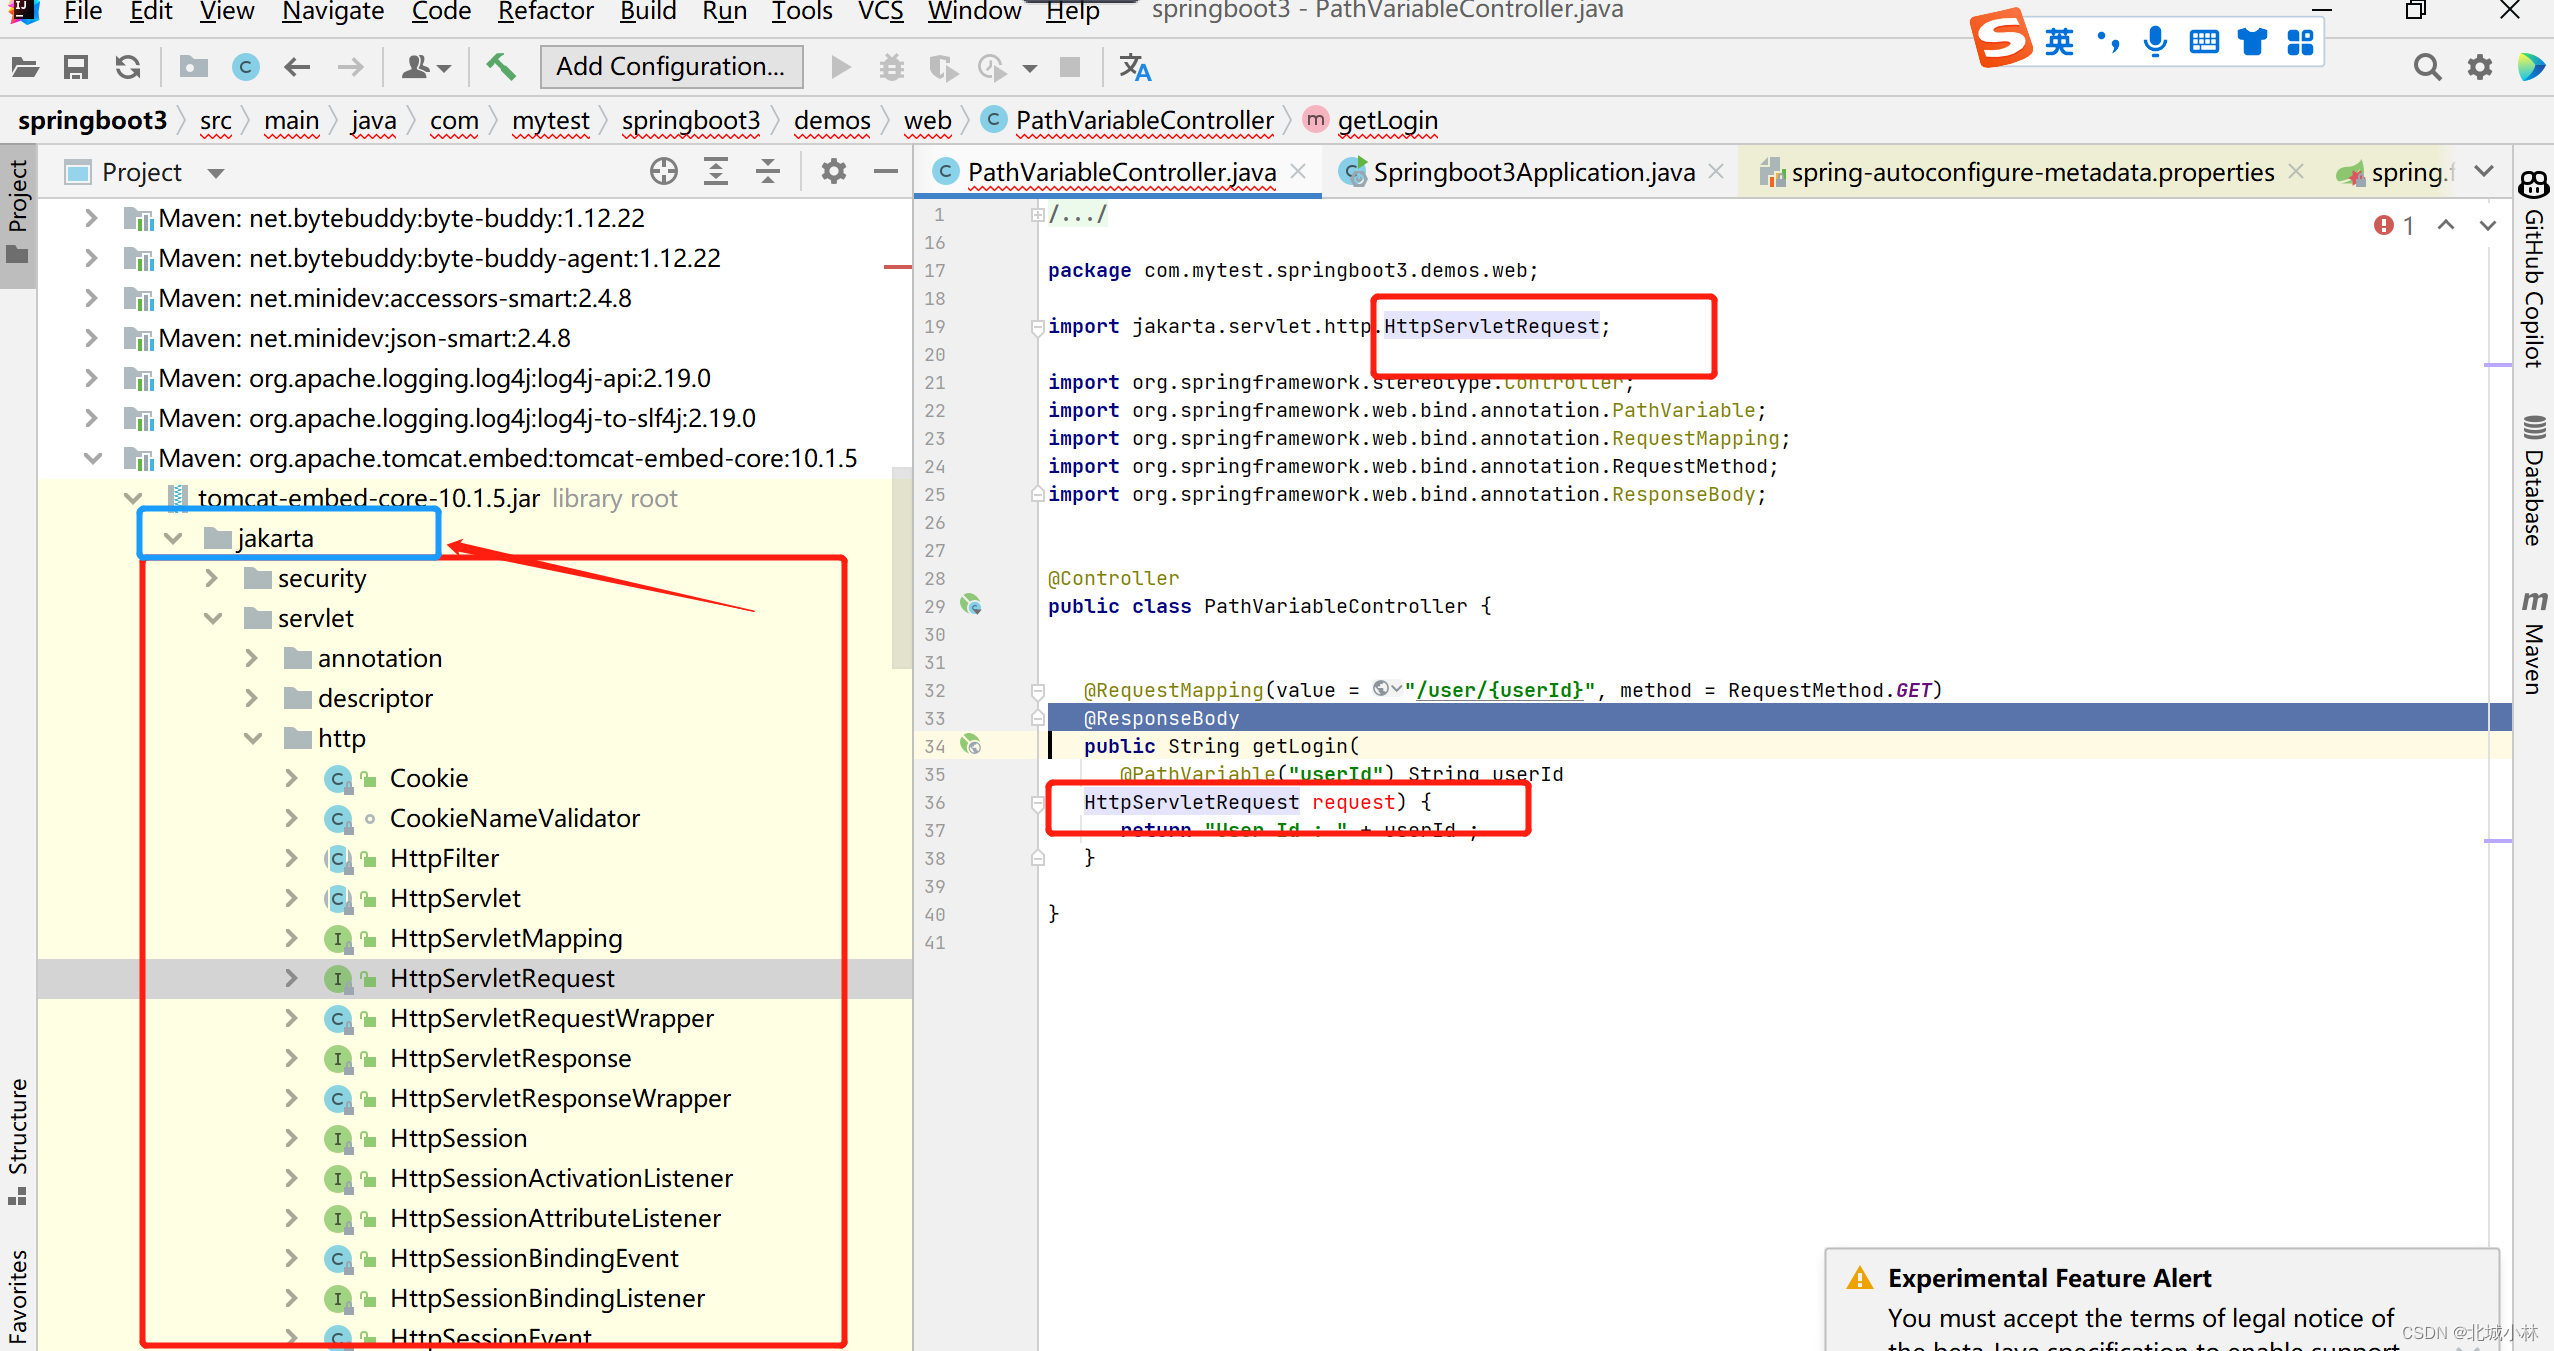
三、jakata api迁移
1、Springboot2.X
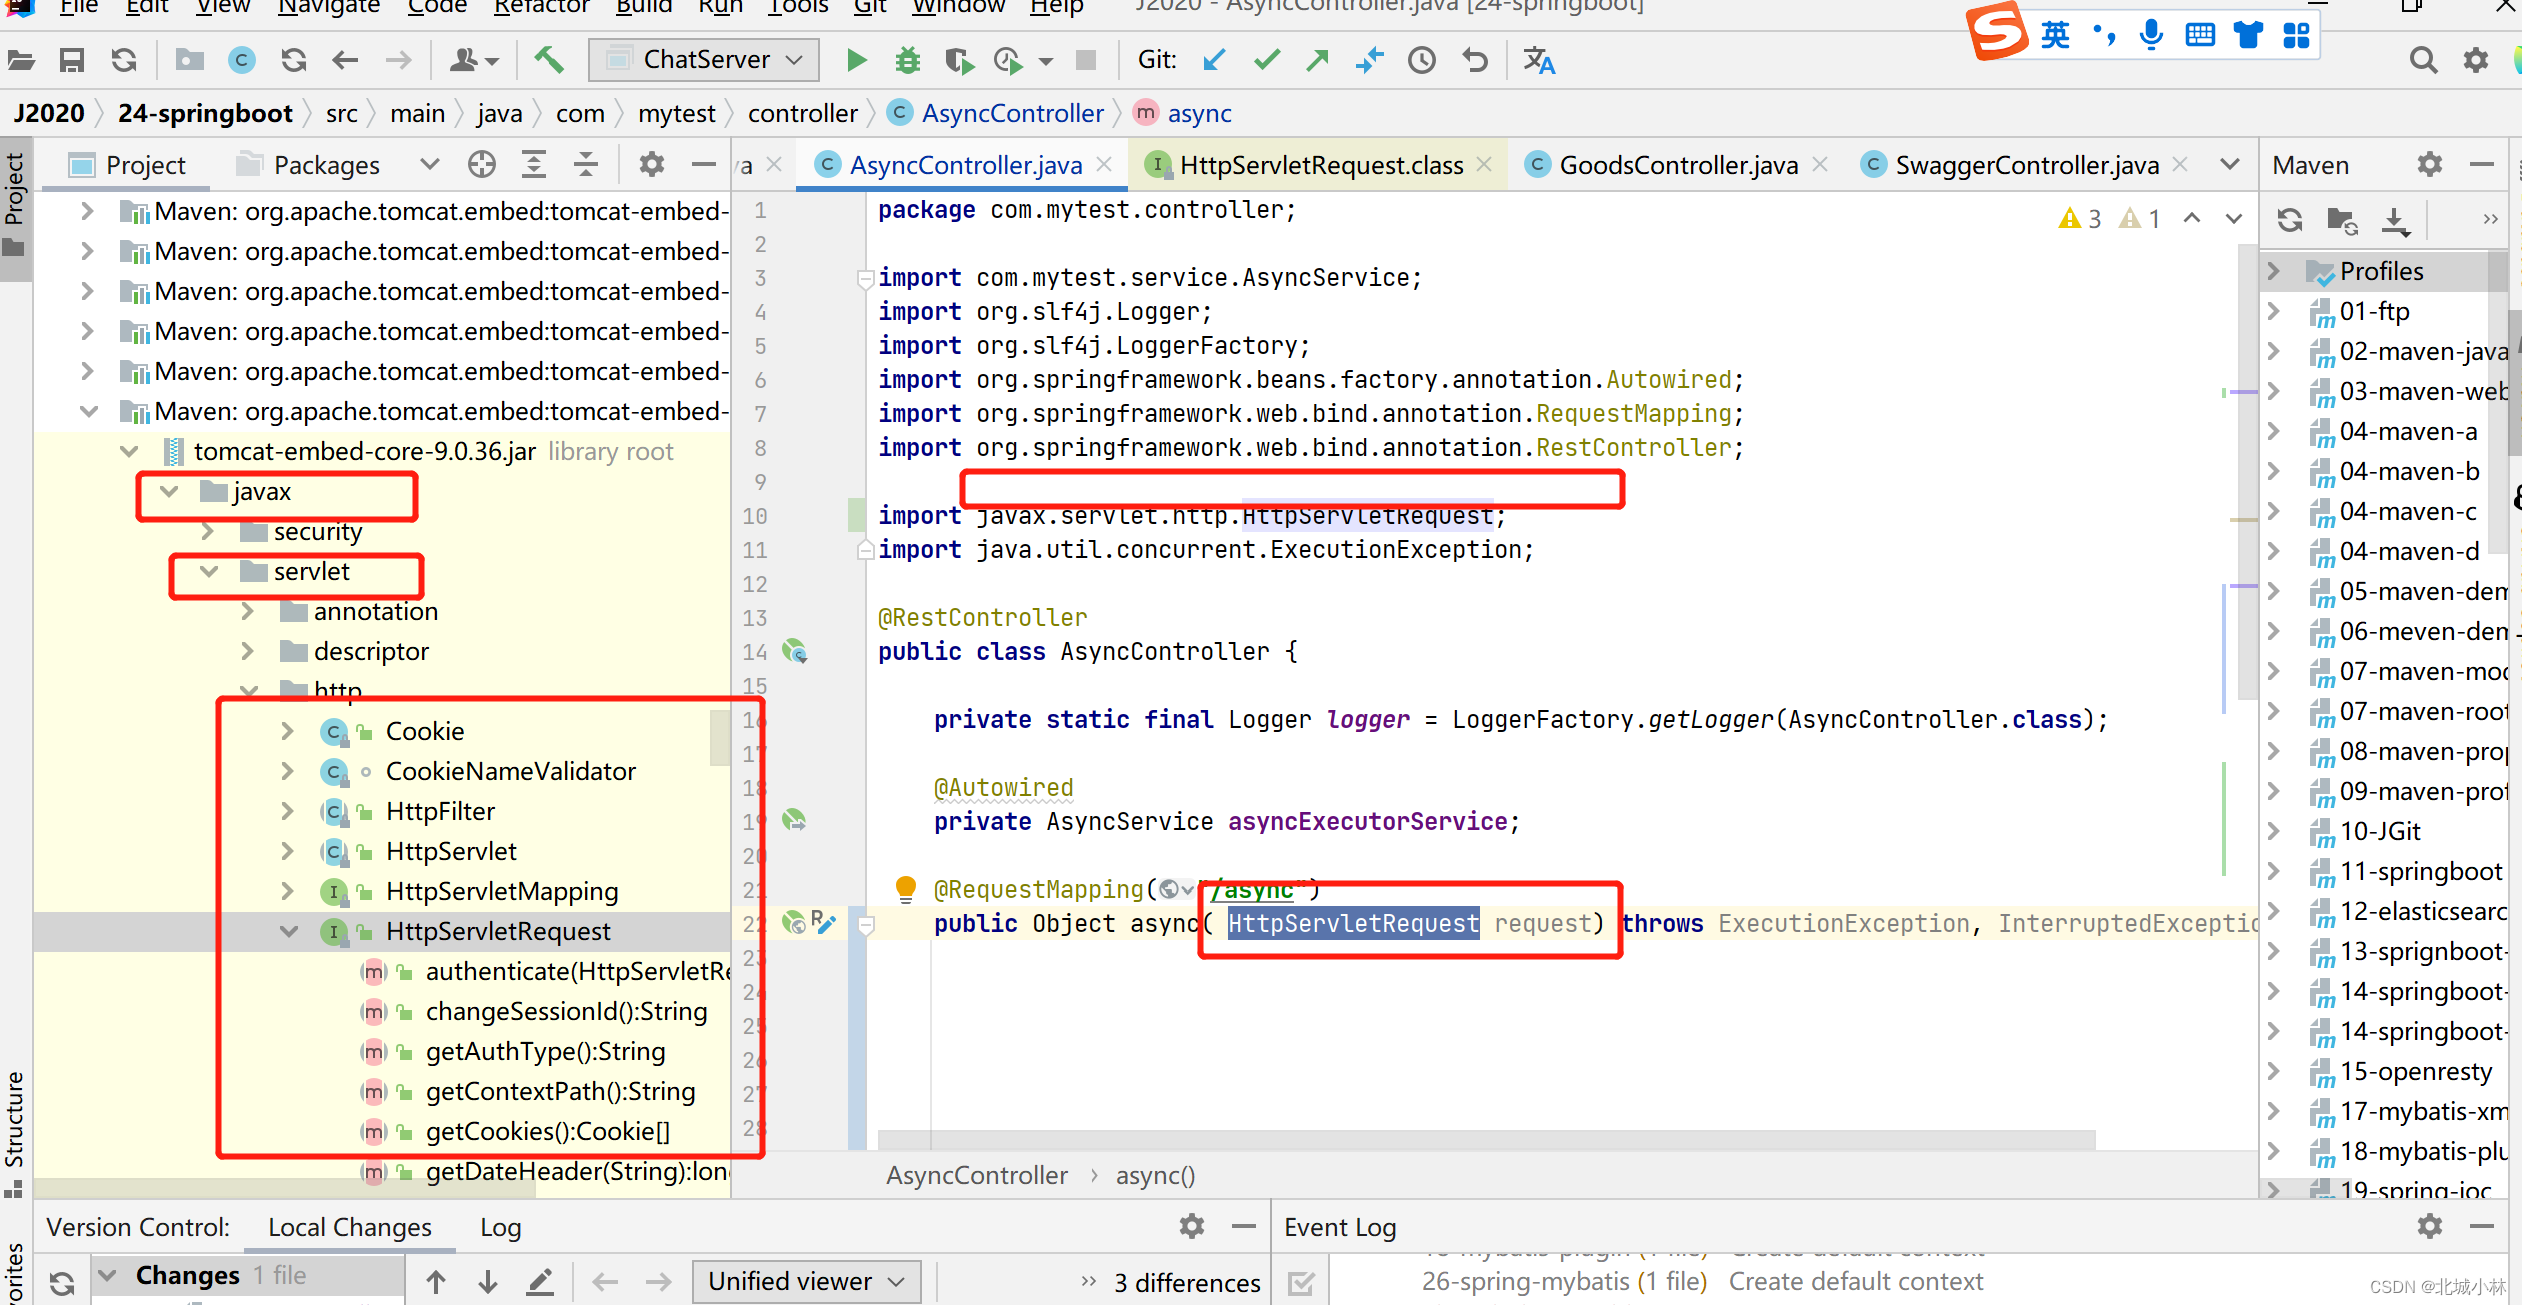
2、Springboot3.X
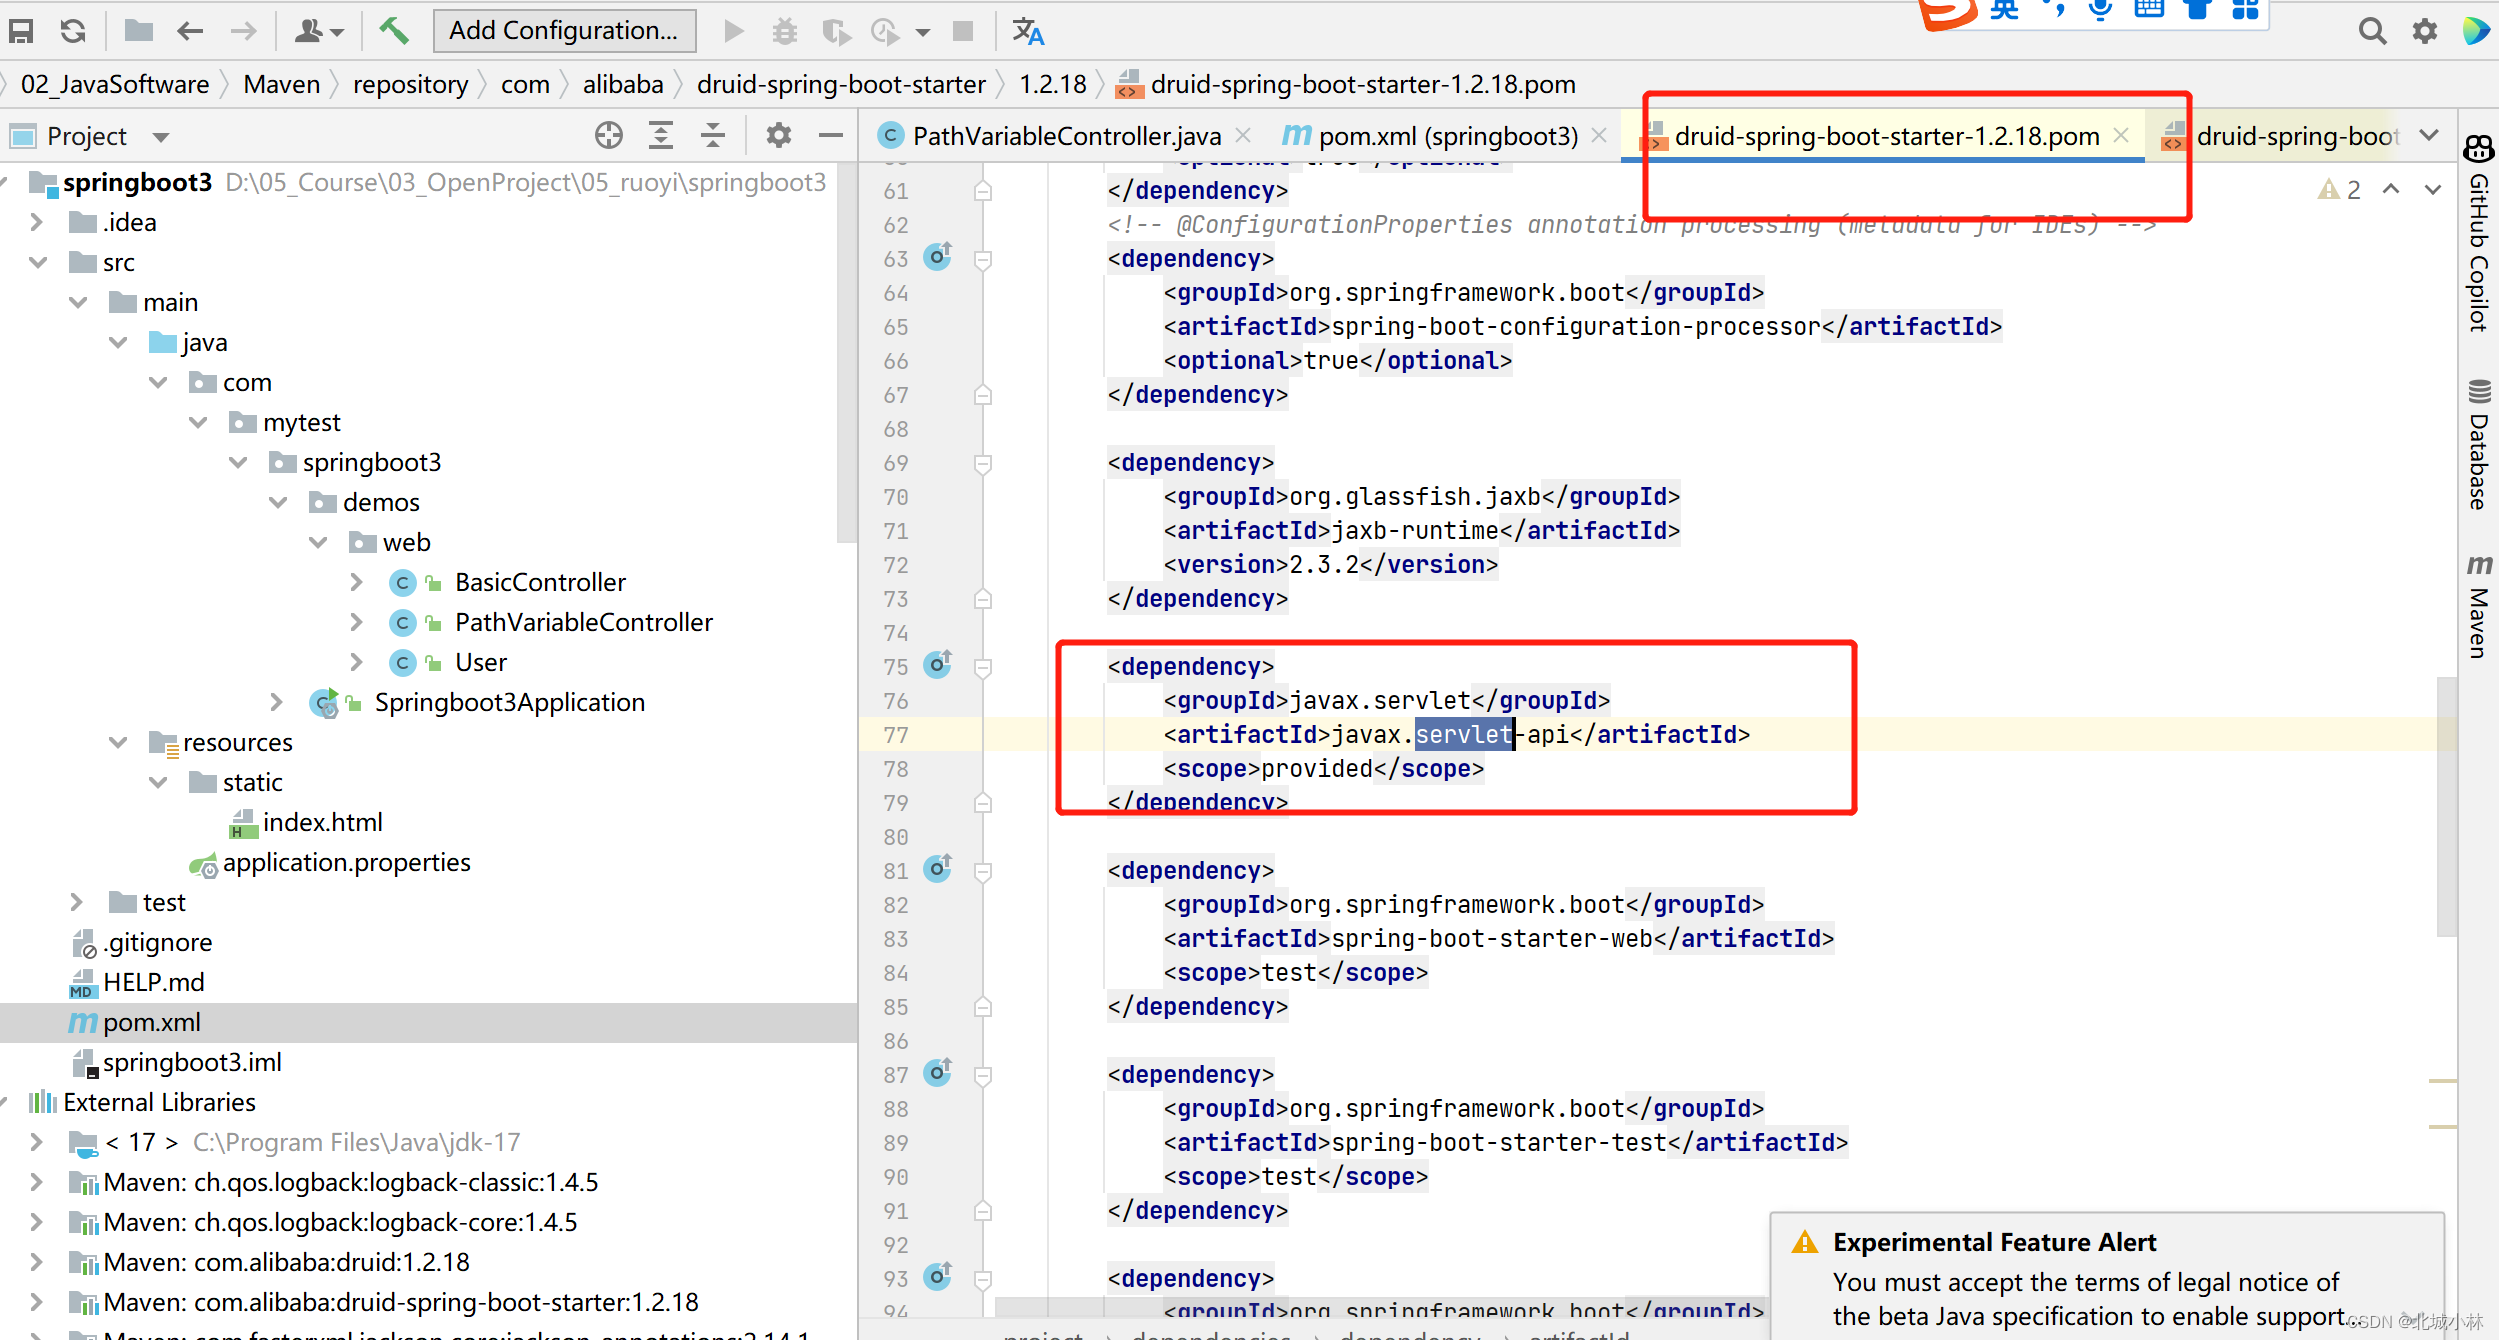
3、SpringBoot3使用druid有问题,因为它引用的是旧的包
四 新特性 - 函数式接口
SpringMVC 5.2 以后 允许我们使用函数式的方式,定义Web的请求处理流程。
Web请求处理的方式:
-
- @Controller + @RequestMapping:耦合式 (路由、业务耦合)
-
- 函数式Web:分离式(路由、业务分离)
1、场景
场景:User RESTful - CRUD
● GET /user/1 获取1号用户
● POST /user 请求体携带JSON,新增一个用户
● DELETE /user/1 删除1号用户
2.、核心类
● RouterFunction - 路由函数
● RequestPredicate - 请求谓词
● ServerRequest - 请求
● ServerResponse -响应
##3、 代码示例
import org.springframework.context.annotation.Bean;
import org.springframework.context.annotation.Configuration;
import org.springframework.http.MediaType;
import org.springframework.web.servlet.function.RequestPredicate;
import org.springframework.web.servlet.function.RouterFunction;
import org.springframework.web.servlet.function.ServerResponse;

import static org.springframework.web.servlet.function.RequestPredicates.accept;
import static org.springframework.web.servlet.function.RouterFunctions.route;

@Configuration(proxyBeanMethods = false)
public class MyRoutingConfiguration {

    private static final RequestPredicate ACCEPT_JSON = accept(MediaType.APPLICATION_JSON);

    @Bean
    public RouterFunction<ServerResponse> routerFunction(MyUserHandler userHandler) {
        return route()
                .GET("/{user}", ACCEPT_JSON, userHandler::getUser)
                .POST("/", ACCEPT_JSON, userHandler::addUser)
                .DELETE("/{user}", ACCEPT_JSON, userHandler::deleteUser)
                .build();
    }

}
import org.springframework.stereotype.Component;
import org.springframework.web.servlet.function.ServerRequest;
import org.springframework.web.servlet.function.ServerResponse;

@Component
public class MyUserHandler {

    public ServerResponse getUser(ServerRequest request) {
        ...
        return ServerResponse.ok().build();
    }

    public ServerResponse addUser(ServerRequest request) {
        ...
        return ServerResponse.ok().build();
    }

    public ServerResponse deleteUser(ServerRequest request) {
        ...
        return ServerResponse.ok().build();
    }

}
五、新特性Problemdetails
1、Problemdetails 是一种新的规范
详见
RFC 7807: https://www.rfc-editor.org/rfc/rfc7807
就是会对一部分错误信息进行处理后再返回
@Configuration(proxyBeanMethods = false)
//需要我们再配置文件中配置过这个属性 spring.mvc.problemdetails.enabled=true
@ConditionalOnProperty(prefix = "spring.mvc.problemdetails", name = "enabled", havingValue = "true")
static class ProblemDetailsErrorHandlingConfiguration {

    @Bean
    @ConditionalOnMissingBean(ResponseEntityExceptionHandler.class)
    ProblemDetailsExceptionHandler problemDetailsExceptionHandler() {
        return new ProblemDetailsExceptionHandler();
    }

}
2、详细说明
- ProblemDetailsExceptionHandler 是一个 @ControllerAdvice集中处理系统异常。
- 处理以下异常。如果系统出现以下异常,会被SpringBoot支持以 RFC 7807规范方式返回错误数据
	@ExceptionHandler({
			HttpRequestMethodNotSupportedException.class, //请求方式不支持
			HttpMediaTypeNotSupportedException.class,
			HttpMediaTypeNotAcceptableException.class,
			MissingPathVariableException.class,
			MissingServletRequestParameterException.class,
			MissingServletRequestPartException.class,
			ServletRequestBindingException.class,
			MethodArgumentNotValidException.class,
			NoHandlerFoundException.class,
			AsyncRequestTimeoutException.class,
			ErrorResponseException.class,
			ConversionNotSupportedException.class,
			TypeMismatchException.class,
			HttpMessageNotReadableException.class,
			HttpMessageNotWritableException.class,
			BindException.class
		})
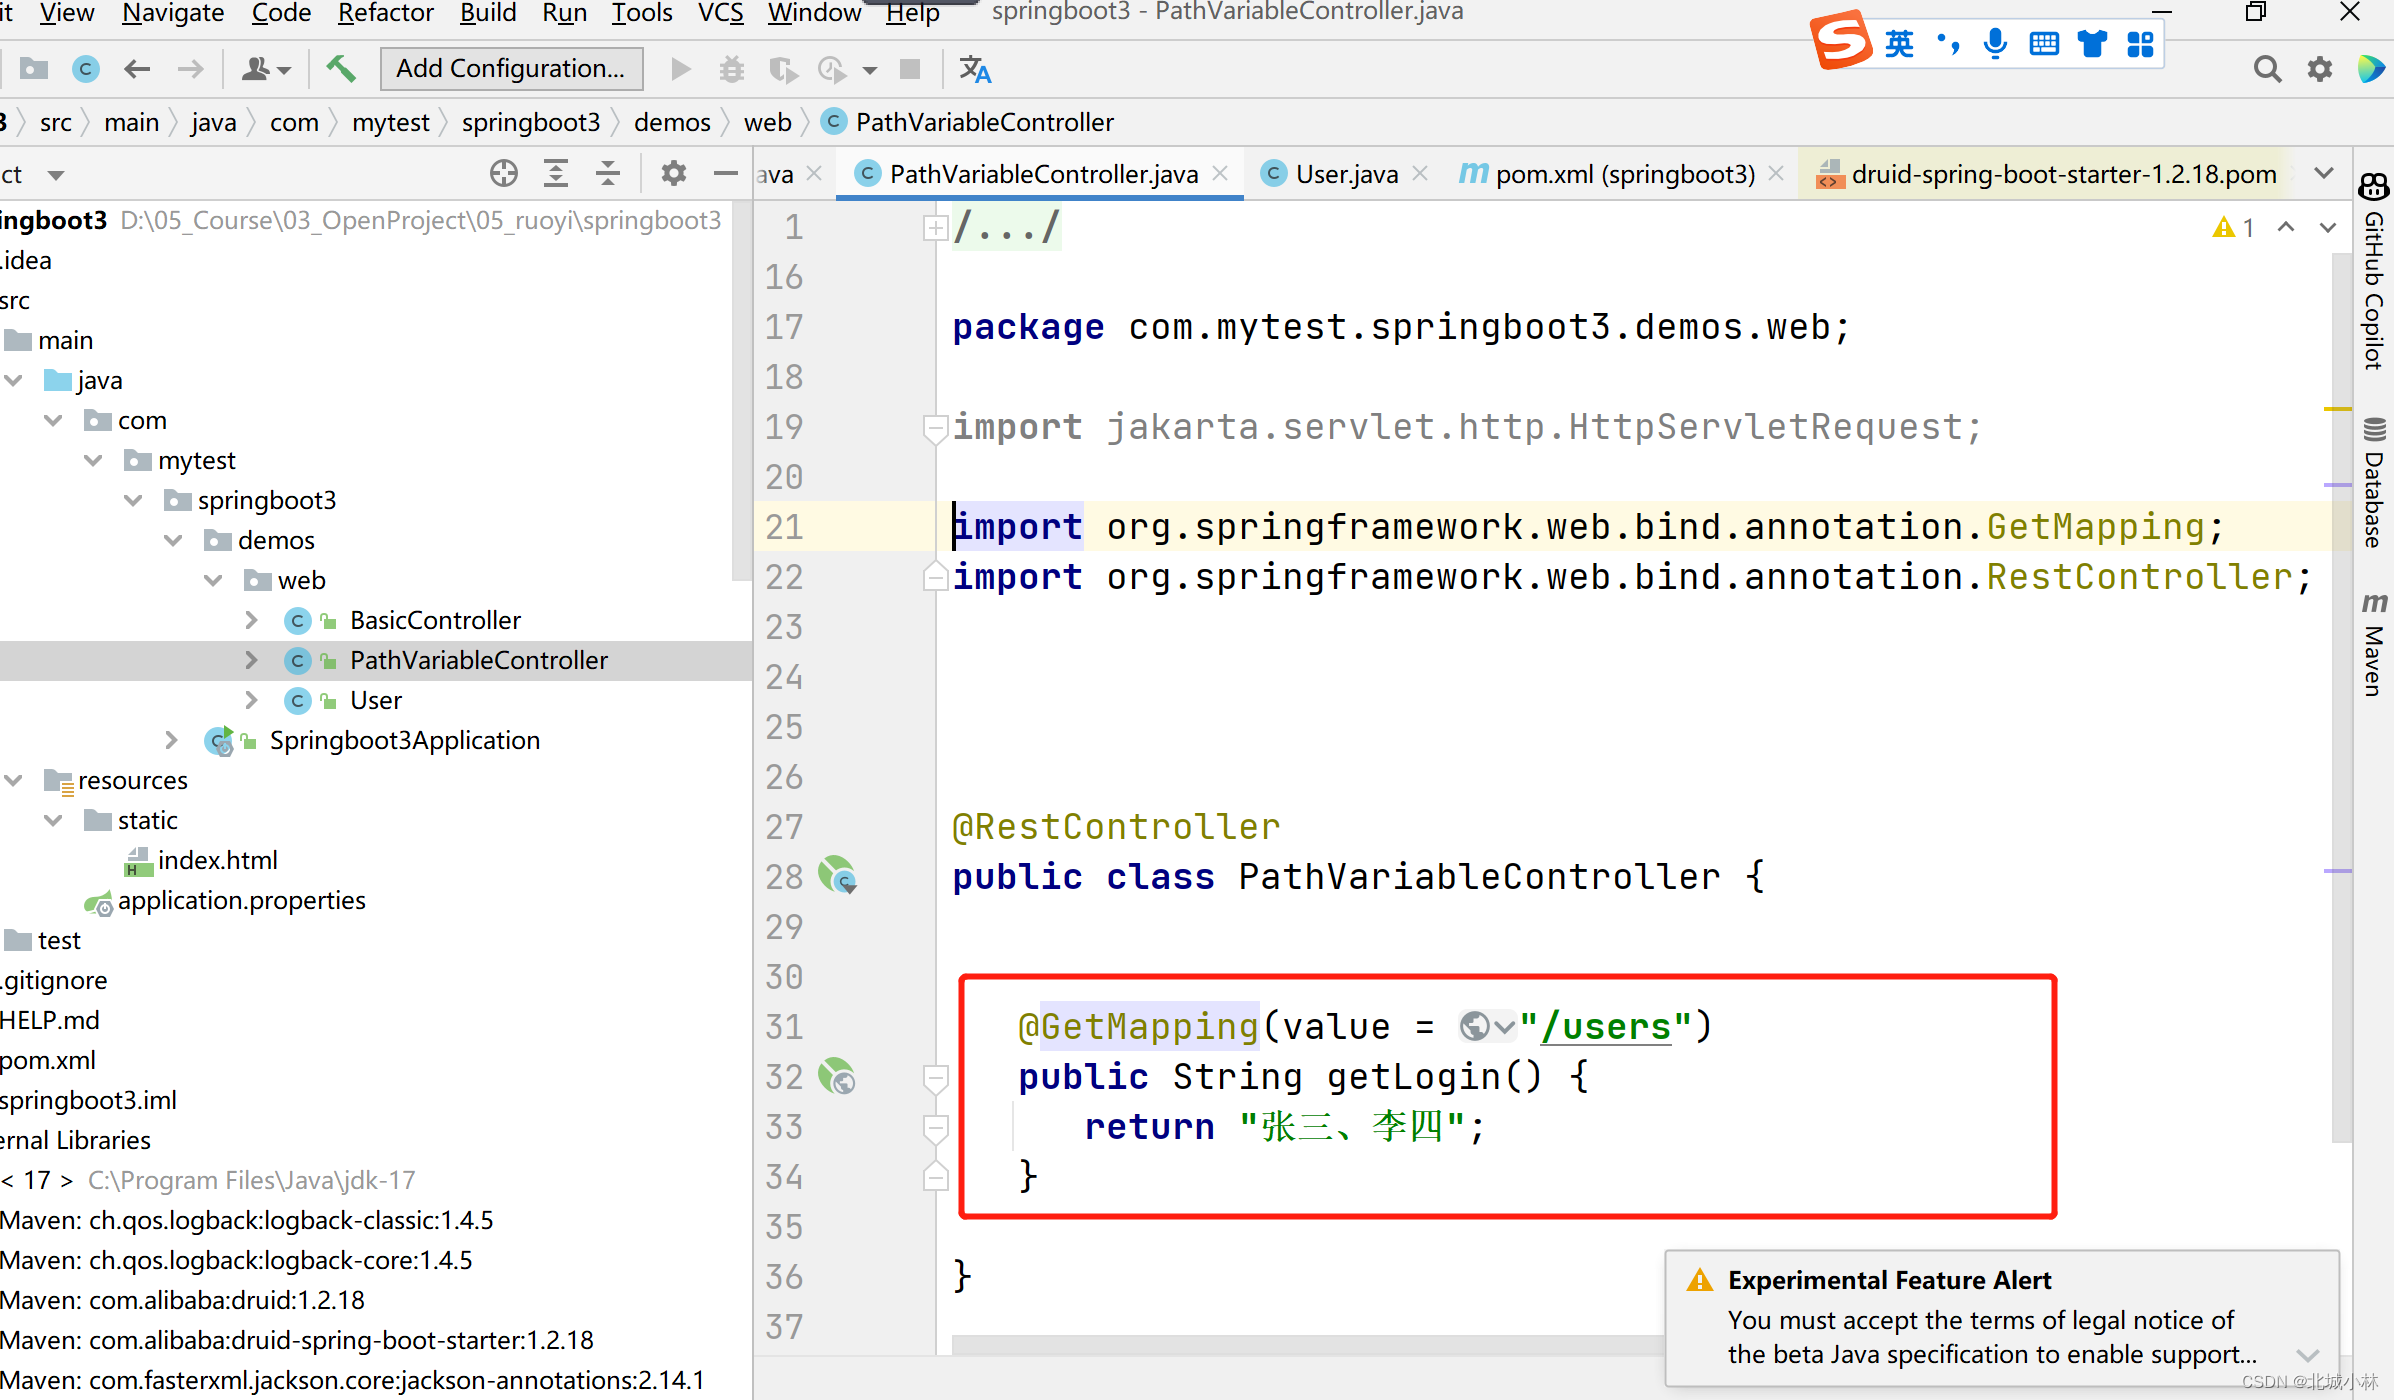
3、开启后的效果
3.1、先准备一个GET请求接口
3.2、使用Post请求该接口
{
    "timestamp": "2023-04-18T11:13:05.515+00:00",
    "status": 405,
    "error": "Method Not Allowed",
    "trace": "org.springframework.web.HttpRequestMethodNotSupportedException: Request method 'POST' is not supported\r\n\tat org.springframework.web.servlejava.base/java.lang.Thread.run(Thread.java:833)\r\n",
    "message": "Method 'POST' is not supported.",
    "path": "/users"
}
3.3、添加problemdetails配置后再使用Post请求该接口
spring.mvc.problemdetails.enabled=true
开启后 会使用新的MediaType
Content-Type: application/problem+json+ 额外扩展返回
并且返回信息也会变化
{
    "type": "about:blank",
    "title": "Method Not Allowed",
    "status": 405,
    "detail": "Method 'POST' is not supported.",
    "instance": "/users"
}
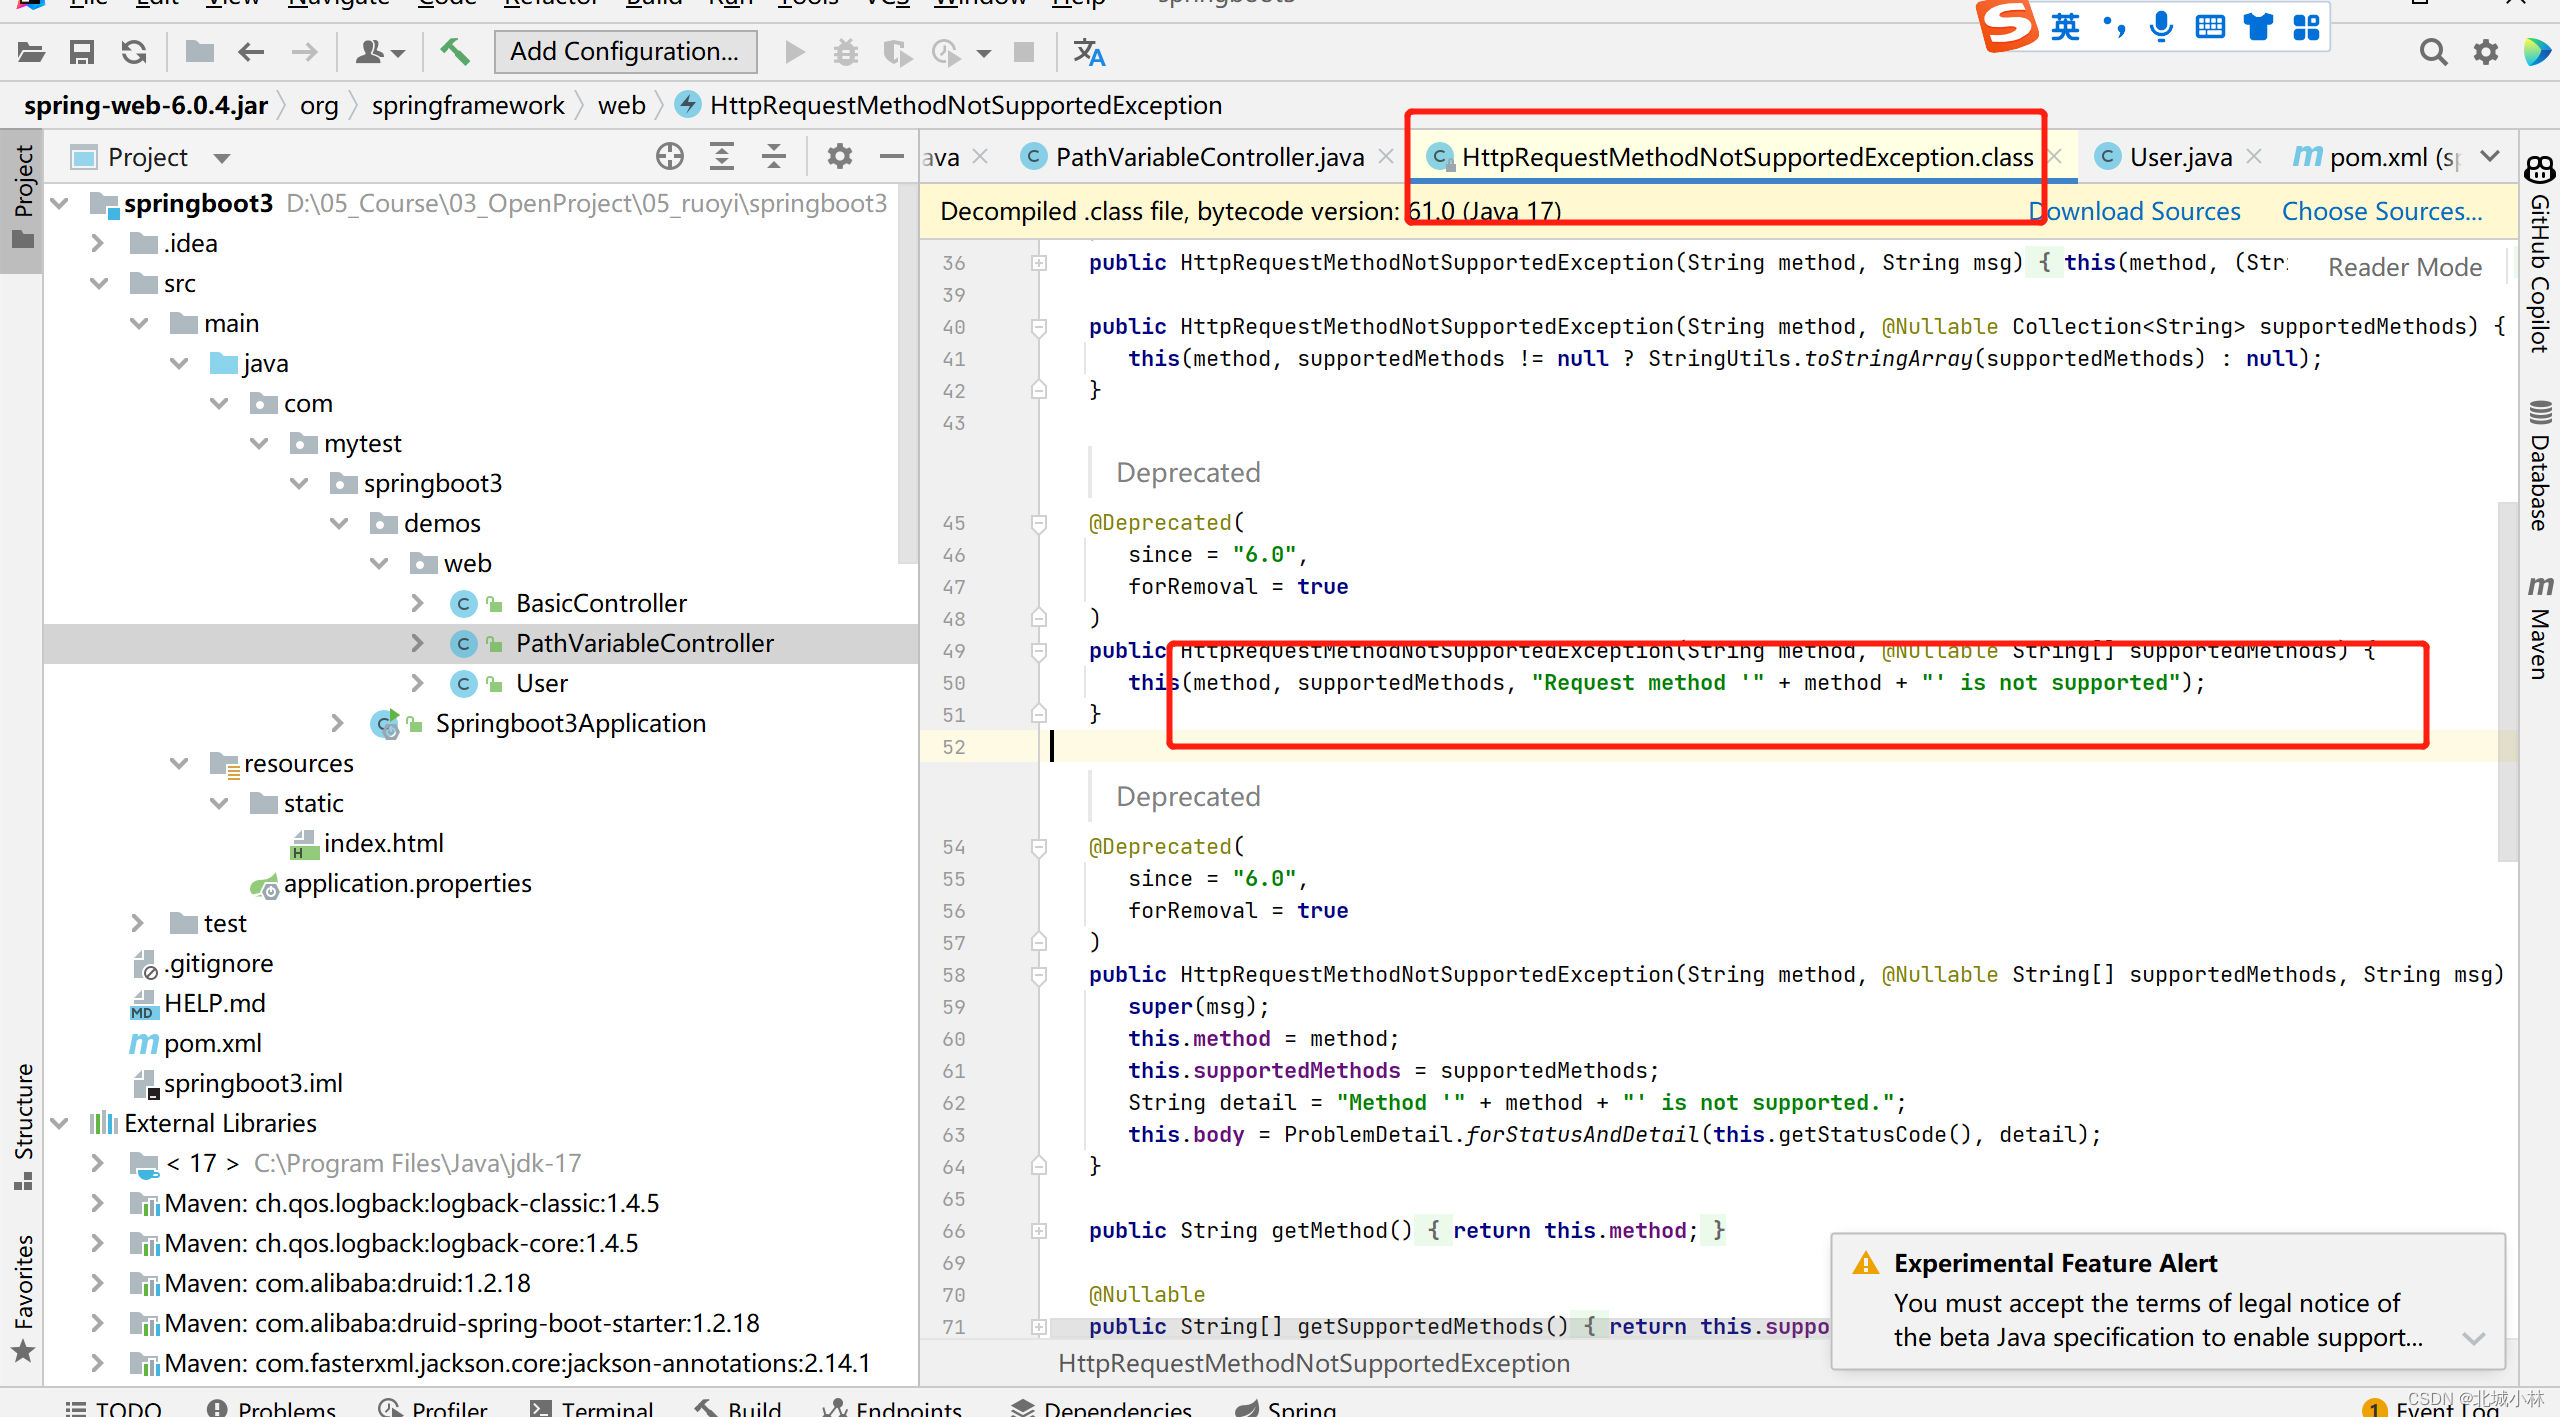
3.4、原理分析
主要是因为该请求异常被 HttpRequestMethodNotSupportedException拦截了
六、支持GraalVM 与 AOT
1. AOT与JIT
- AOT:Ahead-of-Time(提前编译):程序执行前,全部被编译成机器码
- JIT:Just in Time(即时编译): 程序边编译,边运行;
编译:
● 源代码(.c、.cpp、.go、.java。。。) =编译= 机器码
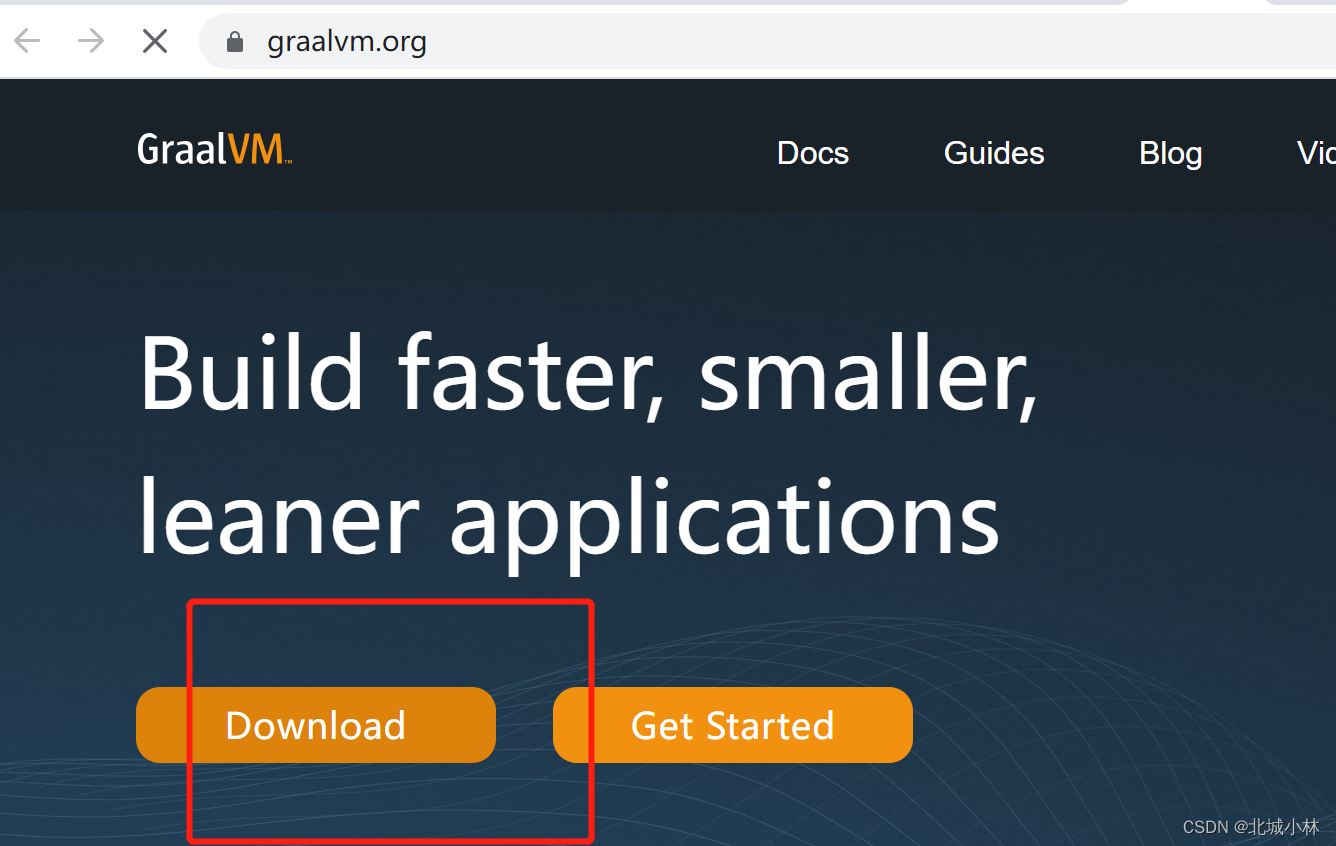
2. GraalVM
https://www.graalvm.org/
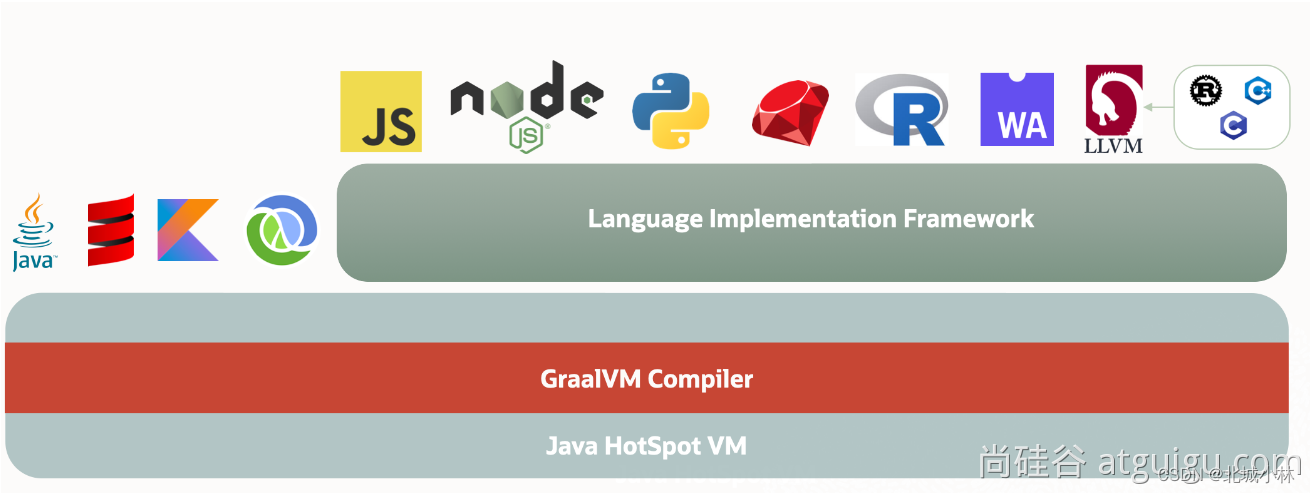
GraalVM是一个高性能的JDK,旨在加速用Java和其他JVM语言编写的应用程序的执行,同时还提供JavaScript、Python和许多其他流行语言的运行时。
GraalVM提供了两种运行Java应用程序的方式:
-
- 在HotSpot JVM上使用Graal即时(JIT)编译器
-
- 作为预先编译(AOT)的本机可执行文件运行(本地镜像)。
GraalVM的多语言能力使得在单个应用程序中混合多种编程语言成为可能,同时消除了外部语言调用的成本。
- 作为预先编译(AOT)的本机可执行文件运行(本地镜像)。
1.1.GraalVM架构
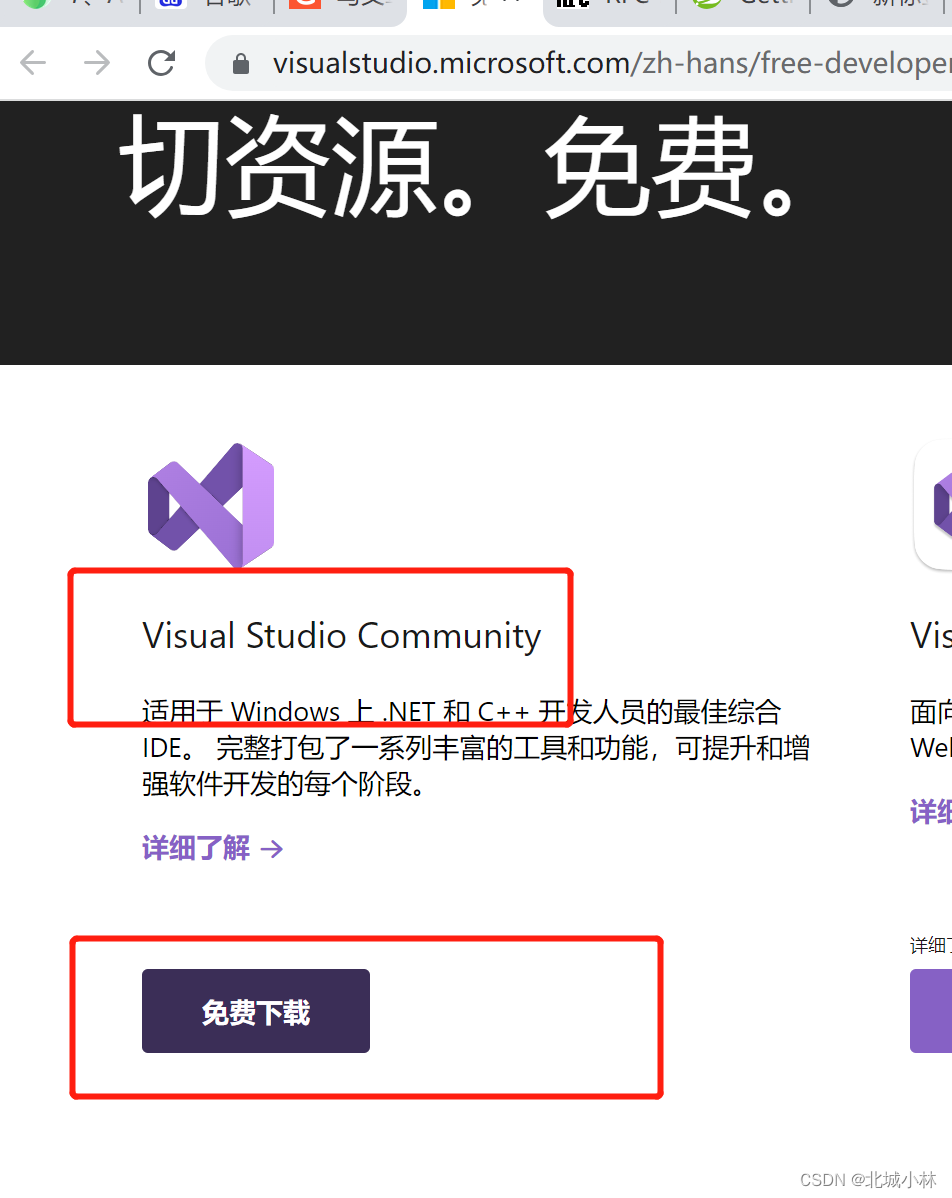
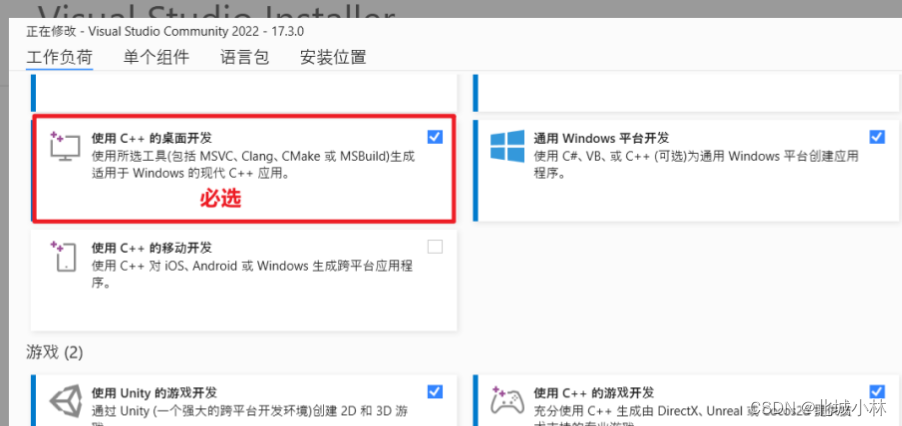
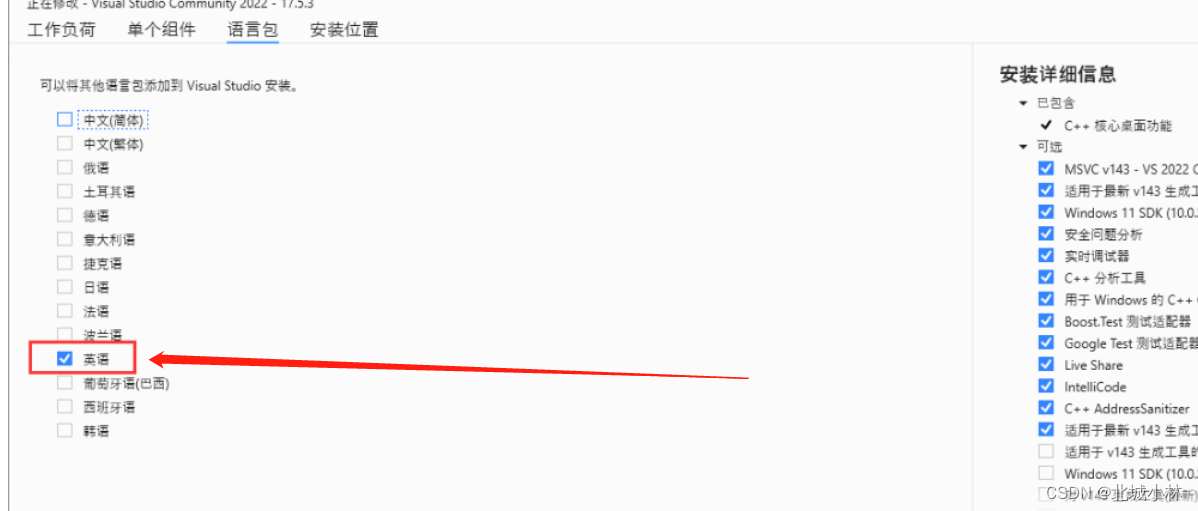
1.2 安装 VisualStudio
https://visualstudio.microsoft.com/zh-hans/free-developer-offers/
1.3 安装 GraalVM
-
- 安装
下载 GraalVM + native-image

- 安装
-
- 配置
修改 JAVA_HOME 与 Path,指向新bin路径
- 配置
- 3.验证JDK环境为GraalVM提供的即可:
1.3安装 native-image 依赖
安装 native-image 依赖:
-
- 网络环境好:参考:
https://www.graalvm.org/latest/reference-manual/native-image/#install-native-image
- 网络环境好:参考:
gu install native-image
-
- 网络环境不好:使用下载的离线jar;native-image-xxx.jar文件
gu install --file native-image-installable-svm-java17-windows-amd64-22.3.2.jar
-
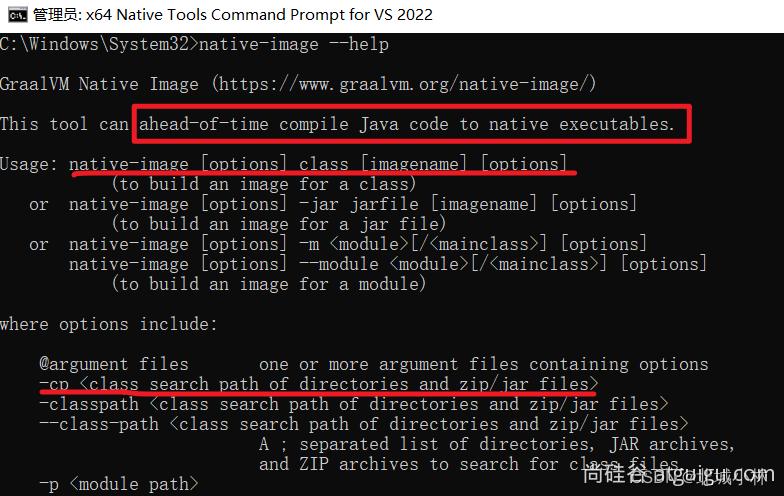
- 验证
native-image
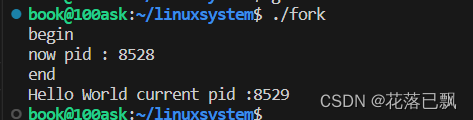
1.4测试
第一步: 创建项目
-
- 创建普通java项目。编写HelloWorld类;
-
使用mvn clean package进行打包 -
确认jar包是否可以执行java -jar xxx.jar -
可能需要给 MANIFEST.MF添加 Main-Class: 你的主类 - 第二部. 编译镜像
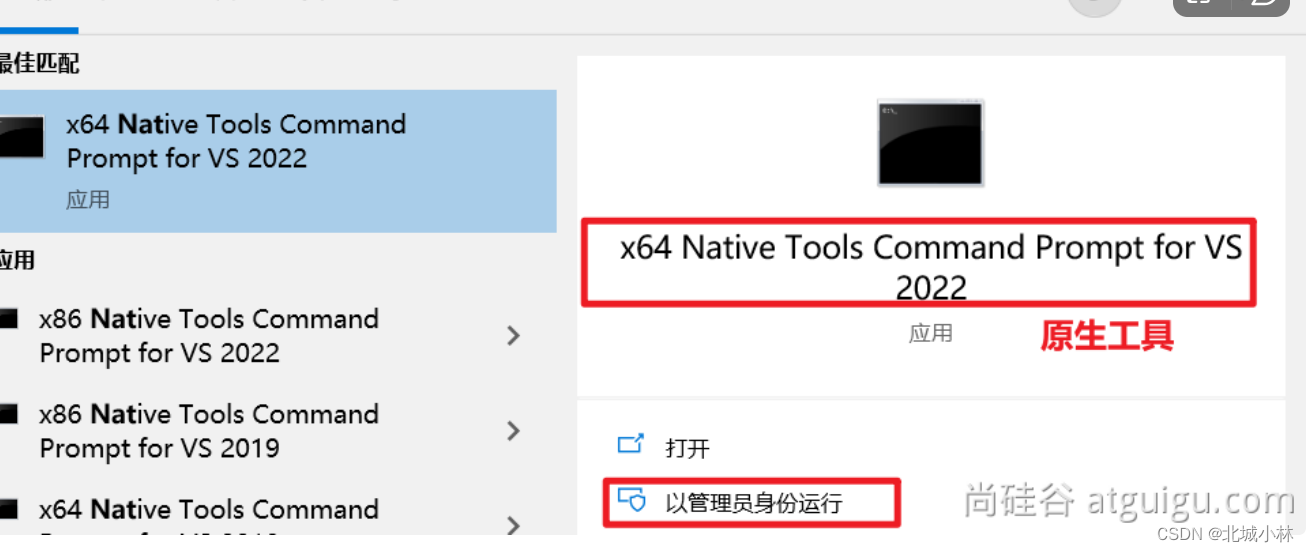
● 编译为原生镜像(native-image):使用native-tools终端
#从入口开始,编译整个jar
native-image -cp springboot3-aot-1.0-SNAPSHOT.jar com.springboot3.MainApplication -o qidongchengxu

#编译某个类【必须有main入口方法,否则无法编译】
native-image -cp .\classes org.example.App
3、springboot整合graalvm
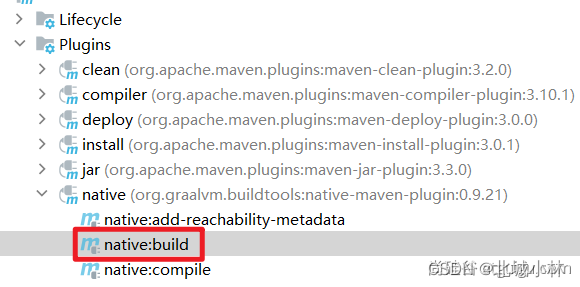
第一步:添加插件
 <build>
        <plugins>
            <plugin>
                <groupId>org.graalvm.buildtools</groupId>
                <artifactId>native-maven-plugin</artifactId>
            </plugin>
            <plugin>
                <groupId>org.springframework.boot</groupId>
                <artifactId>spring-boot-maven-plugin</artifactId>
            </plugin>
        </plugins>
    </build>
第二步:生成native-image
- 1、运行aot提前处理命令:mvn springboot:process-aot
- 2、运行native打包:mvn -Pnative native:build -f pom.xml
常见问题
可能提示如下各种错误,无法构建原生镜像,需要配置环境变量;
● 提示其他找不到出现cl.exe找不到错误
● 出现乱码
● 提示no include path set
● 提示fatal error LNK1104: cannot open file ‘LIBCMT.lib’
● 提示 LINK : fatal error LNK1104: cannot open file ‘kernel32.lib’
需要修改三个环境变量:Path、INCLUDE、lib
- 1、 Path:添加如下值
C:\Program Files\Microsoft Visual Studio\2022\Community\VC\Tools\MSVC\14.33.31629\bin\Hostx64\x64
- 2、新建INCLUDE环境变量:值为
C:\Program Files\Microsoft Visual Studio\2022\Community\VC\Tools\MSVC\14.33.31629\include;C:\Program Files (x86)\Windows Kits\10\Include\10.0.19041.0\shared;C:\Program Files (x86)\Windows Kits\10\Include\10.0.19041.0\ucrt;C:\Program Files (x86)\Windows Kits\10\Include\10.0.19041.0\um;C:\Program Files (x86)\Windows Kits\10\Include\10.0.19041.0\winrt
- 3、新建lib环境变量:值为
C:\Program Files\Microsoft Visual Studio\2022\Community\VC\Tools\MSVC\14.33.31629\lib\x64;C:\Program Files (x86)\Windows Kits\10\Lib\10.0.19041.0\um\x64;C:\Program Files (x86)\Windows Kits\10\Lib\10.0.19041.0\ucrt\x64