文章目录
SpringBoot项目中使用Tomcat、Undertow、jetty等容器; 1. 默认使用Tomcat容器,直接运行项目即可:Java -jar xxx.jar 2. 使用undertow容器 2-1 引入Maven依赖,同时屏蔽内置Tomcat 2-2 Undertow容器的常用配置参考 2-3 一个特别的报错警告及处理方法 2-3-1 新增一个component注解的类,如下: 2-4 启动,观察控制台即可验证 3. 使用jetty容器 3-1 引入Maven依赖,同时屏蔽内置Tomcat 3-2 jetty容器的常用配置参考 3-3 启动SpringBoot应用,即可发现jetty已开始运行
server :
tomcat :
uri-encoding : UTF- 8
min-spare-threads : 500
max-threads : 2500
max-connections : 6500
accept-count : 1000
max-http-header-size : 1048576
port : 8080
connection-timeout : 12000
servlet :
context-path : /song
< dependency> < groupId> </ groupId> < artifactId> </ artifactId> < exclusions> < exclusion> < groupId> </ groupId> < artifactId> </ artifactId> </ exclusion> </ exclusions> </ dependency> < dependency> < groupId> </ groupId> < artifactId> </ artifactId> </ dependency>
server.undertow.accesslog.enabled= false
server.undertow.accesslog.dir= logs
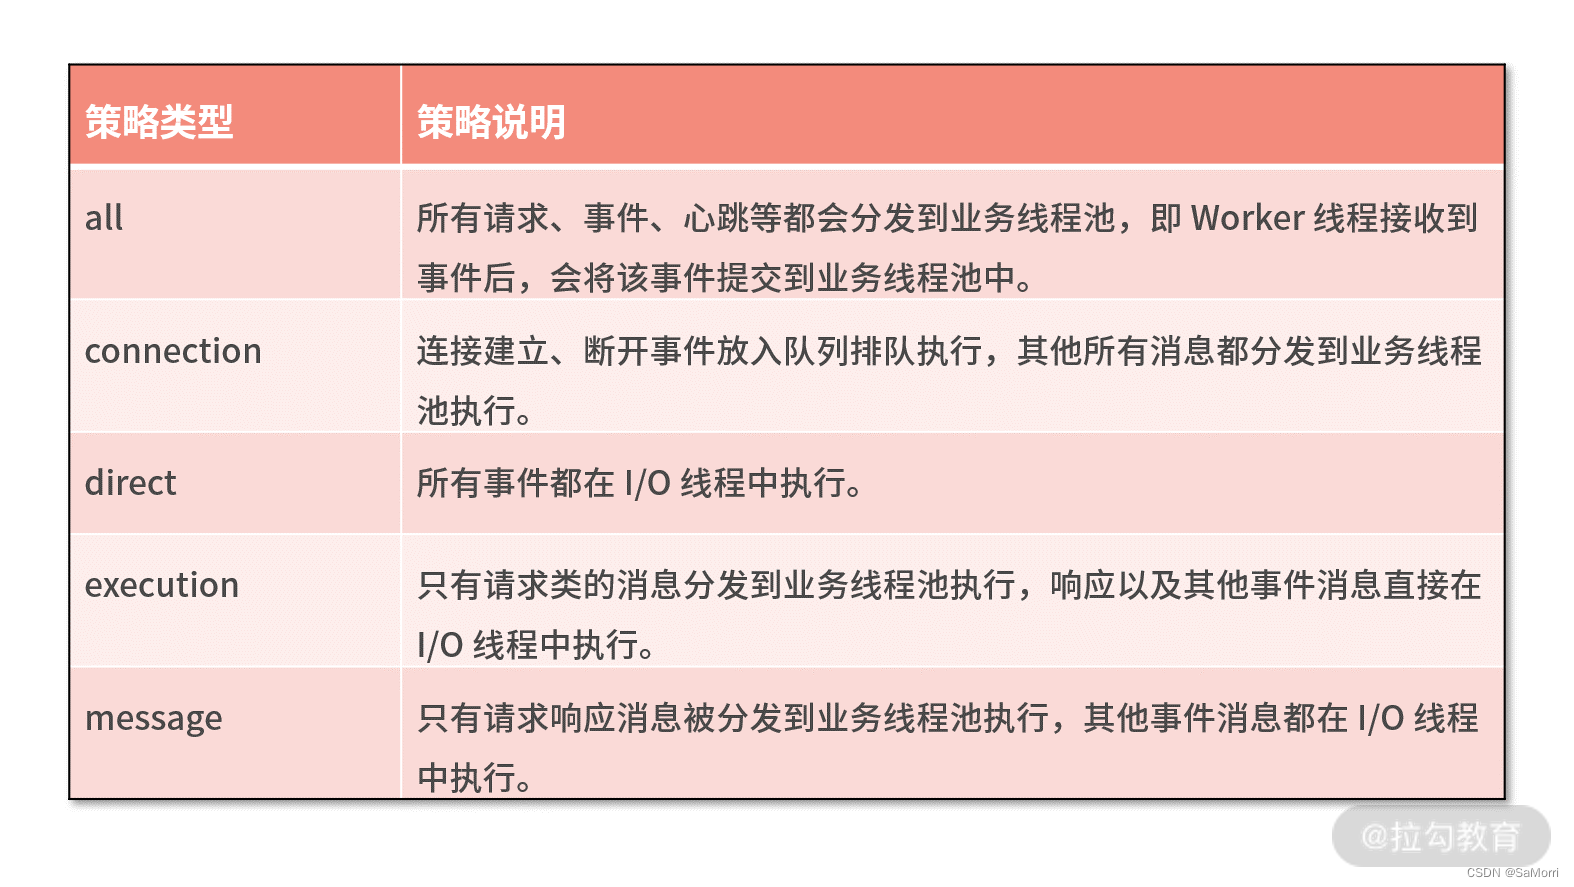
server.undertow.threads.io= 8
server.undertow.threads.worker= 256
server.undertow.max-http-post-size= 4MB
server.undertow.buffer-size= 1024
server.undertow.direct-buffers= true
解决使用undertow容器报io.undertow.websockets.jsr -
UT026010: Buffer pool was not set on WebSocketDeploymentInfo, the default pool will be used
@Component
public class UndertowPoolCustomizer implements WebServerFactoryCustomizer < UndertowServletWebServerFactory > {
@Override
public void customize ( UndertowServletWebServerFactory factory) {
factory. addDeploymentInfoCustomizers ( deploymentInfo -> {
WebSocketDeploymentInfo webSocketDeploymentInfo = new WebSocketDeploymentInfo ( ) ;
webSocketDeploymentInfo. setBuffers ( new DefaultByteBufferPool ( false , 1024 ) ) ;
deploymentInfo. addServletContextAttribute ( "io.undertow.websockets.jsr.WebSocketDeploymentInfo" , webSocketDeploymentInfo) ;
} ) ;
}
}
< dependency> < groupId> </ groupId> < artifactId> </ artifactId> < exclusions> < exclusion> < groupId> </ groupId> < artifactId> </ artifactId> </ exclusion> </ exclusions> </ dependency> < dependency> < groupId> </ groupId> < artifactId> </ artifactId> </ dependency> server.port= 8080
server.servlet.context-path= /home
server.jetty.acceptors= 100
server.jetty.max-http-post-size= 0
server.jetty.selectors= 10