版权声明
- 本文原创作者:谷哥的小弟
- 作者博客地址:http://blog.csdn.net/lfdfhl
Thymeleaf概述

Thymeleaf是一种用于Web和独立环境的现代服务器端的Java模板引擎,主要目标是将优雅的自然模板带到开发工作流程中,并将HTML在浏览器中正确显示。Thymeleaf可以作为静态原型,让开发团队能更容易地协作。Thymeleaf能够处理HTML,XML,JavaScript,CSS,纯文本。在Spring Boot开发中推荐使用Thymeleaf实现视图页面。
Thymeleaf官网
https://www.thymeleaf.org/
Thymeleaf依赖
在使用Thymeleaf时请在pom.xml添加如下依赖:
<dependency>
  <groupId>org.springframework.boot</groupId>
  <artifactId>spring-boot-starter-thymeleaf</artifactId>
</dependency>
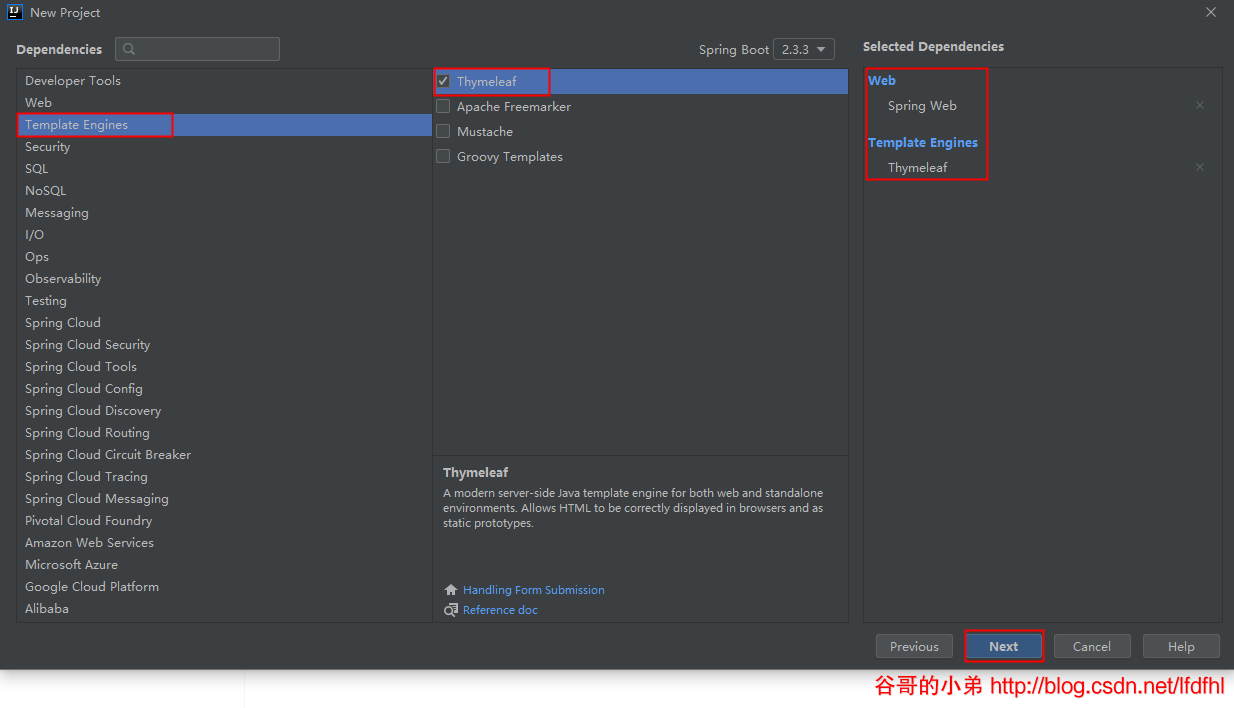
除此之外,也可以在创建Spring Boot项目时勾选Thymeleaf依赖使得IDEA自动添加Thymeleaf相关依赖。
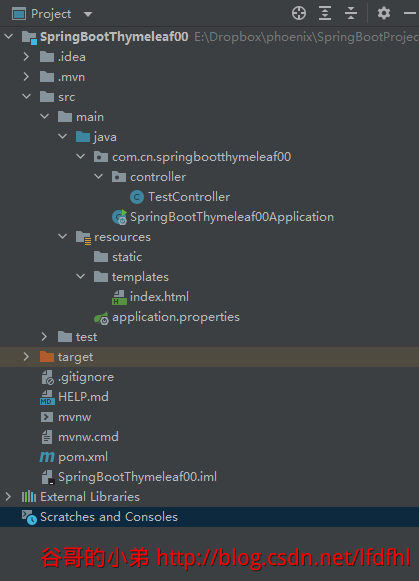
Thymeleaf项目结构
Spring Boot项目使用Thymeleaf时,项目结构如下。
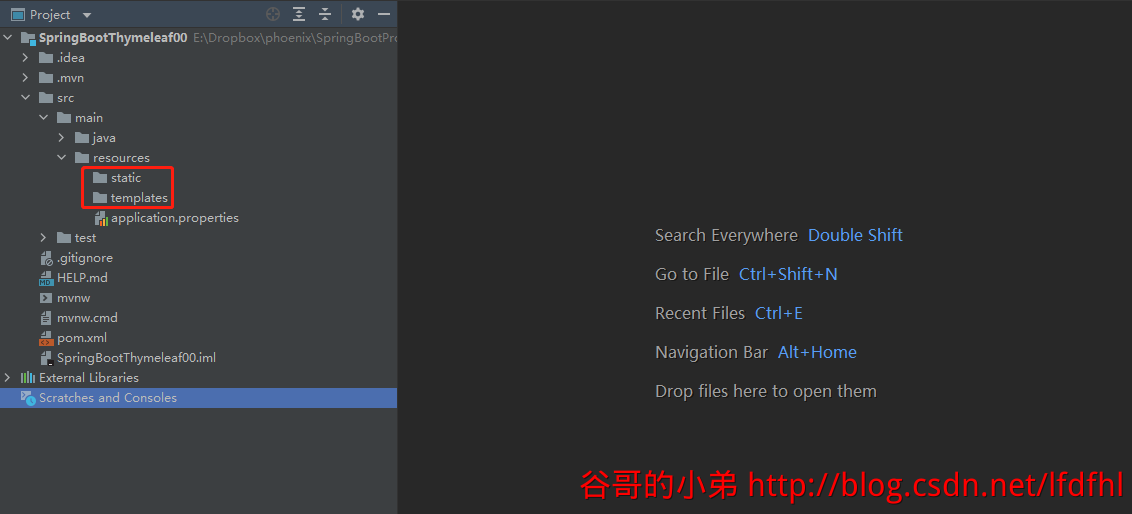
static
static文件夹用于存放静态资源,例如:css文件、js文件。
templates
templates用于存放使用了Thymeleaf的html文件。
Thymeleaf配置
在使用Thymeleaf时请在application.properties添加如下配置。
要点概述:
- 1、关闭Thymeleaf缓存
- 2、指定Thymeleaf模板页面存放路径;例如:/resources/templates/中
- 3、指定Thymeleaf模板编码方式;例如:UTF-8
- 4、指定Thymeleaf模板的后缀;例如:.html
- 5、指定Thymeleaf模板的模式;例如:HTML5
# 缓存设置。开发中设置为false,线上时设置为true
spring.thymeleaf.cache=false
# 模板的编码方式
spring.thymeleaf.encoding=UTF-8
# 模式
spring.thymeleaf.mode=HTML5
# 模板页面存放路径
spring.thymeleat.prefix=classpath:/resources/templates/
# 模板页面名称后缀
spring.thymeleaf.suffix=.html
Thymeleaf命名空间
在使用Thymeleaf时请在html文件头部添加如下配置引入Thymeleaf命名空间。
<html lang="en" xmlns:th="http://www.thymeleaf.org">
Thymeleaf使用方式
一般情况下,我们不会直接访问使用了Thymeleaf的html文件。而是,先访问Controller;再由Controller跳转至html文件。
Thymeleaf入门案例
在此,以案例形式详细介绍Thymeleaf配置的使用。
项目结构
要点概述:
- 1、static文件夹用于存放静态资源,例如:css文件、js文件。
- 2、templates用于存放使用了Thymeleaf的html文件。
依赖文件
请在pom.xml文件中添加如下依赖。
<?xml version="1.0" encoding="UTF-8"?>
<project xmlns="http://maven.apache.org/POM/4.0.0" xmlns:xsi="http://www.w3.org/2001/XMLSchema-instance"
         xsi:schemaLocation="http://maven.apache.org/POM/4.0.0 https://maven.apache.org/xsd/maven-4.0.0.xsd">
    <modelVersion>4.0.0</modelVersion>
    <parent>
        <groupId>org.springframework.boot</groupId>
        <artifactId>spring-boot-starter-parent</artifactId>
        <version>2.5.4</version>
        <relativePath/> <!-- lookup parent from repository -->
    </parent>
    <groupId>com.cn</groupId>
    <artifactId>SpringBootThymeleaf00</artifactId>
    <version>0.0.1-SNAPSHOT</version>
    <name>SpringBootThymeleaf00</name>
    <description>SpringBootThymeleaf00</description>
    <properties>
        <java.version>1.8</java.version>
    </properties>
    <dependencies>
        <dependency>
            <groupId>org.springframework.boot</groupId>
            <artifactId>spring-boot-starter-thymeleaf</artifactId>
        </dependency>
        <dependency>
            <groupId>org.springframework.boot</groupId>
            <artifactId>spring-boot-starter-web</artifactId>
        </dependency>

        <dependency>
            <groupId>org.springframework.boot</groupId>
            <artifactId>spring-boot-starter-test</artifactId>
            <scope>test</scope>
        </dependency>
    </dependencies>

    <build>
        <plugins>
            <plugin>
                <groupId>org.springframework.boot</groupId>
                <artifactId>spring-boot-maven-plugin</artifactId>
            </plugin>
        </plugins>
    </build>

</project>
配置文件
请在application.properties文件添加以下配置。
# 缓存设置。开发中设置为false,线上时设置为true
spring.thymeleaf.cache=false
# 模板的编码方式
spring.thymeleaf.encoding=UTF-8
# 模式
spring.thymeleaf.mode=HTML5
# 模板页面存放路径
spring.thymeleat.prefix=classpath:/resources/templates/
# 模板页面名称后缀
spring.thymeleaf.suffix=.html
后台程序
请在controller中创建TestController。
要点概述:
- 1、在控制器上使用@Controller ,而不是@RestController
- 2、在Request域即HttpServletRequest中保存数据
- 3、利用return跳转至templates下的index.html页面
package com.cn.springbootthymeleaf00.controller;

import org.springframework.stereotype.Controller;
import org.springframework.web.bind.annotation.RequestMapping;
import javax.servlet.http.HttpServletRequest;
/**
 * 本文作者:谷哥的小弟
 * 博客地址:http://blog.csdn.net/lfdfhl
 */
@Controller
@RequestMapping("/MyController")
public class TestController {
    @RequestMapping("/test1")
    public String test1(HttpServletRequest httpServletRequest){
        String authorName = "谷哥的小弟";
        // 将数据保存至HttpServletRequest
        httpServletRequest.setAttribute("name",authorName);
        // 跳转至index.html
        return "index";
    }
}
前端页面
在templates下创建index.html页面。
要点概述:
- 1、引入Thymeleaf命名空间
- 2、利用< span th:text=“${属性名}”></ span> 获取从Controller传递至前端的数据
<!DOCTYPE html>
<!-- 引入Thymeleaf命名空间 -->
<html lang="en" xmlns:th="http://www.thymeleaf.org">
<head>
<meta charset="UTF-8">
<title>Hello Thymeleaf</title>
</head>
<body>
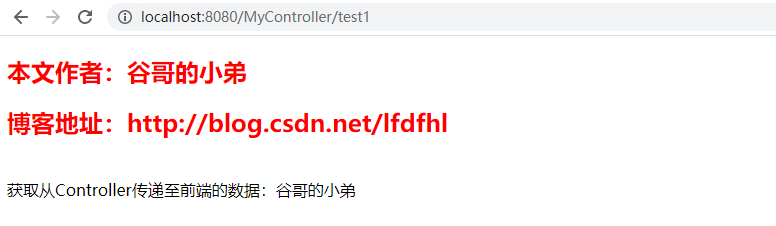
<h2 style="color: red;">本文作者:谷哥的小弟</h2>
<h2 style="color: red;">博客地址:http://blog.csdn.net/lfdfhl</h2>
<br/>
获取从Controller传递至前端的数据:<span th:text="${name}"></span>
</body>
</html>
SpringBootThymeleaf00Application
package com.cn.springbootthymeleaf00;

import org.springframework.boot.SpringApplication;
import org.springframework.boot.autoconfigure.SpringBootApplication;
/**
 * 本文作者:谷哥的小弟
 * 博客地址:http://blog.csdn.net/lfdfhl
 */
@SpringBootApplication
public class SpringBootThymeleaf00Application {

    public static void main(String[] args) {
        SpringApplication.run(SpringBootThymeleaf00Application.class, args);
    }

}
测试
测试地址:http://localhost:8080/MyController/test1


![【进阶]Java:线程通信(了解)](https://img-blog.csdnimg.cn/85806098b96c417aa2ac4587a45d292f.png)