目录
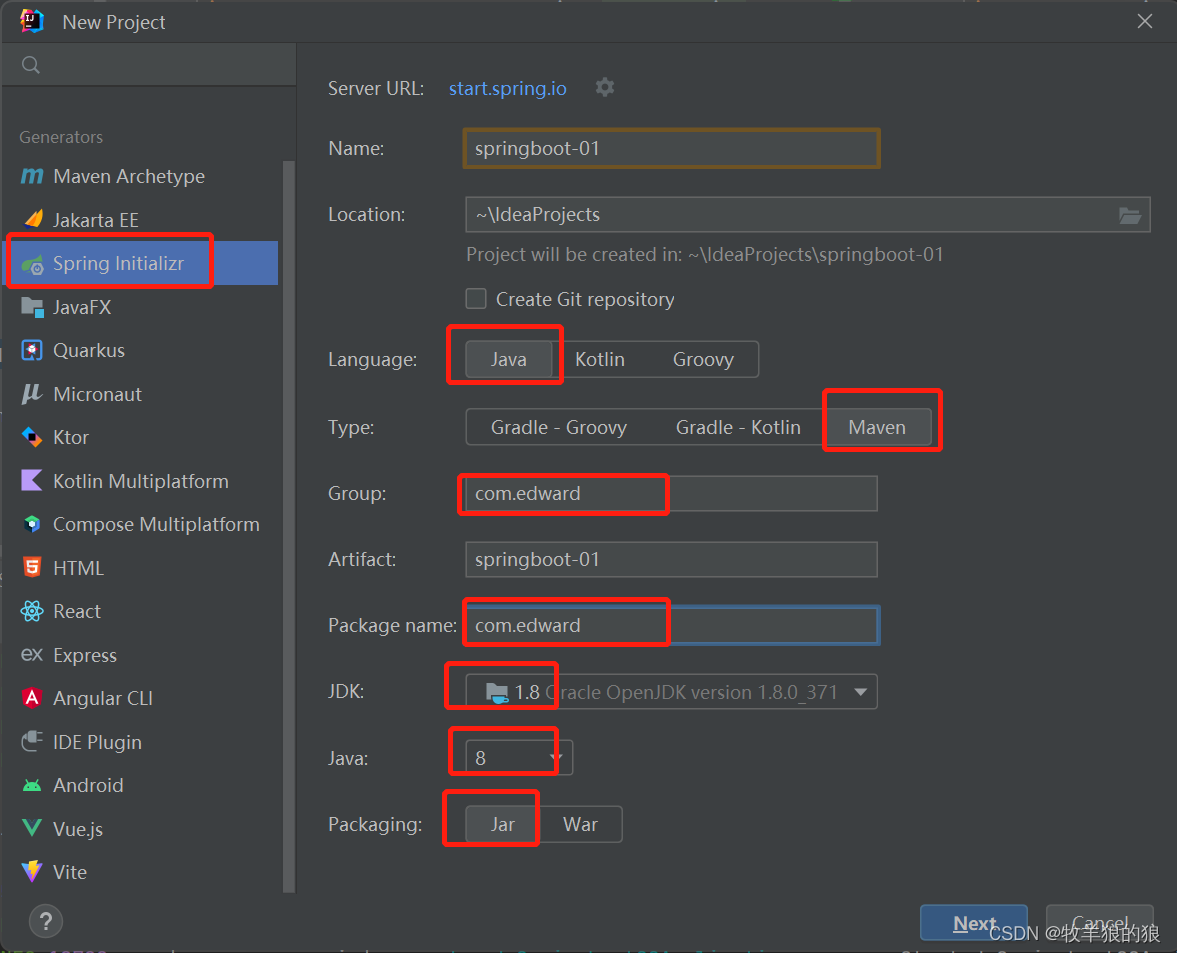
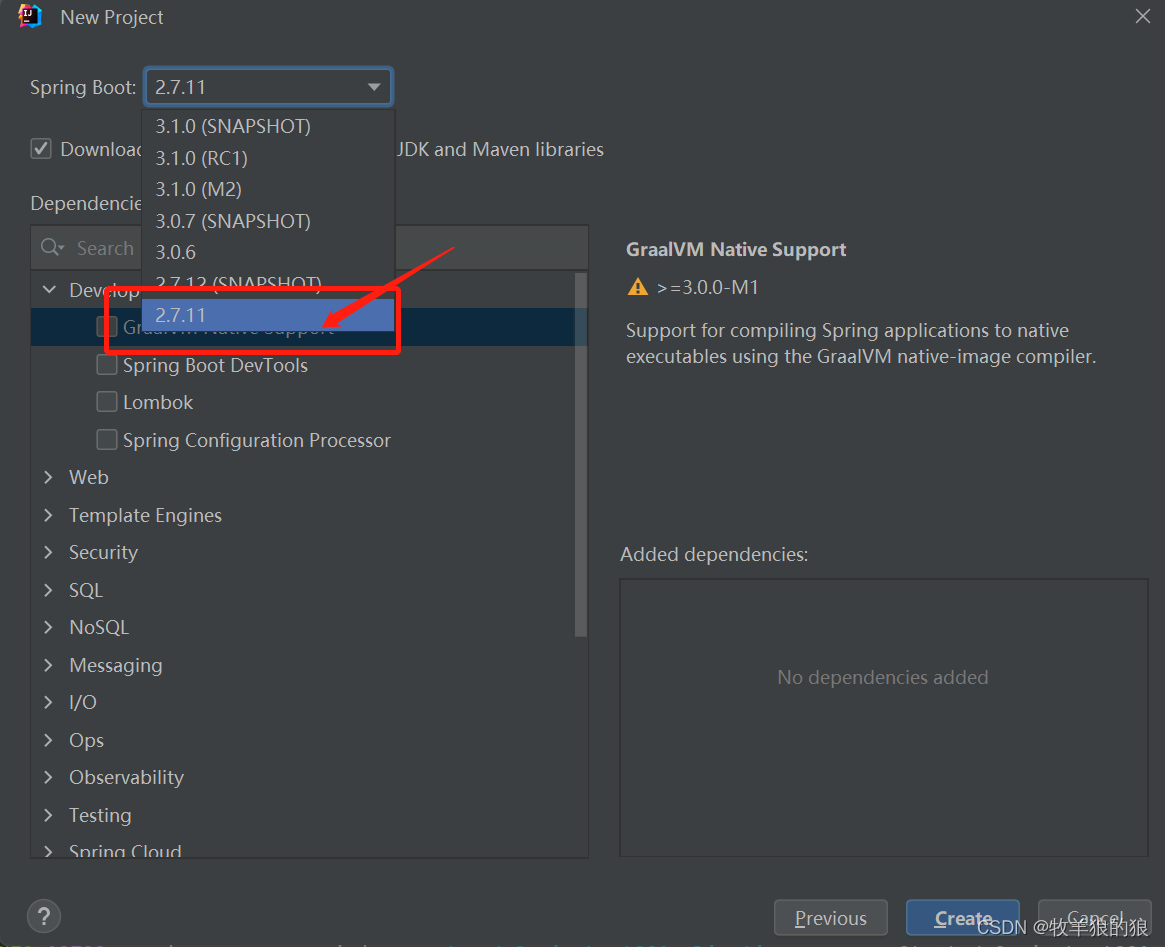
一、new project
二、pom.xml
三、配置 resources/application.yml
四、CodeGenerator 代码生成
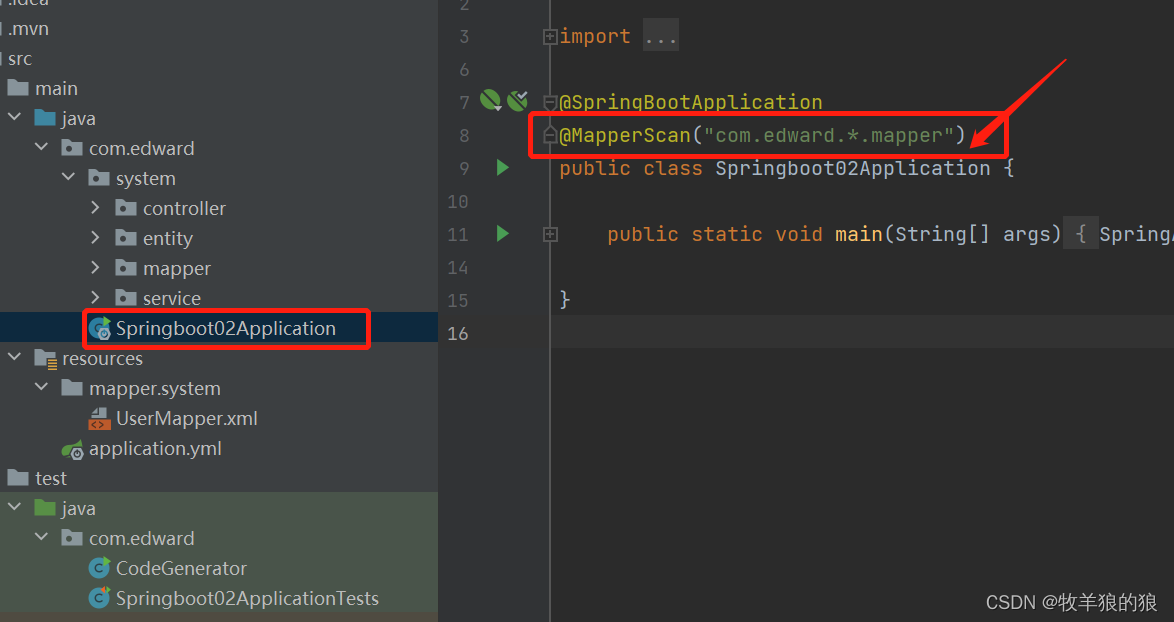
五、在项目主启动类中,添加@MapperScan注解
六、编写 Controller
七、选择application类, 点击运行
一、new project:
二、pom.xml
<?xml version="1.0" encoding="UTF-8"?>
<project xmlns="http://maven.apache.org/POM/4.0.0" xmlns:xsi="http://www.w3.org/2001/XMLSchema-instance"
         xsi:schemaLocation="http://maven.apache.org/POM/4.0.0 https://maven.apache.org/xsd/maven-4.0.0.xsd">
    <modelVersion>4.0.0</modelVersion>
    <parent>
        <groupId>org.springframework.boot</groupId>
        <artifactId>spring-boot-starter-parent</artifactId>
        <version>2.7.11</version>
        <relativePath/> <!-- lookup parent from repository -->
    </parent>
    <groupId>com.edward</groupId>
    <artifactId>springboot-02</artifactId>
    <version>0.0.1-SNAPSHOT</version>
    <name>springboot-02</name>
    <description>springboot-02</description>
    <properties>
        <java.version>1.8</java.version>
    </properties>
    <dependencies>
        <dependency>
            <groupId>org.springframework.boot</groupId>
            <artifactId>spring-boot-starter</artifactId>
        </dependency>
        <dependency>
            <groupId>org.springframework.boot</groupId>
            <artifactId>spring-boot-starter-web</artifactId>
        </dependency>
        <dependency>
            <groupId>org.springframework.boot</groupId>
            <artifactId>spring-boot-starter-test</artifactId>
            <scope>test</scope>
        </dependency>
        <dependency>
            <groupId>mysql</groupId>
            <artifactId>mysql-connector-java</artifactId>
            <version>8.0.32</version>
        </dependency>
        <dependency>
            <groupId>com.baomidou</groupId>
            <artifactId>mybatis-plus</artifactId>
            <version>3.5.3.1</version>
        </dependency>
        <dependency>
            <groupId>com.baomidou</groupId>
            <artifactId>mybatis-plus-boot-starter</artifactId>
            <version>3.1.0</version>
        </dependency>
        <dependency>
            <groupId>com.baomidou</groupId>
            <artifactId>mybatis-plus-generator</artifactId>
            <version>3.5.3</version>
        </dependency>
        <dependency>
            <groupId>org.freemarker</groupId>
            <artifactId>freemarker</artifactId>
            <version>2.3.32</version>
        </dependency>
        <dependency>
            <groupId>org.projectlombok</groupId>
            <artifactId>lombok</artifactId>
            <optional>true</optional>
        </dependency>
    </dependencies>

    <build>
        <plugins>
            <plugin>
                <groupId>org.springframework.boot</groupId>
                <artifactId>spring-boot-maven-plugin</artifactId>
            </plugin>
        </plugins>
    </build>

</project>
三、配置 resources/application.yml
server:
  port: 9999
spring:
  datasource:
    username: root
    password: 88888888
    url: jdbc:mysql://localhost:3306/wzw?useUnicode=true&characterEncoding=utf8&useSSL=false
    driver-class-name: com.mysql.cj.jdbc.Driver
四、CodeGenerator 代码生成
在 test 目录下新建 CodeGenerator 类,用于 mybatis-plus 自动生成 java 代码
package com.edward;

import com.baomidou.mybatisplus.generator.FastAutoGenerator;
import com.baomidou.mybatisplus.generator.config.OutputFile;
import com.baomidou.mybatisplus.generator.engine.FreemarkerTemplateEngine;

import java.util.Collections;

public class CodeGenerator {
    public static void main(String[] args) {
        String username = "root";
        String password = "88888888";
        String url = "jdbc:mysql://localhost:3306/wzw?useUnicode=true&characterEncoding=utf8&useSSL=false";
        String moduleName = "system";
        String mapperLocation = "C:\\Users\\lenovo\\IdeaProjects\\springboot-02\\src\\main\\resources\\mapper\\" + moduleName;

        FastAutoGenerator.create(url, username, password)
                .globalConfig(builder -> {
                    builder.author("edward") // 设置作者
//                            .enableSwagger(); // 开启 swagger 模式
//                            .fileOverride() // 覆盖已生成文件
                            .outputDir("C:\\Users\\lenovo\\IdeaProjects\\springboot-02\\src\\main\\java"); // 指定输出目录
                })
                .packageConfig(builder -> {
                    builder.parent("com.edward") // 设置父包名
                            .moduleName(moduleName) // 设置父包模块名
                            .pathInfo(Collections.singletonMap(OutputFile.xml, mapperLocation)); // 设置mapperXml生成路径
                })
                .strategyConfig(builder -> {
                    builder.addInclude("user, t1") // 设置需要生成的表名
                            .addTablePrefix("t_"); // 设置过滤表前缀
                })
                .templateEngine(new FreemarkerTemplateEngine()) // 使用Freemarker引擎模板,默认的是Velocity引擎模板
                .execute();

    }
}
运行CodeGenerator类后,java 目录和 resource 目录下会自动生成项目所需代码:

五、在项目主启动类中,添加@MapperScan注解:
@MapperScan("com.edward.*.mapper")
注意:Springboot02Application 与 system 模块必须是同级的!!
六、编写 Controller
package com.edward.system.controller;
import com.edward.system.entity.User;
import com.edward.system.service.impl.UserServiceImpl;
import org.springframework.beans.factory.annotation.Autowired;
import org.springframework.stereotype.Service;
import org.springframework.web.bind.annotation.GetMapping;
import org.springframework.web.bind.annotation.RequestMapping;
import org.springframework.stereotype.Controller;
import org.springframework.web.bind.annotation.RestController;
import java.util.List;
@RestController
@RequestMapping("/system/user")
public class UserController {
@Autowired
private UserServiceImpl userServiceImpl;
@GetMapping("/hello")
public String hello() {
return "你好,世界";
}
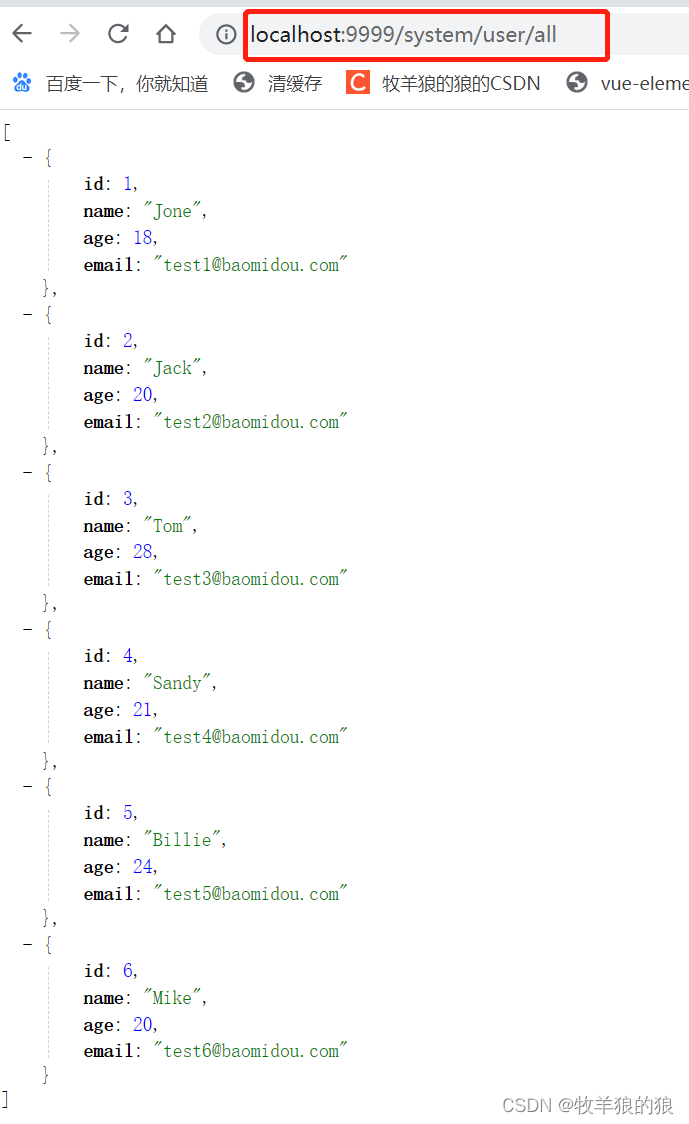
@GetMapping("/all")
public List<User> getAllUser() {
List<User> userList = userServiceImpl.list();
return userList;
}
}
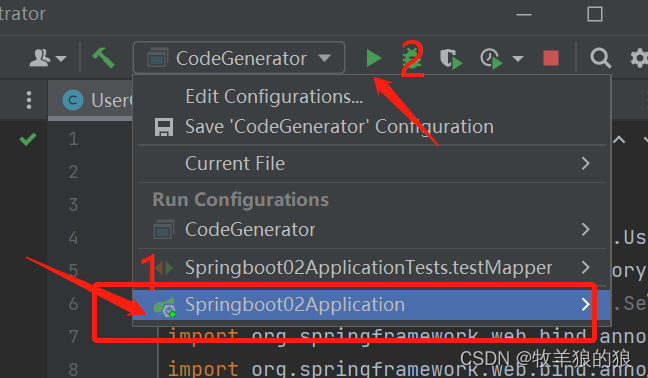
七、选择application类, 点击运行
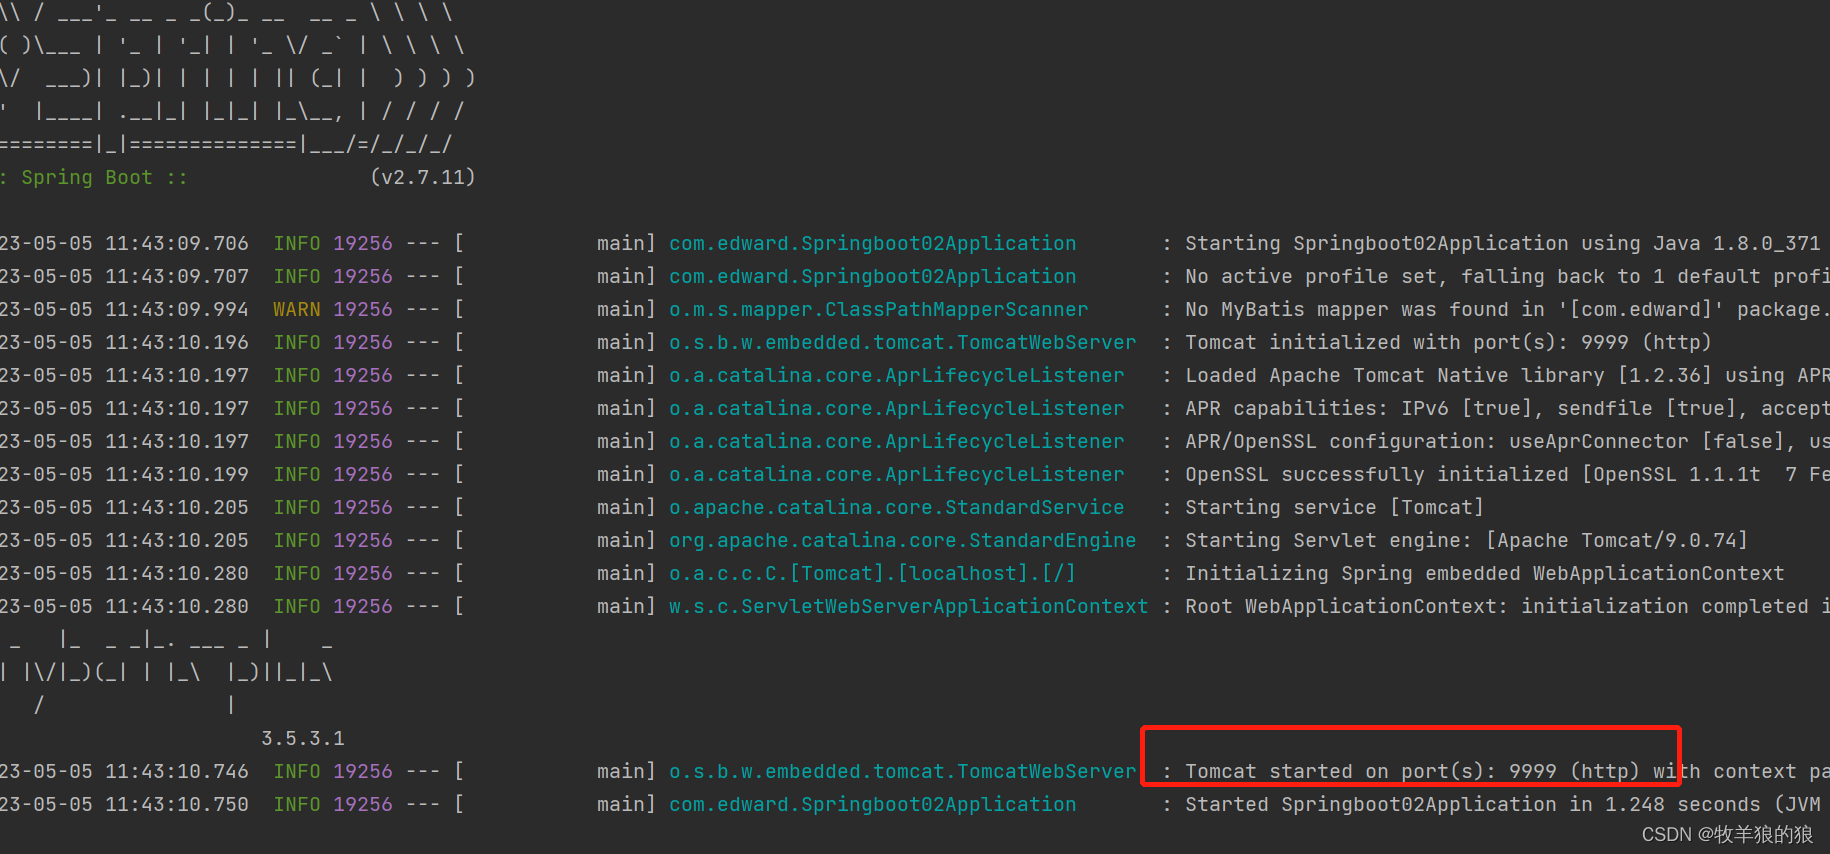
控制台上出现下方log时,表示在 localhost:9999 上启动成功:
访问页面: