一、被监控机安装snmp
yum -y install snmp
二、被监控机的配置
vi /etc/snmp/snmpd.conf
做以下更改:
1、找到com2sec notConfigUser default public
改为:com2sec notConfigUser 192.168.1.1(改成监控服务器的ip) public
2、找到access notConfigGroup "" any noauth exact systemview none none
改 为:access notConfigGroup "" any noauth exact all none none
3、找到#view all included .1 80
将前面的 # 注释 去掉。
以下为访问项目,如果想监控磁盘空间,load等需把注释去掉
编译安装默认已去掉,自带安装的需手动把注释去掉
Make sure mountd is running
proc mountd #去掉前面的"#"
Make sure there are no more than 4 ntalkds running, but 0 is oktoo.
proc ntalkd 4
Make sure at least one sendmail, but less than or equal to 10 arerunning.
proc sendmail 10 1
Check the / partition and make sure it contains at least 10 megs.
disk / 10000
Check for loads:
load 12 14 14
三、重启snmpd服务
红帽7使用 systemctl start snmpd
查看snmpd状态 systemctl status snmpd
/etc/init.d/snmpd restart或killall -9 snmpd
/usr/local/sbin/snmpd
四、iptables或者firewall规则
iptables
假如开启了iptables并且INPUT默认策略为DROP
在第一条插入充许192.168.1.1(监控机)以udp协议访问snmpd默认161端口的规则
可编辑/etc/sysconfig/iptables文件来修改iptables规则。
/sbin/iptables -I INPUT -p udp -m udp -s 192.168.1.1(监控机的IP) --dport 161 -jACCEPT
保存一下,防止重启服务后失效
/etc/init.d/iptablessave
firewall
放行 UDP端口161 永久生效
firewall-cmd --zone=public --add-port=161/udp --permanent
查看已经放行端口
firewall-cmd --permanent --list-port
五、测试snmp(可选)
snmpwalk -c public -v 2c 被监控设备地址
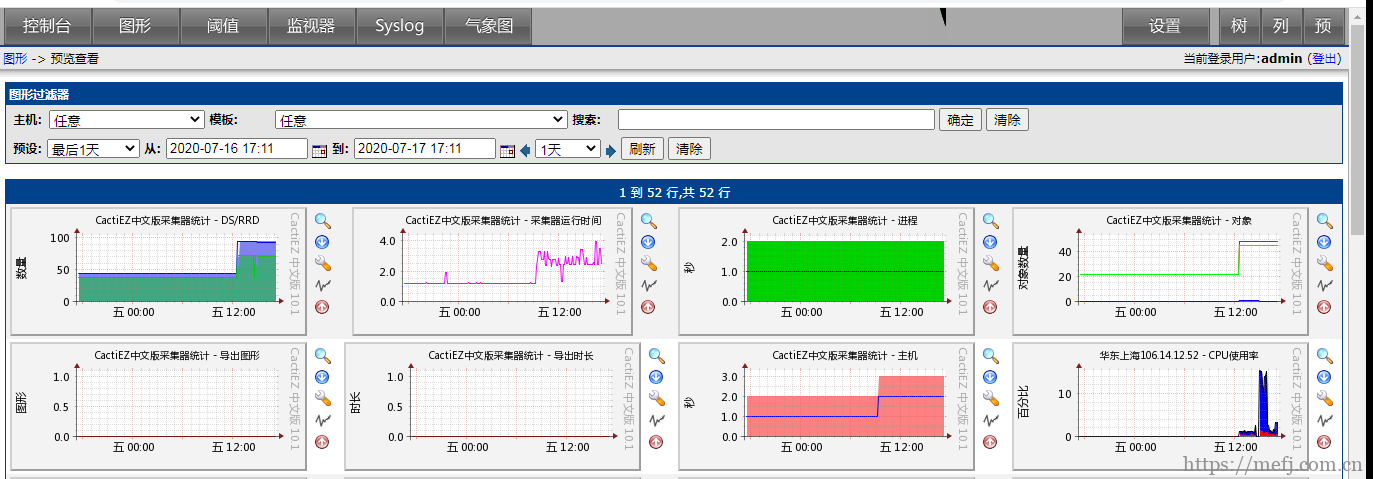
之后打开监控机添加主机就可以