文章目录
- 0.交叉编译的必要性
- 1.下载交叉编译工具链
- 1.1.直接在Windows下使用mingw(不使用虚拟机)编译(还没成功,无法编译)
- 1.2.在虚拟机中的Ubuntu中进行交叉编译
- 2.下载qt源码
- 3.编译Qt
- 3.1.创建loongarch64的mkspec
- 3.2.创建编译脚本
- 3.3.编译
- 3.3.1. error: no include path in which to search for limits.h
- 3.3.2.Target architecture was not detected as supported by Double-Conversion.
- 3.4.编译子模块
- 4.在QtCreator中使用
0.交叉编译的必要性
经过测试,我手头上的一个工程,在qemu中(【在win10上虚拟一个LoongOS系统(类似虚拟机)作为开发环境】)需要编译20分钟,而交叉编译的话,只需要2分钟,编译时间减少了90%,完美。
1.下载交叉编译工具链
1.1.直接在Windows下使用mingw(不使用虚拟机)编译(还没成功,无法编译)
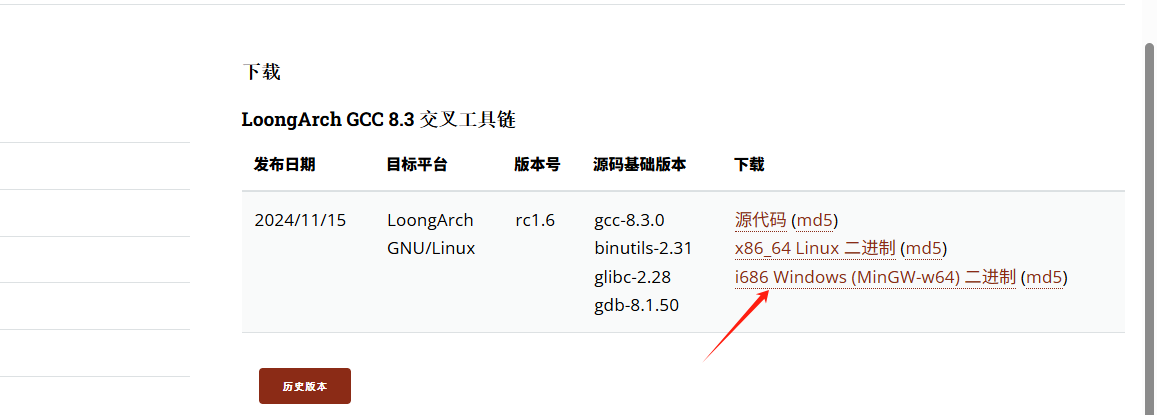
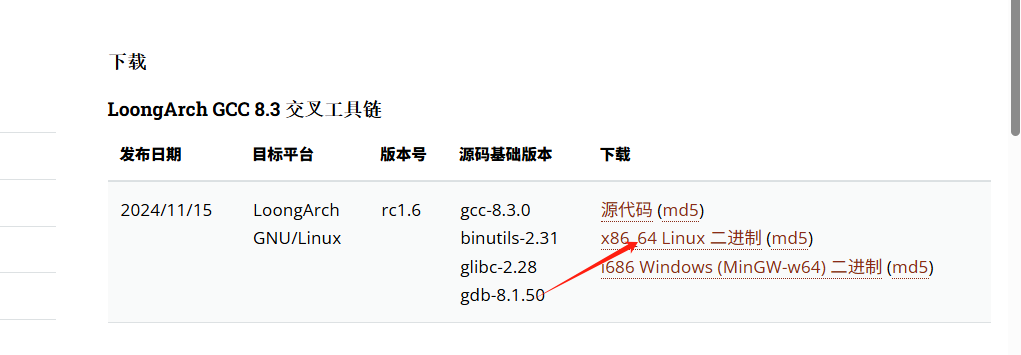
到这里下载【龙芯 GNU 编译工具链】(注意不要点那个md5,否则下载的是文件md5校验码,而不是文件本身),从rc1.4版本开始,龙芯开源社区提供了mingw版本的交叉编译工具链,可以在Windows上直接交叉编译,不用再到虚拟机中的Linux系统中进行操作了。
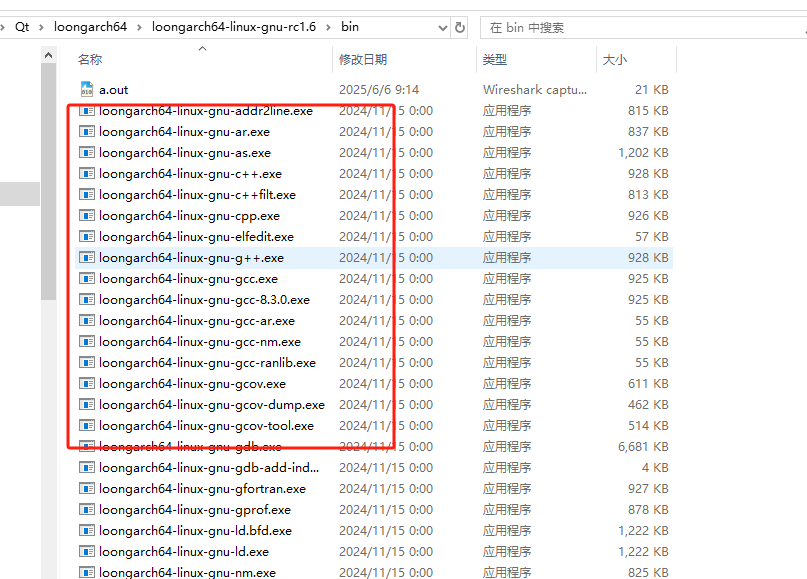
下载解压后,bin目录下都是exe文件,是我们编译相关的工具
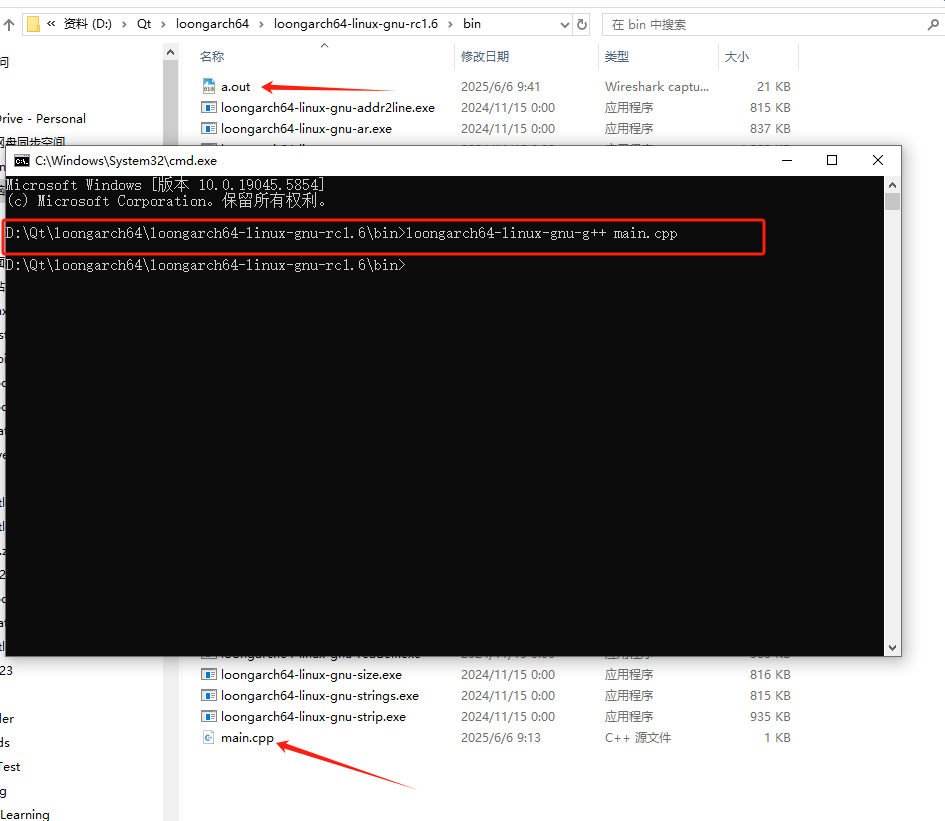
简单测试的话,可以写个main.cpp, 然后用这里面的g++编译一下,顺利得到一个a.out了,把这个a.out拿到龙芯系统中,就可以顺利运行了
#include <math.h>
#include <iostream>
int main(int argc, char **argv){
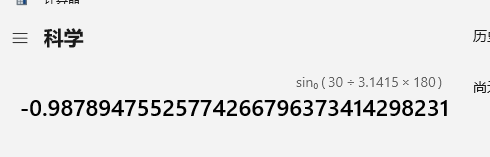
std::cout << sin(30) << "----" << 123 << std::endl;
}
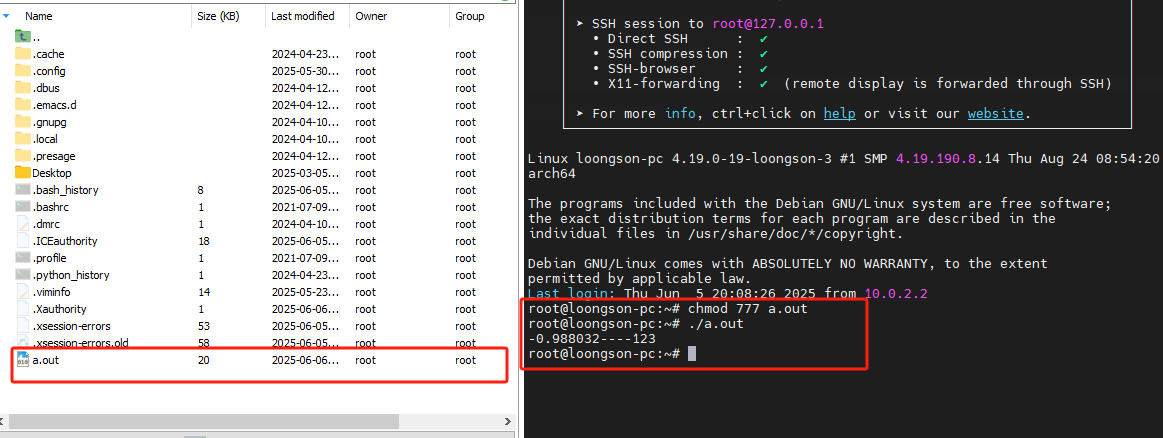
sin(30)之所以不是0.5,是因为这个30是弧度,而不是角度;也就是,假如用的是角度值,它算的是sin(30/pi*180)
下载QtBase源码,进入到代码路径,新建一个build.bat脚本
注意:要同时注明-platform (主机平台)、-xplatform(目标平台),以及使用configure而不是configure.bat
configure  ^
    -prefix /loongarch64 ^
    -confirm-license ^
    -opensource ^
    -shared ^
    -release ^
    -make libs ^
    -platform win32-g++ ^
    -xplatform linux-loongarch64-gnu-g++ ^
    -sysroot F:/loongos/loongarch64-linux-gnu-rc1.6/loongarch64-linux-gnu/sysroot ^
    -I f:/loongos/myHeader ^
    -optimized-qmake ^
    -pch ^
    -qt-libjpeg ^
    -qt-libpng ^
    -qt-zlib ^
    -skip qtdeclarative ^
    -no-opengl ^
    -no-sse2 ^
    -no-openssl ^
    -no-cups ^
    -no-glib ^
    -no-dbus ^
    -no-xcb ^
    -no-separate-debug-info ^
    -no-fontconfig ^
    -nomake examples -nomake tools -nomake tests -no-iconv
exit
sysroot是你下载的交叉编译工具中的文件夹
f:/loongos/myHeader这个路径是我为了解决错误而魔改了一个limit.h文件所存放的目录
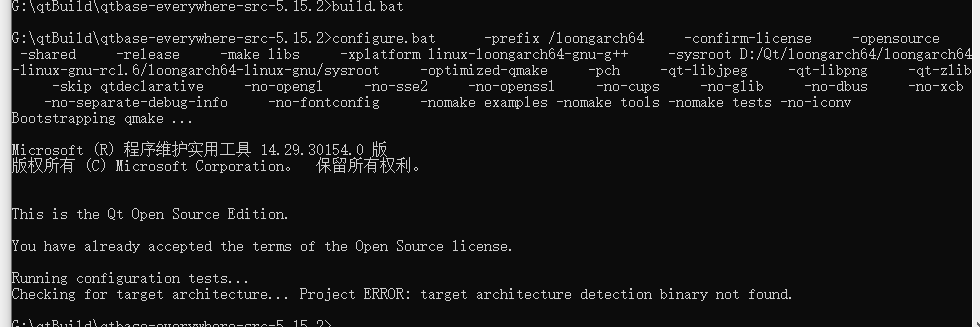
注意,只能用mingw来编译,用msvc的话,会出现这个问题:
Checking for target architecture... Project ERROR: target architecture detection binary not found.
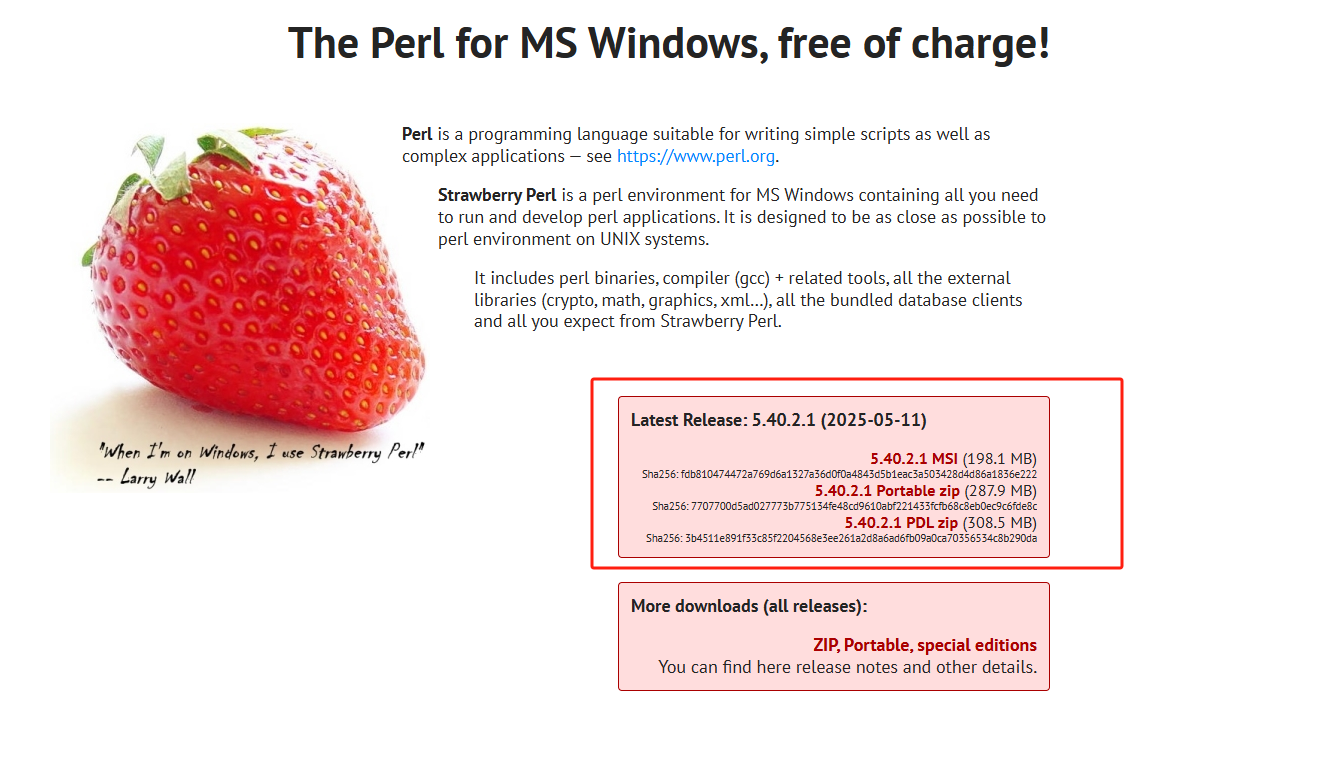
编译之前,要先安装perl https://strawberryperl.com/
运行完脚本
后续的操作和在linux下一样。
在执行mingw-32 make的过程中,会报这个错误:
f:\loongos\loongarch64-linux-gnu-rc1.6\loongarch64-linux-gnu\sysroot\usr\include/limits.h:124:26: error: no include path in which to search for limits.h
 # include_next <limits.h>                 ^
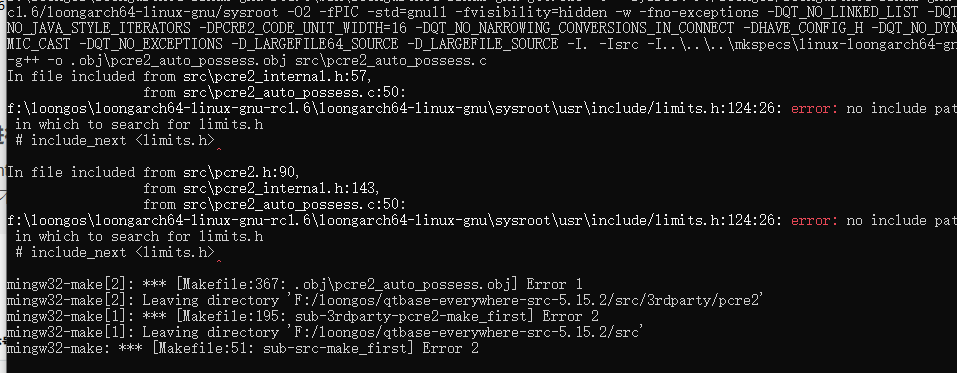
这个错误好像是因为工具链中的limits.h文件定义的东西不给目前的编译器用,叫编译器去问其他limits.h要。那行,那我来提供吧(我这种操作估计有问题,但是暂时没有找到更好的办法)
拷贝sysroot中的limits.h,然后改成下面的样子,然后放到一个独立的路径,然后将路径加进去我们的脚本中,也就是脚本中的这个。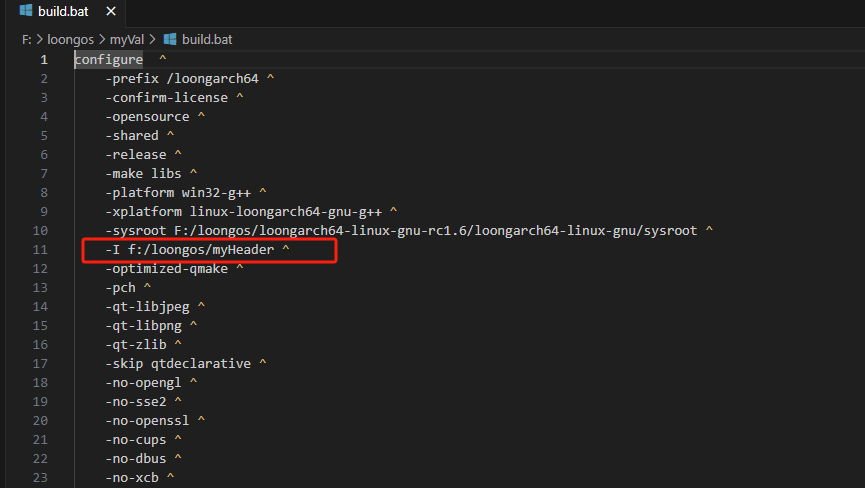
/* Copyright (C) 1991-2018 Free Software Foundation, Inc.
   This file is part of the GNU C Library.

   The GNU C Library is free software; you can redistribute it and/or
   modify it under the terms of the GNU Lesser General Public
   License as published by the Free Software Foundation; either
   version 2.1 of the License, or (at your option) any later version.

   The GNU C Library is distributed in the hope that it will be useful,
   but WITHOUT ANY WARRANTY; without even the implied warranty of
   MERCHANTABILITY or FITNESS FOR A PARTICULAR PURPOSE.  See the GNU
   Lesser General Public License for more details.

   You should have received a copy of the GNU Lesser General Public
   License along with the GNU C Library; if not, see
   <http://www.gnu.org/licenses/>.  */

/*
 *	ISO C99 Standard: 7.10/5.2.4.2.1 Sizes of integer types	<limits.h>
 */

#ifndef _LIBC_LIMITS_H_
#define _LIBC_LIMITS_H_	1

#define __GLIBC_INTERNAL_STARTING_HEADER_IMPLEMENTATION
#include <bits/libc-header-start.h>


/* Maximum length of any multibyte character in any locale.
   We define this value here since the gcc header does not define
   the correct value.  */
#define MB_LEN_MAX	16


// /* If we are not using GNU CC we have to define all the symbols ourself.
//    Otherwise use gcc's definitions (see below).  */
// #if !defined __GNUC__ || __GNUC__ < 2

/* We only protect from multiple inclusion here, because all the other
   #include's protect themselves, and in GCC 2 we may #include_next through
   multiple copies of this file before we get to GCC's.  */
# ifndef _LIMITS_H
#  define _LIMITS_H	1

#include <bits/wordsize.h>

/* We don't have #include_next.
   Define ANSI <limits.h> for standard 32-bit words.  */

/* These assume 8-bit `char's, 16-bit `short int's,
   and 32-bit `int's and `long int's.  */

/* Number of bits in a `char'.	*/
#  define CHAR_BIT	8

/* Minimum and maximum values a `signed char' can hold.  */
#  define SCHAR_MIN	(-128)
#  define SCHAR_MAX	127

/* Maximum value an `unsigned char' can hold.  (Minimum is 0.)  */
#  define UCHAR_MAX	255

/* Minimum and maximum values a `char' can hold.  */
#  ifdef __CHAR_UNSIGNED__
#   define CHAR_MIN	0
#   define CHAR_MAX	UCHAR_MAX
#  else
#   define CHAR_MIN	SCHAR_MIN
#   define CHAR_MAX	SCHAR_MAX
#  endif

/* Minimum and maximum values a `signed short int' can hold.  */
#  define SHRT_MIN	(-32768)
#  define SHRT_MAX	32767

/* Maximum value an `unsigned short int' can hold.  (Minimum is 0.)  */
#  define USHRT_MAX	65535

/* Minimum and maximum values a `signed int' can hold.  */
#  define INT_MIN	(-INT_MAX - 1)
#  define INT_MAX	2147483647

/* Maximum value an `unsigned int' can hold.  (Minimum is 0.)  */
#  define UINT_MAX	4294967295U

/* Minimum and maximum values a `signed long int' can hold.  */
#  if __WORDSIZE == 64
#   define LONG_MAX	9223372036854775807L
#  else
#   define LONG_MAX	2147483647L
#  endif
#  define LONG_MIN	(-LONG_MAX - 1L)

/* Maximum value an `unsigned long int' can hold.  (Minimum is 0.)  */
#  if __WORDSIZE == 64
#   define ULONG_MAX	18446744073709551615UL
#  else
#   define ULONG_MAX	4294967295UL
#  endif

#  ifdef __USE_ISOC99

/* Minimum and maximum values a `signed long long int' can hold.  */
#   define LLONG_MAX	9223372036854775807LL
#   define LLONG_MIN	(-LLONG_MAX - 1LL)

/* Maximum value an `unsigned long long int' can hold.  (Minimum is 0.)  */
#   define ULLONG_MAX	18446744073709551615ULL

#  endif /* ISO C99 */

# endif	/* limits.h  */
// #endif	/* GCC 2.  */

#endif	/* !_LIBC_LIMITS_H_ */

//  /* Get the compiler's limits.h, which defines almost all the ISO constants.

//     We put this #include_next outside the double inclusion check because
//     it should be possible to include this file more than once and still get
//     the definitions from gcc's header.  */
// #if defined __GNUC__ && !defined _GCC_LIMITS_H_
// /* `_GCC_LIMITS_H_' is what GCC's file defines.  */
// # include_next <limits.h>
// #endif

// /* The <limits.h> files in some gcc versions don't define LLONG_MIN,
//    LLONG_MAX, and ULLONG_MAX.  Instead only the values gcc defined for
//    ages are available.  */
// #if defined __USE_ISOC99 && defined __GNUC__
// # ifndef LLONG_MIN
// #  define LLONG_MIN	(-LLONG_MAX-1)
// # endif
// # ifndef LLONG_MAX
// #  define LLONG_MAX	__LONG_LONG_MAX__
// # endif
// # ifndef ULLONG_MAX
// #  define ULLONG_MAX	(LLONG_MAX * 2ULL + 1)
// # endif
// #endif

// /* The integer width macros are not defined by GCC's <limits.h> before
//    GCC 7, or if _GNU_SOURCE rather than
//    __STDC_WANT_IEC_60559_BFP_EXT__ is used to enable this feature.  */
// #if __GLIBC_USE (IEC_60559_BFP_EXT)
// # ifndef CHAR_WIDTH
// #  define CHAR_WIDTH 8
// # endif
// # ifndef SCHAR_WIDTH
// #  define SCHAR_WIDTH 8
// # endif
// # ifndef UCHAR_WIDTH
// #  define UCHAR_WIDTH 8
// # endif
// # ifndef SHRT_WIDTH
// #  define SHRT_WIDTH 16
// # endif
// # ifndef USHRT_WIDTH
// #  define USHRT_WIDTH 16
// # endif
// # ifndef INT_WIDTH
// #  define INT_WIDTH 32
// # endif
// # ifndef UINT_WIDTH
// #  define UINT_WIDTH 32
// # endif
// # ifndef LONG_WIDTH
// #  define LONG_WIDTH __WORDSIZE
// # endif
// # ifndef ULONG_WIDTH
// #  define ULONG_WIDTH __WORDSIZE
// # endif
// # ifndef LLONG_WIDTH
// #  define LLONG_WIDTH 64
// # endif
// # ifndef ULLONG_WIDTH
// #  define ULLONG_WIDTH 64
// # endif
// #endif /* Use IEC_60559_BFP_EXT.  */

// #ifdef	__USE_POSIX
// /* POSIX adds things to <limits.h>.  */
// # include <bits/posix1_lim.h>
// #endif

// #ifdef	__USE_POSIX2
// # include <bits/posix2_lim.h>
// #endif

// #ifdef	__USE_XOPEN
// # include <bits/xopen_lim.h>
// #endif
编译完,然后在QtCreator中使用时,报glibc的问题
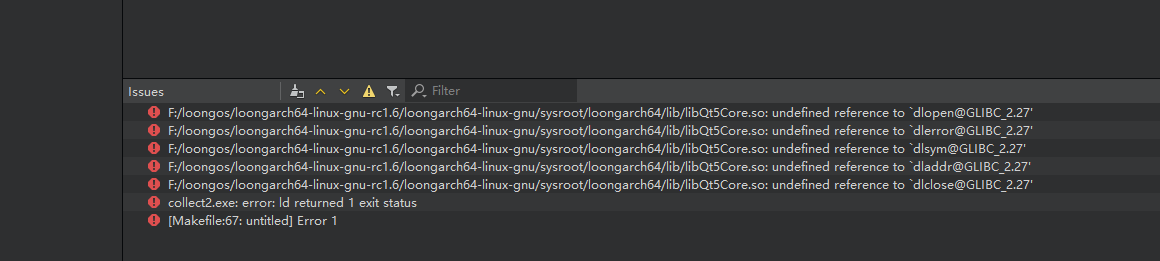
用不了,后面再研究吧。目前只能在虚拟机的Ubuntu里面弄了,弄个共享文件夹,应该也还可以接受。
1.2.在虚拟机中的Ubuntu中进行交叉编译
到这里下载【龙芯 GNU 编译工具链】(注意不要点那个md5,否则下载的是文件md5校验码,而不是文件本身),这次下载x86_64Linux的版本。
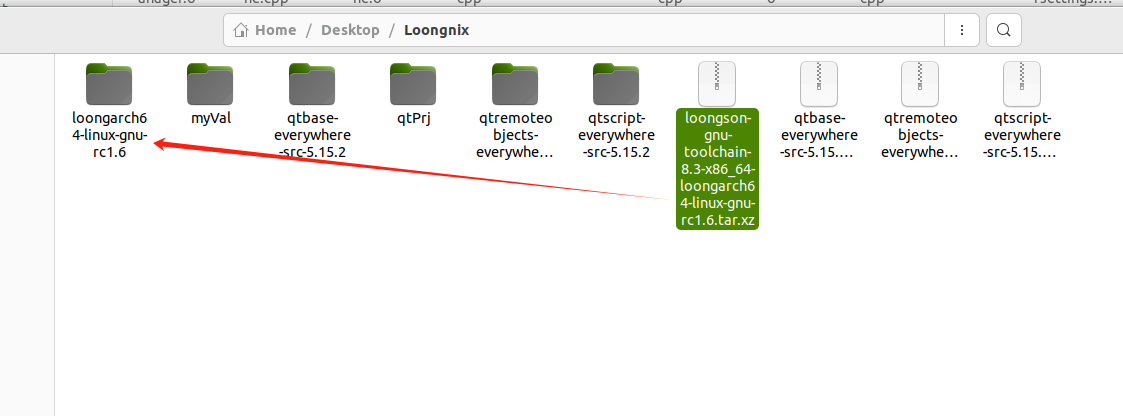
下载后,拷贝到Ubuntu下的一个文件夹,解压,重命名一下(原来的名字太长了)。
2.下载qt源码
到【qt官网这里】 下载qtbase的源码(先编译这个,其他模块编译简单一点)
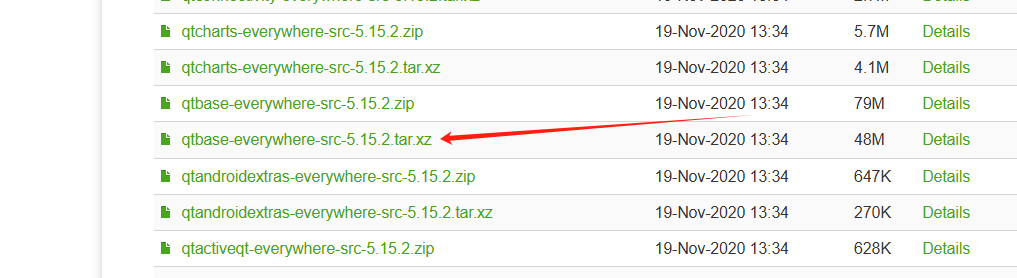
注意假如是linux用的不要下载那个zip,否则会出现什么编码格式的问题。
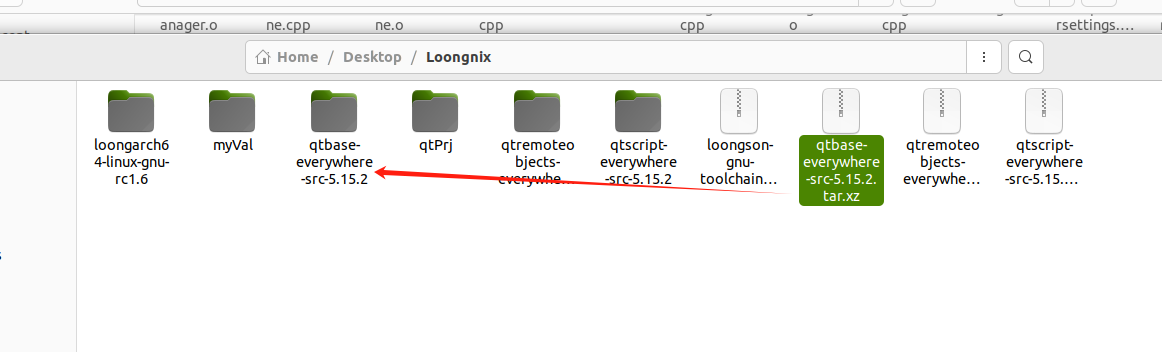
然后就解压到文件夹
3.编译Qt
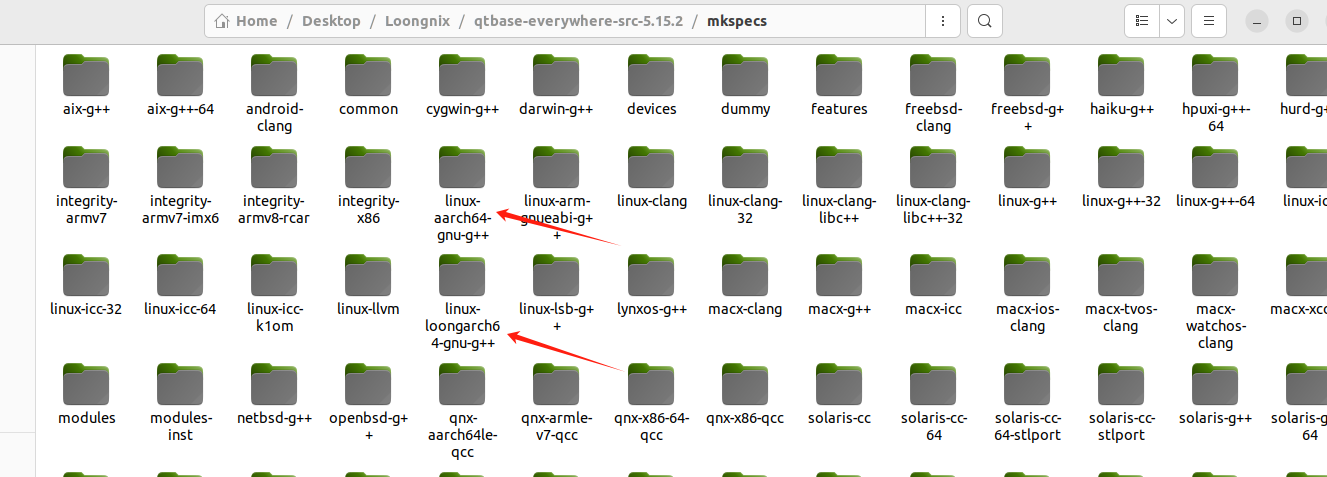
3.1.创建loongarch64的mkspec
到qtbase源码的mkspecs文件夹中,复制linux-aarch64-gnu-g++文件夹,然后将复制出来的文件夹命名为linux-loongarch64-gnu-g++
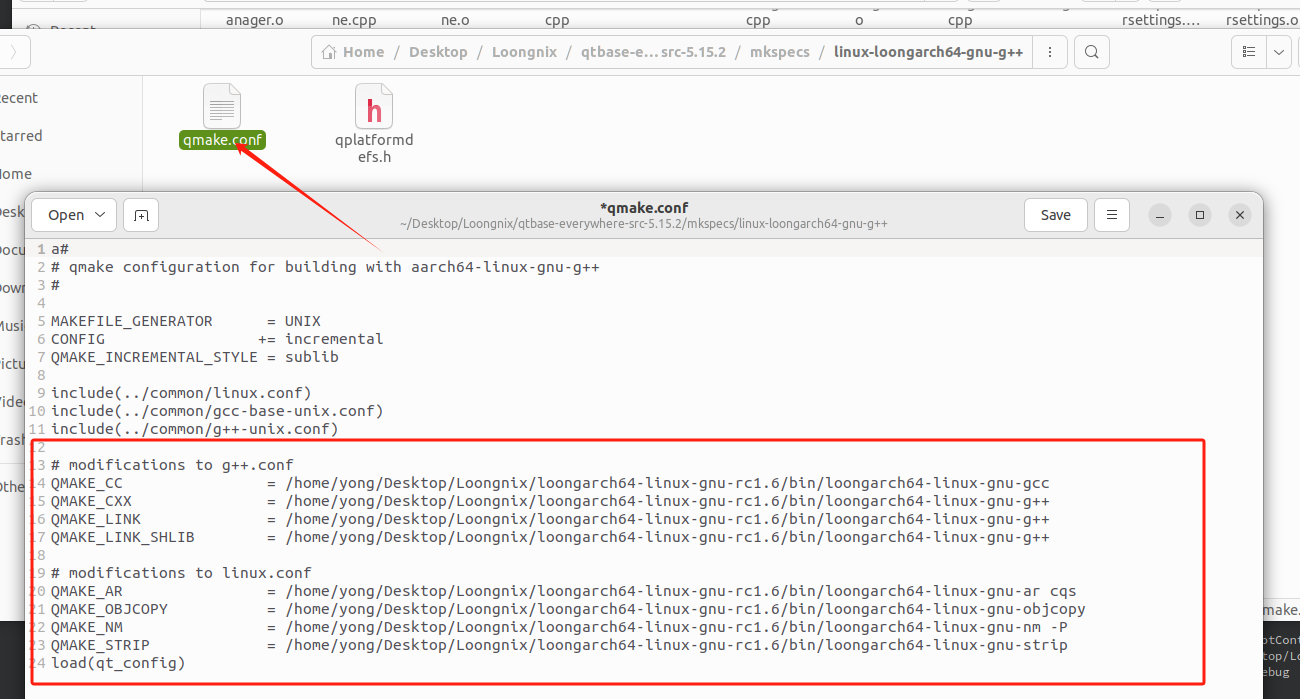
修改其中qmake.conf文件的内容为:(其实也就是将里面的编译器修改为我们下载下来的编译器,注意要按照你实际的路径来写)
a#
# qmake configuration for building with aarch64-linux-gnu-g++
#

MAKEFILE_GENERATOR      = UNIX
CONFIG                 += incremental
QMAKE_INCREMENTAL_STYLE = sublib

include(../common/linux.conf)
include(../common/gcc-base-unix.conf)
include(../common/g++-unix.conf)

# modifications to g++.conf
QMAKE_CC                = /home/yong/Desktop/Loongnix/loongarch64-linux-gnu-rc1.6/bin/loongarch64-linux-gnu-gcc
QMAKE_CXX               = /home/yong/Desktop/Loongnix/loongarch64-linux-gnu-rc1.6/bin/loongarch64-linux-gnu-g++
QMAKE_LINK              = /home/yong/Desktop/Loongnix/loongarch64-linux-gnu-rc1.6/bin/loongarch64-linux-gnu-g++
QMAKE_LINK_SHLIB        = /home/yong/Desktop/Loongnix/loongarch64-linux-gnu-rc1.6/bin/loongarch64-linux-gnu-g++

# modifications to linux.conf
QMAKE_AR                = /home/yong/Desktop/Loongnix/loongarch64-linux-gnu-rc1.6/bin/loongarch64-linux-gnu-ar cqs
QMAKE_OBJCOPY           = /home/yong/Desktop/Loongnix/loongarch64-linux-gnu-rc1.6/bin/loongarch64-linux-gnu-objcopy
QMAKE_NM                = /home/yong/Desktop/Loongnix/loongarch64-linux-gnu-rc1.6/bin/loongarch64-linux-gnu-nm -P
QMAKE_STRIP             = /home/yong/Desktop/Loongnix/loongarch64-linux-gnu-rc1.6/bin/loongarch64-linux-gnu-strip
load(qt_config)
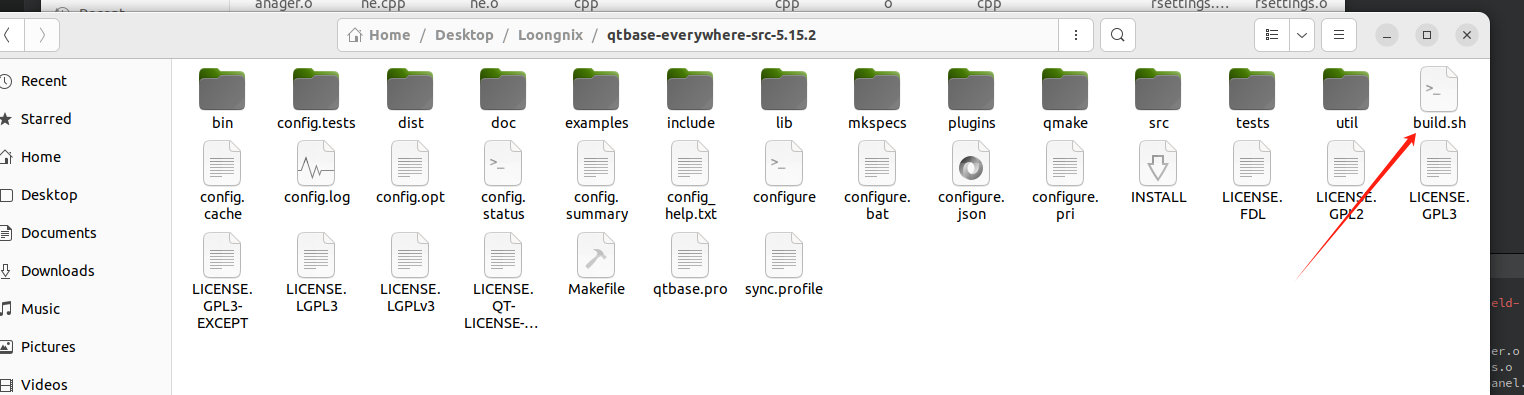
3.2.创建编译脚本
然后,再在源码根目录下,新建一个build.sh,内容为:
./configure \
    -prefix /build \
    -confirm-license \
    -opensource \
    -shared \
    -release \
    -make libs \
    -sysroot /home/yong/Desktop/Loongnix/loongarch64-linux-gnu-rc1.6/loongarch64-linux-gnu/sysroot \
    -I /home/yong/Desktop/Loongnix/loongarch64-linux-gnu-rc1.6/loongarch64-linux-gnu/sysroot/usr/include \
    -L /home/yong/Desktop/Loongnix/loongarch64-linux-gnu-rc1.6/loongarch64-linux-gnu/sysroot/usr/lib64 \
    -xplatform linux-loongarch64-gnu-g++ \
    -optimized-qmake \
    -pch \
    -qt-libjpeg \
    -qt-libpng \
    -qt-zlib \
    -skip qtdeclarative \
    -no-opengl \
    -no-sse2 \
    -no-openssl \
    -no-cups \
    -no-glib \
    -no-dbus \
    -no-xcb \
    -no-separate-debug-info \
    -no-fontconfig \
    -nomake examples -nomake tools -nomake tests -no-iconv
exit
3.3.编译
然后就可以执行该脚本,正常的话会显示以下界面
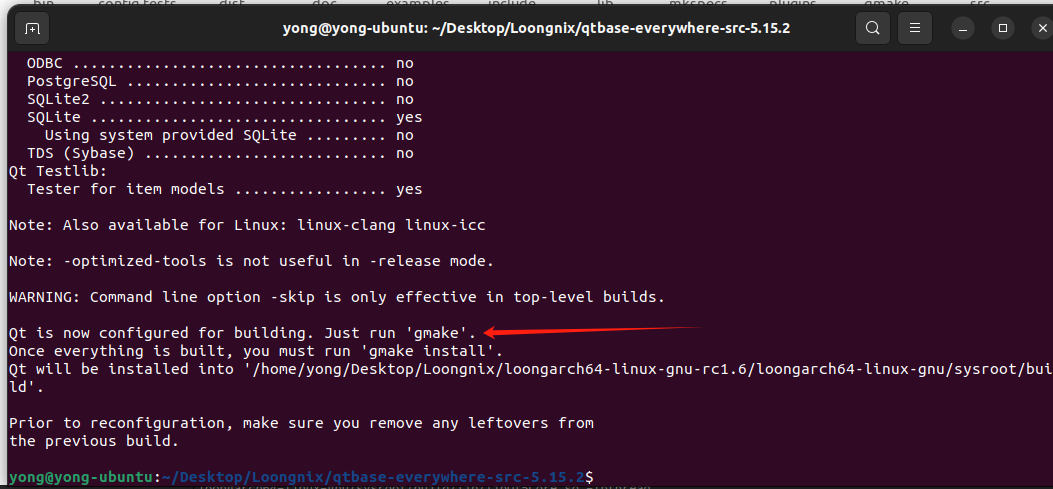
然后就可以执行gmake,进行编译:
gmake -j8
-j8 表示用8个线程进行编译。请选择合适的线程数。
然后在编译的过程中,会出现几个错误,需要修改一下源码
3.3.1. error: no include path in which to search for limits.h
【QT Ubuntu Gcc 静态编译源码 5.15.2 error numeric_limits 出错】
3.3.2.Target architecture was not detected as supported by Double-Conversion.
参考:【qt 源码编译心路历程】
error: #error Target architecture was not detected as supported by Double-Conversion.

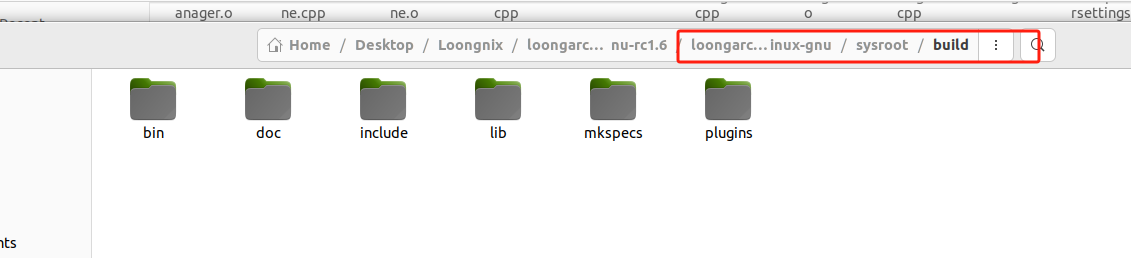
编译完后,就可以gmake install来进行安装。
安装的位置是前面脚本中的sysroot/prefix,比如我的sysroot为/home/yong/Desktop/Loongnix/loongarch64-linux-gnu-rc1.6/loongarch64-linux-gnu/sysroot,prefix为/build,那安装的真正目录为/home/yong/Desktop/Loongnix/loongarch64-linux-gnu-rc1.6/loongarch64-linux-gnu/sysroot/build
3.4.编译子模块
子模块的编译比较简单,因为子模块都有一个pro文件,也就是说,子模块都是使用前面qtbase编译时得到的qmake来编译的。
这里用QtRemoteObjects来说明。
下载源码,并解压

然后到解压后的文件夹中,执行qmake,注意此时的qmake是指你前面编译出来的qmake,而不是系统的qmake。
/home/yong/Desktop/Loongnix/loongarch64-linux-gnu-rc1.6/loongarch64-linux-gnu/sysroot/build/bin/qmake
然后就可以编译
make -j8
make install
然后就ok了。
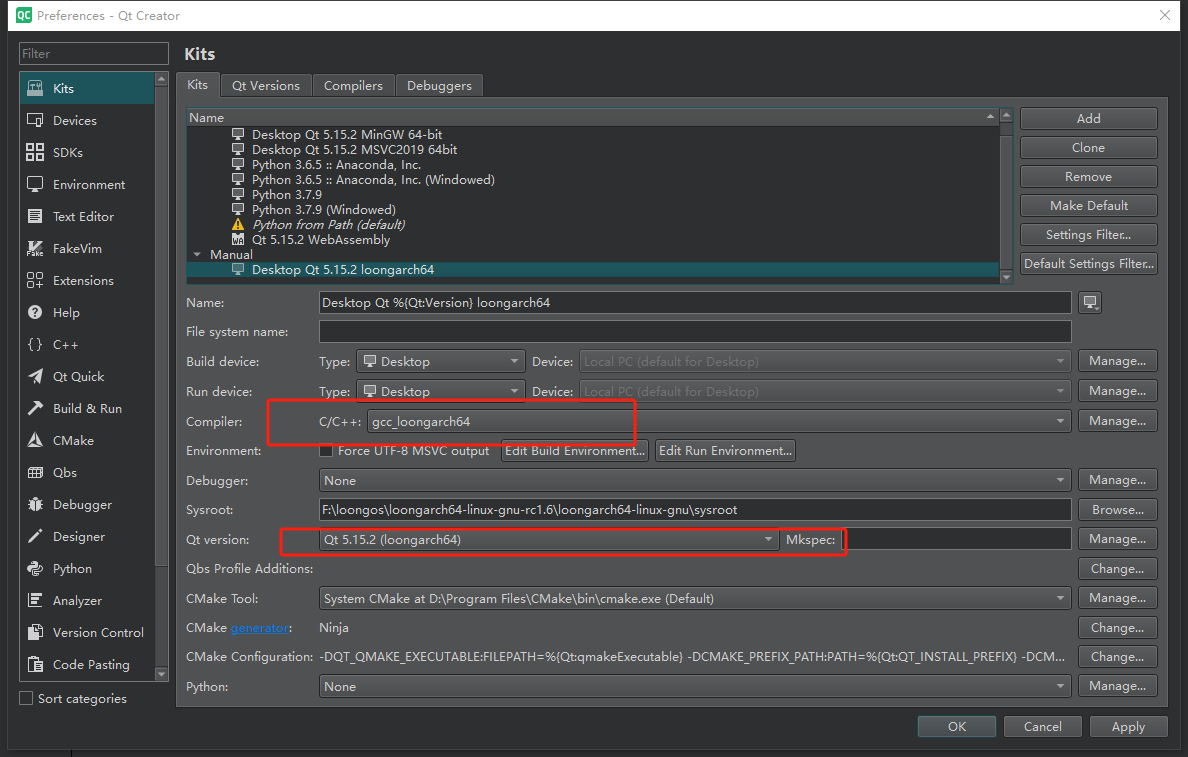
4.在QtCreator中使用
将交叉编译器添加进来

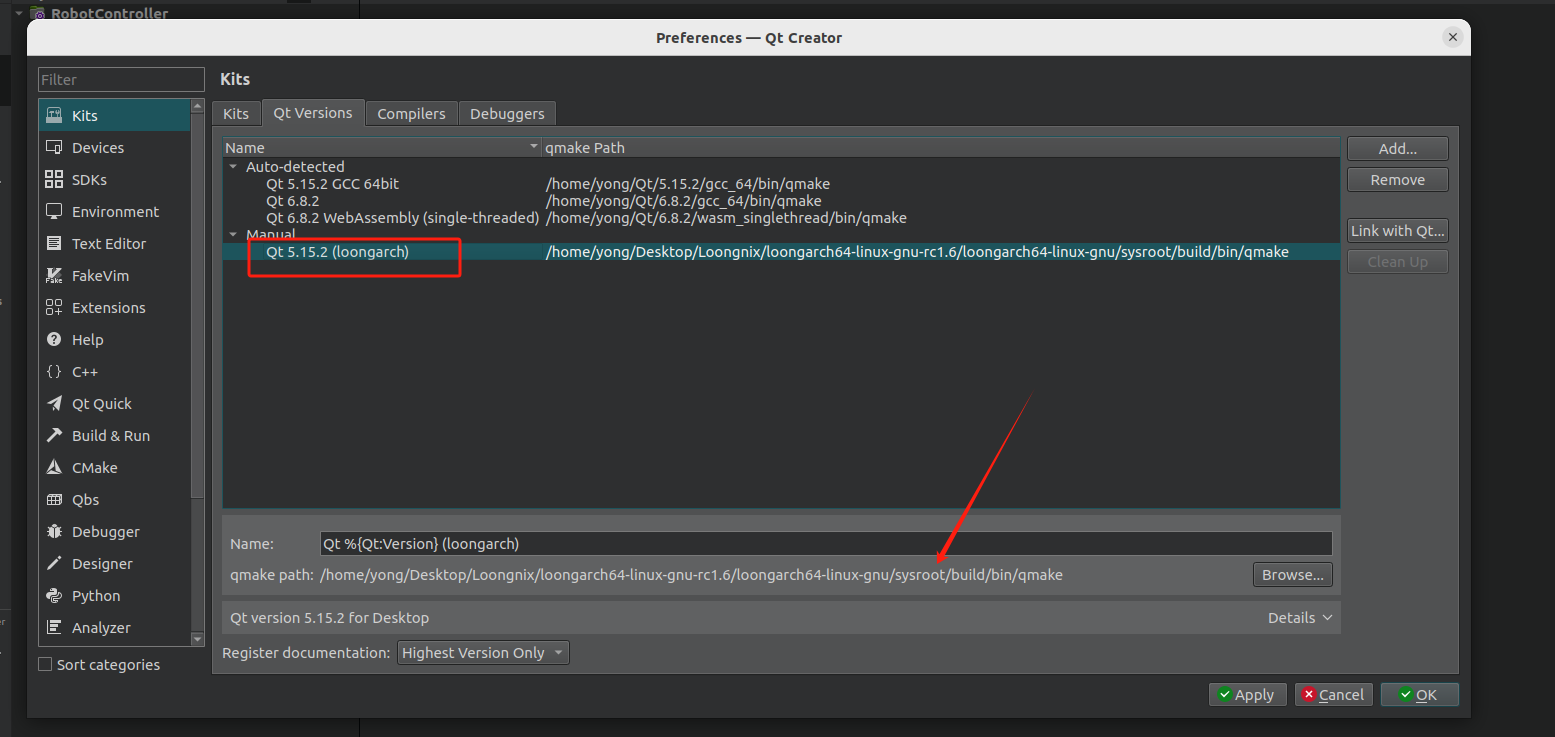
将qmake添加进来
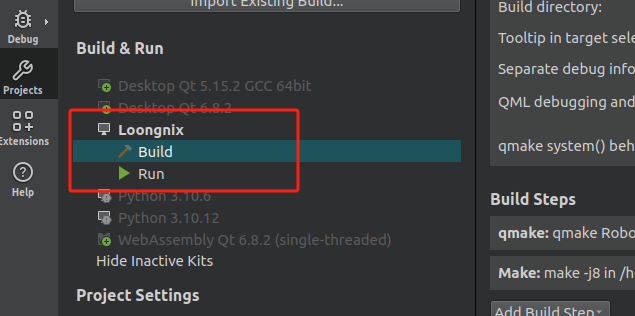
然后创建编译套件,选择对应的qmake、编译器
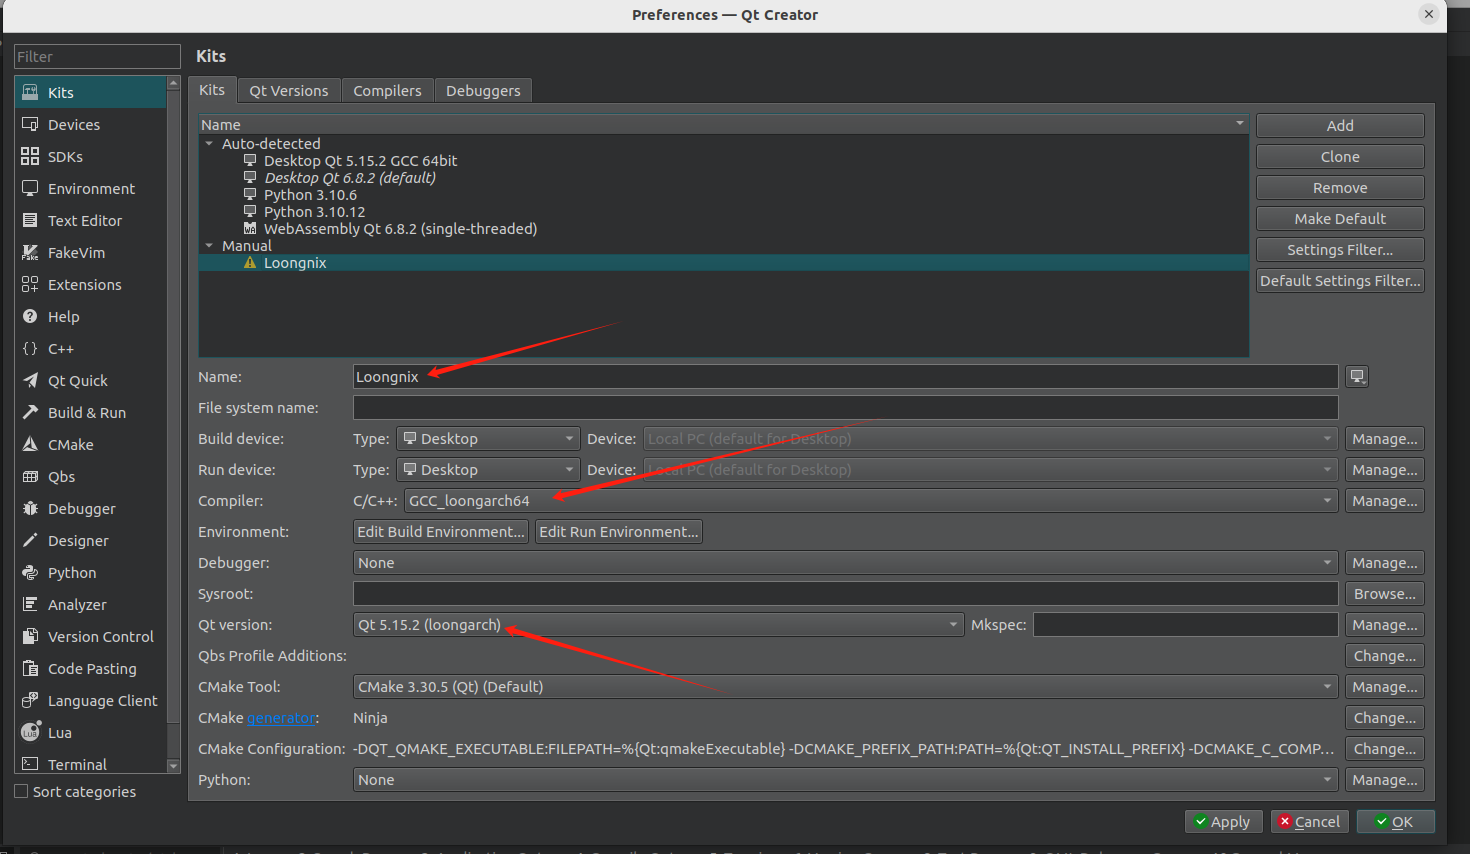
然后就可以正常使用了。
参考:
【在WSL2中构建龙芯MIPS编译环境并编译应用软件】
【龙芯派二代2k1000la开发——交叉编译环境搭建(C/C++和Qtcreator)】
【龙芯 GNU 编译工具链】
【Ubuntu QT 交叉编译环境搭建(超级详细)】
【QT Ubuntu Gcc 静态编译源码 5.15.2 error numeric_limits 出错】
【qt 源码编译心路历程】
【龙芯2K1000LA移植交叉编译环境以及QT】