前言
本文介绍的是PocketFlow的cookbook中的pocketflow-agent部分。
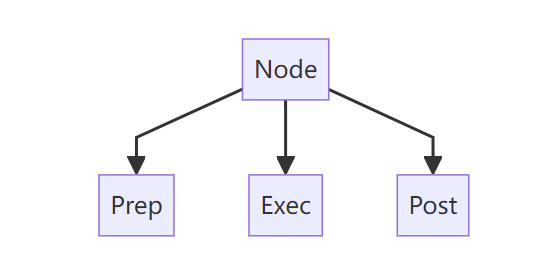
回顾一下PocketFlow的核心架构:
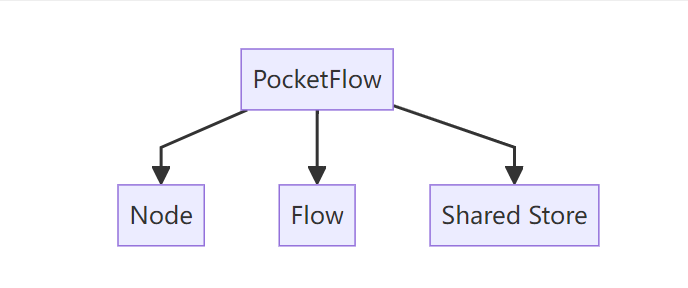
每一个节点的架构:
具体介绍可以看上一篇文章:
“Pocket Flow,一个仅用 100 行代码实现的 LLM 框架”
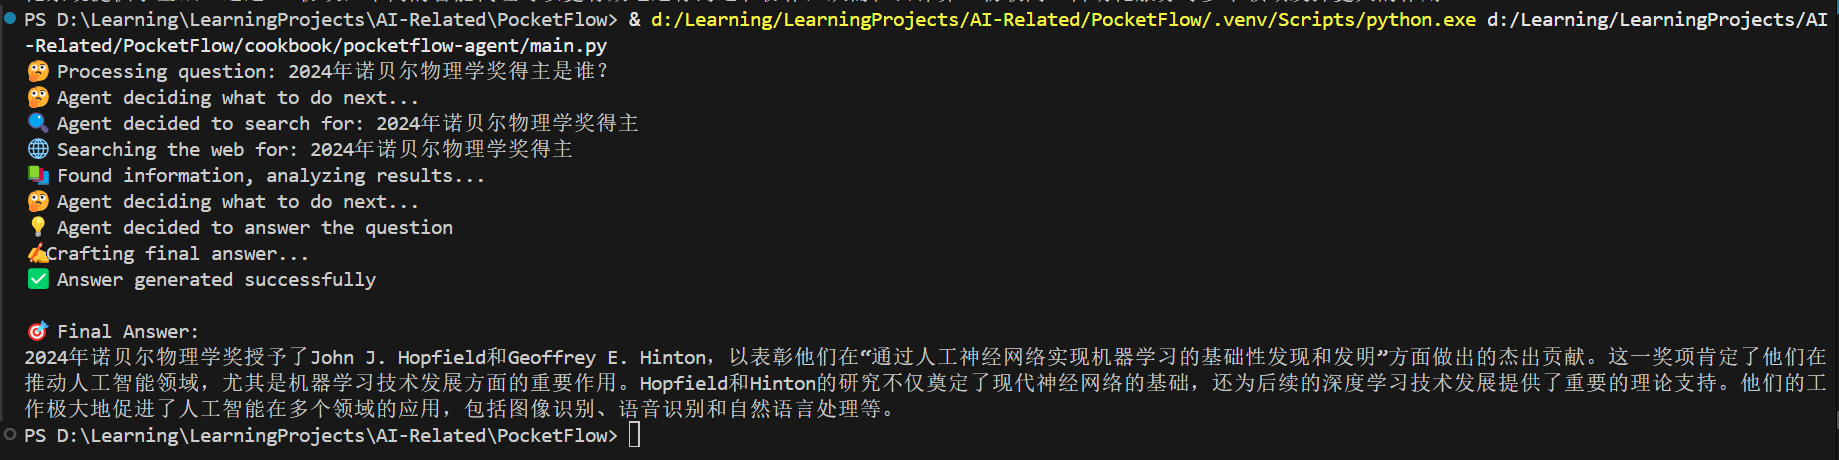
实现效果
这个Web Search Agent是干嘛的呢?
这个Agent会判断你输入的问题是否需要搜索网络,如果需要会搜索网络之后回答。
效果如下图所示:
现在就让我们看看是怎么实现的吧!!
Web Search Agent实现
先看看这个Web Search Agent的整体架构。
Web Search Agent包含三个节点:
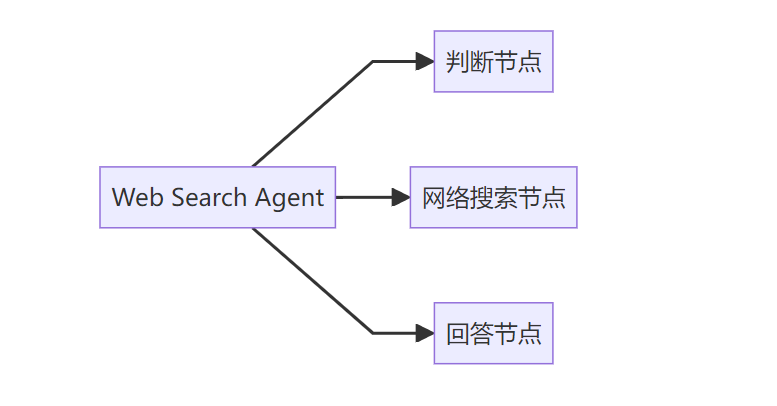
这三个节点的关系如下图所示:
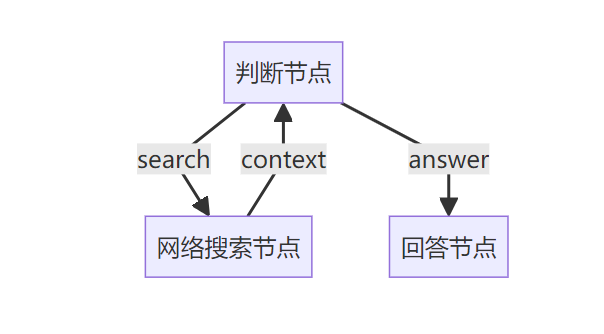
现在来看整体流程。
首先创建节点并连接:
def create_agent_flow():
    """
    Create and connect the nodes to form a complete agent flow.

    The flow works like this:
    1. DecideAction node decides whether to search or answer
    2. If search, go to SearchWeb node
    3. If answer, go to AnswerQuestion node
    4. After SearchWeb completes, go back to DecideAction

    Returns:
        Flow: A complete research agent flow
    """
    # Create instances of each node
    decide = DecideAction()
    search = SearchWeb()
    answer = AnswerQuestion()

    # Connect the nodes
    # If DecideAction returns "search", go to SearchWeb
    decide - "search" >> search

    # If DecideAction returns "answer", go to AnswerQuestion
    decide - "answer" >> answer

    # After SearchWeb completes and returns "decide", go back to DecideAction
    search - "decide" >> decide

    # Create and return the flow, starting with the DecideAction node
    return Flow(start=decide)
决定节点的prep:

获取上下文(当前还没有上下文)与问题。
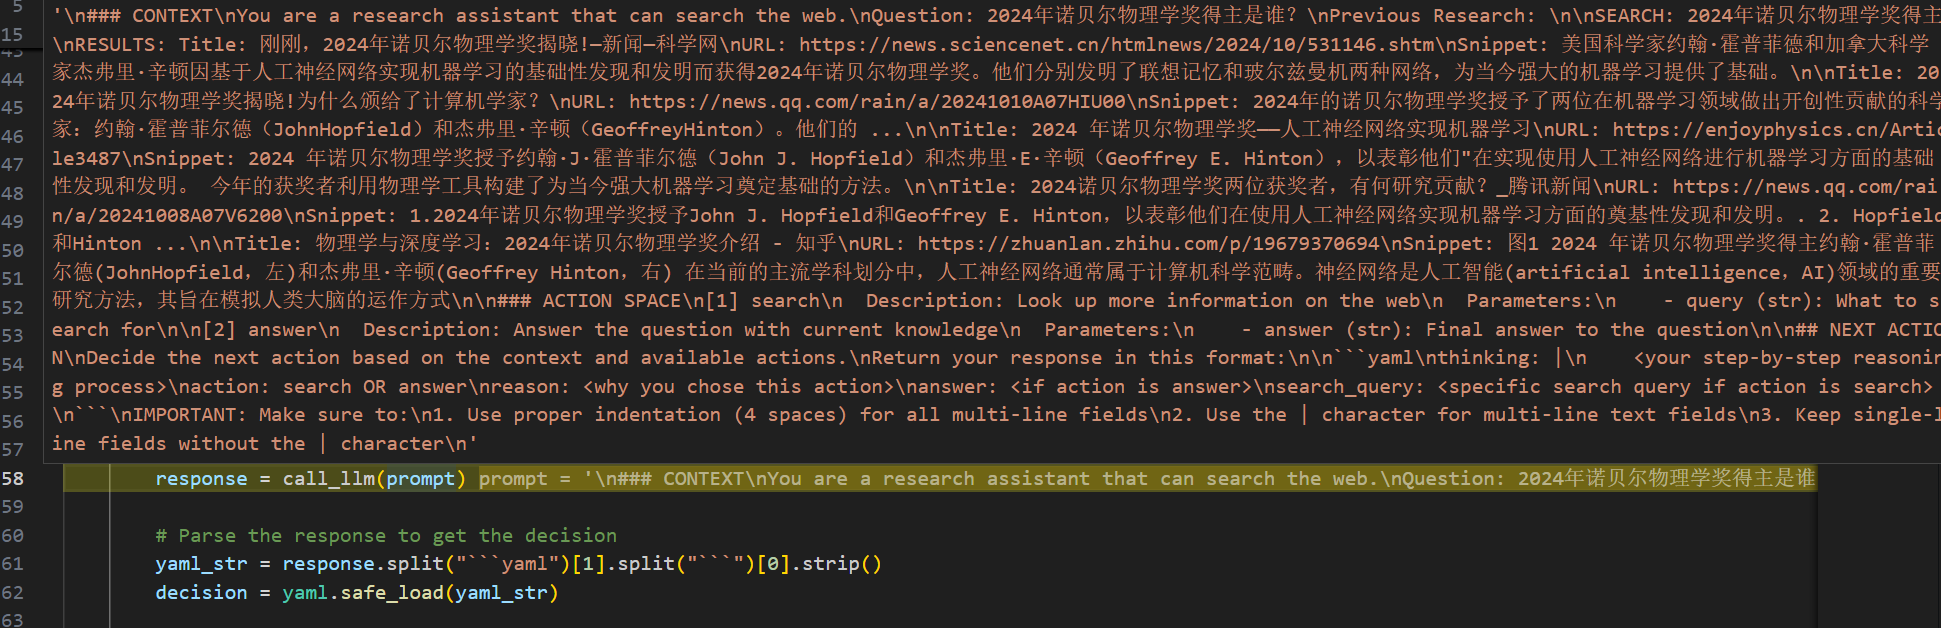
决定节点的exec:
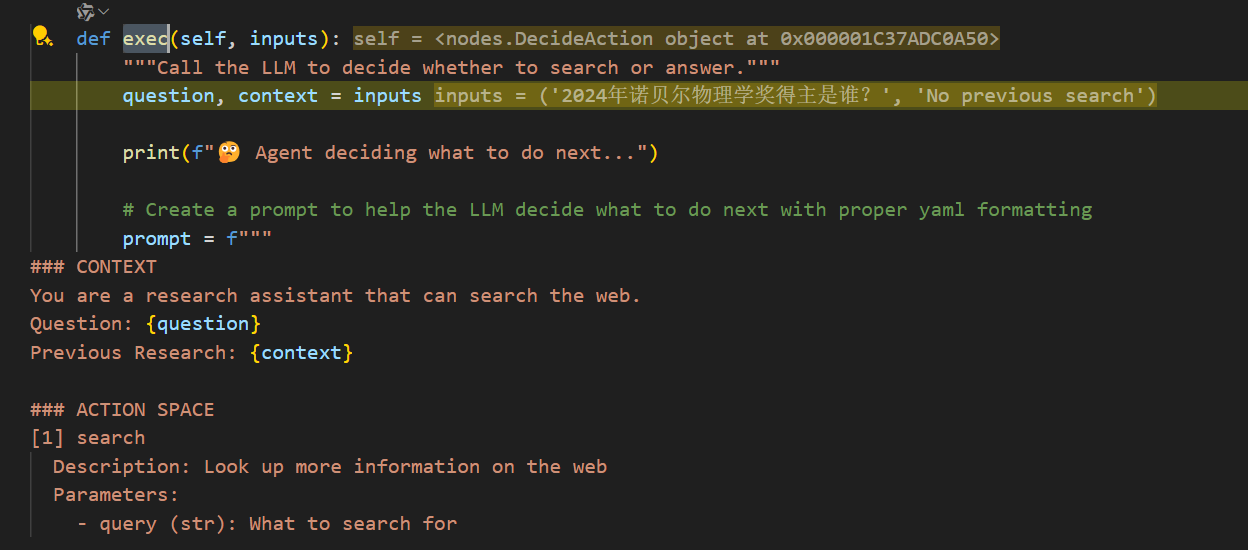
获取prep的问题与上下文,判断是搜索还是回答。
看看这里的提示词:
 prompt = f"""
### CONTEXT
You are a research assistant that can search the web.
Question: {question}
Previous Research: {context}

### ACTION SPACE
[1] search
  Description: Look up more information on the web
  Parameters:
    - query (str): What to search for

[2] answer
  Description: Answer the question with current knowledge
  Parameters:
    - answer (str): Final answer to the question

## NEXT ACTION
Decide the next action based on the context and available actions.
Return your response in this format:

```yaml
thinking: |
    <your step-by-step reasoning process>
action: search OR answer
reason: <why you chose this action>
answer: <if action is answer>
search_query: <specific search query if action is search>
```
IMPORTANT: Make sure to:
1. Use proper indentation (4 spaces) for all multi-line fields
2. Use the | character for multi-line text fields
3. Keep single-line fields without the | character
"""
注意这里作者使用的是yaml返回而不是json,这是因为大模型返回json出错的概率更高一点,我也遇到过好多次json返回错误。
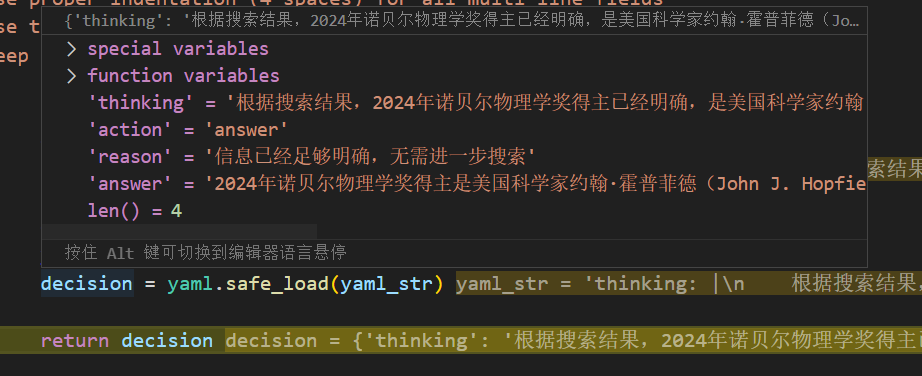
返回大模型的决定:
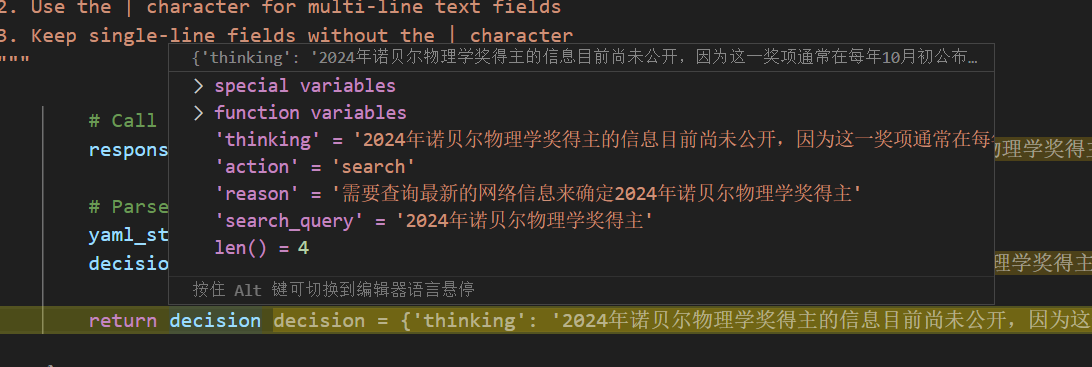
决定节点的post:

会返回search,转到Search节点。
Search节点的prep:

从共享存储中获取要搜索的内容。
Search节点的exec:

开始执行网络搜索,这里作者使用的是duckduckgo,直接使用很方便,当然也可以使用brave,免费订阅一个月2000次的额度。
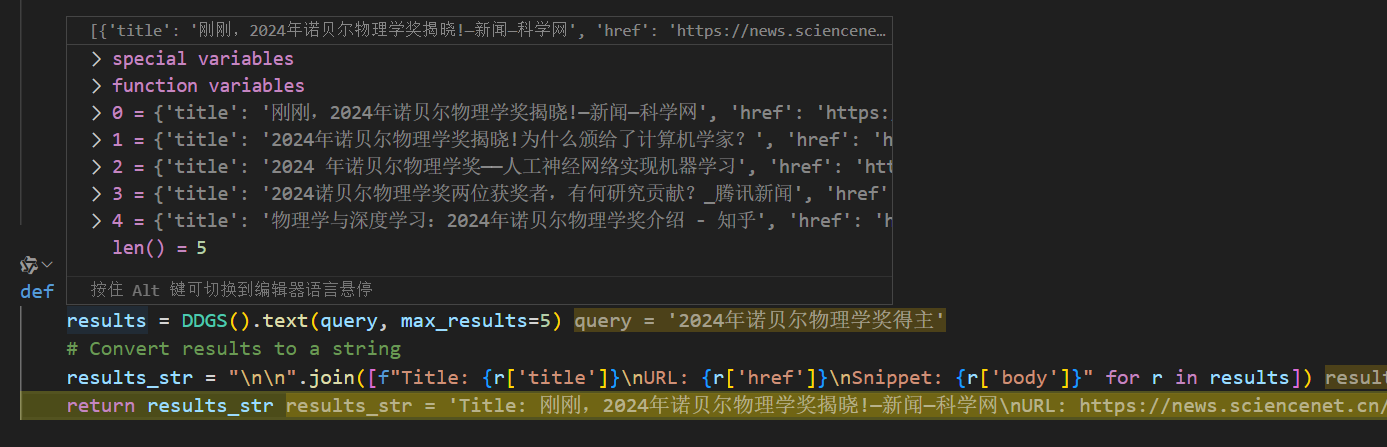
将结果合并之后返回。
Search节点的post:

将网络搜索的结果放到共享存储的context中。
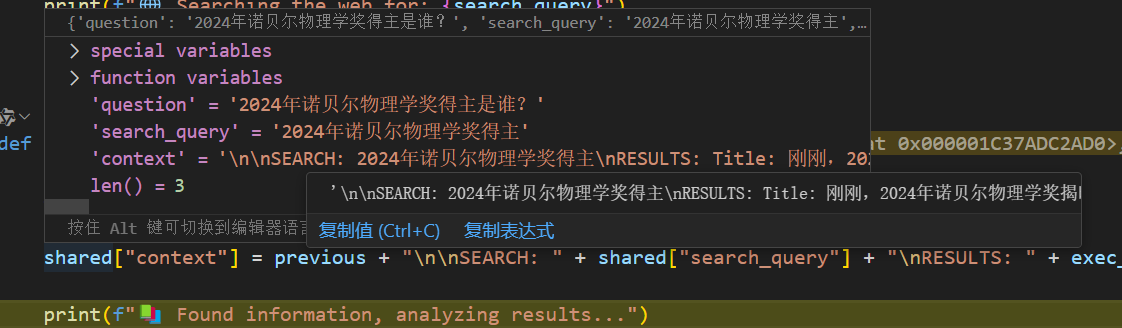
返回决定节点。
根据获取的上下文做判断:
模型决定回答:
回答节点的prep:

从共享存储中获取问题与上下文。
回答节点的exec:
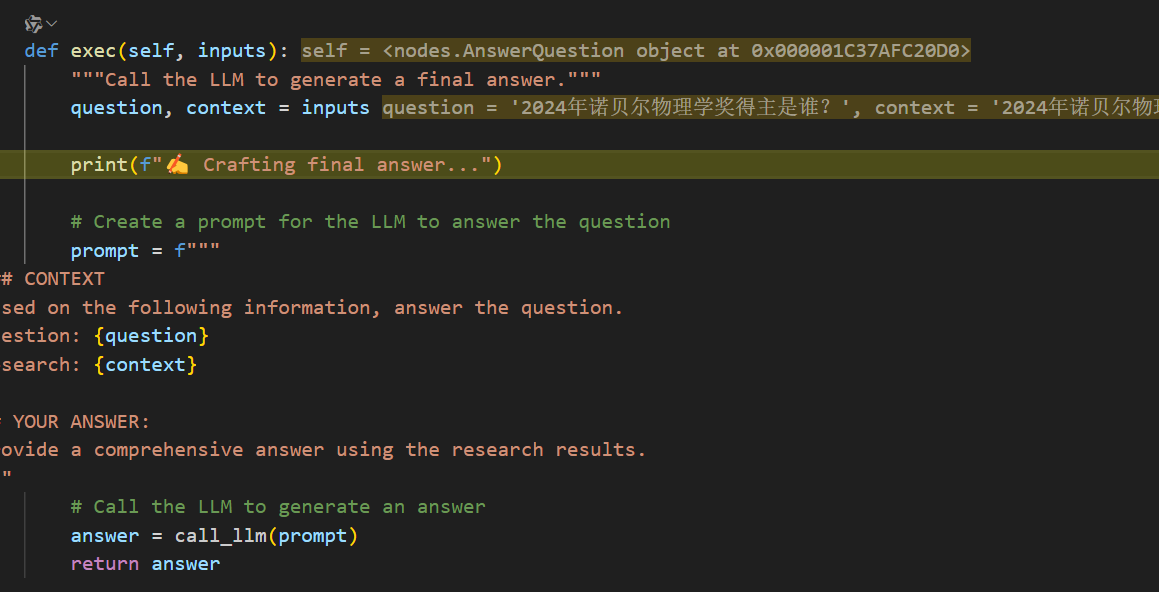
获取问题与上下文,现在的上下文变成之前的答案:

回答的提示词:
 prompt = f"""
### CONTEXT
Based on the following information, answer the question.
Question: {question}
Research: {context}

## YOUR ANSWER:
Provide a comprehensive answer using the research results.
"""
回答节点的post:

最终回答从共享存储中取出:
print(shared.get("answer", "No answer found"))

以上就将这个流程走通了。
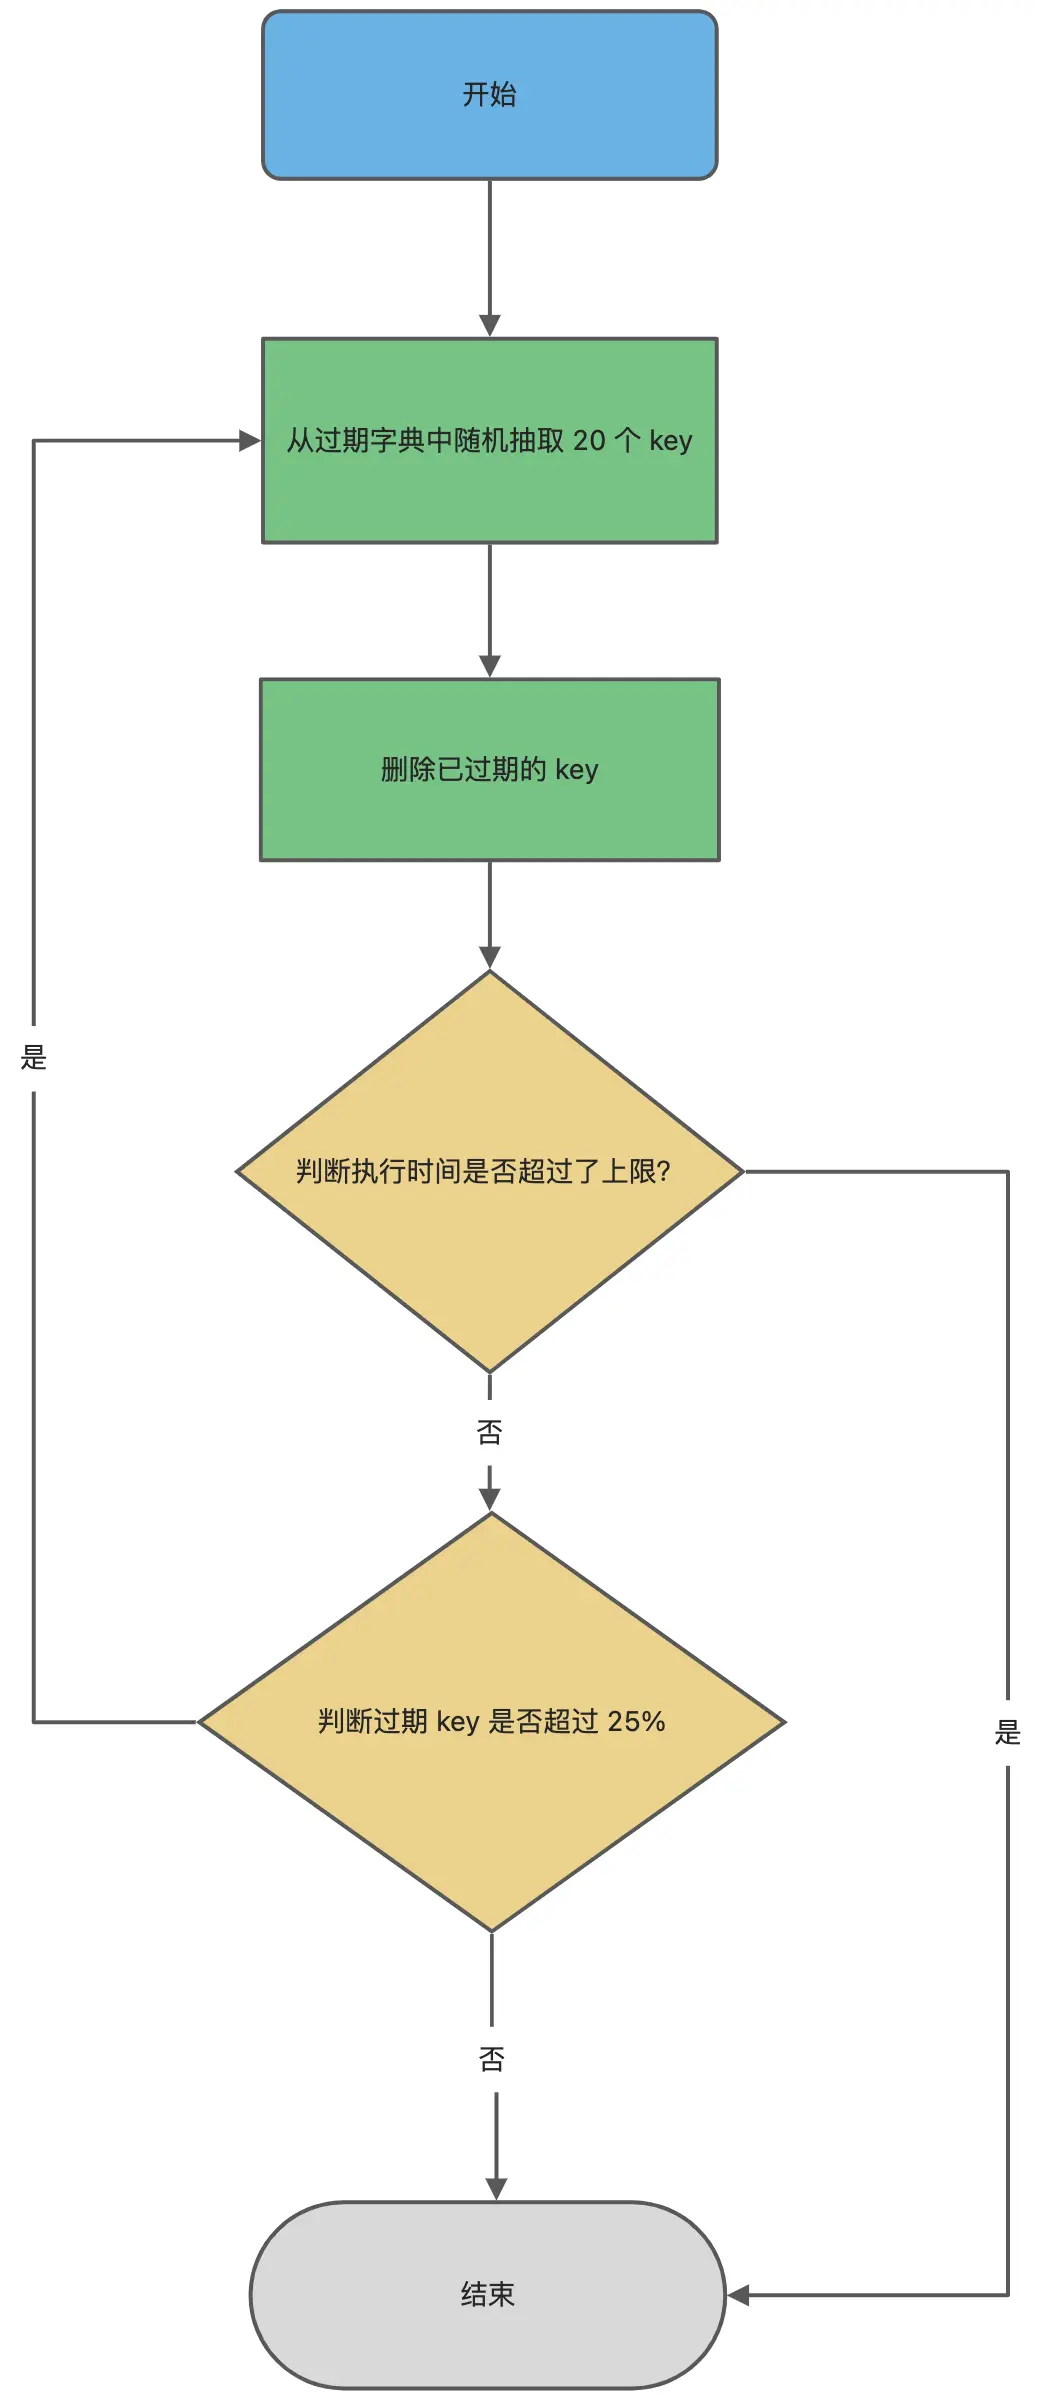
整体的流程图大概如下所示:
flowchart TD
l[开始] --> a
a[决定节点的prep:获取上下文(当前还没有上下文)与问题。] -->
b[决定节点的exec:获取prep的问题与上下文,判断是搜索还是回答。] -->
c[决定节点的post:返回search或answer] -->|search| d[网络搜索节点的prep:从共享存储中获取要搜索的内容。]
c -->|answer|e[回答节点的prep:从共享存储中获取问题与上下文。]
d -->f[网络搜索节点的exec:获取网络搜索结果]
f -->g[网络搜索节点的post:将网络搜索的结果放到共享存储的context中。]
g -->a
e -->i[回答节点的exec:根据获取的上下文回答问题]
i -->j[回答节点的post:从共享存储中取出最终回答]
j--> k[结束]
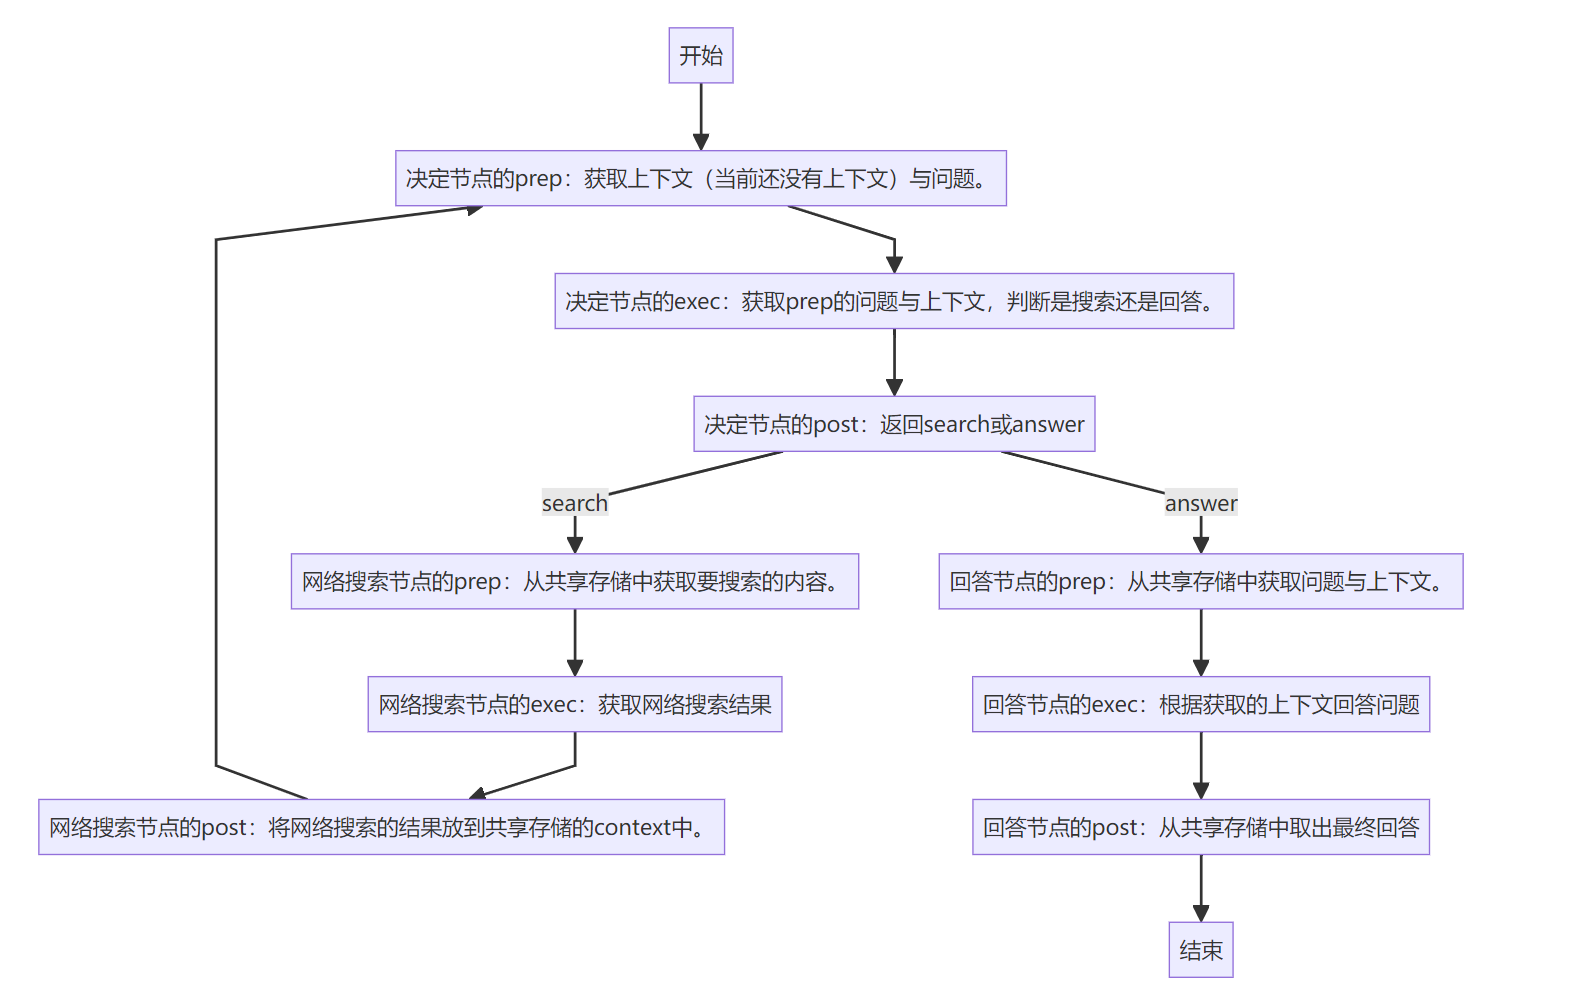
以上就是这个Web Search Agent的工作流。
由于我个人比较喜欢C#,我也用C#复刻了一个,下期介绍如何使用C#复刻一个。