Title: PCL PolygonMesh 与 TextureMesh 源码阅读与简单测试
文章目录
- I . PolygonMesh
- 1. PolygonMesh 结构体
- 2. Vertices 结构体与点云索引
- 3. 测试 PolygonMesh
- II. TextureMesh
- 1. TextureMesh 结构体
- 2. TexMaterial 结构体
- 3. 纹理坐标与纹理坐标索引
- 4. 测试 TextureMesh
以下简单记录以备忘.
I . PolygonMesh
1. PolygonMesh 结构体
先要建立没有纹理的 PolygonMesh, 一般都为三角形网格. ([pcl]/common/include/pcl/PolygonMesh.h)
#pragma once

#include <algorithm>
#include <vector>
#include <ostream>

// Include the correct Header path here
#include <pcl/PCLHeader.h>
#include <pcl/PCLPointCloud2.h>
#include <pcl/Vertices.h>

namespace pcl
{
  struct PolygonMesh
  {
    PolygonMesh () = default;

    ::pcl::PCLHeader  header;

    ::pcl::PCLPointCloud2 cloud;

    std::vector< ::pcl::Vertices>  polygons;

    /* ... ... */

} // namespace pcl
只要设置好 cloud 和 polygons 就可以. header 和 ros 中的 std_msgs/Header.msg 一致.
cloud 的类型是 ::pcl::PCLPointCloud2, 这种格式和 ros 中的 sensor_msgs/PointCloud2 Message 一致.
我们给点云输入数据时还是习惯于使用直观易懂的 pcl::PointCloud<pcl::PointXYZ>. 可以通过 fromPCLPointCloud2 和 toPCLPointCloud2 来进行两者的转换.
polygons 存储的是一个一个的多边形网格的单元面元. 如果创建三角形网格, polygons vector 中的元素就是一个一个 ::pcl::Vertices 三角形面片.
2. Vertices 结构体与点云索引
看一下 ::pcl::Vertices 结构体定义能够比较清晰的理解. ([pcl]/common/include/pcl/Vertices.h)
#pragma once

#include <pcl/memory.h>
#include <pcl/pcl_macros.h>
#include <pcl/types.h>

#include <ostream>

namespace pcl
{
  /** \brief Describes a set of vertices in a polygon mesh, by basically
    * storing an array of indices.
    */
  struct Vertices
  {
    Vertices () = default;

    Indices vertices;

  public:
    using Ptr = shared_ptr<Vertices>;
    using ConstPtr = shared_ptr<const Vertices>;
  }; // struct Vertices


 /* ... ... */

} // namespace pcl
而这个 Indices 是单元面元各个顶点 (点云 cloud 中的点 point) 在点云 cloud 中点的索引指标 (0 开始排序), 就是点云 cloud 中各个点输入时的顺序指标.
#pragma once

/**
 * \file pcl/types.h
 *
 * \brief Defines basic non-point types used by PCL
 * \ingroup common
 */

#include <pcl/pcl_config.h>
#include <pcl/pcl_macros.h>
#include <vector>

#include <cstdint>

#include <Eigen/Core>

namespace pcl
{
  namespace detail {
    /**
     * \brief int_type::type refers to an integral type that satisfies template parameters
     * \tparam Bits number of bits in the integral type
     * \tparam Signed signed or unsigned nature of the type
     */
    template <std::size_t Bits, bool Signed = true>
    struct int_type { using type = void; };

    /**
     * \brief helper type to use for `int_type::type`
     * \see int_type
     */
    template <std::size_t Bits, bool Signed = true>
    using int_type_t = typename int_type<Bits, Signed>::type;

    template <>
    struct int_type<8, true> { using type = std::int8_t; };
    template <>
    struct int_type<8, false> { using type = std::uint8_t; };
    template <>
    struct int_type<16, true> { using type = std::int16_t; };
    template <>
    struct int_type<16, false> { using type = std::uint16_t; };
    template <>
    struct int_type<32, true> { using type = std::int32_t; };
    template <>
    struct int_type<32, false> { using type = std::uint32_t; };
    template <>
    struct int_type<64, true> { using type = std::int64_t; };
    template <>
    struct int_type<64, false> { using type = std::uint64_t; };

    /**
     * \brief number of bits in PCL's index type
     *
     * Please use PCL_INDEX_SIZE when building PCL to choose a size best suited for your needs.
     * PCL 1.12 will come with default 32
     *
     * PCL 1.11 has a default size = sizeof(int)
     */
    constexpr std::uint8_t index_type_size = PCL_INDEX_SIZE;

    /**
     * \brief signed/unsigned nature of PCL's index type
     * Please use PCL_INDEX_SIGNED when building PCL to choose a type best suited for your needs.
     * Default: signed
     */
    constexpr bool index_type_signed = PCL_INDEX_SIGNED;
}  // namespace detail

  /**
   * \brief Type used for an index in PCL
   *
   * Default index_t = int for PCL 1.11, std::int32_t for PCL >= 1.12
   */
  using index_t = detail::int_type_t<detail::index_type_size, detail::index_type_signed>;
  static_assert(!std::is_void<index_t>::value, "`index_t` can't have type `void`");

     /**
   * \brief Type used for an unsigned index in PCL
   *
   * Unsigned index that mirrors the type of the index_t
   */
  using uindex_t = detail::int_type_t<detail::index_type_size, false>;
  static_assert(!std::is_signed<uindex_t>::value, "`uindex_t` must be unsigned");

  /**
   * \brief Type used for indices in PCL
   * \todo Remove with C++20
   */
  template <typename Allocator = std::allocator<index_t>>
  using IndicesAllocator = std::vector<index_t, Allocator>;

  /**
   * \brief Type used for indices in PCL
   */
  using Indices = IndicesAllocator<>;

  /**
   * \brief Type used for aligned vector of Eigen objects in PCL
   */
  template <typename T>
  using AlignedVector = std::vector<T, Eigen::aligned_allocator<T>>;
}  // namespace pcl
3. 测试 PolygonMesh
#include <pcl/PolygonMesh.h>
#include <pcl/point_cloud.h>
#include <pcl/point_types.h>
#include <pcl/conversions.h>
#include <pcl/io/ply_io.h>
#include <chrono>
#include <iostream>


void generatePolygonMesh()
{
    pcl::PolygonMesh simple_polygon_mesh;

    // header
    simple_polygon_mesh.header.frame_id = "odom";
    simple_polygon_mesh.header.seq = 0;
    // 获取当前时间点
    auto now = std::chrono::system_clock::now();
    // 计算从纪元开始的微秒数
    auto duration = now.time_since_epoch();
    auto microseconds = std::chrono::duration_cast<std::chrono::microseconds>(duration).count();
    // The value represents microseconds since 1970-01-01 00:00:00 (the UNIX epoch)
    simple_polygon_mesh.header.stamp = microseconds;

    // cloud
    pcl::PointCloud<pcl::PointXYZ> raw_point_cloud;
    raw_point_cloud.push_back(pcl::PointXYZ(0.0, 1.0, 0.0)); // #0
    raw_point_cloud.push_back(pcl::PointXYZ(0.0, 0.0, 0.0)); // #1
    raw_point_cloud.push_back(pcl::PointXYZ(1.0, 0.0, 0.0)); // #2
    raw_point_cloud.push_back(pcl::PointXYZ(1.0, 1.0, -0.5)); // #3
    pcl::toPCLPointCloud2(raw_point_cloud, simple_polygon_mesh.cloud);

    // polygons
    std::vector< ::pcl::Vertices>  triangle_polygons;
    pcl::Vertices triangle_face_1;
    triangle_face_1.vertices.push_back(0);
    triangle_face_1.vertices.push_back(1);
    triangle_face_1.vertices.push_back(2);
    triangle_polygons.push_back(triangle_face_1);

    pcl::Vertices triangle_face_2;
    triangle_face_2.vertices.push_back(0);
    triangle_face_2.vertices.push_back(2);
    triangle_face_2.vertices.push_back(3);
    triangle_polygons.push_back(triangle_face_2);

    simple_polygon_mesh.polygons = triangle_polygons;

    std::cout << "========= simple_polygon_mesh ===========\n" << simple_polygon_mesh << std::endl;
    pcl::io::savePLYFile("output_mesh.ply", simple_polygon_mesh);
}

int main()
{
    generatePolygonMesh();
}
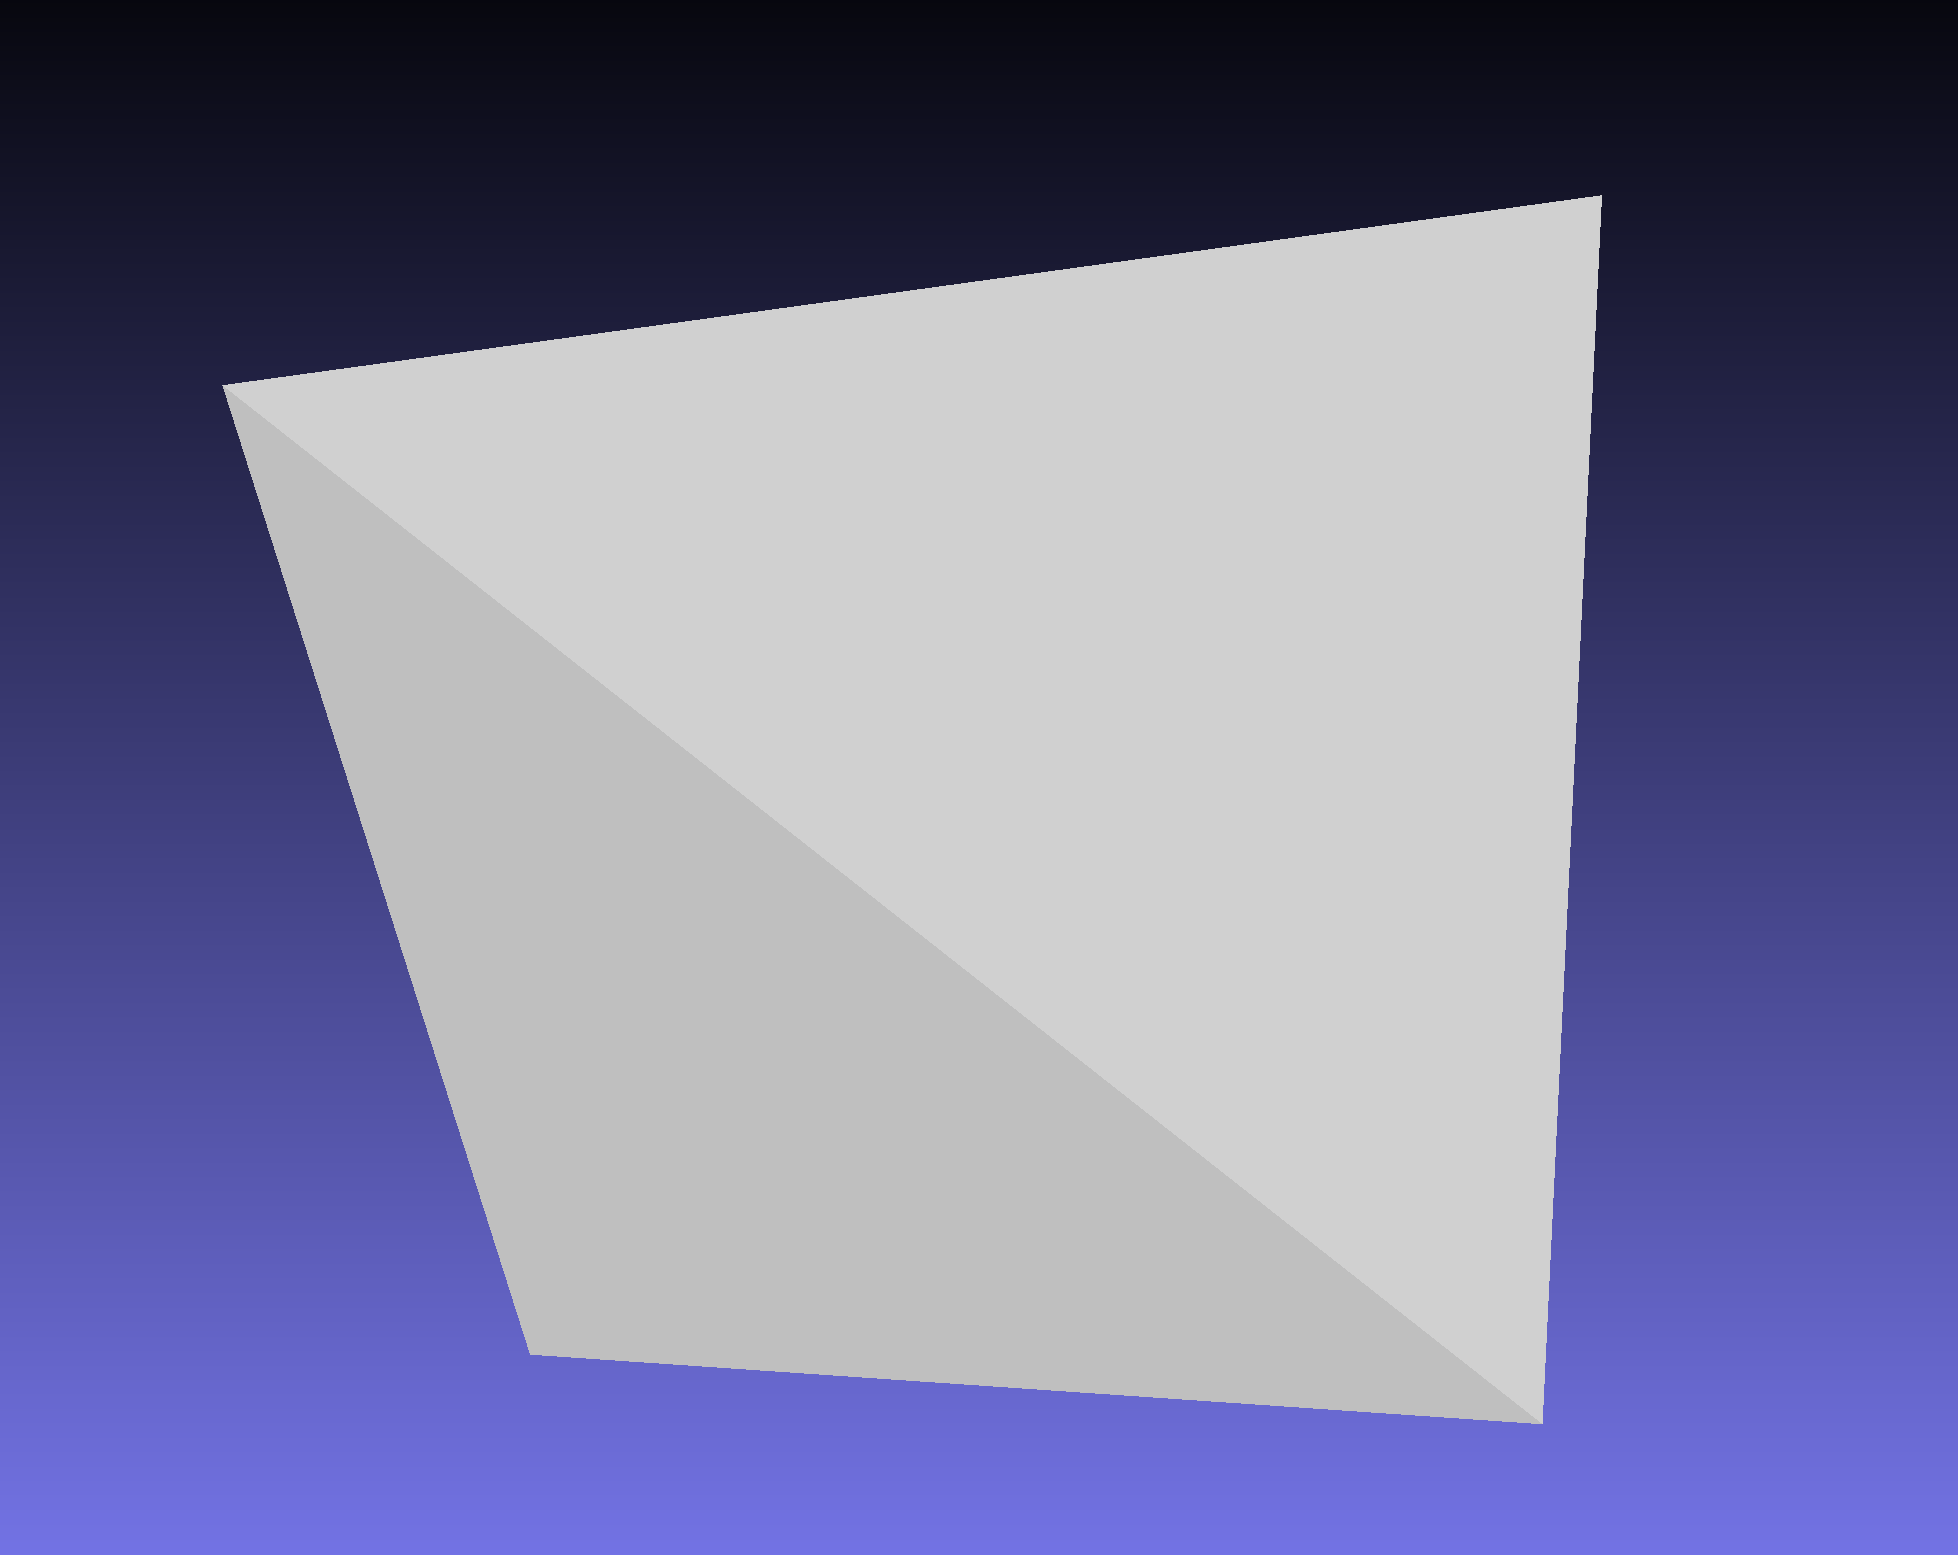
生成的三角形网格
II. TextureMesh
1. TextureMesh 结构体
TextureMesh 在 PolygonMesh 基础上多了纹理部分, 以及纹理(像素)和网格(几何)之间的映射关系. 先看一下 TextureMesh 结构体的定义.
结构体内所有元素 tex_polygons、tex_materials 等都套了 2 层 std::vector, 这是因为每一个网格可以拥有不同的多个纹理.
#pragma once

#include <Eigen/Core>
#include <string>
#include <pcl/PCLPointCloud2.h>
#include <pcl/Vertices.h>

namespace pcl
{
  /** \author Khai Tran */
  struct TexMaterial
  {
    struct RGB
    {
      float r = 0;
      float g = 0;
      float b = 0;
    }; //RGB

    /** \brief Texture name. */
    std::string tex_name;

    /** \brief Texture file. */
    std::string tex_file;

    /** \brief Defines the ambient color of the material to be (r,g,b). */
    RGB         tex_Ka;

    /** \brief Defines the diffuse color of the material to be (r,g,b). */
    RGB         tex_Kd;

    /** \brief Defines the specular color of the material to be (r,g,b). This color shows up in highlights. */
    RGB         tex_Ks;

    /** \brief Defines the transparency of the material to be alpha. */
    float       tex_d;

    /** \brief Defines the shininess of the material to be s. */
    float       tex_Ns;

    /** \brief Denotes the illumination model used by the material.
      *
      * illum = 1 indicates a flat material with no specular highlights, so the value of Ks is not used.
      * illum = 2 denotes the presence of specular highlights, and so a specification for Ks is required.
      */
    int         tex_illum;
  }; // TexMaterial

  /** \author Khai Tran */
  struct TextureMesh
  {
    pcl::PCLPointCloud2  cloud;
    pcl::PCLHeader  header;


    /** \brief polygon which is mapped with specific texture defined in TexMaterial */
    std::vector<std::vector<pcl::Vertices> >    tex_polygons;
    /** \brief UV coordinates */
    std::vector<std::vector<Eigen::Vector2f, Eigen::aligned_allocator<Eigen::Vector2f> > > tex_coordinates;
    /** \brief define texture material */
    std::vector<pcl::TexMaterial>               tex_materials;
    /** \brief Specifies which texture coordinates from tex_coordinates each polygon/face uses.
      * The vectors must have the same sizes as in tex_polygons, but the pcl::Vertices
      * may be empty for those polygons/faces that do not use coordinates.
      */
    std::vector<std::vector<pcl::Vertices> >    tex_coord_indices;

    public:
      using Ptr = shared_ptr<pcl::TextureMesh>;
      using ConstPtr = shared_ptr<const pcl::TextureMesh>;
   }; // struct TextureMesh

   using TextureMeshPtr = TextureMesh::Ptr;
   using TextureMeshConstPtr = TextureMesh::ConstPtr;
} // namespace pcl
2. TexMaterial 结构体
tex_name: 材质的名称, 用于在模型中引用此材质.
tex_file: 纹理图像文件的路径, 通常为.png、.jpg 等格式.
tex_Ka: 环境光颜色, 控制材质在全局光照下的基础颜色.
tex_Kd: 漫反射颜色, 控制材质在光线照射下的基本颜色 (最主要的颜色成分).
tex_Ks: 镜面反射颜色, 控制材质高光的颜色 (通常与金属性相关).
tex_d: 透明度值, 范围 0.0 (完全透明) 到 1.0 (完全不透明).
tex_Ns: 光泽度值, 范围 0~1000+, 值越大高光越集中 (例如, 塑料≈300, 金属≈800).
tex_illum: 光照模型编号, 控制材质的渲染方式. 设为1 表示一个没有镜面高光的平面材质,所以不使用镜面反射颜色(Ks)的值. 设为 2 表示存在镜面高光,因此需要指定镜面反射颜色 (Ks).
material.tex_name = “my_texture”; // 千万不要命名为 “texture”!
会引发 “error C1105: cannot call a non-function”.
避免使用以下保留名称作为变量名: texture、position、normal、color、matrix、view、projection
3. 纹理坐标与纹理坐标索引
纹理坐标 UV coordinates 可看做是归一化的像素坐标, 纹理坐标索引就是 UV 坐标的标号. 通过为每个 PolygonMesh 的顶点 Vertex 指定一个像素的 UV 坐标索引, 而由顶点定义的面元内部区域中的任意点就可以通过线性插值计算得到对应的 UV 坐标. 这样就实现了图像纹理坐标到三维模型表面坐标之间的映射, 进而就能在三维网格表面贴图和渲染了.
需要说明利用 OpenCV 加载的图像坐标的原点在左上角, 这不同于 OpenGL 的原点左下角设置. 而渲染引擎一般使用 OpenGL (pcl 库中也是如此), 所以对 UV 坐标中的 V 坐标需要翻转一下.
std::vector<                 // 第一层向量:材质组(Material Groups)
  std::vector<               // 第二层向量:每个材质组中的所有UV坐标
    Eigen::Vector2f,         // UV坐标点(U,V),使用Eigen库的二维向量
    Eigen::aligned_allocator<Eigen::Vector2f>  // 内存对齐分配器(确保SSE优化)
  >
> tex_coordinates;
看似很严格定义的 std::vector<std::vector<pcl::Vertices> > tex_coord_indices, 在 libpcl-dev 1.14.0 还没有起作用. UV 索引和 PolygonMesh 各个顶点索引之间就是顺序对应, 即 tex_polygons[i][j] 对应 tex_coordinates[i][j].
std::vector<                // 第一层向量:材质组(Material Groups)
  std::vector<              // 第二层向量:每个材质组中的多边形(Polygons)
    pcl::Vertices           // 每个多边形的顶点对应的 UV 坐标索引
  >
> tex_coord_indices;
4. 测试 TextureMesh
#include <pcl/PolygonMesh.h>
#include <pcl/point_cloud.h>
#include <pcl/point_types.h>
#include <pcl/conversions.h>
#include <pcl/io/ply_io.h>
#include <pcl/io/obj_io.h>
#include <pcl/TextureMesh.h>
#include <pcl/visualization/pcl_visualizer.h>
#include <iostream>
#include <opencv2/opencv.hpp>
#include <opencv2/core.hpp>
#include <opencv2/imgcodecs.hpp>
#include <opencv2/highgui.hpp>
#include <filesystem>

void visualizeTexturedMesh(const pcl::TextureMesh& tex_mesh)
{
    pcl::visualization::PCLVisualizer::Ptr viewer(new pcl::visualization::PCLVisualizer("3D Mesh Viewer"));

    // 添加网格到可视化器
    if (!viewer->addTextureMesh(tex_mesh, "ploygon_mesh"))
    {
        std::cerr << "Failed to add texture mesh!" << std::endl;
        return;
    }

    // 设置显示参数
    viewer->setBackgroundColor(0.4, 0.698, 1.0);
    viewer->setSize(1280, 720);                     // 窗口尺寸
    viewer->addCoordinateSystem(0.1, "axis", 0);
    viewer->addText("Texture Mesh Viewer\nPress Q to exit",
                   10, 10, 20, 1.0, 1.0, 1.0, "help");

    while (!viewer->wasStopped()) {
        viewer->spinOnce(100);  // 更新频率100ms
    }
}

pcl::TextureMesh generateTextureMesh()
{
    pcl::TextureMesh simple_texture_mesh;

    // 1 导入多边形网格(点云+网格), 并设置纹理网格的点云和网格
    pcl::PolygonMesh polyon_mesh;
    pcl::io::loadPLYFile("./output_mesh.ply", polyon_mesh);

    simple_texture_mesh.cloud = polyon_mesh.cloud;
    simple_texture_mesh.header = polyon_mesh.header;
    simple_texture_mesh.tex_polygons.push_back(polyon_mesh.polygons);

    // 2 设置 UV 映射
    std::vector<Eigen::Vector2f, Eigen::aligned_allocator<Eigen::Vector2f>> tex_coords;
    float u_0 = 0.0;
    float v_0 = 0.0;
    tex_coords.emplace_back(u_0, 1.0f - v_0); // OpenGL坐标系需要翻转V
    float u_1 = 0.0;
    float v_1 = 1.0;
    tex_coords.emplace_back(u_1, 1.0f - v_1);
    float u_2 = 1.0;
    float v_2 = 1.0;
    tex_coords.emplace_back(u_2, 1.0f - v_2);
    float u_3 = 1.0;
    float v_3 = 0.0;
    tex_coords.emplace_back(u_3, 1.0f - v_3);
    simple_texture_mesh.tex_coordinates.push_back(tex_coords);

    // 3 设置纹理材质
    std::string image_path = "../image.png";
    cv::Mat image = cv::imread(image_path);


    // 设置纹理材质
    pcl::TexMaterial material;
    material.tex_file = "image.png";
    material.tex_name = "my_texture";  // 千万不要命名为 "texture"!
    // 增加漫反射强度(允许值 >1.0)
    material.tex_Kd.r = 1.5;
    material.tex_Kd.g = 1.5;
    material.tex_Kd.b = 1.5;
    // 增强环境光反射
    material.tex_Ka.r = 0.6;
    material.tex_Ka.g = 0.6;
    material.tex_Ka.b = 0.6;
    // 添加自发光效果(模拟亮度提升)
    material.tex_illum = 1;

    simple_texture_mesh.tex_materials.push_back(material);

    std::string img_name_new{"image.png"};
    cv::imwrite(img_name_new, image);

    return simple_texture_mesh;
}

int main()
{
    pcl::TextureMesh tex_mesh = generateTextureMesh();
    visualizeTexturedMesh(tex_mesh);
}
纹理原图
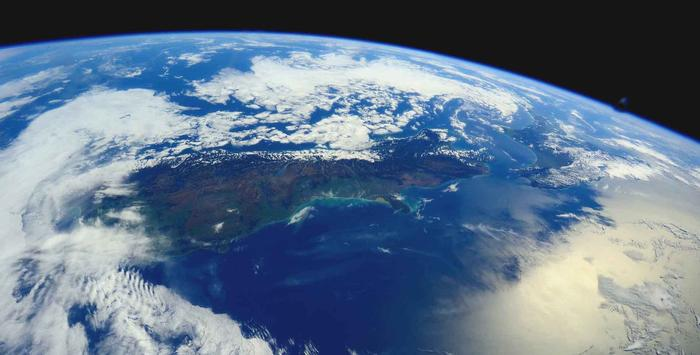
纹理映射后的效果

版权声明:本文为博主原创文章,遵循 CC 4.0 BY 版权协议,转载请附上原文出处链接和本声明。
本文链接:https://blog.csdn.net/woyaomaishu2/article/details/148018953
本文作者:wzf@robotics_notes


![[模型部署] 3. 性能优化](https://i-blog.csdnimg.cn/blog_migrate/tags/671f42ab07fd990f949a1c903140dd83.png#pic_center)