环境须知
Cuda必须安装
不需要安装Python,因为该项目会自动安装Python3.10的虚拟环境
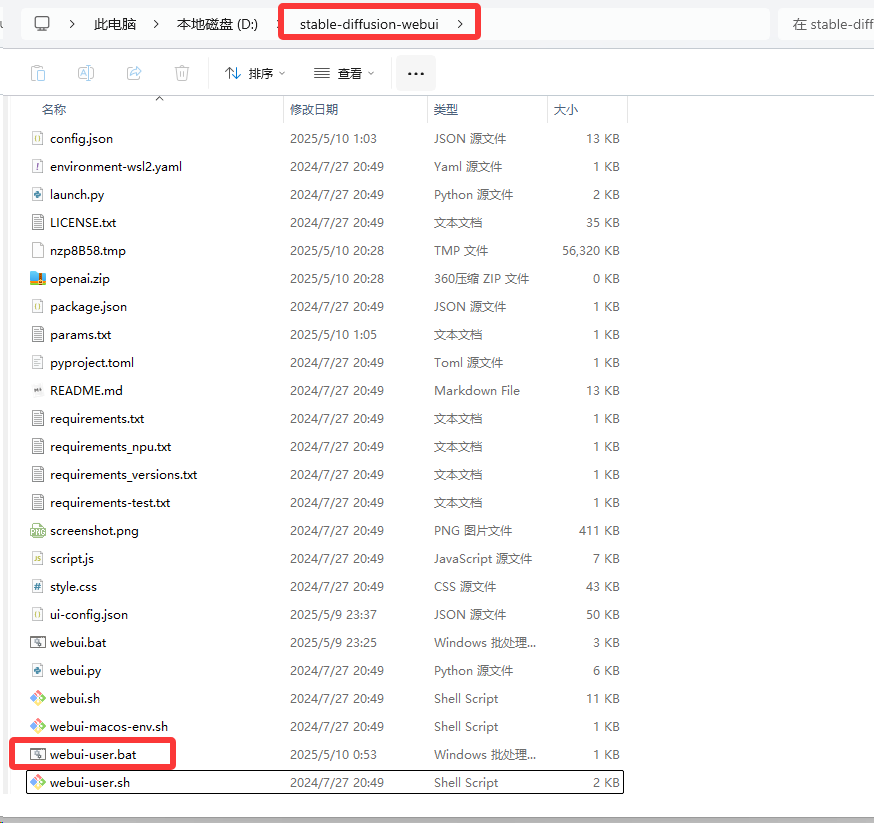
1.下载StableDiffusionWebUI压缩包并解压
下载方式一:
从Github下载https://github.com/AUTOMATIC1111/stable-diffusion-webui 的压缩包,解压后名为 stable-diffusion-webui-master ,将其改名为 stable-diffusion-webui
下载方式二:
https://pan.xunlei.com/s/VOPuC7bBTn_rVktEMu6O2gbQA1?pwd=nfq8# ,同样的也需要解压后改名为stable-diffusion-webui,,不要有-master
2.安装
双击 webui-user.bat 文件开始启动,初次启动会自动安装各种环境,如图
理论上是一键安装完成,自动启动WebUI,实际国内会有以下这个问题
v1-5-pruned-emaonly.safetensors下载失败导致报错
其实这也算不上个问题,只是因为网络原因自动下载模型失败罢了
前有报错提示:
Downloading: "https://huggingface.co/runwayml/stable-diffusion-v1-5/resolve/main/v1-5-pruned-emaonly.safetensors" to D:\stable-diffusion-webui\models\Stable-diffusion\v1-5-pruned-emaonly.safetensors
后有报错关键信息:
FileNotFoundError: No checkpoints found. When searching for checkpoints, looked at:
- file D:\stable-diffusion-webui\model.ckpt
- directory D:\stable-diffusion-webui\models\Stable-diffusion Can't run without a checkpoint. Find and place a .ckpt or .safetensors file into any of those locations.
解释:
本提示表示正在从hugginface下载“v1-5-pruned-emaonly.safetensors”到SD的models\Stable-diffusion目录,但是根据报错可知,这里在表示 没有checkpoint文件就无法运行,需要我们使用 .ckpt 或 .safetensors 的任意文件放入。
其实呢,这也不算是个大问题,我们自己去下载任意一个模型放入要求的目录中就行了。你可以按照提示 下载 https://huggingface.co/runwayml/stable-diffusion-v1-5/resolve/main/v1-5-pruned-emaonly.safetensors 也可以在 civitai.com下载其他模型,然后将其放入 stable-diffusion-webui\models\Stable-diffusion 目录中就行了。幽络源土拨鼠这里提供一个 写实的人物模型 realisian_v60.safetensors :
点击下载 realisian_v60.safetensors
3.基本的使用
3.1加载模型
在步骤2中我们下载了 realisian_v60.safetensors 模型 且已经放到了 stable-diffusion-webui\models\Stable-diffusion 目录中,现在点击界面中左上角的加载按钮即可刷新模型,然后点击下拉框选择我们的模型,然后等待processing加载完成。如图
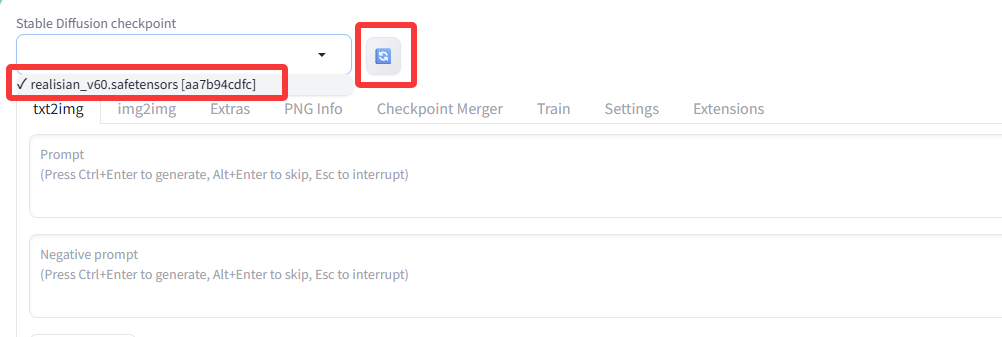
实际的情况是这里你会发现模型并没有加载成功,看如下解析与解决
我们来到控制台,可以看到,这里首先是在进行加载模型
Loading weights [4610115bb0] from D:\stable-diffusion-webui\models\Stable-diffusion\realisian_v60.safetensors
Creating model from config: D:\stable-diffusion-webui\configs\v1-inference.yaml
但是报错如下
raise EnvironmentError(
OSError: Can't load tokenizer for 'openai/clip-vit-large-patch14'. If you were trying to load it from 'https://huggingface.co/models', make sure you don't have a local directory with the same name. Otherwise, make sure 'openai/clip-vit-large-patch14' is the correct path to a directory containing all relevant files for a CLIPTokenizer tokenizer.
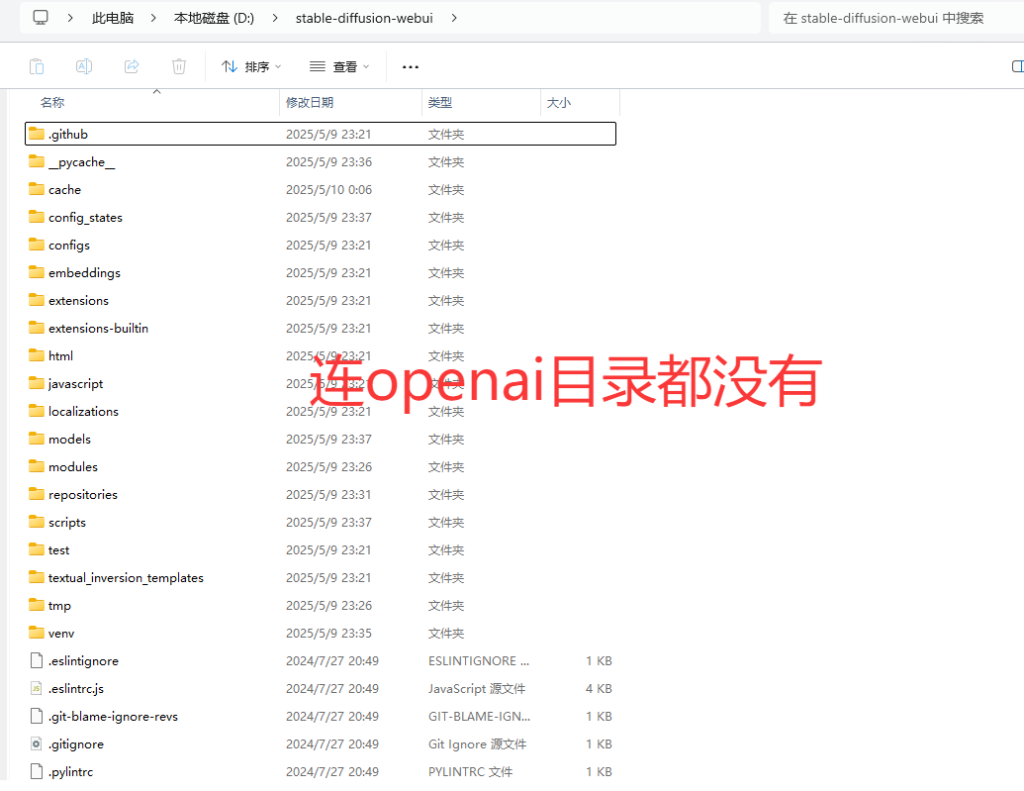
土拨鼠的个人解释:这里提示我们程序无法从openai/clip-vit-large-patch14目录加载tokenizer,那么我们先在 stable-diffusion-webui/openai/clip-vit-large-patch14目录看看,但是当我们尝试去看的时候发现并没有openai目录,如图
再进一步看报错能够发现,这里在提示我们可以去hugginface下载这个东西,我们可以在hugginface搜索 clip-vit-large-patch14,然后你就能找到要下载的地方在
https://huggingface.co/openai/clip-vit-large-patch14/tree/main ,当然,这里土拨鼠已经为你们准备好了 openai/clip-vit-large-patch14,直接下载,然后解压到 stable-diffusion-webui中
点击下载 openai/clip-vit-large-patch14
然后再次点击加载模型就好了。
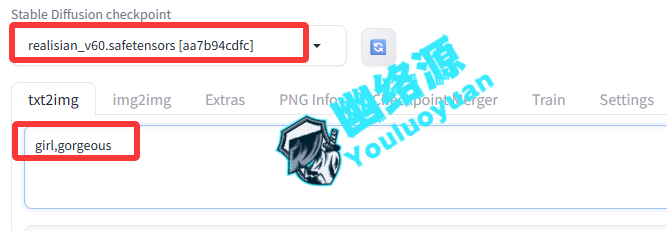
3.2填充提示词
在 prompt 框中输入想要的东西,注意,这里必须得是英文单词,且如果有多个词,最好用英文逗号分隔,土拨鼠这里演示一下 提示词 girl ,如图
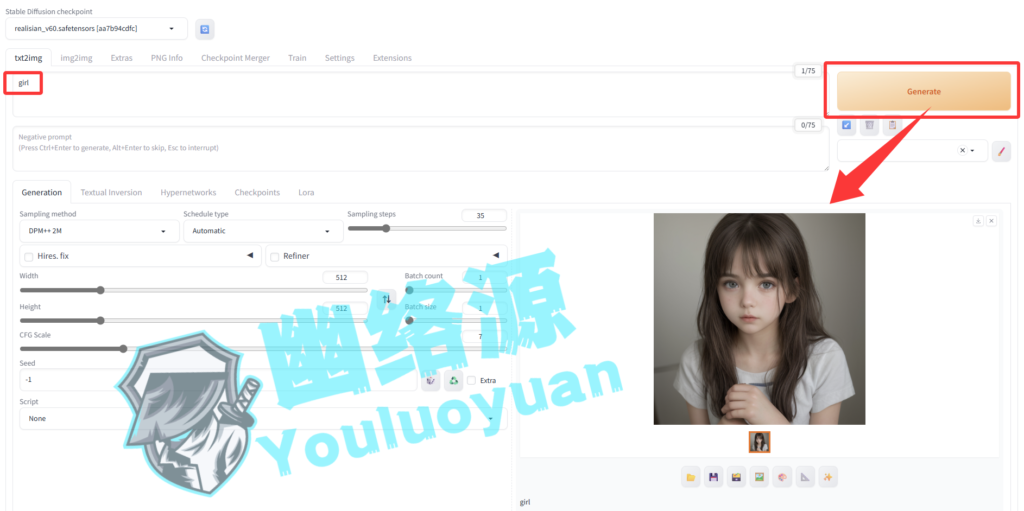
3.3 生成图片
别的配置这里我们先不管,直接点击 Generate进行生成,如图可以看到这里就生成了一张 girl 图片
查看下节教程-强大的Lora模型使用
强大的Lora绘图模型使用-StableDiffusion