学习链接
Apache httpclient & okhttp(1)
Apache httpclient & okhttp(2)
httpcomponents-client github
apache httpclient文档
apache httpclient文档详细使用
log4j日志官方文档
【Java基础】- HttpURLConnection详解
java使用httpclient 、HttpURLConnection 发送第三方请求 使用详解、总结。HttpClient 的使用
Java 中的 HTTP 客户端库OkHttp、Apache HttpClient和HttpUrlConnection
文章目录
- 学习链接
- Apache HttpClient
- HttpComponents概述
- 特点
- httpcomponents-client
- 项目代码
- 文档资料
- 0、HTTP编程入门
- 1、快速入门httpclient
- 2、使用教程
- 3、代码示例
- 4、日志说明
- log4j的配置说明
- 快速入门
- pom.xml
- log4j2.xml
- QuickStart01
- HTTP客户端不读取响应时的服务端处理机制
- QuickStart02
- QuickStart03(Fluent流式)
- 示例代码
- 响应处理
- 手动连接释放
- httpclient的配置
- 请求中止
- 客户端鉴权
- 代理请求
- 代理鉴权
- 块编码流式传输请求实体(文件传输)
- 多部分编码请求实体(文件上传)
- 自定义执行上下文
- 基于表单的登录
- 多线程请求执行
- 删除过期连接
- 自定义SSL上下文
- 代理隧道
- 异步请求
- Fluent流式
- FluentRequests
- FluentResponseHandling
- FluentExecutor
- FluentAsync
Apache HttpClient
HttpComponents概述
HttpCore是一组低级HTTP传输组件,可用于以最小的占用空间构建自定义客户端和服务器端HTTP服务。HttpCore支持两种输入/输出模型:基于经典Java输入/输出的阻塞输入/输出模型和基于JavaNIO的非阻塞、事件驱动输入/输出模型。
特点
- 基于标准,纯Java,HTTP版本1.0和1.1的实现
- 在可扩展的OO框架中完全实现所有HTTP方法(GET、POST、PUT、DELETE、HEAD、OPTIONS和TRACE)。
- 支持安全超文本传输协议(HTTP over SSL)加密。
- 通过HTTP代理的透明连接。
- 隧道安全超文本传输协议连接通过HTTP代理,通过CONNECT方法。
- 基本,摘要,NTLMv1,NTLMv2,NTLM2会话,SNPNEGO,Kerberos协议鉴权方案。
- 自定义鉴权方案的插件机制。
- 可插拔安全插座工厂,更易于使用第三方解决方案
- 支持在多线程应用程序中使用的连接管理。支持设置最大总连接数以及每个主机的最大连接数。检测并关闭过时的连接。
- 自动Cookie处理读取Set-Cookie:从服务器的标头,并在适当的时候将它们发送回Cookie表头。
- 自定义cookie策略的插件机制。
- 请求输出流以避免通过直接流式传输到套接字到服务器来缓冲任何内容体。
- 响应输入流通过直接从套接字流式传输到服务器来有效地读取响应正文。
- 在HTTP/1.0中使用KeepAlive和在HTTP/1.1中使用持久连接
- 直接访问服务器发送的响应代码和标头。
- 设置连接超时的能力。
- 支持HTTP/1.1响应缓存。
- 源代码在Apache许可下免费提供。
httpcomponents-client
项目代码
apache httpcomponents-client - github,项目有4.5.x和5.4.x分支。稳定版建议使用4.5.14。
文档资料
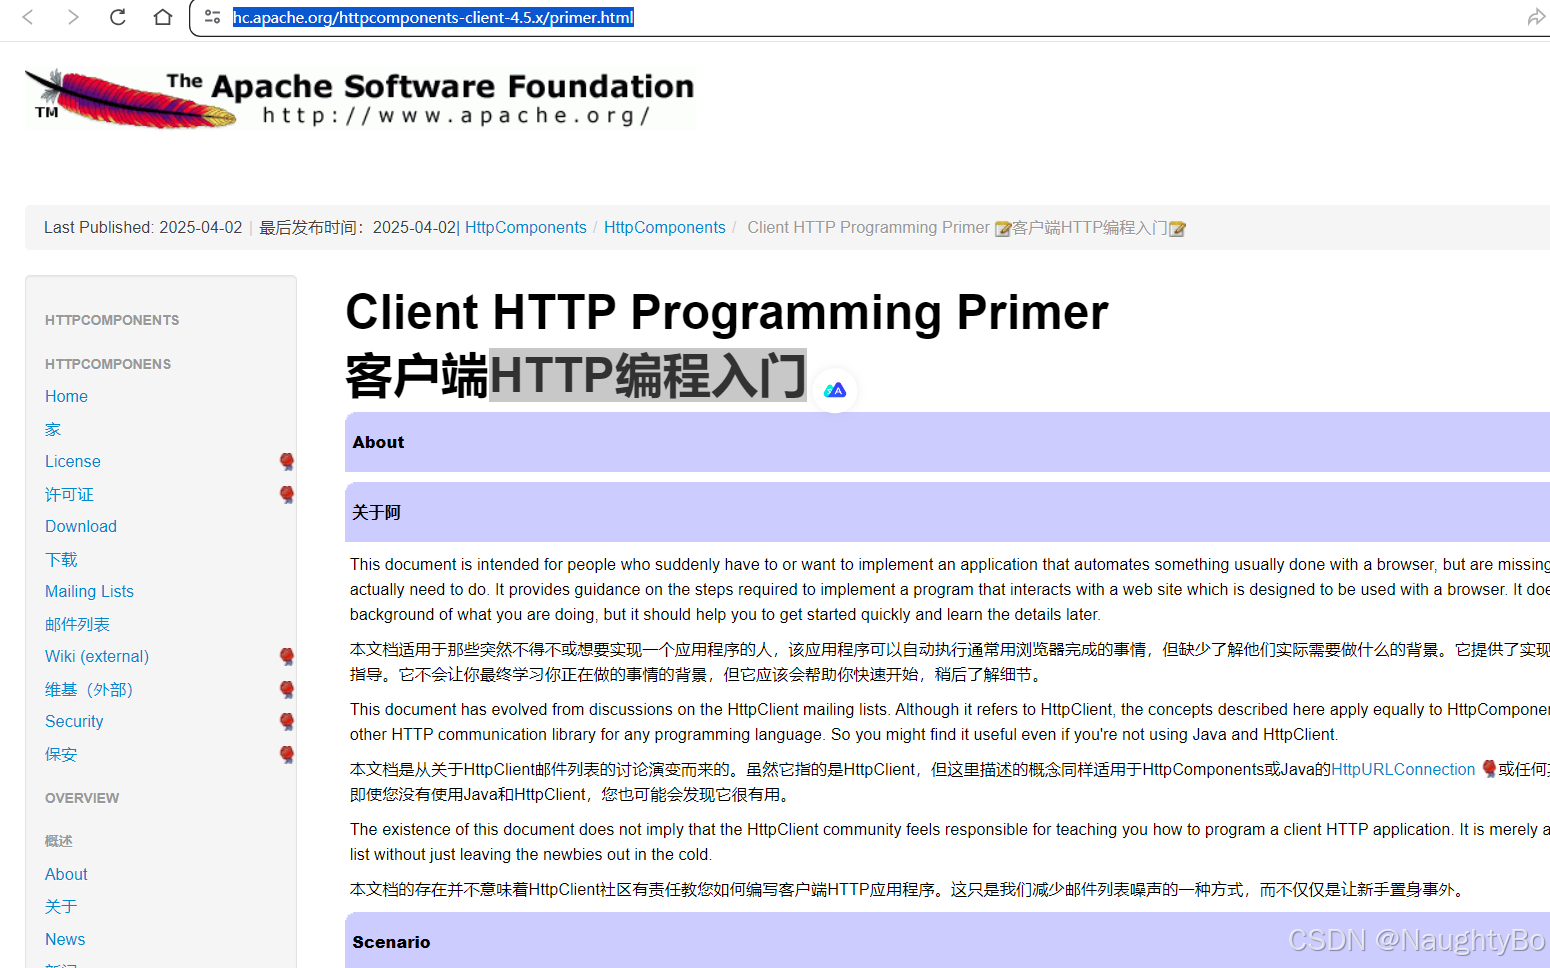
0、HTTP编程入门
https://hc.apache.org/httpcomponents-client-4.5.x/primer.html
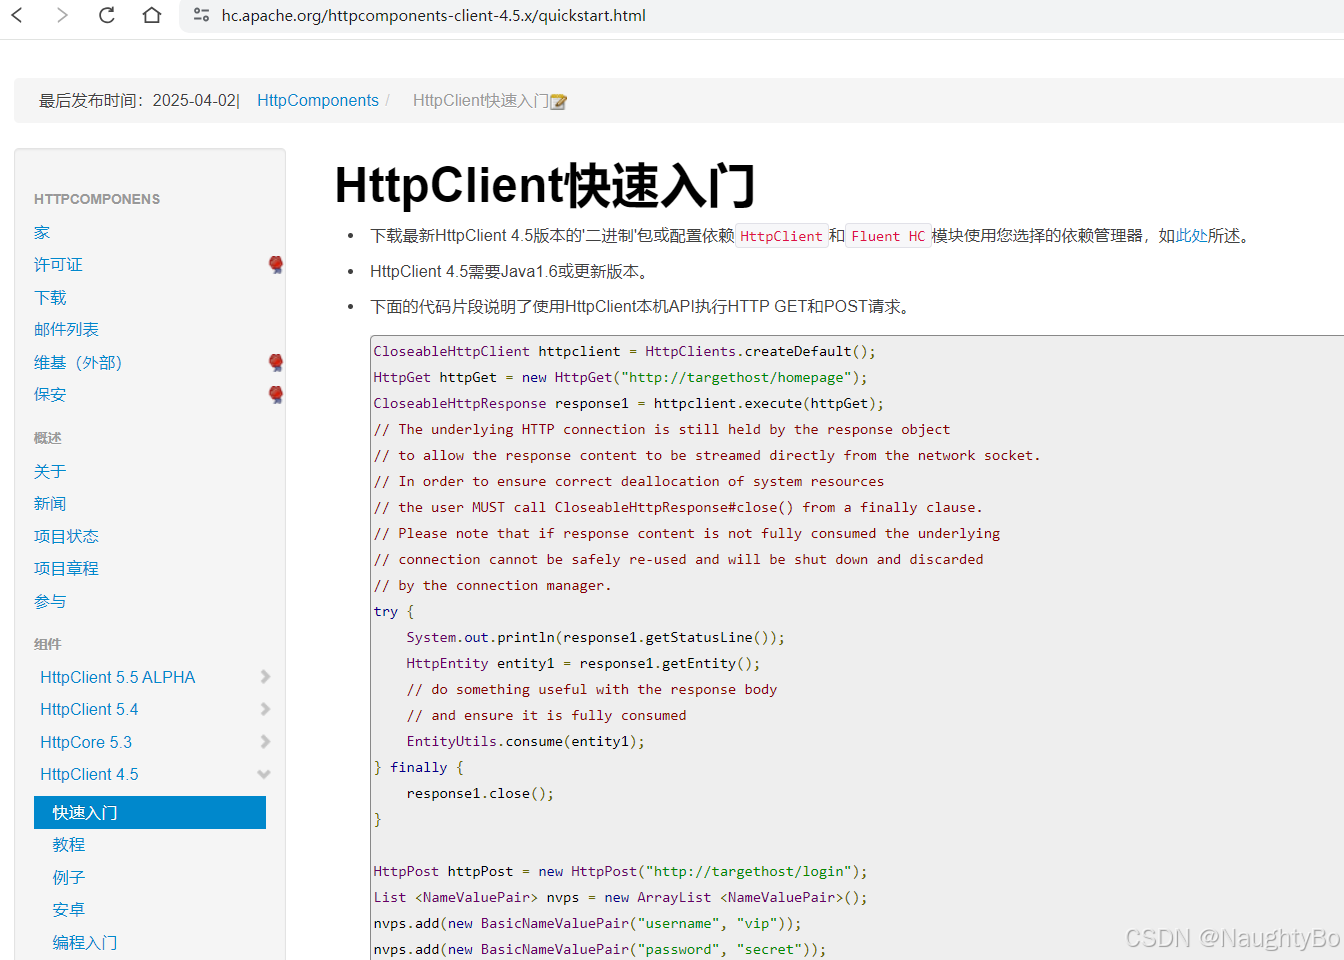
1、快速入门httpclient
https://hc.apache.org/httpcomponents-client-4.5.x/quickstart.html
2、使用教程
https://hc.apache.org/httpcomponents-client-4.5.x/current/tutorial/html/

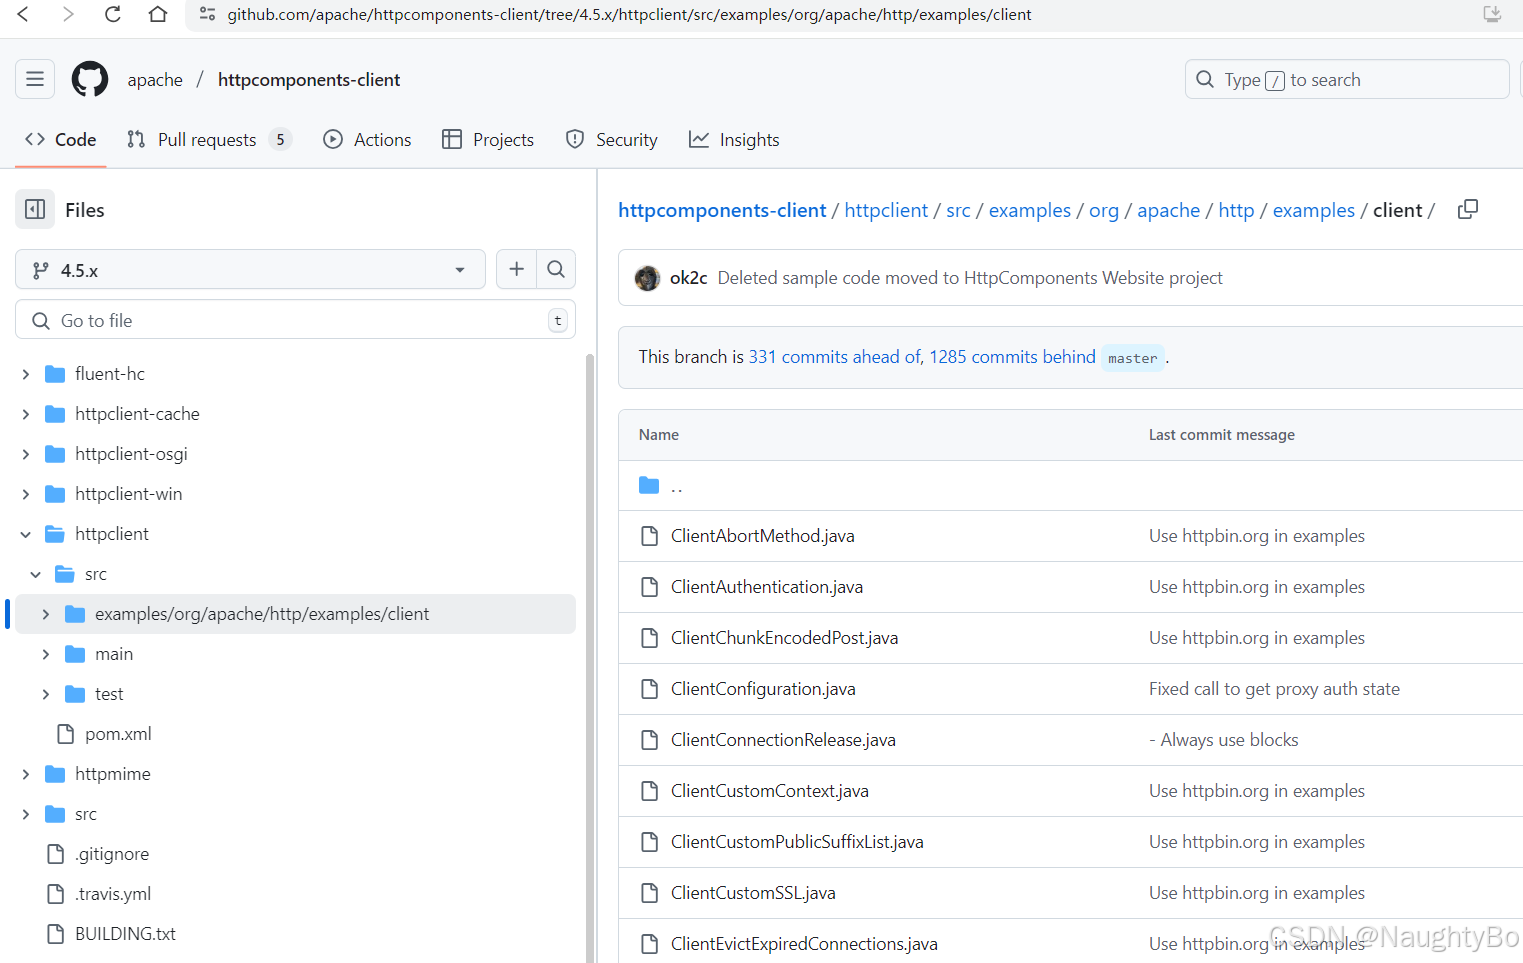
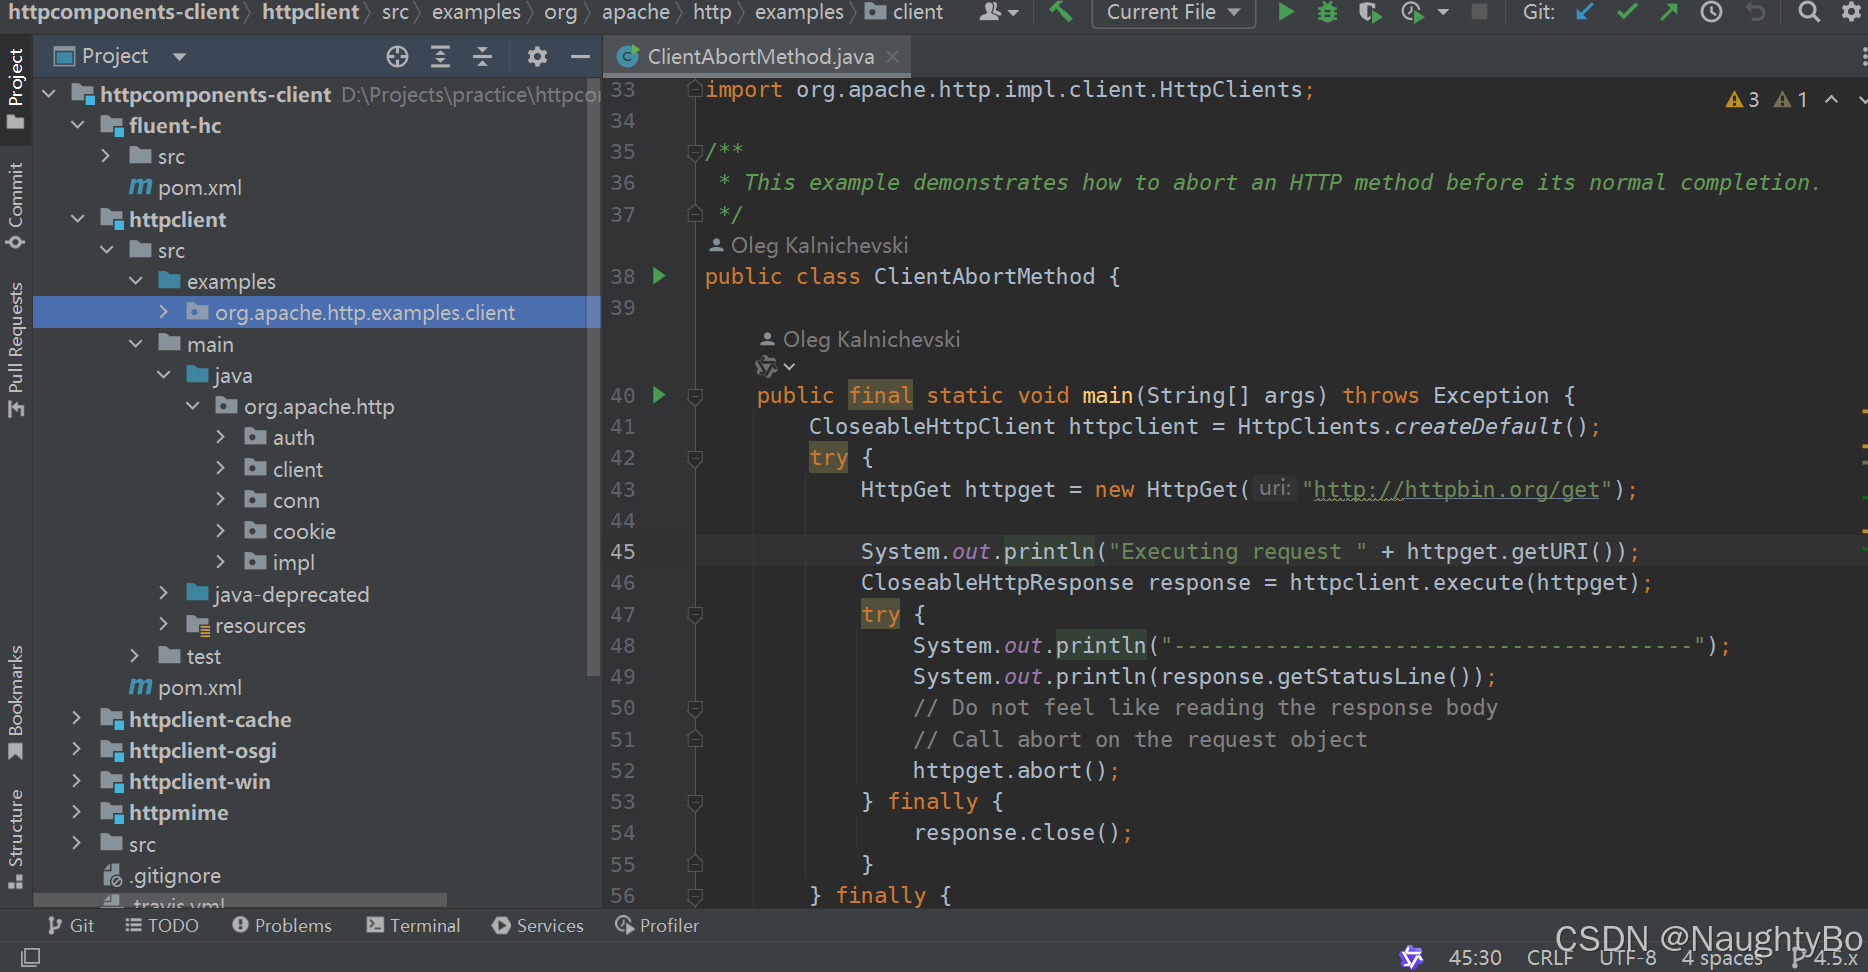
3、代码示例
https://github.com/apache/httpcomponents-client/tree/4.5.x/httpclient/src/examples/org/apache/http/examples/client - 这里面包括丰富的示例,覆盖一些更复杂使用场景
4、日志说明
https://hc.apache.org/httpcomponents-client-4.5.x/logging.html
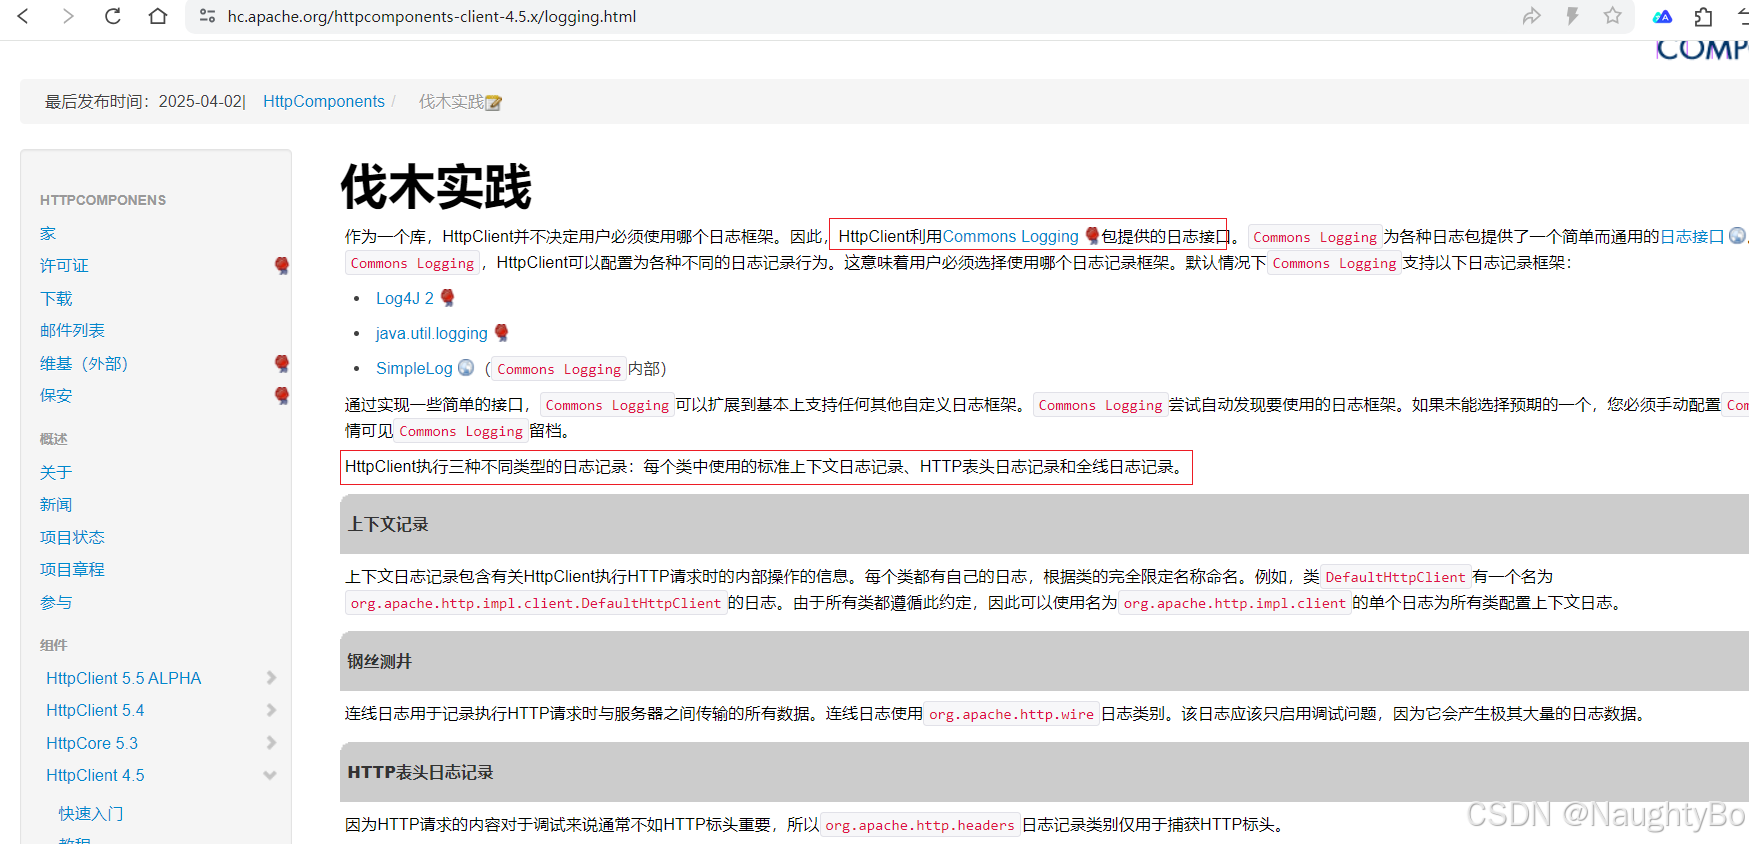
HttpClient利用Commons Logging包提供的日志接口。默认情况下Commons Logging支持以下日志记录框架:
-
Log4J 2
-
java.util.logging
-
SimpleLog(Commons Logging内部)
HttpClient执行三种不同类型的日志记录:每个类中使用的标准上下文日志记录、HTTP表头日志记录和全线日志记录。
- 上下文日志记录包含有关HttpClient
执行HTTP请求时的内部操作的信息。每个类都有自己的日志,根据类的完全限定名称命名。例如,类DefaultHttpClient有一个名为org.apache.http.impl.client.DefaultHttpClient的日志。由于所有类都遵循此约定,因此可以使用名为org.apache.http.impl.client的单个日志为所有类配置上下文日志 - 连线日志用于记录执行HTTP请求时与服务器之间传输的所有数据。
连线日志使用org.apache.http.wire日志类别。该日志应该只启用调试问题,因为它会产生极其大量的日志数据。 - 因为HTTP请求的内容对于调试来说通常不如HTTP标头重要,所以org.apache.http.headers日志记录类别仅用于捕获HTTP标头。
log4j的配置说明
因为使用的版本是httpclient-4.5.14版本,它默认使用的是 apache的commons-logging来记录日志的(即JCL),现在要使用log4j来作为日志实现,需要先排除掉httpclient引入的commons-logging依赖,然后引入jcl-over-slf4j桥接器,桥接器的作用是取代commons-logging依赖(因为httpclient中使用的类名是无法更改的,桥接器的作用就是使用和commons-logging同样的包名和类名,来个偷梁换柱的效果,这样就可以修改日志的实现了),然后再引入log4j-core、log4j-slf4j-impl将日志实现绑定到log4j上
httpclient官网有关日志配置的说明,以及 log4j官网文档说明
快速入门
pom.xml
<?xml version="1.0" encoding="UTF-8"?>
<project xmlns="http://maven.apache.org/POM/4.0.0"
         xmlns:xsi="http://www.w3.org/2001/XMLSchema-instance"
         xsi:schemaLocation="http://maven.apache.org/POM/4.0.0 http://maven.apache.org/xsd/maven-4.0.0.xsd">
    <modelVersion>4.0.0</modelVersion>

    <groupId>com.zzhua</groupId>
    <artifactId>demo-http</artifactId>
    <version>1.0-SNAPSHOT</version>

    <properties>
        <maven.compiler.source>8</maven.compiler.source>
        <maven.compiler.target>8</maven.compiler.target>
        <project.build.sourceEncoding>UTF-8</project.build.sourceEncoding>
    </properties>

    <dependencies>
        <dependency>
            <groupId>org.apache.httpcomponents</groupId>
            <artifactId>httpclient</artifactId>
            <version>4.5.14</version>
            <exclusions>
                <exclusion>
                    <groupId>commons-logging</groupId>
                    <artifactId>commons-logging</artifactId>
                </exclusion>
            </exclusions>
        </dependency>

		<dependency>
            <groupId>org.apache.httpcomponents</groupId>
            <artifactId>fluent-hc</artifactId>
            <version>4.5.14</version>
        </dependency>

		<dependency>
            <groupId>org.apache.httpcomponents</groupId>
            <artifactId>httpmime</artifactId>
            <version>4.5.14</version>
        </dependency>

        <!-- JCL 转 SLF4J 桥接 -->
        <dependency>
            <groupId>org.slf4j</groupId>
            <artifactId>jcl-over-slf4j</artifactId>
            <version>1.7.36</version>
        </dependency>

        <!-- Log4j2 核心和SLF4J绑定 -->
        <dependency>
            <groupId>org.apache.logging.log4j</groupId>
            <artifactId>log4j-core</artifactId>
            <version>2.17.1</version>
        </dependency>
        <dependency>
            <groupId>org.apache.logging.log4j</groupId>
            <artifactId>log4j-slf4j-impl</artifactId>
            <version>2.17.1</version>
        </dependency>


    </dependencies>

</project>
log4j2.xml
<?xml version="1.0" encoding="UTF-8"?>
<Configuration>

    <Appenders>
        <Console name="Console">
            <PatternLayout pattern="%d %-5level [%logger] %msg%n%xThrowable" />
        </Console>
    </Appenders>

    <Loggers>

        <Logger name="org.apache.http" level="DEBUG">
            <AppenderRef ref="Console"/>
        </Logger>

        <Logger name="org.apache.http.wire" level="DEBUG">
            <AppenderRef ref="Console"/>
        </Logger>

        <Root level="INFO">
            <AppenderRef ref="Console" />
        </Root>
    </Loggers>

</Configuration>
QuickStart01
public class QuickStart01 {

    public static void main(String[] args) throws IOException {

        CloseableHttpClient httpclient = HttpClients.createDefault();
        HttpGet httpGet = new HttpGet("https://www.solargod.cn/api/articles/pageListArticles?current=1&size=5");
        CloseableHttpResponse response1 = httpclient.execute(httpGet);

        // 底层HTTP连接仍由响应对象持有,以便直接从网络套接字流式传输响应内容。
        // 为确保正确释放系统资源,用户必须在finally代码块中调用CloseableHttpResponse#close()方法。
        // 需特别注意:若未完整消费响应内容,底层连接将无法安全复用,最终会被连接管理器强制关闭并废弃。

        try {
            System.out.println(response1.getStatusLine());
            HttpEntity entity1 = response1.getEntity();
            // 拿到响应体后, 可以使用它
            // 需要确保响应体被消费完,否则底层连接将无法安全复用。
            // EntityUtils.consume(entity1);
            System.out.println(EntityUtils.toString(entity1, Charsets.UTF_8));
        } finally {
            response1.close();
        }

    }

}
HTTP客户端不读取响应时的服务端处理机制
假设客户端httpclient向服务端springboot发起请求,对吧,服务端需要响应数据给客户端,这个数据比较多,服务端需要不断的读取1个文件,每读取一段,然后写到响应里。httpClient.execute()是发起请求,然后得到1个response,这时服务端这时就收到了请求,然后服务端不断的写入,但是如果此时客户端拿到response之后不去读取响应信息,那底层是怎么做的?服务端仍然不断的写入,但是客户端又不去读?
用户的问题是关于HTTP客户端和服务端之间的数据流交互的。具体来说,当客户端(比如用HttpClient)发送请求到Spring Boot服务端,服务端需要返回大量数据,比如分块读取文件并逐步写入响应。而客户端在获取响应对象后,如果不主动读取内容,底层会发生什么情况呢?
首先,我需要回忆一下HTTP协议的相关知识,特别是关于数据传输的部分。HTTP/1.1支持分块传输编码(chunked transfer encoding),允许服务端逐步发送数据,而不需要预先知道总数据大小。这种情况下,客户端可以边接收边处理数据,而不是等所有数据都传输完毕。
接下来,用户的问题是,当客户端调用httpClient.execute()并得到响应对象后,如果客户端不主动读取响应体(比如不调用getEntity().getContent()或者类似的方法),那么服务端那边还在继续写入数据的话,会发生什么情况?
这个时候,可能需要考虑TCP层的流量控制机制。TCP使用滑动窗口来控制数据传输的速度,确保接收方有足够的缓冲区来接收数据。如果客户端不读取响应数据,接收窗口可能会被填满,导致服务端无法继续发送数据,进而阻塞写入操作,直到客户端开始读取并释放窗口空间。
不过,这里可能涉及到应用层和传输层的交互。服务端在写入响应时,如果使用分块编码,会逐步发送数据块。每个数据块会被写入到输出流中,然后通过TCP发送。如果客户端的TCP接收缓冲区满了,服务端的写入操作可能会被阻塞,直到客户端读取数据,腾出缓冲区空间。这种情况下,服务端的线程可能会被阻塞,无法继续处理其他请求,尤其是在使用同步I/O的情况下。
另外,需要考虑服务端框架的具体实现。比如Spring Boot中使用的是Servlet API,当使用response.getOutputStream()进行写入时,每次写入数据会尝试发送到客户端。如果客户端不读取,缓冲区的数据积压可能导致服务端写入操作变慢或阻塞。此外,可能还存在超时机制,如果长时间没有读取,连接可能会被关闭,释放资源。
另外,HTTP协议本身是请求-响应模型,客户端发起请求后,服务端开始发送响应。如果客户端不读取响应体,但连接仍然保持打开状态,服务端可能会持续尝试发送数据,直到达到某个超时限制。例如,在Spring Boot中,可能有配置的连接超时或响应超时设置,超过时间后会关闭连接。
还需要考虑HttpClient的具体行为。比如,Apache HttpClient在获取响应对象后,如果不读取内容,可能会在连接释放时关闭连接,导致未读取的数据被丢弃。或者在尝试读取响应体时,如果已经关闭了连接,可能会抛出异常。
可能的误解点在于,用户可能认为服务端会一直写入数据,即使客户端不读取,但实际上TCP层的流量控制会阻止这种情况,导致服务端的写入操作被阻塞,直到客户端开始读取数据。或者,如果服务端使用非阻塞I/O(如NIO),可能不会阻塞,但需要相应的处理机制。
总结起来,关键点在于TCP的流量控制、服务端框架的处理方式、超时设置以及客户端的读取行为。如果客户端不读取,服务端的写入可能被阻塞或最终超时关闭连接。
1、TCP流量控制与缓冲区机制
-
接收窗口限制:TCP协议通过滑动窗口机制实现流量控制。客户端的内核会为每个TCP连接维护一个接收缓冲区。服务端写入的数据会先填充此缓冲区。
-
如果客户端不读取数据,缓冲区逐渐被填满,导致接收窗口缩小。当窗口大小为0时,服务端会暂停发送数据,直到客户端读取数据、窗口重新打开。
-
此时,服务端的写入操作(如OutputStream.write())会因TCP层的阻塞而暂停,写入线程被挂起。
-
2、 服务端框架的行为(以Spring Boot为例)
-
同步写入场景:若服务端使用传统阻塞I/O(如Servlet的response.getOutputStream()逐段写入文件):
-
每次调用write()会尝试将数据写入TCP发送缓冲区。
-
若客户端不读取导致缓冲区满,服务端的write()操作会阻塞,直到客户端读取数据腾出空间或超时。
-
若阻塞时间过长,可能触发服务端的写超时(如Spring Boot的server.connection-timeout),强制关闭连接。
-
-
异步非阻塞场景:若服务端使用Reactive框架(如WebFlux)或异步Servlet:
-
写入操作不会阻塞线程,数据会被暂存在内存或队列中。
-
但若客户端长期不读取,可能导致服务端内存耗尽,最终抛出OutOfMemoryError或触发背压(Backpressure)机制暂停数据生产。
-
3、客户端的潜在行为
-
不调用响应内容读取方法:
-
若客户端获取HttpResponse后,既不调用getEntity().getContent(),也不关闭连接:
-
连接保持打开状态,但数据堆积在TCP接收缓冲区。
-
最终可能导致服务端因写超时或客户端因读超时(如httpclient.socket-timeout)关闭连接。
-
-
-
若客户端直接关闭连接(如不处理响应),服务端会收到Connection reset异常,中断写入。
4、资源泄漏与超时
- 服务端资源占用:若客户端不读取且不关闭连接,服务端的线程可能被长时间阻塞(同步模型)或内存被占用(异步模型)。
- 超时机制:
-
服务端超时:通过server.connection-timeout(默认无限制)强制关闭空闲连接。
-
客户端超时:通过httpclient.socket-timeout中断长时间未响应的连接。
-
总结
- 关键制约因素:TCP流量控制确保服务端不会无限写入,客户端不读取时,服务端写入会因缓冲区满而阻塞或触发超时。
最佳实践:
-
客户端应及时读取响应流,或在不需要数据时主动取消请求。
-
服务端应设置合理的超时和缓冲区大小,对大规模数据流采用分页或分块传输,并考虑异步非阻塞模型以避免线程阻塞。
-
示例场景:假设客户端发起下载大文件的请求后崩溃,未读取响应。服务端在尝试写入时会因TCP窗口关闭而暂停,最终因超时(如30秒)关闭连接,释放资源。
QuickStart02
import org.apache.commons.codec.Charsets;
import org.apache.http.HttpEntity;
import org.apache.http.NameValuePair;
import org.apache.http.client.entity.UrlEncodedFormEntity;
import org.apache.http.client.methods.CloseableHttpResponse;
import org.apache.http.client.methods.HttpPost;
import org.apache.http.impl.client.CloseableHttpClient;
import org.apache.http.impl.client.HttpClients;
import org.apache.http.message.BasicNameValuePair;
import org.apache.http.util.EntityUtils;

import java.io.IOException;
import java.util.ArrayList;
import java.util.List;

public class QuickStart02 {

    public static void main(String[] args) throws IOException {

        CloseableHttpClient httpclient = HttpClients.createDefault();

        HttpPost httpPost = new HttpPost("http://127.0.0.1:8080/test01");

        List<NameValuePair> nvps = new ArrayList<NameValuePair>();
        nvps.add(new BasicNameValuePair("username", "vip"));
        nvps.add(new BasicNameValuePair("password", "secret"));

        // 提交表单
        httpPost.setEntity(new UrlEncodedFormEntity(nvps));

        CloseableHttpResponse response2 = httpclient.execute(httpPost);

        try {
            // HTTP/1.1 200
            System.out.println(response2.getStatusLine());
            HttpEntity entity2 = response2.getEntity();

            // 拿到响应体后, 可以使用它
            // 需要确保响应体被消费完,否则底层连接将无法安全复用。
            // EntityUtils.consume(entity2);
            System.out.println(EntityUtils.toString(entity2, Charsets.UTF_8));
        } finally {
            response2.close();
        }

    }

}
QuickStart03(Fluent流式)
流式调用风格,需要引入fluent-hc依赖。
import org.apache.commons.codec.Charsets;
import org.apache.http.client.fluent.Content;
import org.apache.http.client.fluent.Form;
import org.apache.http.client.fluent.Request;

import java.io.IOException;

public class QuickStart03 {

    public static void main(String[] args) throws IOException {

        Content content1 = Request.Get("https://www.solargod.cn/api/articles/pageListArticles?current=1&size=5")
                .execute().returnContent();
        System.out.println(content1.asString(Charsets.UTF_8));

        Content content2 = Request
                .Post("http://127.0.0.1:8080/test01")
                .bodyForm(
                        Form.form()
                                .add("username", "vip")
                                .add("password", "secret")
                                .build()
                )
                .execute().returnContent();
        System.out.println(content2.asString());
    }

}
示例代码
响应处理
此示例演示了如何使用响应处理程序处理HTTP响应。这是执行HTTP请求和处理HTTP响应的推荐方法。这种方法使调用方能够专注于消化HTTP响应的过程,并将系统资源释放的任务委托给HttpClient。HTTP响应处理程序的使用保证了在所有情况下底层HTTP连接都会自动释放回连接管理器。
/**
 * This example demonstrates the use of the {@link ResponseHandler} to simplify
 * the process of processing the HTTP response and releasing associated resources.
 */
public class ClientWithResponseHandler {

    public final static void main(String[] args) throws Exception {
        CloseableHttpClient httpclient = HttpClients.createDefault();
        try {
            HttpGet httpget = new HttpGet("http://httpbin.org/");

            System.out.println("Executing request " + httpget.getRequestLine());

            // Create a custom response handler
            ResponseHandler<String> responseHandler = new ResponseHandler<String>() {

                @Override
                public String handleResponse(
                        final HttpResponse response) throws ClientProtocolException, IOException {
                    int status = response.getStatusLine().getStatusCode();
                    if (status >= 200 && status < 300) {
                        HttpEntity entity = response.getEntity();
                        return entity != null ? EntityUtils.toString(entity) : null;
                    } else {
                        throw new ClientProtocolException("Unexpected response status: " + status);
                    }
                }

            };
            String responseBody = httpclient.execute(httpget, responseHandler);
            System.out.println("----------------------------------------");
            System.out.println(responseBody);
        } finally {
            httpclient.close();
        }
    }

}
手动连接释放
/**
 * This example demonstrates the recommended way of using API to make sure
 * the underlying connection gets released back to the connection manager.
 */
public class ClientConnectionRelease {

    public final static void main(String[] args) throws Exception {
        CloseableHttpClient httpclient = HttpClients.createDefault();
        try {
            HttpGet httpget = new HttpGet("http://httpbin.org/get");

            System.out.println("Executing request " + httpget.getRequestLine());
            CloseableHttpResponse response = httpclient.execute(httpget);
            try {
                System.out.println("----------------------------------------");
                System.out.println(response.getStatusLine());

                // Get hold of the response entity
                HttpEntity entity = response.getEntity();

                // If the response does not enclose an entity, there is no need
                // to bother about connection release
                if (entity != null) {
                    InputStream inStream = entity.getContent();
                    try {
                        inStream.read();
                        // do something useful with the response
                    } catch (IOException ex) {
                        // In case of an IOException the connection will be released
                        // back to the connection manager automatically
                        throw ex;
                    } finally {
                        // 关闭输入流 会触发连接释放
                        // Closing the input stream will trigger connection release
                        inStream.close();
                    }
                }
            } finally {
                response.close();
            }
        } finally {
            httpclient.close();
        }
    }

}
httpclient的配置
此示例演示如何自定义和配置HTTP请求执行和连接管理的最常见方面。
/**
 * This example demonstrates how to customize and configure the most common aspects
 * of HTTP request execution and connection management.
 */
public class ClientConfiguration {

    public final static void main(String[] args) throws Exception {

        // 使用自定义的消息解析器/写入器,来定制 HTTP 消息从数据流中解析及写入的方式。
        HttpMessageParserFactory<HttpResponse> responseParserFactory = new DefaultHttpResponseParserFactory() {

            @Override
            public HttpMessageParser<HttpResponse> create(
                SessionInputBuffer buffer, MessageConstraints constraints) {
                LineParser lineParser = new BasicLineParser() {

                    @Override
                    public Header parseHeader(final CharArrayBuffer buffer) {
                        try {
                            return super.parseHeader(buffer);
                        } catch (ParseException ex) {
                            return new BasicHeader(buffer.toString(), null);
                        }
                    }

                };
                return new DefaultHttpResponseParser(
                    buffer, lineParser, DefaultHttpResponseFactory.INSTANCE, constraints) {

                    @Override
                    protected boolean reject(final CharArrayBuffer line, int count) {
                        // try to ignore all garbage preceding a status line infinitely
                        return false;
                    }

                };
            }

        };
        HttpMessageWriterFactory<HttpRequest> requestWriterFactory = new DefaultHttpRequestWriterFactory();

        // 使用自定义的连接工厂来定制 HTTP 出站连接 的初始化过程。
        // 除了标准的连接配置参数外,HTTP 连接工厂还可以定义 消息解析器/写入器 的例程,供各个连接使用。
        // (这里指的是可以通过自定义 ConnectionFactory 来灵活控制 HTTP 连接的建立方式,并指定底层的数据解析和写入逻辑,从而适应特殊协议或优化网络通信。)
        HttpConnectionFactory<HttpRoute, ManagedHttpClientConnection> connFactory = new ManagedHttpClientConnectionFactory(
                requestWriterFactory, responseParserFactory);

        // 客户端 HTTP 连接对象在完全初始化后,可绑定至任意网络套接字。
        // 网络套接字的初始化过程(包括连接远程地址和绑定本地地址)均由 连接套接字工厂 控制。
        // (该机制允许通过自定义 ConnectionSocketFactory 灵活管理底层套接字的创建、连接和绑定行为,从而支持代理、隧道或特殊网络环境下的 HTTP 通信。)

        // 安全连接的 SSL 上下文 既可根据系统默认配置创建,也可基于应用程序的特定属性进行定制。
        // (这意味着开发者可以选择依赖操作系统/Java 默认的 SSL/TLS 设置,或通过自定义密钥库、信任库及协议参数等,灵活配置 HTTPS 的安全策略。)
        SSLContext sslcontext = SSLContexts.createSystemDefault();

        // 为支持的协议方案(如 http/https)创建一个自定义连接套接字工厂的注册表。
        // (技术说明:该机制允许针对不同协议(如 HTTP、HTTPS 或其他自定义协议)注册对应的 ConnectionSocketFactory 实现,从而在建立连接时动态选择底层套接字的创建和管理逻辑,例如支持代理、自定义 TLS 配置或网络隧道等场景。)
        Registry<ConnectionSocketFactory> socketFactoryRegistry = RegistryBuilder.<ConnectionSocketFactory>create()
            .register("http", PlainConnectionSocketFactory.INSTANCE)
            .register("https", new SSLConnectionSocketFactory(sslcontext))
            .build();

        // 使用自定义 DNS 解析器 以覆盖系统的默认 DNS 解析机制。
        // (技术说明:通过自定义 DnsResolver 实现,可以接管 HTTP 客户端的域名解析过程,支持硬编码映射、智能路由、故障规避或特殊网络环境下的 DNS 定制需求。)
        DnsResolver dnsResolver = new SystemDefaultDnsResolver() {

            @Override
            public InetAddress[] resolve(final String host) throws UnknownHostException {
                if (host.equalsIgnoreCase("myhost")) {
                    return new InetAddress[] { InetAddress.getByAddress(new byte[] {127, 0, 0, 1}) };
                } else {
                    return super.resolve(host);
                }
            }

        };

        // 创建带有自定义配置的 连接管理器。
        // (技术说明:通过自定义 HttpClientConnectionManager(如 PoolingHttpClientConnectionManager 或 BasicHttpClientConnectionManager),
        //           可灵活控制 HTTP 连接的 生命周期、池化策略、超时设置 等核心参数,以满足高并发、长连接或特殊网络环境的需求。)
        PoolingHttpClientConnectionManager connManager = new PoolingHttpClientConnectionManager(
                socketFactoryRegistry, connFactory, dnsResolver);

        // 创建 Socket 配置
        // (技术说明:通过自定义 SocketConfig 可精细控制底层套接字的行为,适用于所有由连接管理器创建的 HTTP 连接。
        //           关键配置项包括:超时控制、性能调优、网络容错)
        SocketConfig socketConfig = SocketConfig.custom()
            .setTcpNoDelay(true)
            .build();

        // 配置连接管理器,使其 默认全局应用 Socket 配置,或 针对特定主机 单独设置。
        connManager.setDefaultSocketConfig(socketConfig);
        connManager.setSocketConfig(new HttpHost("somehost", 80), socketConfig);

        // 在 1 秒空闲时间 后验证连接的有效性
        connManager.setValidateAfterInactivity(1000);

        // 配置消息约束(Message Constraints)
        // 消息约束用于控制 HTTP 请求/响应 的解析行为,防止恶意或错误格式的数据导致资源耗尽(如过大的 Headers、过长的行或无效的结构)。
        MessageConstraints messageConstraints = MessageConstraints.custom()
            .setMaxHeaderCount(200)
            .setMaxLineLength(2000)
            .build();

        // 创建连接配置(Connection Configuration)
        // 连接配置用于精细控制 HTTP 连接的底层行为,包括超时、缓冲区、Keep-Alive、SSL/TLS 等。
        ConnectionConfig connectionConfig = ConnectionConfig.custom()
            .setMalformedInputAction(CodingErrorAction.IGNORE)
            .setUnmappableInputAction(CodingErrorAction.IGNORE)
            .setCharset(Consts.UTF_8)
            .setMessageConstraints(messageConstraints)
            .build();

        // 配置连接管理器:全局默认 vs 特定主机的连接设置
        // 可以通过 HttpClientConnectionManager 为所有连接设置 全局默认配置,或针对 特定主机 进行精细化调整。
        connManager.setDefaultConnectionConfig(connectionConfig);
        connManager.setConnectionConfig(new HttpHost("somehost", 80), ConnectionConfig.DEFAULT);

        // 配置连接池的最大连接数限制(全局 & 单路由)
        // 用于控制 HTTP 连接池 中持久化连接的最大数量,防止资源耗尽,适用于高并发场景。
        connManager.setMaxTotal(100);
        connManager.setDefaultMaxPerRoute(10);
        connManager.setMaxPerRoute(new HttpRoute(new HttpHost("somehost", 80)), 20);

        // 使用自定义 Cookie 存储(Custom Cookie Store)
        // 允许覆盖默认的 Cookie 管理策略,适用于需要 持久化 Cookie、跨会话共享 Cookie 或自定义 Cookie 逻辑 的场景。
        CookieStore cookieStore = new BasicCookieStore();

        // 使用自定义凭证提供器(Custom Credentials Provider)
        CredentialsProvider credentialsProvider = new BasicCredentialsProvider();

        // 创建全局请求配置(Global Request Configuration)
        // 用于定义所有 HTTP 请求的默认行为,如超时、代理、重定向策略等。适用于统一管理请求级参数。
        RequestConfig defaultRequestConfig = RequestConfig.custom()
            .setCookieSpec(CookieSpecs.DEFAULT)
            .setExpectContinueEnabled(true)
            .setTargetPreferredAuthSchemes(Arrays.asList(AuthSchemes.NTLM, AuthSchemes.DIGEST))
            .setProxyPreferredAuthSchemes(Arrays.asList(AuthSchemes.BASIC))
            .build();

        // 创建自定义配置的 HttpClient
        // - 连接池管理(最大连接数、路由限制)
        // - 请求配置(超时、代理、重定向)
        // - SSL 安全策略(自定义证书/信任库)
        // - 自定义组件(DNS 解析器、Cookie 存储、凭证提供器等)
        CloseableHttpClient httpclient = HttpClients.custom()
            .setConnectionManager(connManager)
            .setDefaultCookieStore(cookieStore)
            .setDefaultCredentialsProvider(credentialsProvider)
            .setProxy(new HttpHost("myproxy", 8080))
            .setDefaultRequestConfig(defaultRequestConfig)
            .build();

        try {

            HttpGet httpget = new HttpGet("http://httpbin.org/get");

            // 请求级配置覆盖(Request-Level Configuration Override)
            // 允许在 单个 HTTP 请求 中覆盖全局配置,优先级高于客户端默认设置。
            // 适用于需要动态调整参数的场景(如特定请求的超时、代理或认证)。
            RequestConfig requestConfig = RequestConfig.copy(defaultRequestConfig)
                .setSocketTimeout(5000)
                .setConnectTimeout(5000)
                .setConnectionRequestTimeout(5000)
                .setProxy(new HttpHost("myotherproxy", 8080))
                .build();

            httpget.setConfig(requestConfig);

            // 本地化定制执行上下文(Execution Context)
            // 允许在 单个请求的上下文 中覆盖或扩展全局配置,实现请求级别的个性化设置(如动态路由、自定义状态管理)。
            HttpClientContext context = HttpClientContext.create();

            // 设置再本地化执行上下文的属性比设置再客户端级别的优先级高
            context.setCookieStore(cookieStore);
            context.setCredentialsProvider(credentialsProvider);

            System.out.println("executing request " + httpget.getURI());

            CloseableHttpResponse response = httpclient.execute(httpget, context);

            try {
                System.out.println("----------------------------------------");
                System.out.println(response.getStatusLine());
                System.out.println(EntityUtils.toString(response.getEntity()));
                System.out.println("----------------------------------------");

                // 请求执行后检查上下文状态
                // Once the request has been executed the local context can
                // be used to examine updated state and various objects affected
                // by the request execution.

                // Last executed request
                context.getRequest();
                // Execution route
                context.getHttpRoute();
                // Target auth state
                context.getTargetAuthState();
                // Proxy auth state
                context.getProxyAuthState();
                // Cookie origin
                context.getCookieOrigin();
                // Cookie spec used
                context.getCookieSpec();
                // User security token
                context.getUserToken();

            } finally {
                response.close();
            }
        } finally {
            httpclient.close();
        }
    }

}
请求中止
此示例演示如何在HTTP请求正常完成之前中止该请求。
/**
 * This example demonstrates how to abort an HTTP method before its normal completion.
 */
public class ClientAbortMethod {

    public final static void main(String[] args) throws Exception {
        CloseableHttpClient httpclient = HttpClients.createDefault();
        try {
            HttpGet httpget = new HttpGet("http://localhost:8080/test02?time=5000");

            System.out.println("Executing request " + httpget.getURI());
            CloseableHttpResponse response = httpclient.execute(httpget);
            try {
                System.out.println("----------------------------------------");
                System.out.println(response.getStatusLine());

				// 如果不打算读取响应正文,则对请求对象调用abort方法
                // Do not feel like reading the response body
                // Call abort on the request object
                httpget.abort();

            } finally {
                response.close();
            }
        } finally {
            httpclient.close();
        }
    }

}
客户端鉴权
下面示例就是basic认证
/**
 * A simple example that uses HttpClient to execute an HTTP request against
 * a target site that requires user authentication.
 */
public class ClientAuthentication {

    public static void main(String[] args) throws Exception {
        CredentialsProvider credsProvider = new BasicCredentialsProvider();
        credsProvider.setCredentials(
                new AuthScope("httpbin.org", 80),
                new UsernamePasswordCredentials("user", "passwd"));
        CloseableHttpClient httpclient = HttpClients.custom()
                .setDefaultCredentialsProvider(credsProvider)
                .build();
        try {
            HttpGet httpget = new HttpGet("http://httpbin.org/basic-auth/user/passwd");

            System.out.println("Executing request " + httpget.getRequestLine());
            CloseableHttpResponse response = httpclient.execute(httpget);
            try {
                System.out.println("----------------------------------------");
                System.out.println(response.getStatusLine());
                System.out.println(EntityUtils.toString(response.getEntity()));
            } finally {
                response.close();
            }
        } finally {
            httpclient.close();
        }
    }
}
代理请求
演示如何通过代理发送HTTP请求。
这段代码通过本地 8080 端口的代理服务器,向 https://httpbin.org 发送一个 GET 请求,并打印响应内容。httpbin.org 是一个用于测试 HTTP 请求和响应的服务。
/**
 * How to send a request via proxy.
 *
 * @since 4.0
 */
public class ClientExecuteProxy {

    public static void main(String[] args)throws Exception {
        CloseableHttpClient httpclient = HttpClients.createDefault();
        try {
            HttpHost target = new HttpHost("httpbin.org", 443, "https");
            HttpHost proxy = new HttpHost("127.0.0.1", 8080, "http");

            RequestConfig config = RequestConfig.custom()
                    .setProxy(proxy)
                    .build();
            HttpGet request = new HttpGet("/");
            request.setConfig(config);

            System.out.println("Executing request " + request.getRequestLine() + " to " + target + " via " + proxy);

            CloseableHttpResponse response = httpclient.execute(target, request);
            try {
                System.out.println("----------------------------------------");
                System.out.println(response.getStatusLine());
                System.out.println(EntityUtils.toString(response.getEntity()));
            } finally {
                response.close();
            }
        } finally {
            httpclient.close();
        }
    }

}
代理鉴权
一个简单的示例显示了通过身份验证代理隧道的安全连接上执行HTTP请求。
/**
 * A simple example that uses HttpClient to execute an HTTP request
 * over a secure connection tunneled through an authenticating proxy.
 */
public class ClientProxyAuthentication {

    public static void main(String[] args) throws Exception {
        CredentialsProvider credsProvider = new BasicCredentialsProvider();
        credsProvider.setCredentials(
                new AuthScope("localhost", 8888),
                new UsernamePasswordCredentials("squid", "squid"));
        credsProvider.setCredentials(
                new AuthScope("httpbin.org", 80),
                new UsernamePasswordCredentials("user", "passwd"));
        CloseableHttpClient httpclient = HttpClients.custom()
                .setDefaultCredentialsProvider(credsProvider).build();
        try {
            HttpHost target = new HttpHost("httpbin.org", 80, "http");
            HttpHost proxy = new HttpHost("localhost", 8888);

            RequestConfig config = RequestConfig.custom()
                .setProxy(proxy)
                .build();
            HttpGet httpget = new HttpGet("/basic-auth/user/passwd");
            httpget.setConfig(config);

            System.out.println("Executing request " + httpget.getRequestLine() + " to " + target + " via " + proxy);

            CloseableHttpResponse response = httpclient.execute(target, httpget);
            try {
                System.out.println("----------------------------------------");
                System.out.println(response.getStatusLine());
                System.out.println(EntityUtils.toString(response.getEntity()));
            } finally {
                response.close();
            }
        } finally {
            httpclient.close();
        }
    }
}
块编码流式传输请求实体(文件传输)
此示例显示如何使用块编码流式传输请求实体。
/**
 * Example how to use unbuffered chunk-encoded POST request.
 */
public class ClientChunkEncodedPost {

    public static void main(String[] args) throws Exception {

        CloseableHttpClient httpclient = HttpClients.createDefault();
        try {
            // HttpPost httppost = new HttpPost("http://httpbin.org/post");
            HttpPost httppost = new HttpPost("http://127.0.0.1:8080/test03");

            File file = new File("C:\\Users\\zzhua195\\Desktop\\新建文本文档.txt");

            // 在这里,使用FileEntity类可能更合适,
            // 但这里用的是更通用的InputStreamEntity,以展示从任意数据源流式传输数据的能力。
            InputStreamEntity reqEntity = new InputStreamEntity(
                    new FileInputStream(file), -1, ContentType.APPLICATION_OCTET_STREAM);
            reqEntity.setChunked(true);

            // FileEntity reqEntity = new FileEntity(file, "binary/octet-stream");

            httppost.setEntity(reqEntity);

			// Executing request: POST http://127.0.0.1:8080/test03 HTTP/1.1
            System.out.println("Executing request: " + httppost.getRequestLine());

            CloseableHttpResponse response = httpclient.execute(httppost);

            try {
                System.out.println("----------------------------------------");
                // HTTP/1.1 200
                System.out.println(response.getStatusLine());
                // 响应内容
                System.out.println(EntityUtils.toString(response.getEntity()));
                /* EntityUtils#toString
						final Reader reader = new InputStreamReader(inStream, charset);
			            final CharArrayBuffer buffer = new CharArrayBuffer(capacity);
			            final char[] tmp = new char[1024];
			            int l;
			            while((l = reader.read(tmp)) != -1) {
			                buffer.append(tmp, 0, l);
			            }
			            return buffer.toString();
				*/
            } finally {
                response.close();
            }
        } finally {
            httpclient.close();
        }
    }

}
可以这样收到传输的数据(比如,传的是个文本)
@RequestMapping("test03")
public Object test03(HttpServletRequest request) throws Exception {
    StringBuilder out = new StringBuilder();
    InputStreamReader reader = new InputStreamReader(request.getInputStream(), StandardCharsets.UTF_8);
    char[] buffer = new char[4 * 1024];
    int bytesRead = -1;
    while ((bytesRead = reader.read(buffer)) != -1) {
        out.append(buffer, 0, bytesRead);
    }
    return out.toString();
}
多部分编码请求实体(文件上传)
(需要引入httpmime-4.5.14的jar依赖)
此示例显示如何执行包含多部分编码实体的请求。
/**
 * Example how to use multipart/form encoded POST request.
 */
public class ClientMultipartFormPost {

    public static void main(String[] args) throws Exception {

        CloseableHttpClient httpclient = HttpClients.createDefault();
        try {
            HttpPost httppost = new HttpPost("http://localhost:8080/multipart01");
            // HttpPost httppost = new HttpPost("http://localhost:8080/multipart02");

            FileBody bin = new FileBody(new File("C:\\Users\\zzhua195\\Desktop\\test.png"));
            StringBody comment = new StringBody("A binary file of some kind", ContentType.TEXT_PLAIN);

            HttpEntity reqEntity = MultipartEntityBuilder.create()
                    .addPart("bin", bin)
                    .addPart("comment", comment)
                    .build();


            httppost.setEntity(reqEntity);

            System.out.println("executing request " + httppost.getRequestLine());
            CloseableHttpResponse response = httpclient.execute(httppost);
            try {
                System.out.println("----------------------------------------");
                System.out.println(response.getStatusLine());
                HttpEntity resEntity = response.getEntity();
                if (resEntity != null) {
                    System.out.println("Response content length: " + resEntity.getContentLength());
                }
                EntityUtils.consume(resEntity);
            } finally {
                response.close();
            }
        } finally {
            httpclient.close();
        }
    }

}
对应的后端代码
@RequestMapping("multipart01")
 public Object multipart(
         @RequestPart("bin") MultipartFile file,
         @RequestPart("comment") String comment
 ) throws InterruptedException, IOException {
     System.out.println(file.getBytes().length);
     System.out.println(comment);
     return "ojbk";
 }

 @RequestMapping("multipart02")
 public Object multipart(MultipartDTO multipartDTO) throws InterruptedException, IOException {
     System.out.println(multipartDTO.getBin().getBytes().length);
     System.out.println(multipartDTO.getComment());
     return "ojbk";
 }
自定义执行上下文
此示例演示了使用本地HTTP上下文填充的自定义属性。
/**
 * This example demonstrates the use of a local HTTP context populated with
 * custom attributes.
 */
public class ClientCustomContext {

    public final static void main(String[] args) throws Exception {
        CloseableHttpClient httpclient = HttpClients.createDefault();
        try {
            // 创建1个本地的cookie存储
            CookieStore cookieStore = new BasicCookieStore();

            // 创建1个本地的http上下文
            HttpClientContext localContext = HttpClientContext.create();

            // 将cookie存储绑定到本地的http上下文
            localContext.setCookieStore(cookieStore);

            // HttpGet httpget = new HttpGet("http://httpbin.org/cookies");
            HttpGet httpget = new HttpGet("http://localhost:8080/cookie");

            // Executing request GET http://localhost:8080/cookie HTTP/1.1
            System.out.println("Executing request " + httpget.getRequestLine());

            // 将本地的http客户端上下文 作为参数 传入
            CloseableHttpResponse response = httpclient.execute(httpget, localContext);
            try {
                System.out.println("----------------------------------------");

				// HTTP/1.1 200
                System.out.println(response.getStatusLine());

                List<Cookie> cookies = cookieStore.getCookies();

                for (int i = 0; i < cookies.size(); i++) {
                	// Local cookie: [version: 0][name: name][value: zzhua][domain: localhost][path: /][expiry: null]
                    System.out.println("Local cookie: " + cookies.get(i));
                }

                // EntityUtils.consume(response.getEntity());
                System.out.println(EntityUtils.toString(response.getEntity()));

            } finally {
                response.close();
            }
        } finally {
            httpclient.close();
        }
    }

}
在响应中写入cookie
@RequestMapping("cookie")
public Object cookie(HttpServletResponse response) throws InterruptedException {
    response.addCookie(new Cookie("name", "zzhua"));
    return "ojbk";
}
基于表单的登录
此示例演示了如何使用HttpClient执行基于表单的登录。
/**
 * A example that demonstrates how HttpClient APIs can be used to perform
 * form-based logon.
 */
public class ClientFormLogin {

    public static void main(String[] args) throws Exception {

        BasicCookieStore cookieStore = new BasicCookieStore();

        // 自定义http客户端
        CloseableHttpClient httpclient = HttpClients.custom()
                // 设置cookieStore
                .setDefaultCookieStore(cookieStore)
                .build();

        try {

            HttpGet httpget = new HttpGet("http://localhost:8080/formLogin");

            CloseableHttpResponse response1 = httpclient.execute(httpget);

            try {
                HttpEntity entity = response1.getEntity();
                // Login form get: HTTP/1.1 200
                System.out.println("Login form get: " + response1.getStatusLine());
                EntityUtils.consume(entity);

                System.out.println("Initial set of cookies:");
                List<Cookie> cookies = cookieStore.getCookies();
                if (cookies.isEmpty()) {
                    System.out.println("None");
                } else {
                    for (int i = 0; i < cookies.size(); i++) {
                        System.out.println("- " + cookies.get(i).toString());
                    }
                }
            } finally {
                response1.close();
            }

            // 使用RequestBuilder构建请求对象
            HttpUriRequest login = RequestBuilder.post()
                    .setUri(new URI("http://localhost:8080/formLogin"))
                    // 其实就是表单登录来的方式,同 QuickStart02
                    .addParameter("username", "IDToken1")
                    .addParameter("password", "IDToken2")
                    .build();

            CloseableHttpResponse response2 = httpclient.execute(login);

            try {
                HttpEntity entity = response2.getEntity();
                // Login form get: HTTP/1.1 200
                System.out.println("Login form get: " + response2.getStatusLine());
                EntityUtils.consume(entity);

                System.out.println("Post logon cookies:");
                List<Cookie> cookies = cookieStore.getCookies();
                if (cookies.isEmpty()) {
                    System.out.println("None");
                } else {
                    for (int i = 0; i < cookies.size(); i++) {
                        System.out.println("- " + cookies.get(i).toString());
                    }
                }
            } finally {
                response2.close();
            }
        } finally {
            httpclient.close();
        }
    }
}
上面发请求其实就是表单登录来的方式
@RequestMapping("formLogin")
public Object formLogin(LoginForm loginForm, HttpServletResponse response) {
    System.out.println(loginForm);
    if (loginForm != null && !StringUtils.isEmpty(loginForm.getUsername())) {
        Cookie cookie = new Cookie("token", "123456");
        response.addCookie(cookie);
    }
    return "ojbk";
}
多线程请求执行
执行来自多个工作线程的HTTP请求的示例。
(当多个线程同时访问httpClient时,必须使用连接管理器!!!)
/**
 * An example that performs GETs from multiple threads.
 *
 */
public class ClientMultiThreadedExecution {

    public static void main(String[] args) throws Exception {

        // 使用线程安全的连接管理器 来创建 httpClient
        // 当多个线程同时访问httpClient时,必须使用连接管理器!!!
        PoolingHttpClientConnectionManager cm = new PoolingHttpClientConnectionManager();
        cm.setMaxTotal(100);

        CloseableHttpClient httpclient = HttpClients.custom()
                .setConnectionManager(cm)
                .build();
        try {

            // 发起多个请求的uri数组
            String[] urisToGet = {
                "http://hc.apache.org/",
                "http://hc.apache.org/httpcomponents-core-ga/",
                "http://hc.apache.org/httpcomponents-client-ga/",
            };

            // 每个uri都用单独的线程去发请求
            GetThread[] threads = new GetThread[urisToGet.length];

            for (int i = 0; i < threads.length; i++) {

                HttpGet httpget = new HttpGet(urisToGet[i]);

                // 使用同1个httpclient发请求
                threads[i] = new GetThread(httpclient, httpget, i + 1);
            }

            // start the threads
            for (int j = 0; j < threads.length; j++) {
                threads[j].start();
            }

            // join the threads
            for (int j = 0; j < threads.length; j++) {
                threads[j].join();
            }

            // 等待所有线程执行完毕,关闭httpclient

        } finally {
            httpclient.close();
        }
    }

    /**
     * A thread that performs a GET.
     */
    static class GetThread extends Thread {

        private final CloseableHttpClient httpClient;
        private final HttpContext context;
        private final HttpGet httpget;
        private final int id;

        public GetThread(CloseableHttpClient httpClient, HttpGet httpget, int id) {
            this.httpClient = httpClient;
            this.context = new BasicHttpContext();
            this.httpget = httpget;
            this.id = id;
        }

        /**
         * Executes the GetMethod and prints some status information.
         */
        @Override
        public void run() {
            try {
                System.out.println(id + " - about to get something from " + httpget.getURI());
                CloseableHttpResponse response = httpClient.execute(httpget, context);
                try {
                    System.out.println(id + " - get executed");
                    // get the response body as an array of bytes
                    HttpEntity entity = response.getEntity();
                    if (entity != null) {
                        byte[] bytes = EntityUtils.toByteArray(entity);
                        System.out.println(id + " - " + bytes.length + " bytes read");
                    }
                } finally {
                    response.close();
                }
            } catch (Exception e) {
                System.out.println(id + " - error: " + e);
            }
        }

    }

}
删除过期连接
/**
 * Example demonstrating how to evict expired and idle connections
 * from the connection pool.
 */
public class ClientEvictExpiredConnections {

    public static void main(String[] args) throws Exception {
        PoolingHttpClientConnectionManager cm = new PoolingHttpClientConnectionManager();
        cm.setMaxTotal(100);
        CloseableHttpClient httpclient = HttpClients.custom()
                .setConnectionManager(cm)
                .evictExpiredConnections()
                .evictIdleConnections(5L, TimeUnit.SECONDS)
                .build();
        try {
            // create an array of URIs to perform GETs on
            String[] urisToGet = {
                "http://hc.apache.org/",
                "http://hc.apache.org/httpcomponents-core-ga/",
                "http://hc.apache.org/httpcomponents-client-ga/",
            };

            for (int i = 0; i < urisToGet.length; i++) {
                String requestURI = urisToGet[i];
                HttpGet request = new HttpGet(requestURI);

                System.out.println("Executing request " + requestURI);

                CloseableHttpResponse response = httpclient.execute(request);
                try {
                    System.out.println("----------------------------------------");
                    System.out.println(response.getStatusLine());
                    System.out.println(EntityUtils.toString(response.getEntity()));
                } finally {
                    response.close();
                }
            }

            PoolStats stats1 = cm.getTotalStats();
            System.out.println("Connections kept alive: " + stats1.getAvailable());

            // Sleep 10 sec and let the connection evictor do its job
            Thread.sleep(10000);

            PoolStats stats2 = cm.getTotalStats();
            System.out.println("Connections kept alive: " + stats2.getAvailable());

        } finally {
            httpclient.close();
        }
    }

}
自定义SSL上下文
此示例演示如何使用自定义SSL上下文创建安全连接。
/**
 * This example demonstrates how to create secure connections with a custom SSL
 * context.
 */
public class ClientCustomSSL {

    public final static void main(String[] args) throws Exception {
        // Trust own CA and all self-signed certs
        SSLContext sslcontext = SSLContexts.custom()
                .loadTrustMaterial(new File("my.keystore"), "nopassword".toCharArray(),
                        new TrustSelfSignedStrategy())
                .build();
        // Allow TLSv1 protocol only
        SSLConnectionSocketFactory sslsf = new SSLConnectionSocketFactory(
                sslcontext,
                new String[] { "TLSv1" },
                null,
                SSLConnectionSocketFactory.getDefaultHostnameVerifier());
        CloseableHttpClient httpclient = HttpClients.custom()
                .setSSLSocketFactory(sslsf)
                .build();
        try {

            HttpGet httpget = new HttpGet("https://httpbin.org/");

            System.out.println("Executing request " + httpget.getRequestLine());

            CloseableHttpResponse response = httpclient.execute(httpget);
            try {
                HttpEntity entity = response.getEntity();

                System.out.println("----------------------------------------");
                System.out.println(response.getStatusLine());
                EntityUtils.consume(entity);
            } finally {
                response.close();
            }
        } finally {
            httpclient.close();
        }
    }

}
代理隧道
此示例显示如何使用ProxyClient通过HTTP代理为任意协议建立隧道。
/**
 * Example code for using {@link ProxyClient} in order to establish a tunnel through an HTTP proxy.
 */
public class ProxyTunnelDemo {

    public final static void main(String[] args) throws Exception {

        ProxyClient proxyClient = new ProxyClient();
        HttpHost target = new HttpHost("www.yahoo.com", 80);
        HttpHost proxy = new HttpHost("localhost", 8888);
        UsernamePasswordCredentials credentials = new UsernamePasswordCredentials("user", "pwd");
        Socket socket = proxyClient.tunnel(proxy, target, credentials);
        try {
            Writer out = new OutputStreamWriter(socket.getOutputStream(), HTTP.DEF_CONTENT_CHARSET);
            out.write("GET / HTTP/1.1\r\n");
            out.write("Host: " + target.toHostString() + "\r\n");
            out.write("Agent: whatever\r\n");
            out.write("Connection: close\r\n");
            out.write("\r\n");
            out.flush();
            BufferedReader in = new BufferedReader(
                    new InputStreamReader(socket.getInputStream(), HTTP.DEF_CONTENT_CHARSET));
            String line = null;
            while ((line = in.readLine()) != null) {
                System.out.println(line);
            }
        } finally {
            socket.close();
        }
    }

}
异步请求
@Slf4j
public class ClientWithRequestFuture {

    public static void main(String[] args) throws Exception {

        // 创建异步请求最简单的方式
        HttpClient httpclient = HttpClientBuilder.create()
                .setMaxConnPerRoute(5)
                .setMaxConnTotal(5).build();
        ExecutorService execService = Executors.newFixedThreadPool(5);
        FutureRequestExecutionService requestExecService = new FutureRequestExecutionService(httpclient, execService);


        try {

            // 因为所有东西都是异步的,因此需要提供1个响应处理器
            ResponseHandler<Boolean> handler = new ResponseHandler<Boolean>() {
                @Override
                public Boolean handleResponse(HttpResponse response) throws ClientProtocolException, IOException {
                    log.info("ResponseHandler#handleResponse: {}", response.getStatusLine().getStatusCode());
                    log.info("ResponseHandler#handleResponse: {}", EntityUtils.toString(response.getEntity()));
                    // simply return true if the status was OK
                    return response.getStatusLine().getStatusCode() == 200;
                }
            };

            // 《发起1个异步请求》
            HttpGet request1 = new HttpGet("http://httpbin.org/get");
            log.info("发请第1个请求 start");
            HttpRequestFutureTask<Boolean> futureTask1 = requestExecService.execute(request1, HttpClientContext.create(), handler);
            log.info("发请第1个请求 end");
            Boolean wasItOk1 = futureTask1.get();
            log.info("It was ok? {}", wasItOk1);

            // 《取消1个异步请求》
            try {
                HttpGet request2 = new HttpGet("http://httpbin.org/get");
                log.info("发请第2个请求 start");
                HttpRequestFutureTask<Boolean> futureTask2 = requestExecService.execute(request2, HttpClientContext.create(), handler);
                log.info("发请第2个请求 end");
                futureTask2.cancel(true);
                log.info("取消第2个请求");
                Boolean wasItOk2 = futureTask2.get();
                log.info("It was cancelled so it should never print this: {}", wasItOk2);
            } catch (CancellationException e) {
                log.info("We cancelled it, so this is expected");
            }

            // 《异步请求超时》
            HttpGet request3 = new HttpGet("http://httpbin.org/get");
            log.info("发请第3个请求 start");
            HttpRequestFutureTask<Boolean> futureTask3 = requestExecService.execute(request3,HttpClientContext.create(), handler);
            log.info("发请第3个请求 end");
            // 在指定的时间内,没有响应,则抛出超时异常
            Boolean wasItOk3 = futureTask3.get(100, TimeUnit.MILLISECONDS);
            log.info("It was ok? {}", wasItOk3);

            //《请求回调》
            // 回调的执行与handler的执行是同1个线程,先执行handler,再执行回调
            FutureCallback<Boolean> callback = new FutureCallback<Boolean>() {
                @Override
                public void completed(Boolean result) {
                    log.info("completed with " + result);
                }

                @Override
                public void failed(Exception ex) {
                    log.info("failed with " + ex.getMessage());
                }

                @Override
                public void cancelled() {
                    log.info("cancelled");
                }
            };

            // 发起简单请求时,添加1个回调
            HttpGet request4 = new HttpGet("http://httpbin.org/get");
            // 当任务 完成、失败、取消 时,回调会被执行
            HttpRequestFutureTask<Boolean> futureTask4 = requestExecService.execute(request4, HttpClientContext.create(), handler, callback);
            Boolean wasItOk4 = futureTask4.get(10, TimeUnit.SECONDS);
            System.out.println("It was ok? "  + wasItOk4);
        } finally {
            requestExecService.close();
        }
    }
}
Fluent流式
FluentRequests
/**
 * This example demonstrates basics of request execution with the HttpClient fluent API.
 */
public class FluentRequests {

    public static void main(String[] args)throws Exception {
        // Execute a GET with timeout settings and return response content as String.
        Request.Get("http://somehost/")
                .connectTimeout(1000)
                .socketTimeout(1000)
                .execute().returnContent().asString();

        // Execute a POST with the 'expect-continue' handshake, using HTTP/1.1,
        // containing a request body as String and return response content as byte array.
        Request.Post("http://somehost/do-stuff")
                .useExpectContinue()
                .version(HttpVersion.HTTP_1_1)
                .bodyString("Important stuff", ContentType.DEFAULT_TEXT)
                .execute().returnContent().asBytes();

        // Execute a POST with a custom header through the proxy containing a request body
        // as an HTML form and save the result to the file
        Request.Post("http://somehost/some-form")
                .addHeader("X-Custom-header", "stuff")
                .viaProxy(new HttpHost("myproxy", 8080))
                .bodyForm(Form.form().add("username", "vip").add("password", "secret").build())
                .execute().saveContent(new File("result.dump"));
    }
FluentResponseHandling
/**
 * This example demonstrates how the HttpClient fluent API can be used to handle HTTP responses
 * without buffering content body in memory.
 */
public class FluentResponseHandling {

    public static void main(String[] args)throws Exception {
        Document result = Request.Get("http://somehost/content")
                .execute().handleResponse(new ResponseHandler<Document>() {

            @Override
            public Document handleResponse(final HttpResponse response) throws IOException {
                StatusLine statusLine = response.getStatusLine();
                HttpEntity entity = response.getEntity();
                if (statusLine.getStatusCode() >= 300) {
                    throw new HttpResponseException(
                            statusLine.getStatusCode(),
                            statusLine.getReasonPhrase());
                }
                if (entity == null) {
                    throw new ClientProtocolException("Response contains no content");
                }
                DocumentBuilderFactory dbfac = DocumentBuilderFactory.newInstance();
                try {
                    DocumentBuilder docBuilder = dbfac.newDocumentBuilder();
                    ContentType contentType = ContentType.getOrDefault(entity);
                    if (!contentType.equals(ContentType.APPLICATION_XML)) {
                        throw new ClientProtocolException("Unexpected content type:" + contentType);
                    }
                    Charset charset = contentType.getCharset();
                    if (charset == null) {
                        charset = Consts.ISO_8859_1;
                    }
                    return docBuilder.parse(entity.getContent(), charset.name());
                } catch (ParserConfigurationException ex) {
                    throw new IllegalStateException(ex);
                } catch (SAXException ex) {
                    throw new ClientProtocolException("Malformed XML document", ex);
                }
            }

            });
        // Do something useful with the result
        System.out.println(result);
    }

}
FluentExecutor
/**
 * This example demonstrates how the he HttpClient fluent API can be used to execute multiple
 * requests within the same security context. The Executor class maintains a common context shared
 * by all requests executed with it. The Executor is thread-safe and can be used to execute
 * requests concurrently from multiple threads of execution.
 */
public class FluentExecutor {

    public static void main(String[] args)throws Exception {
        Executor executor = Executor.newInstance()
                .auth(new HttpHost("somehost"), "username", "password")
                .auth(new HttpHost("myproxy", 8080), "username", "password")
                .authPreemptive(new HttpHost("myproxy", 8080));

        // Execute a GET with timeout settings and return response content as String.
        executor.execute(Request.Get("http://somehost/")
                .connectTimeout(1000)
                .socketTimeout(1000)
                ).returnContent().asString();

        // Execute a POST with the 'expect-continue' handshake, using HTTP/1.1,
        // containing a request body as String and return response content as byte array.
        executor.execute(Request.Post("http://somehost/do-stuff")
                .useExpectContinue()
                .version(HttpVersion.HTTP_1_1)
                .bodyString("Important stuff", ContentType.DEFAULT_TEXT)
                ).returnContent().asBytes();

        // Execute a POST with a custom header through the proxy containing a request body
        // as an HTML form and save the result to the file
        executor.execute(Request.Post("http://somehost/some-form")
                .addHeader("X-Custom-header", "stuff")
                .viaProxy(new HttpHost("myproxy", 8080))
                .bodyForm(Form.form().add("username", "vip").add("password", "secret").build())
                ).saveContent(new File("result.dump"));
    }

}
FluentAsync
/**
 * This example demonstrates how the he HttpClient fluent API can be used to execute multiple
 * requests asynchronously using background threads.
 */
public class FluentAsync {

    public static void main(String[] args)throws Exception {
        // Use pool of two threads
        ExecutorService threadpool = Executors.newFixedThreadPool(2);
        Async async = Async.newInstance().use(threadpool);

        Request[] requests = new Request[] {
                Request.Get("http://www.google.com/"),
                Request.Get("http://www.yahoo.com/"),
                Request.Get("http://www.apache.com/"),
                Request.Get("http://www.apple.com/")
        };


        Queue<Future<Content>> queue = new LinkedList<Future<Content>>();
        // Execute requests asynchronously
        for (final Request request: requests) {
            Future<Content> future = async.execute(request, new FutureCallback<Content>() {

                @Override
                public void failed(final Exception ex) {
                    System.out.println(ex.getMessage() + ": " + request);
                }

                @Override
                public void completed(final Content content) {
                    System.out.println("Request completed: " + request);
                }

                @Override
                public void cancelled() {
                }

            });
            queue.add(future);
        }

        while(!queue.isEmpty()) {
            Future<Content> future = queue.remove();
            try {
                future.get();
            } catch (ExecutionException ex) {
            }
        }
        System.out.println("Done");
        threadpool.shutdown();
    }

}