目录
一、后端
二、前端
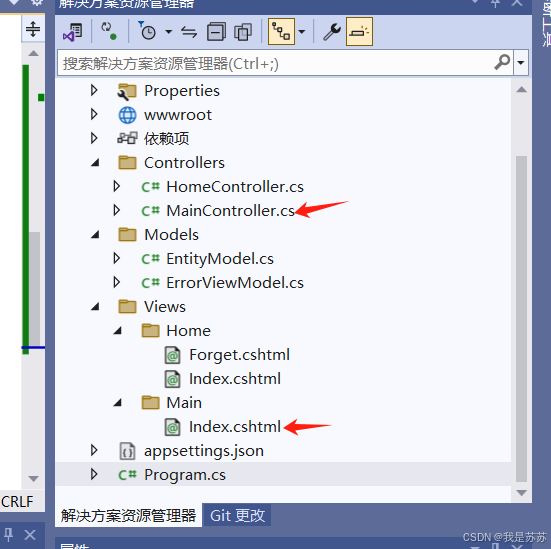
三、代码位置
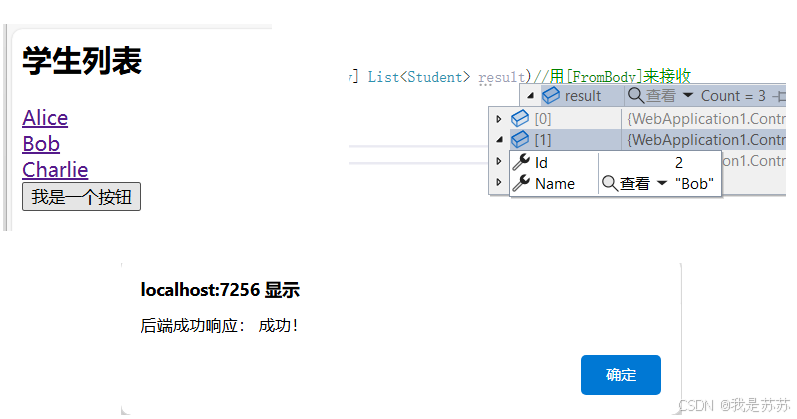
四、实现效果
五、关键的点
1.后端传输给前端:
2.前端传输给后端
一、后端
using Microsoft.AspNetCore.Mvc;
using Microsoft.AspNetCore.Mvc.RazorPages;
using Microsoft.AspNetCore.Mvc.Rendering;
using WebApplication1.Models;

namespace WebApplication1.Controllers
{
    public class MainController : Controller
    {

        public class Student
        {
            public int Id { get; set; }
            public string Name { get; set; }
        }

        public IActionResult Index()
        {
            // 构造学生列表数据
            List<Student> students = new List<Student>
            {
                new Student { Id = 1, Name = "Alice" },
                new Student { Id = 2, Name = "Bob" },
                new Student { Id = 3, Name = "Charlie" }
            };
            ViewData["Students"]= students;
            return View(); // 将学生列表传递给视图
        }
        [HttpPost]
        public ActionResult ProcessStudent([FromBody] List<Student> result)//用[FromBody]来接收
        {
            // 返回示例:假设直接返回成功信息
            return Content($"成功!");
        }
    }
}
二、前端
@using static WebApplication1.Controllers.MainController
@{
    var stulist = ViewData["Students"] as List<Student>;//声明后端的ViewData,注意需要as关键字转化为实体
}

<h2>学生列表</h2>

@foreach (var student in stulist)//声明过后可以直接遍历
{
    <div>
        <a class="student-link" href="#" data-student-id="@student.Id" data-student-name="@student.Name">
            @student.Name
        </a>
    </div>
}

<button id="submitButton">我是一个按钮</button>
<script src="https://code.jquery.com/jquery-3.6.0.min.js"></script>

<script>
    var selectedStudentId = null;
    var selectedStudentName = null;

    $(document).ready(function () {
        //class=student-link订阅点击事件
        $('.student-link').click(function () {
            // 获取被点击链接的数据
            selectedStudentId = $(this).data('student-id');
            selectedStudentName = $(this).data('student-name');
            console.log(`Selected student: id=${selectedStudentId}, name=${selectedStudentName}`);//打印到控制台
        });

        //id=submitButton订阅点击事件
        $('#submitButton').click(function () {
            var allStudents = []; // 存放所有学生信息
            // 遍历所有学生,收集学生信息
            $('.student-link').each(function () {
                var studentId = $(this).data('student-id');//自定义属性不可以用Val()
                var studentName = $(this).data('student-name');
                allStudents.push({ id: studentId, name: studentName });//存入列表中
            });

            // 在这里提交所有学生信息
            $.ajax({
                url: '@Url.Action("ProcessStudent", "Main")',//将发送一个POST请求到MainController的ProcessStudent方法中
                type: 'POST',
                contentType: 'application/json',
                data: JSON.stringify(allStudents),//JSON格式发送
                success: function (response) {
                    alert('后端成功响应: ' + response);
                },
                error: function () {
                    alert('后端未成功相应');
                }
            });
        });
    });
</script>
三、代码位置
四、实现效果
五、关键的点
1.后端传输给前端:
①需要声明和强制转换
@{
    var stulist = ViewData["Students"] as List<Student>;//声明后端的ViewData,注意需要as关键字转化为实体
}②只能在同一个控制器+方法名传输,例如Controller/MainController的Index方法的ViewData(或者ViewBag)只可以传输给Views/Main/Index.cshtml,不能够传递给其余前端界面。
2.前端传输给后端
①需要写清楚url和type(传输类型),以下url表示发送一个POST请求到MainController的ProcessStudent方法中
url: '@Url.Action("ProcessStudent", "Main")'
type: 'POST',②后端接收也需要注明类型和方法名(要和前端一一对应好),用JSON传递还需要加上[FromBody]强制转化为实体
[HttpPost]
public ActionResult ProcessStudent([FromBody] List<Student> result)//用[FromBody]来接收
{
// 返回示例:假设直接返回成功信息
return Content($"成功!");
}