1.修改IO配置
以GPIO92为例

IO配置文件在:
bsp/kernel/kernel4.14/arch/arm64/boot/dts/sprd/uis8581e5h10.dts
bsp/bootloader/u-boot15/board/spreadtrum/uis8581e5h10/pinmap-sp9863a.c
配置
按上述内容,配置IO口
![]()
编译之前查看硬件GPIO,没有GPIO92
cat d/gpio

编译
2.ADB操作GPIO
adb shell
su
echo 284 > /sys/class/gpio/export
echo out > /sys/class/gpio/gpio284/direction
cat d/gpio
查看

echo 1 > /sys/class/gpio/gpio284/value输出高电平
实测正常
3.安卓源码下C文件编译
创建文件夹及相关文件
test/Android.mk
LOCAL_PATH:= $(call my-dir)
include $(CLEAR_VARS)

LOCAL_STATIC_LIBRARIES := libcutils libc
LOCAL_MODULE :=   gpiotest

LOCAL_FORCE_STATIC_EXECUTABLE := true
LOCAL_SRC_FILES:= \
         gpiotest.c

LOCAL_C_INCLUDES := bionic/libc/bionic

ifeq ($(HAVE_SELINUX),true)
LOCAL_CFLAGS += -DHAVE_SELINUX
LOCAL_SHARED_LIBRARIES += libselinux
LOCAL_C_INCLUDES += external/libselinux/include
endif

include $(BUILD_EXECUTABLE)
test/gpiotest.c
#include<stdio.h>

int main()
{
    printf("Hello World!\n");
}
进入目录angleyes/test,编译
cp -rf vendor/sprd/release/IDH/uis8581e5h10_Natv-userdebug-native/out/ .
cp -rf vendor/sprd/release/IDH/uis8581e5h10_Natv-userdebug-native/bsp/ .
source build/envsetup.sh
lunch uis8581e5h10_Natv-userdebug-native
mm
找到输出目录
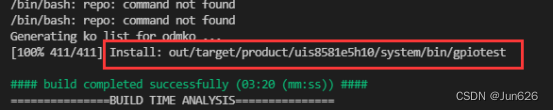
上传到设备上
adb root
adb disable-verity
adb reboot
adb root
adb remount
adb shell
mount -o rw,remount /system
exit
adb push gpiotest /system![]()
测试代码
chmod a+x gpiotest
./gpiotest
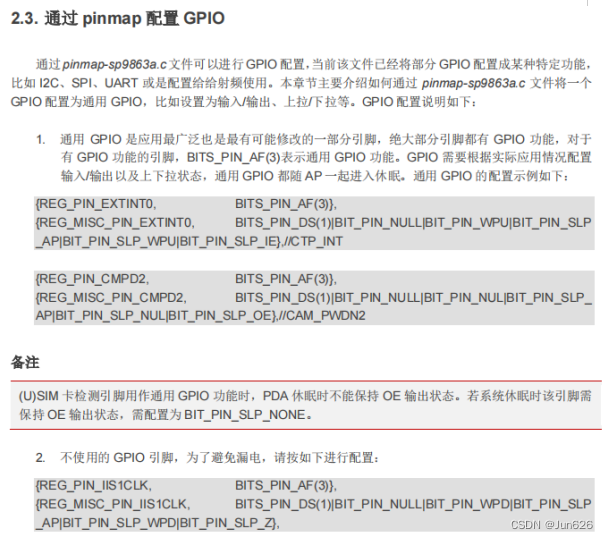
4.通过源码控制GPIO
将上部分的c文件修改一下
#include <stdio.h>
#include <string.h>
#include <fcntl.h>// for open
#include <unistd.h>// for close

int main()
{
    int ret, fd;
    fd = open("/sys/class/gpio/export", O_WRONLY);
    if (fd < 0)
    return -1;
    ret = write(fd, "284", strlen("284")); if (ret < 0)
    return -1;
    close(fd);
    fd = open("/sys/class/gpio/gpio284/direction", O_RDWR);
    if (fd < 0)
    return -1;
    ret = write(fd, "out", strlen("out"));
    if (ret < 0)
    return -1;
    close(fd);
    fd = open("/sys/class/gpio/gpio284/value", O_RDWR);
    if (fd < 0)
    return -1;
    ret = write(fd, "1", strlen("1"));
    if (ret < 0)
    return -1;
    close(fd);
}
测试
uis8581e5h10:/system # chmod a+x gpiotest
uis8581e5h10:/system # ls /sys/class/gpio/
export  gpio218 gpiochip176 gpiochip448 gpiochip480 unexport
gpio217 gpio268 gpiochip192 gpiochip464 gpiochip496
uis8581e5h10:/system # ./gpiotest
uis8581e5h10:/system # ls /sys/class/gpio/
export  gpio218 gpio284     gpiochip192 gpiochip464 gpiochip496
gpio217 gpio268 gpiochip176 gpiochip448 gpiochip480 unexport
uis8581e5h10:/system #
5.按键功能调试
设备树位置:bsp/kernel/kernel4.14/arch/arm64/boot/dts/sprd/uis8581e5h10.dts
修改节点:gpio-keys
如新增sos按键
key-sos {
			label = "SOS Key";
			linux,code = <KEY_F1>;
			gpios = <&ap_gpio 55 GPIO_ACTIVE_LOW>;
			debounce-interval = <2>;
			wakeup-source;
		};
在内核层查看
cat /sys/kernel/debug/gpio

配置pinmap
gpio55:REG_PIN_SPI2_CLK
gpio123:REG_PIN_KEYOUT2
gpio28:REG_PIN_RFCTL9
在pinmap里面,找到对应内容

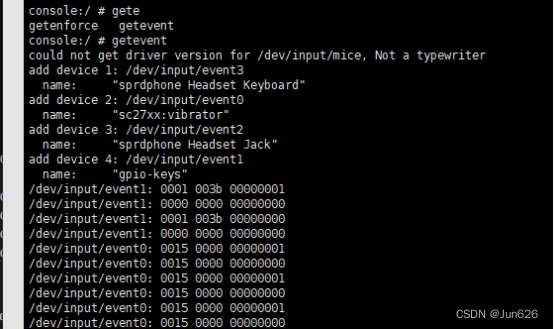
编译,通过命令;getevent -p
查看按键消息
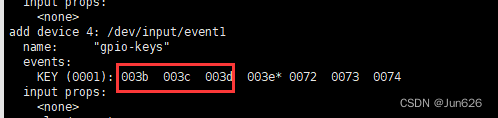
通过命令:getevent
监听按键