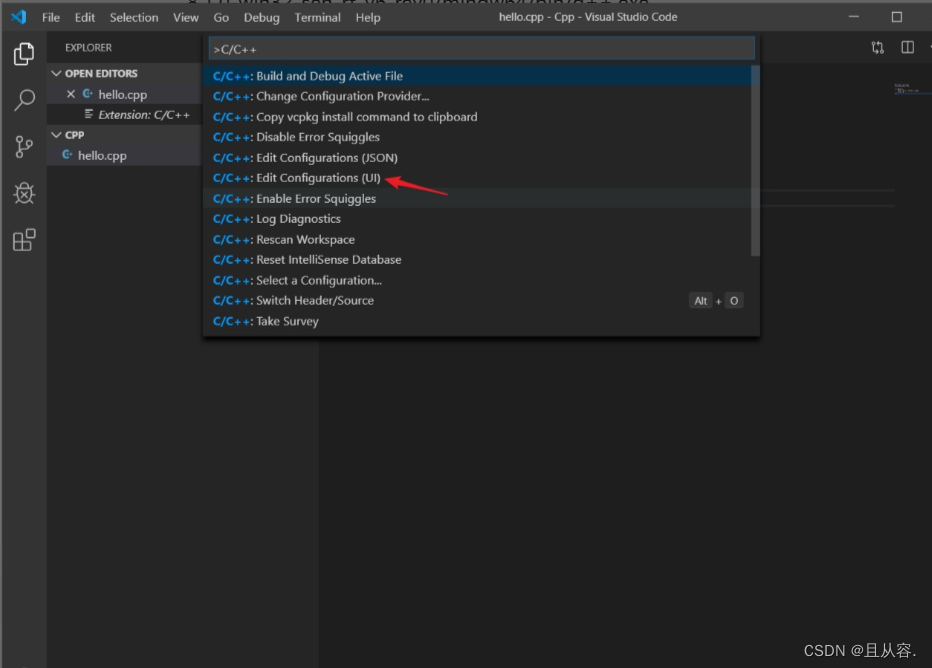
(1).配置编译器
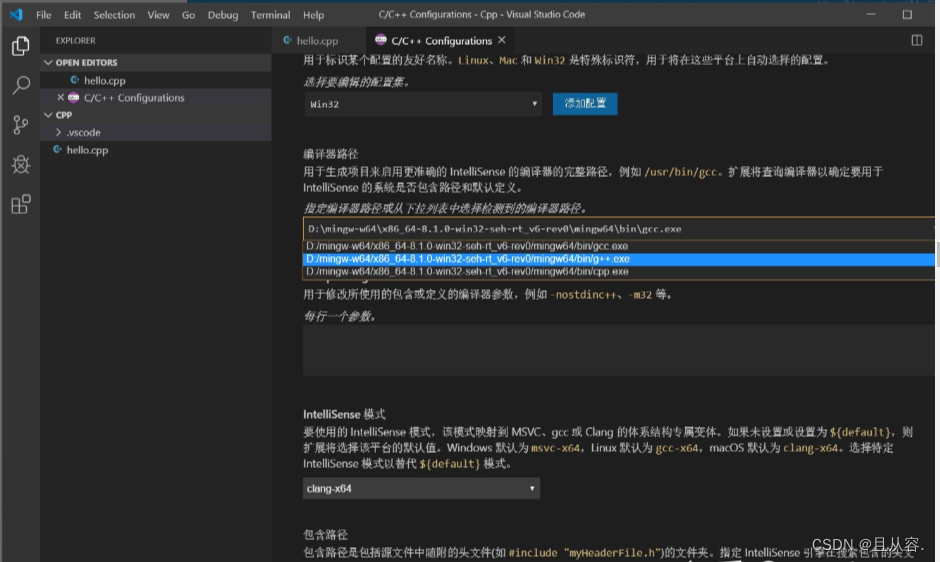
接下来配置编译器路径,按快捷键Ctrl+Shift+P调出命令面板,输入C/C++,选择“Edit Configurations(UI)”进入配置。这里配置两个选项: - 编译器路径:D:/mingw-w64/x86_64-8.1.0-win32-seh-rt_v6-rev0/mingw64/bin/g++.exe
这里的路径根据大家自己安装的Mingw编译器位置和配置的环境变量位置所决定。
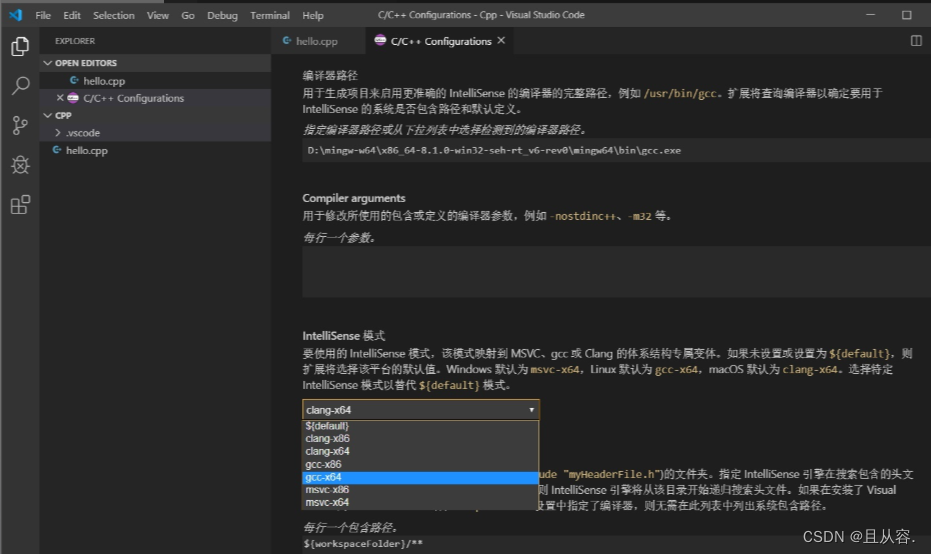
IntelliSense 模式:gcc-x64
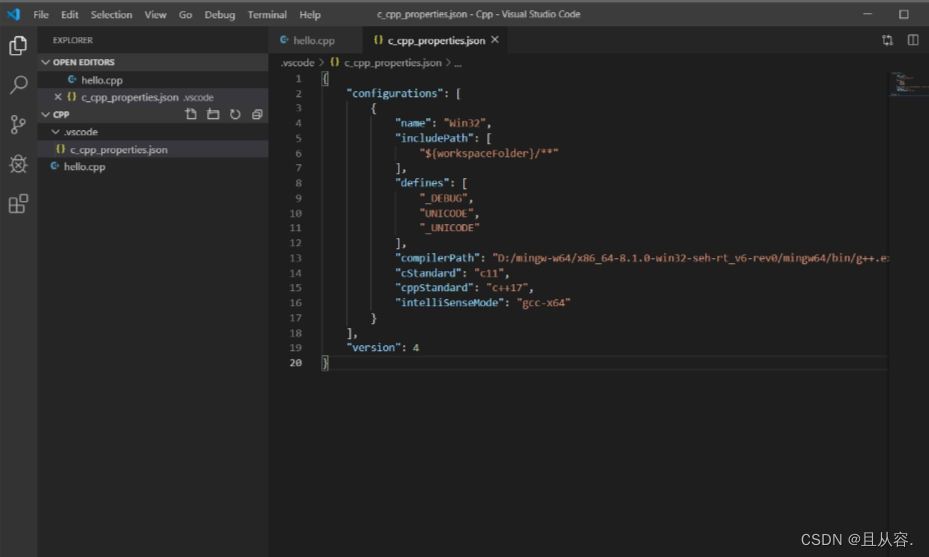
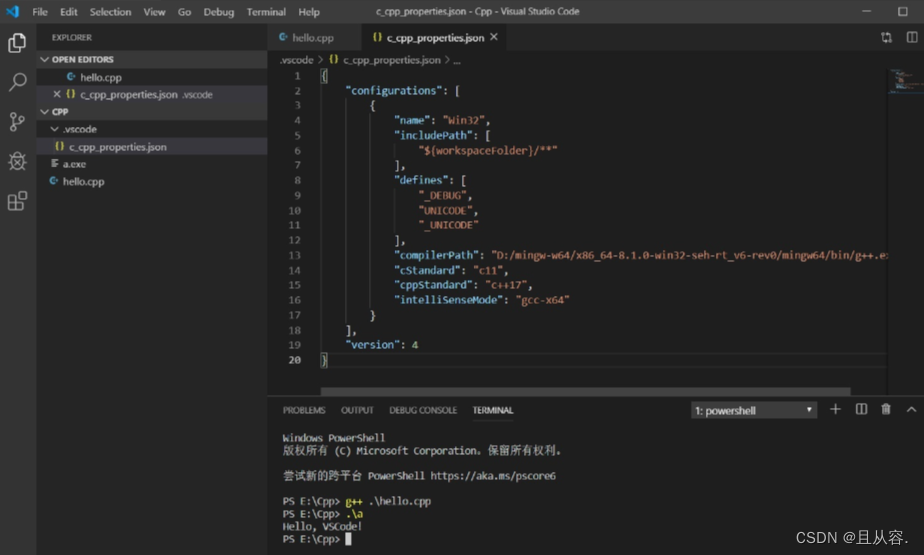
配置完成后,此时在侧边栏可以发现多了一个.vscode文件夹,并且里面有一个c_cpp_properties.json文件,内容如下,说明上述配置成功。现在可以通过Ctrl+<`快捷键打开内置终端并进行编译运行了。
{
    "configurations": [
        {
            "name": "Win32",
            "includePath": [
                "${workspaceFolder}/**"
            ],
            "defines": [
                "_DEBUG",
                "UNICODE",
                "_UNICODE"
            ],
            //此处是编译器路径,以后可直接在此修改
            "compilerPath": "D:/mingw-w64/x86_64-8.1.0-win32-seh-rt_v6-rev0/mingw64/bin/g++.exe",
            "cStandard": "c11",
            "cppStandard": "c++17",
            "intelliSenseMode": "gcc-x64"
        }
    ],
    "version": 4
}
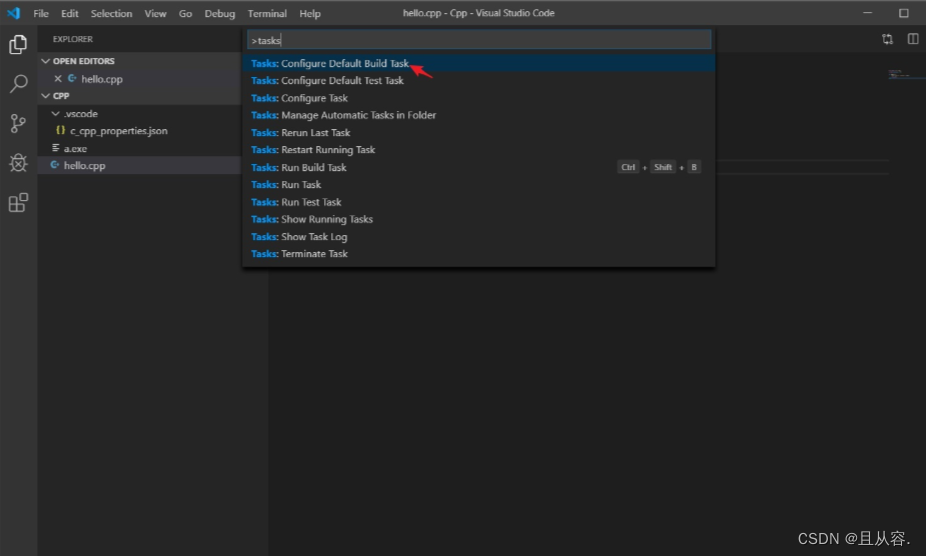
(2).配置构建任务
接下来,创建一个tasks.json文件来告诉VS Code如何构建(编译)程序。该任务将调用g++编译器基于源代码创建可执行文件。 按快捷键Ctrl+Shift+P调出命令面板,输入tasks,选择“Tasks:Configure Default Build Task”:
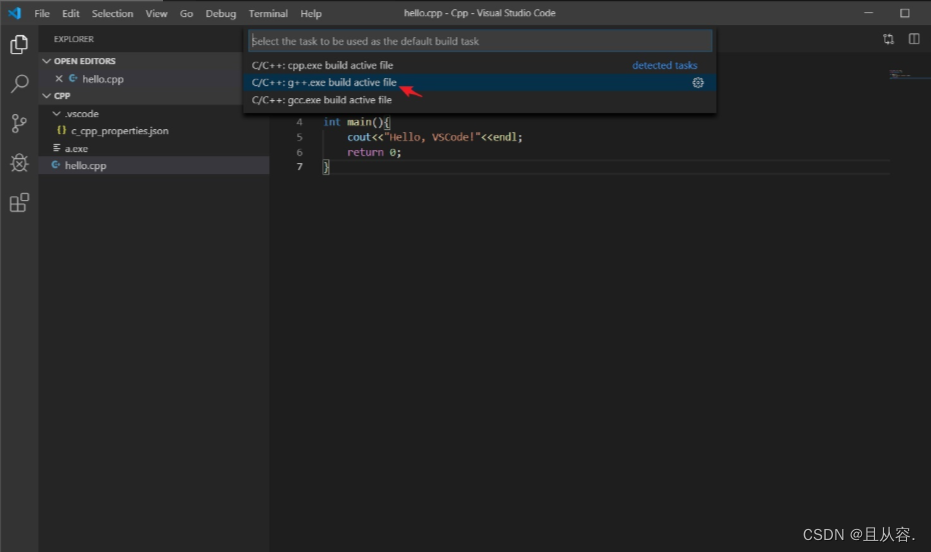
再选择“C/C++: g++.exe build active file”:
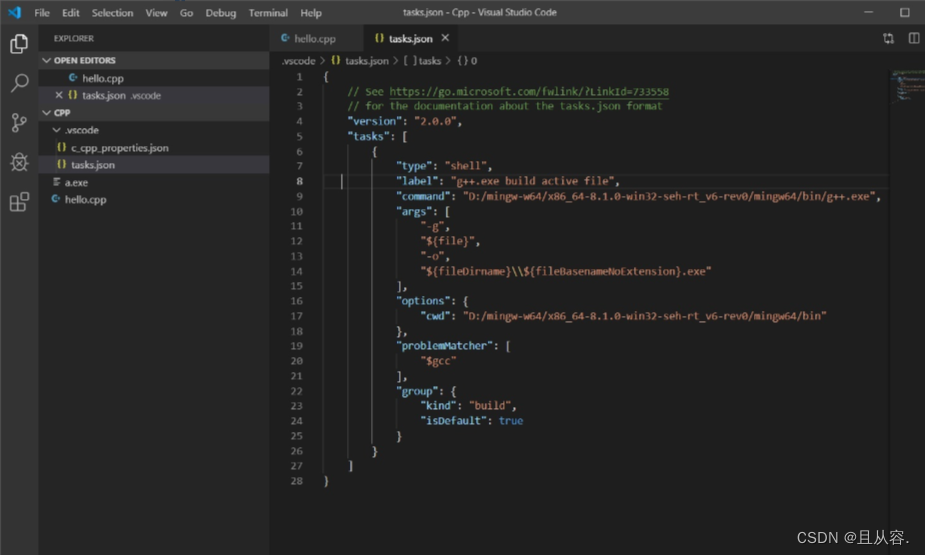
此时会出现一个名为tasks.json的配置文件,内容如下:
{
// See https://go.microsoft.com/fwlink/?LinkId=733558
// for the documentation about the tasks.json format
“version”: “2.0.0”,
“tasks”: [
{
“type”: “shell”,
“label”: “g++.exe build active file”,//任务的名字,就是刚才在命令面板中选择的时候所看到的,可以自己设置
         "command": "D:/mingw-w64/x86_64-8.1.0-win32-seh-rt_v6-rev0/mingw64/bin/g++.exe",
            "args": [//编译时候的参数
                "-g",//添加gdb调试选项
                "${file}",
                "-o",//指定生成可执行文件的名称
                "${fileDirname}\\${fileBasenameNoExtension}.exe"
            ],
            "options": {
                "cwd": "D:/mingw-w64/x86_64-8.1.0-win32-seh-rt_v6-rev0/mingw64/bin"
            },
            "problemMatcher": [
                "$gcc"
            ],
            "group": {
                "kind": "build",
                "isDefault": true//表示快捷键Ctrl+Shift+B可以运行该任务
            }
        }
    ]
}
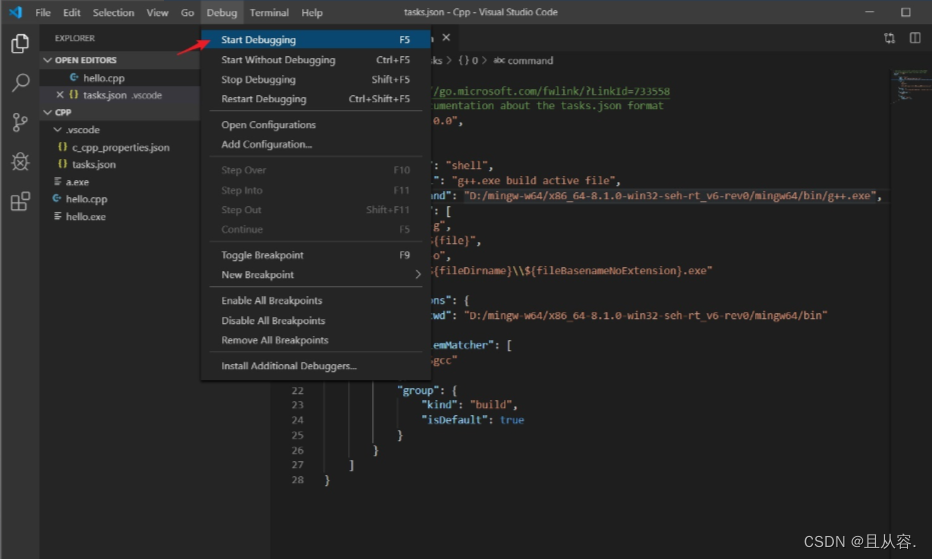
(3).配置调试设置
这里主要是为了在.vscode文件夹中产生一个launch.json文件,用来配置调试的相关信息。点击菜单栏的Debug–>Start Debugging:
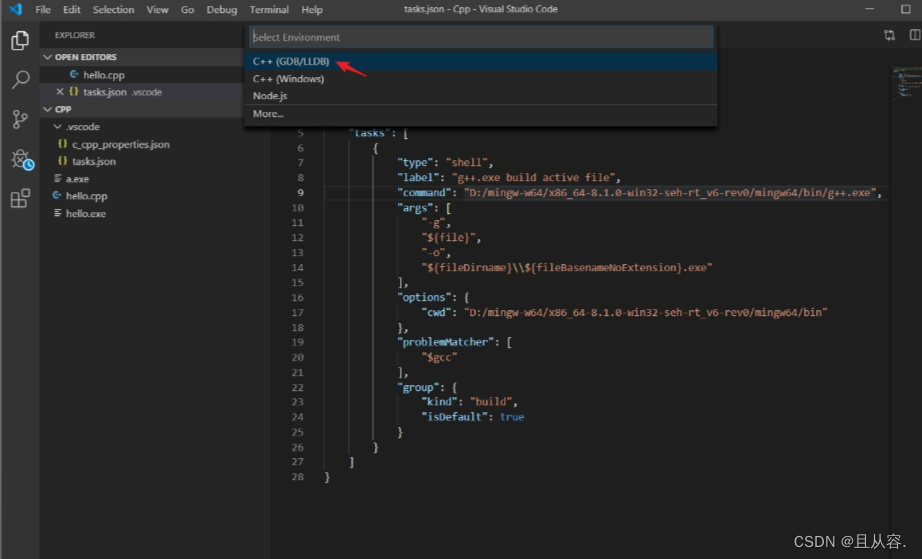
选择C++(GDB/LLDB):
紧接着会产生一个launch.json的文件: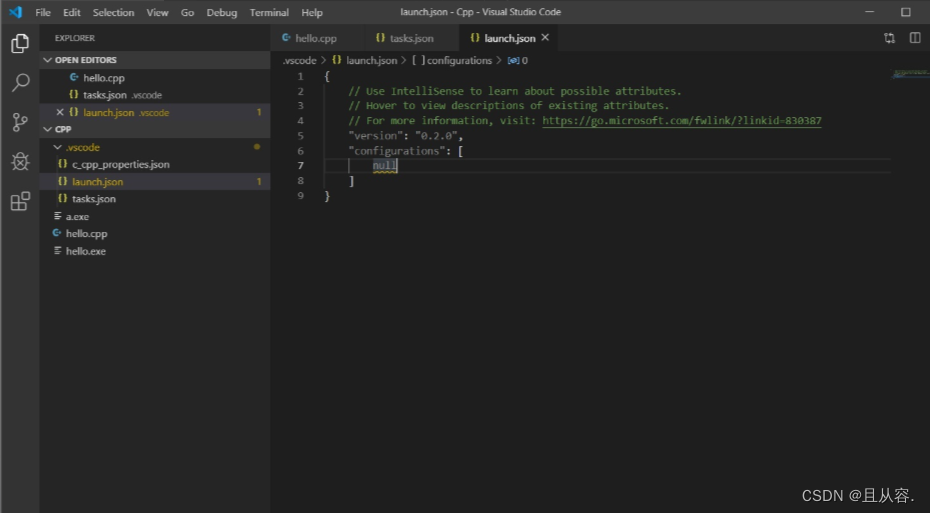
如果是在编写好的c++代码文件页面进行上述过程,会一直报"Unable to create ‘launch.json’ file inside the ‘.vscode’ folder (Cannot read property ‘name’ of undefined)."的错误,网上也没有找到相关的解决办法,但如果在之前已经创建好的json文件页面进行创建launch.json文件的过程,是可以正常进行的。
如果配置完仍不可正常运行,可以直接复制配置文件中的内容,
launch.json
{
    // 使用 IntelliSense 了解相关属性。
    // 悬停以查看现有属性的描述。
    // 欲了解更多信息,请访问: https://go.microsoft.com/fwlink/?linkid=830387

    "version": "0.2.0",
    "configurations": [

    {
             "name": "g++.exe build and debug active file",
             "type": "cppdbg",
             "request": "launch",
             "program": "${fileDirname}\\${fileBasenameNoExtension}.exe",
             "args": [],
             "stopAtEntry": false,
             "cwd": "${workspaceFolder}",
             "environment": [],
             "externalConsole": true,      //修改此项,让其弹出终端
             "MIMode": "gdb",
             "miDebuggerPath": "E:\\MinGW\\bin\\gdb.exe",
             "setupCommands": [
                 {
                     "description": "Enable pretty-printing for gdb",
                     "text": "-enable-pretty-printing",
                     "ignoreFailures": true
                 }
             ],
             "preLaunchTask": "task g++" //修改此项
         }


    ]
}
注:launch.json文件中preLaunchTask的值要和task.json里的label值一致
建议大家配置成功后,将.vscode文件夹备份一份,以后需要的时候直接复制即可,不用再花时间进行配置了。


![[NPUCTF2020]ezinclude](https://img-blog.csdnimg.cn/58bee4ab7031486198f49ba7aafff1a0.png)