目录
- 1、下载
- 2、安装
- 3、设置开机自启
- 4、登录系统
- 5、配置中央仓库
- 6、用户管理
- 7、创建仓库
- 8、代码推送
- 9、引入私有仓库包
1、下载
-
搭建版本:3.45.0
-
下载地址:https://help.sonatype.com/repomanager3/product-information/download

2、安装
-
安装目录:
/home/nexus# 创建安装目录 mkdir /home/nexus将下载的
nexus-3.45.0-01-unix.tar.gz上传到/home/nexus下 -
解压操作
# 解压 tar -zxvf nexus-3.45.0-01-unix.tar.gz -
配置nexus
neuxs的默认占用内存大小为2703m,可以根据实际情况进行适当的修改
# 修改nexus.vmoptions文件
vim /home/nexus/nexus-3.45.0-01/bin/nexus.vmoptions

# 原始内容如下:
-Xms2703m
-Xmx2703m
-XX:MaxDirectMemorySize=2703m
-
配置端口
neuxs的默认使用8081端口,如果存在冲突可以在nexus-default.properties中进行修改# 修改nexus-default.properties文件 vim /home/nexus/nexus-3.45.0-01/etc/nexus-default.properties # 修改端口为9090,需要防火墙开通端口 application-port=9090 -
配置Root用户
# 编辑nexus.rc文件 vim /home/nexus/nexus-3.45.0-01/bin/nexus.rc # 内容如下,开通就是存在`#`号 #run_as_user="root" ============================================== # 编辑nexus文件 vim /home/nexus/nexus-3.45.0-01/bin/nexus # 将run_as_root=false改为run_as_root=true run_as_root=true -
配置jdk
# 编辑nexus文件 vim /home/nexus/nexus-3.45.0-01/bin/nexus # 内容如下 INSTALL4J_JAVA_HOME_OVERRIDE=/usr/local/java/jdk1.8.0_131 -
开始安装及运行
# 进入bin目录 /home/nexus/nexus-3.45.0-01/bin # 安装及后台运行 ./nexus run -
测试访问
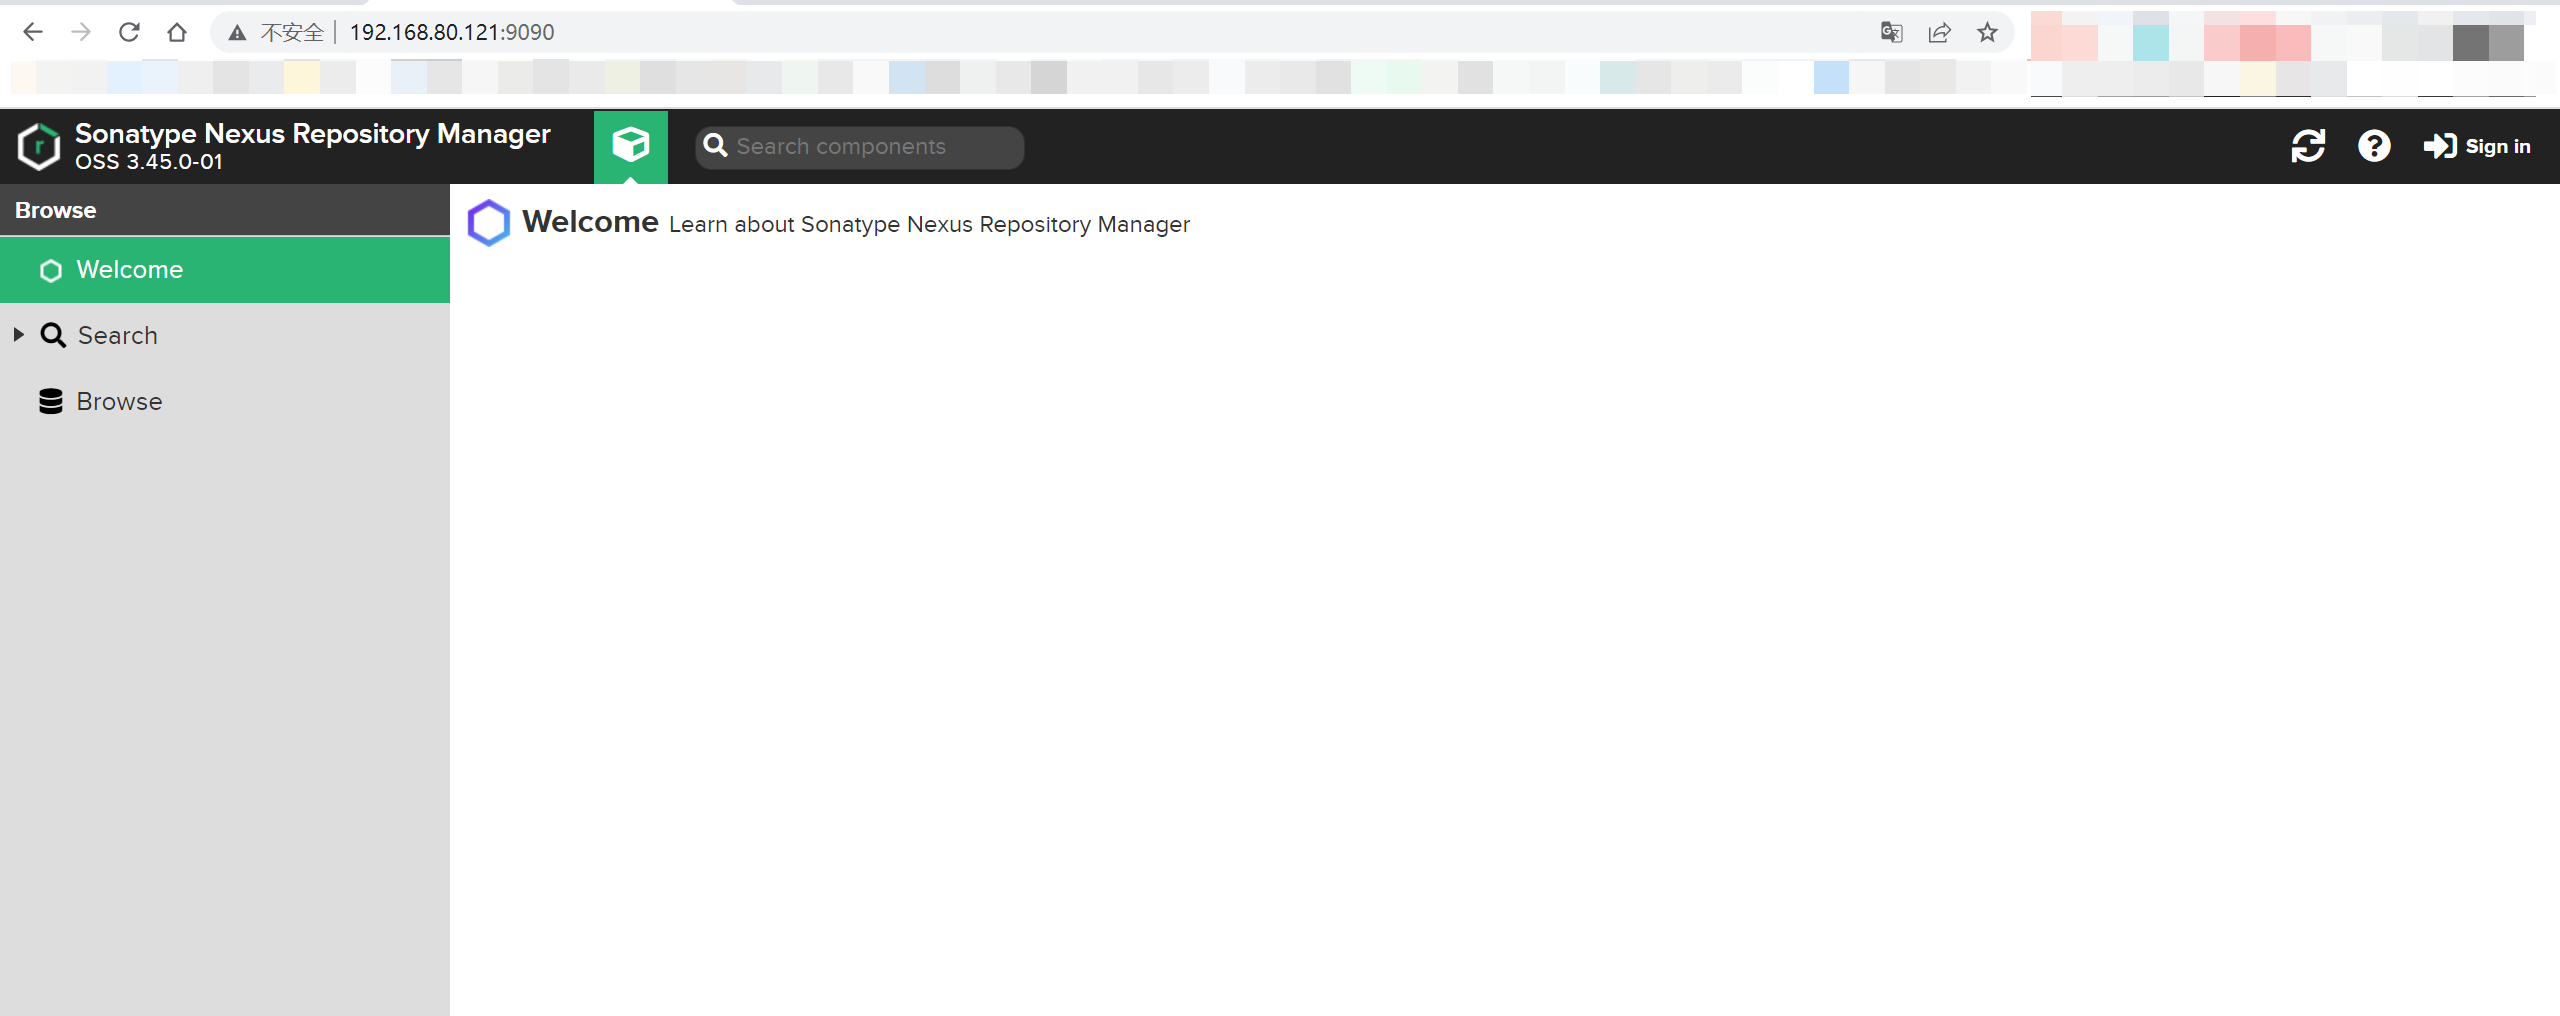
测试地址:http://192.168.80.121:9090/
3、设置开机自启
-
创建自启服务文件
# 创建自启服务文件 vim /usr/lib/systemd/system/nexus.service # 内容 [Unit] Description=nexus service After=network.target [Service] Type=forking ExecStart=/home/nexus/nexus-3.45.0-01/bin/nexus start ExecReload=/home/nexus/nexus-3.45.0-01/bin/nexus restart ExecStop=/home/nexus/nexus-3.45.0-01/bin/nexus stop Restart=on-failure [Install] WantedBy=multi-user.target -
加入自启服务
systemctl enable nexus.service systemctl daemon-reload -
启动&停止命令(执行启动命令后,需要1~2分钟)
# 启动
systemctl start nexus.service
# 重启
systemctl restart nexus.service
# 停止
systemctl stop nexus.service
# 查看状态
systemctl status nexus.service
4、登录系统
nexus的默认用户名为admin
默认密码位置在/home/nexus/sonatype-work/nexus3/admin.password中,使用时直接复制即可,密码为一个uuid;
cat /home/nexus/sonatype-work/nexus3/admin.password
在首次登录系统后,会进行一次密码修改
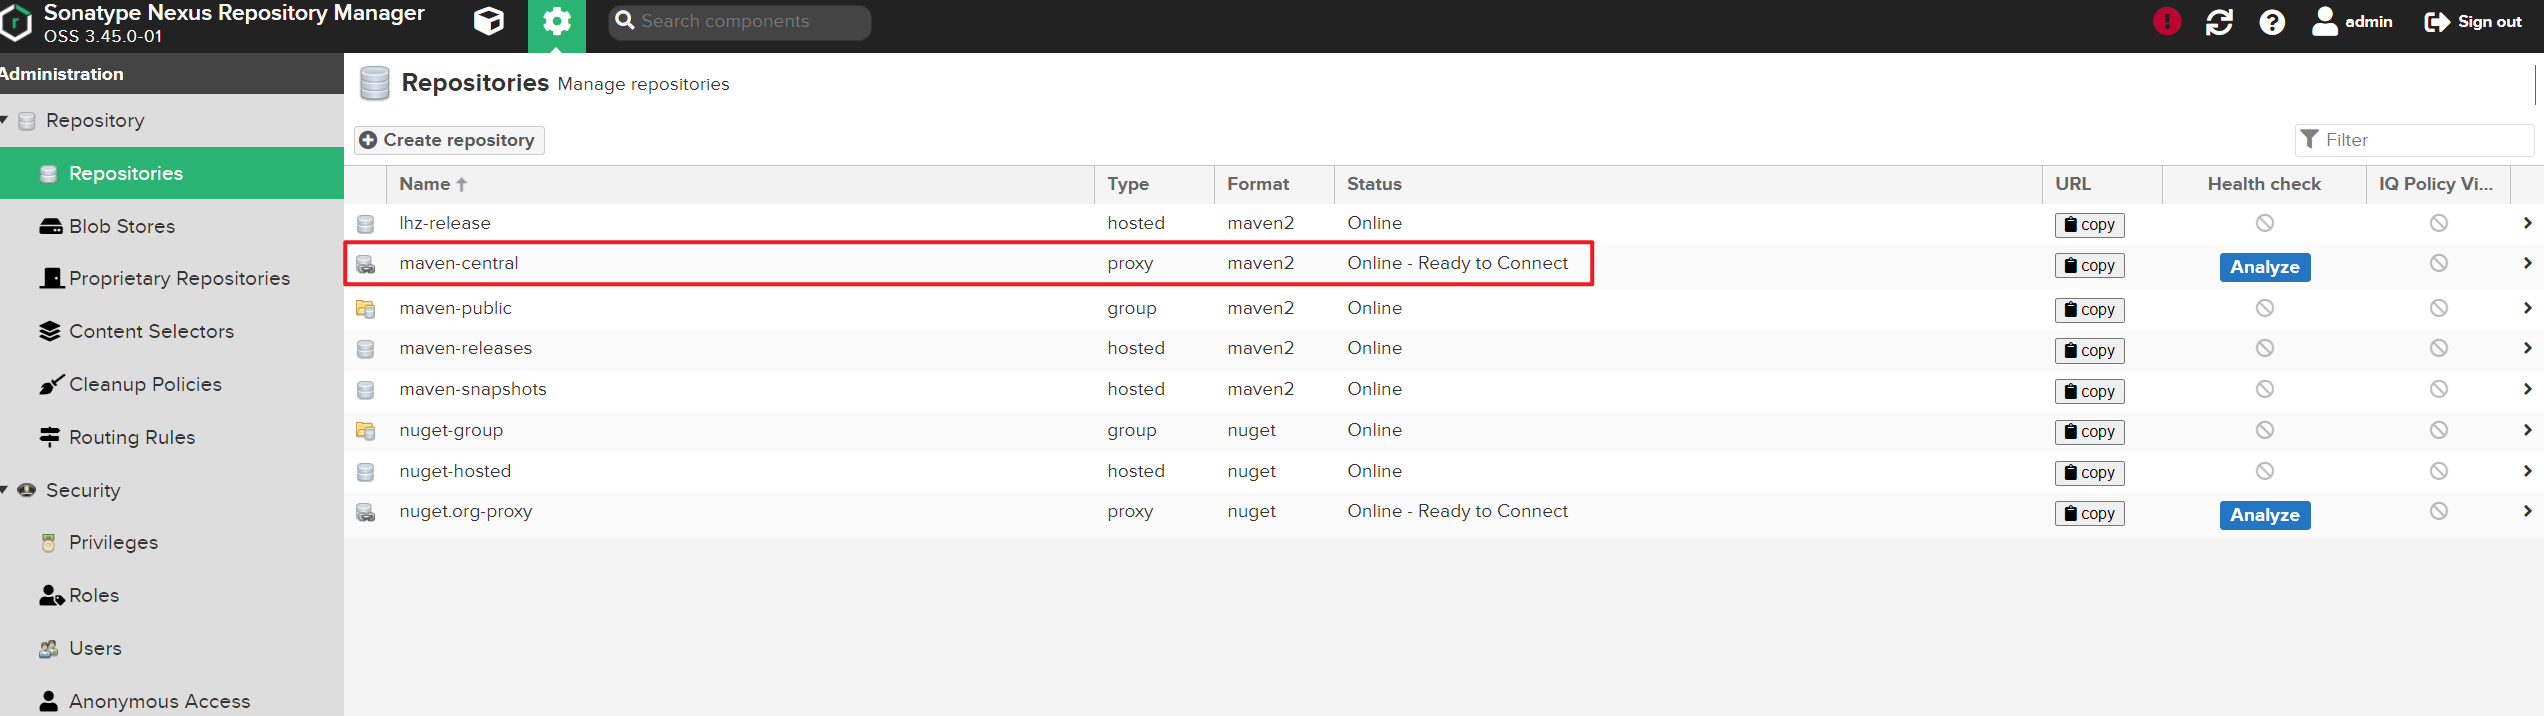
5、配置中央仓库
仓库地址:https://mirrors.huaweicloud.com/repository/maven/

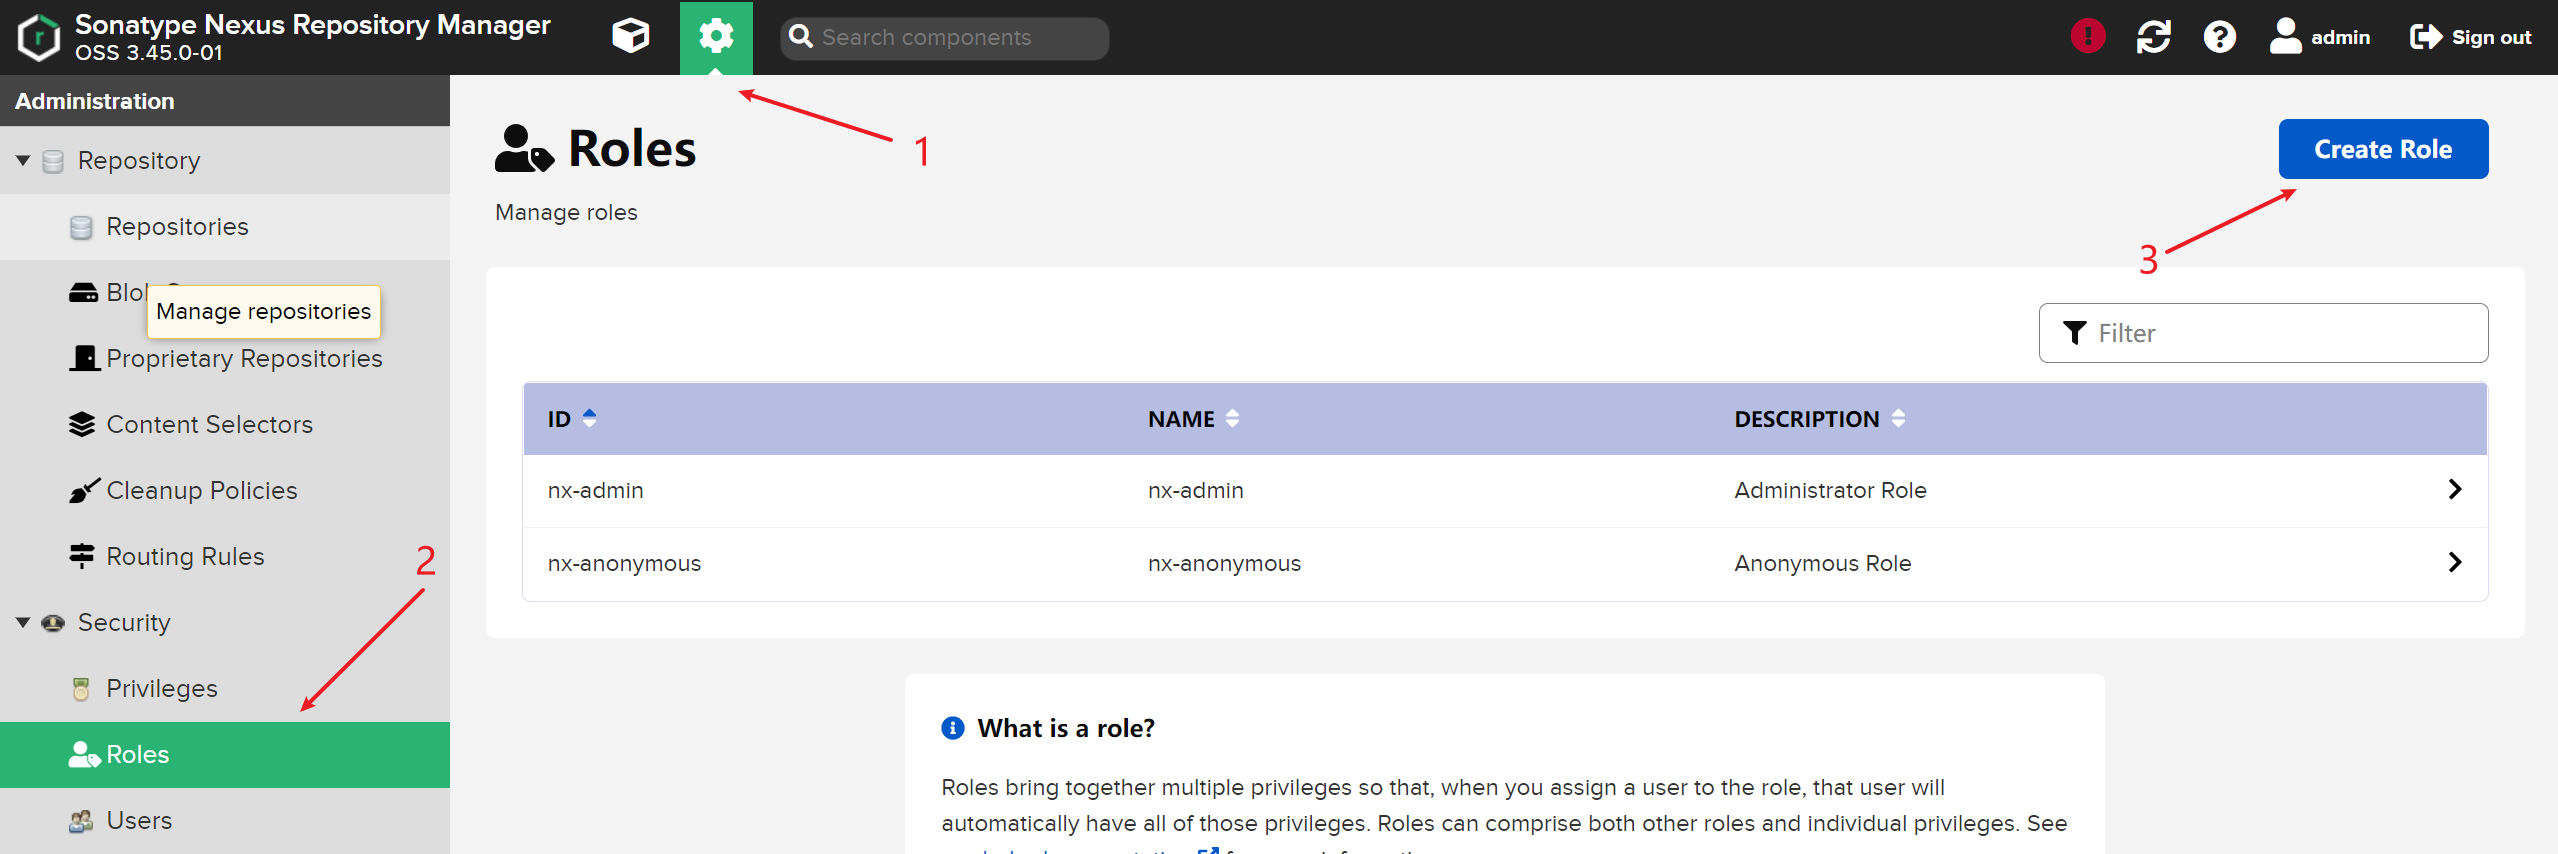
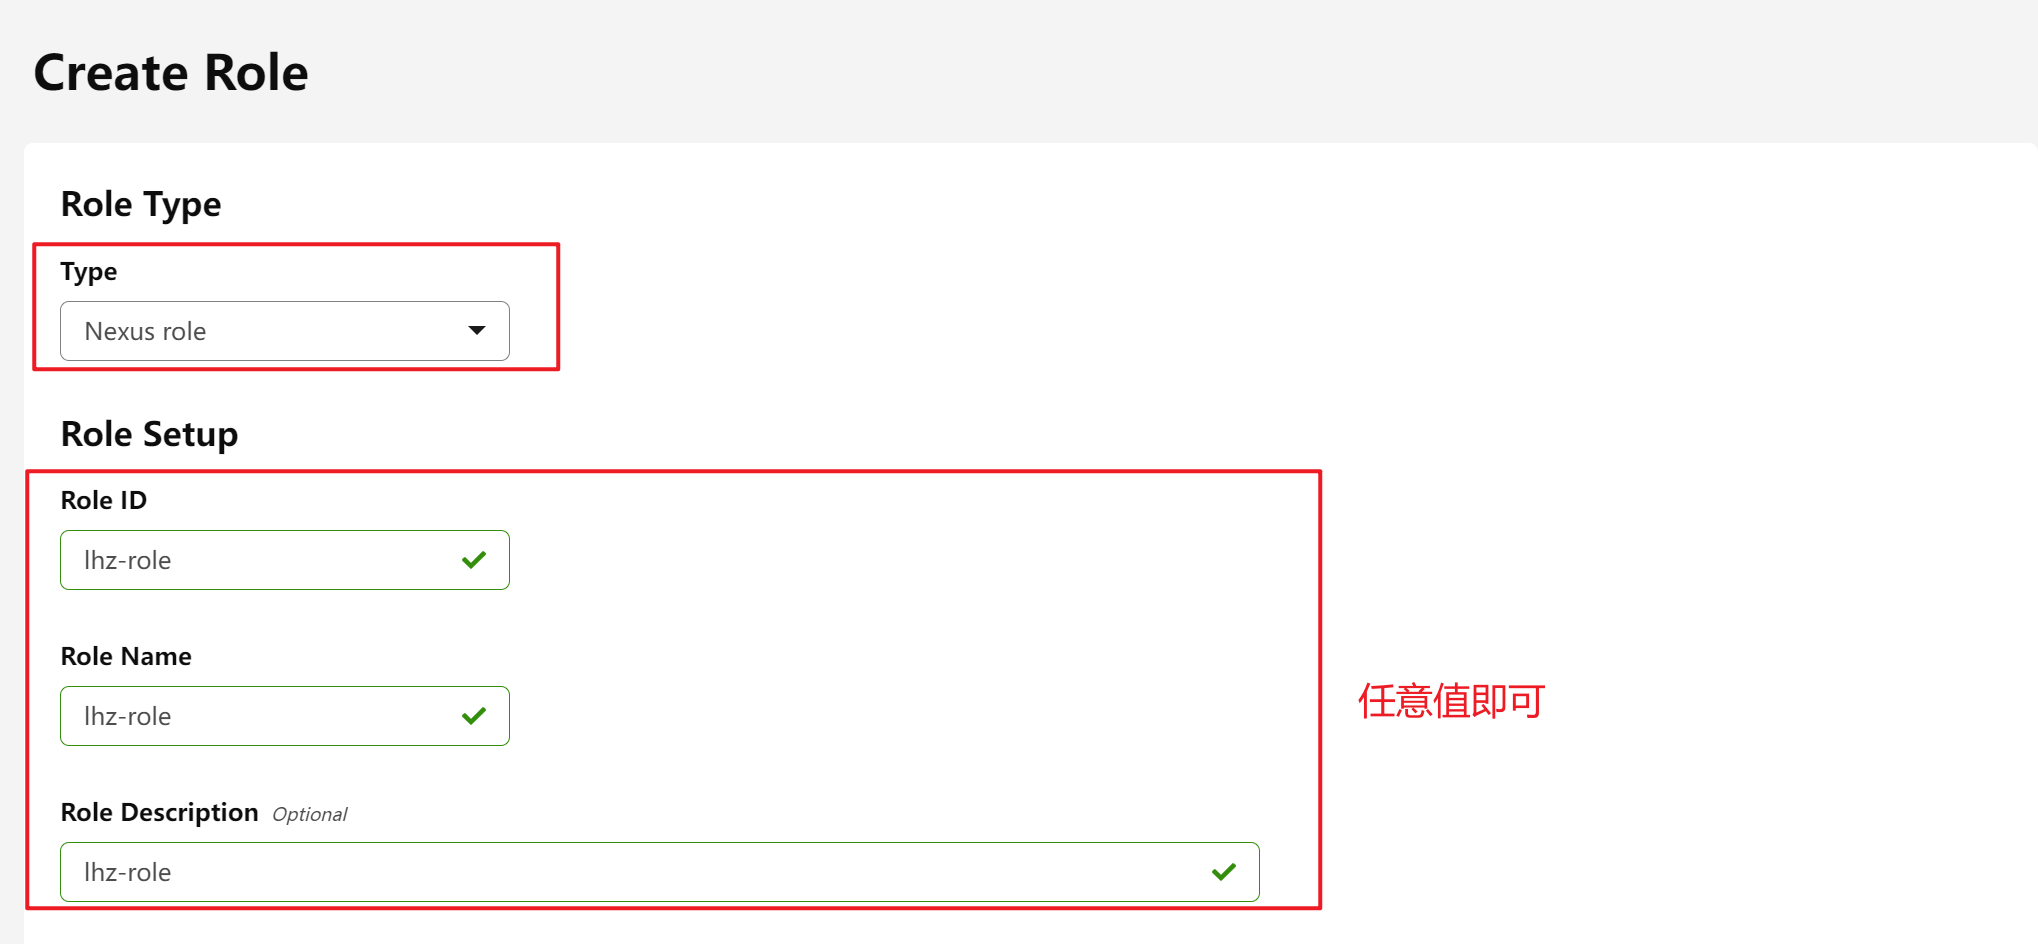
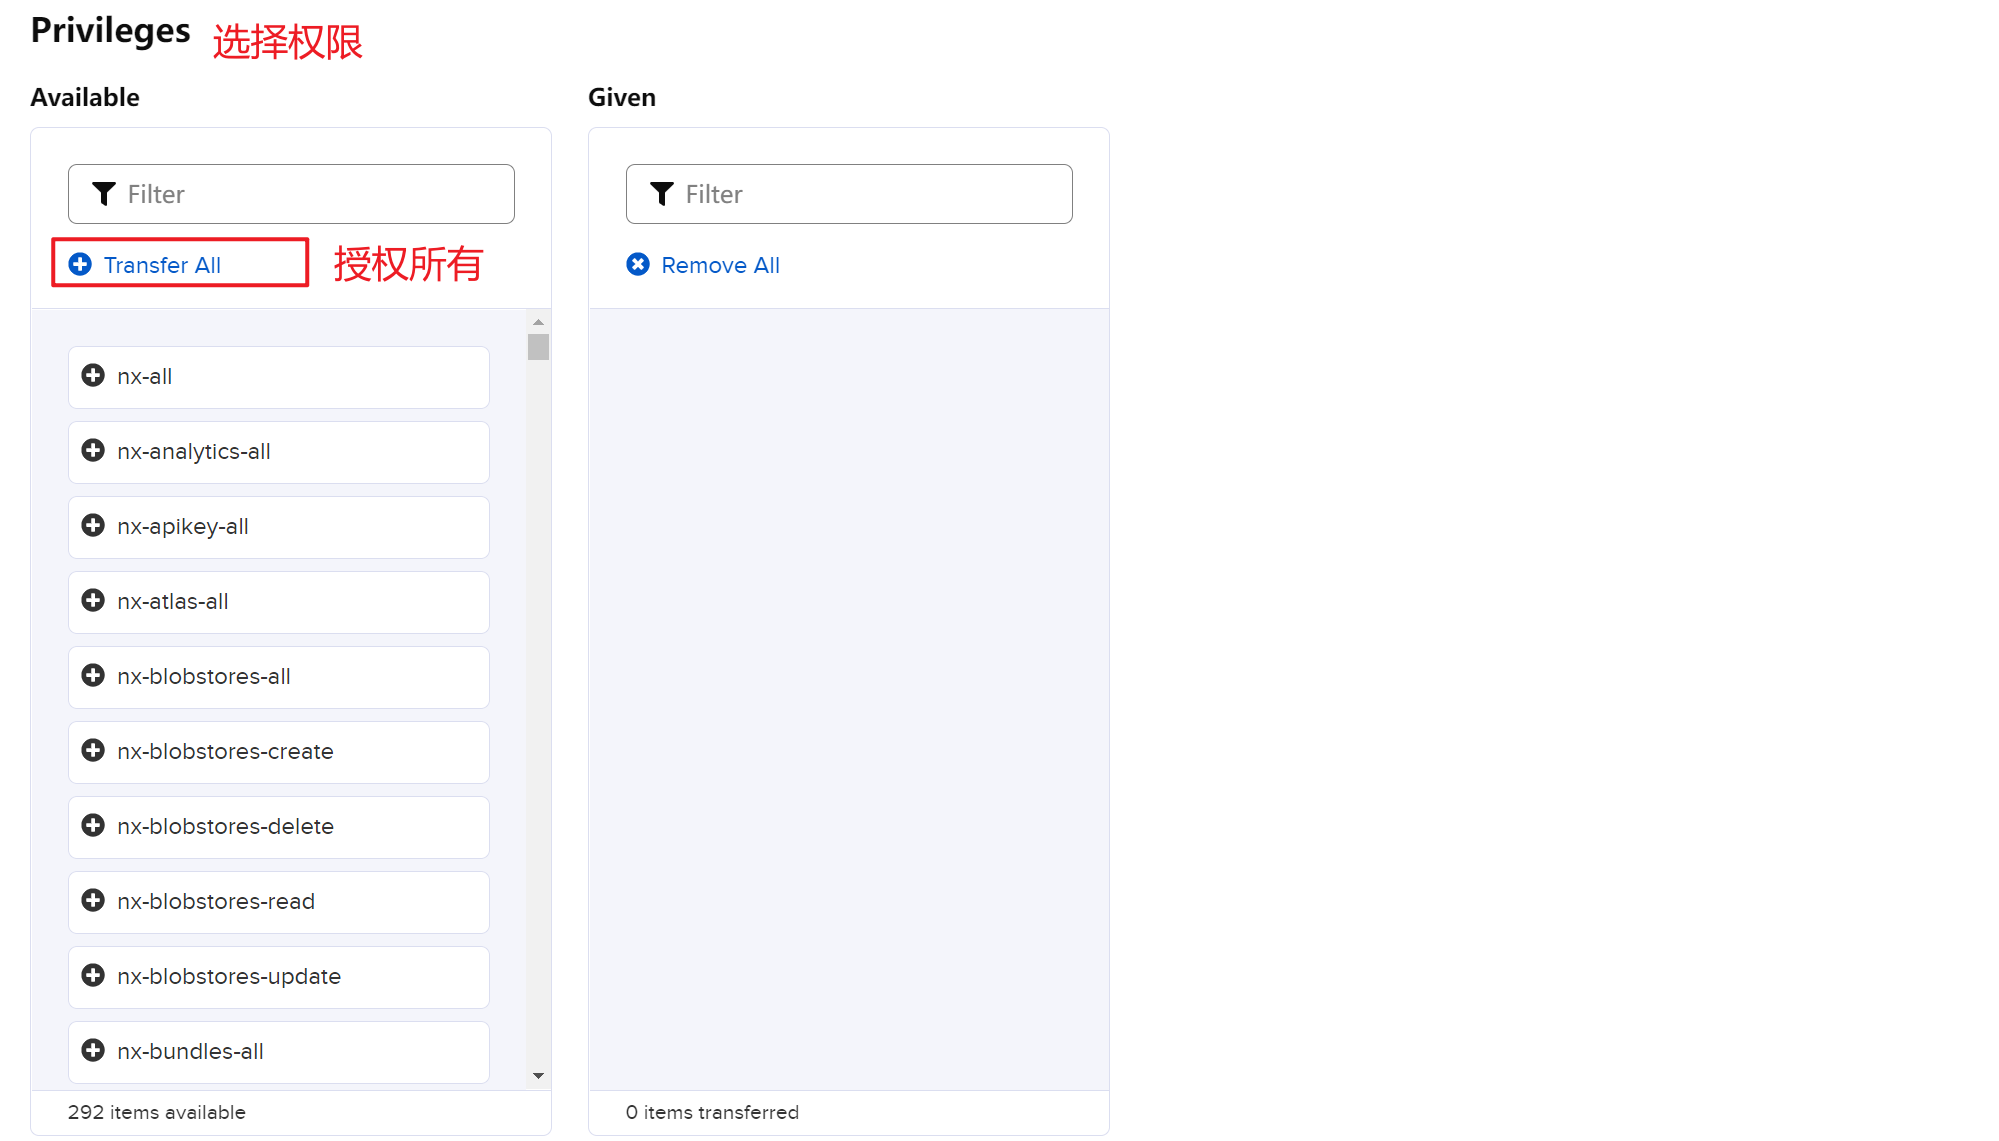
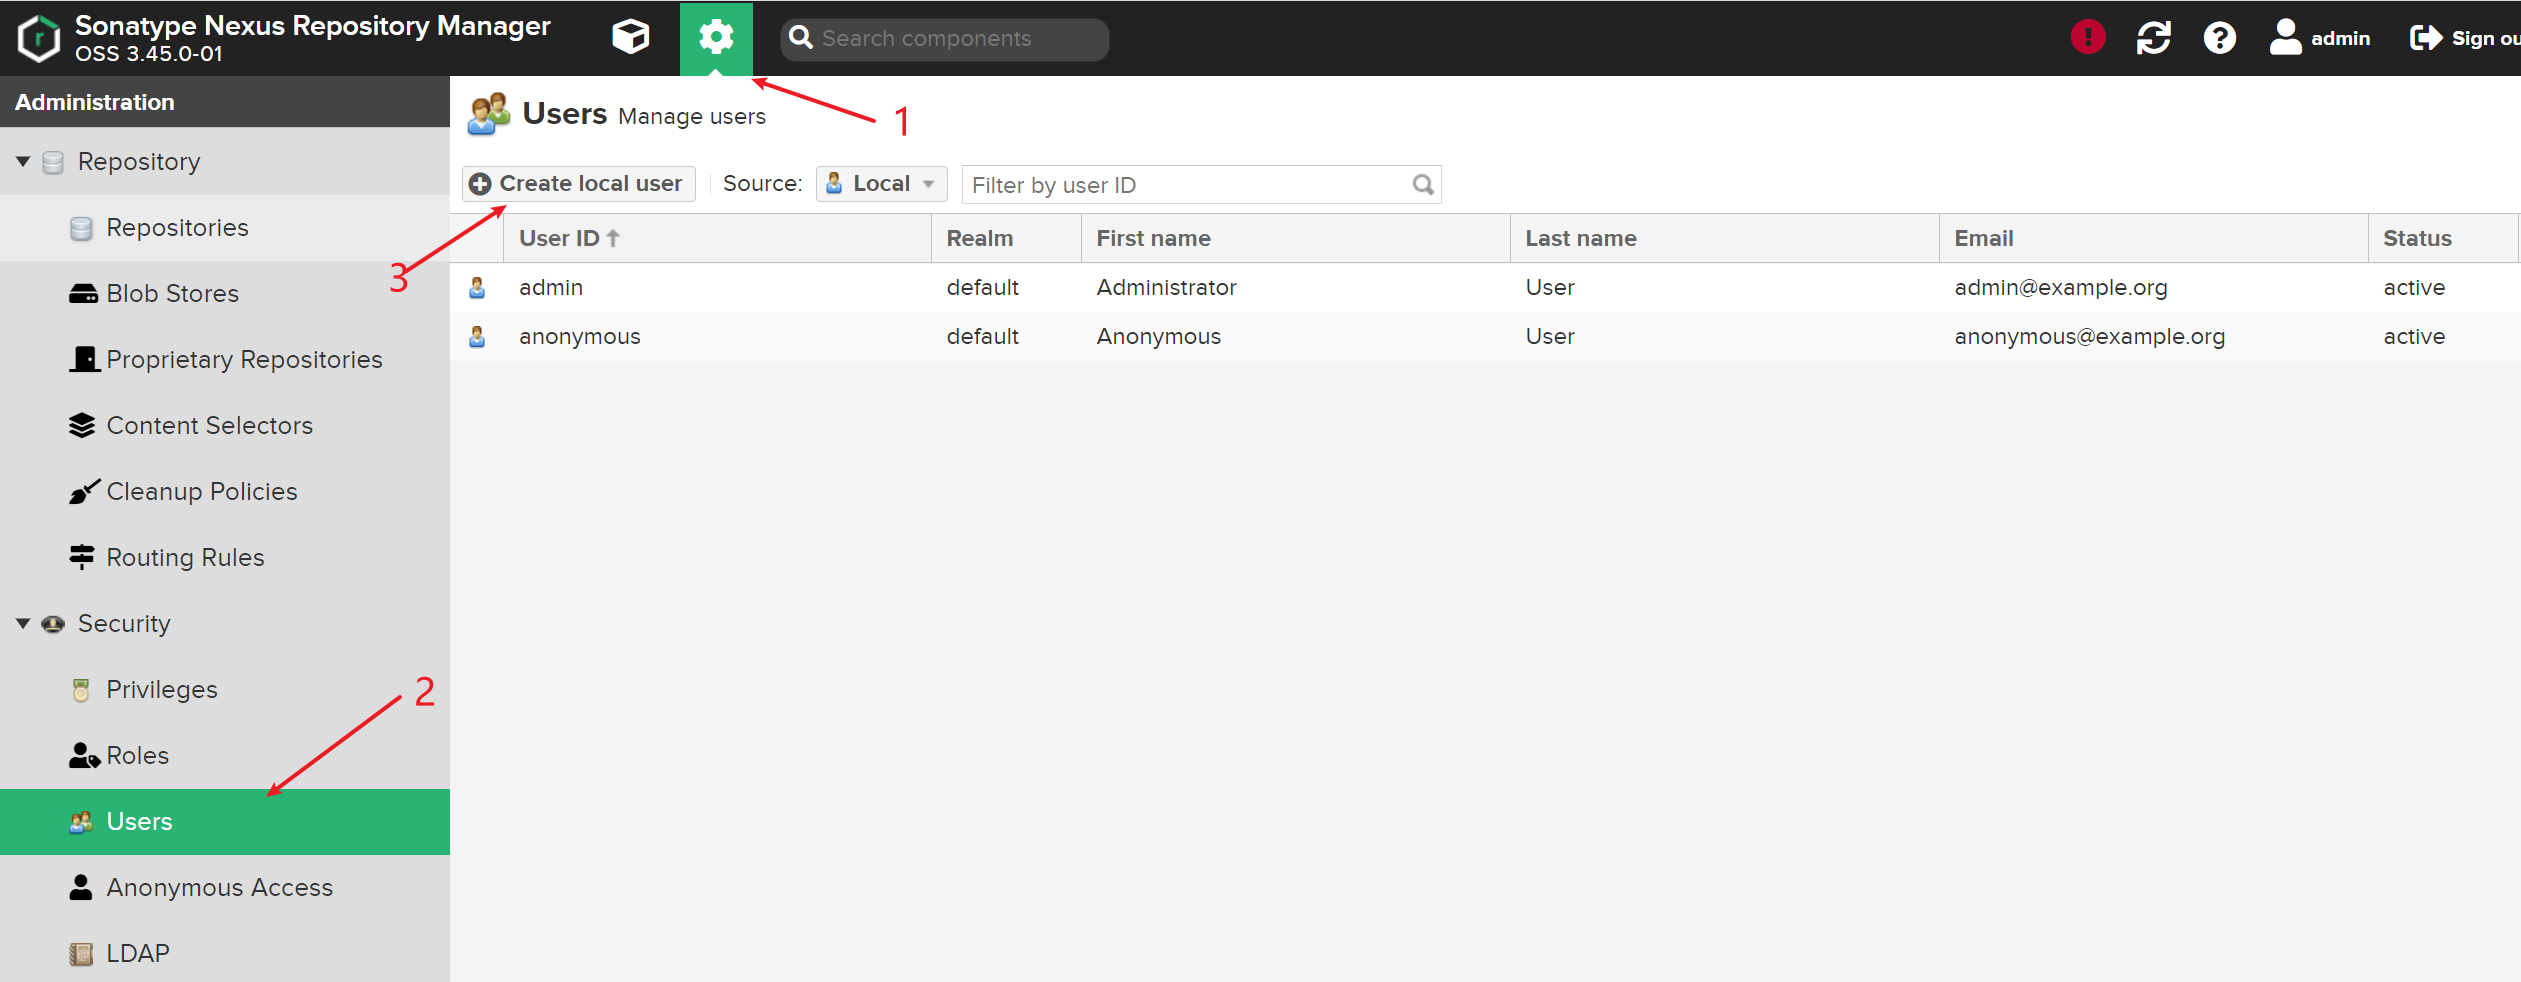
6、用户管理
1、添加角色
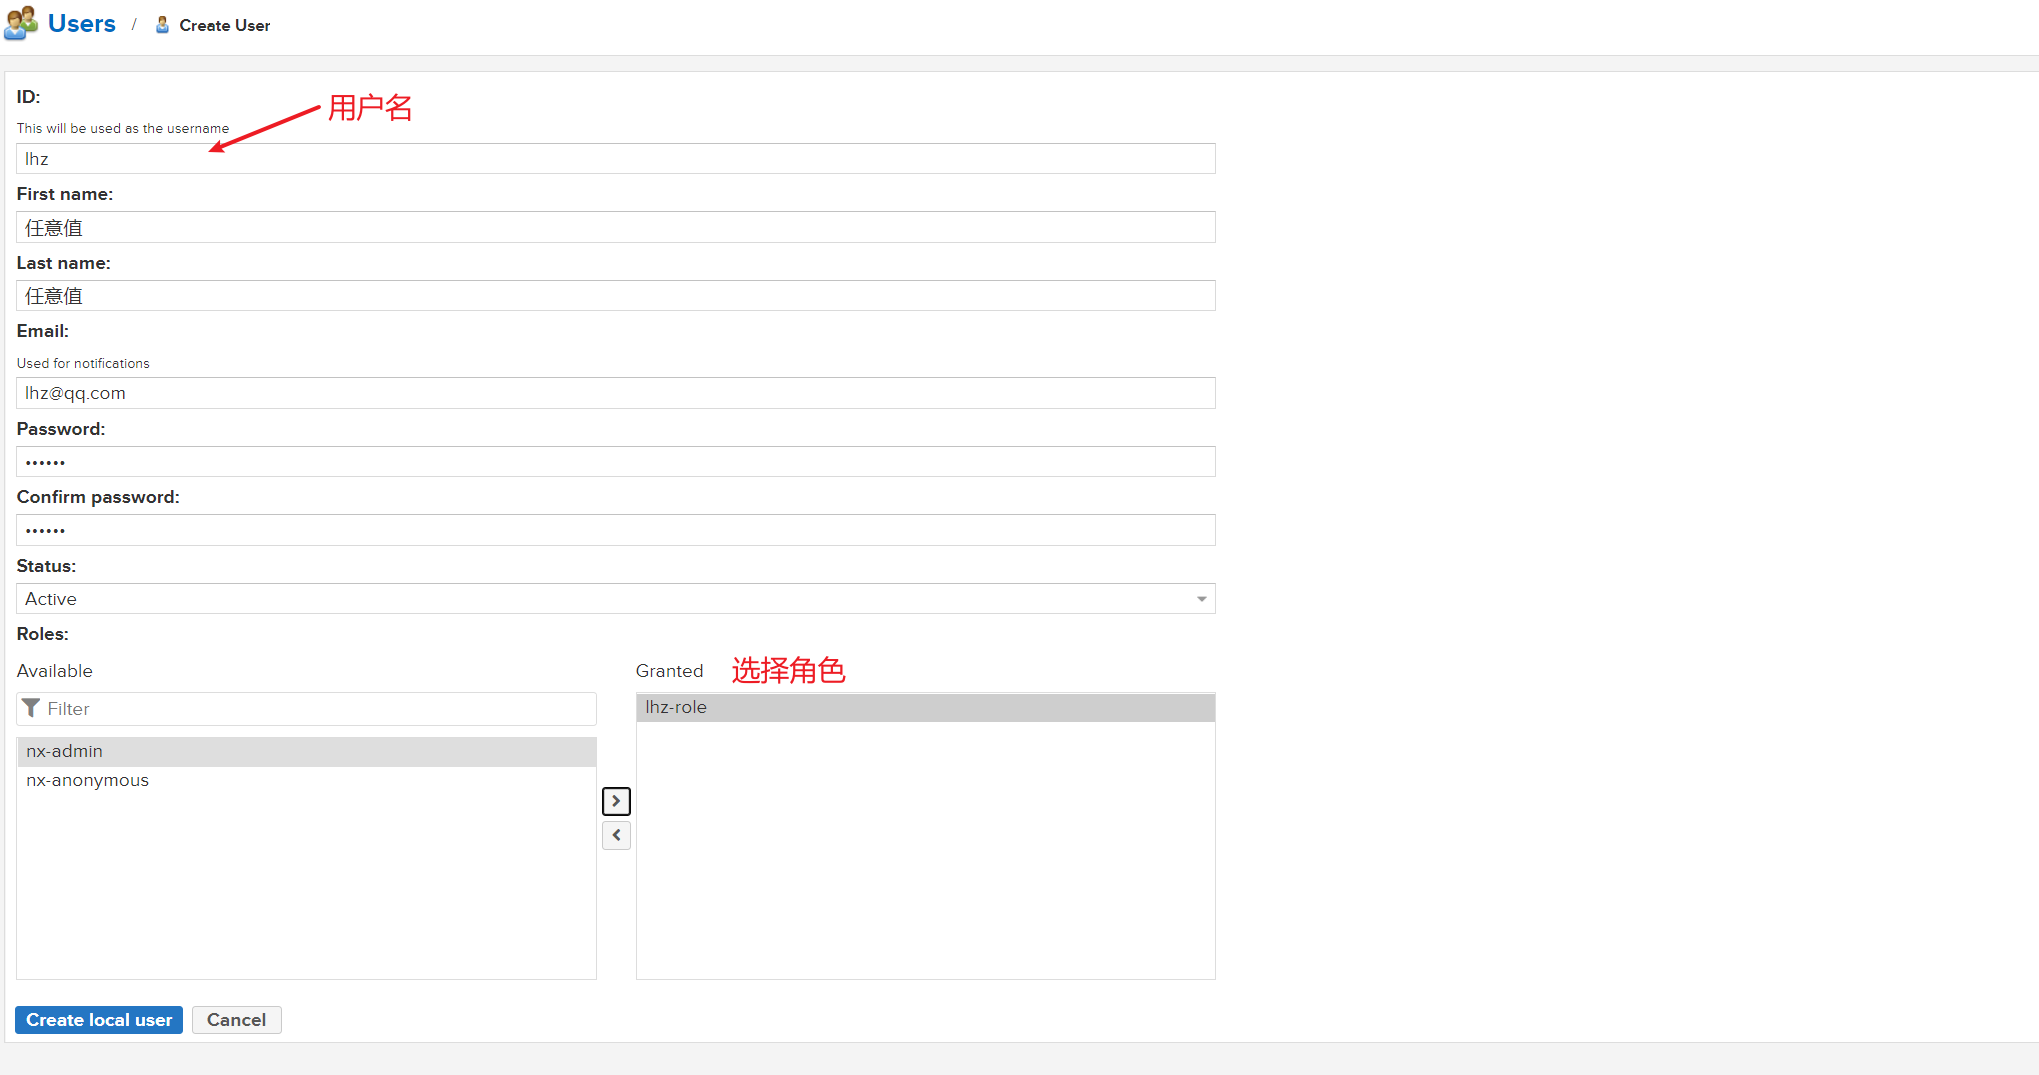
2、创建用户
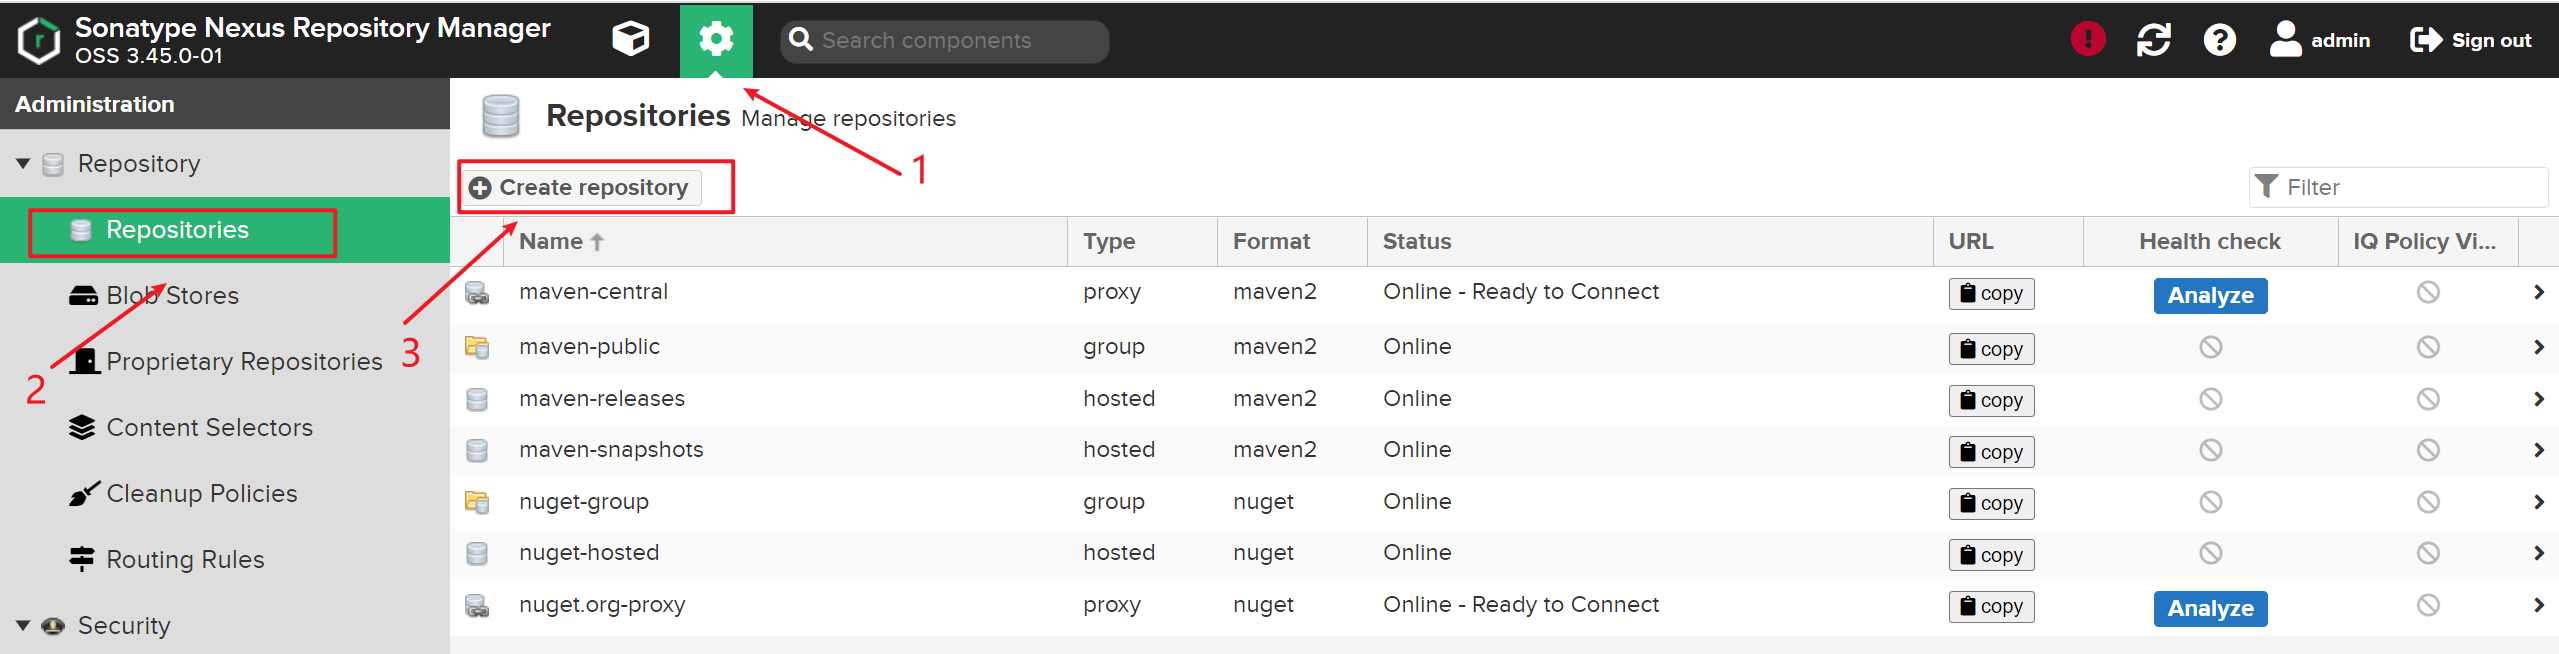
7、创建仓库
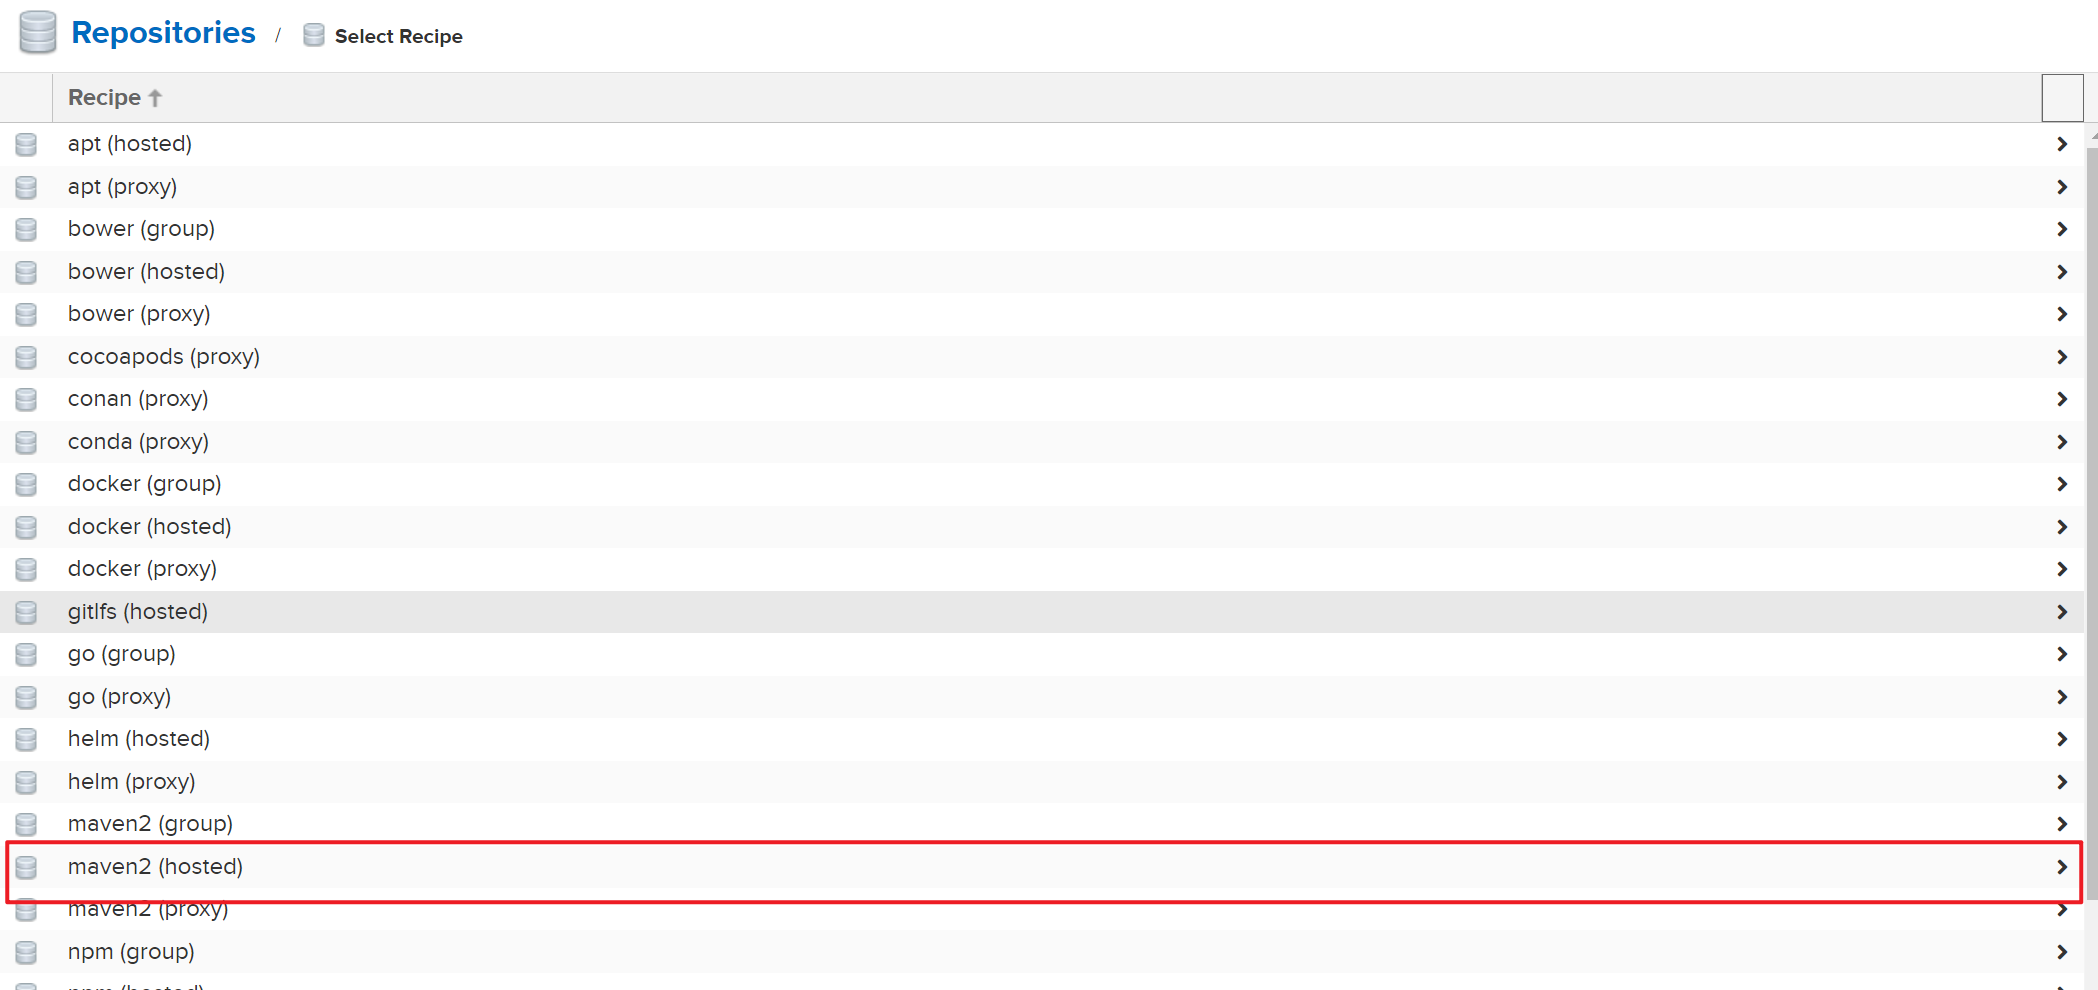
1、创建maven2(hosted)类型仓库
创建仓库需要在登录后才能进行
点击
Create repository,然后选择类型为maven2(hosted)
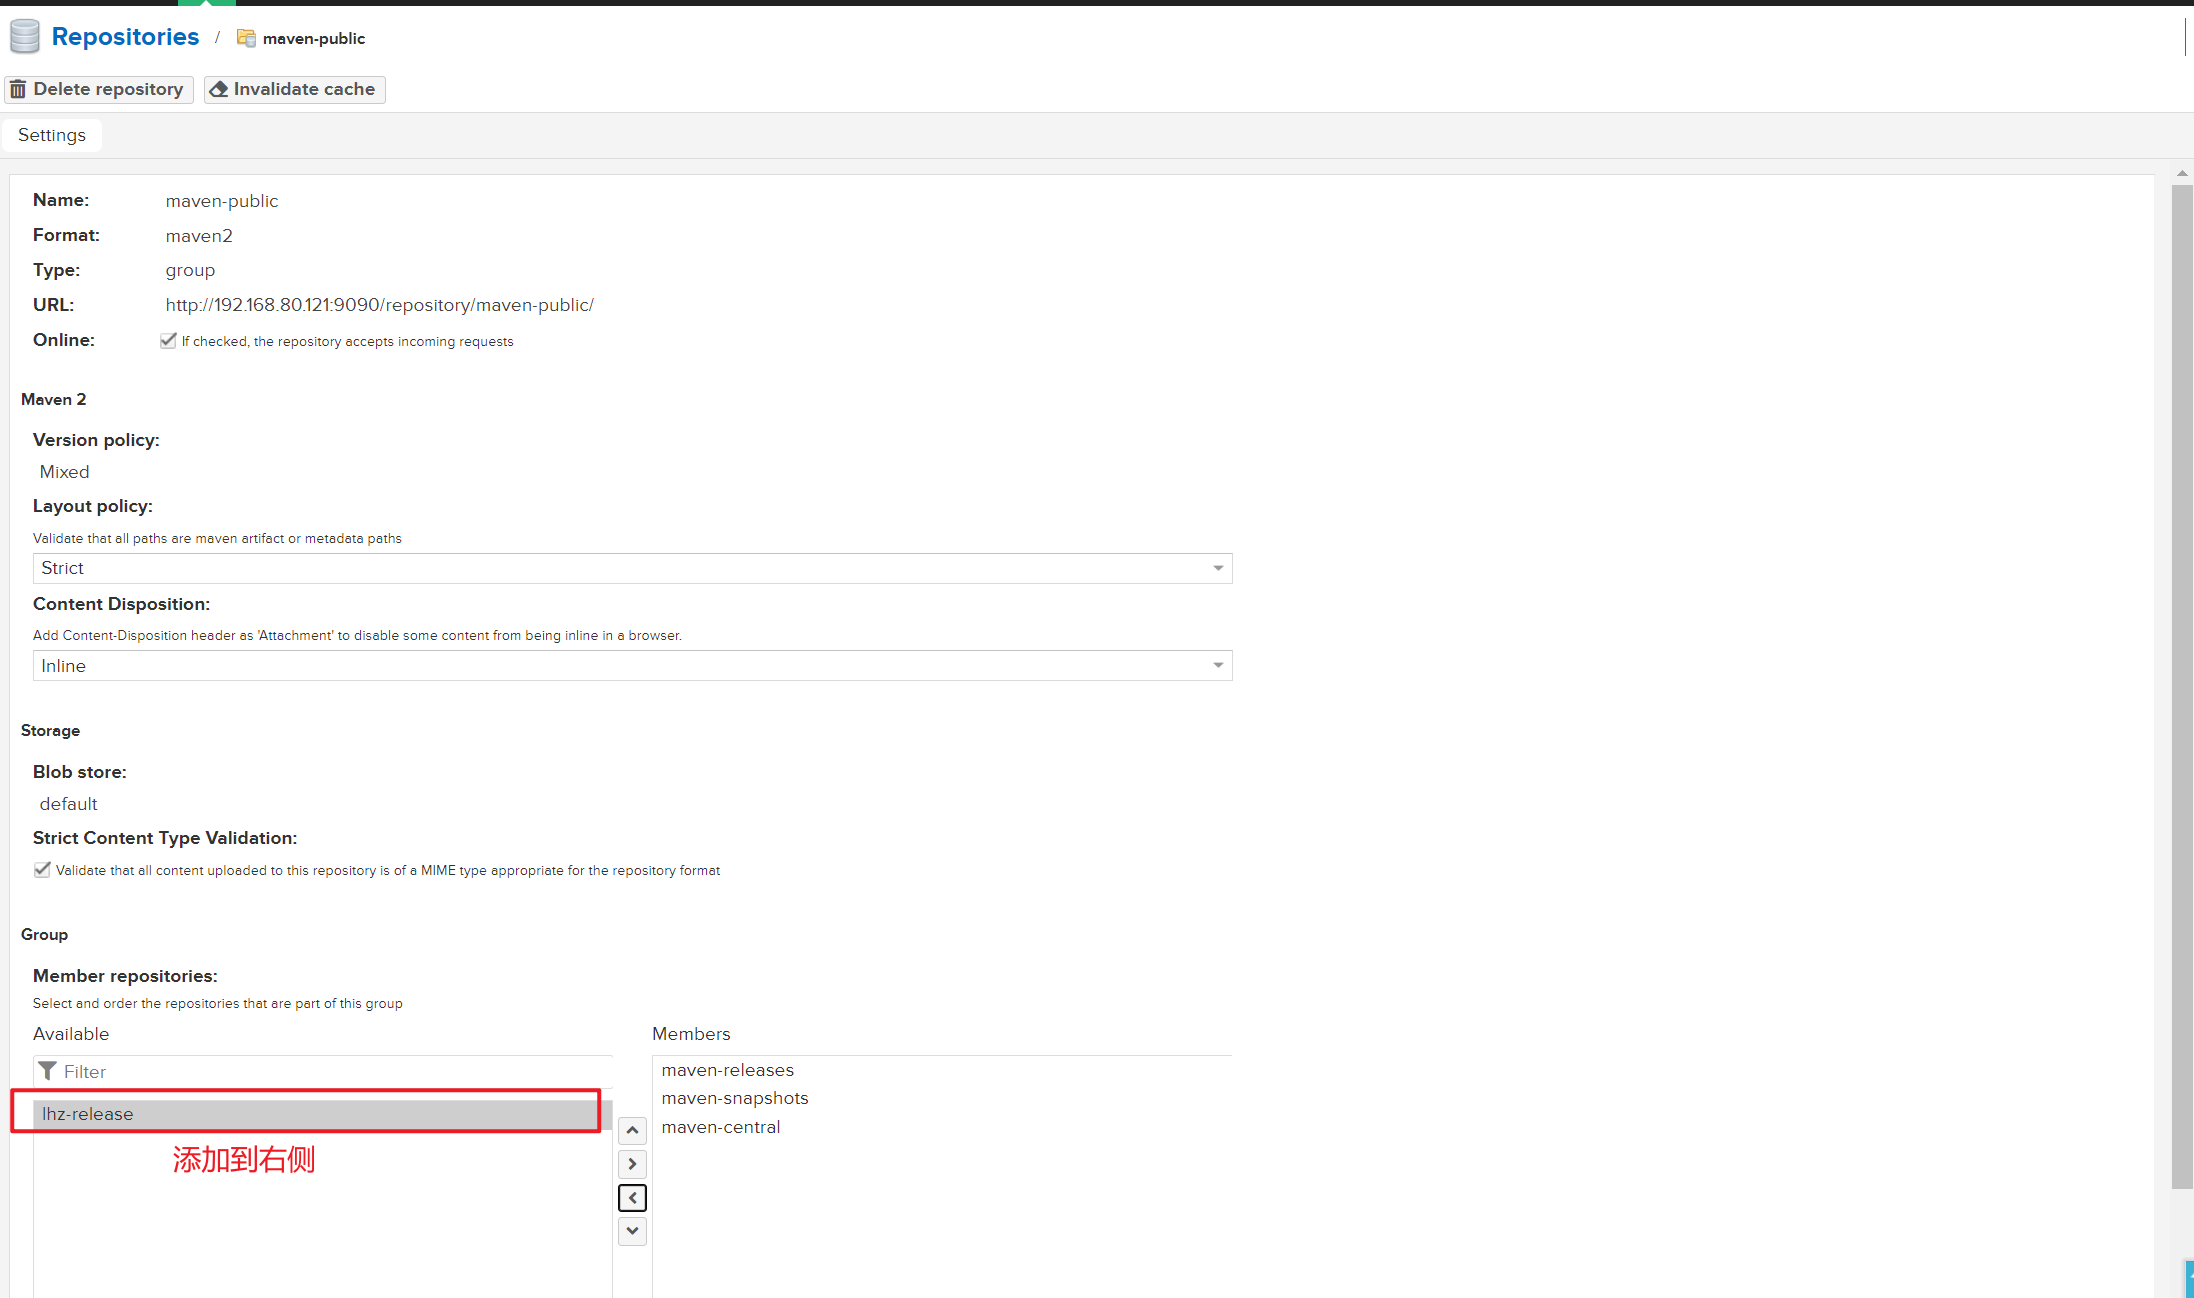
2、设置仓库属性
Maven 仓库分为两种:
Snapshot 快照仓库和Release 发行仓库。Snapshot 快照仓库用于保存开发过程中的不稳定 SNAPSHOT 版本,Release 发行仓库则用来保存稳定的 RELEASE 版本。
仓库名称设置为
lhz-release(任意);将
Version policy选择为Release;将
Deployment policy选择Allow redeploy,允许部署和更新私服上的组件。
3、添加到仓库组

8、代码推送
1、POM文件自动推送
在本地Maven的setting.xml文件中,在<servers>标签中添加Neuxs私服的配置,如下
<servers>
<!--nexus服务器-->
  <servers>
    <server>
        <!--任意值-->
        <id>lhz-nexus</id>
        <!--私服的访问账户-->
        <username>admin</username>
        <!--私服的访问密码-->
        <password>123321</password>
    </server>
</servers>
在需要推送到Nexus仓库代码的POM.XML中,配置推送的仓库及地址
<!--dependencies下面-->
<distributionManagement>
    	<!--推送到release版本的仓库-->
        <repository>
            <!-- 需要和conf文件下pom文件server标签中id保持一致 -->
            <id>lhz-nexus</id>
            <name>nexus release</name>
            <!--推送的仓库地址-->
            <url>http://192.168.80.121:9090/repository/lhz-release/</url>
        </repository>
</distributionManagement>
执行推送:
# maven推送命令
mvn clean deploy

# 推送项目中的部分pom.xml
<?xml version="1.0" encoding="UTF-8"?>
<project xmlns="http://maven.apache.org/POM/4.0.0"
         xmlns:xsi="http://www.w3.org/2001/XMLSchema-instance"
         xsi:schemaLocation="http://maven.apache.org/POM/4.0.0 http://maven.apache.org/xsd/maven-4.0.0.xsd">

    <groupId>com.lhz.utils</groupId>
    <artifactId>template-common-utils</artifactId>
    <packaging>jar</packaging>
    <version>2.0</version>
    <modelVersion>4.0.0</modelVersion>

    <properties>
        <maven.compiler.target>1.8</maven.compiler.target>
        <maven.compiler.source>1.8</maven.compiler.source>
    </properties>


    <dependencies>
        <dependency>
            <groupId>eu.bitwalker</groupId>
            <artifactId>UserAgentUtils</artifactId>
            <version>1.21</version>
        </dependency>
        <dependency>
            <groupId>org.apache.commons</groupId>
            <artifactId>commons-compress</artifactId>
            <version>1.22</version>
        </dependency>
        <dependency>
            <groupId>commons-codec</groupId>
            <artifactId>commons-codec</artifactId>
            <version>1.15</version>
        </dependency>
     	......
     	......
        <dependency>
            <groupId>org.apache.commons</groupId>
            <artifactId>commons-pool2</artifactId>
            <version>2.8.1</version>
        </dependency>
    </dependencies>

    <!--dependencies下面-->
    <distributionManagement>
        <!--推送到release版本的仓库-->
        <repository>
            <!-- 需要和conf文件下pom文件server标签中id保持一致 -->
            <id>lhz-nexus</id>
            <name>nexus release</name>
            <url>http://192.168.80.121:9090/repository/lhz-release/</url>
        </repository>
    </distributionManagement>

    <build>
        <plugins>
            <plugin>
                <groupId>org.apache.maven.plugins</groupId>
                <artifactId>maven-compiler-plugin</artifactId>
                <version>3.8.1</version>
                <configuration>
                    <source>1.8</source>
                    <target>1.8</target>
                </configuration>
            </plugin>
        </plugins>
    </build>
</project>

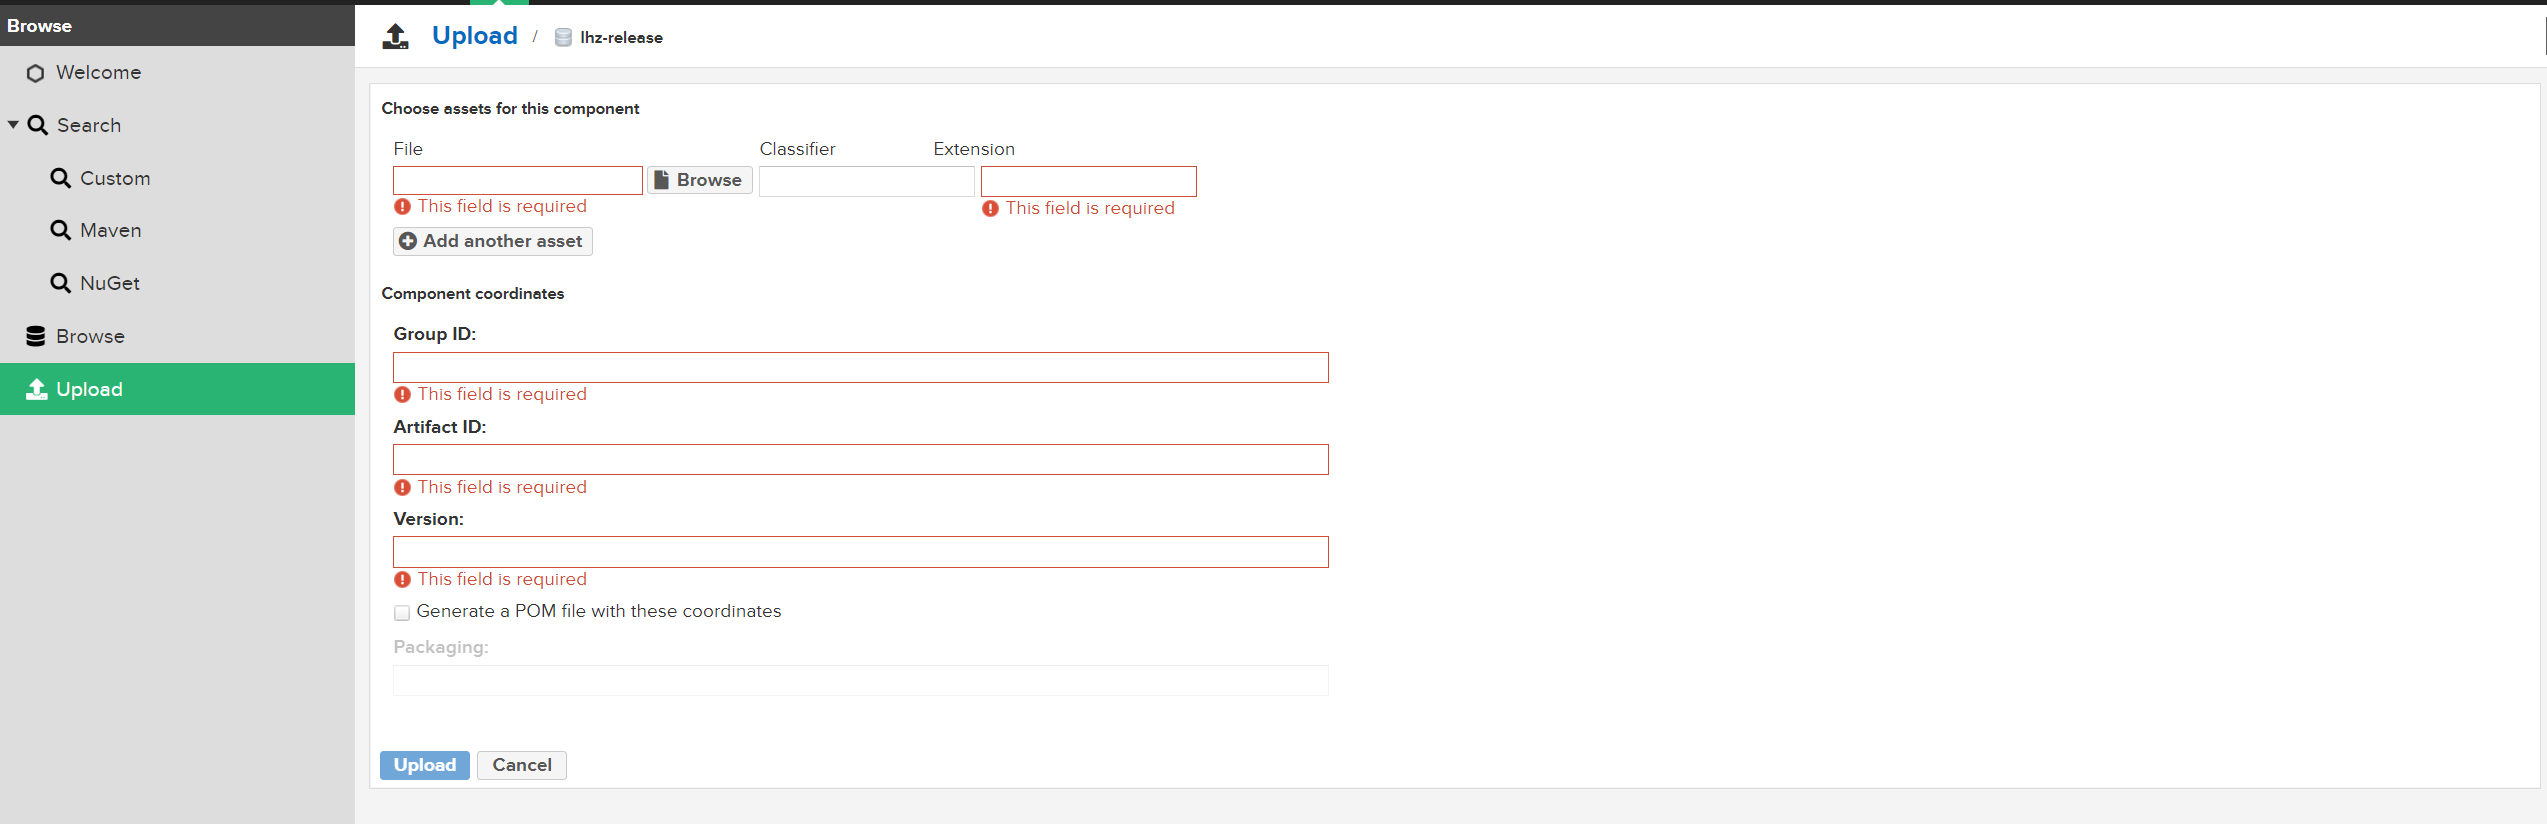
2、手动上传jar包到nexus

9、引入私有仓库包
配置如下:
<!--maven配置添加私服的镜像地址,settings.xml 文件中-->
<mirrors>
    <!--如果http不被允许的话,将屏蔽下面的`maven-default-http-blocker`配置-->
    <mirror>
      <id>maven-default-http-blocker</id>
      <mirrorOf>external:http:*</mirrorOf>
      <name>Pseudo repository to mirror external repositories initially using HTTP.</name>
      <url>http://0.0.0.0/</url>
      <blocked>true</blocked>
    </mirror>

    <!--添加私服镜像-->
    <mirror>
        <id>lhz-nexus</id>
		<!--任意值-->
        <name>nexus repository</name>
        <mirrorOf>*</mirrorOf>
        <url>http://192.168.80.121:9090/repository/maven-public/</url>
    </mirror>
</mirrors>

<!--需要拉取jar包的项目中,pom.xml 文件中-->
    <repositories>
        <repository>
           <!--与mirror配置的一致-->
           <id>lhz-nexus</id>
            <name>Nexus Reposotory</name>
			<url>http://192.168.80.121:9090/repository/maven-public/</url>
            <releases>
                <enabled>true</enabled>
            </releases>
            <snapshots>
                <enabled>true</enabled>
            </snapshots>
        </repository>
    </repositories>