一、本文介绍
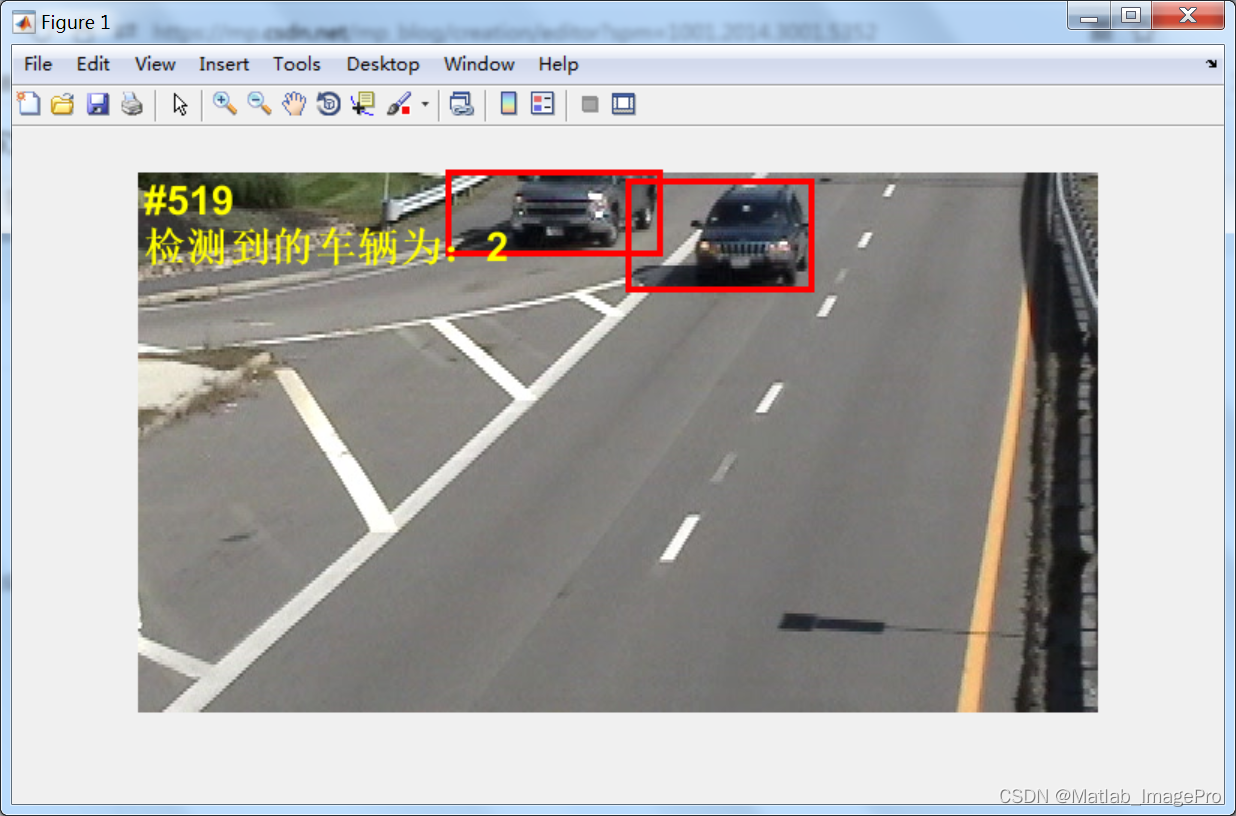
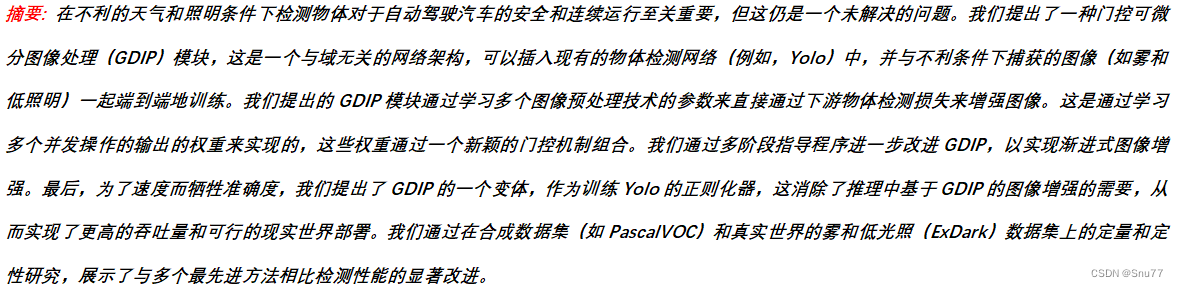
本文给大家带来的改进机制是门控可微分图像处理GDIP模块,其可以理解为是一直图像增强领域的模块,其主要适用于雾天的一些去雾检测,当然了也适用于于一些图片模糊不清的场景,GDIP(Gated Differentiable Image Processing)的主要原理基于一种门控可微分图像处理模块,旨在改善在不利条件下(如雾天和低照明条件)捕获的图像的物体检测性能,GDIP通过多阶段引导过程进一步改进,用于逐步图像增强,提出了GDIP的一个变体,可以作为训练Yolo的正则化器使用,这样就在推理过程中消除了基于GDIP的图像增强的需要。
欢迎大家订阅我的专栏一起学习YOLO!

专栏目录:YOLOv8改进有效系列目录 | 包含卷积、主干、检测头、注意力机制、Neck上百种创新机制
目录
一、本文介绍
二、原理介绍
2.1 GDIP基本原理
2.2 新颖的门控机制
2.3 多级GDIP
2.4 GDIP作为训练正则器
三、核心代码
四、添加方式教程
4.1 修改一
4.2 修改二
4.3 修改三
五、yaml文件和运行记录
5.1 yaml文件1
5.2 训练代码
5.3 训练过程截图
五、本文总结
二、原理介绍
 官方论文地址:官方论文地址点击此处即可跳转
官方代码地址:官方代码地址点击此处即可跳转
2.1 GDIP基本原理
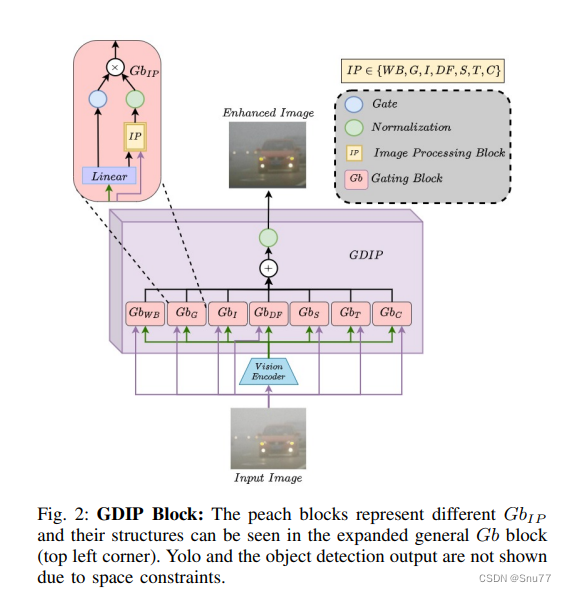
GDIP(Gated Differentiable Image Processing)的主要原理基于一种门控可微分图像处理模块,旨在改善在不利条件下(如雾天和低照明条件)捕获的图像的物体检测性能。GDIP框架能够插入到现有的物体检测网络中(例如我们本文中的YOLO),并能与这些网络一起端到端地训练,以直接通过下游物体检测损失来增强图像。这是通过学习多种图像预处理技术的参数实现的,这些技术并发操作,并通过一种新颖的门控机制将它们的输出结合起来。
GDIP通过多阶段引导过程进一步改进,用于逐步图像增强。在保证速度的同时,为了权衡精度和速度,提出了GDIP的一个变体,可以作为训练Yolo的正则化器使用,这样就在推理过程中消除了基于GDIP的图像增强的需要,从而实现了更高的吞吐量和可行的实世界部署。
核心贡献包括:
1. 门控机制:一种新颖的门控机制,使得多个可微分图像处理模块能够并发地进行相对加权,以增强不利环境条件下的图像,用于物体检测。
2. 多级GDIP(MGDIP):一个图像通过多个GDIP模块逐步增强,每个模块由图像编码器的不同层指导,以此来增强图像。
3. 作为训练正则化器的GDIP:GDIP的一个适应性,直接改善了不利条件下的物体检测训练,消除了推理过程中GDIP的需要,从而节省了计算时间,并略微降低了性能。
通过定量和定性研究在合成数据集(如PascalVOC)和实际条件下的雾天(RTTS)和低照明(ExDark)数据集上,证明了GDIP相较于多个最新方法显著改进了检测性能。
2.2 新颖的门控机制
该机制允许对多个可微分的图像处理模块(如色调校正、对比度平衡、锐化、去雾等)进行同时加权组合。这种加权不是固定的,而是通过网络学习到的,能够根据图像的具体特点(例如雾天或低光照条件)动态调整每个图像处理操作的权重。这样,网络可以更加灵活地应对各种不利的环境条件,提高物体检测的准确性。
2.3 多级GDIP
该方法通过将GDIP块与视觉编码器的每一层相结合,实现了多级渐进式的图像增强。这种设计让GDIP能够利用来自不同层次的特征表示,为不同的图像处理操作提供指导。通过这种方式,系统可以更细致地处理图像中的不同特征,如边缘或纹理,从而在各种不同的环境条件下提高物体检测的性能。
2.4 GDIP作为训练正则器
这一贡献提出了将GDIP框架作为训练正则器使用的方法,通过这种方式,即使在推理阶段不直接应用GDIP进行图像增强,也能直接改善物体检测的训练过程。这种方法通过在训练阶段利用GDIP来改进Yolo的特征学习,使网络能够学习到对不利条件更为鲁棒的特征表示。这样一来,即便在推理阶段不使用GDIP进行图像预处理,检测模型仍然能够在各种复杂环境下保持较高的性能。

三、核心代码
核心代码的使用方式看章节四,本文内容的计算量很高,大家需要注意,本来想要做一下优化的对官方代码想了下没有做的原因是不想影响效果,后面有需要我可以创新一下!
import math
import warnings
import torch
import torchvision

warnings.filterwarnings('ignore')


class GatedDIP(torch.nn.Module):
    """_summary_

    Args:
        torch (_type_): _description_
    """

    def __init__(self,
                 encoder_output_dim=256,
                 num_of_gates=7):
        """_summary_

        Args:
            encoder_output_dim (int, optional): _description_. Defaults to 256.
            num_of_gates (int, optional): _description_. Defaults to 7.
        """
        super(GatedDIP, self).__init__()
        # Encoder Model
        self.encoder = torchvision.models.vgg16(pretrained=False)

        # Changed 4096 --> 256 dimension
        self.encoder.classifier[6] = torch.nn.Linear(4096, encoder_output_dim, bias=True)

        # Gating Module
        self.gate_module = torch.nn.Sequential(torch.nn.Linear(encoder_output_dim, num_of_gates, bias=True))

        # White-Balance Module
        self.wb_module = torch.nn.Sequential(torch.nn.Linear(encoder_output_dim, 3, bias=True))

        # Gamma Module
        self.gamma_module = torch.nn.Sequential(torch.nn.Linear(encoder_output_dim, 1, bias=True))

        # Sharpning Module
        self.gaussian_blur = torchvision.transforms.GaussianBlur(13, sigma=(0.1, 5.0))
        self.sharpning_module = torch.nn.Sequential(torch.nn.Linear(encoder_output_dim, 1, bias=True))

        # De-Fogging Module
        self.defogging_module = torch.nn.Sequential(torch.nn.Linear(encoder_output_dim, 1, bias=True))

        # Contrast Module
        self.contrast_module = torch.nn.Sequential(torch.nn.Linear(encoder_output_dim, 1, bias=True))

        # Contrast Module
        self.tone_module = torch.nn.Sequential(torch.nn.Linear(encoder_output_dim, 8, bias=True))

    def rgb2lum(self, img):
        """_summary_

        Args:
            img (torch.tensor): _description_

        Returns:
            _type_: _description_
        """
        img = 0.27 * img[:, 0, :, :] + 0.67 * img[:, 1, :, :] + 0.06 * img[:, 2, :, :]
        return img

    def lerp(self, a, b, l):
        return (1 - l.unsqueeze(2).unsqueeze(3)) * a + l.unsqueeze(2).unsqueeze(3) * b

    def dark_channel(self, x):
        """_summary_

        Args:
            x (torch.tensor): _description_

        Returns:
            _type_: _description_
        """
        z = x.min(dim=1)[0].unsqueeze(1)
        return z

    def atmospheric_light(self, x, dark, top_k=1000):
        """_summary_

        Args:
            x (torch.tensor): _description_
            top_k (int, optional): _description_. Defaults to 1000.

        Returns:
            _type_: _description_
        """
        h, w = x.shape[2], x.shape[3]
        imsz = h * w
        numpx = int(max(math.floor(imsz / top_k), 1))
        darkvec = dark.reshape(x.shape[0], imsz, 1)
        imvec = x.reshape(x.shape[0], 3, imsz).transpose(1, 2)
        indices = darkvec.argsort(1)
        indices = indices[:, imsz - numpx:imsz]
        atmsum = torch.zeros([x.shape[0], 1, 3]).cuda()
        for b in range(x.shape[0]):
            for ind in range(1, numpx):
                atmsum[b, :, :] = atmsum[b, :, :] + imvec[b, indices[b, ind], :]
        a = atmsum / numpx
        a = a.squeeze(1).unsqueeze(2).unsqueeze(3)
        return a

    def blur(self, x):
        """_summary_

        Args:
            x (torch.tensor): _description_

        Returns:
            _type_: _description_
        """
        return self.gaussian_blur(x)

    def defog(self, x, latent_out, fog_gate):
        """Defogging module is used for removing the fog from the image using ASM
        (Atmospheric Scattering Model).
        I(X) = (1-T(X)) * J(X) + T(X) * A(X)
        I(X) => image containing the fog.
        T(X) => Transmission map of the image.
        J(X) => True image Radiance.
        A(X) => Atmospheric scattering factor.

        Args:
            x (torch.tensor): Input image I(X)
            latent_out (torch.tensor): Feature representation from DIP Module.
            fog_gate (torch.tensor): Gate value raning from (0. - 1.) which enables defog module.

        Returns:
            torch.tensor : Returns defogged image with true image radiance.
        """
        omega = self.defogging_module(latent_out).unsqueeze(2).unsqueeze(3)
        omega = self.tanh_range(omega, torch.tensor(0.1), torch.tensor(1.))
        dark_i = self.dark_channel(x)
        a = self.atmospheric_light(x, dark_i)
        i = x / a
        i = self.dark_channel(i)
        t = 1. - (omega * i)
        j = ((x - a) / (torch.maximum(t, torch.tensor(0.01)))) + a
        j = (j - j.min()) / (j.max() - j.min())
        j = j * fog_gate.unsqueeze(1).unsqueeze(2).unsqueeze(3)
        return j

    def white_balance(self, x, latent_out, wb_gate):
        """ White balance of the image is predicted using latent output of an encoder.

        Args:
            x (torch.tensor): Input RGB image.
            latent_out (torch.tensor): Output from the last layer of an encoder.
            wb_gate (torch.tensor): White-balance gate used to change the influence of color scaled image.

        Returns:
            torch.tensor: returns White-Balanced image.
        """
        log_wb_range = 0.5
        wb = self.wb_module(latent_out)
        wb = torch.exp(self.tanh_range(wb, -log_wb_range, log_wb_range))

        color_scaling = 1. / (1e-5 + 0.27 * wb[:, 0] + 0.67 * wb[:, 1] +
                              0.06 * wb[:, 2])
        wb = color_scaling.unsqueeze(1) * wb
        wb_out = wb.unsqueeze(2).unsqueeze(3) * x
        wb_out = (wb_out - wb_out.min()) / (wb_out.max() - wb_out.min())
        wb_out = wb_gate.unsqueeze(1).unsqueeze(2).unsqueeze(3) * wb_out
        return wb_out

    def tanh01(self, x):
        """_summary_

        Args:
            x (torch.tensor): _description_

        Returns:
            _type_: _description_
        """
        return torch.tanh(x) * 0.5 + 0.5

    def tanh_range(self, x, left, right):
        """_summary_

        Args:
            x (torch.tensor): _description_
            left (float): _description_
            right (float): _description_

        Returns:
            _type_: _description_
        """
        return self.tanh01(x) * (right - left) + left

    def gamma_balance(self, x, latent_out, gamma_gate):
        """_summary_

        Args:
            x (torch.tensor): _description_
            latent_out (torch.tensor): _description_
            gamma_gate (torch.tensor): _description_

        Returns:
            _type_: _description_
        """
        log_gamma = torch.log(torch.tensor(2.5))
        gamma = self.gamma_module(latent_out).unsqueeze(2).unsqueeze(3)
        gamma = torch.exp(self.tanh_range(gamma, -log_gamma, log_gamma))
        g = torch.pow(torch.maximum(x, torch.tensor(1e-4)), gamma)
        g = (g - g.min()) / (g.max() - g.min())
        g = g * gamma_gate.unsqueeze(1).unsqueeze(2).unsqueeze(3)
        return g

    def sharpning(self, x, latent_out, sharpning_gate):
        """_summary_

        Args:
            x (torch.tensor): _description_
            latent_out (torch.tensor): _description_
            sharpning_gate (torch.tensor): _description_

        Returns:
            _type_: _description_
        """
        out_x = self.blur(x)
        y = self.sharpning_module(latent_out).unsqueeze(2).unsqueeze(3)
        y = self.tanh_range(y, torch.tensor(0.1), torch.tensor(1.))
        s = x + (y * (x - out_x))
        s = (s - s.min()) / (s.max() - s.min())
        s = s * (sharpning_gate.unsqueeze(1).unsqueeze(2).unsqueeze(3))
        return s

    def identity(self, x, out_x, identity_gate):
        """_summary_

        Args:
            x (torch.tensor): _description_
            identity_gate (torch.tensor): _description_

        Returns:
            _type_: _description_
        """
        g = identity_gate.unsqueeze(1).unsqueeze(2).unsqueeze(3)
        x = (x * g) + ((torch.tensor(1.).cuda() - g) * out_x)
        return x

    def contrast(self, x, latent_out, contrast_gate):
        """_summary_

        Args:
            x (torch.tensor): _description_
            latent_out (torch.tensor): _description_
            contrast_gate (torch.tensor): _description_

        Returns:
            _type_: _description_
        """
        alpha = torch.tanh(self.contrast_module(latent_out))
        luminance = torch.minimum(torch.maximum(self.rgb2lum(x), torch.tensor(0.0)), torch.tensor(1.0)).unsqueeze(1)
        contrast_lum = -torch.cos(math.pi * luminance) * 0.5 + 0.5
        contrast_image = x / (luminance + 1e-6) * contrast_lum
        contrast_image = self.lerp(x, contrast_image, alpha)
        contrast_image = (contrast_image - contrast_image.min()) / (contrast_image.max() - contrast_image.min())
        contrast_image = contrast_image * contrast_gate.unsqueeze(1).unsqueeze(2).unsqueeze(3)
        return contrast_image

    def tone(self, x, latent_out, tone_gate):
        """_summary_

        Args:
            x (torch.tensor): _description_
            latent_out (torch.tensor): _description_
            tone_gate (torch.tensor): _description_

        Returns:
            _type_: _description_
        """
        curve_steps = 8
        tone_curve = self.tone_module(latent_out).reshape(-1, 1, curve_steps)
        tone_curve = self.tanh_range(tone_curve, 0.5, 2)
        tone_curve_sum = torch.sum(tone_curve, dim=2) + 1e-30
        total_image = x * 0
        for i in range(curve_steps):
            total_image += torch.clamp(x - 1.0 * i / curve_steps, 0, 1.0 / curve_steps) \
                           * tone_curve[:, :, i].unsqueeze(2).unsqueeze(3)
        total_image *= curve_steps / tone_curve_sum.unsqueeze(2).unsqueeze(3)
        total_image = (total_image - total_image.min()) / (total_image.max() - total_image.min())
        total_image = total_image * tone_gate.unsqueeze(1).unsqueeze(2).unsqueeze(3)
        return total_image

    def forward(self, x):
        """_summary_

        Args:
            x (torch.Tensor): _description_

        Returns:
            _type_: _description_
        """
        latent_out = torch.nn.functional.relu_(self.encoder(x))
        gate = self.tanh_range(self.gate_module(latent_out), 0.01, 1.0)
        wb_out = self.white_balance(x, latent_out, gate[:, 0])
        gamma_out = self.gamma_balance(x, latent_out, gate[:, 1])
        sharpning_out = self.sharpning(x, latent_out, gate[:, 3])
        fog_out = self.defog(x, latent_out, gate[:, 4])
        contrast_out = self.contrast(x, latent_out, gate[:, 5])
        tone_out = self.tone(x, latent_out, gate[:, 6])
        out_x = wb_out + gamma_out + fog_out + sharpning_out + contrast_out + tone_out
        out_x = (out_x - out_x.min()) / (out_x.max() - out_x.min())
        x = self.identity(x, out_x, gate[:, 2])
        return x


if __name__ == '__main__':
    batch_size = 2
    encoder_out_dim = 256
    x = torch.randn(1, 3, 640, 640).cuda()
    x = (x - x.min()) / (x.max() - x.min())
    model = GatedDIP(encoder_output_dim=encoder_out_dim).cuda()
    print(model)
    out = model(x)
    print('out shape:', out.shape)
四、添加方式教程
4.1 修改一
第一还是建立文件,我们找到如下ultralytics/nn/modules文件夹下建立一个目录名字呢就是'Addmodules'文件夹(用群内的文件的话已经有了无需新建)!然后在其内部建立一个新的py文件将核心代码复制粘贴进去即可。
4.2 修改二
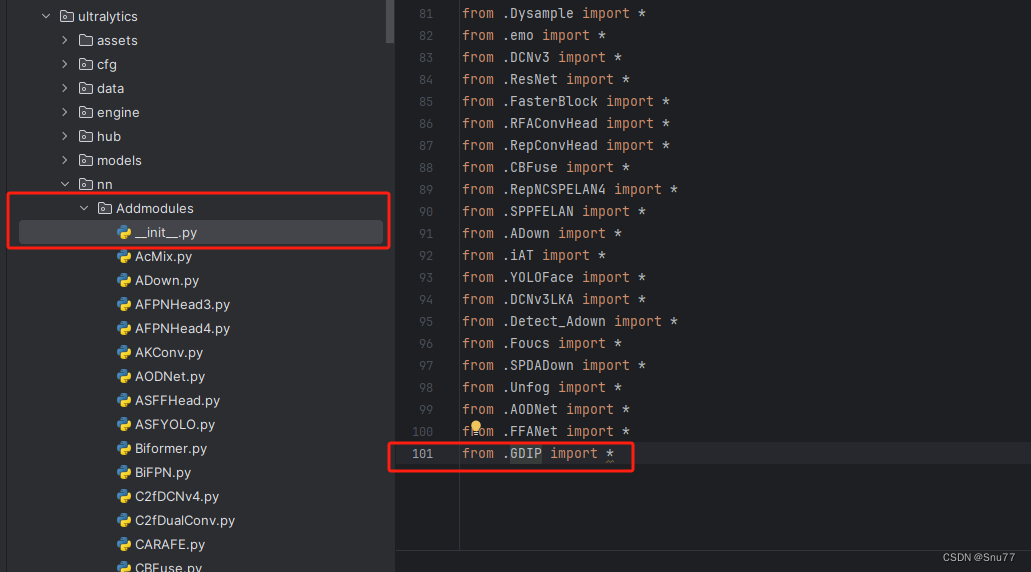
第二步我们在该目录下创建一个新的py文件名字为'__init__.py'(用群内的文件的话已经有了无需新建),然后在其内部导入我们的检测头如下图所示。
4.3 修改三
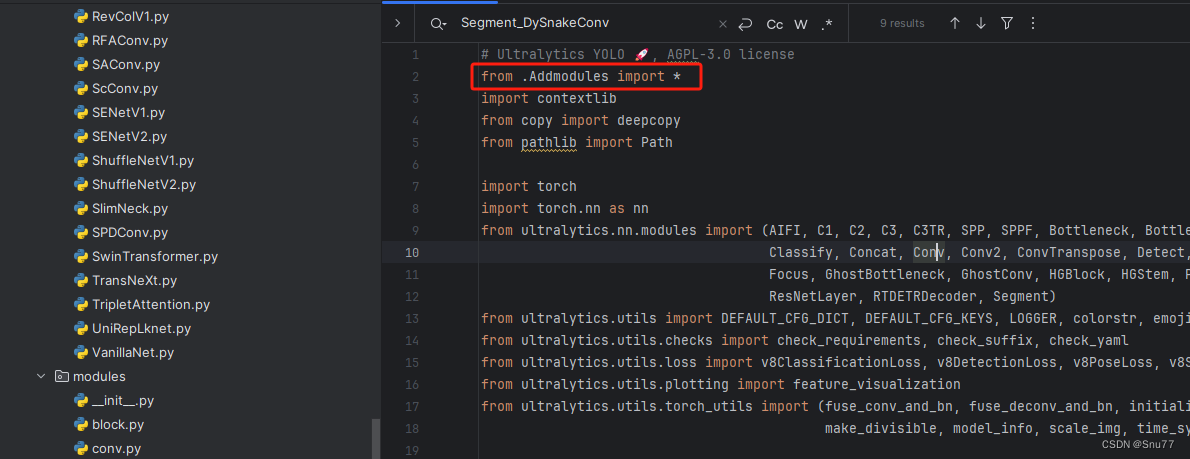
第三步我门中到如下文件'ultralytics/nn/tasks.py'进行导入和注册我们的模块(用群内的文件的话已经有了无需重新导入直接开始第四步即可)!
从今天开始以后的教程就都统一成这个样子了,因为我默认大家用了我群内的文件来进行修改!!
到此就修改完成了,大家可以复制下面的yaml文件运行。
五、yaml文件和运行记录
5.1 yaml文件1
# Ultralytics YOLO 🚀, AGPL-3.0 license
# YOLOv8 object detection model with P3-P5 outputs. For Usage examples see https://docs.ultralytics.com/tasks/detect

# Parameters
nc: 80  # number of classes
scales: # model compound scaling constants, i.e. 'model=yolov8n.yaml' will call yolov8.yaml with scale 'n'
  # [depth, width, max_channels]
  n: [0.33, 0.25, 1024]  # YOLOv8n summary: 225 layers,  3157200 parameters,  3157184 gradients,   8.9 GFLOPs
  s: [0.33, 0.50, 1024]  # YOLOv8s summary: 225 layers, 11166560 parameters, 11166544 gradients,  28.8 GFLOPs
  m: [0.67, 0.75, 768]   # YOLOv8m summary: 295 layers, 25902640 parameters, 25902624 gradients,  79.3 GFLOPs
  l: [1.00, 1.00, 512]   # YOLOv8l summary: 365 layers, 43691520 parameters, 43691504 gradients, 165.7 GFLOPs
  x: [1.00, 1.25, 512]   # YOLOv8x summary: 365 layers, 68229648 parameters, 68229632 gradients, 258.5 GFLOPs

# YOLOv8.0n backbone
backbone:
  # [from, repeats, module, args]
  - [-1, 1, GatedDIP, []]  # 0-P1/2
  - [-1, 1, Conv, [64, 3, 2]]  # 1-P1/2
  - [-1, 1, Conv, [128, 3, 2]]  # 2-P2/4
  - [-1, 3, C2f, [128, True]]
  - [-1, 1, Conv, [256, 3, 2]]  # 4-P3/8
  - [-1, 6, C2f, [256, True]]
  - [-1, 1, Conv, [512, 3, 2]]  # 6-P4/16
  - [-1, 6, C2f, [512, True]]
  - [-1, 1, Conv, [1024, 3, 2]]  # 8-P5/32
  - [-1, 3, C2f, [1024, True]]
  - [-1, 1, SPPF, [1024, 5]]  # 10

# YOLOv8.0n head
head:
  - [-1, 1, nn.Upsample, [None, 2, 'nearest']]
  - [[-1, 7], 1, Concat, [1]]  # cat backbone P4
  - [-1, 3, C2f, [512]]  # 13

  - [-1, 1, nn.Upsample, [None, 2, 'nearest']]
  - [[-1, 5], 1, Concat, [1]]  # cat backbone P3
  - [-1, 3, C2f, [256]]  # 16 (P3/8-small)

  - [-1, 1, Conv, [256, 3, 2]]
  - [[-1, 13], 1, Concat, [1]]  # cat head P4
  - [-1, 3, C2f, [512]]  # 19 (P4/16-medium)

  - [-1, 1, Conv, [512, 3, 2]]
  - [[-1, 10], 1, Concat, [1]]  # cat head P5
  - [-1, 3, C2f, [1024]]  # 22 (P5/32-large)

  - [[16, 19, 22], 1, Detect, [nc]]  # Detect(P3, P4, P5)
5.2 训练代码
大家可以创建一个py文件将我给的代码复制粘贴进去,配置好自己的文件路径即可运行。
import warnings
warnings.filterwarnings('ignore')
from ultralytics import YOLO
if __name__ == '__main__':
model = YOLO('ultralytics/cfg/models/v8/yolov8-C2f-FasterBlock.yaml')
# model.load('yolov8n.pt') # loading pretrain weights
model.train(data=r'替换数据集yaml文件地址',
# 如果大家任务是其它的'ultralytics/cfg/default.yaml'找到这里修改task可以改成detect, segment, classify, pose
cache=False,
imgsz=640,
epochs=150,
single_cls=False, # 是否是单类别检测
batch=4,
close_mosaic=10,
workers=0,
device='0',
optimizer='SGD', # using SGD
# resume='', # 如过想续训就设置last.pt的地址
amp=False, # 如果出现训练损失为Nan可以关闭amp
project='runs/train',
name='exp',
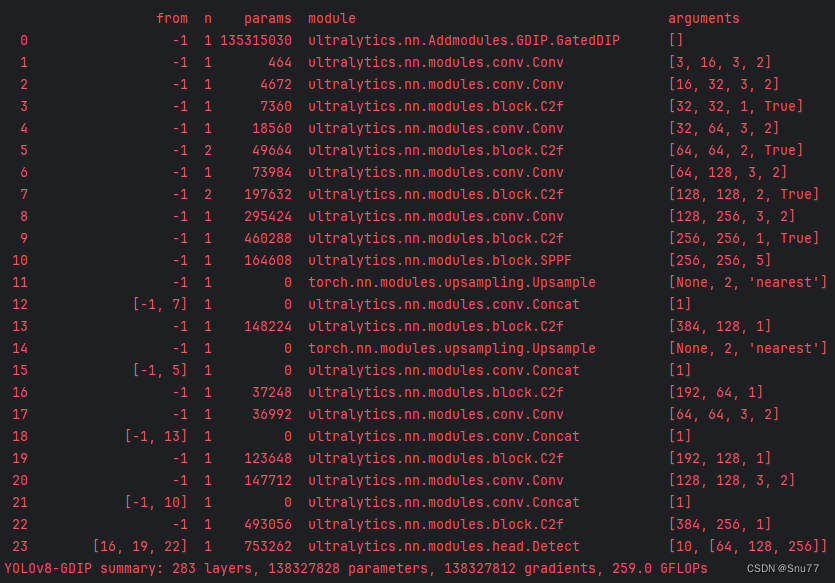
)5.3 训练过程截图
五、本文总结
到此本文的正式分享内容就结束了,在这里给大家推荐我的YOLOv8改进有效涨点专栏,本专栏目前为新开的平均质量分98分,后期我会根据各种最新的前沿顶会进行论文复现,也会对一些老的改进机制进行补充,如果大家觉得本文帮助到你了,订阅本专栏,关注后续更多的更新~
专栏目录:YOLOv8改进有效系列目录 | 包含卷积、主干、检测头、注意力机制、Neck上百种创新机制