一、 打jar包依赖
- 先去掉启动类
- pom中添加如下的maven打包插件
<build>
        <plugins>
            <plugin>
                <groupId>org.apache.maven.plugins</groupId>
                <artifactId>maven-compiler-plugin</artifactId>
                <version>3.8.0</version>
                <configuration>
                    <source>1.8</source>
                    <target>1.8</target>
                </configuration>
            </plugin>
        </plugins>
    </build>
- 使用maven的install生成依赖jar包
3.1 使用 idea工具

3.2 使用maven命令
①使用mvn install命令
②将项目打包成jar包,之后找到该jar包路径,填入下面的-Dfile=jar包路径
mvn install:install-file -Dfile=D:\temp\idea_workplace\jardemo\target\jardemo-0.0.1-SNAPSHOT.jar -DgroupId=com.example -DartifactId=jardemo -Dversion=0.0.1-SNAPSHOT -Dpackaging=jar
-Dfile 为本地jar的路径
-DgroupId为在maven仓库中的路径
-DartifactId为maven仓库中的依赖的名称
-Dversion为版本号
-Dpackaging为类型
二、上传jar依赖到远程仓库
使用Maven命令的方式上传jar
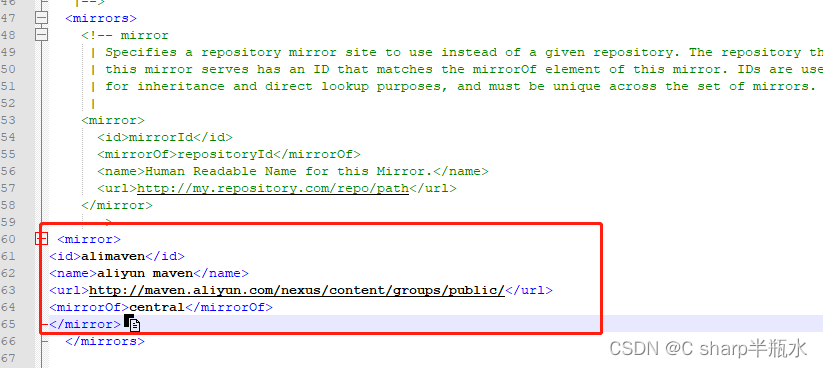
1、在maven的settings.xml文件中添加
<!--nexus服务器-->
<servers>
  <!--id为对应资源库id-->
  <server>
    <id>nexus-snapshot-hosted</id>
    <username>admin</username>
    <password>nexus</password>
  </server>
  <server>
    <id>nexus-hosted</id>
    <username>admin</username>
    <password>nexus</password>
  </server>
  <server>
    <id>nexus</id>
    <username>admin</username>
    <password>nexus</password>
  </server>
</servers>
2、执行mvn命令
mvn deploy:deploy-file
-DgroupId=对应pom中的groupId
-DartifactId=对应pom中的artifactId
-Dversion=对应pom中的version
-Dpackaging=对应pom中的packaging
-Dfile=文件路径
-DpomFile=表示需要上传的jar包对应的pom文件的绝对路径
-Durl=上传的服务器
-DrepositoryId=服务器的表示ID,setting.xml文件中配置的serverId,用来关联私服的用户名和密码
mvn命令举例
mvn deploy:deploy-file
-DgroupId=com.example
-DartifactId=dandelion-common-codec
-Dversion=1.0.0-SNAPSHOT
-Dpackaging=jar
-Dfile=D:\Repository\dandelion-common-codec\target\dandelion-common-codec-1.0.0-SNAPSHOT.jar
-Durl=http://127.0.0.1:8081/repository/yunding-platform-snapshots/ -DrepositoryId=platform-snapshots
结果