一、整合JUnit
1、Spring 整合 JUnit
核心注解有两个:
@RunWith(SpringJUnit4ClassRunner.class)是设置Spring专用于测试的类运行器(Spring程序执行程序有自己的一套独立的运行程序的方式,不能使用JUnit提供的类运行方式)@ContextConfiguration(classes = SpringConfig.class)是用来设置Spring核心配置文件或配置类的(就是加载Spring的环境所需具体的环境配置)
//加载spring整合junit专用的类运行器
@RunWith(SpringJUnit4ClassRunner.class)
//指定对应的配置信息
@ContextConfiguration(classes = SpringConfig.class)
public class DemoServiceTestCase {
    //注入你要测试的对象
    @Autowired
    private DemoService demoService;
    @Test
    public void testGetById(){
        //执行要测试的对象对应的方法
        System.out.println(accountService.findById(2));
    }
}
2、SpringBoot 整合 JUnit
SpringBoot直接简化了 @RunWith(SpringJUnit4ClassRunner.class) 和 @ContextConfiguration(classes = SpringConfig.class) 这两个几乎固定的注解。
package com.ty;

import com.ty.service.DemoService;
import org.junit.jupiter.api.Test;
import org.springframework.beans.factory.annotation.Autowired;
import org.springframework.boot.test.context.SpringBootTest;

@SpringBootTest
class SpringbootDemoApplicationTests {

    @Autowired
    private DemoService demoService;

    @Test
    public void getByIdTest(){
        demoService.getById();
    }
}
注意:
当然,如果测试类 SpringbootDemoApplicationTests 所在的包目录与 SpringBoot启动类 SpringbootDemoApplication 不相同,则启动时JUnit会找不到SpringBoot的启动类。报错 java.lang.IllegalStateException: Unable to find a @SpringBootConfiguration, you need to use @ContextConfiguration or @SpringBootTest(classes=...) with your test。
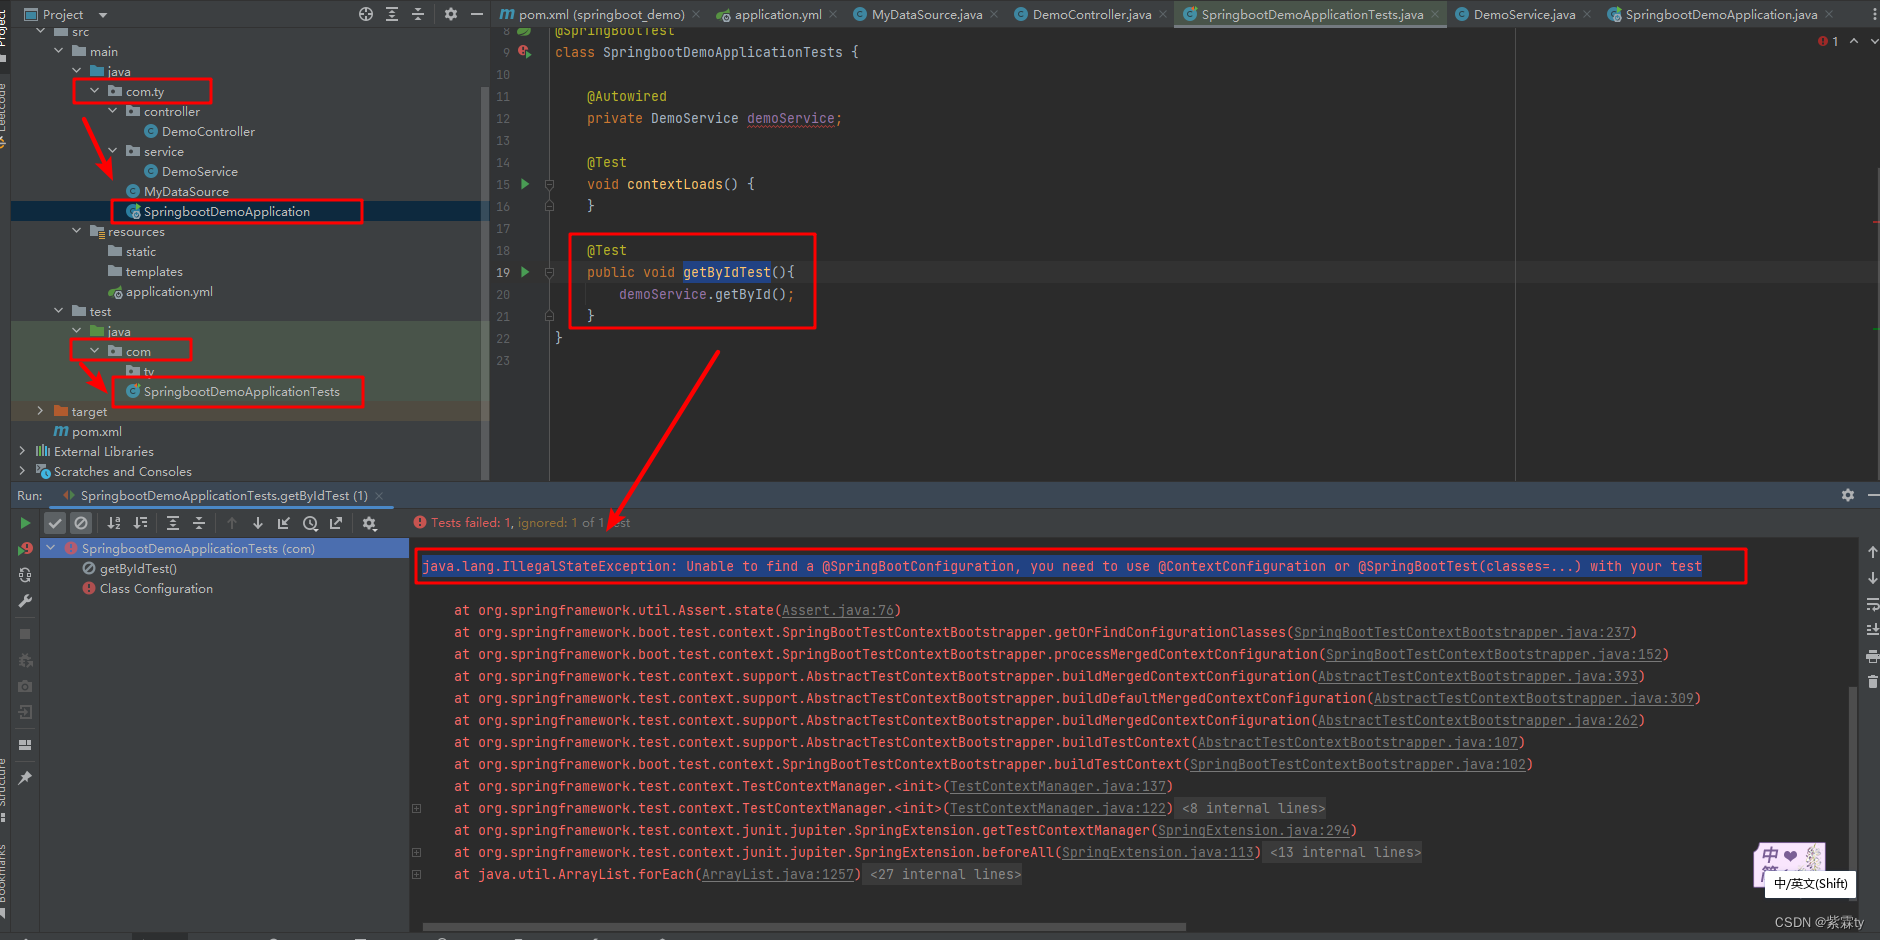
解决方法: 将测试类 SpringbootDemoApplicationTests 所在的包目录与 SpringBoot启动类 SpringbootDemoApplication 调整一致,或通过 @SpringBootTest(classes = SpringbootDemoApplication.class) 指定SpringBoot启动类。
二、整合MyBatis
1、Spring 整合 MyBatis
-
首选引入MyBatis的一系列 Jar
<dependencies> <dependency> <groupId>com.alibaba</groupId> <artifactId>druid</artifactId> <version>1.1.16</version> </dependency> <dependency> <groupId>org.mybatis</groupId> <artifactId>mybatis</artifactId> <version>3.5.6</version> </dependency> <dependency> <groupId>mysql</groupId> <artifactId>mysql-connector-java</artifactId> <version>5.1.47</version> </dependency> <!--1.导入mybatis与spring整合的jar包--> <dependency> <groupId>org.mybatis</groupId> <artifactId>mybatis-spring</artifactId> <version>1.3.0</version> </dependency> <!--导入spring操作数据库必选的包--> <dependency> <groupId>org.springframework</groupId> <artifactId>spring-jdbc</artifactId> <version>5.2.10.RELEASE</version> </dependency> </dependencies> -
数据库连接信息配置
jdbc.driver=com.mysql.jdbc.Driver jdbc.url=jdbc:mysql://localhost:3306/spring_db?useSSL=false jdbc.username=root jdbc.password=root -
定义mybatis专用的配置类
//定义mybatis专用的配置类 @Configuration public class MyBatisConfig { // 定义创建SqlSessionFactory对应的bean @Bean public SqlSessionFactoryBean sqlSessionFactory(DataSource dataSource){ //SqlSessionFactoryBean是由mybatis-spring包提供的,专用于整合用的对象 SqlSessionFactoryBean sfb = new SqlSessionFactoryBean(); //设置数据源替代原始配置中的environments的配置 sfb.setDataSource(dataSource); //设置类型别名替代原始配置中的typeAliases的配置 sfb.setTypeAliasesPackage("com.itheima.domain"); return sfb; } // 定义加载所有的映射配置 @Bean public MapperScannerConfigurer mapperScannerConfigurer(){ MapperScannerConfigurer msc = new MapperScannerConfigurer(); msc.setBasePackage("com.itheima.dao"); return msc; } } -
Spring核心配置
@Configuration @ComponentScan("com.itheima") @PropertySource("jdbc.properties") public class SpringConfig { } -
配置Bean
@Configuration
public class JdbcConfig {
    @Value("${jdbc.driver}")
    private String driver;
    @Value("${jdbc.url}")
    private String url;
    @Value("${jdbc.username}")
    private String userName;
    @Value("${jdbc.password}")
    private String password;

    @Bean("dataSource")
    public DataSource dataSource(){
        DruidDataSource ds = new DruidDataSource();
        ds.setDriverClassName(driver);
        ds.setUrl(url);
        ds.setUsername(userName);
        ds.setPassword(password);
        return ds;
    }
}
2、SpringBoot 整合 MyBatis
对比以上,SpringBoot简单很多。
-
首先导入MyBatis对应的starter
mybatis-spring-boot-starter和 数据库驱动mysql-connector-java<dependency> <groupId>org.mybatis.spring.boot</groupId> <artifactId>mybatis-spring-boot-starter</artifactId> <version>2.2.0</version> </dependency> <dependency> <groupId>mysql</groupId> <artifactId>mysql-connector-java</artifactId> <version>8.0.27</version> <scope>runtime</scope> </dependency> -
配置数据源相关信息
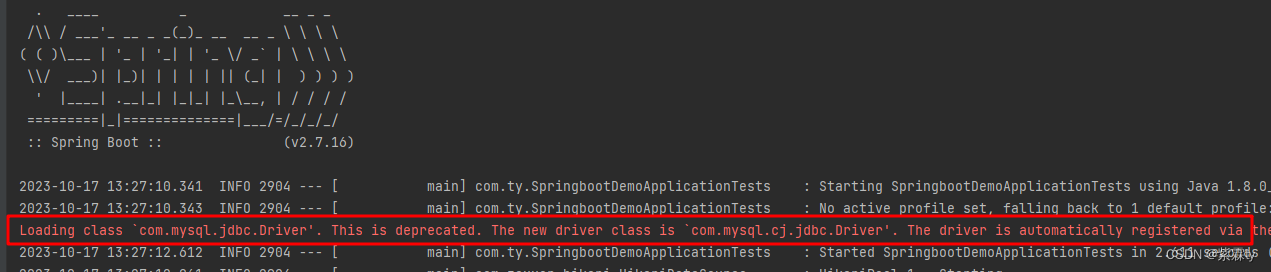
spring:
  datasource:
    driver-class-name: com.mysql.jdbc.Driver
    url: jdbc:mysql://localhost:3306/ty
    username: root
    password: 123
驱动类过时,提醒更换为com.mysql.cj.jdbc.Driver
-
配置Entity和Dao,数据库SQL映射需要添加@Mapper被容器识别到
package com.ty.entity;

import lombok.Data;

@Data
public class TyUser {

    private Integer id;

    private String name;

    private Integer age;

}
package com.ty.dao; import com.ty.entity.TyUser; import org.apache.ibatis.annotations.Mapper; import org.apache.ibatis.annotations.Select; @Mapper public interface DemoDao { @Select("select * from ty_user where id = #{id}") public TyUser getById(Integer id); } -
通过测试类,注入 DemoService 即可调用。
package com.ty;

import com.ty.dao.DemoDao;
import com.ty.entity.TyUser;
import org.junit.jupiter.api.Test;
import org.springframework.beans.factory.annotation.Autowired;
import org.springframework.boot.test.context.SpringBootTest;

@SpringBootTest
class SpringbootDemoApplicationTests {
    @Autowired
    private DemoDao demoDao;

    @Test
    public void getByIdTestDao(){
        TyUser byId = demoDao.getById(1);
        System.out.println(byId);
    }

}
三、整合MyBatis-Plus
MyBaitsPlus(简称MP),国人开发的技术,符合中国人开发习惯
-
导入 mybatis_plus starter
mybatis-plus-boot-starter<dependency> <groupId>com.baomidou</groupId> <artifactId>mybatis-plus-boot-starter</artifactId> <version>3.4.3</version> </dependency> -
配置数据源相关信息
spring: datasource: driver-class-name: com.mysql.jdbc.Driver url: jdbc:mysql://localhost:3306/ty username: root password: 123 -
Dao 映射接口与实体类
package com.example.springboot_mybatisplus_demo.dao;

import com.baomidou.mybatisplus.core.mapper.BaseMapper;
import com.example.springboot_mybatisplus_demo.entity.User;
import org.apache.ibatis.annotations.Mapper;

@Mapper
public interface DemoDao extends BaseMapper<User> {
}
实体类名称与表名一致,可自动映射。当表名有前缀时,可在application.yml中配置表的通用前缀。
package com.example.springboot_mybatisplus_demo.entity; import lombok.Data; @Data public class User { private Integer id; private String name; private Integer age; }mybatis-plus: global-config: db-config: table-prefix: ty_ #设置所有表的通用前缀名称为tbl_ -
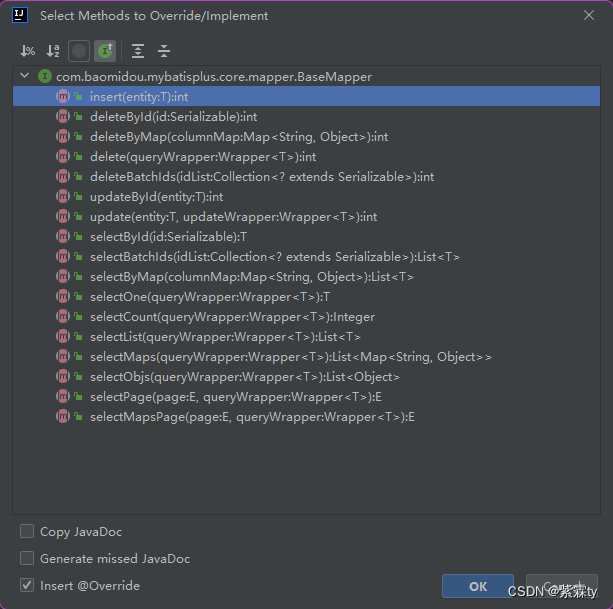
编写测试类,注入DemoDao ,即可调用 mybatis_plus 提供的一系列方法。继承的BaseMapper的接口中帮助开发者预定了若干个常用的API接口,简化了通用API接口的开发工作。
package com.example.springboot_mybatisplus_demo;

import com.example.springboot_mybatisplus_demo.dao.DemoDao;
import com.example.springboot_mybatisplus_demo.entity.User;
import org.junit.jupiter.api.Test;
import org.springframework.beans.factory.annotation.Autowired;
import org.springframework.boot.test.context.SpringBootTest;

@SpringBootTest
class SpringbootMybatisplusDemoApplicationTests {

    @Autowired
    private DemoDao demoDao;

    @Test
    public void getByIdTestDao(){
        User byId = demoDao.selectById(1);
        System.out.println(byId);
    }

}