官方有很详细的文档,但是看过几遍之后如果要翻找还是有点麻烦,本文算作是学习笔记,提取一些关键点记录下来,另附上官方教程 Writing your first Django app
注: 文中的指令使用py,是在Windows上,macOS要使用 python3
1. 安装Django
Django 是一个基于 Python 的Web开发框架,安装前可以用下面的命令检查是否安装了 Django,如果已经安装,会显示版本,没有安装会提示没有该模块
py -m django --version如果没有安装,可以使用下面的命令安装
py -m pip install Django2. 创建项目
项目就是一个 project,一个项目可以包含多个 app,也可以理解为多个模块,创建项目使用如下命令,其中 mysite 是项目名称:
django-admin startproject mysite在令窗口中,切到刚刚创建的项目的根目录(有 manage.py),在项目中创建一个app,名字就叫 polls
py manage.py startapp polls然后修改几个文件
polls/views.py
from django.http import HttpResponse

def index(request):
    return HttpResponse("Hello World!")
polls/urls.py
from django.urls import path
from . import views

urlpatterns = [
    path("", views.index, name="index"),
]
mysite/urls.py
from django.contrib import admin
from django.urls import include, path

urlpatterns = [
    path("polls/", include("polls.urls")),
    path("admin/", admin.site.urls),
]
最后启动服务,浏览器访问 http://localhost:8000/polls/
py manage.py runserver3. 配置语言和时区
项目配置在 mysite/settings.py
语言标识可以在这里查找 Language Identifiers (RFC 3066)
# 语言设置为中文
LANGUAGE_CODE = 'zh-Hans'
时区标识可以在这里查找 List of tz database time zones
# 时区设置为北京时间
TIME_ZONE = 'Asia/Shanghai'
4. 数据库
就使用自带的 SQLite 吧,方便又简单,如果开发商用的Web App,建议使用其他数据库,要进行额外的配置。
(1)创建数据模型
修改 polls/models.py
import datetime

from django.db import models
from django.utils import timezone

class Question(models.Model):
	question_text = models.CharField(max_length=200)
	pub_date = models.DateTimeField("date published")

	def __str__(self):
		return self.question_text

	def was_published_recently(self):
		return self.pub_date >= timezone.now() - datetime.timedelta(days=1)


class Choice(models.Model):
	# Choice属于一个Question
	question = models.ForeignKey(Question, on_delete=models.CASCADE)
	choice_text = models.CharField(max_length=200)
	votes = models.IntegerField(default=0)

	def __str__(self):
		return self.choice_text
(2)激活模型
修改 mysite/settings.py,在 INSTALLED_APP 中添加 polls.apps.PollsConfig
INSTALLED_APPS = [
    "polls.apps.PollsConfig",
    "django.contrib.admin",
    "django.contrib.auth",
    "django.contrib.contenttypes",
    "django.contrib.sessions",
    "django.contrib.messages",
    "django.contrib.staticfiles",
]
(3)创建数据迁移(尚未提交)
py manage.py makemigrations polls查看创建的迁移使用的SQL语句,下面命令中的 0001 是上面创建迁移时生成的 polls/migrations/0001_initial.py 文件名中的数字
py manage.py sqlmigrate polls 0001(4)提交迁移
py manage.py migrate总结起来就三步:修改模型 -> 创建迁移 -> 提交迁移
(5)玩转数据库API
打开交互式窗口
py manage.py shell>>> from polls.models import Choice, Question >>> Question.objects.all() <QuerySet []> >>> from django.utils import timezone >>> q = Question(question_text="What's new?", pub_date=timezone.now()) >>> q.save() >>> q.id 1 >>> q.question_text "What's new?" >>> q.pub_date datetime.datetime(2012, 2, 26, 13, 0, 0, 775217, tzinfo=datetime.timezone.utc) >>> q.question_text = "What's up?" >>> q.save() >>> Question.objects.all() <QuerySet [<Question: Question object (1)>]>
>>> from polls.models import Choice, Question
>>> Question.objects.all()
<QuerySet [<Question: What's up?>]>
>>> Question.objects.filter(id=1)
<QuerySet [<Question: What's up?>]>
>>> Question.objects.filter(question_text__startswith="What")
<QuerySet [<Question: What's up?>]>
>>> from django.utils import timezone
>>> current_year = timezone.now().year
>>> Question.objects.get(pub_date__year=current_year)
<Question: What's up?>
>>> Question.objects.get(id=2)
Traceback (most recent call last):
    ...
DoesNotExist: Question matching query does not exist.
>>> Question.objects.get(pk=1)
<Question: What's up?>
>>> q = Question.objects.get(pk=1)
>>> q.was_published_recently()
True
>>> q = Question.objects.get(pk=1)
>>> q.choice_set.all()
<QuerySet []>
>>> q.choice_set.create(choice_text="Not much", votes=0)
<Choice: Not much>
>>> q.choice_set.create(choice_text="The sky", votes=0)
<Choice: The sky>
>>> c = q.choice_set.create(choice_text="Just hacking again", votes=0)
>>> c.question
<Question: What's up?>

>>> q.choice_set.all()
<QuerySet [<Choice: Not much>, <Choice: The sky>, <Choice: Just hacking again>]>
>>> q.choice_set.count()
3
>>> Choice.objects.filter(question__pub_date__year=current_year)
<QuerySet [<Choice: Not much>, <Choice: The sky>, <Choice: Just hacking again>]>
>>> c = q.choice_set.filter(choice_text__startswith="Just hacking")
>>> c.delete()
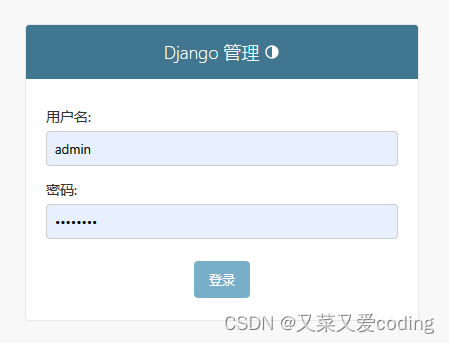
5. 创建管理员
输入下面的命令,然后根据提示设置账户名,邮箱,密码
py manage.py createsuperuser启动服务,浏览器访问 http://127.0.0.1:8000/admin/
py manage.py runserver