文章目录
- 一、引言
- 1、开发环境
- 2、整体架构图
- 二、认识ArkUI
- 1、基本概念
- 2、开发范式(附:案例)
- (1)ArkTS
- (2)JS
- 三、附件
一、引言
1、开发环境
之后关于HarmonyOS技术的分享,将会持续使用到以下版本
- HarmonyOS:3.1/4.0
- SDK:API 9 Release
- Node.js:v14.20.1
- DevEco Studio: 3.1.0
2、整体架构图
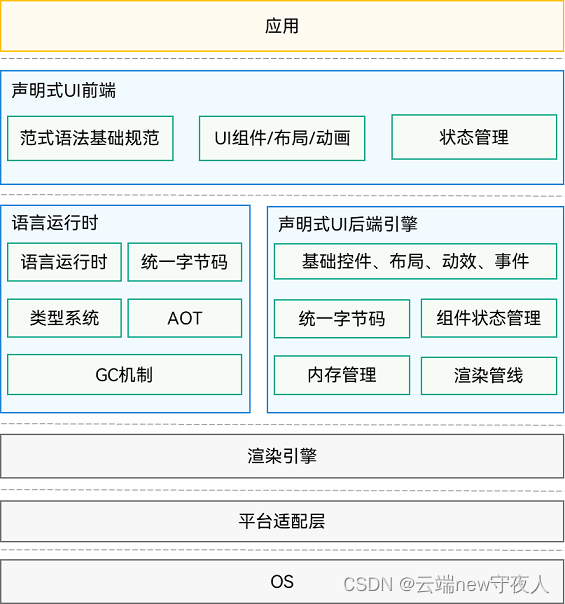
二、认识ArkUI
HarmonyOS应用的UI开发依赖于方舟开发框架(简称ArkUI)。
根据官方介绍,ArkUI提供了UI语法、丰富的UI功能(组件、布局、动画以及交互事件),以及实时界面预览工具等,可以支持开发者进行可视化界面开发。
1、基本概念
(官方已经给出了非常详细的介绍,我这里就照搬,主要为后面的实操进行铺垫)
- UI:即用户界面。开发者可以将应用的用户界面设计为多个功能页面,每个页面进行单独的文件管理,并通过页面路由API完成页面间的调度管理如跳转、回退等操作,以实现应用内的功能解耦。
- 组件:UI构建与显示的最小单位,如列表、网格、按钮、单选框、进度条、文本等。开发者通过多种组件的组合,构建出满足自身应用诉求的完整界面。
2、开发范式(附:案例)
ArkUI为开发者提供了两种范式:基于TypeScript声明式范式(ArkTS)、兼容JS的类Web开发范式(JS)
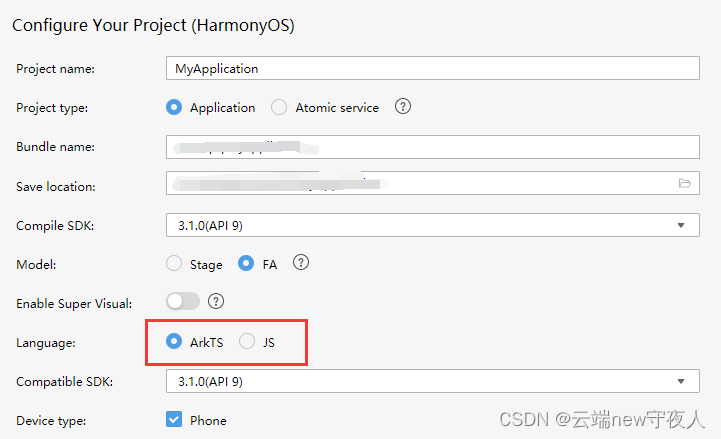
(1)ArkTS
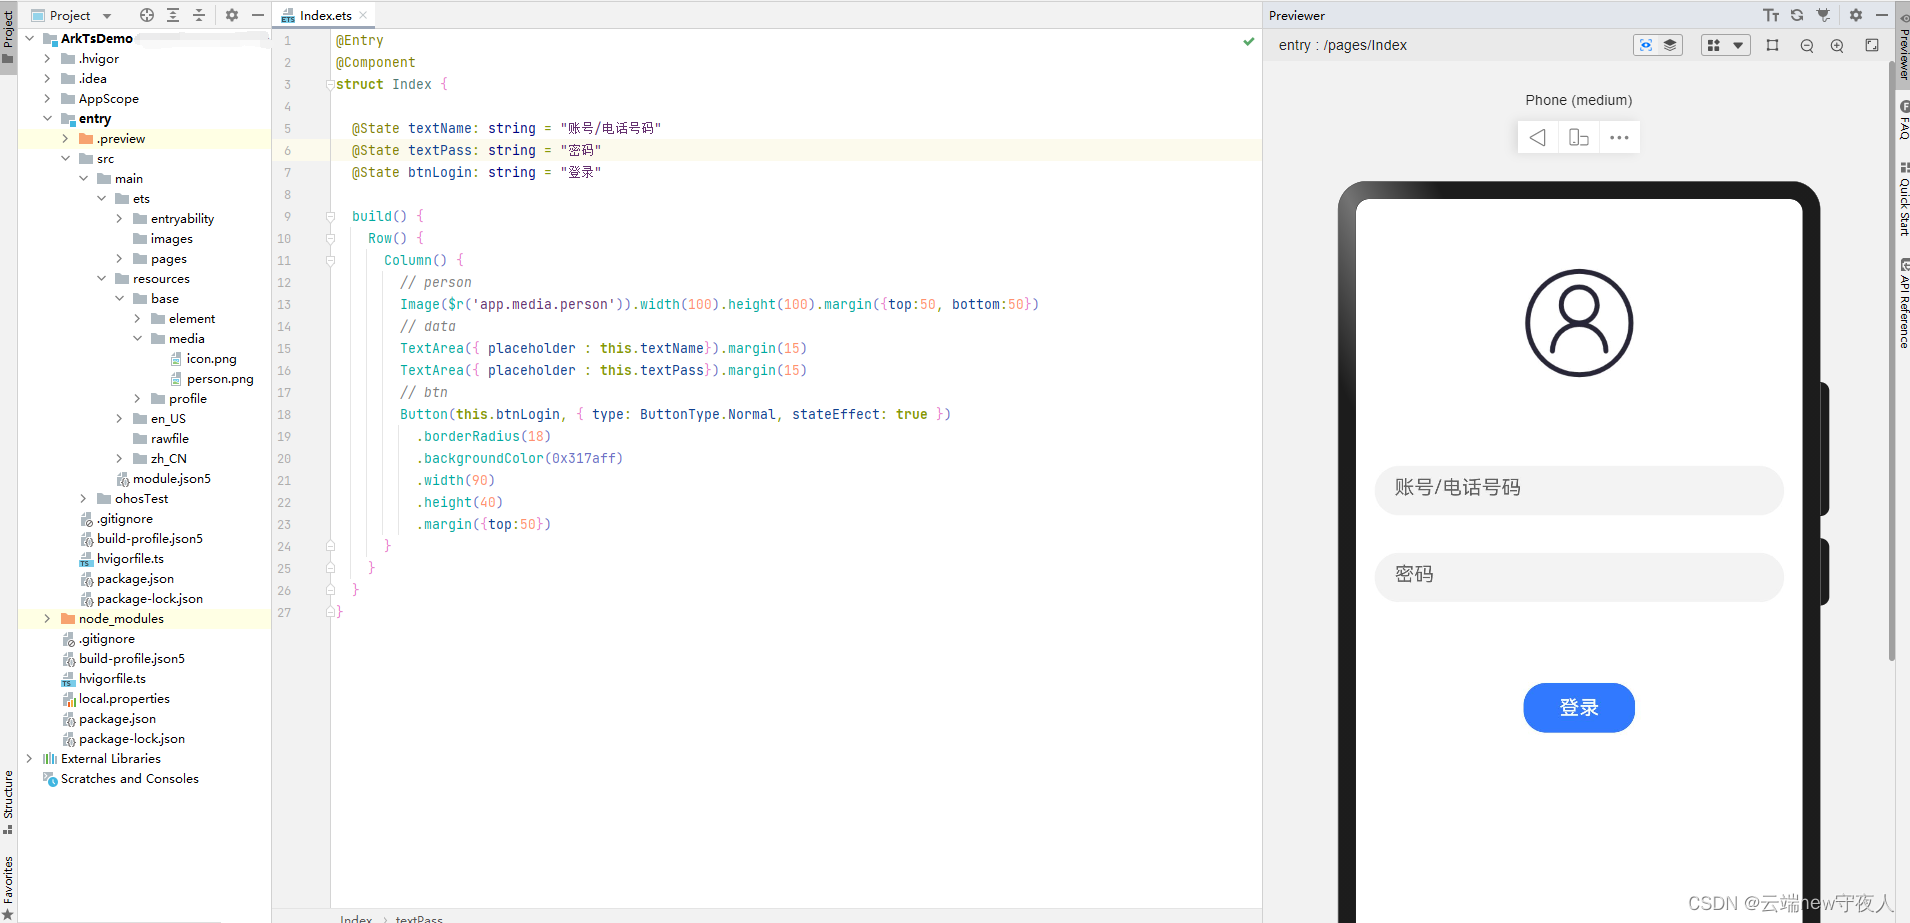
ArkTS我也仅仅学习了四个月,相比较我在使用JS开发UI界面上而言,有所偏弱。
对比较于Android:ArkUI将界面设计和具体操作放到的一个文件中(当然ArkUI有组件自定义,这个就另当别论),这个方式比较新颖。在内存的占用上会相对减低很多,性能和维护上也相对提升很多。
(2)JS
HTML、CSS、JS这一套技术,相信很多IT人都已经非常熟悉,这也是我能快速入手HarmonyOS的重要因素。个人也是比较推荐使用这套技术进行简单应用,如果要使用到手机硬件功能的话,推荐使用ArkTS。ArkTS在操作编写上比JS要方便很多。
三、附件
- ArkTS代码
@Entry
@Component
struct Index {

  @State textName: string = "账号/电话号码"
  @State textPass: string = "密码"
  @State btnLogin: string = "登录"

  build() {
    Row() {
      Column() {
        // person
        Image($r('app.media.person')).width(100).height(100).margin({top:50, bottom:50})
        // data
        TextArea({ placeholder : this.textName}).margin(15)
        TextArea({ placeholder : this.textPass}).margin(15)
        // btn
        Button(this.btnLogin, { type: ButtonType.Normal, stateEffect: true })
          .borderRadius(18)
          .backgroundColor(0x317aff)
          .width(90)
          .height(40)
          .margin({top:50})
      }
    }
  }
}
- JS代码
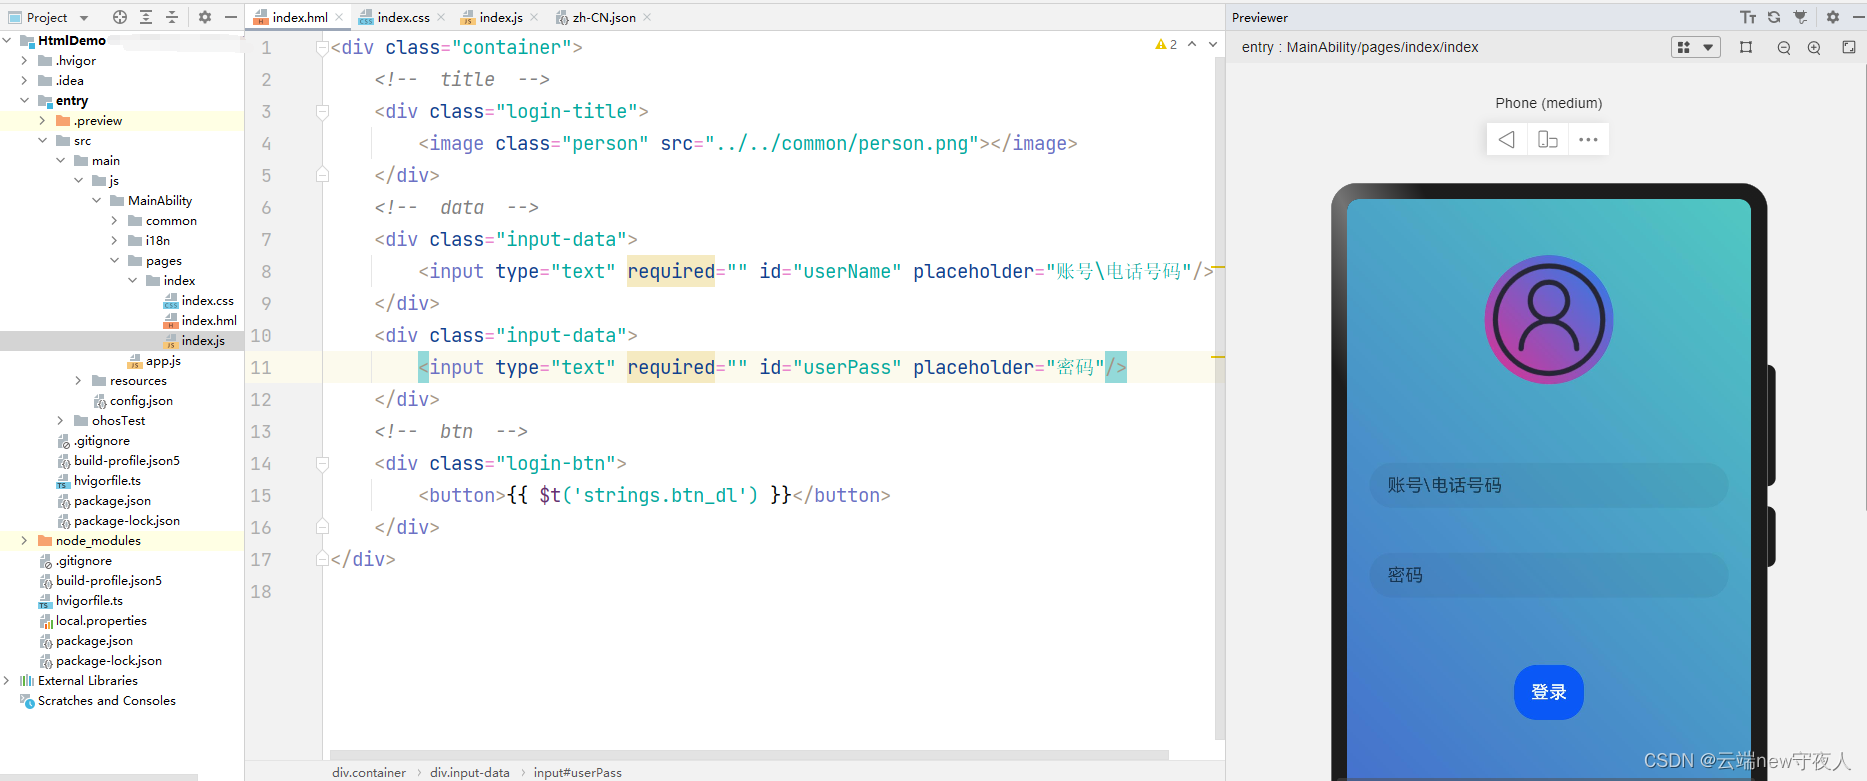
index.hml
<div class="container">
    <!--  title  -->
    <div class="login-title">
        <image class="person" src="../../common/person.png"></image>
    </div>
    <!--  data  -->
    <div class="input-data">
        <input type="text" required="" id="userName" placeholder="账号\电话号码"/>
    </div>
    <div class="input-data">
        <input type="text" required="" id="userPass" placeholder="密码"/>
    </div>
    <!--  btn  -->
    <div class="login-btn">
        <button>{{ $t('strings.btn_dl') }}</button>
    </div>
</div>
- index.css
.container {
    display: flex;
    flex-direction: column;
    align-items: center;
    left: 0px;
    top: 0px;
    width: 100%;
    height: 100%;
    background: linear-gradient(-135deg, #50c8c2, #4158d0);
}

.person {
    text-align: center;
    background: linear-gradient(-135deg, #ff2481ef, #ffe03092);
    width: 230px;
    height: 230px;
    margin: 100px;
    border-radius: 230px;
}

@media screen and (orientation: landscape) {
    .title {
        font-size: 60px;
    }
}

@media screen and (device-type: tablet) and (orientation: landscape) {
    .title {
        font-size: 100px;
    }
}

.input-data{
    padding: 40px;
}

.login-btn button{
    margin-top: 80px;
    padding: 30px;
}


![[GWCTF 2019]我有一个数据库](https://img-blog.csdnimg.cn/218f913edfa54109b392bede748803b3.png)