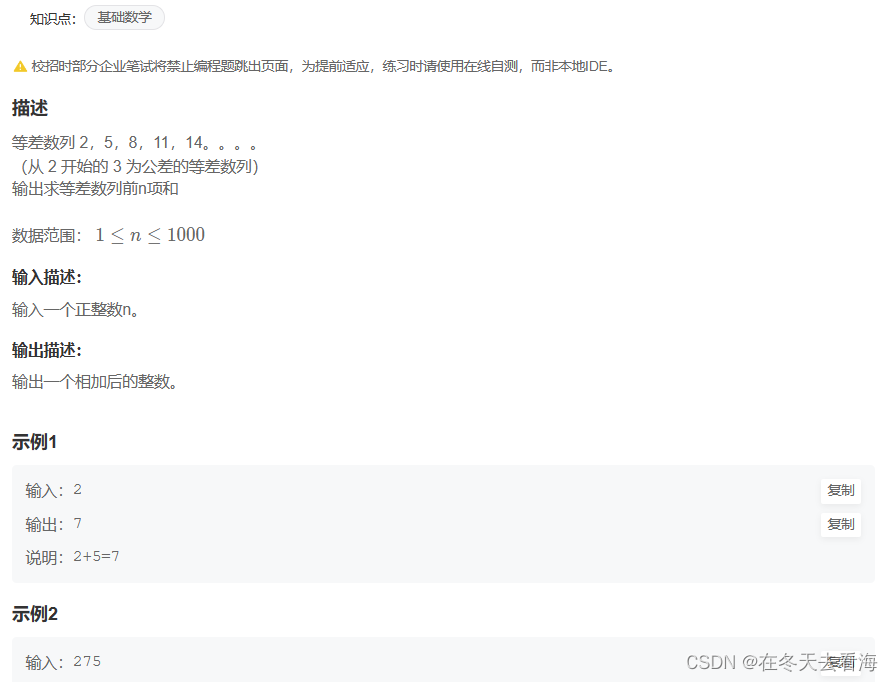
目录
- 准备工作
- ssh的连接以及配置
- 调试
准备工作
1.首先你需要下载一个vscode
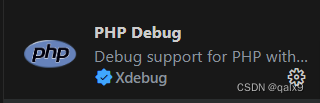
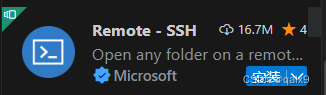
2.下载模块
你需要在VScode中去下载我们所需的两个模块PHP Debug以及remote -ssh
3.安装对应版本的xdebug
需要在xdebug的官方去进行分析,选择适合你自己版本的xdebug
去往官方,将你自己的phpinfo()的源码复制到它相应的位置,让它进行分析出一个最适合你自己的xdebug。
https://xdebug.org/wizard
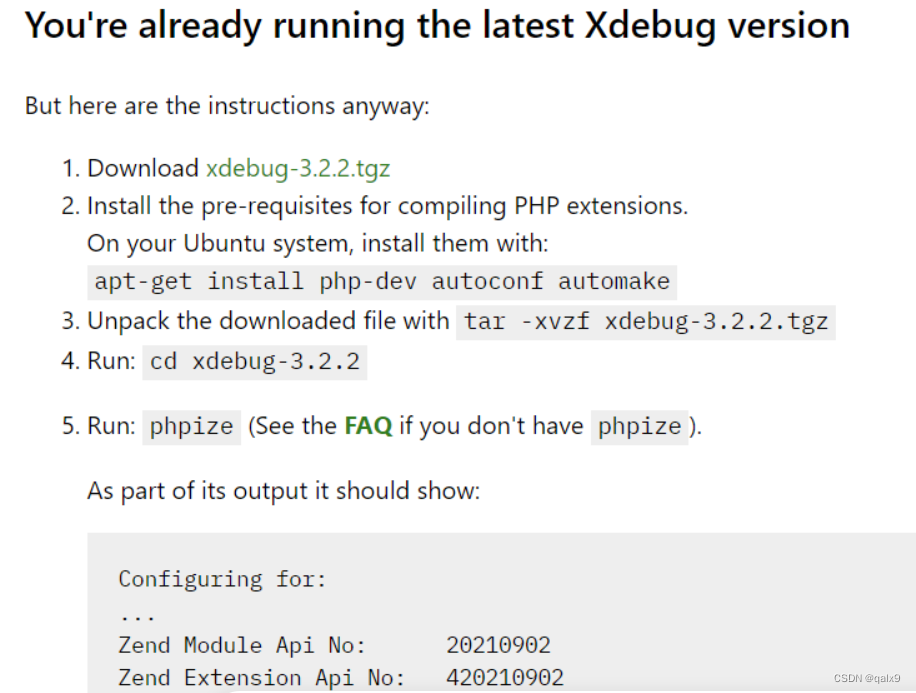
根据它官方的步骤进行安装。
ssh的连接以及配置
1.SSH的连接
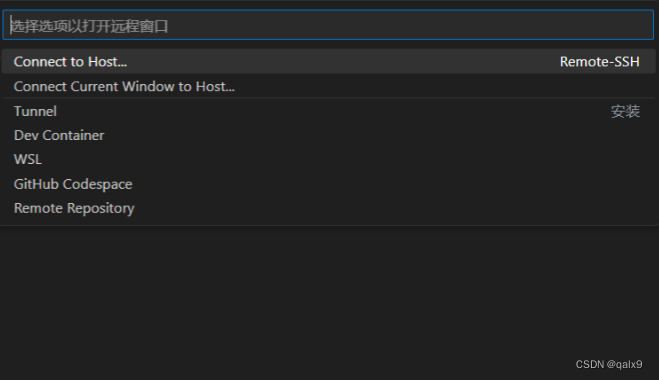
安装好上述的模块后,打开vscode,点击左下角的><按钮,然后选择Connect to Host。
ssh连接自己想要连接的ip地址。
连接成功后,打开你的项目文件夹
同样去安装一次xdebug扩展
安装好后点击运行与调试,创建launch.json文件,创建后会有内容
我们可以将这些内容进行注释。然后添加自己的内容:
"version": "0.2.0",
    "configurations": [
        {
            "name": "Debug current script in console",
            "type": "php",
            "request": "launch",
            "program": "${file}",
            "cwd": "${fileDirname}",
            "externalConsole": false,
            "port": 9004
        },
        {
            "name": "Listen for Xdebug",
            "type": "php",
            "request": "launch",
            "port": 9004
        }
2.xdebug配置
我们进入/etc/php/8.1/fpm/conf.d/20-xdebug.ini这个目录下进行修改。
zend_extension=xdebug.so
[XDebug]
xdebug.remote_enable = on
xdebug.start_with_request = 1
xdebug.mode=trace
xdebug.collect_includes = 1
xdebug.collect_params = 1
xdebug.mode=debug
xdebug.client_host=127.0.0.1
xdebug.client_port=9004
xdebug.start_with_request=yes
xdebug.remote_log=/var/log/xdebug.log
注意:这里的端口必须要保持一致。
然后重启php-fpm和web服务。
systemctl restart php-fpm
systemctl restart httpd
调试
这些操作完成后,你就可以进行调试了。
打上断点,进行调试。