因为我们要根据路由配置对应的图标,也要为了后续方便更改。因此我们将所有的图标注册为全局组件。(使用之前将分页器以及矢量图注册全局组件的自定义插件)(所有图标全局注册的方法element-plus文档中已给出)
全局注册elementPlus图标
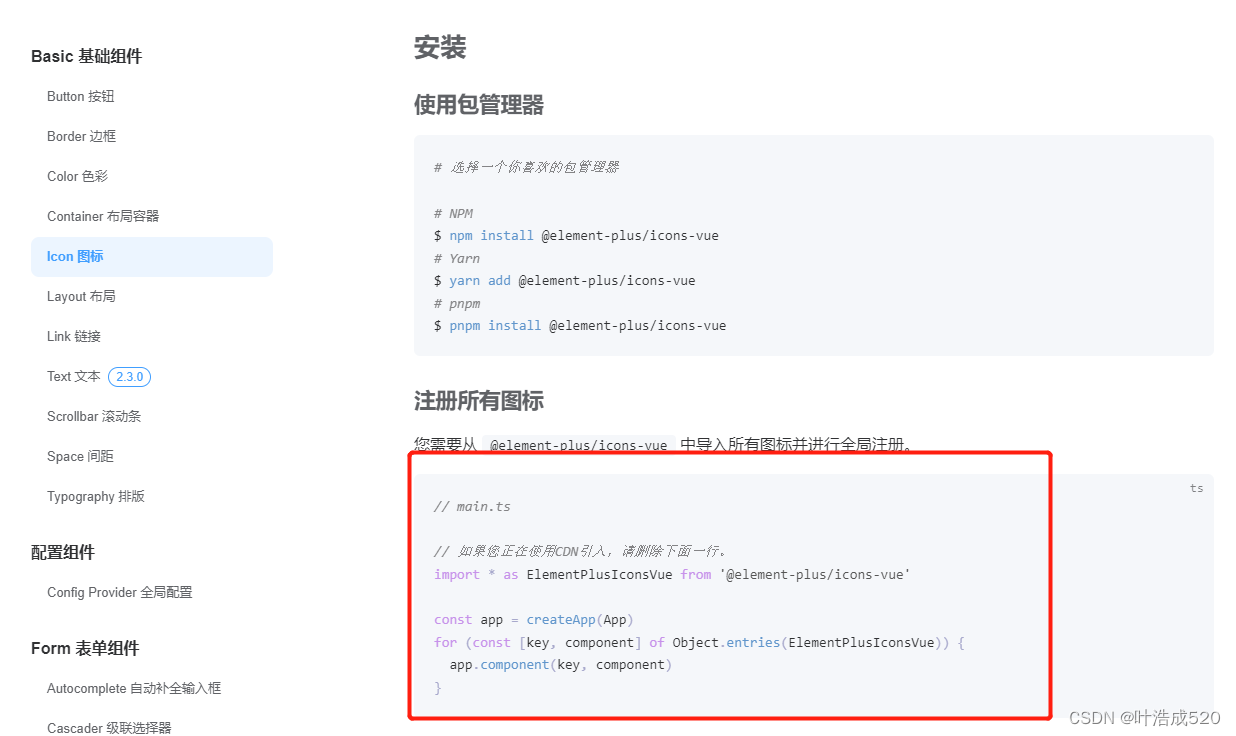
经过上面的步骤,就可以把elementPlus自带的icon图标全局注册了。
路由使用elementPlus图标
给路由元信息添加属性:icon
以layout和其子组件为例:首先在element-puls找到你要使用的图标的名字。将它添加到路由元信息的icon属性上
{
  //登录成功以后展示数据的路由
  path: '/',
  component: () => import('@/layout/index.vue'),
  name: 'layout',
  meta: {
    title: 'layout',
    hidden: false,
    icon: 'Avatar',//elementPlus中的图标
  },
  children: [
    {
      path: '/home',
      component: () => import('@/views/home/index.vue'),
      meta: {
        title: '首页',
        hidden: false,
        icon: 'HomeFilled',//elementPlus中的图标
      },
    },
  ],
},
外部引入的svg图标——vite.config.js中批量引入

import { createSvgIconsPlugin } from 'vite-plugin-svg-icons';
export default defineConfig(({command,mode})=>{
	const env = loadEnv(mode,process.cwd())
	return {
		plugins:[
			vue(),
		    AutoImport({
		        resolvers: [
		          ElementPlusResolver(),
		          IconsResolver({
		            prefix: 'Icon',
		          }),
		        ],
		      }),
		    Components({
		        resolvers: [
		          ElementPlusResolver(),
		          IconsResolver({
		            enabledCollections: ['ep'],
		          }),
		        ],
		      }),
		    Icons({
		        autoInstall: true,
		      }),
		    createSvgIconsPlugin({
		        // Specify the icon folder to be cached
		        iconDirs: [path.resolve(process.cwd(), 'src/assets/icons')],
		        // Specify symbolId format
		        symbolId: 'icon-[dir]-[name]',
		    }),
		]
	}
})
然后svg图标的使用,例如全屏图标:
<el-button icon="FullScreen" circle @click="fullScreen" />
顺道写下全屏功能的实现:
<script lang="ts" setup>
import {reactive,ref} from 'vue';
//全屏功能
const fullScreen = ()=>{
//用来判断是不是全屏,返回布尔值
const full = document.fullscreenElement
//有兼容问题
if(full){
document.exitFullscreen();
}else{
document.documentElement.requestFullscreen();
}
}
</script>
```

# `components`中的组件全局批量注册——避免使用时多次引入
#### 步骤一:在`components`文件夹中新建`index.ts`文件
#### 步骤二:在`index.ts`文件中引入各个组件
```js
import SvgIcon from './SvgIcon/index.vue'
import Category from '@/components/Category/index.vue'
```
#### 步骤三:使用`vue`中的`App`和`Component`
```js
import type { App, Component } from 'vue'
const allGlobalComponent: Component = { SvgIcon, Category }
```
#### 步骤四:使用`install`方法来处理
```js
export default {
install(app: App) {
Object.keys(allGlobalComponent).forEach((key: string) => {
// 注册为全局组件
app.component(key, allGlobalComponent[key])
})
},
}
```
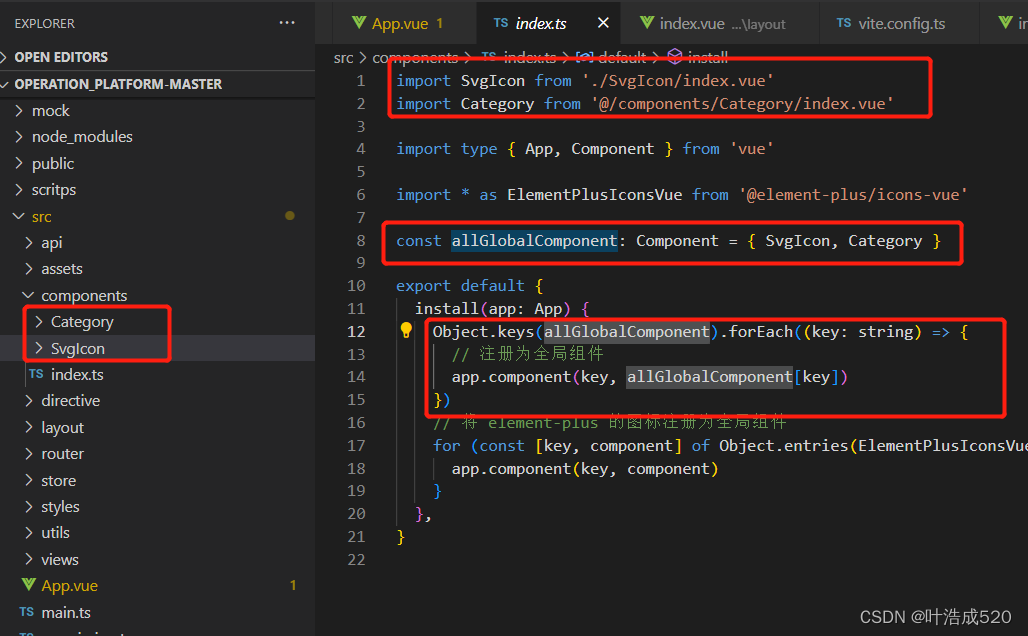
结合文章中第一步的全局引入`elementPlus`图标,也可以放在此文件中:
完整代码如下:
```js
import SvgIcon from './SvgIcon/index.vue'
import Category from '@/components/Category/index.vue'
import type { App, Component } from 'vue'
import * as ElementPlusIconsVue from '@element-plus/icons-vue'
const allGlobalComponent: Component = { SvgIcon, Category }
export default {
install(app: App) {
Object.keys(allGlobalComponent).forEach((key: string) => {
// 注册为全局组件
app.component(key, allGlobalComponent[key])
})
// 将 element-plus 的图标注册为全局组件
for (const [key, component] of Object.entries(ElementPlusIconsVue)) {
app.component(key, component)
}
},
}
```
#### `main.ts`中引入`components`
```js
import globalComponent from './components/index'
const app = createApp(App)
app.use(globalComponent)
```