1、添加依赖
 <!--        接口测试包-->
        <dependency>
            <groupId>io.springfox</groupId>
            <artifactId>springfox-swagger2</artifactId>
            <!--排除swagger2的annotations和models依赖,然后再引入1.5.21版本的annotations和models依赖-->
            <exclusions>
                <exclusion>
                    <groupId>io.swagger</groupId>
                    <artifactId>swagger-annotations</artifactId>
                </exclusion>
                <exclusion>
                    <groupId>io.swagger</groupId>
                    <artifactId>swagger-models</artifactId>
                </exclusion>
            </exclusions>
            <version>2.9.2</version>
        </dependency>
        <dependency>
            <groupId>com.github.xiaoymin</groupId>
            <artifactId>knife4j-spring-boot-starter</artifactId>
            <version>2.0.1</version>
        </dependency>
2、添加配置文件
package com.example.redis.config;

import org.springframework.beans.factory.annotation.Value;
import org.springframework.context.annotation.Bean;
import org.springframework.context.annotation.Configuration;
import springfox.documentation.builders.ApiInfoBuilder;
import springfox.documentation.builders.PathSelectors;
import springfox.documentation.builders.RequestHandlerSelectors;
import springfox.documentation.service.ApiInfo;
import springfox.documentation.spi.DocumentationType;
import springfox.documentation.spring.web.plugins.Docket;
import springfox.documentation.swagger2.annotations.EnableSwagger2;

/**
 * @ClassName Swagger2Config
 * @Description TODO
 * @Author xulina
 * @Date 2022/10/13 15:27
 **/
@EnableSwagger2
@Configuration
public class Swagger2Config {
    @Value("${swaggrBasePackage:com.example.redis}")
    private String swaggrBasePackage ;
    @Bean
    public Docket createApi(){
        return new Docket(DocumentationType.SWAGGER_2)
                .apiInfo(apiInfo())
                .select()
                .apis(RequestHandlerSelectors.basePackage(swaggrBasePackage))
                .paths(PathSelectors.any())
                .build();
    }

    @Bean
    public ApiInfo apiInfo(){
        return new ApiInfoBuilder()
                .title("redis")
                .description("redis")
                .termsOfServiceUrl("http://localhost:8999/")
                .version("1.0")
                .build();
    }
}
3、启动类上添加注解
@EnableKnife4j
@EnableSwagger2
4、接口上添加注解
package com.example.redis.test.mq;

import com.github.xiaoymin.knife4j.annotations.ApiSort;
import io.swagger.annotations.Api;
import io.swagger.annotations.ApiOperation;
import lombok.extern.slf4j.Slf4j;
import org.springframework.beans.factory.annotation.Autowired;
import org.springframework.data.redis.core.StringRedisTemplate;
import org.springframework.web.bind.annotation.GetMapping;
import org.springframework.web.bind.annotation.RestController;

/**
 * @ClassName SendRedisMessage
 * @Description TODO
 * @Author xulina
 * @Date 2023/8/9 15:19
 **/
@Api(tags = {"redis消息中间件"})
@ApiSort(value = 10)
@RestController
@Slf4j
public class SendRedisMessageController {
    @Autowired
    private StringRedisTemplate stringRedisTemplate;

    @GetMapping("sendMessageTest")
    @ApiOperation("发送消息")
    public String SendRediaMessage(){
        log.info("Sending message...");
        stringRedisTemplate.convertAndSend("topic","a message");
        return "Send Success";
    }
}
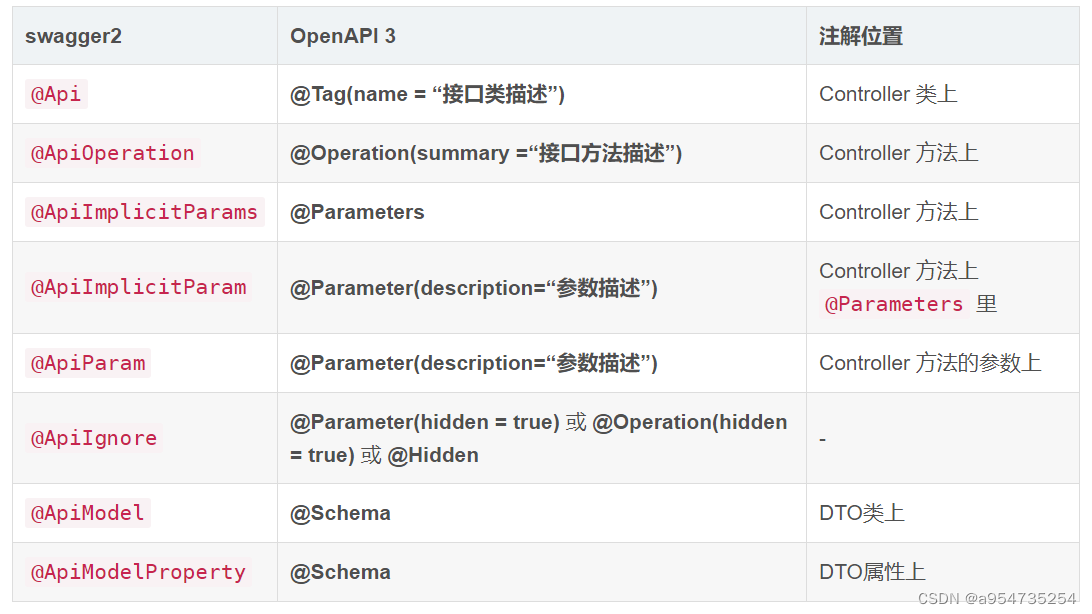
注解说明如下表
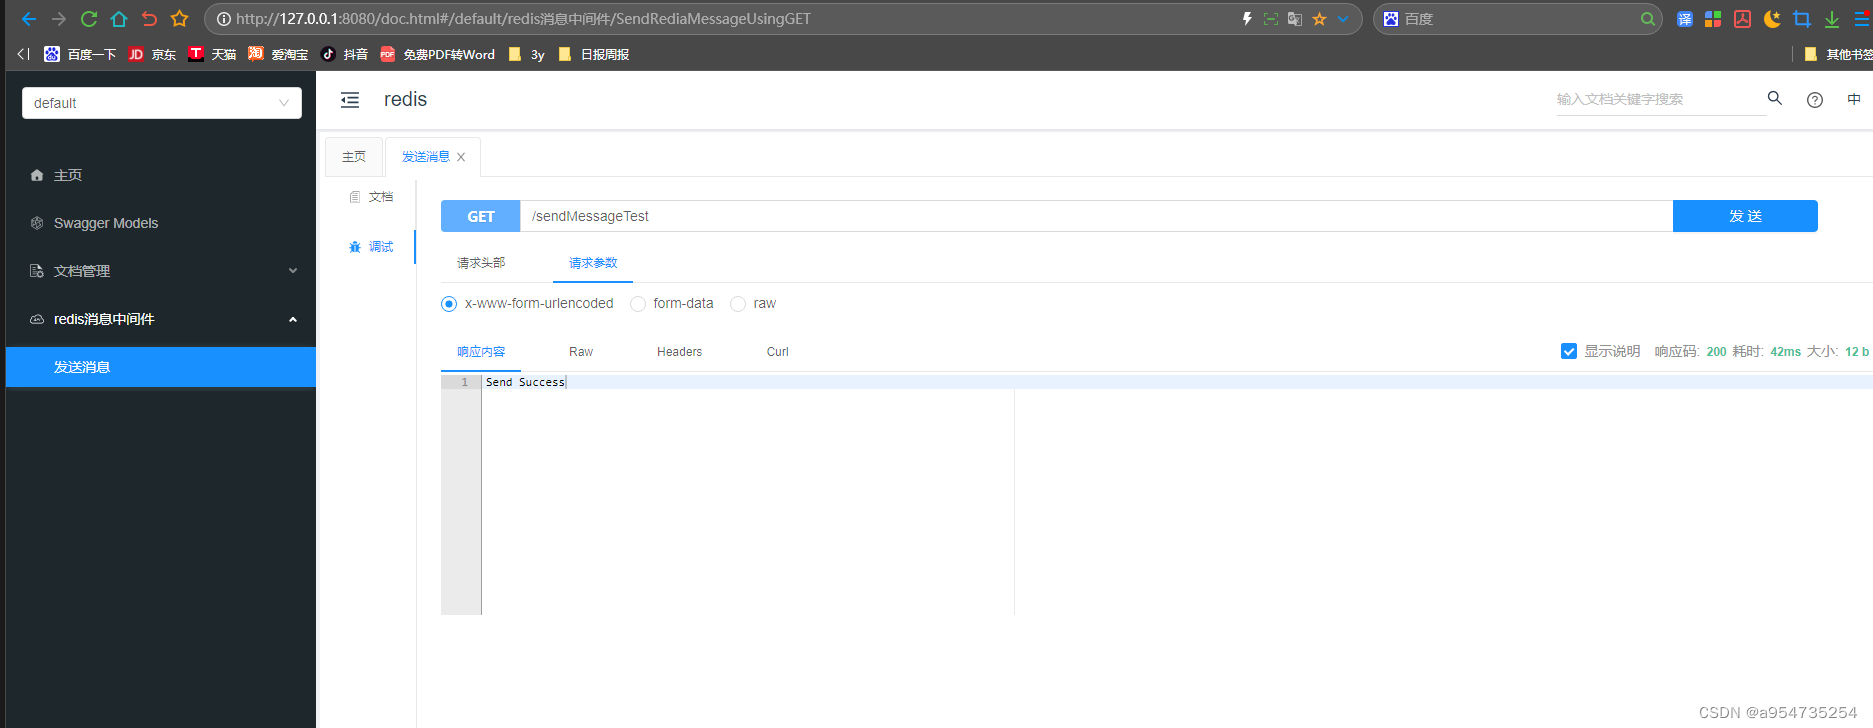
5、运行服务,打开浏览器,在浏览器输入 http://127.0.0.1:8080/doc.html,如下图所示


![NSS [UUCTF 2022 新生赛]ez_upload](https://img-blog.csdnimg.cn/img_convert/adbb1e972f8d8d8043e9de6a862ea583.png)