目录
一、SpringBoot实用篇—开发。
(1)热部署(开发阶段使用)。
(1.1)手动启动热部署。
(1.2)自动启动热部署。
(1.3)热部署范围配置。
(1.4)关闭热部署。
(2)高级配置。
(2.1)@ConfigurationProperties注解。
(2.2)宽松绑定/松散绑定。
(2.3)常用计量单位绑定。
(2.4)数据校验。
(2.5)进制数据转换规则问题。
(3)@Bean的使用方式。
(4)测试。
(4.1)加载测试专用属性。
(4.2)加载测试专用配置。
(4.3)Web环境模拟测试。
(4.3.1)设置测试端口。
(4.3.2)模拟测试请求。
(4.3.3)模拟测试匹配。
(4.3.3.1)虚拟请求状态匹配。
(4.3.3.2)虚拟请求响应体匹配。
(4.3.3.3)虚拟请求响应体(json)匹配。
(4.3.3.4)虚拟请求响应头匹配。
(4.3.3.5)实际情况。
(4.4)数据层测试回滚。
(4.5)测试用例数据设定(随机数据)。
(5)数据层解决方案(SQL数据库)。
(5.1)内置数据源。(数据源技术选型替换方案)
(5.2)内置持久层技术。(持久层技术选型替换方案)
(5.3)内嵌数据库,仅用于开发阶段。(数据库技术选型替换方案)
(5.4)数据层技术选型总结。
(6)数据层解决方案(NOSQL数据库)。
(6.1)Redis。
(6.1.1)SpringBoot整合Redis。
(6.2)SpringBoot读写Redis的客户端。
(6.3)jedis的使用。
(6.2)MongoDB。
(6.2.1)MongoDB定义与安装启动。
(6.2.2)MongoDB的基础CRUD。
(6.2.3)SpringBoot整合MongoDB。
(6.3)ES(分布式全文搜索引擎)。
(6.3.1)ES的下载与启动、IK分词器下载与使用。
(6.3.2)索引创建。
(6.3.3)文档操作(增删改查)。
(6.3.4)SpringBoot整合ES。
(6.3.4.1) Template客户端(低级客户端)。
(6.3.4.2)高级客户端。
(6.3.5)创建索引、添加文档。
(6.3.6)查询文档操作。
一、SpringBoot实用篇—开发。
(1)热部署(开发阶段使用)。
注意:热部署只在开发环境下有效,线上是没有意义的(只是开发程序的辅助功能)。
(1.1)手动启动热部署。
IDEA中启动热部署: build(构建) —> build Object(构建项目)。

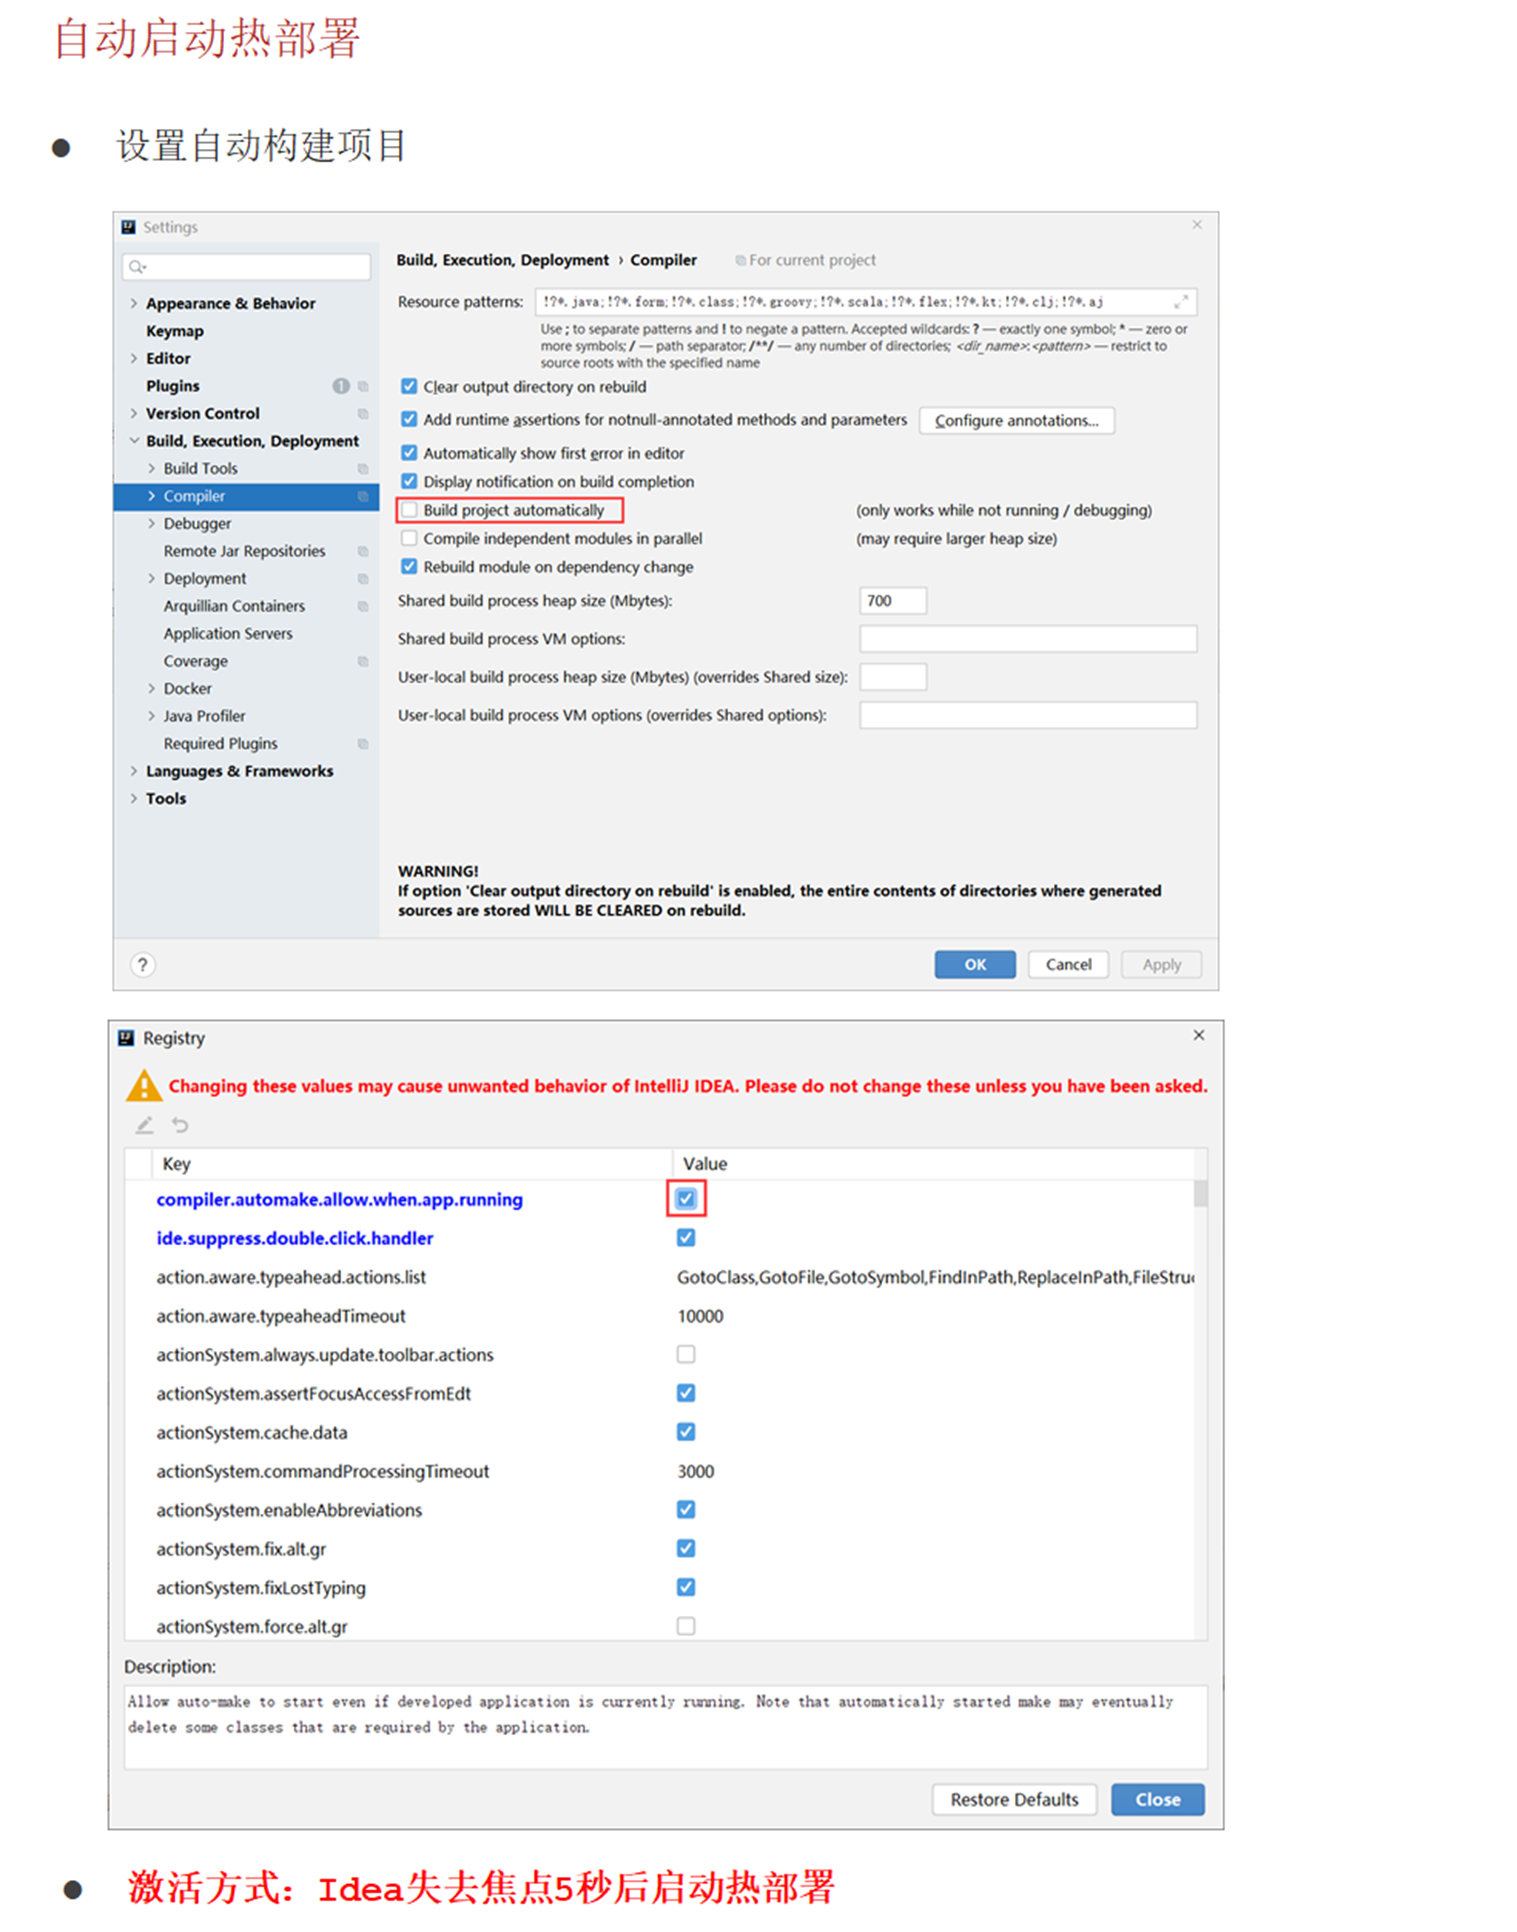
(1.2)自动启动热部署。
图1:setting -> Build、 Execution、Deployment -> Compiler -> 勾选 Build project automatically
图2:ctrl + alt + shift + / (同时按下这四个键会弹出注册表,为运行程序设置启动热部署)
(1.3)热部署范围配置。
spring:
  devtools:
    restart:
      exclude: static/**,public/**,config/application.yml
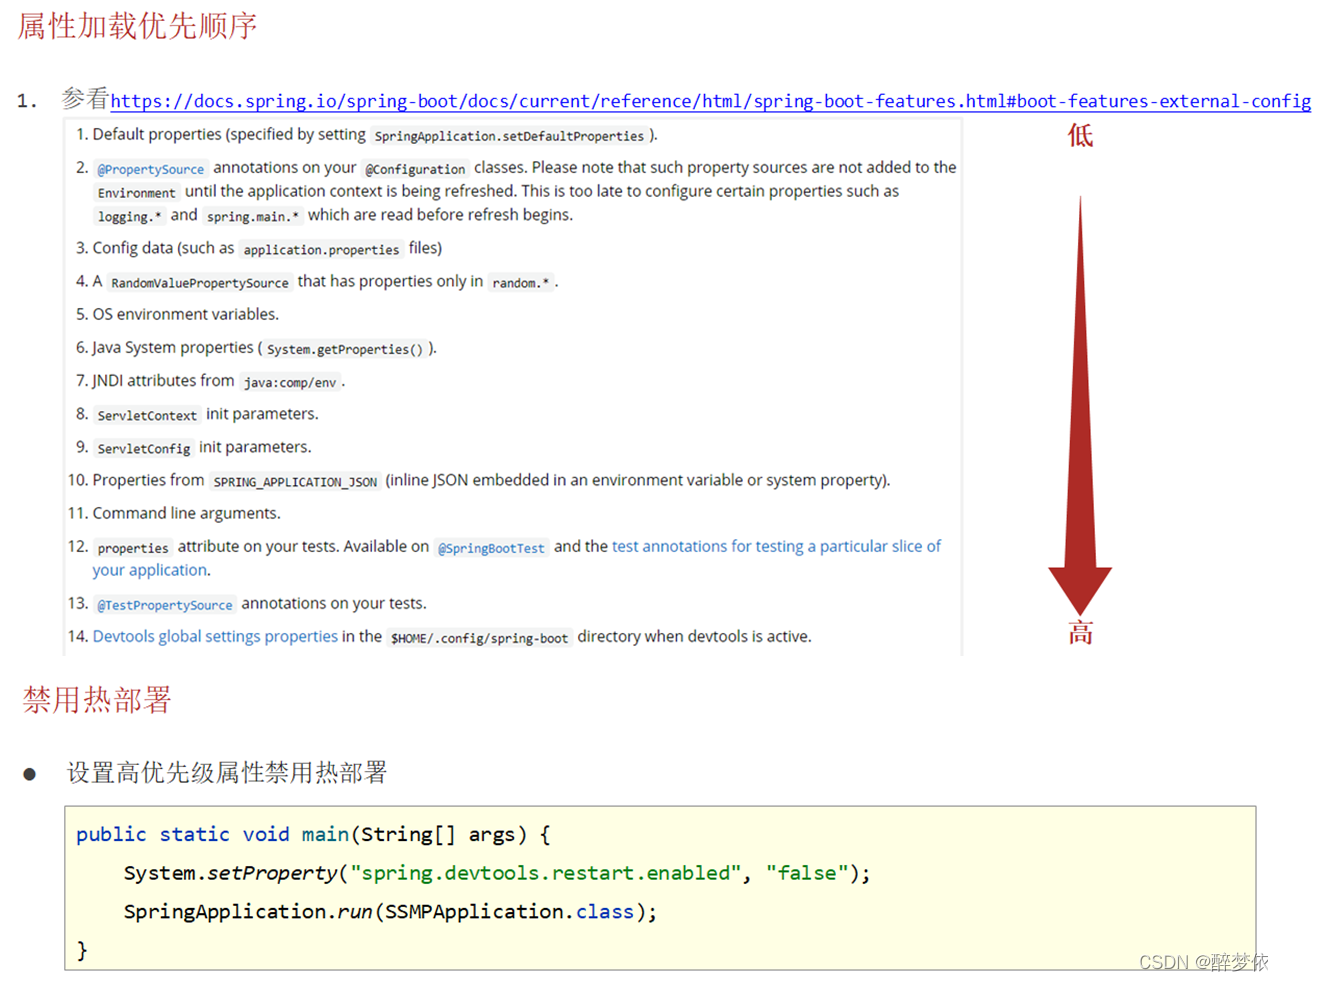
(1.4)关闭热部署。
第一种:优先级较低,要是在其他地方也设置了该属性,很可能不起作用。
spring:
  devtools:
    restart:
      exclude: static/**,public/**,config/application.yml
      enabled: false # 关闭热部署
第二种:java系统属性
@SpringBootApplication
public class Application {
    public static void main(String[] args) {
        System.setProperty("spring.devtools.restart.enabled","false");
        SpringApplication.run(Application.class);
    }
}
(2)高级配置。
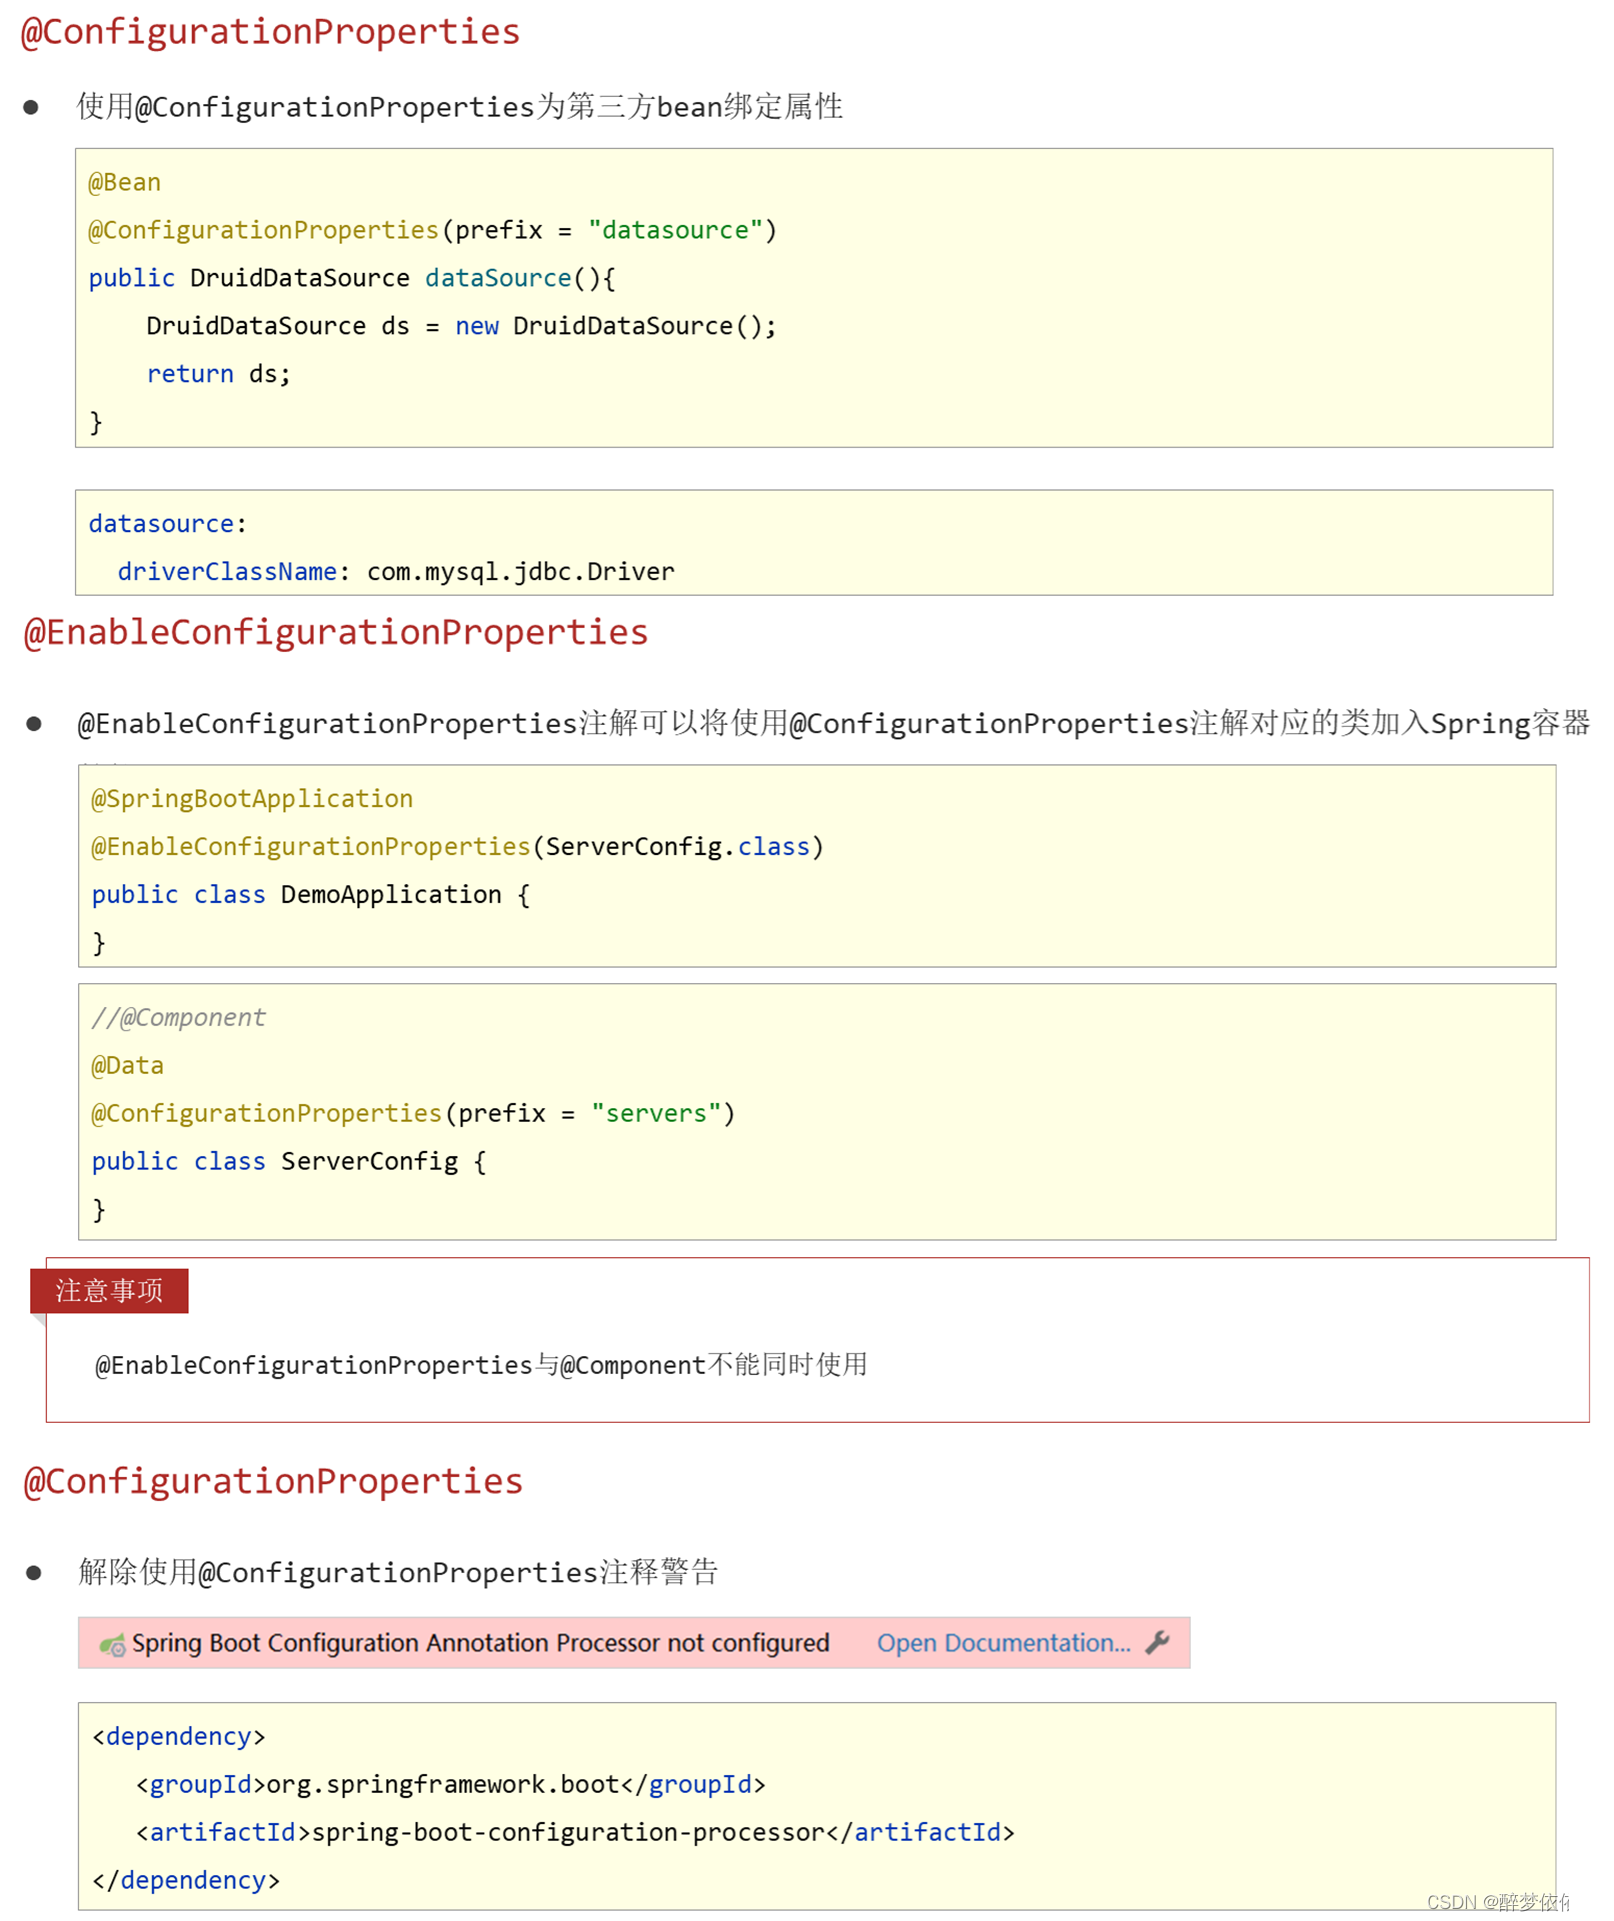
(2.1)@ConfigurationProperties注解。
@EnableConfigurationProperties({ServerConfig.class}) 注解的作用是启用对指定配置属性类的管理,使其成为 Spring 容器中的一个 Bean,并可以在其他组件中注入并使用该类的实例来访问配置属性的值。
(2.2)宽松绑定/松散绑定。
适用范围:@ConfigurationProperties注解。

(2.3)常用计量单位绑定。
第一种:
servers:
  ip-address: 192.168.0.2   # 烤肉串模式
  port: 2345
  timeout: -1
  serverTimeOut: 3
  dataSize: 10MB
第二种:
@Component
@Data
@ConfigurationProperties(prefix = "servers")
public class ServerConfig {
    private String ipAddress;
    private int port;
    private Long timeout;
    @DurationUnit(ChronoUnit.HOURS)
    private Duration serverTimeOut;
    @DataSizeUnit(DataUnit.MEGABYTES)
    private DataSize dataSize;
}
(2.4)数据校验。
springboot 3.x版本之后(具体哪开始不支持不清楚),这种已经不起作用了:
 <!--导入JSR303规范,试过了springboot 2.5.0版本还是支持这种的-->
        <dependency>
            <groupId>javax.validation</groupId>
            <artifactId>validation-api</artifactId>
            <<!--version>2.0.1.Final</version>,这里不需要版本,因为已经定义版本了-->
        </dependency>

<!--使用hibernate框架提供的校验器做实现类-->
        <dependency>
            <groupId>org.hibernate.validator</groupId>
            <artifactId>hibernate-validator</artifactId>
        </dependency>
springboot 3.x版本使用这个(里面包含了实现类hibernate-validator依赖):
        <!--导入JSR303规范,试过springboot 3.1.1 版本可以使用-->
        <dependency>
            <groupId>org.springframework.boot</groupId>
            <artifactId>spring-boot-starter-validation</artifactId>
        </dependency>
(2.5)进制数据转换规则问题。
如果使用数值,而且是以0开头的,它会默认是其他进制(下面最大是7,所以默认八进制):
datasource:
  driverClassName: com.mysql.cj.jdbc.Driver456
# password: 0127
  password: "0127"
注意:写数值建议使用引号包裹。
(3)@Bean的使用方式。
@Bean是一个方法级别上的注解,主要用在@Configuration和@Compoment注解的类里。
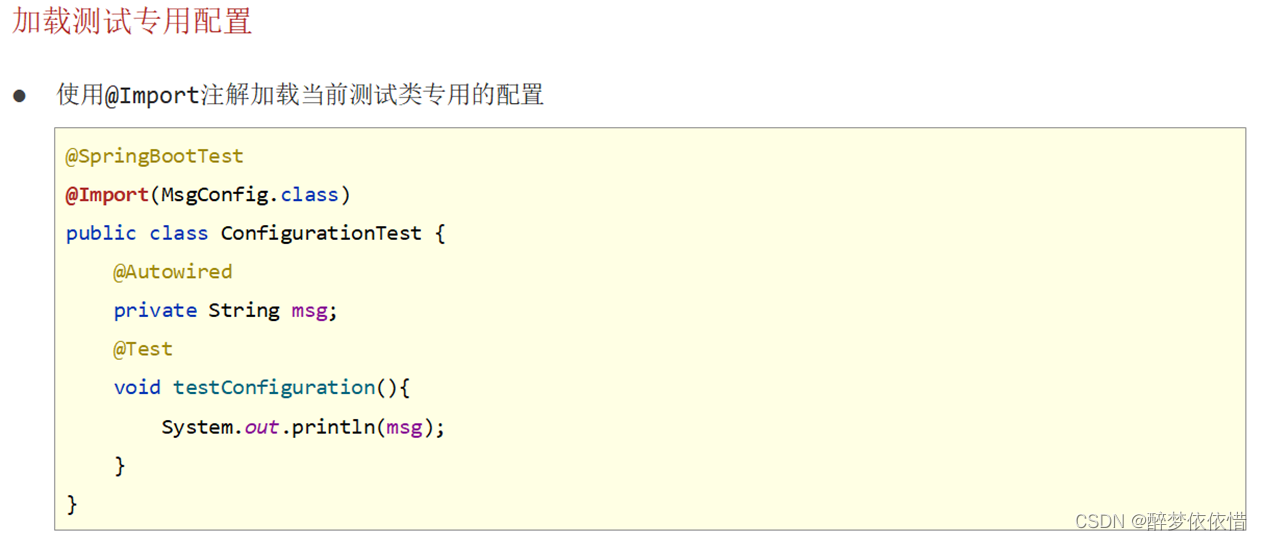
或者使用@Import(MsgConfig.class)注解指定有@Bean的类。
@SpringBootTest
@Import(MsgConfig.class)
public class ConfigurationTest {
    @Autowired
    private String msg;
    @Test
    void testConfiguration(){
        System.out.println(msg);
    }
}(4)测试。
(4.1)加载测试专用属性。
注意:springboot低版本是args优先级高,高版本是properties优先级高。
args 是一个常见的变量名,它通常用于表示程序中的命令行参数(Command-line Arguments)。
//properties属性可以为当前测试用例添加临时的属性配置
//@SpringBootTest(properties = {"test.prop=testValue1"})
//args属性可以为当前测试用例添加临时的命令行参数
//@SpringBootTest(args = {"--test.prop=testValue2"})
//是testValue1
//@SpringBootTest(properties = {"test.prop=testValue1"},args = {"--test.prop=testValue2"})
//是testValue1
@SpringBootTest(args = {"--test.prop=testValue2"},properties = {"test.prop=testValue1"})
public class PropertiesAndArgsTest {
    @Value("${test.prop}")
    private String msg;
    @Test
    void testPropertes(){
        System.out.println(msg);
    }
}
(4.2)加载测试专用配置。
注意:不要添加@Configuration,否则将是全局的。在测试类中使用@Import(MsgConfig.class)来指定,则只是在该测试类环境下使用。(加载测试范围配置应用于小范围测试环境)
//@Configuration
public class MsgConfig {
    @Bean
    public String msg(){
        return "bean msg";
    }
}
(4.3)Web环境模拟测试。
(4.3.1)设置测试端口。
- WebEnvironment.MOCK:在模拟的Servlet环境中启动应用程序(默认值)。
- WebEnvironment.RANDOM_PORT:在随机可用的端口上启动内嵌的Servlet容器,用于进行集成测试。
- WebEnvironment.DEFINED_PORT:在指定的端口上启动内嵌的Servlet容器,用于进行集成测试。
- WebEnvironment.NONE:不启动Web服务器,用于非Web环境下的集成测试。(测试失败)

(4.3.2)模拟测试请求。

(4.3.3)模拟测试匹配。
(4.3.3.1)虚拟请求状态匹配。

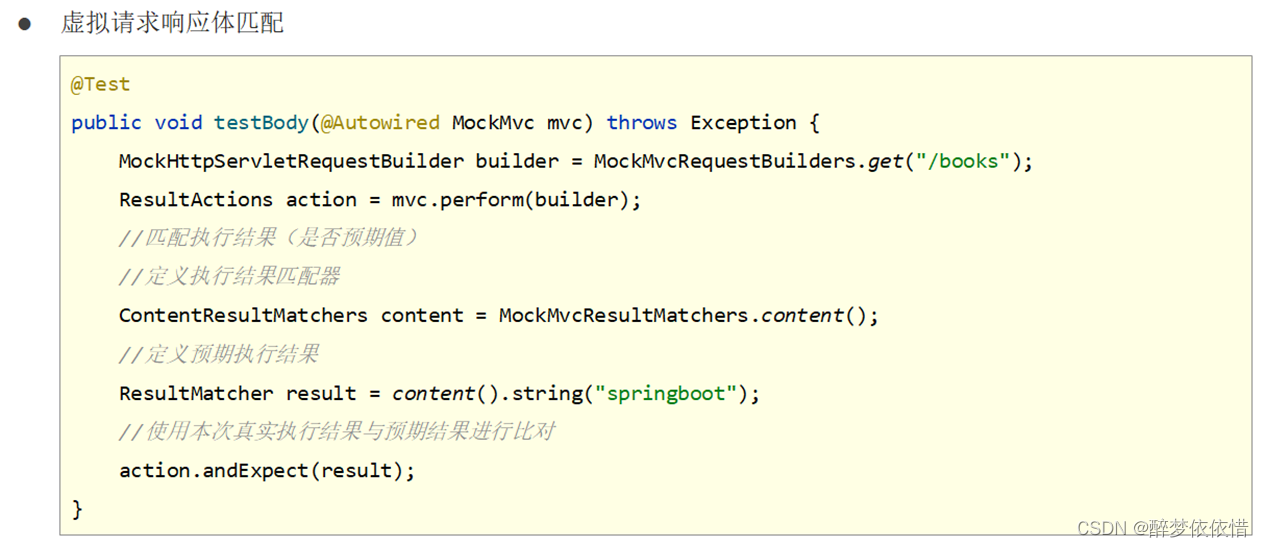
(4.3.3.2)虚拟请求响应体匹配。
(4.3.3.3)虚拟请求响应体(json)匹配。

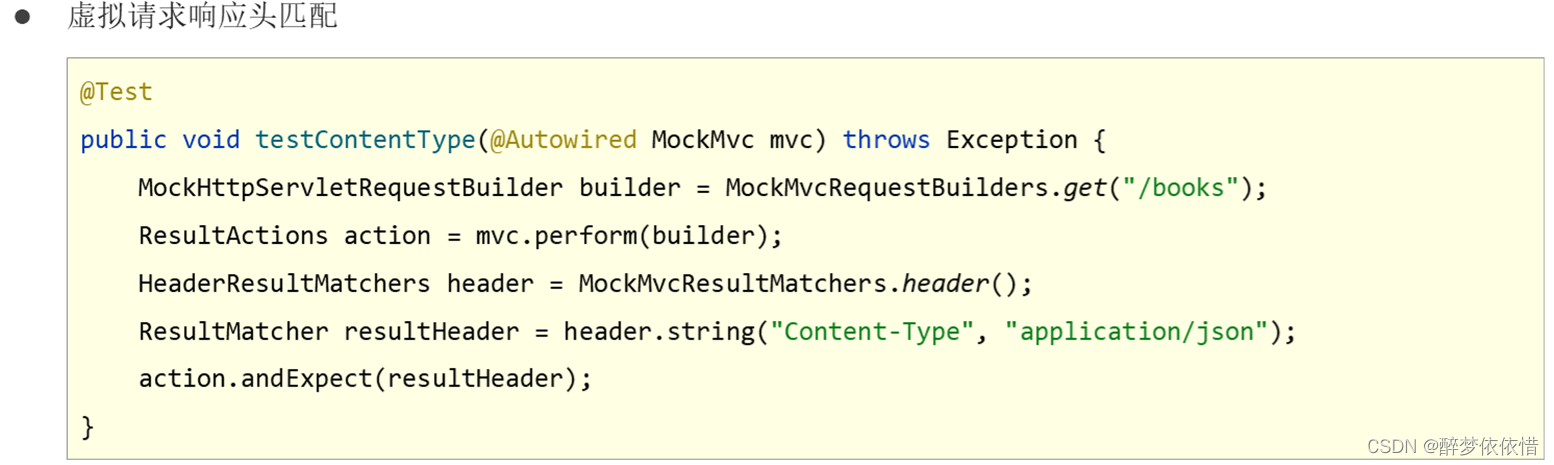
(4.3.3.4)虚拟请求响应头匹配。
(4.3.3.5)实际情况。
注意:要全部满足才通过。
@Test
void testGetById(@Autowired MockMvc mvc) throws Exception {
MockHttpServletRequestBuilder builder = MockMvcRequestBuilders.get("/books");
ResultActions action = mvc.perform(builder);
StatusResultMatchers status = MockMvcResultMatchers.status();
ResultMatcher ok = status.isOk();
HeaderResultMatchers header = MockMvcResultMatchers.header();
ResultMatcher contentType = header.string("Content-Type", "application/json");
ContentResultMatchers content = MockMvcResultMatchers.content();
ResultMatcher result = content.json("{\"id\":1,\"name\":\"springboot\",\"type\":\"springboot\",\"description\":\"springboot\"}");
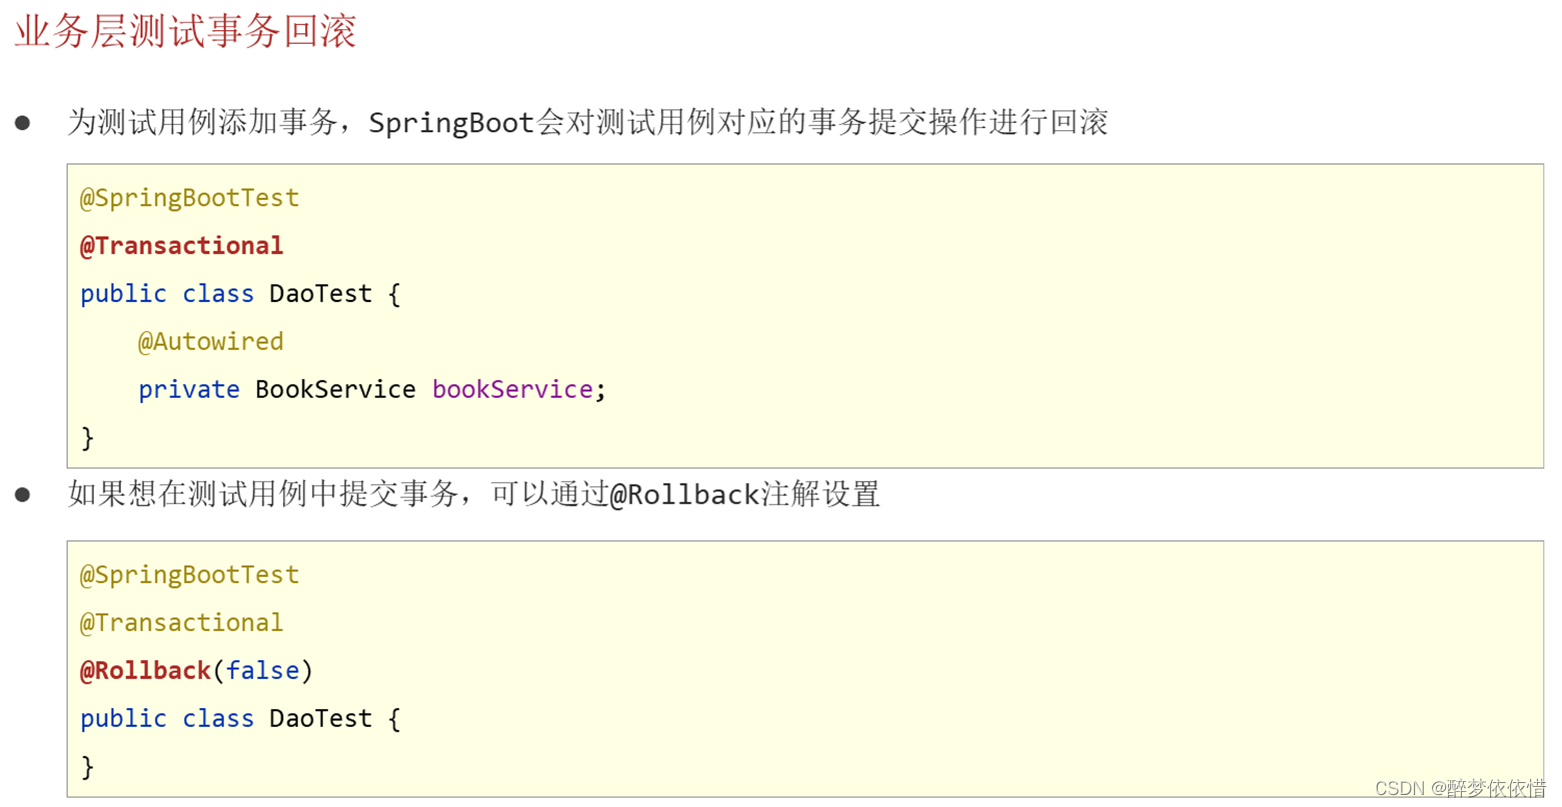
}(4.4)数据层测试回滚。
注意:springboot中Junit单元测试(测试类)@Transactional注解默认事务不提交。
1、 @Rollback(true):要回滚,不要添加数据,但是id还是被占用的,默认就有(即不需要加)。
2、@Rollback(false):不要回滚,就是要添加数据。
上面的两点都是有@Transactional注解的前提下。
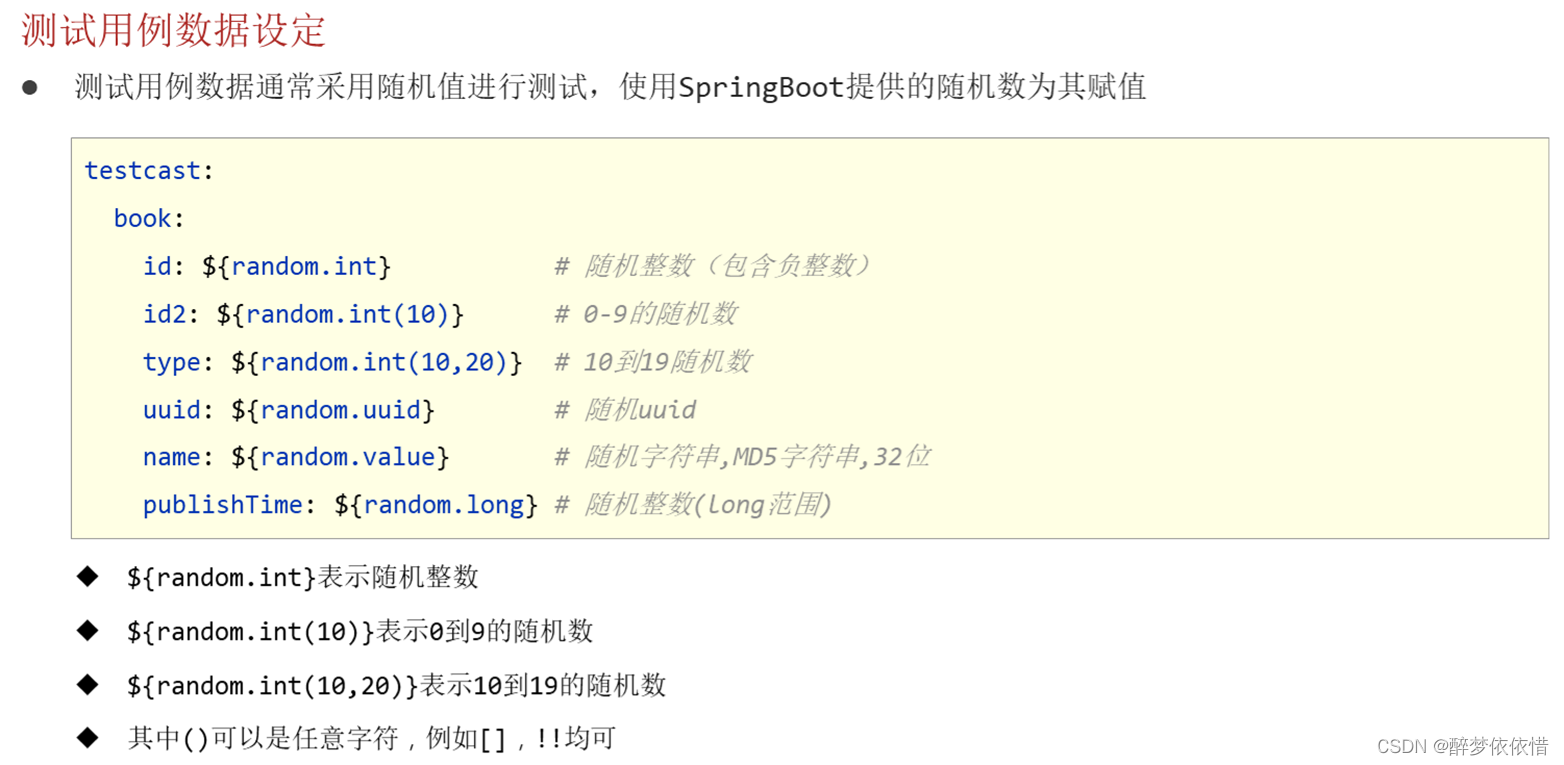
(4.5)测试用例数据设定(随机数据)。
作用:使用随机数据替换测试用例中书写固定的数据。
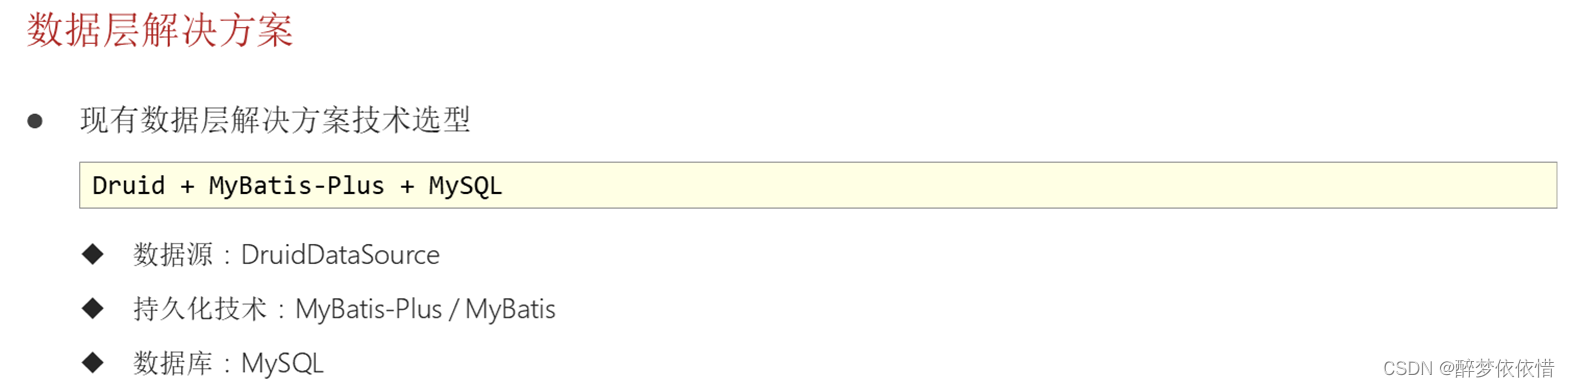
(5)数据层解决方案(SQL数据库)。
实质:就是代替这些技术的技术。
 (5.1)内置数据源。(数据源技术选型替换方案)
spring:
  datasource:
    url: jdbc:mysql://localhost:3306/test?serverTimezone=UTC
    hikari:
      driver-class-name: com.mysql.cj.jdbc.Driver
      username: root
      password: tan
      maximum-pool-size: 50
spring:
datasource:
url: jdbc:mysql://localhost:3306/test?serverTimezone=UTC
driver-class-name: com.mysql.cj.jdbc.Driver
username: root
password: tan
hikari:
maximum-pool-size: 50
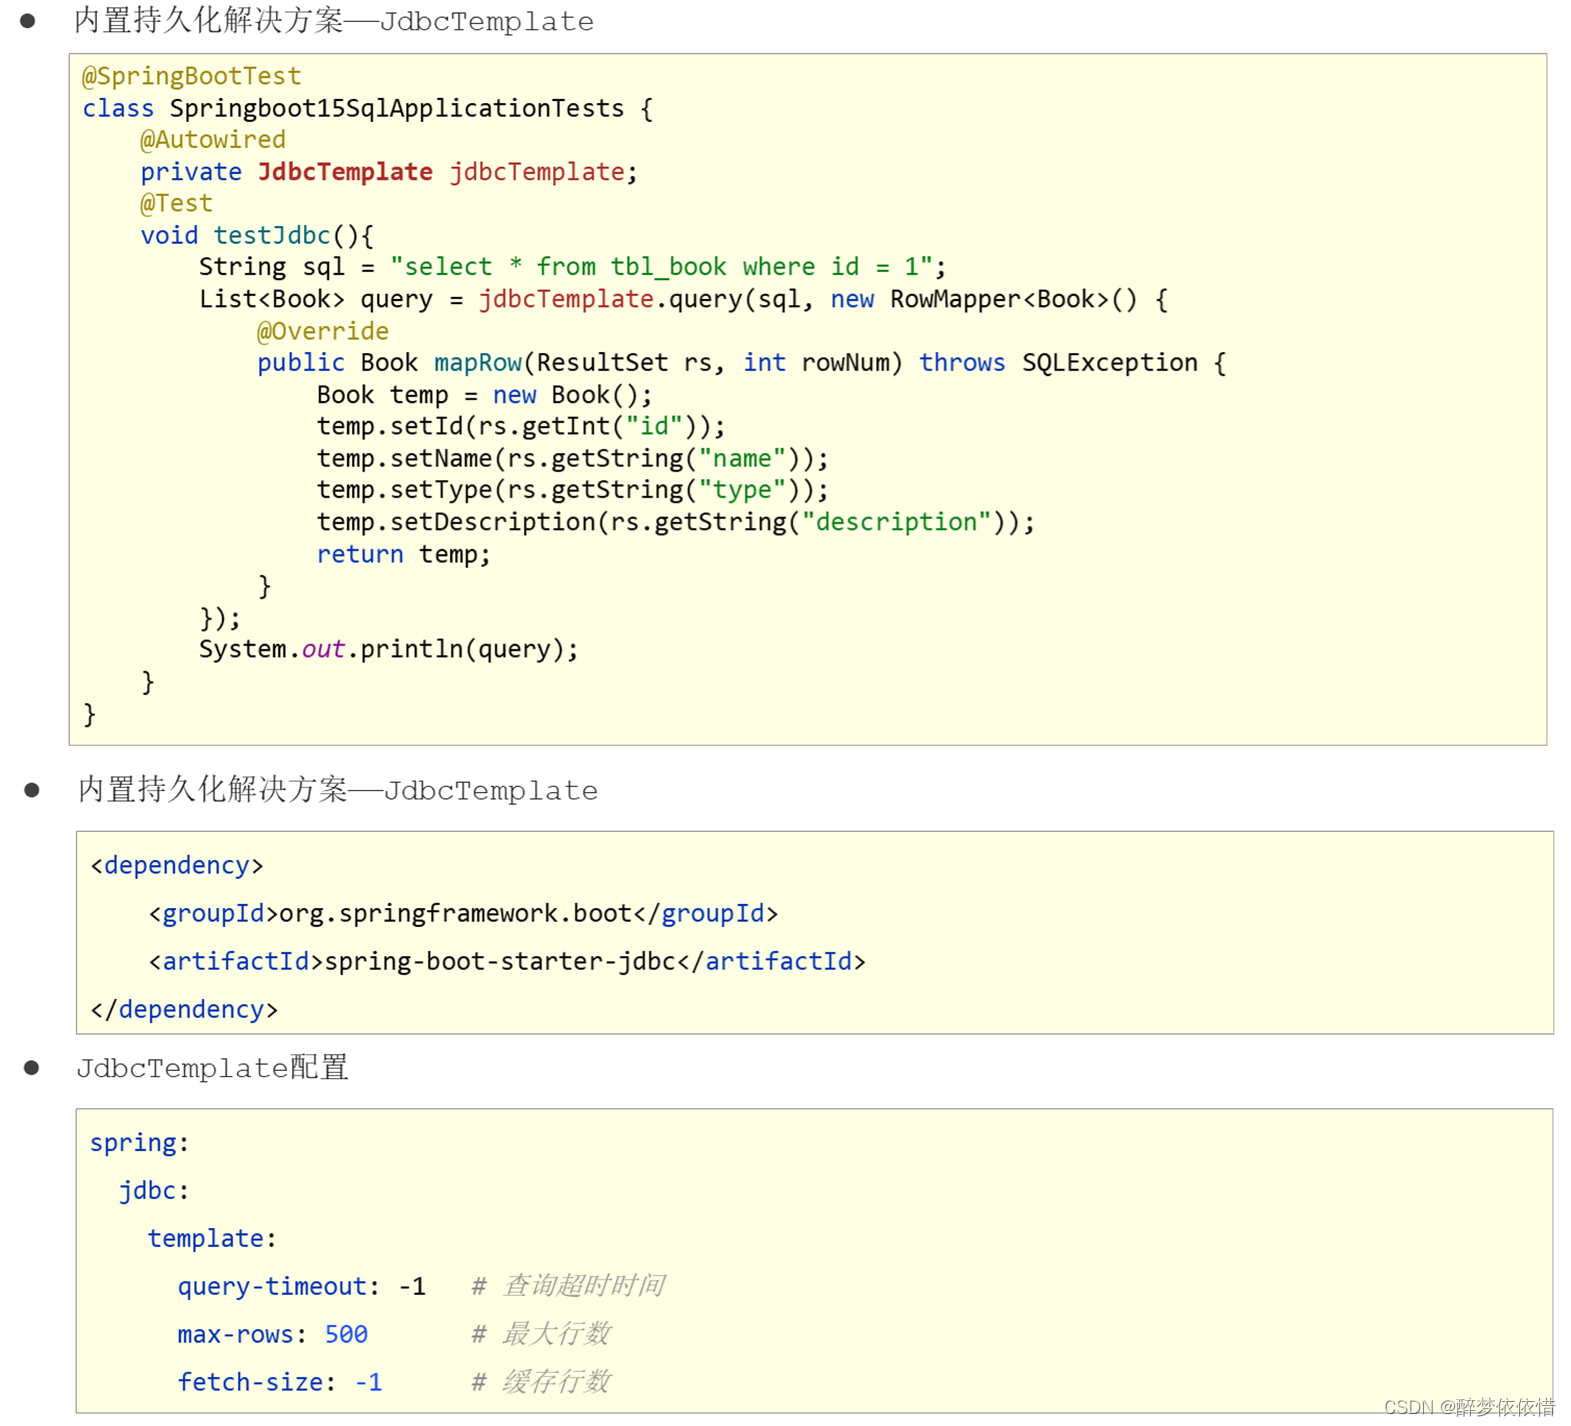
(5.2)内置持久层技术。(持久层技术选型替换方案)
JdbcTemplate之前经常用,这里就不详细介绍用法了。
    @Test
    void testJdbcTemplate(@Autowired JdbcTemplate jdbcTemplate) {
        String sql = "select * from mytable";
        RowMapper<Book> rm = new RowMapper<Book>() {
            @Override
            public Book mapRow(ResultSet rs, int rowNum) throws SQLException {
                Book book = new Book();
                book.setId(rs.getInt("id"));
                book.setName(rs.getString("name"));
                book.setType(rs.getString("type"));
                book.setDescription(rs.getString("description"));
                return book;
            }
        };
        List<Book> list = jdbcTemplate.query(sql, rm);
        System.out.println(list);
    }
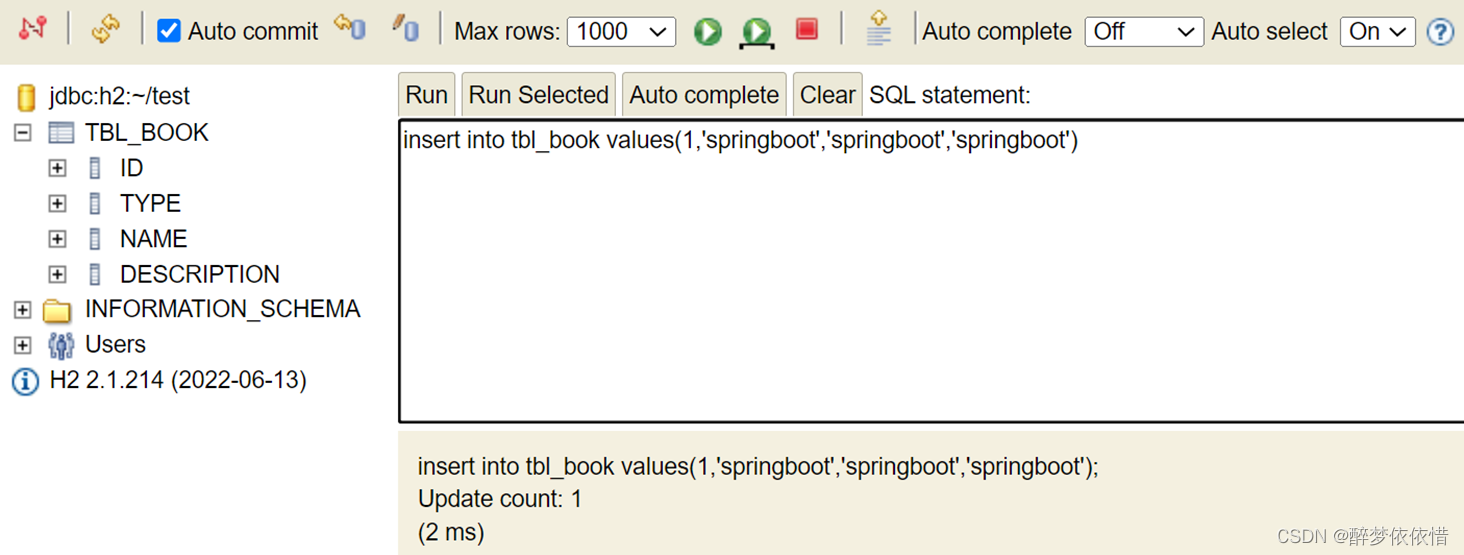
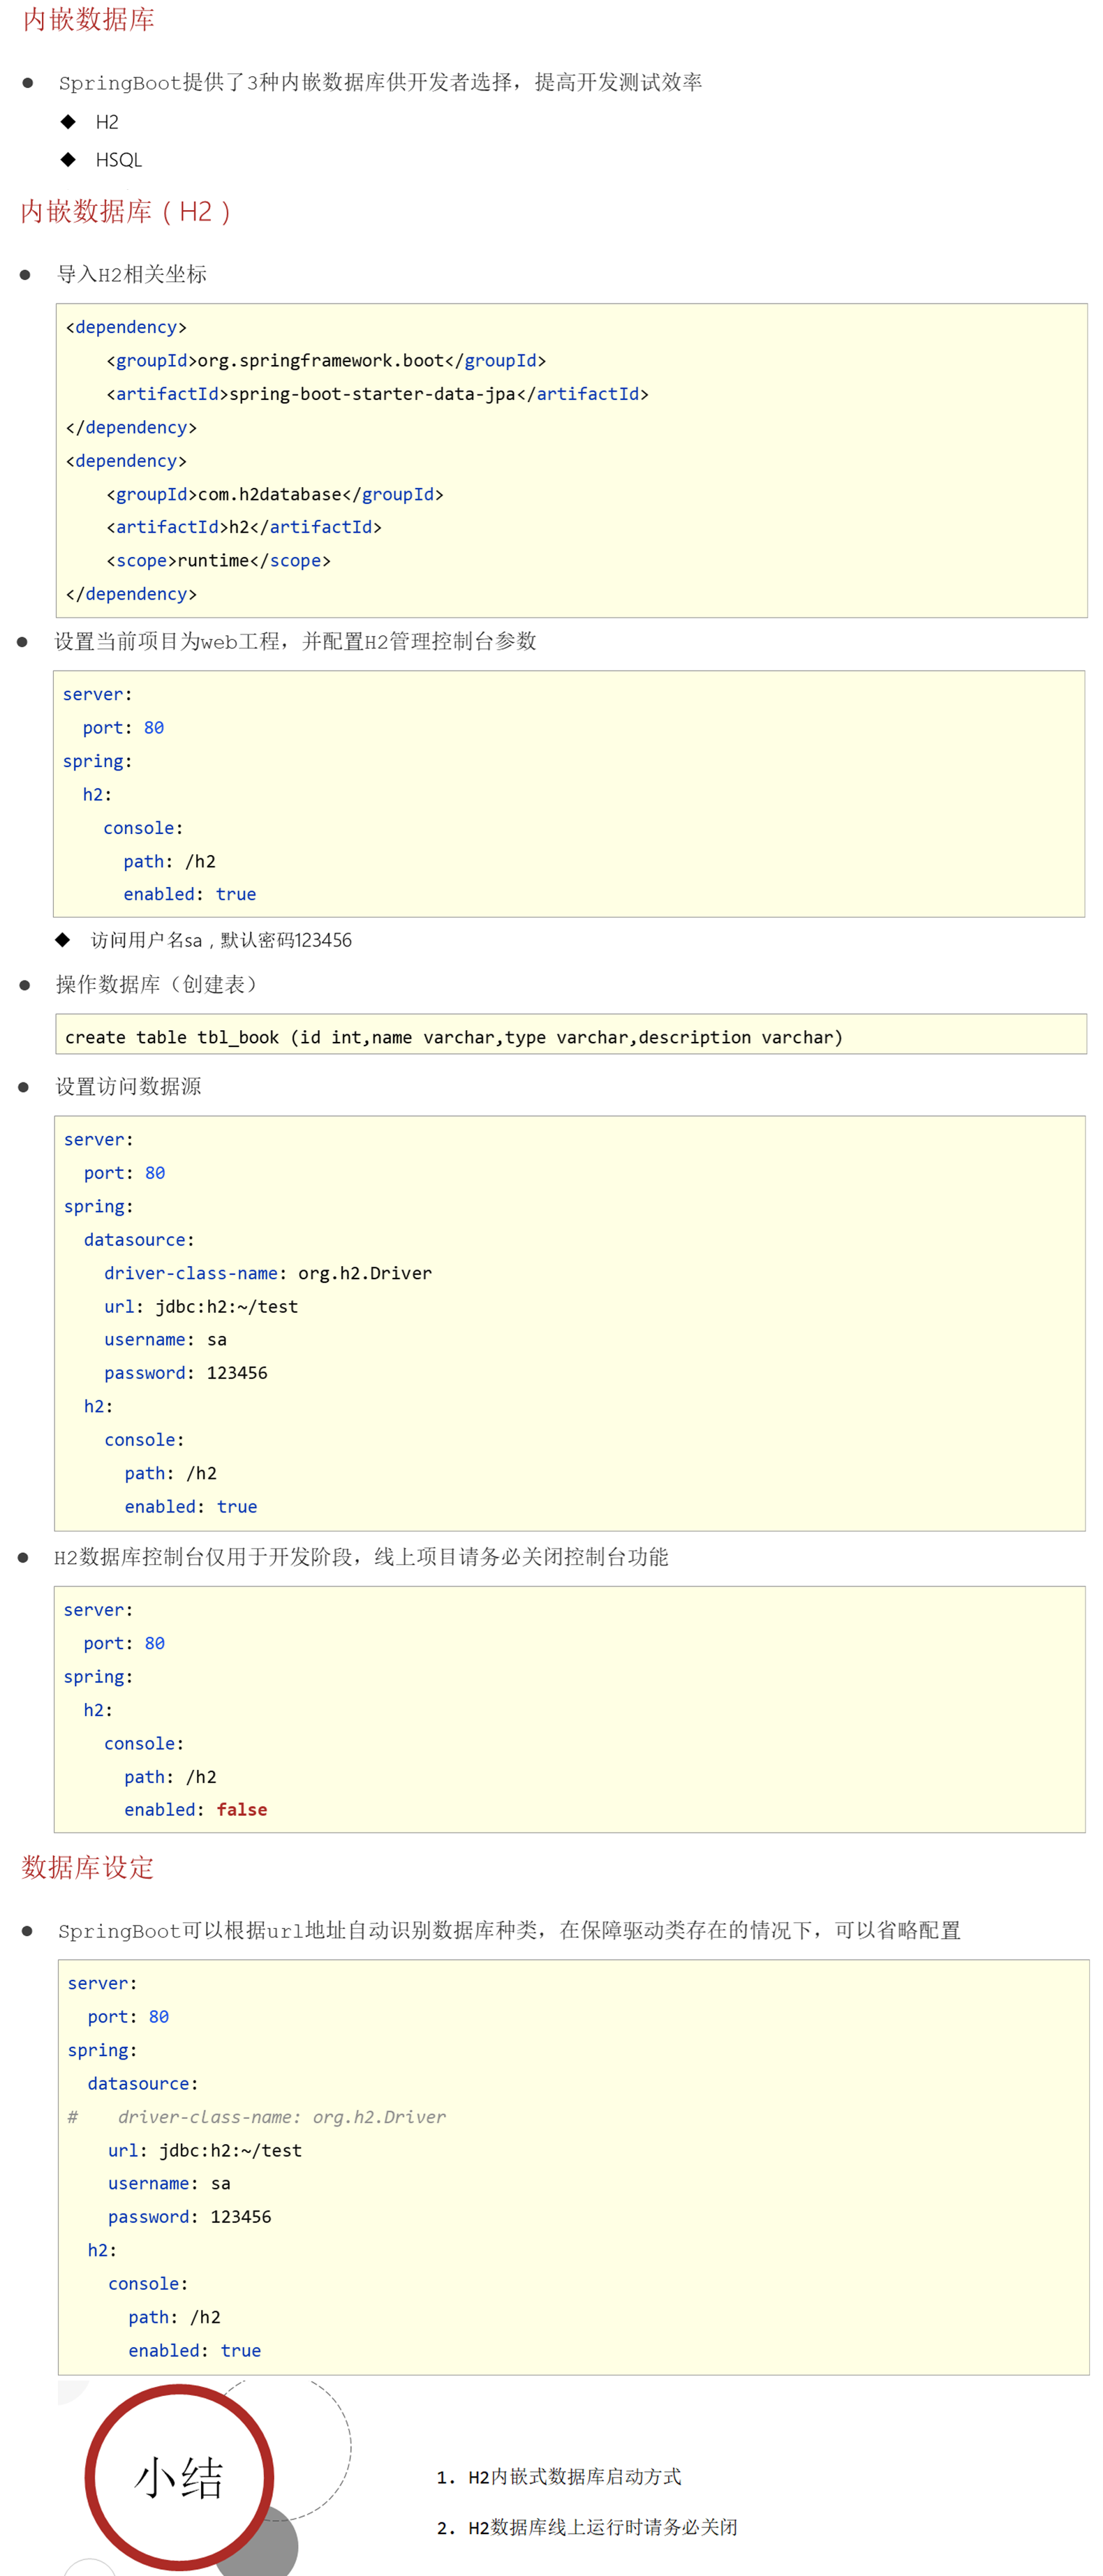
(5.3)内嵌数据库,仅用于开发阶段。(数据库技术选型替换方案)
# h2数据库
server:
  port: 8080 # 程序的端口
spring:
  h2:
    console:
      path: /h2
      enabled: true
# 第一次使用的时候需要配置这些,因为需要初始化(以后在浏览器连接数据库就不用了,如果要用程序连接数据库就需要配置连接数据库的这些信息,估计初始化的时候把信息都存到硬盘了)
  datasource:
    url: jdbc:h2:~/test
    driver-class-name: org.h2.Driver
    username: sa
    password: 123456
    hikari:
      maximum-pool-size: 50
注意:h2数据库的测试类时,不能运行启动类(@SpringBootApplication标注的类),不然会报错。
    @Test
    void testJdbcTemplateSave(@Autowired JdbcTemplate jdbcTemplate) {
        String sql = "insert into tbl_book values(4,'springboot','springboot','pringboot')";
        jdbcTemplate.update(sql);
    }
注意:使用h2数据库时,不能使用双引号“”(会报错),只能使用单引号‘’ 。
(5.4)数据层技术选型总结。

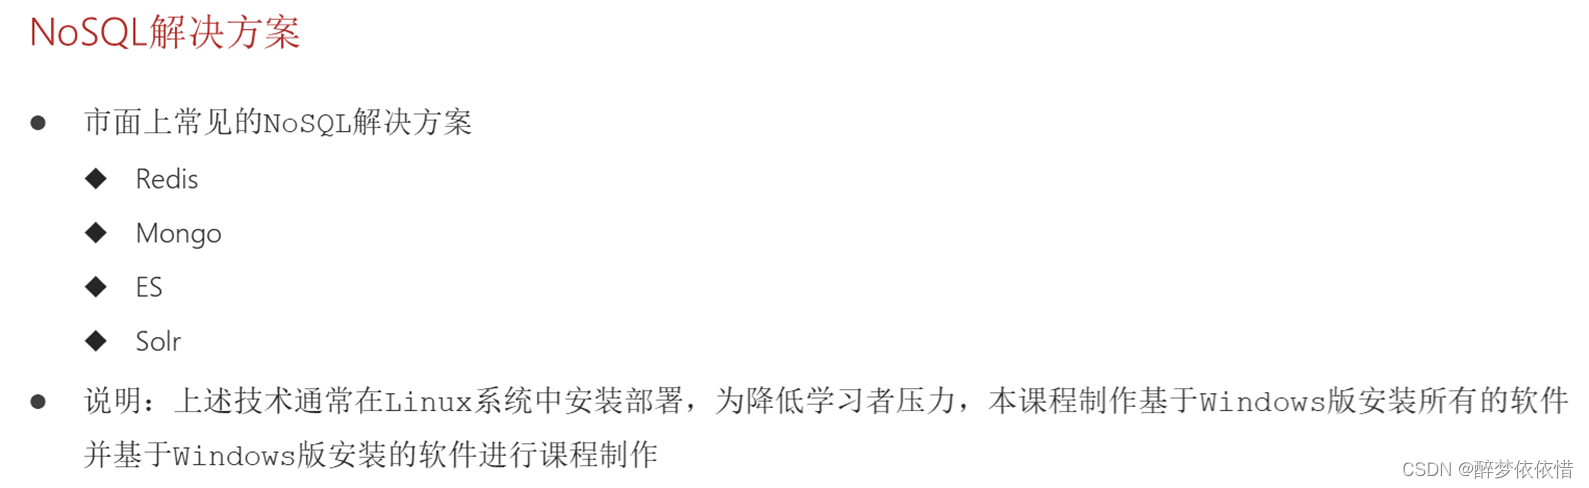
(6)数据层解决方案(NOSQL数据库)。
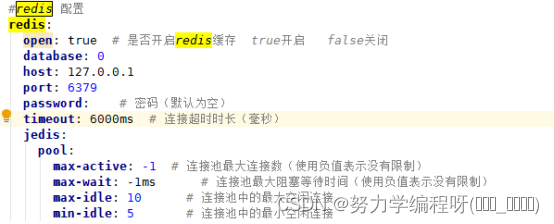
(6.1)Redis。
(6.1.1)SpringBoot整合Redis。
@SpringBootTest
class Springboot16RedisApplicationTests {
//    @Autowired
//    private RedisTemplate redisTemplate;
    @Test
    void hset(@Autowired RedisTemplate redisTemplate){
        HashOperations ops = redisTemplate.opsForHash();
        ops.put("info","aa","aaa");
    }
    @Test
    void hget(@Autowired RedisTemplate redisTemplate){
        HashOperations ops = redisTemplate.opsForHash();
        Object val = ops.get("info", "aa");
        System.out.println(val);
    }
}
spring:
  data:
    redis:
      host: localhost
      port: 6379
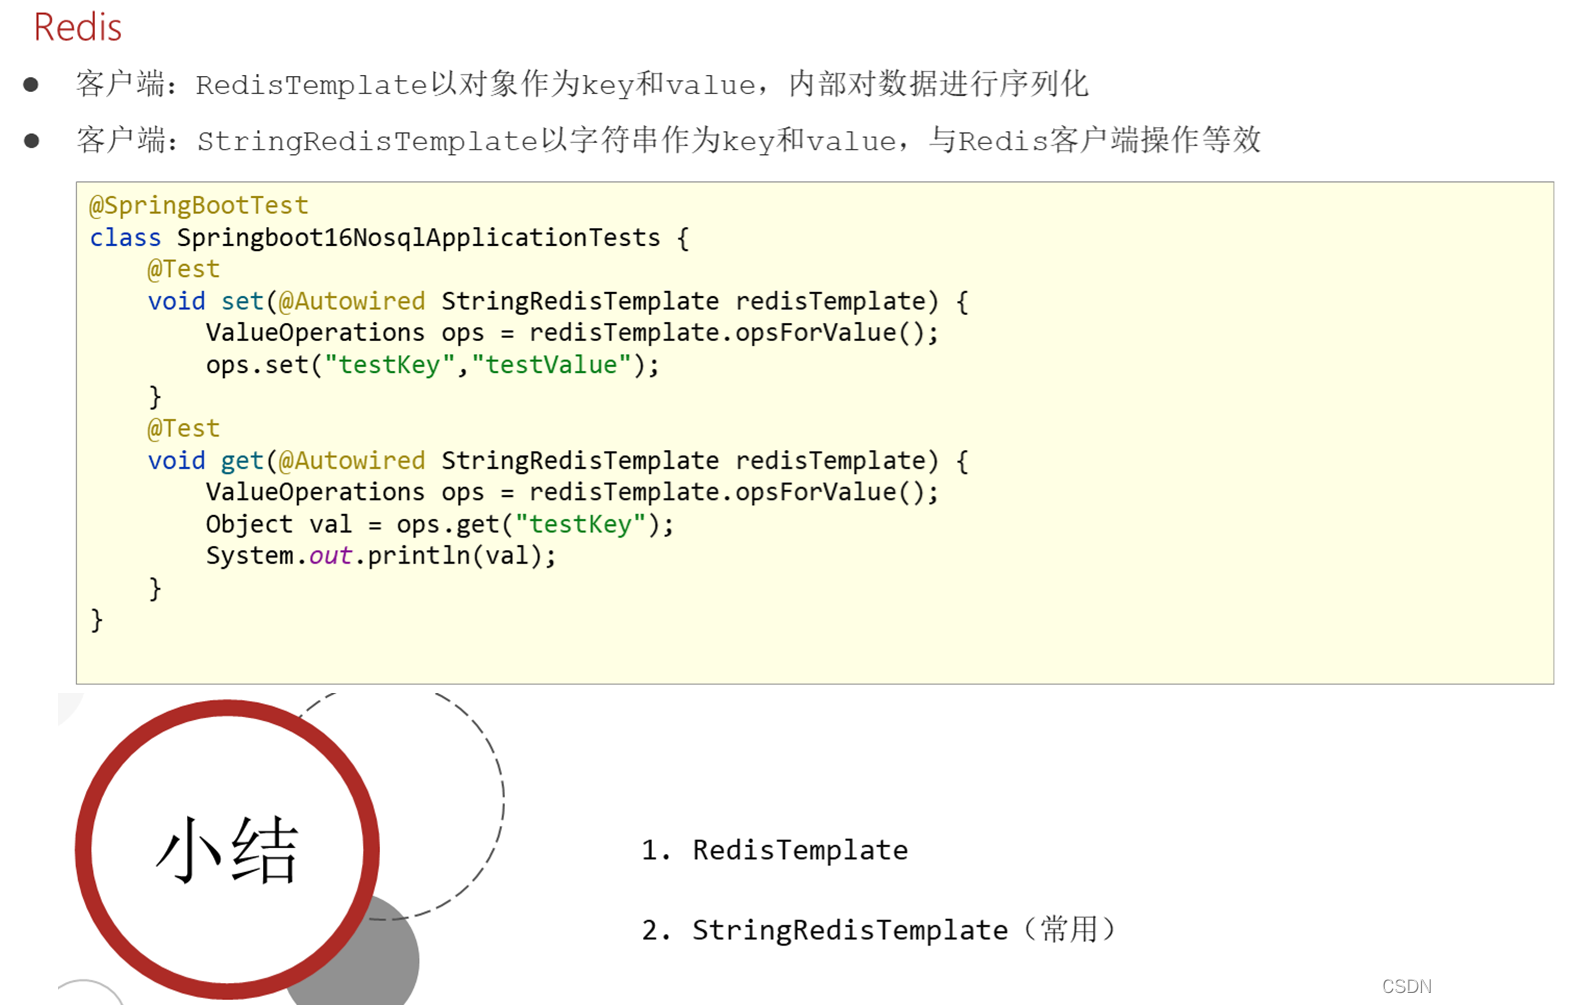
(6.2)SpringBoot读写Redis的客户端。
区别是:一个是需要自己指定泛型(不指定泛型默认Object,内部对数据进行序列化),另外一个就是不需要自己指定泛型。
@SpringBootTest
public class StringRedisTemplateTest {
    @Autowired
    private RedisTemplate<String,String> redisTemplate;
    @Autowired
    private StringRedisTemplate stringRedisTemplate;
    @Test
    void set(){
        ValueOperations<String, String> ops = stringRedisTemplate.opsForValue();
//        ValueOperations<String, String> ops = redisTemplate.opsForValue();
        String username = ops.get("username");
        System.out.println(username);
    }
}
(6.3)jedis的使用。
注意:使用jedis,执行还是不需要变的(相当于数据连接池一样,不需要改变代码)。
@SpringBootTest
public class StringRedisTemplateTest {
    @Autowired
    private RedisTemplate<String,String> redisTemplate;
    @Autowired
    private StringRedisTemplate stringRedisTemplate;
    @Test
    void set(){
        ValueOperations<String, String> ops = stringRedisTemplate.opsForValue();
//        ValueOperations<String, String> ops = redisTemplate.opsForValue();
        String username = ops.get("username");
        System.out.println(username);
    }
}
(6.2)MongoDB。
(6.2.1)MongoDB定义与安装启动。

(6.2.2)MongoDB的基础CRUD。
//查询数据
db.getCollection("book").find()
//添加(insert/save)数据(文档),db.book 等价于db.getCollection("book")
db.book.save({"name":"springboot",type:"springboot"})
//查询
db.book.find()
//删除数据
db.book.remove({type:"springboot"})
//修改数据(只修改遇到的第一个)
db.book.update({name:"springboot"},{$set:{name:"springboot2"}})
//删库跑路(这里只删了book(表)文档的所有数据)
db.book.remove({});
(6.2.3)SpringBoot整合MongoDB。

(6.3)ES(分布式全文搜索引擎)。
(6.3.1)ES的下载与启动、IK分词器下载与使用。

(6.3.2)索引创建。
指定分词器与分词规则参考:
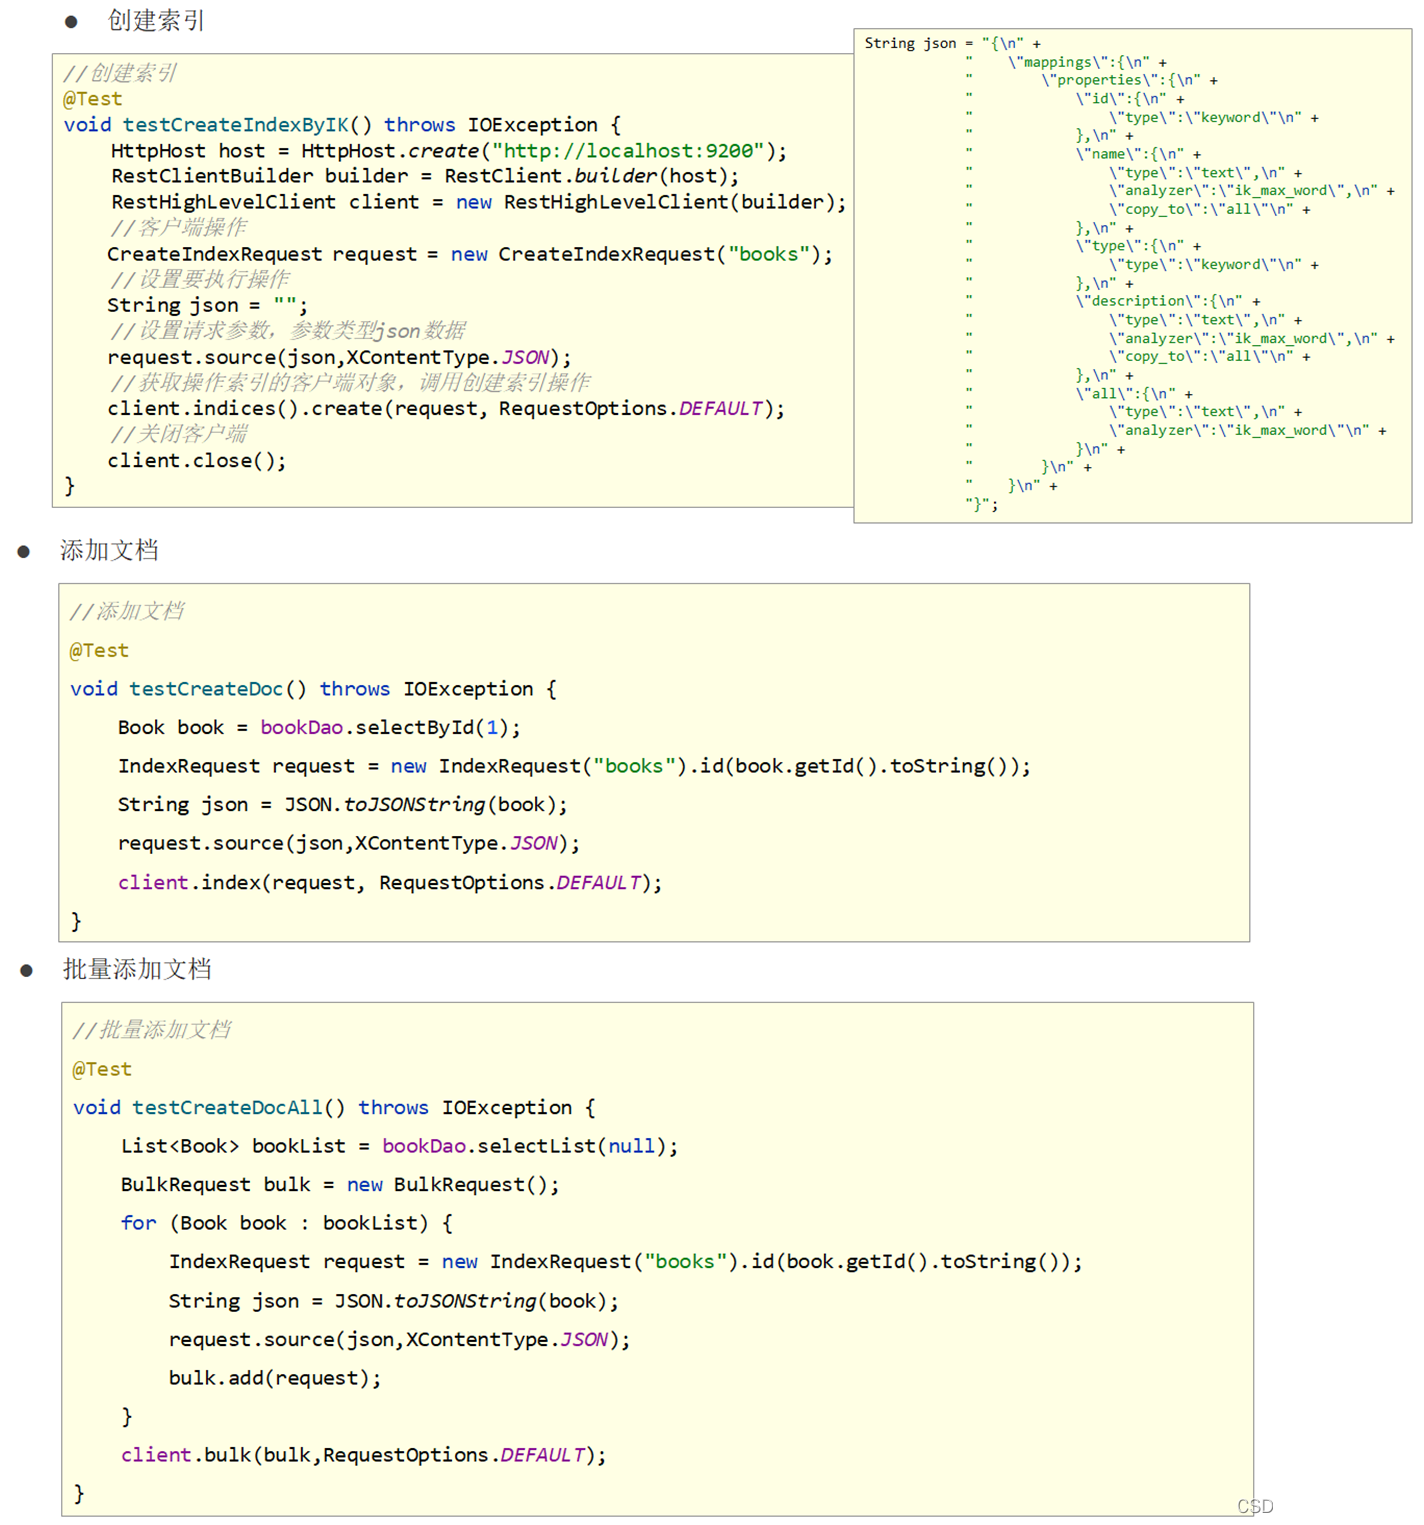
{"mappings":{"properties":{"id":{"type":"keyword"},"name":{"type":"text","analyzer":"ik_max_word","copy_to":"all"},"type":{"type":"keyword"},"description":{"type":"text","analyzer":"ik_max_word","copy_to":"all"},"all":{"type":"text","analyzer":"ik_max_word"}}}}
(6.3.3)文档操作(增删改查)。

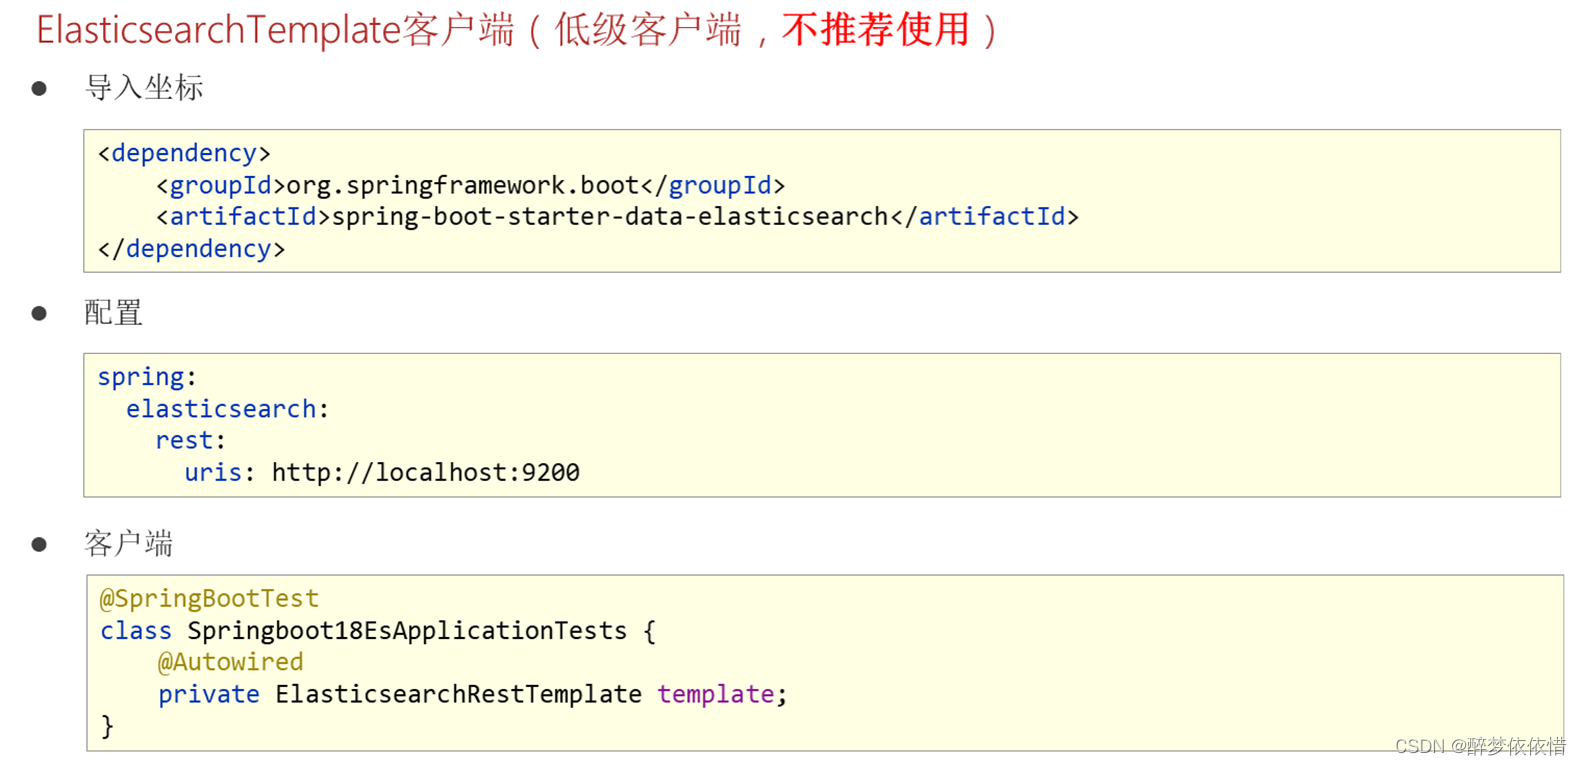
(6.3.4)SpringBoot整合ES。
(6.3.4.1) Template客户端(低级客户端)。
(6.3.4.2)高级客户端。
在Elasticsearch7.15版本之后,Elasticsearch官方宣布弃用了它的高级客户端RestHighLevelClient。
注意:虽然已经弃用了,但是这里我还是使用这种方法,因为网上很多文章还是使用这种,要么就比较复杂的,这里为了方便,就使用这种了。
注意事项:elasticsearch服务端与客户端要一致,不然测试会报错。
        <dependency>
            <groupId>org.elasticsearch.client</groupId>
            <artifactId>elasticsearch-rest-high-level-client</artifactId>
            <version>7.16.2</version>
        </dependency>
@BeforeEach
void setUp() {
HttpHost host = HttpHost.create("http://localhost:9200");
RestClientBuilder builder = RestClient.builder(host);
client = new RestHighLevelClient(builder);
}
@AfterEach
void tearDown() throws IOException {
client.close();
}提示:经常使用的IDEA工具的alt+insertScrlk快捷键就有这两个方法。

(6.3.5)创建索引、添加文档。
索引(表)、文档(表的一条记录)。
如果出现报错,看看这个类是否导入的是这个包的类,我就是导入错的包,一直报错。import org.elasticsearch.client.indices.CreateIndexRequest;
(6.3.6)查询文档操作。


![C国演义 [第九章]](https://img-blog.csdnimg.cn/c67342f880b949e09ca640c0b5f21aba.png)