1.基本介绍
Github上的“https://github.com/akullpp/awesome-java”页整理了非常多的各类Java组件的实现,前面一篇从它的图片处理篇找到了《image-comparison》进行了动手实践,关于图片处理的二维码组件《ZXing》本站曾有实践;关于图片识别的组件《Tess4J》页略有实践;关于图片操作(放大、缩小、旋转、水印等)的《Thumbnailator》组件也略有实践,所以在看到了《image-comparison》这个时觉得挺有意思的,专门拿过来实践了一下,它可以比较 2 个相同大小的图像(图片大小必须一致),并通过绘制矩形直观地显示差异,图像的某些部分可以从比较中排除,可用于自动化质量保证测试,项目的官方地址为“https://github.com/romankh3/image-comparison”,更多描述和项目介绍可转至这里查看。
代码实践这块应用起来比较简单,直接借助于官网的图片进行运行输出,可以得到与官网一致的效果,详细如下文所示:
参考代码
/**
 * 图片比较演示 https://github.com/romankh3/image-comparison
 * 【Github官方图片,略有小改动】
 *
 * @author chendd
 * @date 2023/7/8 14:37
 */
public class GithubImageComparisonTest {

    public static void main(String[] args) {
        //加载图片
        BufferedImage expectedImage = ImageComparisonUtil.readImageFromResources("Expected.png");
        BufferedImage actualImage = ImageComparisonUtil.readImageFromResources("Actual.png");
        //对比两个图片
        ImageComparisonResult imageComparisonResult = new ImageComparison(expectedImage, actualImage).compareImages();
        String folder = ImageComparisonUtil.class.getClassLoader().getResource("").getPath();
        //存储图片和输出结果
        ImageComparisonUtil.saveImage(new File(folder , "Github图片对比结果.png") , imageComparisonResult.getResult());
        System.out.println("Github图片对比状态:" + imageComparisonResult.getImageComparisonState());
    }

}
结果输出

(源图片)

(对比图片)

(对比结果)
PS:对比结果的图片中两处红色细线边框就是程序执行后自动标记的。
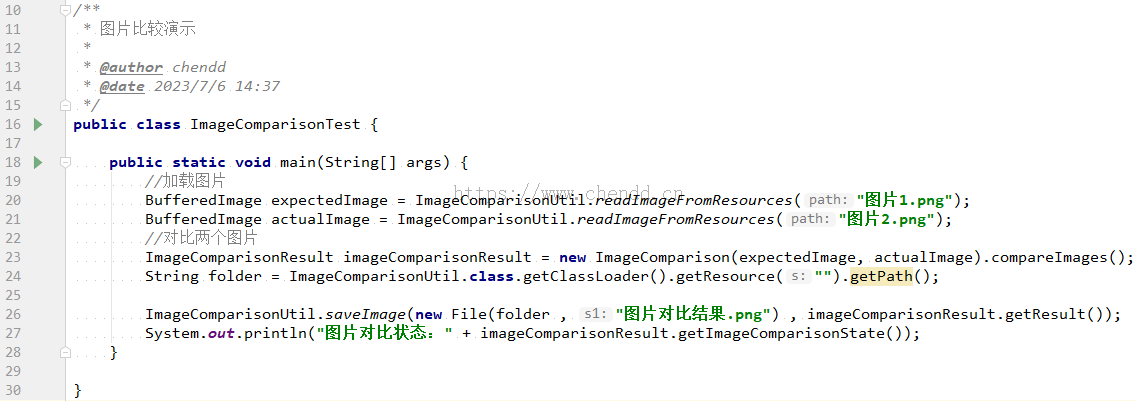
参考代码
/**
 * 图片比较演示 https://github.com/romankh3/image-comparison
 *
 * @author chendd
 * @date 2023/7/8 14:37
 */
public class ImageComparisonTest {

    public static void main(String[] args) {
        //加载图片
        BufferedImage expectedImage = ImageComparisonUtil.readImageFromResources("图片1.png");
        BufferedImage actualImage = ImageComparisonUtil.readImageFromResources("图片2.png");
        //对比两个图片
        ImageComparisonResult imageComparisonResult = new ImageComparison(expectedImage, actualImage).compareImages();
        String folder = ImageComparisonUtil.class.getClassLoader().getResource("").getPath();
        //存储图片和输出结果
        ImageComparisonUtil.saveImage(new File(folder , "图片对比结果.png") , imageComparisonResult.getResult());
        System.out.println("图片对比状态:" + imageComparisonResult.getImageComparisonState());
    }

}
结果输出
(源图片)
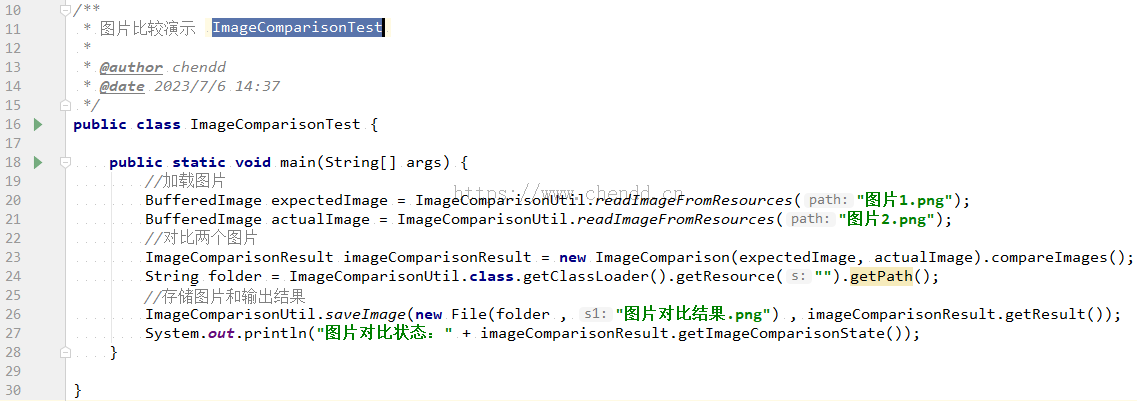
(对比图片)
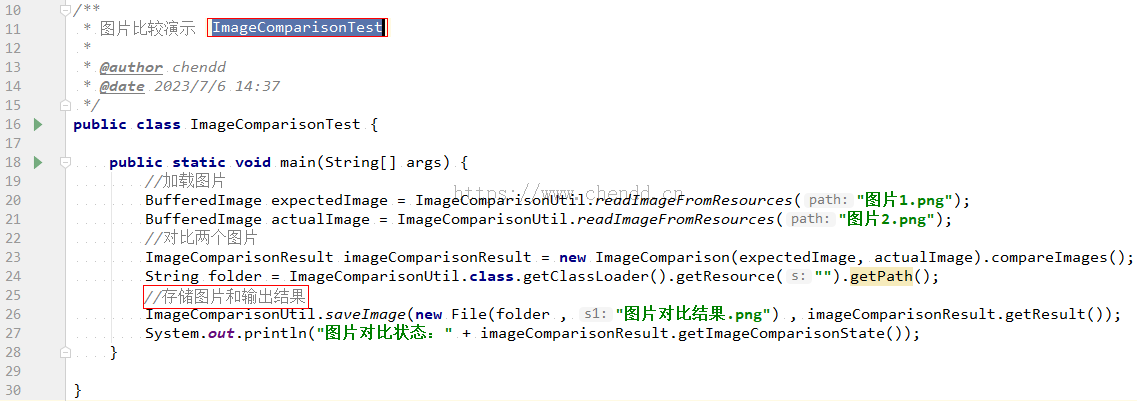
(对比结果)
PS:对比结果的图片中两处红色细线边框就是程序执行后自动标记的,第一处是第11行的蓝色背景类名称,截图时双击选中了类名称,导致有背景色;第二处是第25行,增加了一行的代码注释;
IDEA源码工程demo下载见原文。
Java 比对两张图片的差异欢迎来到陈冬冬的个人经验分享平台https://www.chendd.cn/blog/article/1678031638323060737.html


![[SWPUCTF 2021 新生赛]jicao](https://img-blog.csdnimg.cn/img_convert/9540adb812a54a44afc5cbf518ad84d0.png)


![心法利器[89] | 实用文本生成中的解码方法](https://img-blog.csdnimg.cn/img_convert/9e0f27af632c4e0061e45724bf322b48.png)
![[CVPR‘23] PanoHead: Geometry-Aware 3D Full-Head Synthesis in 360 deg](https://img-blog.csdnimg.cn/610649e5fecc4c14bee9c6f210457e0a.png)