本篇主要步骤
- 1、前置环境
- 2、安装 hexo
- 3、初始化 hexo
- 4、运行 hexo
1、前置环境
参考官网教程:hexo 博客系统安装前提
2、安装 hexo
这里采用官网推荐的第二种方式局部安装 hexo 包。
$ npm install hexo
3、初始化 hexo
创建一个空文件夹,用来作为项目根目录。进入路径,执行:
$ npx hexo init
如下说明初始化成功。
>npx hexo init
INFO  Cloning hexo-starter https://github.com/hexojs/hexo-starter.git
fatal: unable to access 'https://github.com/hexojs/hexo-starter.git/': Recv failure: Connection was reset
WARN  git clone failed. Copying data instead
INFO  Install dependencies
added 243 packages from 189 contributors and audited 244 packages in 20.749s

26 packages are looking for funding
  run `npm fund` for details

found 0 vulnerabilities

INFO  Start blogging with Hexo!
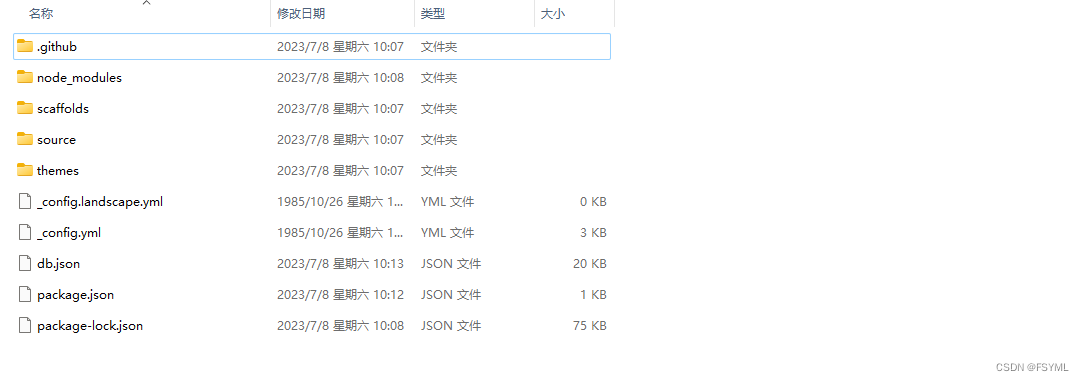
并在项目路径下生成项目文件
4、运行 hexo
使用 npx hexo <command>命令可以对 hexo 项目进行各种操作。所有命令如下:
Commands:
  clean     Remove generated files and cache.
  config    Get or set configurations.
  deploy    Deploy your website.
  generate  Generate static files.
  help      Get help on a command.
  init      Create a new Hexo folder.
  list      List the information of the site
  migrate   Migrate your site from other system to Hexo.
  new       Create a new post.
  publish   Moves a draft post from _drafts to _posts folder.
  render    Render files with renderer plugins.
  server    Start the server.
  version   Display version information.
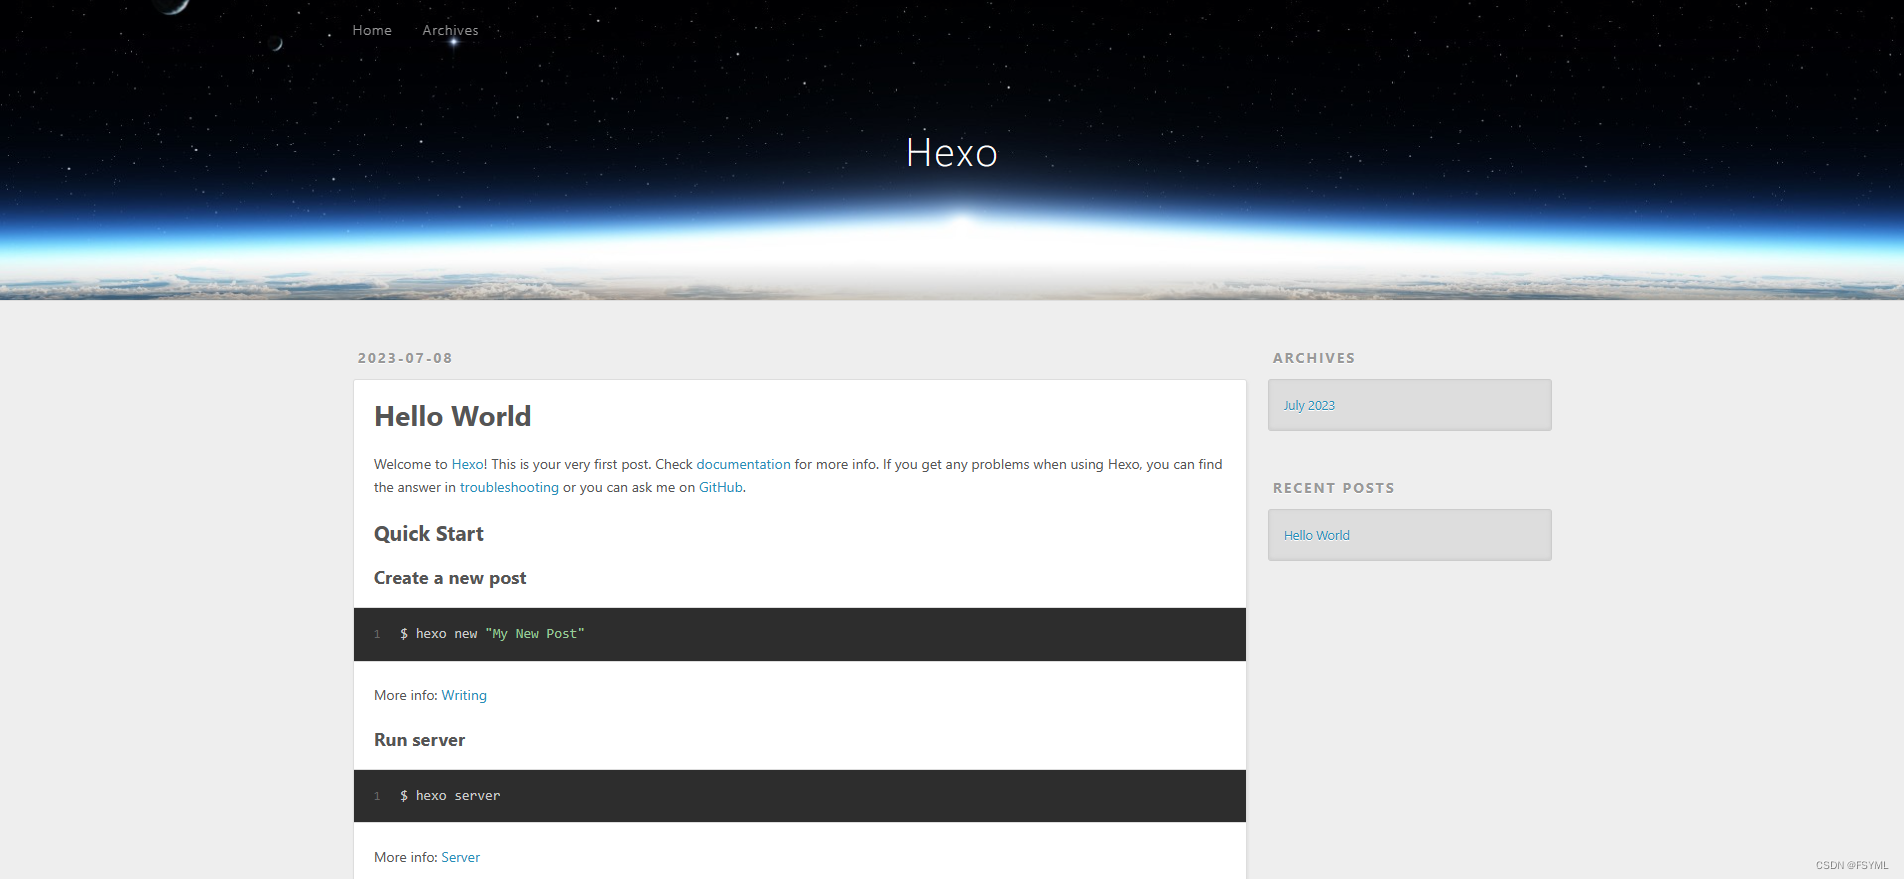
执行 npx hexo server试试运行 hexo。
>npx hexo server
INFO  Validating config
INFO  Start processing
INFO  Hexo is running at http://localhost:4000/ . Press Ctrl+C to stop.
根据提示浏览器访问 地址http://localhost:4000/查看效果
以上在本地就基本安装好了 hexo 博客。本篇 end …🙂🙂🙂