目录
1 简介
2 规范
2.1 命名
2.2 模块划分
3 示例
1 简介
SpringBoot中的starter是一种非常重要的机制,能够抛弃以前繁琐的配置,将其统一集成进starter,应用者只需要在maven中引入starter依赖,SpringBoot就自动扫描到要加载的信息并启动相应的默认配置,starter让我们摆脱了各种依赖库的处理,SpringBoot会自动通过classpath路径下的类发现需要的bean,并注册进IOC容器,SpringBoot提供了针对日常企业研发应用研发各种场景的spring-boot-starter依赖模块。
2 规范
2.1 命名
SpringBoot提供的starter以spring-boot-starter-xxx的方式命名,如mvc
        <dependency>
            <groupId>org.springframework.boot</groupId>
            <artifactId>spring-boot-starter-web</artifactId>
        </dependency>
而第三方默认自定义的starter使用xxx-spring-boot-starter的命名规则,以此来区分springBoot提供的starter,如mybatis。这也是约定大于配置的一种理念。
        <dependency>
            <groupId>com.baomidou</groupId>
            <artifactId>mybatis-plus-boot-starter</artifactId>
            <version>3.4.0</version>
        </dependency>
2.2 模块划分
一个标准Spring boot Starter的组成:
autoconfigure模块:一般包含自动配置相关代码
starter模块:提供对autoconfigure模块的依赖以及其他的二方依赖,一般业务方通过依赖starter来实现这个组件的依赖
3 示例
功能:分每一个分配中国国籍
相关依赖:
<?xml version="1.0" encoding="UTF-8"?>
<project xmlns="http://maven.apache.org/POM/4.0.0" xmlns:xsi="http://www.w3.org/2001/XMLSchema-instance"
         xsi:schemaLocation="http://maven.apache.org/POM/4.0.0 https://maven.apache.org/xsd/maven-4.0.0.xsd">
    <modelVersion>4.0.0</modelVersion>
    <parent>
        <groupId>org.springframework.boot</groupId>
        <artifactId>spring-boot-starter-parent</artifactId>
        <version>2.2.6.RELEASE</version>
        <relativePath/> <!-- lookup parent from repository -->
    </parent>
    <groupId>com.liubujun</groupId>
    <artifactId>learn-spring-boot-starter</artifactId>
    <version>0.0.1-SNAPSHOT</version>
    <name>learn-spring-boot-starter</name>
    <description>Demo project for Spring Boot</description>
    <properties>
        <java.version>1.8</java.version>
    </properties>
    <dependencies>
        <dependency>
            <groupId>org.springframework.boot</groupId>
            <artifactId>spring-boot-starter-web</artifactId>
        </dependency>

        <dependency>
            <groupId>org.springframework.boot</groupId>
            <artifactId>spring-boot-configuration-processor</artifactId>
        </dependency>

        <dependency>
            <groupId>org.springframework.boot</groupId>
            <artifactId>spring-boot-autoconfigure</artifactId>
        </dependency>

        <dependency>
            <groupId>org.projectlombok</groupId>
            <artifactId>lombok</artifactId>
        </dependency>
    </dependencies>

    <build>
<!--        <plugins>-->
<!--            <plugin>-->
<!--                <groupId>org.springframework.boot</groupId>-->
<!--                <artifactId>spring-boot-maven-plugin</artifactId>-->
<!--            </plugin>-->
<!--        </plugins>-->
    </build>

</project>
第一个工程结构如下:
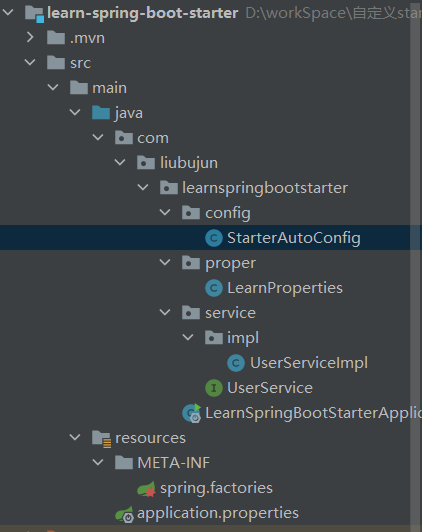
准备一个Service:
public interface UserService {

    String printUser(String name);
}
Service的实现类:
@Service
public class UserServiceImpl implements UserService {

    LearnProperties learnProperties;

    public UserServiceImpl(LearnProperties learnProperties) {
        this.learnProperties = learnProperties;
    }

    @Override
    public String printUser(String name) {
        return name+" is a citizen of "+learnProperties.getNationality();
    }
}属性类:国籍从application.properties文件中获取
@ConfigurationProperties(prefix = "starter.user") //将配置文件中的相关属性与Java Bean进行动态绑定
@Data
public class LearnProperties {

    /**
     * 国籍
     */
    private String nationality;

}
配置类:
@Configuration
@EnableConfigurationProperties(LearnProperties.class) //让使用@ConfigurationProperties注解的类(LearnProper)生效
@ConditionalOnProperty(prefix = "starter",name = "isopen",havingValue = "true",matchIfMissing = true)
public class StarterAutoConfig {

    @Autowired
    LearnProperties learnProperties;

    @Bean
    UserService userService(){
        return new UserServiceImpl(learnProperties);
    }
}
//prefix为配置文件中的前缀,
//name为配置的名字
//havingValue是与配置的值对比值,当两个值相同返回true,配置类生效
添加文件工厂:spring.factories
org.springframework.boot.autoconfigure.EnableAutoConfiguration=\
  com.liubujun.learnspringbootstarter.config.StarterAutoConfig
以上是第一个工程配置完成之后进行打包:
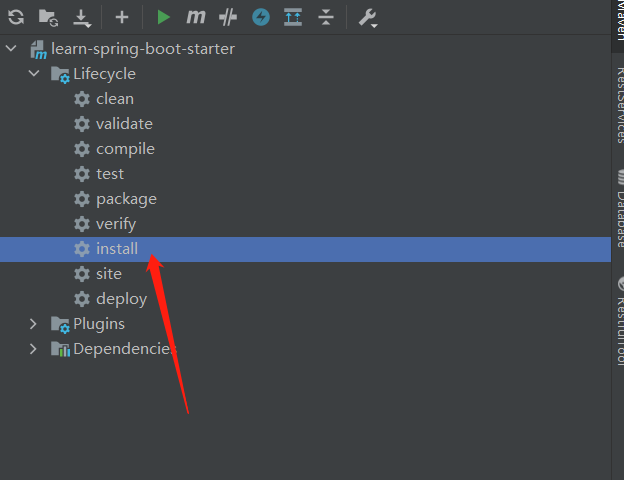
如此一个starter就制作完成了,那么如何使用它呢,可以想一想平时我们使用第三方依赖的时候是如何去使用它们的starter的,只需要在pom文件中引入该starter就好了。
此时准备第二个工程进行测试,工程结构如下:
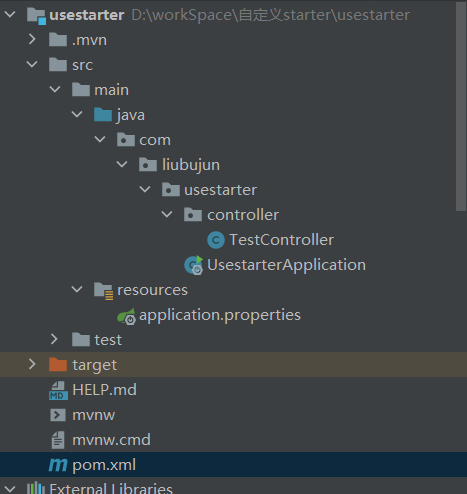
步骤一:
在pom文件中引入上一个工程的依赖,如下:
        <!--自定义starter-->
        <dependency>
            <groupId>com.liubujun</groupId>
            <artifactId>learn-spring-boot-starter</artifactId>
            <version>0.0.1-SNAPSHOT</version>
        </dependency>
步骤二:
在配置文件中进行配置(此处的配置是根据引入上一个工程的依赖来进行配置的,就是第一个工程的属性类)
starter.user.nationality=the People's Republic of China
starter.isopen=true
步骤三:
建一个测试类
@RestController
@RequestMapping("test")
public class TestController {

    @Resource
    UserService userService;

    @GetMapping("test")
    public String testController(String name){
        return userService.printUser(name);
    }
}
测试结果如下:

可以发现,引入了另外一个工程的starter之后,可以使用里面的相关代码,这也侧面印证了自己之前只引入依赖而没有思考是如何实现的。


![[附源码]Python计算机毕业设计Django-中国传统手工艺销售平台](https://img-blog.csdnimg.cn/8ef98439179a44118e1285446de01e50.png)


![[附源码]Python计算机毕业设计Django在线影院系统](https://img-blog.csdnimg.cn/96950f8b6b57476cbfb3b57398eee355.png)
![[附源码]计算机毕业设计JAVA中小学微课学习系统](https://img-blog.csdnimg.cn/c08e2fb567794d0b82fffb3eebdc2247.png)