路由传参
跳转路由时,可以给路由对应的组件内传参
声明式导航
/path?参数名=值
/path/值 —需要路由对象提前配置 path: ‘/path/:参数名’
对应的页面组件接收传递过来的值
$route.query.参数名
$route.params.参数名
router/index.js
import Vue from 'vue'
// 1. 导入路由
import VueRouter from "vue-router"

// 引入组件
// import Home from '../views/Home'
// import Login from '../views/Login'
// import Register from '../views/Register'

// 2. 使用路由插件
// 在vue中,使用vue插件,需要调用Vue.use()
Vue.use(VueRouter)

// 3. 创建路由规则
const routes = [
    {
        path: '/',
        redirect: '/list'
    },
    {
        path: '/list',
        component: () => import('../views/List')
    },
    {
        path: '/part',
        component: () => import('../views/Part')
    },
    {
        path: '/detail/:name',
        component: () => import('../views/Detail')
    },
    {
        path: '*',
        component: () => import('../views/NotFound')
    },
]

// 4. 创建路由对象,传入规则
const router = new VueRouter({
    // routes: routes,
    routes,
    mode: 'history',
})

// 导出路由对象
export default router
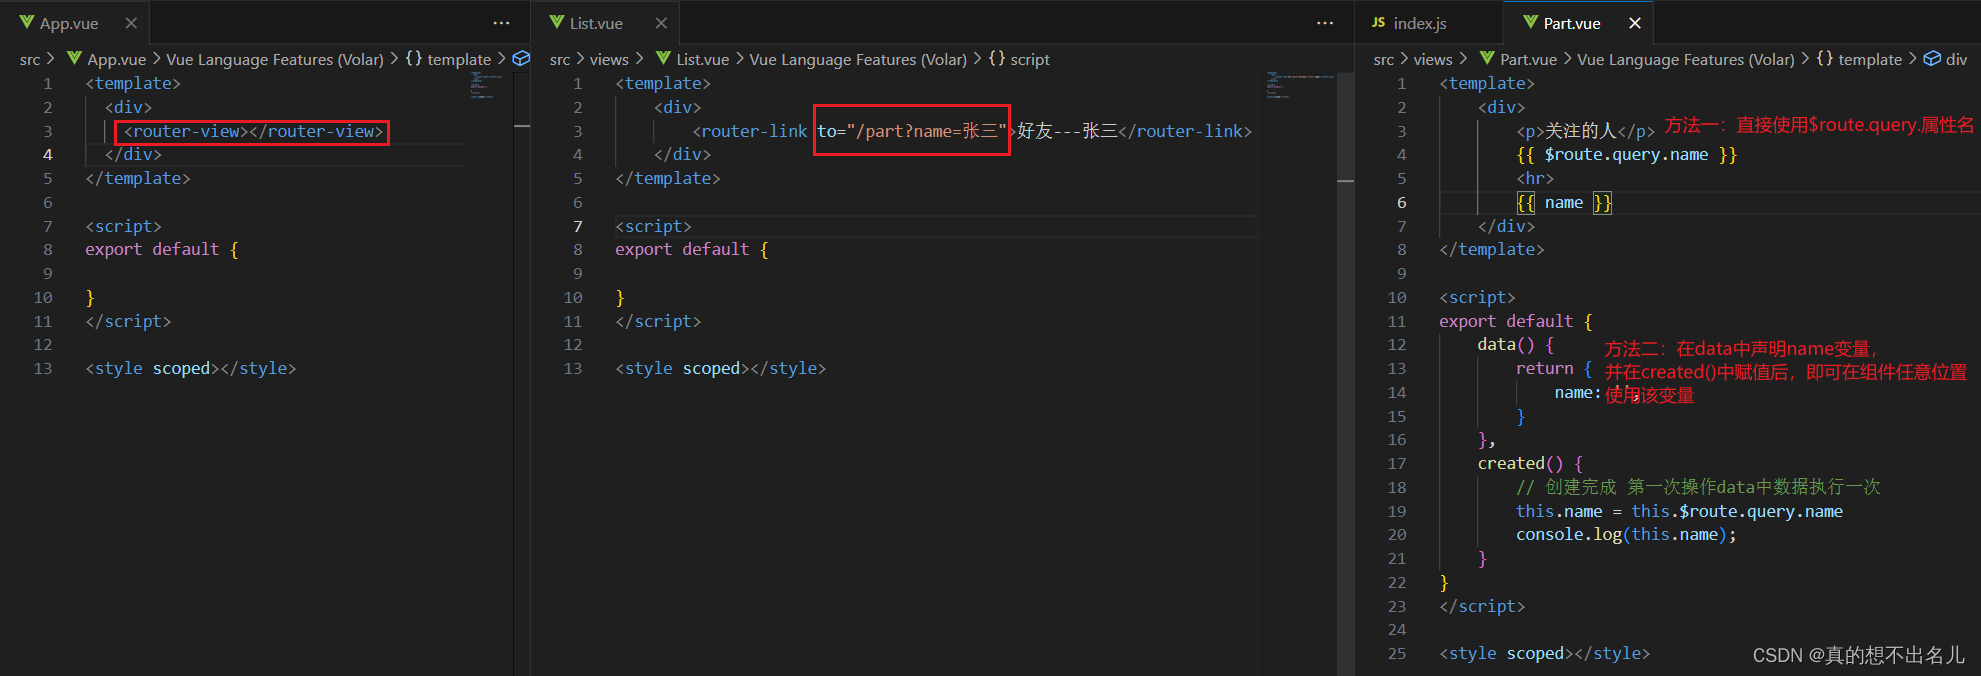
App.vue
<template>
  <div>
    <router-view></router-view>
  </div>
</template>

<script>
export default {

}
</script>

<style scoped></style>
List.vue
<template>
    <div>
        <router-link to="/part?name=张三">好友---张三</router-link>
        <router-link to="/detail/王五">好友---王五</router-link>
        // to一定要加: 进行属性绑定,动态属性传值
        <router-link :to="'/part?name='+ n1">朋友---{{ n1 }}</router-link>
        <router-link :to="'/detail/'+ n2">朋友---{{ n2 }}</router-link>
    </div>
</template>

<script>
export default {
    data() {
        return {
            n1: '小米',
            n2: '小鹏',
        }
    },
}
</script>

<style scoped></style>
Part.vue
<template>
    <div>
        <p>关注的人</p>
        // 方式 1
        {{ $route.query.name }}
        <hr>
        {{ name }}
    </div>
</template>

<script>
export default {
    data() {
        return {
            name: '',
        }
    },
    created() {
        // 创建完成 第一次操作data中数据执行一次
        this.name = this.$route.query.name
        console.log(this.name);
    }
}
</script>

<style scoped></style>
Detail.vue
<template>
    <div>
        detail
        // 方式 2
        <p>{{ $route.params.name }}</p>
        <hr>
        {{ name }}
    </div>
</template>

<script>
export default {
    data() {
        return {
            name: '',
        }
    },
    created() {
        this.name = this.$route.params.name
    }
}
</script>

<style scoped></style>
编程式导航
语法:
query/params 任选一个
this.$router.push({
		path: "路由路径",
		name: "路由名",
		query: {
			"参数名": "值",
		},
		params: {
			"参数名": "值",
		},
})
List.vue
<template>
    <div>
        <router-link to="/part?name=张三">好友---张三</router-link>
        <router-link to="/detail/王五">好友---王五</router-link>
        <router-link :to="'/part?name=' + n1">朋友---{{ n1 }}</router-link>
        <router-link :to="'/detail/' + n2">朋友---{{ n2 }}</router-link>
        <hr>
        <span @click="fn1">朋友---{{ n1 }}</span>
        <span @click="fn2">朋友---{{ n2 }}</span>
    </div>
</template>

<script>
export default {
    data() {
        return {
            n1: '小米',
            n2: '小鹏',
        }
    },
    methods: {
        fn1() {
            this.$router.push({
                path: '/part',
                query: {
                    // name: '小米',
                    name: this.n1,
                }
            })
        },
        fn2() {
            // this.$router.push({
            //     // 不能用path,path会自动忽略params
            //     name: 'detail',
            //     params: {
            //         name: this.n2,
            //     }
            // })
            this.$router.push('/detail/' + this.n2)
        },
    },
}
</script>

<style scoped></style>
路由守卫
https://router.vuejs.org/zh/guide/advanced/navigation-guards.html
vue-router 提供的导航守卫主要用来通过跳转或取消的方式守卫导航。这里有很多方式植入路由导航中:全局的,单个路由独享的,或者组件级的。
全局前置守卫
需求:在跳转路由前,判断用户是否登录,登录了才能跳转到"part"页面,未登录弹窗提示
在路由对象上使用固定的方法 beforeEach()
// 1. 在路由对象上使用固定的方法 beforeEach(一定要在创建路由之后使用该方法)
/*

路由跳转"之前"先执行这里,决定是否跳转
router.beforeEach((to, from, next)=>{
to 要跳转的路由(路由对象信息) 目标
from 从哪里跳转的路由(路由对象信息) 来源
next 函数体,next()  才会让路由正常的跳转切换,next(false)在原地停留  next("路由路径") 强制修改到另一个路由路径上
不调用next 页面留在原地
})

*/
// 在跳转路由前,判断用户是否登录,登录了才能跳转到"part"页面,未登录弹窗提示
const isLogin = false  // 登录状态(未登录)
router.beforeEach((to, from, next) => {
    // console.log(to)
    // console.log(from)
    if (to.path === '/part' && isLogin === false) {
        alert('请先登录')
        next(false)
    } else {
        next()  // 正常放行
    }
})
Vant组件库
https://vant-contrib.gitee.io/vant/v2/#/zh-CN/
Vant轻量、可靠的移动端 Vue 组件库
安装
在当前项目根目录中打开终端输入以下命令
npm i vant@latest-v2 -S
导入所有的组件
main.js中导入
// 导入所有的组件
import Vant from 'vant'
import 'vant/lib/index.css'

Vue.use(Vant)
使用组件
<van-button type="primary">主要按钮</van-button>
<van-button type="info">信息按钮</van-button>
<van-button type="default">默认按钮</van-button>
<van-button type="warning">警告按钮</van-button>
<van-button type="danger">危险按钮</van-button>
手动按需引入
只引入使用的组件
在不使用插件的情况下,可以手动引入需要的组件 —每一个组件都要引入
import Button from 'vant/lib/button';
import 'vant/lib/button/style';
注册
List.vue
<template>
  <div>
    <van-button type="primary">主要按钮</van-button>
    <van-button type="info">信息按钮</van-button>
    <van-button type="default">默认按钮</van-button>
    <van-button type="warning">警告按钮</van-button>
    <van-button type="danger">危险按钮</van-button>
  </div>
</template>

<script>
// 组件要引入到要显示组件的那个vue中
import Button from "vant/lib/button";
import "vant/lib/button/style";
export default {
  components: {
    // VanButton: Button,
    [Button.name]: Button,
  },
};
</script>
自动按需引入
babel-plugin-import 是一款 babel 插件,它会在编译过程中将 import 的写法自动转换为按需引入的方式。
安装插件
npm i babel-plugin-import -D
在babel.config.js中配置完,要重新启动项目
module.exports = {
  presets: [
    '@vue/cli-plugin-babel/preset'
  ],
  plugins: [
    ['import', {
      libraryName: 'vant',
      libraryDirectory: 'es',
      style: true
    }, 'vant']
  ]
};
main.js
import { Button, Icon } from 'vant'
Vue.use(Button)
Vue.use(Icon)
组件中使用
<template>
  <div>
    <van-button type="primary">主要按钮</van-button>
    <van-button type="info">信息按钮</van-button>
    <van-button type="default">默认按钮</van-button>
    <van-button type="warning">警告按钮</van-button>
    <van-button type="danger">危险按钮</van-button>
    <van-icon name="chat-o" />
    <van-icon name="https://b.yzcdn.cn/vant/icon-demo-1126.png" />
  </div>
</template>

<script>
export default {};
</script>

<style scoped>
</style>
案例
路由配置
二级路由
组件
- Layout.vue —总的框架
- List.vue —商品列表
- Search.vue —商品搜索
- My.vue —我的信息
配置路由
import Vue from "vue";

import VueRouter from 'vue-router'

Vue.use(VueRouter)

const routes = [
    {
        path: '/',
        redirect: '/list',
        component: () => import('../views/Layout'),
        children: [
            {
                path: '/list',
                component: () => import('../views/List'),
            },
            {
                path: '/my',
                component: () => import('../views/My'),
            },
            {
                path: '/search',
                component: () => import('../views/Search'),
            },
        ]
    },
    {
        path: '*',
        component: () => import('../views/NotFound')
    }
]

const router = new VueRouter({
    routes,
    mode: 'history'
})

export default router
底部封装
- 创建MyTabBar.vue组件
<template>
  <div>
    <van-tabbar v-model="active">
      <van-tabbar-item icon="home-o" to="/list">商品列表</van-tabbar-item>
      <van-tabbar-item icon="search" to="/search">商品搜索</van-tabbar-item>
      <van-tabbar-item icon="friends-o" to="/my">我的信息</van-tabbar-item>
    </van-tabbar>
  </div>
</template>

<script>
export default {
  data() {
    return {
      active: 0,
    };
  },
};
</script>

<style scoped>
</style>
顶部封装
- 创建MyHead.vue组件
<template>
  <div>
    <div class="head">TabBar案例</div>
  </div>
</template>

<script>
export default {};
</script>

<style scoped>
.head {
  height: 50px;
  line-height: 50px;
  color: #fff;
  background-color: blue;
  text-align: center;
}
</style>
MyTabBar.vue组件和MyHead.vue组件要注册并引入到 Layout.vue 组件中
商品列表
- 封装MyTable.vue === 标签和样式
- axios在MyGoodList.vue请求数据回来,把MyTable.vue引入到MyGoodList.vue中,再把MyGoodList.vue引入到List.vue中
- 请求地址https://www.escook.cn/api/goods
- 传入MyTable.vue中循环数据显示
List.vue
<template>
    <div>
        <my-good-list></my-good-list>
    </div>
</template>

<script>
import MyGoodList from '@/components/MyGoodList.vue'
export default {
    components: { MyGoodList, }
}
</script>

<style scoped></style>
MyTable.vue
<template>
  <div>
    <table>
      <thead>
        <tr>
          <th>#</th>
          <th>名称</th>
          <th>价格</th>
          <th>标签</th>
          <th>操作</th>
        </tr>
      </thead>
      <tbody>
        // 循环遍历渲染数据
        <tr v-for="(item, index) in list">
          <td>{{ item.id }}</td>
          <td>{{ item.goods_name }}</td>
          <td>{{ item.goods_price }}</td>
          <td>{{ item.tags }}</td>
          <td>
            <van-button type="primary">删除</van-button>
          </td>
        </tr>
      </tbody>
    </table>
  </div>
</template>

<script>
export default {
  // 子组件props接收
  props: {
    list: Array,
  },
};
</script>

<style scoped>
table {
  width: 100%;
  border: 1px solid #eee;
  border-collapse: collapse;
  margin: 20px auto;
}
td,
th {
  height: 30px;
  border: 1px solid #eee;
}
</style>
axios在MyGoodList.vue请求数据回来
- 下载axios
yarn add axios
MyGoodList.vue
<template>
  <div>
    // 父传子 父自定义属性
    <my-table :list="list"></my-table>
  </div>
</template>

<script>
import axios from "axios";
import MyTable from "./MyTable.vue";
export default {
  data() {
    return {
      list: [],
    };
  },
  components: {
    MyTable,
  },
  create() {
    // axios({
    //   url: "https://www.escook.cn/api/goods",
    // }).then((res) => {
    //   let {
    //     data: { data: result },
    //   } = res;
    //   console.log(result);
    // });
    this.getData();
  },
  methods: {
    async getData() {
      let {
        data: { data: result },
      } = await axios({ url: "https://www.escook.cn/api/goods" });
      console.log(result);
      this.list = result;
    },
  },
};
</script>

<style scoped>
</style>
商品表格—插槽
使用插槽技术,和作用于插槽技术,给MyTable.vue组件,自定义标题,自定义列标题,自定义表格内容
需求:允许用户自定义表头和表格单元格内容
- 在MyTable.vue中准备slot
- 使用MyTable组件时传入具体标签
步骤:
- 提高组件==复用性和灵活性 ==,把表格列标题thead部分预留slot,设置 name 属性
- 使用MyTable.vue时,传入列标题标签
- 表格内容 td 部分也可以让组件使用者自定义,也给tbody预留 slot 和 name属性
- 使用插槽需要用到插槽内的item对象上的数据,作用域插槽
MyTable.vue
<template>
  <div>
    <table>
      <thead>
        <tr>
          // <th>#</th>
          // <th>名称</th>
          // <th>价格</th>
          // <th>标签</th>
          // <th>操作</th>
          <slot name="header"></slot>
        </tr>
      </thead>
      <tbody>
        <!-- 循环遍历渲染数据 -->
        <tr v-for="(item, index) in list">
          // <td>{{ item.id }}</td>
          // <td>{{ item.goods_name }}</td>
          // <td>{{ item.goods_price }}</td>
          // <td>{{ item.tags }}</td>
          // <td>
          //   <van-button type="primary">删除</van-button>
          // </td>
          <slot name="body" :row="item" :index="index"></slot>
        </tr>
      </tbody>
    </table>
  </div>
</template>

<script>
export default {
  // 子组件props接收
  props: {
    list: Array,
  },
};
</script>

<style scoped>
table {
  width: 100%;
  border: 1px solid #eee;
  border-collapse: collapse;
  margin: 20px auto;
}
td,
th {
  height: 30px;
  border: 1px solid #eee;
}
</style>
MyGoodList.vue
<template>
  <div>
    <!-- 父传子 父自定义属性 -->
    <my-table :list="list">
      <template #header>
        <th>#</th>
        <th>名称</th>
        <th>价格</th>
        <th>标签</th>
        <th>操作</th>
      </template>
      <template #body="{ row, index }">
        <td>{{ row.id }}</td>
        <td>{{ row.goods_name }}</td>
        <td>{{ row.goods_price }}</td>
        <td>{{ row.tags }}</td>
        <td>
          <van-button type="primary">删除</van-button>
        </td>
      </template>
    </my-table>
  </div>
</template>
mock模拟后端数据
由于上面使用的接口挂了,所以改用mock模拟后端数据,并对axios进行了简单的二次封装
axios二次封装
src/utils/request.js
// 二次封装axios

import axios from 'axios'

const http = axios.create({
    // 通用请求的地址前缀
    baseURL: '/api',
    timeout: 10000, // 超时时间
})

// 添加请求拦截器
http.interceptors.request.use(function (config) {
    // 在发送请求之前做些什么
    return config;
}, function (error) {
    // 对请求错误做些什么
    return Promise.reject(error);
});

// 添加响应拦截器
http.interceptors.response.use(function (response) {
    // 2xx 范围内的状态码都会触发该函数。
    // 对响应数据做点什么
    return response;
}, function (error) {
    // 超出 2xx 范围的状态码都会触发该函数。
    // 对响应错误做点什么
    return Promise.reject(error);
});


export default http // 对外暴露 http 实例
封装getData方法对外暴露,使用http.get()请求列表页数据
arc/api/index.js
import http from '../utils/request'

// 请求列表页数据
export const getData = () => {
    // 返回一个promise对象
    return http.get('/list/getData')
}
在MyGoodList.vue中调用getData方法请求数据
MyGoodList.vue
import { getData } from '../api'
export default {
    created() {
        getData().then(({ data: { data: { data: list } } }) => {  // 解构得到请求的数据
            console.log(list)
            this.list = list
        })
    },
}
定义mock请求拦截
api/mock.js
import Mock from 'mockjs'
import listApi from './mockServeData/list'

// 定义mock请求拦截
Mock.mock('/api/list/getData', listApi.getStatisticalData)

// // 定义mock请求拦截
// Mock.mock('/api/home/getData', function () {
//     // 拦截到请求后的处理逻辑
//     console.log('拦截到了')
//     return []
// })
main.js中引入mock
main.js中配置
import './api/mock'
mock模拟列表数据
api/mockServeData/list.js
mock模拟列表数据
// 列表数据
// mock数据模拟
import Mock from 'mockjs'
export default {
    getStatisticalData: () => {
        return {
            code: 20000,
            data: {
                data: [
                    {
                        id: 1001,
                        goods_name: '小米',
                        goods_price: 2999,
                        tags: ['性价比', '高性能'],
                        inputValue: '',
                        inputVisible: false,
                    },
                    {
                        id: 1002,
                        goods_name: '魅族',
                        goods_price: 2999,
                        tags: ['性价比', '高性能'],
                        inputValue: '',
                        inputVisible: false,
                    },
                    {
                        id: 1003,
                        goods_name: '华为',
                        goods_price: 2999,
                        tags: ['高性能'],
                        inputValue: '',
                        inputVisible: false,
                    },
                    {
                        id: 1004,
                        goods_name: '荣耀',
                        goods_price: 2999,
                        tags: ['高性能'],
                        inputValue: '',
                        inputVisible: false,
                    },
                    {
                        id: 1005,
                        goods_name: 'oppo',
                        goods_price: 2999,
                        tags: ['高性能'],
                        inputValue: '',
                        inputVisible: false,
                    },
                    {
                        id: 1006,
                        goods_name: 'vivo',
                        goods_price: 2999,
                        tags: ['高性能'],
                        inputValue: '',
                        inputVisible: false,
                    }
                ],
            }
        }
    }
}
商品表格tags
main.js中按需引入Tag组件
<td>
	<van-tag v-for="(item, ind) in row.tags" :key="ind" type="primary">
	{{ item }}
	</van-tag>
</td>
商品表格—删除功能
点击删除按钮删除对应行的数据
main.js中按需引入Button组件
分析:
- 删除按钮绑定点击事件
- 作用域插槽绑定id
- 传给删除方法,删除MyGoodList.vue里面数组的数据
MyGoodList.vue—注册点击事件
<van-button type="primary" @click="removeBtn(row.id)">删除</van-button>
MyGoodList.vue 根据id删除数据
    methods: {
        removeBtn(id) {
            // 1. 根据id查找下标
            let index = this.list.findIndex((obj) => obj.id === id)
            // 2. 实现删除
            this.list.splice(index, 1)
        }
    },
商品表格—添加tab
需求:店家tab按钮,出现输入框自动获取焦点,失去焦点关闭输入框,会出新增tag,esc清空内容
main.js中按需引入Button组件、Field组件
- 点击tab,按钮消失,输入框出现
- 输入框自动获焦
- 失去焦点,输入框消失,按钮出现
- 监测输入框回车,若无数据进行拦截,有数据则添加
- input输入框 按esc清空数据
点击tab,按钮消失,输入框出现
<td>
	<div class="top">
		<van-field
		v-model="value"
		v-if="row.inputVisible"
		placeholder="请输入新标签" />
		<van-button
		type="info"
		size="small"
		v-else
		@click="row.inputVisible = true">Tag+</van-button>
	</div>
	<van-tag type="primary" v-for="(item, ind) in row.tags" :key="ind"> {{ item }} </van-tag>
</td>
输入框自动获焦
Vant组件使用autofocus自动获焦
<van-field
v-model="value"
v-if="row.inputVisible"
placeholder="请输入新标签"
:autofocus="true" />
失去焦点,输入框消失,按钮出现
blur事件 输入框失去焦点时触发
<van-field
v-model="value"
v-if="row.inputVisible"
placeholder="请输入新标签"
:autofocus="true"
@blur="row.inputVisible = false"/>
监测输入框回车,若无数据进行拦截,有数据则添加
输入框要双向绑定mock数据中的inputValue,
利用该数据中的inputValue添加标签内容到row.tags中
- 监听input的回车事件
<van-field
v-model="row.inputValue"
v-if="row.inputVisible"
placeholder="请输入新标签"
:autofocus="true"
@blur="row.inputVisible = false"
@keyup.enter="enterFn(row)" />
- 事件处理函数
// 在methods方法中定义enterFn方法
enterFn(row) {
	// console.log(row);
	// 非空判断
	if (row.inputValue.trim().length === 0) {
		return alert('添加标签不能为空!')
	}
	// 添加
	row.tags.push(row.inputValue)
	row.inputValue = ''
}
input输入框 按esc清空数据
- 监听input的esc事件
<van-field
v-model="row.inputValue"
v-if="row.inputVisible"
placeholder="请输入新标签"
:autofocus="true"
@blur="row.inputVisible = false"
@keyup.enter="enterFn(row)"
@keyup.esc="clearFn(row)"/>
- 事件处理函数
clearFn(row) {
	row.inputValue = ''
}