今天我们来实现 RGB相机的控制程序,用来控制彩色相机的曝光、灵敏度、白平衡、亮度/色度降噪、 设备端裁剪、相机触发器等。
目录
- Setup 1: 创建文件
- Setup 2: 安装依赖
- Setup 3: 导入需要的包
- Setup 4: 全局变量
- Setup 5: 定义clamp函数
- Setup 6: 创建pipeline
- Setup 7: 创建节点
- Setup 8: 设置节点流名称
- Setup 9: 设置视频大小
- Setup 10: 建立链接关系
- Setup 11: 连接设备并启动管道
- Setup 12: 创建与DepthAI设备通信的输入队列和输出队列
- Setup 13: 计算最大裁剪比例
- Setup 14: 设置默认参数
- Setup 15: 设置相机模式
- Setup 16: 主循环
- 获取视频帧
- 从`ispQueue`获取所有的ISP帧
- 从`stillQueue`获取所有的静态帧
- Setup 17:运行程序
Setup 1: 创建文件
- 创建新建2-rgb-camera-control文件夹
- 用vscode打开该文件夹
- 新建一个main.py 文件
Setup 2: 安装依赖
安装依赖前需要先创建和激活虚拟环境,我这里已经创建了虚拟环境OAKenv,在终端中输入cd…退回到OAKenv的根目录,输入 OAKenv\Scripts\activate激活虚拟环境
安装pip依赖项:
pip install numpy opencv-python depthai blobconverter --user
Setup 3: 导入需要的包
在main.py中导入项目需要的包
import depthai as dai
import cv2
from itertools import cycle
from itertools import cycle 导入了cycle函数,这是Python中itertools模块中的一个函数。cycle函数用于创建一个无限迭代器,可以循环遍历特定的序列。
Setup 4: 全局变量
# 设置 size('W','A','S','D' controls)
STEP_SIZE = 8
# 手动曝光/聚焦/白平衡设置步骤
EXP_STEP = 500 #us
ISO_STEP = 50
LENS_STEP = 3
WB_STEP = 200
-
STEP_SIZE = 8定义步长为8。这表示在进行控制时,每次变化的单位大小为8。 -
EXP_STEP = 500定义手动曝光的步长为500微秒(us)。这表示在手动调整曝光时,每次增加或减小的曝光时间的单位大小为500微秒。 -
ISO_STEP = 50定义ISO值的步长为50。这表示在手动调整ISO值时,每次增加或减小的单位大小为50。 -
LENS_STEP = 3定义镜头聚焦的步长为3。这表示在手动调整镜头聚焦时,每次增加或减小的单位大小为3。 -
WB_STEP = 200定义白平衡的步长为200。这表示在手动调整白平衡时,每次增加或减小的单位大小为200。
Setup 5: 定义clamp函数
def clamp(num,v0,v1):
    return max(v0,min(num,v1))
这个clamp函数用于将输入的值限制在指定的范围内。
num是要进行限制的值。v0是允许的最小值。v1是允许的最大值。
函数的作用是检查给定的值num是否在范围[v0, v1]内。如果它小于最小值v0,则返回v0作为结果;如果它大于最大值v1,则返回v1作为结果;否则,返回num本身。
这个函数可以用于确保某个值在指定的范围内。例如,如果希望将变量x限制在0和100之间,可以使用x = clamp(x, 0, 100)来确保x的值不会小于0或大于100。
Setup 6: 创建pipeline
pipeline = dai.Pipeline()
Setup 7: 创建节点
camRgb = pipeline.create(dai.node.ColorCamera)
camRgb.setResolution(dai.ColorCameraProperties.SensorResolution.THE_1080_P)
camRgb.setIspScale(2,3) # 1080p --> 720p
stillEncoder = pipeline.create(dai.node.VideoEncoder)
这里创建了两个节点,并为其中的ColorCamera节点进行了一些配置。
通过pipeline.create()函数创建了一个名为camRgb的ColorCamera节点。
使用camRgb.setResolution()方法设置了相机的分辨率为1080p,即1920x1080像素。
使用camRgb.setIspScale()方法将图像缩小,将1080p的分辨率缩放为720p的分辨率。这里指定的缩放因子为2和3,表示将水平和垂直方向的分辨率都缩小为原来的2/3。因此,从1080p缩放到720p会使图像的宽度缩小为原来的2/3,高度缩小为原来的2/3。
使用pipeline.create()函数创建了一个名为stillEncoder的VideoEncoder节点。
这段代码的主要目的是创建相机节点并对其进行初始化和配置,以便后续在管道中使用这些节点。
controlIn = pipeline.create(dai.node.XLinkIn)
configIn = pipeline.create(dai.node.XLinkIn)
ispOut = pipeline.create(dai.node.XLinkOut)
videoOut = pipeline.create(dai.node.XLinkOut)
stillMjpegOut = pipeline.create(dai.node.XLinkOut)
这段代码创建了四个节点,并为每个节点分配了一个名称。
使用pipeline.create()函数创建了一个名为controlIn的XLinkIn节点。该节点用于接收控制信息。
使用pipeline.create()函数创建了一个名为configIn的XLinkIn节点。该节点用于接收配置信息。
使用pipeline.create()函数创建了一个名为ispOut的xLinkOut节点。该节点用于输出ISP(图像信号处理)处理后的图像。
使用pipeline.create()函数创建了一个名为videoOut的xLinkOut节点。该节点用于输出视频流。
使用pipeline.create()函数创建了一个名为stillMjpegOut的xLinkOut节点。该节点用于输出静态图像的MJPEG格式。
这些节点的主要作用是在管道中实现不同的数据传输和输出功能。
Setup 8: 设置节点流名称
controlIn.setStreamName("control")
configIn.setStreamName("config")
ispOut.setStreamName("isp")
videoOut.setStreamName("video")
stillMjpegOut.setStreamName("still")
使用controlIn.setStreamName()方法为之前创建的XLinkIn和xLinkOut节点设置了流名称。
通过为每个节点设置流名称,可以在管道中准确地分配和传输相应的数据流。这样可以更方便地管理和处理不同类型的数据。
Setup 9: 设置视频大小
camRgb.setVideoSize(640,360)
stillEncoder.setDefaultProfilePreset(1,dai.VideoEncoderProperties.Profile.MJPEG)
这段代码设置了camRgb节点的视频大小和stillEncoder节点的默认配置。
camRgb.setVideoSize(640, 360)方法设置了camRgb节点的视频大小为640x360像素。这表示输出的视频流将以该分辨率进行传输和显示。
stillEncoder.setDefaultProfilePreset(1, dai.VideoEncoderProperties.Profile.MJPEG)方法将stillEncoder节点的默认配置设置为使用MJPEG(Motion JPEG)编码器。MJPEG是一种常用的图像压缩格式,适合用于静态图像的编码和传输。这意味着stillEncoder节点将使用MJPEG编码器将静态图像转换为MJPEG格式,以便在后续流程中进行传输和处理。
Setup 10: 建立链接关系
camRgb.isp.link(ispOut.input)
camRgb.still.link(stillEncoder.input)
camRgb.video.link(videoOut.input)
controlIn.out.link(camRgb.inputControl)
configIn.out.link(camRgb.inputConfig)
stillEncoder.bitstream.link(stillMjpegOut.input)
这段代码建立了节点之间的链接关系。
camRgb.isp.link(ispOut.input)表示将camRgb节点的ISP(Image Signal Processor)输出链接到ispOut节点的输入。这将启用ISP处理,并将处理后的图像发送到ispOut节点。
camRgb.still.link(stillEncoder.input)表示将camRgb节点的静态图像输出链接到stillEncoder节点的输入。这将启用图像编码,并将编码后的图像发送到stillEncoder节点。
camRgb.video.link(videoOut.input)表示将camRgb节点的视频输出链接到videoOut节点的输入。这将启用视频传输,并将视频数据发送到videoOut节点。
controlIn.out.link(camRgb.inputControl)将controlIn节点的输出链接到camRgb节点的输入控制接口,以接收来自controlIn节点的控制命令。
configIn.out.link(camRgb.inputConfig)将configIn节点的输出链接到camRgb节点的配置输入接口,以接收来自configIn节点的配置数据。
stillEncoder.bitstream.link(stillMjpegOut.input)表示将stillEncoder节点的比特流输出链接到stillMjpegOut节点的输入。这将启用MJPEG格式的图像传输,并将MJPEG数据发送到stillMjpegOut节点。
Setup 11: 连接设备并启动管道
with dai.Device(pipeline) as device:
Setup 12: 创建与DepthAI设备通信的输入队列和输出队列
    controlQueue = device.getInputQueue("control")
    configQueue = device.getInputQueue("config")
    ispQueue = device.getOutputQueue("isp")
    videoQueue = device.getOutputQueue("video")
    stillQueue = device.getOutputQueue("still")
controlQueue = device.getInputQueue("control")通过getInputQueue方法创建了一个名为"control"的输入队列controlQueue,用于接收用于控制DepthAI设备的命令和指令。
configQueue = device.getInputQueue("config")通过getInputQueue方法创建了一个名为"config"的输入队列configQueue,用于接收DepthAI设备的配置信息。
ispQueue = device.getOutputQueue("isp")通过getOutputQueue方法创建了一个名为"isp"的输出队列ispQueue,用于接收经过ISP处理的图像数据。
videoQueue = device.getOutputQueue("video")通过getOutputQueue方法创建了一个名为"video"的输出队列videoQueue,用于接收视频数据。
stillQueue = device.getOutputQueue("still")通过getOutputQueue方法创建了一个名为"still"的输出队列stillQueue,用于接收静态图像数据。
Setup 13: 计算最大裁剪比例
    maxCropX = (camRgb.getIspWidth() - camRgb.getVideoWidth()) / camRgb.getIspWidth()
    maxCropY = (camRgb.getIspHeight() - camRgb.getVideoHeight()) / camRgb.getIspHeight()
    print(maxCropX,maxCropY,camRgb.getIspWidth(),camRgb.getVideoHeight())
这段代码计算了最大裁剪比例,以及获取了ISP图像的宽度、高度和视频图像的高度,并进行了打印输出。
maxCropX计算公式为(camRgb.getIspWidth() - camRgb.getVideoWidth()) / camRgb.getIspWidth(),表示ISP图像宽度与视频图像宽度之间的差值除以ISP图像宽度,得到最大裁剪比例。
maxCropY计算公式为(camRgb.getIspHeight() - camRgb.getVideoHeight()) / camRgb.getIspHeight(),表示ISP图像高度与视频图像高度之间的差值除以ISP图像高度,得到最大裁剪比例。
camRgb.getIspWidth()获取了ISP图像的宽度。
camRgb.getVideoHeight()获取了视频图像的高度。
通过print函数将最大裁剪比例maxCropX和maxCropY,以及ISP图像的宽度和视频图像的高度进行打印输出。
Setup 14: 设置默认参数
 # Default crop
    cropX = 0
    cropY = 0
    sendCamConfig = True

    # Defaults and limits for manual focus/exposure controls
    lensPos = 150
    expTime = 20000
    sensIso = 800
    wbManual = 4000
    ae_comp = 0
    ae_lock = False
    awb_lock = False
    saturation = 0
    contrast = 0
    brightness = 0
    sharpness = 0
    luma_denoise = 0
    chroma_denoise = 0
    control = 'none'
    show = False
cropX和cropY设置为0,表示默认情况下不进行裁剪。
sendCamConfig设置为True,表示默认情况下将发送相机配置。
用于手动对焦/曝光控制的默认值:
lensPos设置为150,表示默认情况下的镜头位置。expTime设置为20000,表示默认情况下的曝光时间。sensIso设置为800,表示默认情况下的ISO感光度。wbManual设置为4000,表示默认情况下的手动白平衡。ae_comp设置为0,表示默认情况下的自动曝光补偿。ae_lock设置为False,表示默认情况下自动曝光未锁定。awb_lock设置为False,表示默认情况下自动白平衡未锁定。saturation、contrast、brightness、sharpness、luma_denoise和chroma_denoise均设置为0,表示默认情况下没有进行任何图像增强或降噪。control设置为’none’,表示默认情况下没有进行任何控制操作。show设置为False,表示默认情况下不显示图像。
Setup 15: 设置相机模式
    awb_mode = cycle([item for name,item in vars(dai.CameraControl.AutoWhiteBalanceMode).items() if name.isupper()])
    anti_banding_mode = cycle([item for name,item in vars(dai.CameraControl.AntiBandingMode).items() if name.isupper()])
    effect_mode = cycle([item for name,item in vars(dai.CameraControl.EffectMode).items() if name.isupper()])
这段代码使用了循环生成器来设置相机的自动白平衡模式awb_mode、防闪烁模式anti_banding_mode和效果模式effect_mode。
awb_mode的生成器从dai.CameraControl.AutoWhiteBalanceMode中获取了所有大写的属性,并使用cycle函数创建了一个循环生成器。
anti_banding_mode的生成器从dai.CameraControl.AntiBandingMode中获取了所有大写的属性,并使用cycle函数创建了一个循环生成器。
effect_mode的生成器从dai.CameraControl.EffectMode中获取了所有大写的属性,并使用cycle函数创建了一个循环生成器。
name.isupper()是一个字符串方法,用于检查字符串中的所有字符是否都是大写字母。如果是,则返回True,否则返回False。
这样设置可以循环选择相机的自动白平衡模式、防闪烁模式和效果模式。
Setup 16: 主循环
while True:
获取视频帧
        vidFrames = videoQueue.tryGetAll()
        for vidFrame in vidFrames:
            cv2.imshow('video',vidFrame.getCvFrame())
通过videoQueue获取所有的视频帧,并使用cv2.imshow()来展示每一帧。cv2.imshow()是OpenCV库中的一个函数,用于展示图片或视频帧。
从ispQueue获取所有的ISP帧
  ispFrames = ispQueue.tryGetAll()
        for ispFrame in ispFrames:
            if show:
                txt = f"[{ispFrame.getSequenceNum()}]"
                txt += f"Exposure:{ispFrame.getExposureTime().total_seconds()*1000:.3f} ms, "
                txt += f"ISO:{ispFrame.getSensitivity()}, "
                txt += f"Lens position:{ispFrame.getLensPosition()}, "
                txt += f"Color temp:{ispFrame.getColorTemperature()} K"
                print(txt)
            cv2.imshow('isp',ispFrame.getCvFrame())

            # Send new cfg to camera
            if sendCamConfig:
                cfg = dai.ImageManipConfig()
                cfg.setCropRect(cropX,cropY,0,0)
                configQueue.send(cfg)
                print('Sending new crop - x: ',cropX,' y: ',cropY)
                sendCamConfig = False
这段代码从ispQueue获取所有的ISP帧,并进行显示。对于每个ispFrame,首先检查show是否为True,如果是,则获取与帧相关的文本信息,并将其打印出来。文本信息包括帧的序列号、曝光时间、ISO值、镜头位置和色温。
使用cv2.imshow()展示每个ispFrame的OpenCV表示。每个帧都会在名为’isp’的窗口中显示。
接下来,如果sendCamConfig为True,则创建一个新的dai.ImageManipConfig()配置,并将其发送到相机的configQueue中,这个配置包括裁剪的区域。同时,还会打印出发送的新裁剪区域的坐标(x、y),并将sendCamConfig设置为False,表示发送配置完成。
从stillQueue获取所有的静态帧
        stillFrames = stillQueue.tryGetAll()
        for stillFrame in stillFrames:
            # Decode JPEG
            frame = cv2.imdecode(stillFrame.getData(), cv2.IMREAD_UNCHANGED)
            # Display
            cv2.imshow('still', frame)
这段代码从stillQueue获取所有的静态帧,并进行显示。对于每个stillFrame,首先使用cv2.imdecode()函数将JPEG数据解码为图像。解码后的图像存储在frame变量中。
然后,使用cv2.imshow()展示解码后的图像。图像会在名为’still’的窗口中显示。
 key = cv2.waitKey(1)
        if key == ord('q'):
            break
        elif key == ord('/'):
            show = not show
            if not show: print("Printing camera settings: OFF")
        elif key == ord('c'):
            ctrl = dai.CameraControl()
            ctrl.setCaptureStill(True)
            controlQueue.send(ctrl)
        elif key == ord('t'):
            print("Autofocus trigger (and disable continuous)")
            ctrl = dai.CameraControl()
            ctrl.setAutoFocusMode(dai.CameraControl.AutoFocusMode.AUTO)
            ctrl.setAutoFocusTrigger()
            controlQueue.send(ctrl)
        elif key == ord('f'):
            print("Autofocus enable, continuous")
            ctrl = dai.CameraControl()
            ctrl.setAutoFocusMode(dai.CameraControl.AutoFocusMode.CONTINUOUS_VIDEO)
            controlQueue.send(ctrl)
        elif key == ord('e'):
            print("Autoexposure enable")
            ctrl = dai.CameraControl()
            ctrl.setAutoExposureEnable()
            controlQueue.send(ctrl)
        elif key == ord('b'):
            print("Auto white-balance enable")
            ctrl = dai.CameraControl()
            ctrl.setAutoWhiteBalanceMode(dai.CameraControl.AutoWhiteBalanceMode.AUTO)
            controlQueue.send(ctrl)
        elif key in [ord(','), ord('.')]:
            if key == ord(','): lensPos -= LENS_STEP
            if key == ord('.'): lensPos += LENS_STEP
            lensPos = clamp(lensPos, 0, 255)
            print("Setting manual focus, lens position: ", lensPos)
            ctrl = dai.CameraControl()
            ctrl.setManualFocus(lensPos)
            controlQueue.send(ctrl)
        elif key in [ord('i'), ord('o'), ord('k'), ord('l')]:
            if key == ord('i'): expTime -= EXP_STEP
            if key == ord('o'): expTime += EXP_STEP
            if key == ord('k'): sensIso -= ISO_STEP
            if key == ord('l'): sensIso += ISO_STEP
            expTime = clamp(expTime, 1, 33000)
            sensIso = clamp(sensIso, 100, 1600)
            print("Setting manual exposure, time: ", expTime, "iso: ", sensIso)
            ctrl = dai.CameraControl()
            ctrl.setManualExposure(expTime, sensIso)
            controlQueue.send(ctrl)
        elif key in [ord('n'), ord('m')]:
            if key == ord('n'): wbManual -= WB_STEP
            if key == ord('m'): wbManual += WB_STEP
            wbManual = clamp(wbManual, 1000, 12000)
            print("Setting manual white balance, temperature: ", wbManual, "K")
            ctrl = dai.CameraControl()
            ctrl.setManualWhiteBalance(wbManual)
            controlQueue.send(ctrl)
        elif key in [ord('w'), ord('a'), ord('s'), ord('d')]:
            if key == ord('a'):
                cropX = cropX - (maxCropX / camRgb.getResolutionWidth()) * STEP_SIZE
                if cropX < 0: cropX = 0
            elif key == ord('d'):
                cropX = cropX + (maxCropX / camRgb.getResolutionWidth()) * STEP_SIZE
                if cropX > maxCropX: cropX = maxCropX
            elif key == ord('w'):
                cropY = cropY - (maxCropY / camRgb.getResolutionHeight()) * STEP_SIZE
                if cropY < 0: cropY = 0
            elif key == ord('s'):
                cropY = cropY + (maxCropY / camRgb.getResolutionHeight()) * STEP_SIZE
                if cropY > maxCropY: cropY = maxCropY
            sendCamConfig = True
        elif key == ord('1'):
            awb_lock = not awb_lock
            print("Auto white balance lock:", awb_lock)
            ctrl = dai.CameraControl()
            ctrl.setAutoWhiteBalanceLock(awb_lock)
            controlQueue.send(ctrl)
        elif key == ord('2'):
            ae_lock = not ae_lock
            print("Auto exposure lock:", ae_lock)
            ctrl = dai.CameraControl()
            ctrl.setAutoExposureLock(ae_lock)
            controlQueue.send(ctrl)
        elif key >= 0 and chr(key) in '34567890[]':
            if   key == ord('3'): control = 'awb_mode'
            elif key == ord('4'): control = 'ae_comp'
            elif key == ord('5'): control = 'anti_banding_mode'
            elif key == ord('6'): control = 'effect_mode'
            elif key == ord('7'): control = 'brightness'
            elif key == ord('8'): control = 'contrast'
            elif key == ord('9'): control = 'saturation'
            elif key == ord('0'): control = 'sharpness'
            elif key == ord('['): control = 'luma_denoise'
            elif key == ord(']'): control = 'chroma_denoise'
            print("Selected control:", control)
        elif key in [ord('-'), ord('_'), ord('+'), ord('=')]:
            change = 0
            if key in [ord('-'), ord('_')]: change = -1
            if key in [ord('+'), ord('=')]: change = 1
            ctrl = dai.CameraControl()
            if control == 'none':
                print("Please select a control first using keys 3..9 0 [ ]")
            elif control == 'ae_comp':
                ae_comp = clamp(ae_comp + change, -9, 9)
                print("Auto exposure compensation:", ae_comp)
                ctrl.setAutoExposureCompensation(ae_comp)
            elif control == 'anti_banding_mode':
                abm = next(anti_banding_mode)
                print("Anti-banding mode:", abm)
                ctrl.setAntiBandingMode(abm)
            elif control == 'awb_mode':
                awb = next(awb_mode)
                print("Auto white balance mode:", awb)
                ctrl.setAutoWhiteBalanceMode(awb)
            elif control == 'effect_mode':
                eff = next(effect_mode)
                print("Effect mode:", eff)
                ctrl.setEffectMode(eff)
            elif control == 'brightness':
                brightness = clamp(brightness + change, -10, 10)
                print("Brightness:", brightness)
                ctrl.setBrightness(brightness)
            elif control == 'contrast':
                contrast = clamp(contrast + change, -10, 10)
                print("Contrast:", contrast)
                ctrl.setContrast(contrast)
            elif control == 'saturation':
                saturation = clamp(saturation + change, -10, 10)
                print("Saturation:", saturation)
                ctrl.setSaturation(saturation)
            elif control == 'sharpness':
                sharpness = clamp(sharpness + change, 0, 4)
                print("Sharpness:", sharpness)
                ctrl.setSharpness(sharpness)
            elif control == 'luma_denoise':
                luma_denoise = clamp(luma_denoise + change, 0, 4)
                print("Luma denoise:", luma_denoise)
                ctrl.setLumaDenoise(luma_denoise)
            elif control == 'chroma_denoise':
                chroma_denoise = clamp(chroma_denoise + change, 0, 4)
                print("Chroma denoise:", chroma_denoise)
                ctrl.setChromaDenoise(chroma_denoise)
            controlQueue.send(ctrl)
这段代码等待用户按下键盘上的某个键,并根据按键的值执行相应的操作。以下是每个按键所执行的操作:
- 按下’q’键,退出程序。
- 按下’/'键,切换是否显示相机设置的标志
show。如果show为False,打印出"Printing camera settings: OFF"。 - 按下’c’键,发送消息以请求相机捕获静态帧。
- 按下’t’键,执行自动对焦触发和禁用连续自动对焦的操作。
- 按下’f’键,启用连续自动对焦的操作。
- 按下’e’键,启用自动曝光的操作。
- 按下’b’键,启用自动白平衡的操作。
- 按下’,‘键或’.'键,调整镜头位置(焦距)。
- 按下’i’键或’o’键,调整曝光时间。
- 按下’k’键或’l’键,调整ISO值。
- 按下’n’键或’m’键,调整白平衡的色温。
- 按下’w’键、'a’键、's’键或’d’键,调整图像的裁剪区域。
- 按下’1’键,切换自动白平衡锁的状态。
- 按下’2’键,切换自动曝光锁的状态。
- 按下’3’键到’0’键,或’[‘键和’]'键,选择相机控制参数。
- 按下’-‘键、’_‘键、’+‘键或’='键,根据所选择的相机控制参数,增加或减少其值。
以上操作都会创建一个dai.CameraControl()对象,并将其发送到controlQueue队列中以更改相机设置。
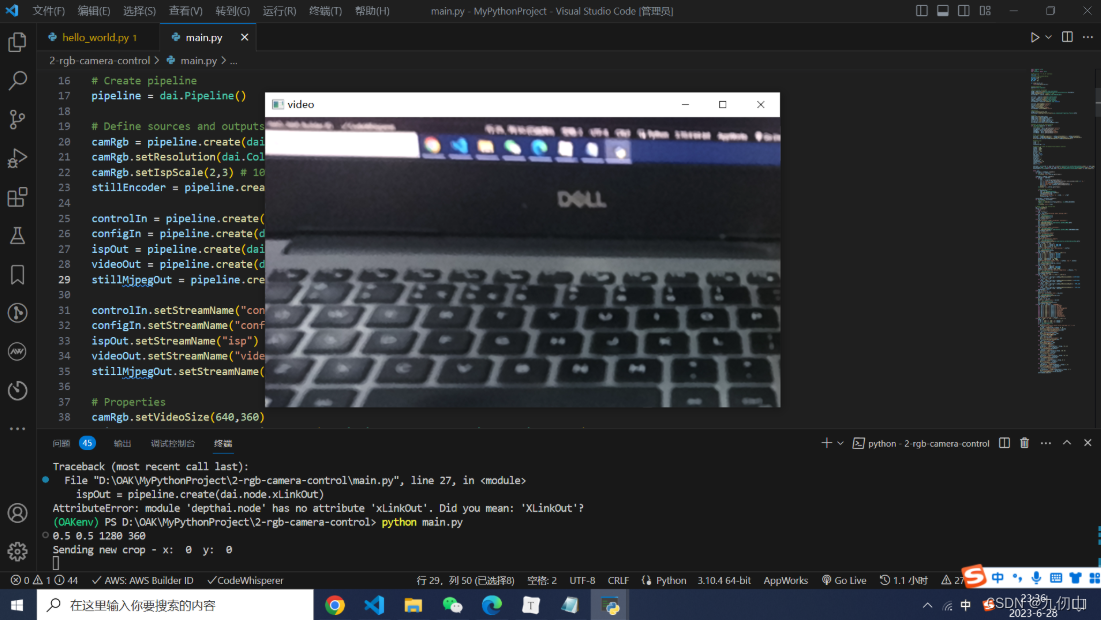
Setup 17:运行程序
在终端中输入如下指令运行程序
python main.py
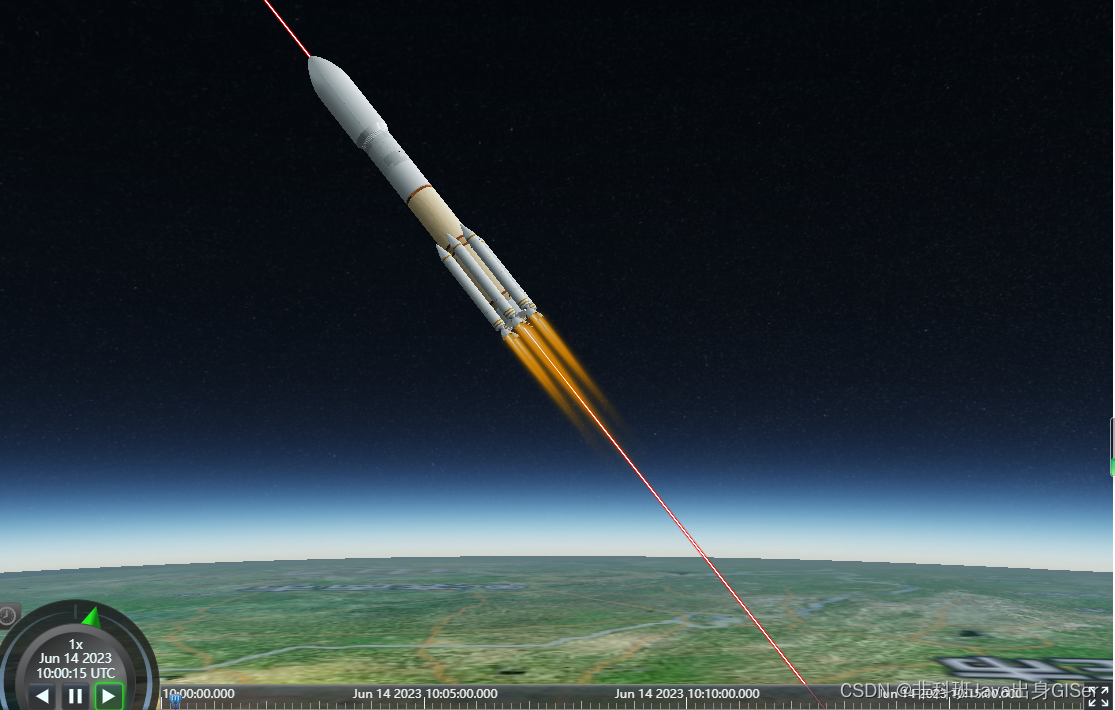
可以看到已经驱动OAK打开了视频,可以通过输入上面定义的按键来控制相机


![v8-tc39-ecma262: at,代替“arr[0]“取值](https://img-blog.csdnimg.cn/b1193ff62e7c4c24802566e845d471de.png)