1、安装ROS1
【ROS】Ubuntu20.04安装ROS1
2、安装Anaconda
【AI】PyTorch入门(一):通过Anaconda安装PyTorch
【PyThon】Anaconda常用命令
3、源码下载
使用论文 Goal-Driven Autonomous Exploration Through Deep Reinforcement Learning 的源码实例
git clone https://github.com/reiniscimurs/DRL-robot-navigation
4、编译
conda activate pytorch
cd ~/DRL-robot-navigation/catkin_ws
catkin_make -DPYTHON_EXECUTABLE=/usr/bin/python3
注意:执行命令catkin_make来编译时,需要添加参数-DPYTHON_EXECUTABLE=/usr/bin/python3,否则会报错
-- Could NOT find PY_em (missing: PY_EM)
CMake Error at /opt/ros/noetic/share/catkin/cmake/empy.cmake:30 (message):
  Unable to find either executable 'empy' or Python module 'em'...  try
5、修改源码
按照github(https://github.com/reiniscimurs/DRL-robot-navigation)步骤操作时,没有启动gazebo
1)手动创建launch
cd DRL-robot-navigation-main/catkin_ws/src/multi_robot_scenario/launch
vi TD3_world.launch
<launch>
    <include file="$(find gazebo_ros)/launch/empty_world.launch">
        <arg name="world_name" value="$(find multi_robot_scenario)/launch/TD3.world"/>
        <arg name="paused" value="false"/>
        <arg name="use_sim_time" value="true"/>
        <arg name="gui" value="true"/>
        <arg name="headless" value="false"/>
        <arg name="debug" value="false"/>
      </include>
</launch>
2)修改velody_env.py文件
修改DRL-robot-navigation/TD3/velody_env.py
cd DRL-robot-navigation/TD3
cp velody_env.py velody_env.py-bk
vi velody_env.py
将r1改为p3dx
分布在:第82行、116行、130行
3)屏蔽启动launch的代码,后面会手动启动
还在文件velody_env.py中修改
        #port = "11311"
        #subprocess.Popen(["roscore", "-p", port])

        print("Roscore launched!")

        # Launch the simulation with the given launchfile name
        rospy.init_node("gym", anonymous=True)
        #if launchfile.startswith("/"):
        #    fullpath = launchfile
        #else:
        #    fullpath = os.path.join(os.path.dirname(__file__), "assets", launchfile)
        #if not path.exists(fullpath):
        #    raise IOError("File " + fullpath + " does not exist")

        #subprocess.Popen(["roslaunch", "-p", port, fullpath])
        #print("Gazebo launched!")
6、启动环境、开始训练
1)在终端1中启动:虚拟世界
conda activate pytorch
cd ~/DRL-robot-navigation/catkin_ws
catkin_make
source devel/setup.sh
roslaunch multi_robot_scenario TD3_world.launch
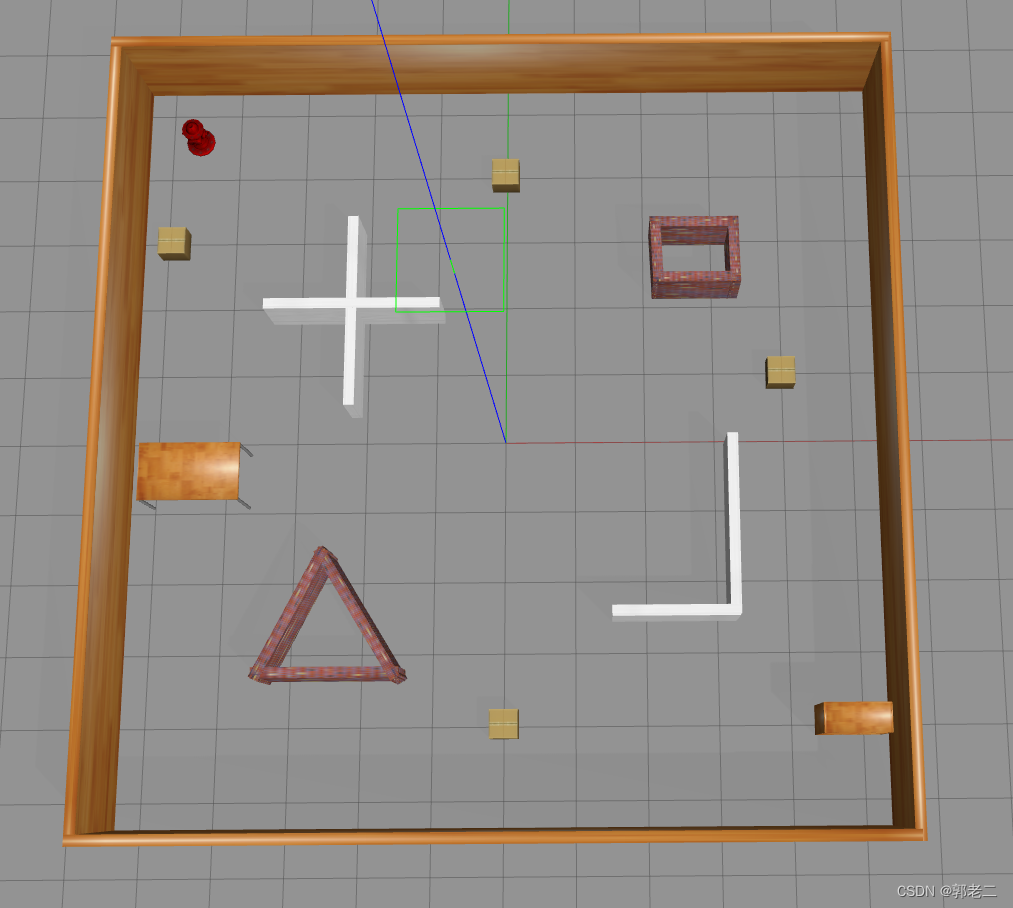
2)在终端2中启动:机器人模型
conda activate pytorch
cd DRL-robot-navigation-main/catkin_ws/
source devel/setup.sh
roslaunch multi_robot_scenario pioneer3dx.gazebo.launch

3)在终端3中启动:训练脚本
conda activate pytorch
cd DRL-robot-navigation-main/TD3
python train_velodyne_td3.py
7、停止所有服务
killall -9 rosout roslaunch rosmaster gzserver nodelet robot_state_publisher gzclient python python3