目录
环境配置:
一、安装配置基础环境
步骤一:配置本地yun
步骤二:安装Remi 仓库配置包(清华源获取)
步骤三:配置Remi 仓库配置包
步骤四:安装php的加速器配置
步骤五:启动服务,并设置为开机自启
步骤六:进入数据库管理
步骤七:获取中文配置安装包并解压
步骤八:移动wordpress并赋予apache属主属组权限
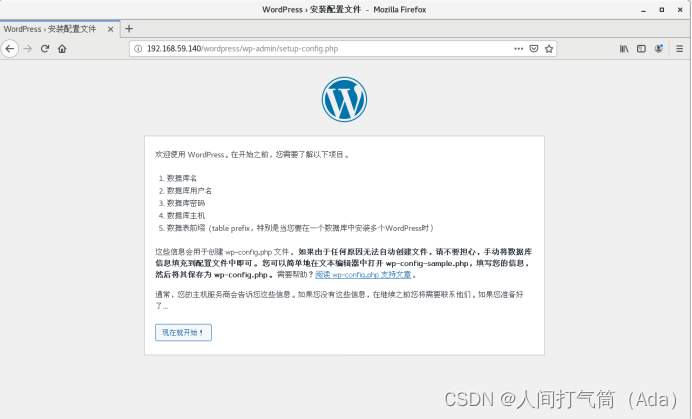
#浏览器访问
二、手动将数据库信息填充到配置文件
步骤一:修改文件wp-config-sample.php并改名为 wp-config.php
步骤二:浏览器访问--->进行图像化操作
步骤三:安装
步骤四:登录
环境配置:
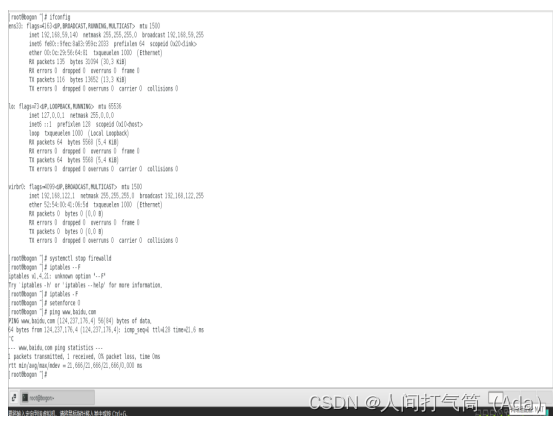
关闭防火墙
systemctl stop firewalld
iptables -F
setenforce 0
安装了本地yum
NAT模式
例:IP地址为192.168.59.140
一、安装配置基础环境
步骤一:配置本地yun
cd /etc/yum.repos.d/
Mkdir bak
Mv *.repo bak
Mv bak/Centos-Base.repo .

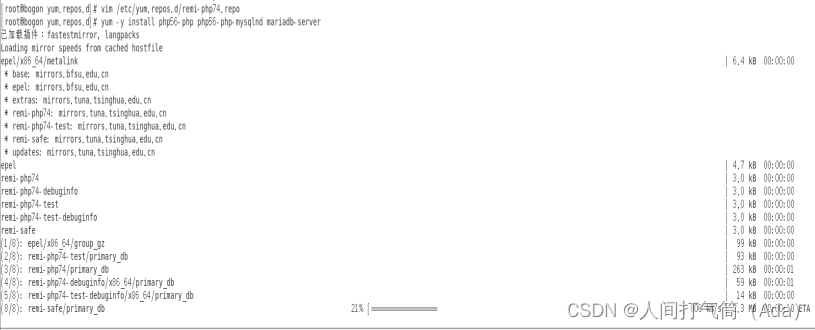
步骤二:安装Remi 仓库配置包(清华源获取)
[root@localhost ~]# yum -y install https://mirrors.tuna.tsinghua.edu.cn/remi/enterprise/remi-release-7.rpm

步骤三:配置Remi 仓库配置包
[root@localhost ~]# sed -i 's#enabled=0#enabled=1#g' /etc/yum.repos.d/remi-php74.repo

或者vim /etc/yum.repos.d/remi-php74.repo
:%s/enabled=0/enabled=1/g

步骤四:安装php的加速器配置
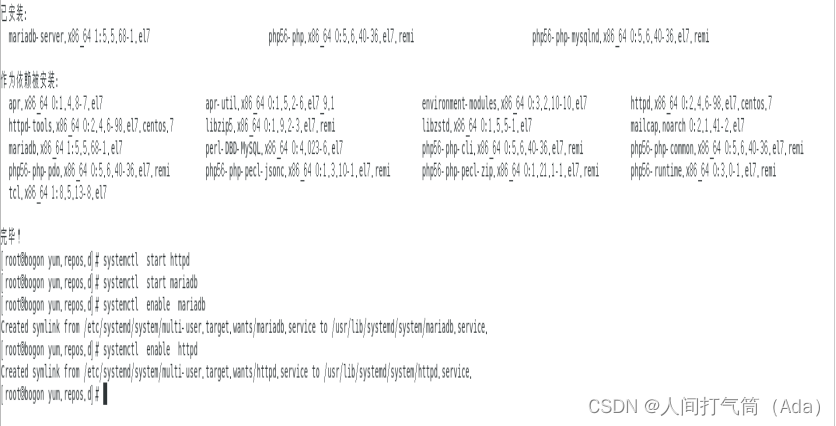
[root@localhost ~]# yum -y install php56-php php56-php-mysqlnd mariadb-server
步骤五:启动服务,并设置为开机自启
[root@localhost ~]# systemctl enable --now httpd mariadb
(systemctl start httpd systemctl start mariadb
systemctl enable httpd systemctl enable mariadb)
步骤六:进入数据库管理
[root@localhost ~]# mysql
MariaDB [(none)]> create database wordpress;
MariaDB [(none)]> grant all on wordpress.* to wordpress@'192.168.59.140' identified by 'jx2023@';
MariaDB [(none)]>exit

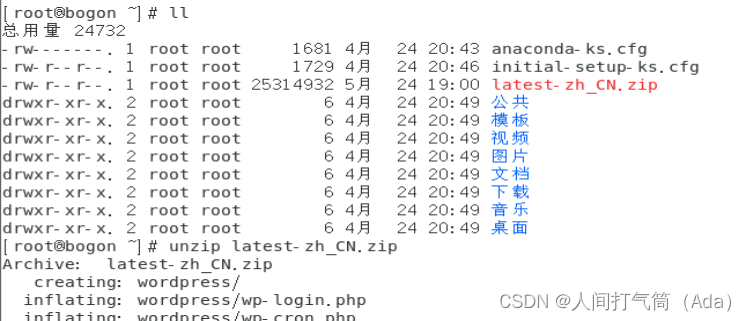
步骤七:获取中文配置安装包并解压
[root@localhost ~]# wget https://cn.wordpress.org/latest-zh_CN.zip
[root@localhost ~]# unzip latest-zh_CN.zip
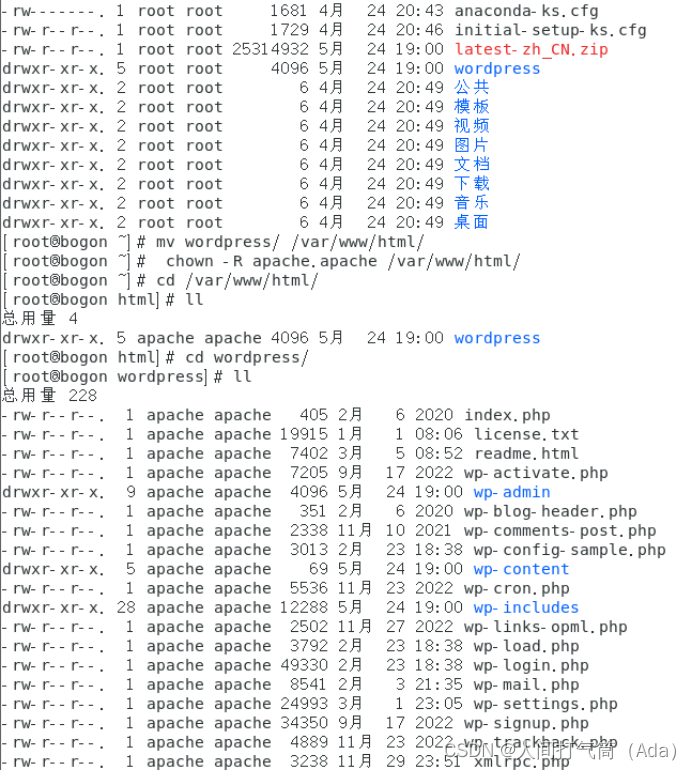
步骤八:移动wordpress并赋予apache属主属组权限
[root@localhost ~]# mv wordpress/ /var/www/html/
[root@localhost ~]# chown -R apache.apache /var/www/html/
#浏览器访问
#http://192.168.59.140/wordpress
二、手动将数据库信息填充到配置文件
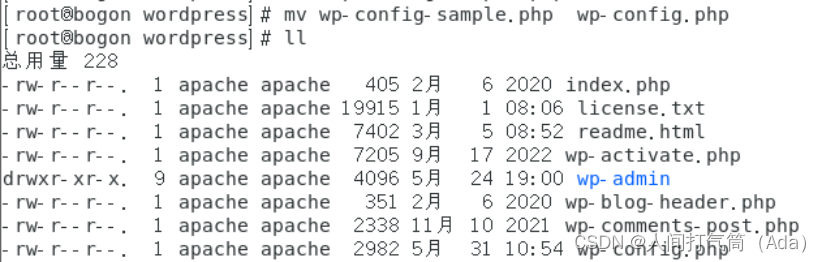
步骤一:修改文件wp-config-sample.php并改名为 wp-config.php
cd /var/www/html/wordpress
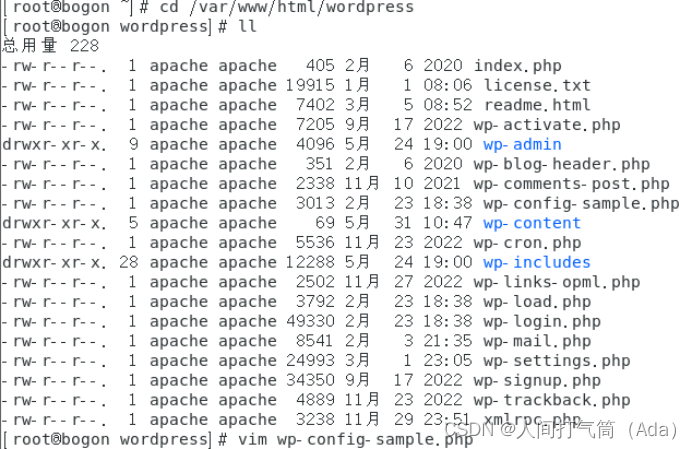
vim wp-config-sample.php

将DB_NAME 内的‘database_name_here’改为‘wordpress’
DB_USER内的‘username_here ’改为‘root’
DB_PASSWORD内的 ‘password_here’ 删除

改名mv wp-config-sample.php wp-config.php
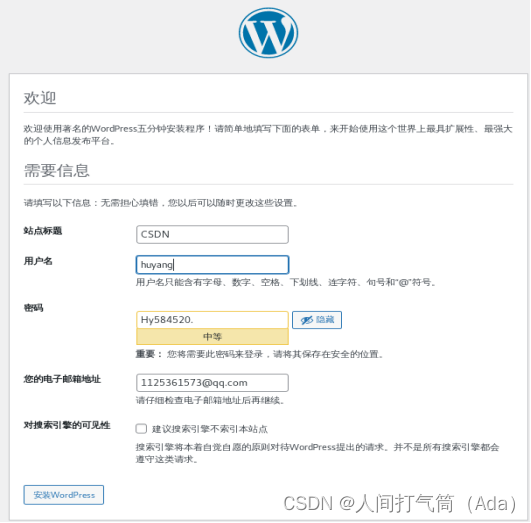
步骤二:浏览器访问--->进行图像化操作
#浏览器访问
#http://192.168.59.140/wordpress
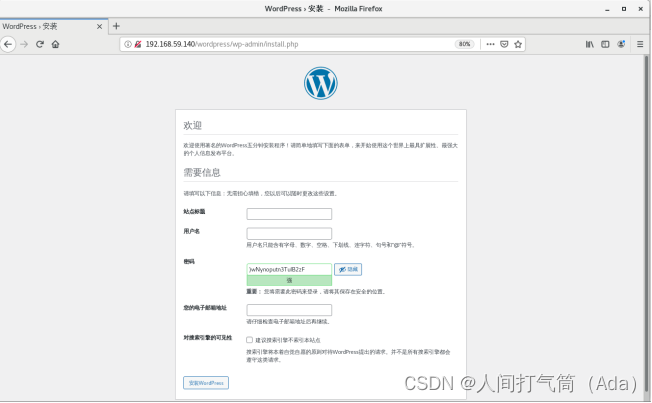
设置内容:如下图
步骤三:安装

安装成功
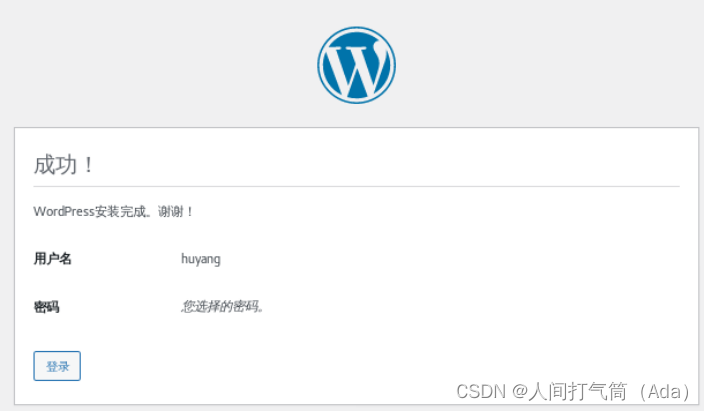
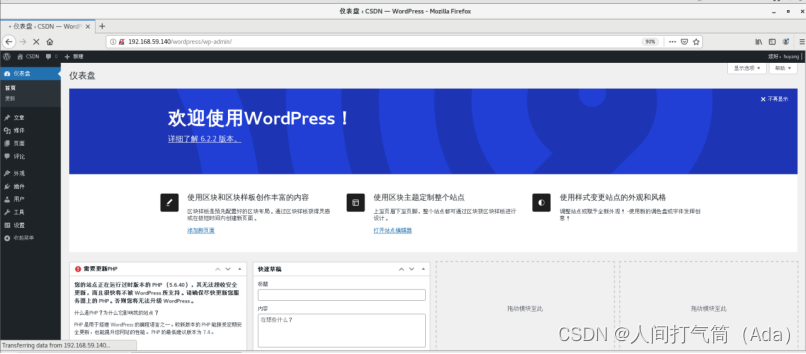
步骤四:登录

成功登录