四层负载均衡含义及应用场景
四层负载均衡是基于传输层协议包来封装的(如:TCP/IP),那我们介绍的的七层是指的应用层,他的组装在四层的基础之上,无论四层还是七层都是指的OSI网络模型。我们之前介绍了七层负载均衡,这篇文章介绍下四层负载均衡。
四层负载均衡在一般企业中是用不到的,因为没有那么大的并发量,我们用七层足以,不会涉及端口限制问题。但是在大规模集群架构中也是不可或缺的,我们往往采取四层+七层来构建大规模集群架构,所以我们也需要深入学习下,具体使用场景有以下两种。
1、四层+七层做负载均衡,四层保证七层的高可用性。如:Nginx无法保证自己的高可用性,需要依赖LVS或者keepalive。
2、TCP协议的负载均衡,有些请求是TCP协议的(mysql、ssh),这些请求只需要四层转发即可。
Nginx四层负载均衡配置测试
1、前期准备
我们准备一台虚拟机LB00(10.0.0.4,172.16.1.4)
配好yum源,安装Linux,启动Linux
2、添加配置目录到主配置文件并创建该目录
[root@LB00 nginx]# cat /etc/nginx/nginx.conf

user  nginx;
worker_processes  auto;

error_log  /var/log/nginx/error.log notice;
pid        /var/run/nginx.pid;


events {
    worker_connections  1024;
}


include /etc/nginx/conf.c/*.conf; #在nginx主配置文件添加配置文件路径

http {
    include       /etc/nginx/mime.types;
    default_type  application/octet-stream;

    log_format  main  '$remote_addr - $remote_user [$time_local] "$request" '
                      '$status $body_bytes_sent "$http_referer" '
                      '"$http_user_agent" "$http_x_forwarded_for"';

    access_log  /var/log/nginx/access.log  main;

    sendfile        on;
    #tcp_nopush     on;

    keepalive_timeout  65;

    #gzip  on;

    include /etc/nginx/conf.d/*.conf;
}
[root@LB00 nginx]# mkdir /etc/nginx/conf.c
3、添加负载均衡配置文件并进行配置
[root@LB00 nginx]# cd /etc/nginx/conf.c
[root@LB00 conf.c]# vim proxy_4.conf
stream {
    upstream lb {
            server 172.16.1.5:80 weight=5 max_fails=3 fail_timeout=30s;
            server 172.16.1.6:80 weight=5 max_fails=3 fail_timeout=30s;
    }

    server {
            listen 80;
            proxy_connect_timeout 3s;
            proxy_timeout 3s;
            proxy_pass lb;
    }
}
~
<4.conf" [New] 13L, 317C written
[root@LB00 conf.c]# nginx -t
nginx: the configuration file /etc/nginx/nginx.conf syntax is ok
nginx: configuration file /etc/nginx/nginx.conf test is successful
[root@LB00 conf.c]# systemctl restart nginx
4、windows添加hosts解析,并查看nginx日志
注意:4层负载均衡没有access日志,因为在nginx.conf的配置中,access的日志格式是配置在http下的,而四层复杂均衡配置实在http以外的。
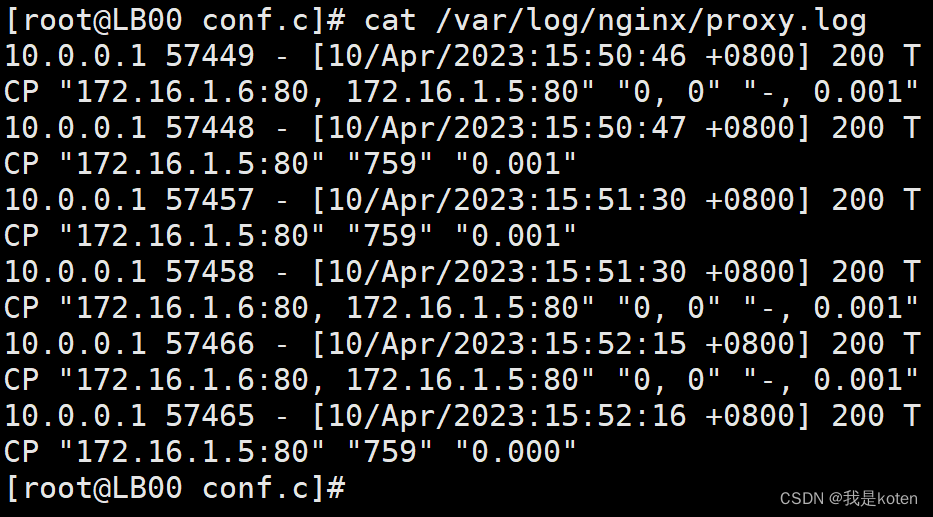
如果需要日志则需要如下配置,将日志保存到proxy.log中
[root@LB00 conf.c]# cat lb_domain.conf
stream {
    log_format  proxy '$remote_addr $remote_port - [$time_local] $status $protocol '
                  '"$upstream_addr" "$upstream_bytes_sent" "$upstream_connect_time"' ;
    access_log /var/log/nginx/proxy.log proxy;
    upstream lb {
            server 172.16.1.5:80 weight=5 max_fails=3 fail_timeout=30s;
            server 172.16.1.6:80 weight=5 max_fails=3 fail_timeout=30s;
    }

    server {
            listen 80;
            proxy_connect_timeout 3s;
            proxy_timeout 3s;
            proxy_pass lb;
    }
}
LB00日志
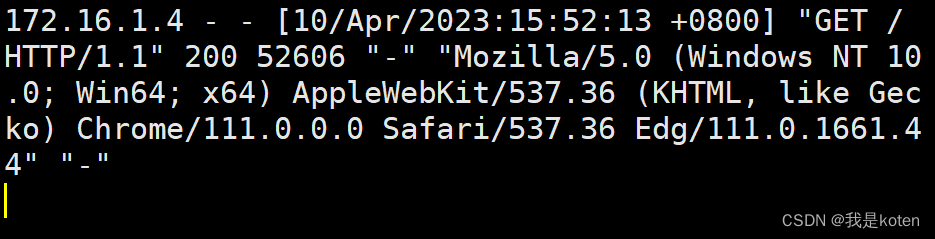
LB01日志
Web01日志
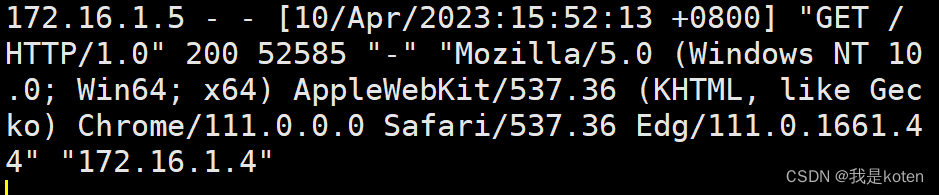
一切正常,由LB00做四层负载均衡到LB01和LB02,LB0和LB02做七层负载均衡到Web01和Web02,静态数据去访问NFS,动态数据去请求MySQL。
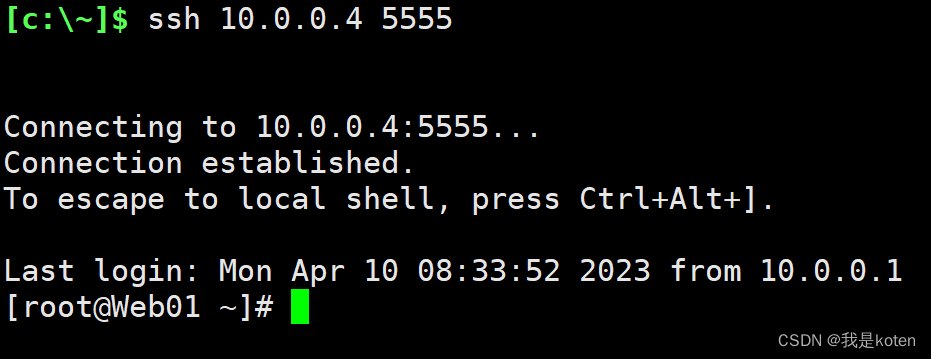
Nginx四层负载均衡端口转发
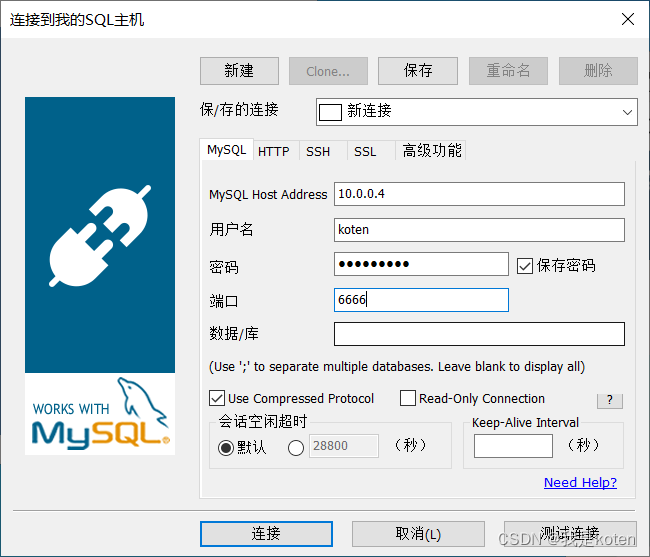
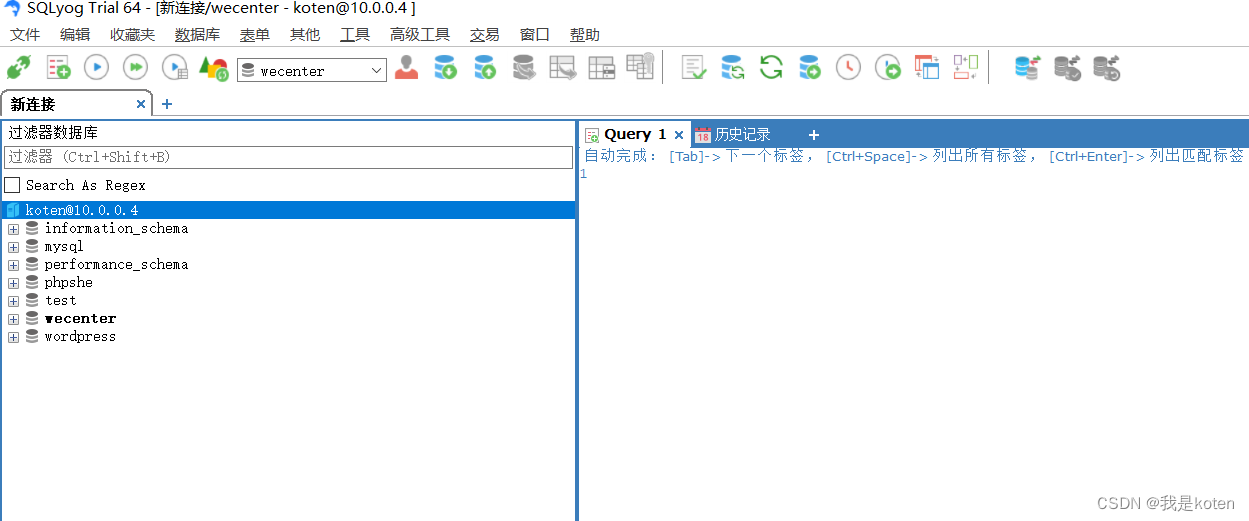
实现请求负载均衡5555转发到172.16.1.7:22,请求负载均衡6666转发到172.16.1.51:3306
配置文件
[root@lb4-01 ~]# cat /etc/nginx/conf.c/lb_domain.conf
stream {
    log_format  proxy '$remote_addr $remote_port - [$time_local] $status $protocol '
                      '"$upstream_addr" "$upstream_bytes_sent" "$upstream_connect_time"' ;
    access_log /var/log/nginx/proxy.log proxy;


    upstream ssh_7 {
            server 10.0.0.7:22; #定义转发ssh的22端口
    }

    upstream mysql_51 {
            server 10.0.0.51:3306; #定义转发mysql的3306端口
    }
    server {
            listen 5555;
            proxy_connect_timeout 3s;
            proxy_timeout 300s;
            proxy_pass ssh_7;
    }

    server {
            listen 6666;
            proxy_connect_timeout 3s;
            proxy_timeout 3s;
            proxy_pass mysql_51;
    }
}
5555端口测试
6666端口测试
四层负载均衡总结
1、四层负载均衡仅能转发TCP/IP协议、UDP协议、通常用来转发端口,如:tcp/22、udp/53;
2、四层负载均衡可以用来解决七层负载均衡端口限制问题;(七层负载均衡最大使用65535个端口号)
3、四层负载均衡可以解决七层负载均衡高可用问题;(多台后端七层负载均衡能同事的使用)
4、四层的转发效率比七层的高得多,但仅支持tcp/ip协议,不支持http和https协议;
5、通常大并发场景通常会选择使用在七层负载前面增加四层负载均衡。
我是koten,10年运维经验,持续分享运维干货,感谢大家的阅读和关注!