欢迎观看我的博客,如有问题交流,欢迎评论区留言,一定尽快回复!(大家可以去看我的专栏,是所有文章的目录)
文章字体风格:
红色文字表示:重难点★✔
蓝色文字表示:思路以及想法★✔
如果大家觉得有帮助的话,感谢大家帮忙
点赞!收藏!转发!
Servlet API
- 一、HttpServlet
- 1.1 面试题:Servlet 生命周期
- 1.2 ★★★代码示例: 处理 GET 请求
- 1.创建 MethodServlet.java, 创建 doGet 方法
- 2.创建 testMethod.html, 放到 webapp 目录中, 形如
- 一个 Servlet 程序中可以同时部署静态文件. 静态文件就放到 webapp 目录中即可.
- 3.重新部署程序,
- **关于乱码问题**
- 1.3 ★★★ 代码示例: 处理 POST 请求
- 1.在 MethodServlet.java 中, 新增 doPost 方法.
- 2. 在 testMethod.html 中, 新增一个按钮, 和对应的点击事件处理函数
- 3. 重新部署程序,
- 二、HttpServletRequest(HTTP 协议的格式)
- 代码示例: 打印请求信息
- 1. 创建 ShowRequest 类
- 2. 部署程序.
- 代码示例: 获取 GET 请求中的参数
- 1. 创建 GetParameter 类
- 2. 重新部署程序,
- 代码示例: 获取 POST 请求中的参数(1)
- 1. 创建类 PostParameter
- 2. 创建 testPost.html, 放到 webapp 目录中
- 代码示例: 获取 POST 请求中的参数(2)
- 1. 创建 PostParameterJson 类
- 2. 创建 testPostJson.html
- 代码示例: 获取 POST 请求中的参数(3)
- 1. ) 在中央仓库中搜索 Jackson, 选择 JackSon Databind
- 2) 把中央仓库中的依赖配置添加到 pom.xml 中, 形如:
- 3) 在 PostParameterJson 类中修改代码
- HttpServletResponse
- 代码示例: 设置状态码
- 1. 创建 StatusServlet 类
- 2. 部署程序,
- 代码示例: 自动刷新
- 1.创建 AutoRefreshServlet 类
- 代码示例: 重定向
- 1.创建 RedirectServlet 类
一、HttpServlet
我们写 Servlet 代码的时候, 首先第一步就是先创建类, 继承自 HttpServlet, 并重写其中的某些方法.
核心方法
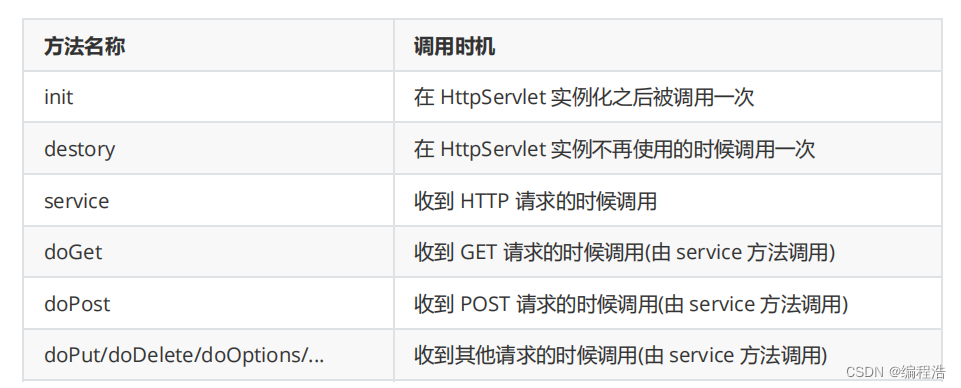
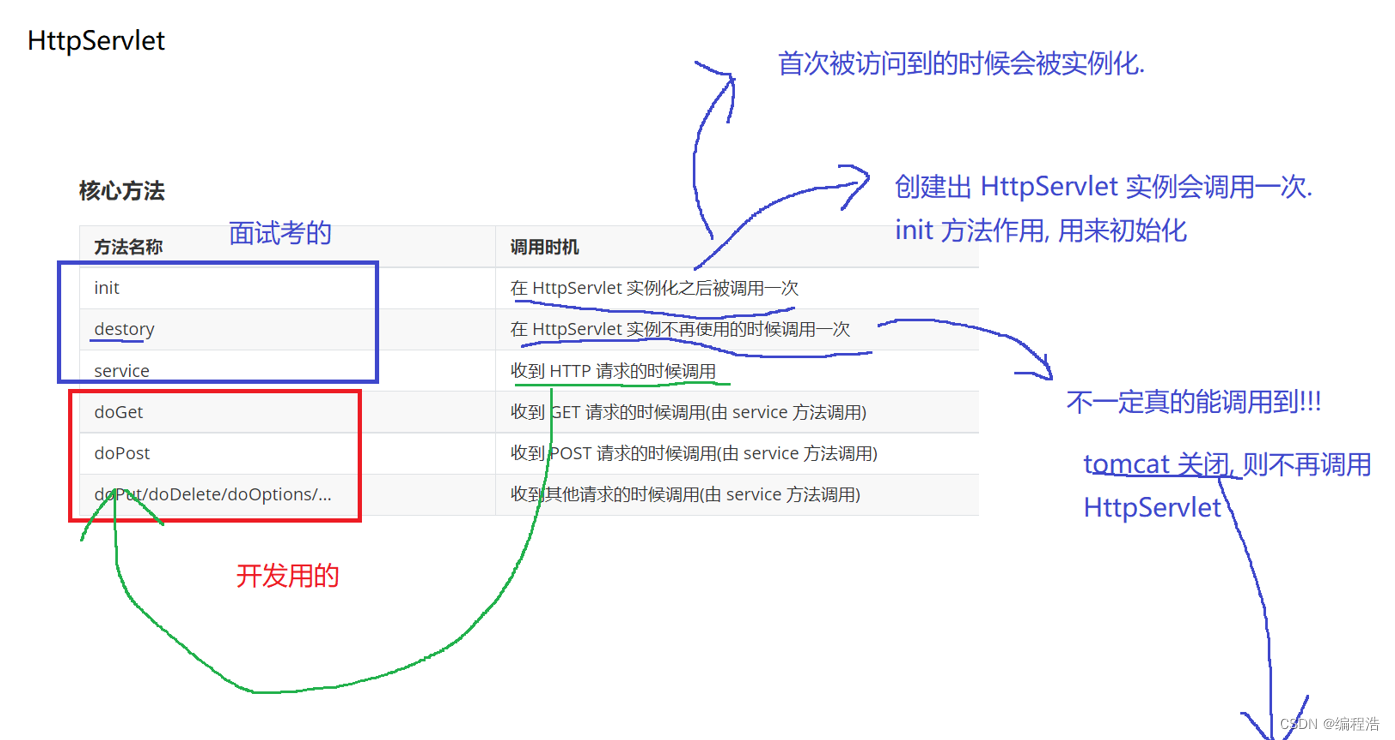

1.1 面试题:Servlet 生命周期
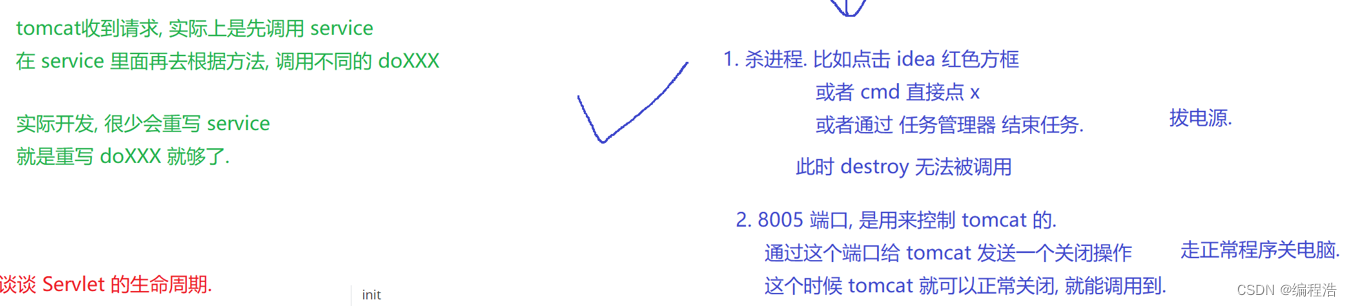
回答三个时期的方法 并且 各干什么事情即可

我们实际开发的时候主要重写 doXXX 方法, 很少会重写 init / destory / service
init / destory / service
这些方法的调用时机, 就称为 “Servlet 生命周期”. (也就是描述了一个 Servlet 实例从生到死的过程).
注意: HttpServlet 的实例只是在程序启动时创建一次. 而不是每次收到 HTTP 请求都重新创建实例.
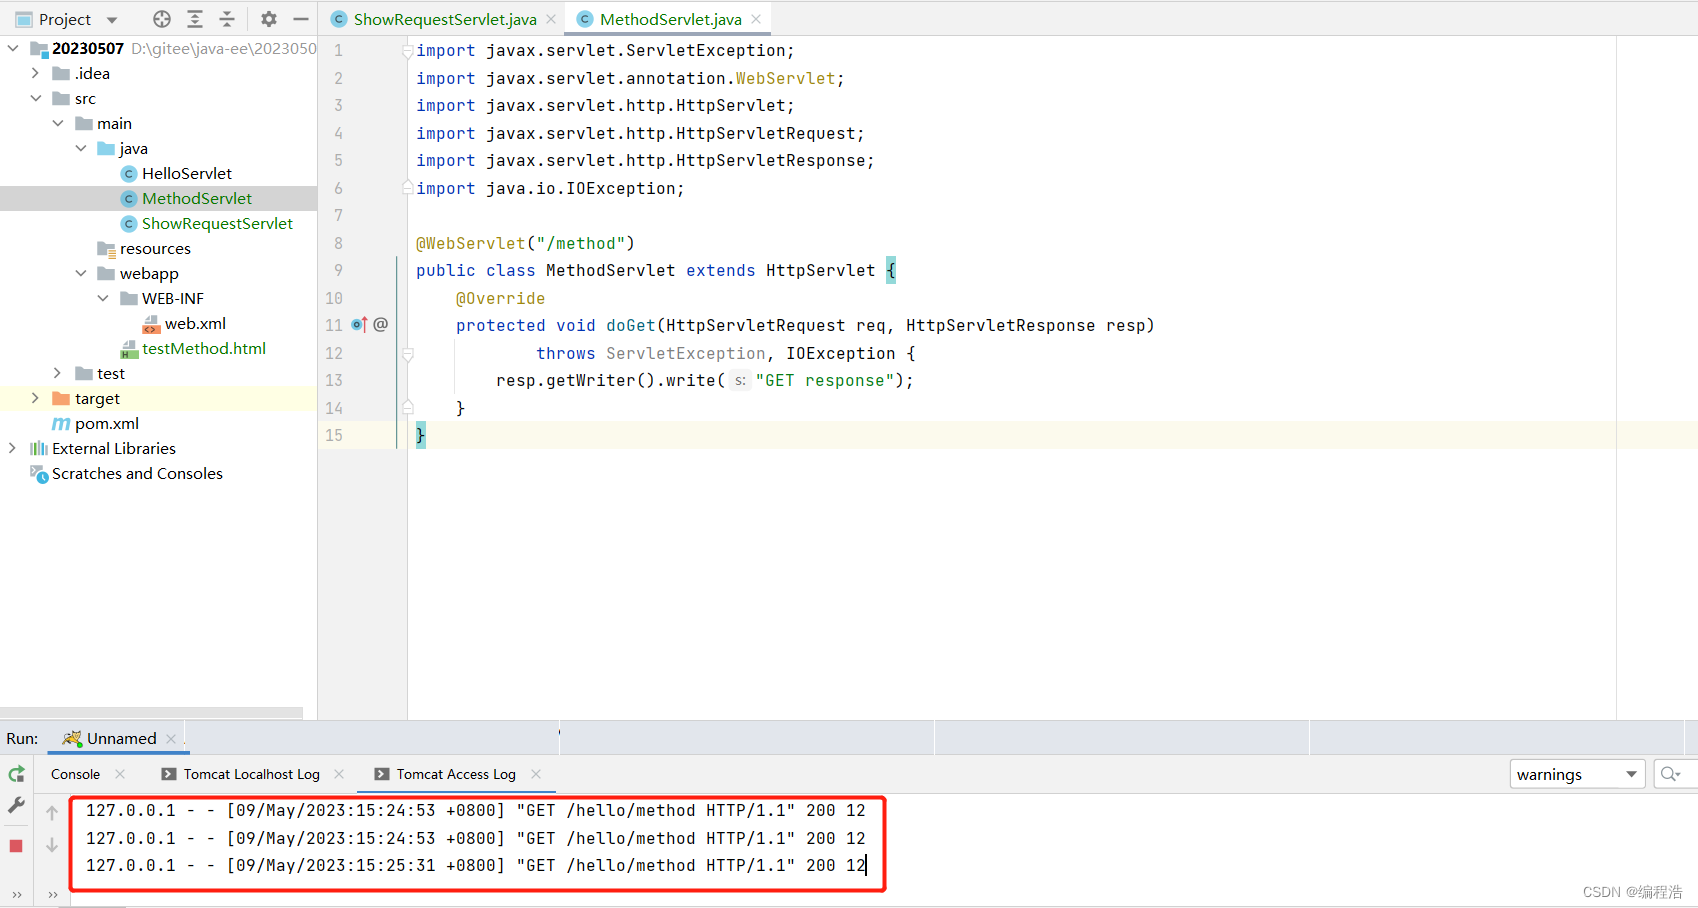
1.2 ★★★代码示例: 处理 GET 请求
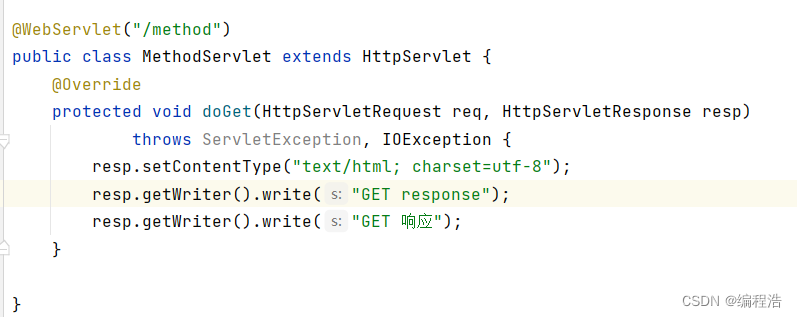
1.创建 MethodServlet.java, 创建 doGet 方法
import javax.servlet.ServletException;
import javax.servlet.annotation.WebServlet;
import javax.servlet.http.HttpServlet;
import javax.servlet.http.HttpServletRequest;
import javax.servlet.http.HttpServletResponse;
import java.io.IOException;

@WebServlet("/method")
public class MethodServlet extends HttpServlet {
    @Override
    protected void doGet(HttpServletRequest req, HttpServletResponse resp)
            throws ServletException, IOException {
        resp.getWriter().write("GET response");
    }
}
2.创建 testMethod.html, 放到 webapp 目录中, 形如
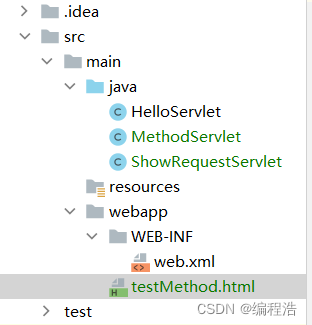
一个 Servlet 程序中可以同时部署静态文件. 静态文件就放到 webapp 目录中即可.
<!DOCTYPE html>
<html lang="en">
<head>
    <meta charset="UTF-8">
    <meta http-equiv="X-UA-Compatible" content="IE=edge">
    <meta name="viewport" content="width=device-width, initial-scale=1.0">
    <title>Document</title>
</head>
<body>
    <button onclick="sendGet()">发送 GET 请求</button>
	<script>
	    function sendGet() {
	        ajax({
	            method: 'GET',
	            url: 'method',
	            callback: function (body, status) {
	                console.log(body);
	           }
	       });
	   }
	    // 把之前封装的 ajax 函数拷贝过来
	    function ajax(args) {
	        var xhr = new XMLHttpRequest();
	        xhr.onreadystatechange = function () {
	            // 0: 请求未初始化
	            // 1: 服务器连接已建立
	            // 2: 请求已接收
	            // 3: 请求处理中
	            // 4: 请求已完成,且响应已就绪
	            if (xhr.readyState == 4) {
	                args.callback(xhr.responseText, xhr.status)
	           }
	       }
	        xhr.open(args.method, args.url);
	        if (args.contentType) {
	            xhr.setRequestHeader('Content-type', args.contentType);
	       }
	               if (args.body) {
	            xhr.send(args.body);
	       } else {
	            xhr.send();
	       }
	   }
	</script>
</body>
</html>
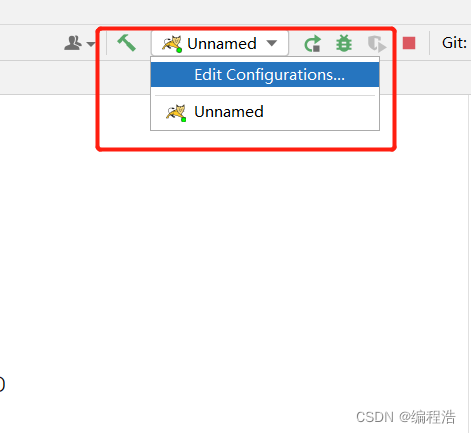
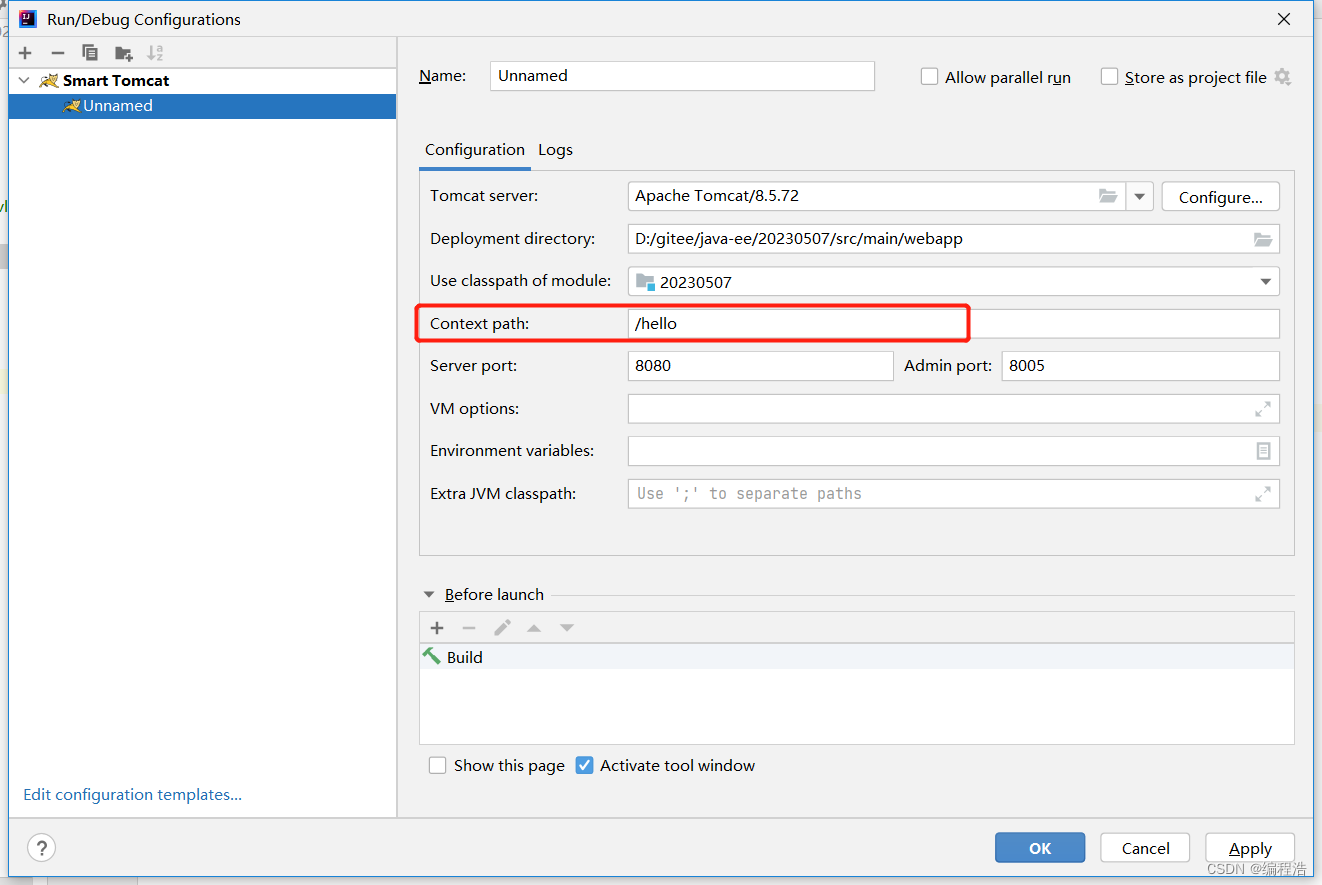
3.重新部署程序,
使用 URL http://127.0.0.1:8080/hello/testMethod.html 访问页面.
注意 路径是看之前电脑 自己部署的 名称
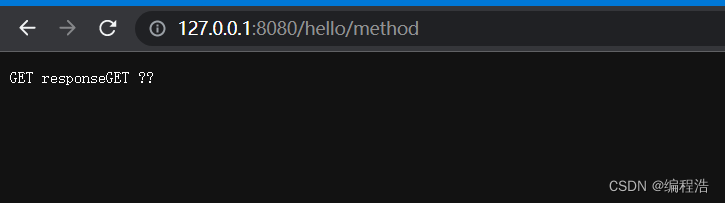
点击 “发送 GET 请求” 按钮, 即可在控制台看到响应内容
通过 Fiddler 抓包, 可以看到,
当浏览器中输入 URL 之后, 浏览器先给服务器发送了一个 HTTP GET 请求
通过 Fiddler 抓包, 可以看到

关于乱码问题
如果我们在响应代码中写入中文, 例如

修正如下:


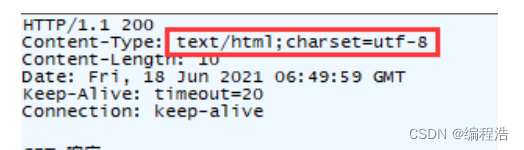
此时通过抓包可以看到, 当加上了 resp.setContentType(“text/html; charset=utf-8”); 代码之
后, 响应中多了 Content-Type 字段, 内部指定了编码方式. 浏览器看到这个字段就能够正确解析中文了.
1.3 ★★★ 代码示例: 处理 POST 请求
1.在 MethodServlet.java 中, 新增 doPost 方法.
@Override
protected void doPost(HttpServletRequest req, HttpServletResponse resp) throws
ServletException, IOException {
    resp.setContentType("text/html; charset=utf-8");
    resp.getWriter().write("POST 响应");
}
2. 在 testMethod.html 中, 新增一个按钮, 和对应的点击事件处理函数
<button onclick="sendPost()">发送 POST 请求</button>
<script>
    function sendPost() {
        ajax({
            method: 'POST',
            url: 'method',
            callback: function (body, status) {
                console.log(body);
           }
       })
   }
</script>
3. 重新部署程序,
使用 URL http://127.0.0.1:8080/hello/testMethod.html 访问页面
二、HttpServletRequest(HTTP 协议的格式)
当 Tomcat 通过 Socket API 读取 HTTP 请求(字符串), 并且按照 HTTP 协议的格式把字符串解析成
HttpServletRequest 对象.
核心方法
@WebServlet("/ShowRequest")
public class ShowRequest extends HttpServlet {
    @Override
    protected void doGet(HttpServletRequest req, HttpServletResponse resp) throws ServletException, IOException {

        StringBuilder stringBuilder = new StringBuilder();
        // 返回请求协议的名称和版本号
        stringBuilder.append(req.getProtocol()); // 协议名称: HTTP  版本号: 1.1
        stringBuilder.append("\n");
//        stringBuilder.append("<br>");

        // 放回请求的HTTP方法名称
        stringBuilder.append(req.getMethod()); // GET
        stringBuilder.append("\n");
//        stringBuilder.append("<br>");

        // 从协议名称知道HTTP请求的第一行的查询字符串中, 返回该请求的URL的一部分
        stringBuilder.append(req.getRequestURI()); // /3010/ShowRequest
        stringBuilder.append("\n");
//        stringBuilder.append("<br>");

        stringBuilder.append(req.getRequestURL()); // 返回整个地址 http://127.0.0.1:8080/0310/ShowRequest
//        stringBuilder.append("<br>");
        stringBuilder.append("\n");

        // 返回指示请求上下文的请求URI部分
        stringBuilder.append(req.getContextPath()); // /3010 -
        stringBuilder.append("\n");
//        stringBuilder.append("<br>");

        // 返回包含路径后的请求URL中的查询字符串
        stringBuilder.append(req.getQueryString()); // null 没有QueryString
        stringBuilder.append("\n");
//        stringBuilder.append("<br>");

        // 把请求的header 拼接
        // 获取到所有的headerNames
        // 枚举
        Enumeration<String> headerNames = req.getHeaderNames();
        // has XXX 判断是否有下一个
        while(headerNames.hasMoreElements()) {
            // 遍历获取到每一个header的name值
            String name = headerNames.nextElement(); // next XXX获取下一个
            // 查询header中name对应的值
            String value = req.getHeader(name);
            stringBuilder.append(name + ", " + value);
            stringBuilder.append("\n");

        }
        resp.getWriter().write(stringBuilder.toString());
    }
}
通过这些方法可以获取到一个请求中的各个方面的信息
注意: 请求对象是服务器收到的内容, 不应该修改. 因此上面的方法也都只是 “读” 方法, 而不是 “写” 方法.
代码示例: 打印请求信息
1. 创建 ShowRequest 类
@WebServlet("/showRequest")
public class ShowRequest extends HttpServlet {
    @Override
    protected void doGet(HttpServletRequest req, HttpServletResponse resp)
throws ServletException, IOException {
        resp.setContentType("text/html; charset=utf-8");
        StringBuilder respBody = new StringBuilder();
        respBody.append(req.getProtocol());
        respBody.append("<br>");
        respBody.append(req.getMethod());
        respBody.append("<br>");
        respBody.append(req.getRequestURI());
        respBody.append("<br>");
        respBody.append(req.getContextPath());
        respBody.append("<br>");
        respBody.append(req.getQueryString());
        respBody.append("<br>");
        respBody.append("<h3>headers:</h3>");
        Enumeration<String> headerNames = req.getHeaderNames();
        while (headerNames.hasMoreElements()) {
            String headerName = headerNames.nextElement();
            respBody.append(headerName + " ");
            respBody.append(req.getHeader(headerName));
            respBody.append("<br>");
       }
        resp.getWriter().write(respBody.toString());
   }
}
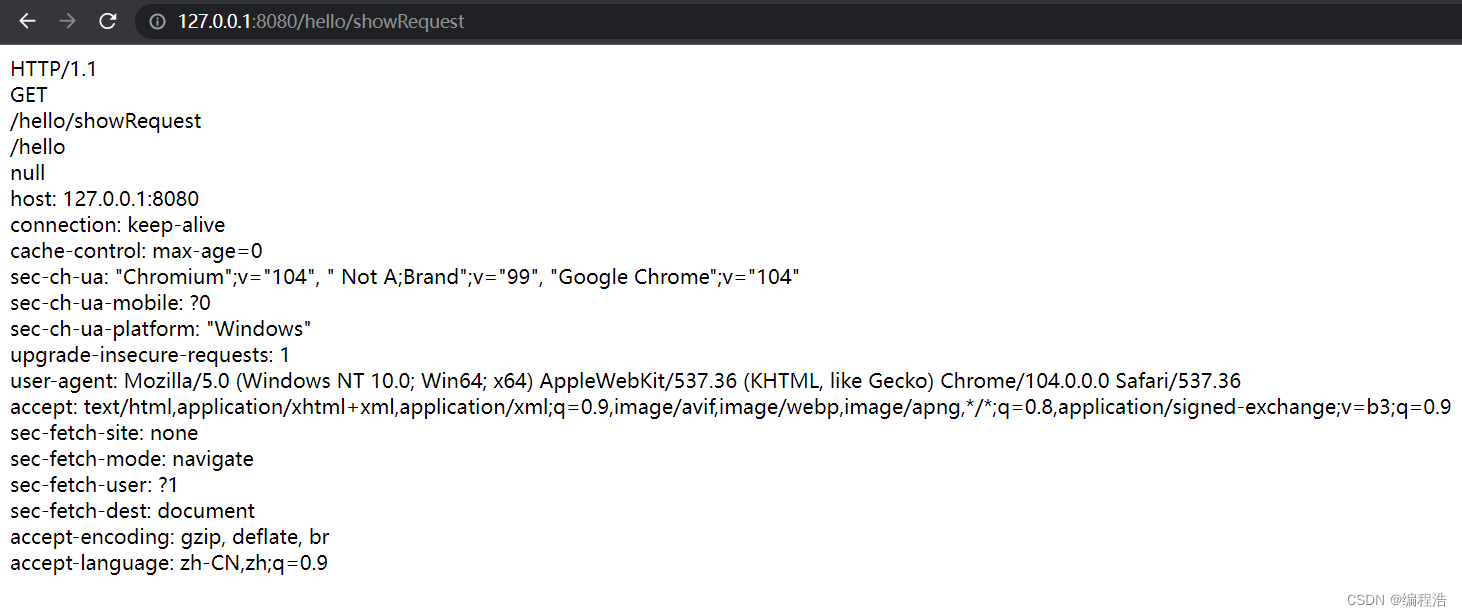
2. 部署程序.
在浏览器通过 URL http://127.0.0.1:8080/自己的路径/showRequest 访问, 可以看到
代码示例: 获取 GET 请求中的参数
GET 请求中的参数一般都是通过 query string 传递给服务器的. 形如
https://v.bitedu.vip/personInf/student?userId=1111&classId=100
此时浏览器通过 query string 给服务器传递了两个参数, userId 和 classId, 值分别是 1111 和 100
在服务器端就可以通过 getParameter 来获取到参数的值.
1. 创建 GetParameter 类
@WebServlet("/getParameter")
public class GetParameter extends HttpServlet {
    @Override
    protected void doGet(HttpServletRequest req, HttpServletResponse resp)
throws ServletException, IOException {
        resp.setContentType("text/html; charset=utf-8");
        String userId = req.getParameter("userId");
        String classId = req.getParameter("classId");
        resp.getWriter().write("userId: " + userId + ", " + "classId: " +
classId);
   }
}
2. 重新部署程序,
在浏览器中通过 http://127.0.0.1:8080/hello/getParameter 访问, 可以看到

当没有 query string的时候, getParameter 获取的值为 null
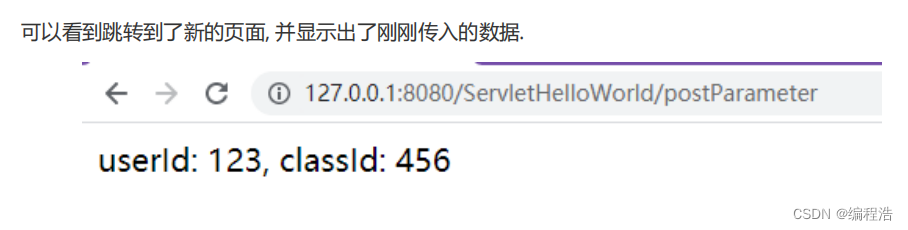
如果通过 http://127.0.0.1:8080/ServletHelloWorld/getParameter?userId=123&classId=456 访问, 可以看到

此时说明服务器已经获取到客户端传递过来的参数.
getParameter 的返回值类型为 String. 必要的时候需要手动把 String 转成 int
代码示例: 获取 POST 请求中的参数(1)
POST 请求的参数一般通过 body 传递给服务器. body 中的数据格式有很多种. 如果是采用 form 表单的形式, 仍然可以通过 getParameter 获取参数的值
1. 创建类 PostParameter
@WebServlet("/postParameter")
public class PostParameter extends HttpServlet {
    @Override
    protected void doPost(HttpServletRequest req, HttpServletResponse resp)
throws ServletException, IOException {
        resp.setContentType("text/html; charset=utf-8");
        String userId = req.getParameter("userId");
        String classId = req.getParameter("classId");
        resp.getWriter().write("userId: " + userId + ", " + "classId: " +
classId);
   }
}
2. 创建 testPost.html, 放到 webapp 目录中
<form action="postParameter" method="POST">
    <input type="text" name="userId">
    <input type="text" name="classId">
    <input type="submit" value="提交">
</form>
重新部署程序, 通过 URL http://127.0.0.1:8080/ServletHelloWorld/testPost.html 访问, 可以看到 HTML


此时通过抓包可以看到, form 表单构造的 body 数据的格式为:
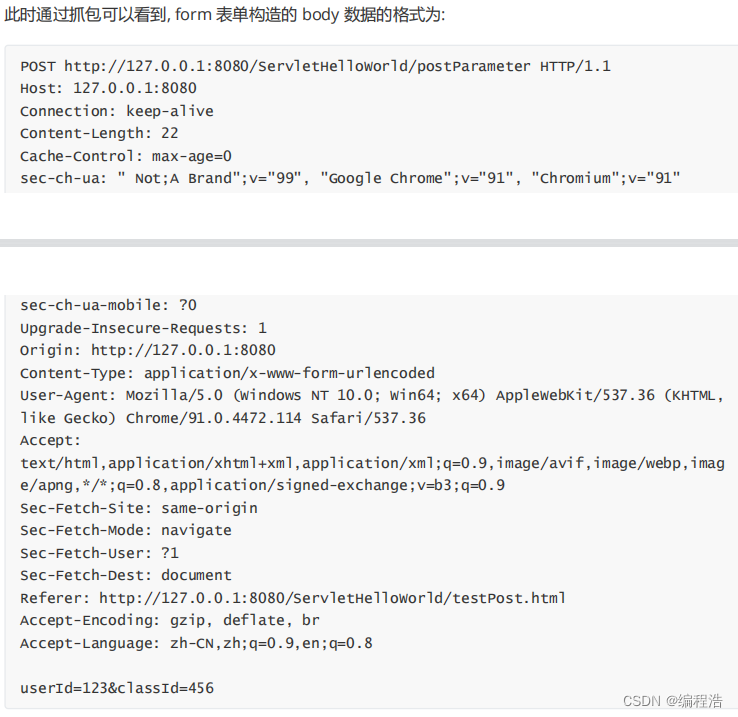
Content-Type: application/x-www-form-urlencoded, 对应的 body 数据格式就形如
userId=123&classId=456
代码示例: 获取 POST 请求中的参数(2)
如果 POST 请求中的 body 是按照 JSON 的格式来传递, 那么获取参数的代码就要发生调整.
1. 创建 PostParameterJson 类
@WebServlet("/postParameterJson")
public class PostParameterJson extends HttpServlet {
    @Override
    protected void doPost(HttpServletRequest req, HttpServletResponse resp)
throws ServletException, IOException {
        resp.setContentType("application/json;charset=utf-8");
        String body = readBody(req);
        resp.getWriter().write(body);
   }
    private String readBody(HttpServletRequest req) throws IOException {
        int contentLength = req.getContentLength();
        byte[] buffer = new byte[contentLength];
        InputStream inputStream = req.getInputStream();
        inputStream.read(buffer);
        return new String(buffer, "utf-8");
   }
}
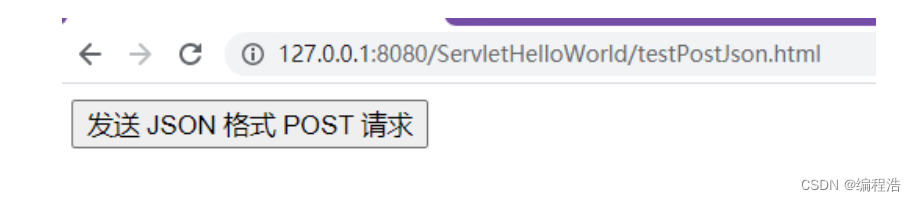
2. 创建 testPostJson.html
    <button onclick="sendJson()">发送 JSON 格式 POST 请求</button>
	<script>
	    function sendJson() {
	        ajax({
	               url: 'postParameterJson',
	            method: 'POST',
	            contentType: 'application/json; charset=utf-8',
	            body: JSON.stringify({ userId: 123, classId: 456 }),
	            callback: function (body, status) {
	                console.log(body);
	           }
	       });
	   }

	    function ajax(args) {
	 // 函数体略.... 参考之前封装的版本.
	   }
	</script>
在浏览器中通过 http://127.0.0.1:8080/ServletHelloWorld/testPostJson.html 访问, 可以看到
点击按钮, 则浏览器就会给服务器发送一个 POST
POST http://127.0.0.1:8080/ServletHelloWorld/postParameterJson HTTP/1.1
Host: 127.0.0.1:8080
Connection: keep-alive
Content-Length: 28
sec-ch-ua: " Not;A Brand";v="99", "Google Chrome";v="91", "Chromium";v="91"
sec-ch-ua-mobile: ?0
User-Agent: Mozilla/5.0 (Windows NT 10.0; Win64; x64) AppleWebKit/537.36 (KHTML,
like Gecko) Chrome/91.0.4472.114 Safari/537.36
Content-Type: application/json; charset=utf-8
Accept: */*
Origin: http://127.0.0.1:8080
Sec-Fetch-Site: same-origin
Sec-Fetch-Mode: cors
Sec-Fetch-Dest: empty
Referer: http://127.0.0.1:8080/ServletHelloWorld/testPostJson.html
Accept-Encoding: gzip, deflate, br
Accept-Language: zh-CN,zh;q=0.9,en;q=0.8
{"userId":123,"classId":456}
服务器收到这个结果之后, 又把数据返回了回去, 浏览器中看到了响应结果.

注意: 到目前为止, 服务器拿到的 JSON 数据仍然是一个整体的 String 类型, 如果要想获取到 userId 和
classId 的具体值, 还需要搭配 JSON 库进一步解析.
代码示例: 获取 POST 请求中的参数(3)
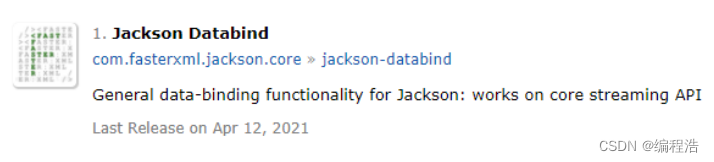
引入 Jackson 这个库, 进行 JSON 解析.
1. ) 在中央仓库中搜索 Jackson, 选择 JackSon Databind
2) 把中央仓库中的依赖配置添加到 pom.xml 中, 形如:
<dependency>
    <groupId>com.fasterxml.jackson.core</groupId>
    <artifactId>jackson-databind</artifactId>
    <version>2.12.3</version>
</dependency>
3) 在 PostParameterJson 类中修改代码
// 创建一个新的类表示 JSON 数据, 属性的名字需要和 JSON 字符串中的 key 一致.
class JsonData {
    public String userId;
    public String classId;
}
@WebServlet("/postParameterJson")
public class PostParameterJson extends HttpServlet {
    @Override
    protected void doPost(HttpServletRequest req, HttpServletResponse resp)
throws ServletException, IOException {
        resp.setContentType("text/html;charset=utf-8");
        String body = readBody(req);
        // 创建 ObjectMapper 对象. 这个是 Jackson 中的核心类.
        ObjectMapper objectMapper = new ObjectMapper();
        // 通过 readValue 方法把 body 这个字符串转成 JsonData 对象
        JsonData jsonData = objectMapper.readValue(body, JsonData.class);
        resp.getWriter().write("userId: " + jsonData.userId + ", " + "classId: "
+ jsonData.classId);
   }
    private String readBody(HttpServletRequest req) throws IOException {
        int contentLength = req.getContentLength();
        byte[] buffer = new byte[contentLength];
        InputStream inputStream = req.getInputStream();
        inputStream.read(buffer);
        return new String(buffer, "utf-8");
   }
}
注意:
- JsonData 这个类用来表示解析之后生成的 JSON 对象. 这个类的属性的名字和类型要和 JSON 字符串的 key 相对应.
- Jackson 库的核心类为 ObjectMapper. 其中的 readValue 方法把一个 JSON 字符串转成 Java 对象. 其中的 writeValueAsString 方法把一个 Java 对象转成 JSON 格式字符串.
- readValue 的第二个参数为 JsonData 的 类对象. 通过这个类对象, 在 readValue 的内部就可以借
助反射机制来构造出 JsonData 对象, 并且根据 JSON 中key 的名字, 把对应的 value 赋值给
JsonData 的对应字段
HttpServletResponse
Servlet 中的 doXXX 方法的目的就是根据请求计算得到相应, 然后把响应的数据设置到 HttpServletResponse 对象中.
然后 Tomcat 就会把这个 HttpServletResponse 对象按照 HTTP 协议的格式, 转成一个字符串, 并通过Socket 写回给浏览器.
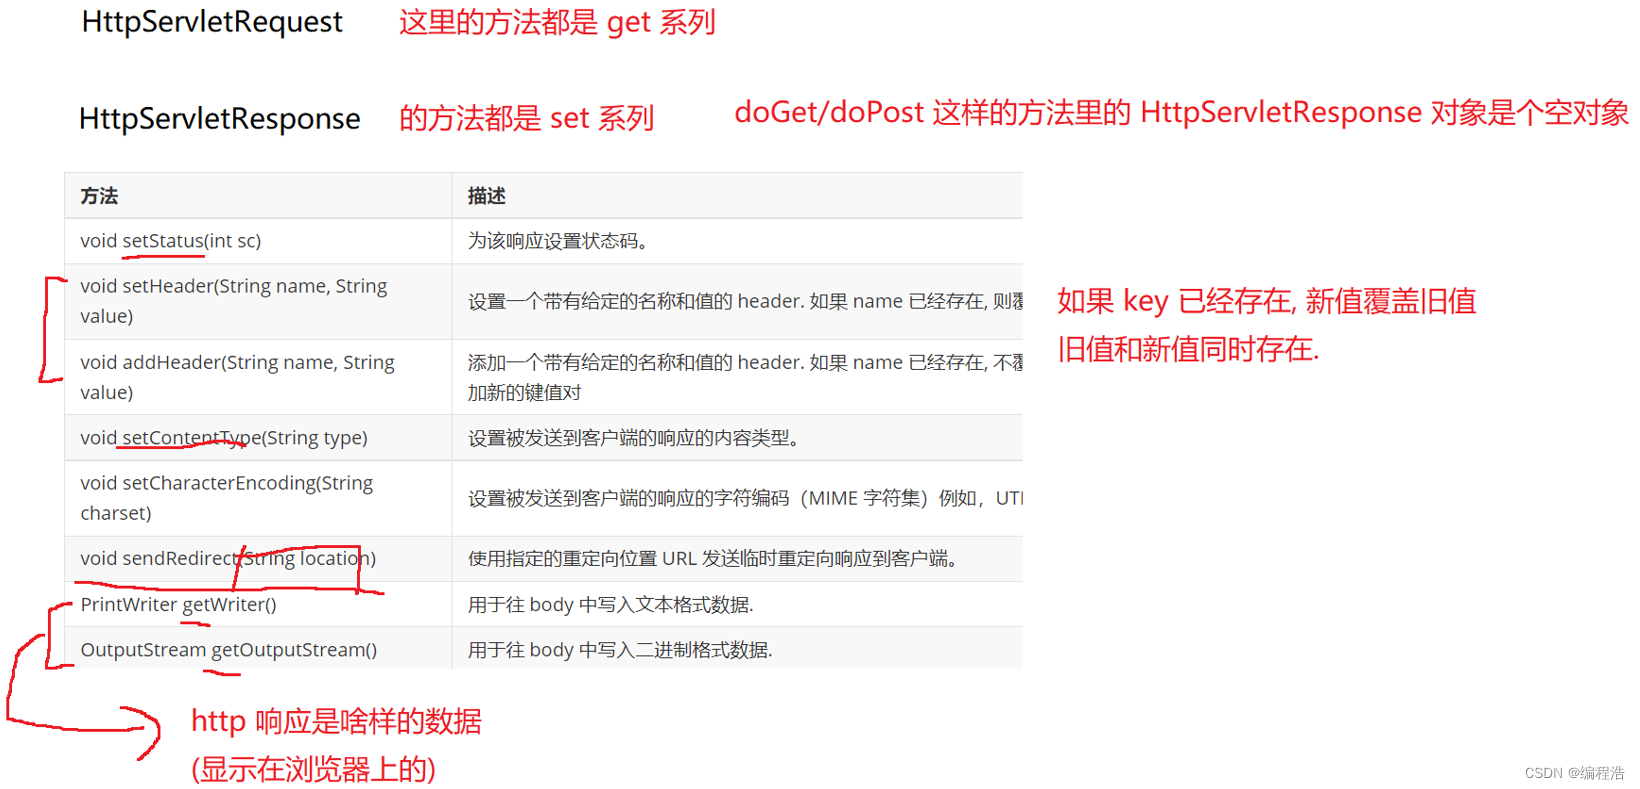
注意: 响应对象是服务器要返回给浏览器的内容, 这里的重要信息都是程序猿设置的. 因此上面的方法都是 “写” 方法.
注意: 对于状态码/响应头的设置要放到 getWriter / getOutputStream 之前. 否则可能设置失效.
代码示例: 设置状态码
实现一个程序, 用户在浏览器通过参数指定要返回响应的状态码.
1. 创建 StatusServlet 类
@WebServlet("/statusServlet")
public class StatusServlet extends HttpServlet {
    @Override
    protected void doGet(HttpServletRequest req, HttpServletResponse resp)
throws ServletException, IOException {
        String statusString = req.getParameter("status");
        if (statusString != null) {
            resp.setStatus(Integer.parseInt(statusString));
       }
        resp.getWriter().write("status: " + statusString);
   }
}
2. 部署程序,
在浏览器中通过 URL http://127.0.0.1:8080/ServletHelloWorld/statusServlet?
status=200 访问, 可以看到
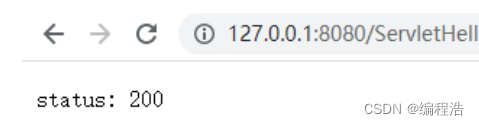
抓包结果:
HTTP/1.1 200
Content-Length: 11
Date: Mon, 21 Jun 2021 08:05:37 GMT
Keep-Alive: timeout=20
Connection: keep-alive
status: 200
变换不同的 status 的值, 就可以看到不同的响应结果
代码示例: 自动刷新
实现一个程序, 让浏览器每秒钟自动刷新一次. 并显示当前的时间戳.
1.创建 AutoRefreshServlet 类
@WebServlet("/autoRefreshServlet")
public class AutoRefreshServlet extends HttpServlet {
    @Override
    protected void doGet(HttpServletRequest req, HttpServletResponse resp)
throws ServletException, IOException {
        resp.setHeader("Refresh", "1");
        long timeStamp = new Date().getTime();
        resp.getWriter().write("timeStamp: " + timeStamp);
   }
}
- 通过 HTTP 响应报头中的 Refresh 字段, 可以控制浏览器自动刷新的时机.
- 通过 Date 类的 getTime 方法可以获取到当前时刻的毫秒级时间戳
部署程序, 通过 URL http://127.0.0.1:8080/ServletHelloWorld/autoRefreshServlet 访问, 可
以看到浏览器每秒钟自动刷新一次.

抓包结果
HTTP/1.1 200
Refresh: 1
Content-Length: 24
Date: Mon, 21 Jun 2021 08:14:29 GMT
Keep-Alive: timeout=20
Connection: keep-alive
timeStamp: 1624263269995
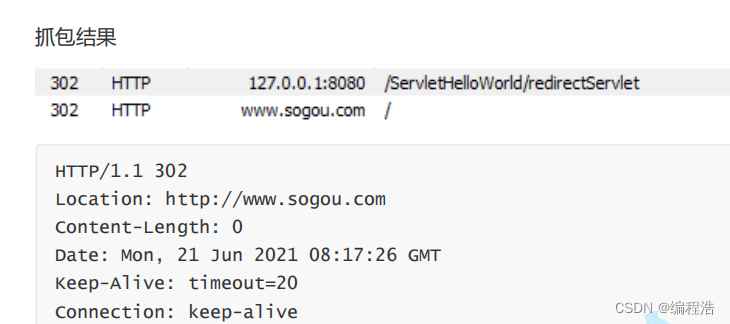
代码示例: 重定向
实现一个程序, 返回一个重定向 HTTP 响应, 自动跳转到另外一个页面.
1.创建 RedirectServlet 类
@WebServlet("/redirectServlet")
public class RedirectServlet extends HttpServlet {
    @Override
    protected void doGet(HttpServletRequest req, HttpServletResponse resp)
throws ServletException, IOException {
        resp.sendRedirect("http://www.sogou.com");
   }
}
部署程序, 通过 URL http://127.0.0.1:8080/ServletHelloWorld/redirectServlet 访问, 可以看
到, 页面自动跳转到 搜狗主页 了.