1. 注册功能改进
1.1 service
将之前的注册案例的代码进行优化,将获取
sqlsession工厂对象、获取sqlsession、获取mapper等操作从servlet中分离出来转变为三层架构的形式
在
service目录下创建UserService
public class UserService {
    SqlSessionFactory sqlSessionFactory = SqlSessionFactoryUtils.getSqlSessionFactory();

    /**
     * 登录方法
     * @param username
     * @param password
     * @return
     */
    public User login(String username, String password){
        //2. 获取SqlSession
        SqlSession sqlSession = sqlSessionFactory.openSession();

        //3. 获取UserMapper
        UserMapper mapper = sqlSession.getMapper(UserMapper.class);

        //4. 调用方法
        User user = mapper.select(username, password);

        //释放资源
        sqlSession.close();

        return user;
    }

    public boolean register(User user){
        //2. 获取SqlSession
        SqlSession sqlSession = sqlSessionFactory.openSession();

        //3. 获取UserMapper
        UserMapper mapper = sqlSession.getMapper(UserMapper.class);

        //4. 判断用户名是否存在
        if(mapper.selectByUsername(user.getUsername()) == null){
            // 用户名不存在,注册
            mapper.add(user);
            sqlSession.commit();

            sqlSession.close();
            return true;
        }else {
            // 用户名存在
            return false;
        }
}
这里对4处的代码进行优化
//4. 判断用户名是否存在
        User u = mapper.selectByUsername(user.getUsername());
        if(u == null){
            // 用户名不存在,注册
            mapper.add(user);
            sqlSession.commit();
        }
        sqlSession.close();

        return u == null;
    }
1.2 web层
从浏览器请求中获取数据(请求体中),将数据封装起来,并且调用方法判断是否需要添加用户
@WebServlet("/registerServlet")
public class RegisterServlet extends HttpServlet {
    private UserService service = new UserService();
    @Override
    protected void doGet(HttpServletRequest request, HttpServletResponse response) throws ServletException, IOException {
        //1. 接收用户数据
        String username = request.getParameter("username");
        String password = request.getParameter("password");

        //转义操作
        username = new String(username.getBytes(StandardCharsets.ISO_8859_1), StandardCharsets.UTF_8);

        //封装用户对象
        User user = new User();
        user.setUsername(username);
        user.setPassword(password);

        //2. 调用方法
        boolean flag = service.register(user);

        //3. 判断成功与否
        if(flag){
            // 注册成功,跳转到login页面
            request.setAttribute("register_msg", "注册成功,请登录");
            request.getRequestDispatcher("/login.jsp").forward(request,response);
        }else {
            // 失败,要返回注册页面
            request.setAttribute("register_msg", "注册失败,用户名已存在");
            request.getRequestDispatcher("/register.jsp").forward(request,response);

        }

    }

    @Override
    protected void doPost(HttpServletRequest request, HttpServletResponse response) throws ServletException, IOException {
        this.doGet(request, response);
    }
}
2. 验证码

2.1 Java代码生成验证码图片
验证码工具类,输出随机验证码图片流,并返回验证码值,给出测试用例
package com.xj.util;

import javax.imageio.ImageIO;
import java.awt.*;
import java.awt.geom.AffineTransform;
import java.awt.image.BufferedImage;
import java.io.File;
import java.io.FileOutputStream;
import java.io.IOException;
import java.io.OutputStream;
import java.util.Arrays;
import java.util.Random;

/**
 * 生成验证码工具类
 */
public class CheckCodeUtil {

    public static final String VERIFY_CODES = "123456789ABCDEFGHIJKLMNOPQRSTUVWXYZ";
    private static Random random = new Random();


	// 测试用例
    public static void main(String[] args) throws IOException {
        OutputStream fos = new FileOutputStream("C:\\project_heima\\day10-JSP\\代码\\brand-demo1\\src\\main\\webapp\\imgs\\a.jpg");
        String checkCode = CheckCodeUtil.outputVerifyImage(100, 50, fos, 4);

        System.out.println(checkCode);
    }


    /**
     * 输出随机验证码图片流,并返回验证码值(一般传入输出流,响应response页面端,Web项目用的较多)
     *
     * @param width 图片宽度
     * @param height 图片高度
     * @param os  输出流
     * @param verifySize 数据长度
     * @return 验证码数据
     * @throws IOException
     */
    public static String outputVerifyImage(int width, int height, OutputStream os, int verifySize) throws IOException {
        String verifyCode = generateVerifyCode(verifySize);
        outputImage(width, height, os, verifyCode);
        return verifyCode;
    }

    /**
     * 使用系统默认字符源生成验证码
     *
     * @param verifySize 验证码长度
     * @return
     */
    public static String generateVerifyCode(int verifySize) {
        return generateVerifyCode(verifySize, VERIFY_CODES);
    }

    /**
     * 使用指定源生成验证码
     *
     * @param verifySize 验证码长度
     * @param sources    验证码字符源
     * @return
     */
    public static String generateVerifyCode(int verifySize, String sources) {
        // 未设定展示源的字码,赋默认值大写字母+数字
        if (sources == null || sources.length() == 0) {
            sources = VERIFY_CODES;
        }
        int codesLen = sources.length();
        Random rand = new Random(System.currentTimeMillis());
        StringBuilder verifyCode = new StringBuilder(verifySize);
        for (int i = 0; i < verifySize; i++) {
            verifyCode.append(sources.charAt(rand.nextInt(codesLen - 1)));
        }
        return verifyCode.toString();
    }

    /**
     * 生成随机验证码文件,并返回验证码值 (生成图片形式,用的较少)
     *
     * @param w
     * @param h
     * @param outputFile
     * @param verifySize
     * @return
     * @throws IOException
     */
    public static String outputVerifyImage(int w, int h, File outputFile, int verifySize) throws IOException {
        String verifyCode = generateVerifyCode(verifySize);
        outputImage(w, h, outputFile, verifyCode);
        return verifyCode;
    }


    /**
     * 生成指定验证码图像文件
     *
     * @param w
     * @param h
     * @param outputFile
     * @param code
     * @throws IOException
     */
    public static void outputImage(int w, int h, File outputFile, String code) throws IOException {
        if (outputFile == null) {
            return;
        }
        File dir = outputFile.getParentFile();
        //文件不存在
        if (!dir.exists()) {
            //创建
            dir.mkdirs();
        }
        try {
            outputFile.createNewFile();
            FileOutputStream fos = new FileOutputStream(outputFile);
            outputImage(w, h, fos, code);
            fos.close();
        } catch (IOException e) {
            throw e;
        }
    }

    /**
     * 输出指定验证码图片流
     *
     * @param w
     * @param h
     * @param os
     * @param code
     * @throws IOException
     */
    public static void outputImage(int w, int h, OutputStream os, String code) throws IOException {
        int verifySize = code.length();
        BufferedImage image = new BufferedImage(w, h, BufferedImage.TYPE_INT_RGB);
        Random rand = new Random();
        Graphics2D g2 = image.createGraphics();
        g2.setRenderingHint(RenderingHints.KEY_ANTIALIASING, RenderingHints.VALUE_ANTIALIAS_ON);

        // 创建颜色集合,使用java.awt包下的类
        Color[] colors = new Color[5];
        Color[] colorSpaces = new Color[]{Color.WHITE, Color.CYAN,
                Color.GRAY, Color.LIGHT_GRAY, Color.MAGENTA, Color.ORANGE,
                Color.PINK, Color.YELLOW};
        float[] fractions = new float[colors.length];
        for (int i = 0; i < colors.length; i++) {
            colors[i] = colorSpaces[rand.nextInt(colorSpaces.length)];
            fractions[i] = rand.nextFloat();
        }
        Arrays.sort(fractions);
        // 设置边框色
        g2.setColor(Color.GRAY);
        g2.fillRect(0, 0, w, h);

        Color c = getRandColor(200, 250);
        // 设置背景色
        g2.setColor(c);
        g2.fillRect(0, 2, w, h - 4);

        // 绘制干扰线
        Random random = new Random();
        // 设置线条的颜色
        g2.setColor(getRandColor(160, 200));
        for (int i = 0; i < 20; i++) {
            int x = random.nextInt(w - 1);
            int y = random.nextInt(h - 1);
            int xl = random.nextInt(6) + 1;
            int yl = random.nextInt(12) + 1;
            g2.drawLine(x, y, x + xl + 40, y + yl + 20);
        }

        // 添加噪点
        // 噪声率
        float yawpRate = 0.05f;
        int area = (int) (yawpRate * w * h);
        for (int i = 0; i < area; i++) {
            int x = random.nextInt(w);
            int y = random.nextInt(h);
            // 获取随机颜色
            int rgb = getRandomIntColor();
            image.setRGB(x, y, rgb);
        }
        // 添加图片扭曲
        shear(g2, w, h, c);

        g2.setColor(getRandColor(100, 160));
        int fontSize = h - 4;
        Font font = new Font("Algerian", Font.ITALIC, fontSize);
        g2.setFont(font);
        char[] chars = code.toCharArray();
        for (int i = 0; i < verifySize; i++) {
            AffineTransform affine = new AffineTransform();
            affine.setToRotation(Math.PI / 4 * rand.nextDouble() * (rand.nextBoolean() ? 1 : -1), (w / verifySize) * i + fontSize / 2, h / 2);
            g2.setTransform(affine);
            g2.drawChars(chars, i, 1, ((w - 10) / verifySize) * i + 5, h / 2 + fontSize / 2 - 10);
        }

        g2.dispose();
        ImageIO.write(image, "jpg", os);
    }

    /**
     * 随机颜色
     *
     * @param fc
     * @param bc
     * @return
     */
    private static Color getRandColor(int fc, int bc) {
        if (fc > 255) {
            fc = 255;
        }
        if (bc > 255) {
            bc = 255;
        }
        int r = fc + random.nextInt(bc - fc);
        int g = fc + random.nextInt(bc - fc);
        int b = fc + random.nextInt(bc - fc);
        return new Color(r, g, b);
    }

    private static int getRandomIntColor() {
        int[] rgb = getRandomRgb();
        int color = 0;
        for (int c : rgb) {
            color = color << 8;
            color = color | c;
        }
        return color;
    }

    private static int[] getRandomRgb() {
        int[] rgb = new int[3];
        for (int i = 0; i < 3; i++) {
            rgb[i] = random.nextInt(255);
        }
        return rgb;
    }

    private static void shear(Graphics g, int w1, int h1, Color color) {
        shearX(g, w1, h1, color);
        shearY(g, w1, h1, color);
    }

    private static void shearX(Graphics g, int w1, int h1, Color color) {

        int period = random.nextInt(2);

        boolean borderGap = true;
        int frames = 1;
        int phase = random.nextInt(2);

        for (int i = 0; i < h1; i++) {
            double d = (double) (period >> 1)
                    * Math.sin((double) i / (double) period
                    + (6.2831853071795862D * (double) phase)
                    / (double) frames);
            g.copyArea(0, i, w1, 1, (int) d, 0);
            if (borderGap) {
                g.setColor(color);
                g.drawLine((int) d, i, 0, i);
                g.drawLine((int) d + w1, i, w1, i);
            }
        }

    }

    private static void shearY(Graphics g, int w1, int h1, Color color) {

        int period = random.nextInt(40) + 10; // 50;

        boolean borderGap = true;
        int frames = 20;
        int phase = 7;
        for (int i = 0; i < w1; i++) {
            double d = (double) (period >> 1)
                    * Math.sin((double) i / (double) period
                    + (6.2831853071795862D * (double) phase)
                    / (double) frames);
            g.copyArea(i, 0, 1, h1, 0, (int) d);
            if (borderGap) {
                g.setColor(color);
                g.drawLine(i, (int) d, i, 0);
                g.drawLine(i, (int) d + h1, i, h1);
            }

        }

    }
}
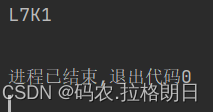
测试用例的结果

2.2 展示验证码

在注册表单当中添加验证码,获取的验证码图片属于动态获取,每一次访问都是不同的图片,所以创建
checkCodeServlet,每次访问由该servlet来返回新的图片
<tr>
	<td>验证码</td>
		<td class="inputs">
			<input name="checkCode" type="text" id="checkCode">
			<img id="checkCodeImg"src="/brand-demo1/checkCodeServlet">
			<a href="#" id="changeImg">看不清?</a>
		</td>
</tr>
创建
checkCodeServlet
@WebServlet("/checkCodeServlet")
public class CheckCodeServlet extends HttpServlet {

    @Override
    protected void doGet(HttpServletRequest request, HttpServletResponse response) throws ServletException, IOException {
        ServletOutputStream os = response.getOutputStream();
        String checkCode = CheckCodeUtil.outputVerifyImage(100, 50, os, 4);
    }

    @Override
    protected void doPost(HttpServletRequest request, HttpServletResponse response) throws ServletException, IOException {
        this.doGet(request, response);
    }
}
另一个功能,看不清换一张,将验证码的表单修改
<tr>
	<td>验证码</td>
		<td class="inputs">
			<input name="checkCode" type="text" id="checkCode">
			<img id="checkCodeImg"src="/brand-demo1/checkCodeServlet">
			<a href="#" id="changeImg">看不清?</a>
		</td>
</tr>
并且添加相应事件
<script>
    document.getElementById("changeImg").onclick = function (){
        document.getElementById("checkCodeImg").src="/brand-demo1/checkCodeServlet";
    }
</script>
这时会出现一个问题,换验证码图片只能响应一次之后就不会换图片了,这是因为被浏览器给缓存了,src路径被缓存了,就无法更换图片了,浏览器响应是尽量使用存在的缓存,所以需要改进。
解决办法:加时间戳
document.getElementById("checkCodeImg").src="/brand-demo1/checkCodeServlet?" + new Date().getMilliseconds();
最后一个功能,点击图片更换验证码
给img添加响应事件即可
document.getElementById("checkCodeImg").onclick = function (){
	document.getElementById("checkCodeImg").src="/brand-demo1/checkCodeServlet?" + new Date().getMilliseconds();
}
2.3 验证码的校验

进行验证码的校验,必须将验证码存储在Session中,以便两个Servlet之间可以获取数据
先在CheckCodeServlet处存入Session
HttpSession session = request.getSession();
session.setAttribute("checkCodeGen", checkCode);
然后在RegisterServlet处读取Session
		// 获取用户输入的验证码
        String checkCode = request.getParameter("checkCode");

        // 程序生产的验证码,从Session中获取
        HttpSession session = request.getSession();
        String checkCodeGen = (String) session.getAttribute("checkCodeGen");

        // 比对
        if(!checkCodeGen.equalsIgnoreCase(checkCode)){
            request.setAttribute("register_msg","验证码错误");
            request.getRequestDispatcher("/register.jsp").forward(request,response);

            // 不允许注册
            return;
        }
验证码一般是忽略大小写比对的,所以用
equalsIgnoreCase()