Spring Boot 提供了方便的注解来实现定时任务。下面是定时任务注解的详细教程:
一、添加依赖
要使用 Spring Boot 的定时任务注解,首先需要在项目中确认已添加过spring-boot-starter的依赖。
<dependency>
    <groupId>org.springframework.boot</groupId>
    <artifactId>spring-boot-starter</artifactId>
</dependency>
这个依赖会自动包含spring-context,它提供了定时任务相关的功能。
二、开启定时任务
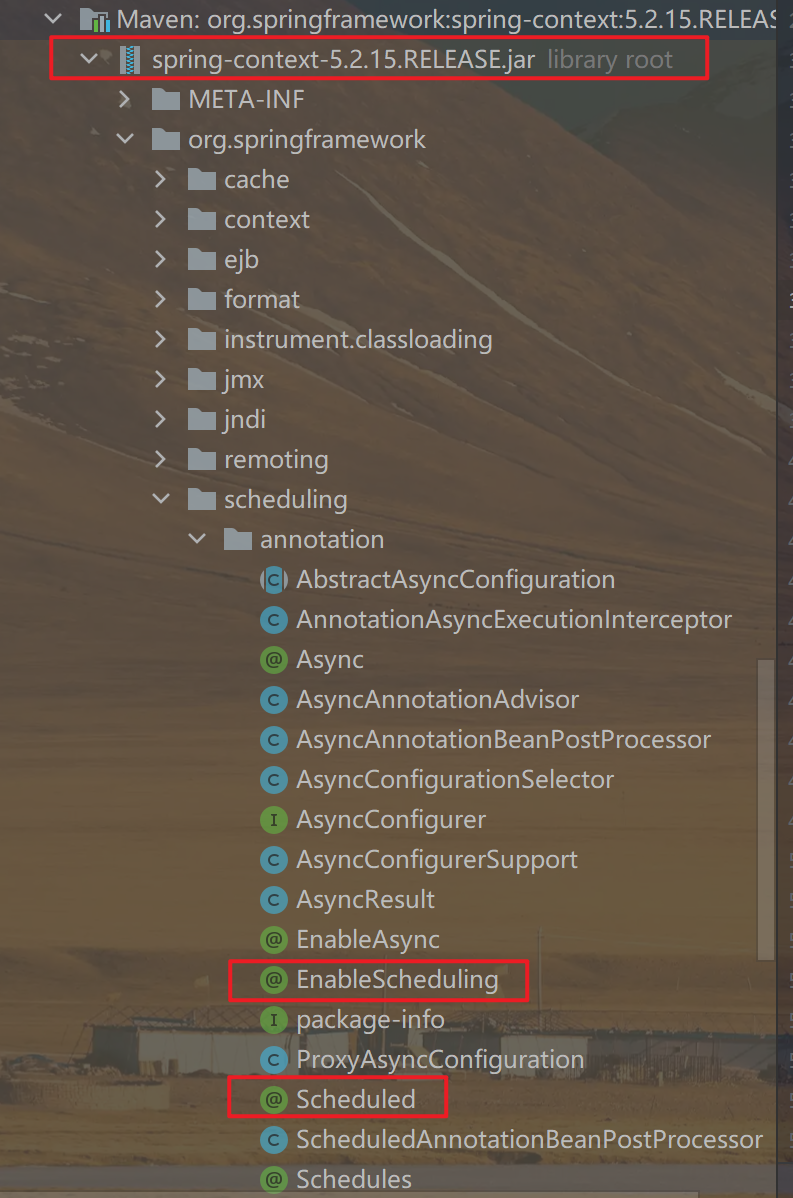
要开启定时任务,需要在主类上添加 @EnableScheduling 注解:
@SpringBootApplication
@EnableScheduling
public class MyApp {
    public static void main(String[] args) {
        SpringApplication.run(MyApp.class, args);
    }
}
三、创建定时任务方法
创建一个方法,并添加 @Scheduled 注解,用来表示这个方法是一个定时任务方法。
@Component
public class MyTask {

    @Scheduled(cron = "0 0 0 * * ?")
    public void myTaskMethod() {
        // 定时任务执行的代码
    }

}
@Scheduled是一个Spring框架中的注解,可以用于指定方法或者类中的方法在特定时间进行执行。它可以帮助我们轻松地编写定时任务。
@Scheduled 应用于方法上,并且支持多种参数。下面是一些常见的参数:
cron:按照Cron表达式来设置定时任务的执行时间fixedDelay:在上一次任务执行完毕后延迟一段时间再执行下一次任务fixedRate:按照固定间隔时间执行任务initialDelay:表示第一次执行延迟时间
下面是一个使用 @Scheduled 注解的例子:
@Component
public class ScheduleTask {
// @Scheduled(cron = "0/5 * * * * ?")
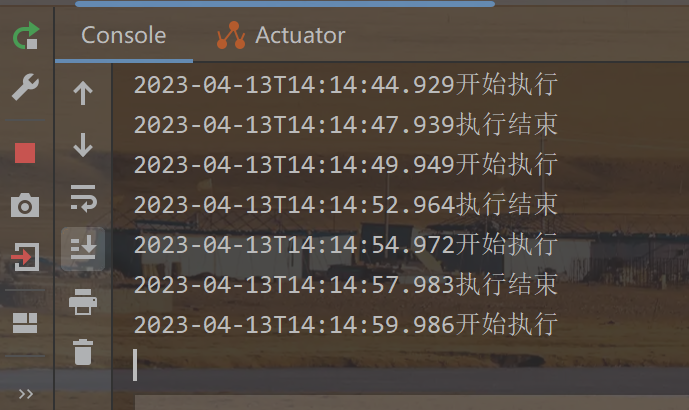
@Scheduled(fixedDelay = 2000)
public void test(){
System.out.println(LocalDateTime.now() + "开始执行");
try {Thread.sleep(3000);} catch (InterruptedException e) {e.printStackTrace();}
System.out.println(LocalDateTime.now() + "执行结束");
}
}这个例子中,ScheduleTask类被标记为 @Component,因此Spring容器会自动扫描并创建实例。然后,该类中的 test() 方法使用 @Scheduled 注解进行标记,fixedDelay=2000表示:在上一次任务执行完毕后,延迟2s再执行下一次任务。


![[考研数据结构] 第3章之队列的基本知识与操作](https://img-blog.csdnimg.cn/41b1225bc0ff4e84a9a696d852ffc869.png)