cron表达式组件使用
- 前言
- vue-cron-editor-buefy
- 1. 安装vue-cron-editor-buefy包
- 2. 使用
- 3. 配置路由
- 4. 运行并查看效果
- vcrontab
- 1. 安装vcrontab包
- 2. 使用
- 3. 配置路由
- 4. 运行并查看
前言
- 本篇来学习下vue中如何生成cron表达式的两个包
vue-cron-editor-buefy
1. 安装vue-cron-editor-buefy包
npm install vue-cron-editor-buefy -S
npm install cronstrue -S
2. 使用
- 在src/views下 新建cronTest.vue.vue文件,内容如下
<template>
<div id="app">
<!-- 输入框 -->
<el-form :model="form" label-position="left">
<el-form-item label="cron表达式" :label-width="formLabelWidth">
<el-input v-model="form.cron_rule" autocomplete="off" placeholder="请输入定时cron表达式" disabled>
<template slot="append">
<el-button type="primary" @click="creatCron">
生成表达式
<i class="el-icon-time el-icon--right"></i>
</el-button>
</template>
</el-input>
</el-form-item>
<!-- cron dialog -->
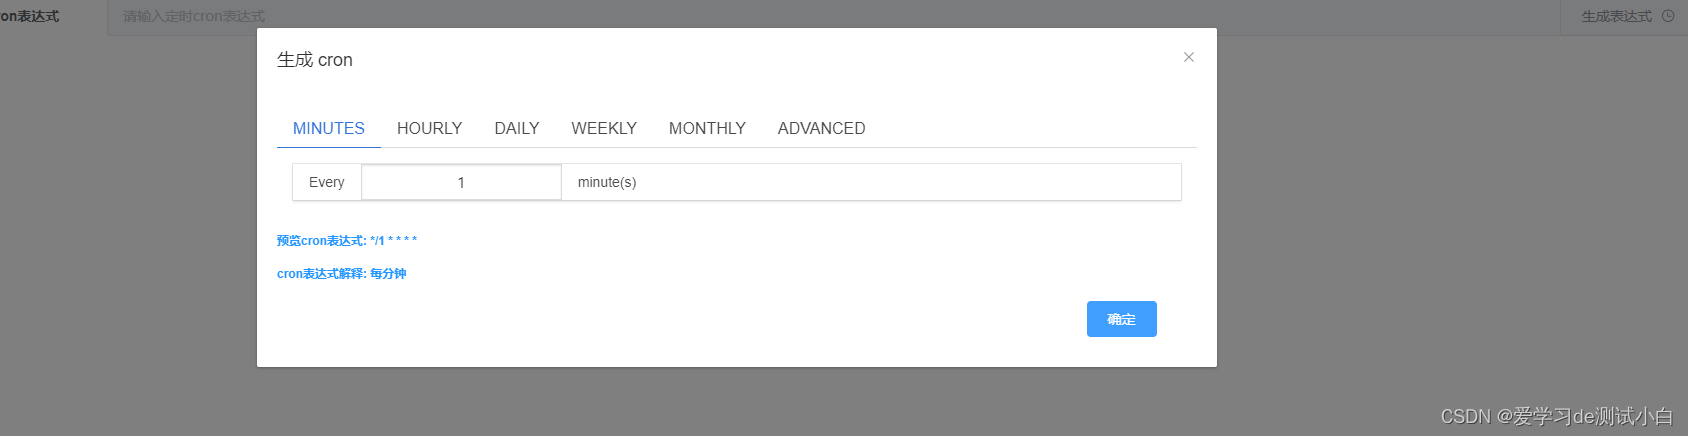
<el-dialog title="生成 cron" :visible.sync="showCron">
<VueCronEditorBuefy v-model="expression"/>
<div style="color:#2496FF">
<h5>预览cron表达式: {{ expression }}</h5>
<h5>cron表达式解释: {{ explainAddCron }}</h5>
</div>
<el-button type="primary" size="medium" @click="cronConfirm" style="margin-left: 88%;">确定
</el-button>
</el-dialog>
</el-form>
</div>
</template>
<script>
import VueCronEditorBuefy from 'vue-cron-editor-buefy';
import cronstrue from "cronstrue/i18n";
export default {
components: { cronstrue,VueCronEditorBuefy, },
data() {
return {
input: "",
expression: "",
showCron: false,
cronExpression: "*/1 * * * *",
form:{},
formLabelWidth: '120px',
showCron: false
};
},
computed: {
explainAddCron() {
if(this.expression){
return cronstrue.toString(this.expression, { locale: "zh_CN",use24HourTimeFormat:true});
}
}
},
methods: {
creatCron(){
this.expression = this.cronExpression
this.showCron = true
},
cronConfirm() {
this.showCron = false
this.form.cron_rule = this.expression
},
}
};
</script>
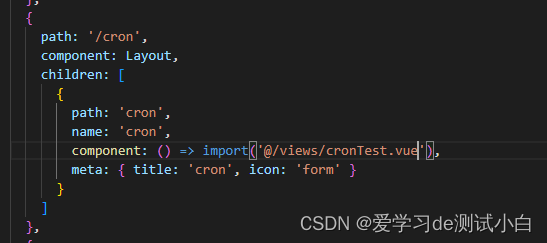
3. 配置路由
{
    path: '/cron',
    component: Layout,
    children: [
      {
        path: 'cron',
        name: 'cron',
        component: () => import('@/views/cronTest.vue'),
        meta: { title: 'cron', icon: 'form' }
      }
    ]
  }
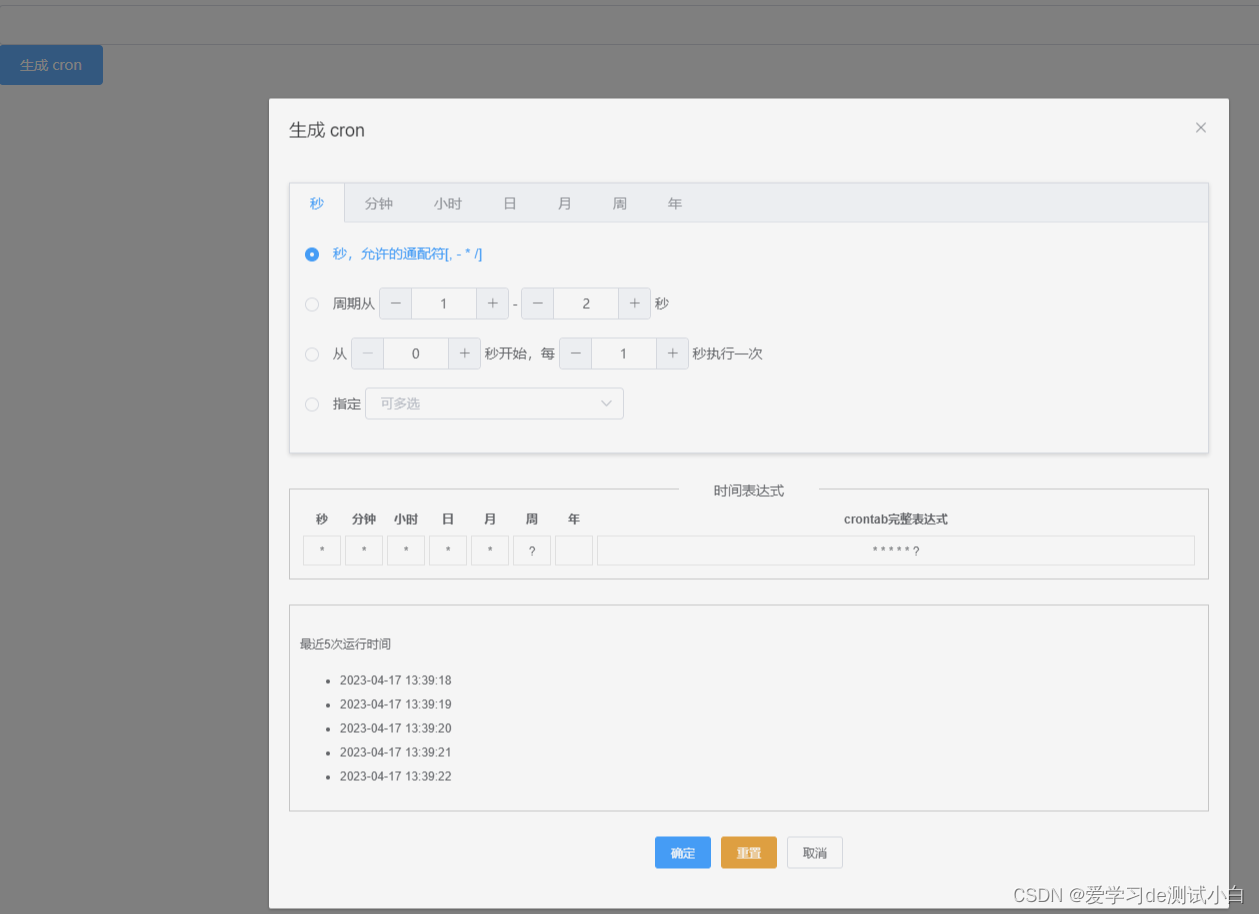
4. 运行并查看效果
vcrontab
1. 安装vcrontab包
npm install vcrontab -S
2. 使用
- 在src/views下 新建cronTest.vue.vue文件,内容如下
<template>
<div id="app">
<div class="box">
<el-input v-model="input" placeholder class="inp"></el-input>
<el-button type="primary" @click="showDialog">生成 cron</el-button>
</div>
<el-dialog title="生成 cron" :visible.sync="showCron">
<vcrontab @hide="showCron=false" @fill="crontabFill" :expression="expression"></vcrontab>
</el-dialog>
</div>
</template>
<script>
import vcrontab from 'vcrontab'
export default {
components: {vcrontab},
data() {
return {
input: "",
expression: "",
showCron: false,
cronExpression: "*/1 * * * *",
form:{},
formLabelWidth: '120px',
showCron: false
};
},
methods: {
crontabFill(value) {
this.input = value;
},
showDialog() {
this.expression = this.input;
this.showCron = true;
}
}
};
</script>
3. 配置路由
4. 运行并查看