前言
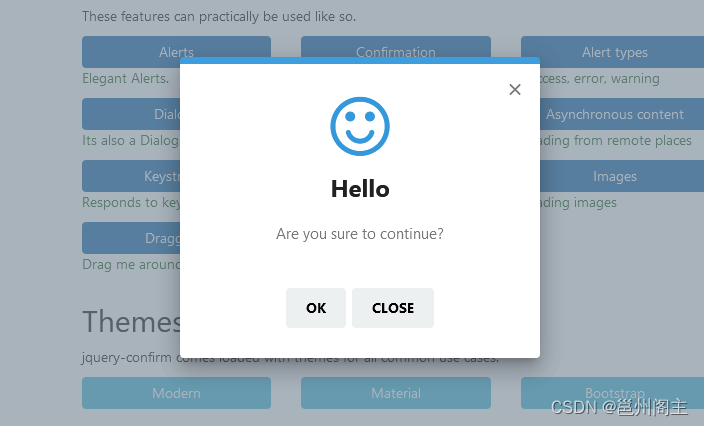
今天为大家分享一款开源的非常轻量且精美的jQuery模态弹窗插件:jquery-confirm,它包含Bootstrap,Material等多种主题供选择。
如果你的前端项目中还在使用jQuery,那么jquery-confirm是你模态弹窗的完美选择。
下面我们就来零距离感受一下jquery-confirm的魅力吧。
jquery-confirm官网地址:https://craftpip.github.io/jquery-confirm/
jquery-confirm源码托管地址:https://github.com/craftpip/jquery-confirm

功能特性
jquery-confirm包含了前端开发中界面的多种交互功能,如:
- Alerts(提示信息)
- Confirmation(弹窗确认)
- Prompt(弹窗输入)
- Dialog(对话框)
- Asynchronous content(异步加载内容)
- Auto-close(窗口自动关闭)
- Keystrokes(快捷键)
- Animations(动画)
- Draggable(拖拽窗口)
- Theme(切换主题)
安装
jquery-confirm组件包含两个资源文件,分别为:样式文件jquery-confirm.min.css和脚本文件jquery-confirm.min.js。
你可以通过CDN直接引用,如下:
登录后复制
<link rel="stylesheet" href="https://cdnjs.cloudflare.com/ajax/libs/jquery-confirm/3.3.2/jquery-confirm.min.css">
<script src="https://cdnjs.cloudflare.com/ajax/libs/jquery-confirm/3.3.2/jquery-confirm.min.js"></script>
或者通过Bower安装:
登录后复制
$ bower install craftpip/jquery-confirm
或者通过npm安装:
登录后复制
$ npm install jquery-confirm
注:jquery-confirm依赖于jQuery,如果你还需要响应式布局,则还依赖Bootstrap。
主题
jquery-confirm提供了多种精美的主题,如:
Modern风格:
Material风格:
Bootstrap风格:
Supervan风格:

开始使用
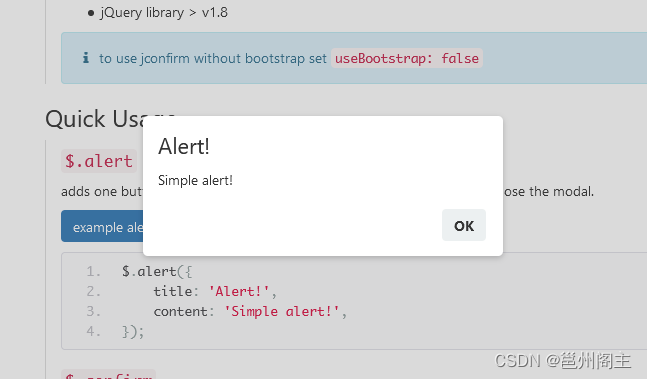
简单的提示信息($.alert)
使用$.alert()函数即可弹出简单的提示信息,如下:
登录后复制
$.alert({
title: 'Alert!',
content: 'Simple alert!',
});
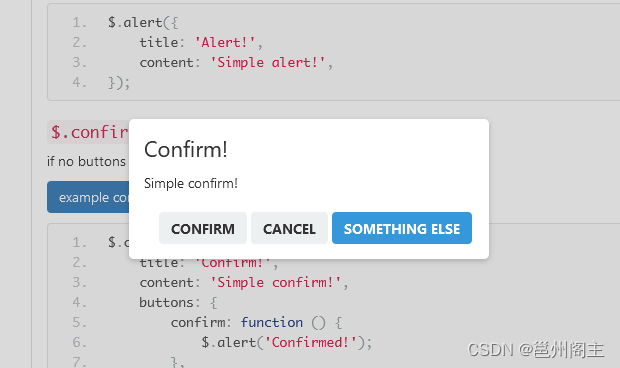
确认弹窗($.confirm)
使用$.confirm()函数可以打开一个确认消息的弹窗,如下:
登录后复制
$.confirm({
title: 'Confirm!',
content: 'Simple confirm!',
buttons: {
confirm: function () {
$.alert('Confirmed!');
},
cancel: function () {
$.alert('Canceled!');
},
somethingElse: {
text: 'Something else',
btnClass: 'btn-blue',
keys: ['enter', 'shift'],
action: function(){
$.alert('Something else?');
}
}
}
});
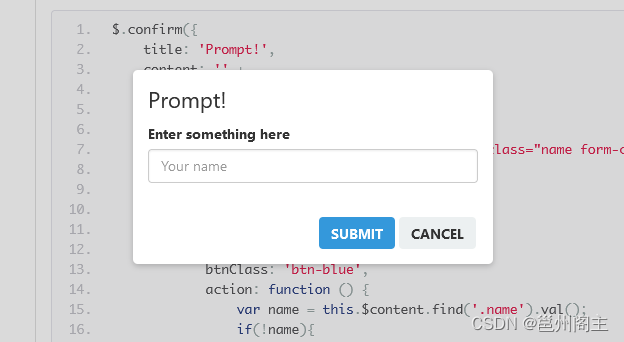
$.confirm()函数还可以自定义content的内容,让其变成一个弹出的输入框,如下:
登录后复制
$.confirm({
title: 'Prompt!',
content: '' +
'<form action="" class="formName">' +
'<div class="form-group">' +
'<label>Enter something here</label>' +
'<input type="text" placeholder="Your name" class="name form-control" required />' +
'</div>' +
'</form>',
buttons: {
formSubmit: {
text: 'Submit',
btnClass: 'btn-blue',
action: function () {
var name = this.$content.find('.name').val();
if(!name){
$.alert('provide a valid name');
return false;
}
$.alert('Your name is ' + name);
}
},
cancel: function () {
//close
},
},
onContentReady: function () {
// bind to events
var jc = this;
this.$content.find('form').on('submit', function (e) {
// if the user submits the form by pressing enter in the field.
e.preventDefault();
jc.$$formSubmit.trigger('click'); // reference the button and click it
});
}
});
对话框($.dialog)
调用$.dialog()函数可以弹出一个对话框,如下:
登录后复制
$.dialog({
title: 'Text content!',
content: 'Simple modal!',
});
以上三种弹窗都提供更简单的参数调用,如:
登录后复制
$.alert('Content here', 'Title here');
$.confirm('A message', 'Title is optional');
$.dialog('Just to let you know');
弹窗按钮
在$.confirm()函数中,你还可以自定义多个按钮,包括按钮的文本,样式,回调等等参数,如下:
登录后复制
$.confirm({
buttons: {
hello: function(helloButton){
// shorthand method to define a button
// the button key will be used as button name
},
hey: function(heyButton){
// access the button using jquery
this.$$hello.trigger('click'); // click the 'hello' button
this.$$hey.prop('disabled', true); // disable the current button using jquery method
// jconfirm button methods, all methods listed here
this.buttons.hello.setText('Helloooo'); // setText for 'hello' button
this.buttons.hey.disable(); // disable with button function provided by jconfirm
this.buttons.hey.enable(); // enable with button function provided by jconfirm
// the button's instance is passed as the first argument, for quick access
heyButton === this.buttons.hey
},
heyThere: {
text: 'Hey there!', // text for button
btnClass: 'btn-blue', // class for the button
keys: ['enter', 'a'], // keyboard event for button
isHidden: false, // initially not hidden
isDisabled: false, // initially not disabled
action: function(heyThereButton){
// longhand method to define a button
// provides more features
}
},
}
});
比如,自定义按钮的文本:
登录后复制
$.confirm({
buttons: {
hey: function () {
// here the button key 'hey' will be used as the text.
$.alert('You clicked on "hey".');
},
heyThere: {
text: 'hey there!', // With spaces and symbols
action: function () {
$.alert('You clicked on "heyThere"');
}
}
}
});
自定义按钮的样式:
登录后复制
$.confirm({
buttons: {
info: {
btnClass: 'btn-blue',
action: function(){}
},
danger: {
btnClass: 'btn-red any-other-class', // multiple classes.
//...
},
warning: {
btnClass: 'btn-warning',
//...
},
}
});
绑定按钮的快捷键:
登录后复制
$.confirm({
content: 'Time to use your keyboard, press shift, alert, A or B',
buttons: {
specialKey: {
text: 'On behalf of shift',
keys: ['shift', 'alt'],
action: function(){
$.alert('Shift or Alt was pressed');
}
},
alphabet: {
text: 'A, B',
keys: ['a', 'b'],
action: function(){
$.alert('A or B was pressed');
}
}
}
});
自定义
自定义对话框类型
在jquery-confirm组件中,你可以通过设置type参数来自定义对话框的类型,如:
登录后复制
$.confirm({
title: 'Encountered an error!',
content: 'Something went downhill, this may be serious',
type: 'red',
typeAnimated: true,
buttons: {
tryAgain: {
text: 'Try again',
btnClass: 'btn-red',
action: function(){
}
},
close: function () {
}
}
});
自定义对话框的图标
通过指定icon,可以自定义对话框的图标,如:
登录后复制
$.confirm({
icon: 'glyphicon glyphicon-heart',
title: 'glyphicon'
});
$.confirm({
icon: 'fa fa-warning',
title: 'font-awesome'
});
$.confirm({
icon: 'fa fa-spinner fa-spin',
title: 'Working!',
content: 'Sit back, we are processing your request!'
});
自定义对话框的宽度
如果使用了Bootstrap响应式布局,你还可以应用Bootstrap的column样式来自定义对话框的宽度,如:
登录后复制
$.confirm({
columnClass: 'small'
});
$.confirm({
columnClass: 'col-md-4 col-md-offset-4',
});
$.confirm({
columnClass: 'col-md-12'
});
$.confirm({
columnClass: 'col-md-4 col-md-offset-8 col-xs-4 col-xs-offset-8',
containerFluid: true, // this will add 'container-fluid' instead of 'container'
});
如果没有引用Bootstrap样式,则必需设置jconfirm.defaults.useBootstrap = false,然后再自定义对话框宽度,如:
登录后复制
$.confirm({
boxWidth: '30%',
useBootstrap: false,
});
$.confirm({
boxWidth: '500px',
useBootstrap: false,
});
可拖拽窗口
jquery-confirm实现可拖拽窗口非常简单,只需要设置draggable参数的值为true即可,如:
登录后复制
$.confirm({
title: 'Hello there',
content: 'click and hold on the title to drag',
draggable: true,
});
默认情况下,拖拽不受浏览器窗口的限制,也就是说你可以把窗口拖拽到浏览器可视区域外,如:
登录后复制
$.confirm({
title: 'Hello there',
content: 'Drag this modal out of the window',
draggable: true,
dragWindowBorder: false,
});
如果想要窗口在浏览器可视区域内拖拽,则设置dragWindowGap参数,如下:
登录后复制
$.confirm({
title: 'Hello there',
content: 'try to drag this modal out of the window',
draggable: true,
dragWindowGap: 0, // number of px of distance
});
Ajax加载
jquery-confirm还支持Ajax加载,你只需要设置content参数以url:为前缀即可,如:
登录后复制
$.confirm({
title: 'Title',
content: 'url:text.txt',
onContentReady: function () {
var self = this;
this.setContentPrepend('<div>Prepended text</div>');
setTimeout(function () {
self.setContentAppend('<div>Appended text after 2 seconds</div>');
}, 2000);
},
columnClass: 'medium',
});
Esc键关闭
jquery-confirm支持快捷键Esc键来关闭对话框,如:
登录后复制
$.confirm({
escapeKey: true,
backgroundDismiss: false,
});
$.confirm({
escapeKey: 'buttonName',
buttons: {
buttonName: function(){
$.alert('Button name was called');
},
close: function(){
}
}
});
内置的回调函数
jquery-confirm内置了许多回调函数,如:
登录后复制
$.confirm({
title: false,
content: 'url:callback.html',
onContentReady: function () {
// when content is fetched & rendered in DOM
alert('onContentReady');
var self = this;
this.buttons.ok.disable();
this.$content.find('.btn').click(function(){
self.$content.find('input').val('Chuck norris');
self.buttons.ok.enable();
});
},
contentLoaded: function(data, status, xhr){
// when content is fetched
alert('contentLoaded: ' + status);
},
onOpenBefore: function () {
// before the modal is displayed.
alert('onOpenBefore');
},
onOpen: function () {
// after the modal is displayed.
alert('onOpen');
},
onClose: function () {
// before the modal is hidden.
alert('onClose');
},
onDestroy: function () {
// when the modal is removed from DOM
alert('onDestroy');
},
onAction: function (btnName) {
// when a button is clicked, with the button name
alert('onAction: ' + btnName);
},
buttons: {
ok: function(){
}
}
});
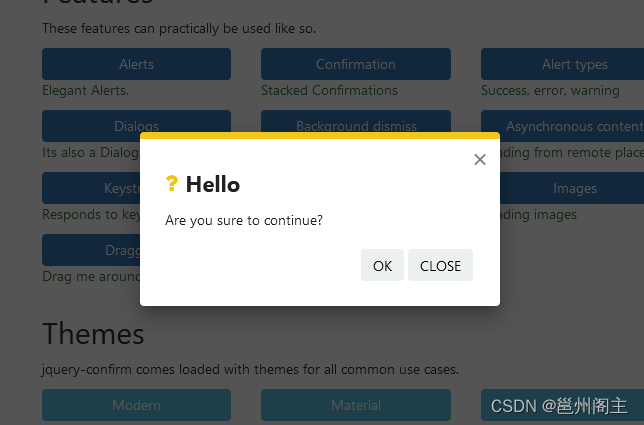
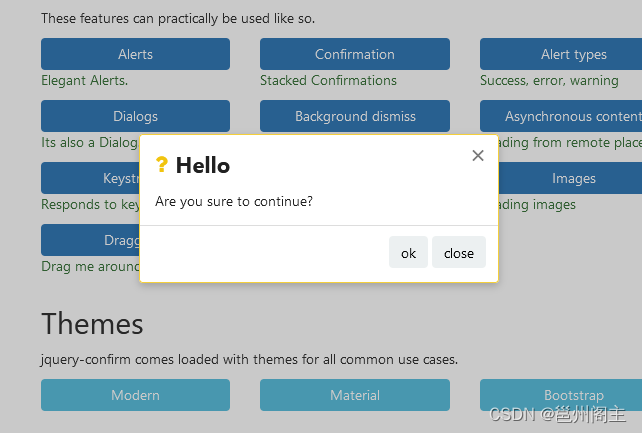
全局参数配置
在jquery-confirm组件被正确加载之后,你可以自定义配置它的全局参数,jquery-confirm提供的全局参数如下:
登录后复制
jconfirm.defaults = {
title: 'Hello',
titleClass: '',
type: 'default',
typeAnimated: true,
draggable: true,
dragWindowGap: 15,
dragWindowBorder: true,
animateFromElement: true,
smoothContent: true,
content: 'Are you sure to continue?',
buttons: {},
defaultButtons: {
ok: {
action: function () {
}
},
close: {
action: function () {
}
},
},
contentLoaded: function(data, status, xhr){
},
icon: '',
lazyOpen: false,
bgOpacity: null,
theme: 'light',
animation: 'scale',
closeAnimation: 'scale',
animationSpeed: 400,
animationBounce: 1,
rtl: false,
container: 'body',
containerFluid: false,
backgroundDismiss: false,
backgroundDismissAnimation: 'shake',
autoClose: false,
closeIcon: null,
closeIconClass: false,
watchInterval: 100,
columnClass: 'col-md-4 col-md-offset-4 col-sm-6 col-sm-offset-3 col-xs-10 col-xs-offset-1',
boxWidth: '50%',
scrollToPreviousElement: true,
scrollToPreviousElementAnimate: true,
useBootstrap: true,
offsetTop: 40,
offsetBottom: 40,
bootstrapClasses: {
container: 'container',
containerFluid: 'container-fluid',
row: 'row',
},
onContentReady: function () {},
onOpenBefore: function () {},
onOpen: function () {},
onClose: function () {},
onDestroy: function () {},
onAction: function () {}
};