像 Postman 这样可视化的 HTTP 请求工具是调试 API 不可或缺的利器。Postman 虽好但也越来越重,而且如果要整合到其他工具中,显然 Postman 又不是一个可行的方案。于是我想打造一个简单的前端组件(widget),它是一个标准 Vue 可复用的组件,能够轻易地被整合。整个组件最终界面如下。
该组件特性:
- 基于 vue2/iview 方案,标准 npm 前端项目
- 代码短小精悍,不过几个文件,不到一千行代码。
- 依赖只有 iview 和 vue-codemirror,低耦合
- 功能简单清晰易上手,代码易于理解与扩展
构建这么一个小组件可以说根本没什么难度,我也是一边仿着 Postman,一边“画界面”,两三天就完事了。当然后续还有很多的想法,很多的功能需要添加。不过前期肯定先出个初版,从最简单的开始。
名字就叫平淡无奇的 “api-helper” 吧~ 在线演示 | 源码 | NPM 发布页
使用方式
这是标准 vue 组件,安装组件:
npm i @ajaxjs/aj-api-helper
或者在 package.json 中添加依赖然后执行 npm i:
  "dependencies": {
    "@ajaxjs/aj-api-helper": "1.0.0"
    ……
  },
引入方式:
import ApiHelperMain from "@ajaxjs/aj-api-helper";

export default {
  components: { ApiHelper: ApiHelperMain.ApiHelper },
  ……
}
标签中引入:<ApiHelper />。
开发历程心得
整体界面
整体界面就是调用 ivew 组件库,这部分没什么好多说的了。代码编辑器使用了 vue-codemirror,也比较简单。
<!-- JSON 源码编辑器-->
<codemirror class="code-editor" v-model="responseBody" :options="cmOption" style="height:300px;"></codemirror>
vue-codemirror 配置如下:
cmOption: {
    tabSize: 4,
    styleActiveLine: true,
    lineNumbers: true,
    mode: "application/json",
    // theme: "monokai"
},
编辑表格
各种 Form、QueryString、Head 需要一个表格放置参数,类似于 Postman 的:

一开始打算使用 iView 的 table 组件,但感觉太笨重,于是还是用原生 <table> 自己搞一个。
这样无论源码还是界面显得清爽很多。实际源码如下:
<template>
  <table class="input-table">
    <thead>
      <th width="50"></th>
      <th>Key</th>
      <th>Value</th>
      <th>说明</th>
      <th>操作</th>
    </thead>
    <tr v-for="(item, index) in tableData" :key="index" :class="{disable: !item.enable}">
      <td align="center">
        <input type="checkbox" v-model="item.enable" />
      </td>
      <td>
        <input @focus="onInputFocus" @blur="onInoutBlur" @input="onInput(index)" v-model="item.key" />
      </td>
      <td>
        <input @focus="onInputFocus" @blur="onInoutBlur" v-model="item.value" />
      </td>
      <td>
        <input @focus="onInputFocus" @blur="onInoutBlur" v-model="item.desc" />
      </td>
      <td align="center">
        <Icon type="md-trash" class="delBtn" title="删除" @click="delRow(index)" />
      </td>
    </tr>
  </table>
</template>

<script>
export default {
  data() {
    return {
      tableData: this.data,
    };
  },
  props: {
    data: { type: Array, required: true },
  },
  methods: {
    onInputFocus(e) {
      let input = e.target;
      if (
        input.parentNode &&
        input.parentNode.parentNode &&
        input.parentNode.parentNode.tagName == "TR"
      ) {
        let tr = input.parentNode.parentNode;
        tr.classList.add("highlight");
      }
    },
    onInoutBlur(e) {
      let input = e.target;
      if (
        input.parentNode &&
        input.parentNode.parentNode &&
        input.parentNode.parentNode.tagName == "TR"
      ) {
        let tr = input.parentNode.parentNode;
        tr.classList.remove("highlight");
      }
    },
    onInput(index) {
      if (index + 1 == this.tableData.length) {
        // 最后一行
        this.tableData.push({
          enable: true,
          key: "",
          value: "",
          desc: "",
        });
      }
    },
    delRow(index) {
      if (this.tableData.length == 1) {
      } else {
        this.$delete(this.tableData, index);
      }
    },
  },
};
</script>

<style lang="less" scoped>
.input-table {
  width: 100%;
  border-collapse: collapse;

  input {
    border: 1px solid transparent;
    outline: none;
    padding: 0px 3px;
    width: 100%;
  }

  input:focus {
    border: 1px solid lightgray !important;
    background-color: white !important;
  }

  tr {
    &.highlight {
      background-color: #f9f9f9;

      input {
        border-color: #f9f9f9;
        background-color: #f9f9f9;
      }
    }

    &.disable {
      input {
        color: lightgray;
      }
    }
  }

  td,
  th {
    padding: 5px 5px;
    border: 1px solid lightgray;
  }
}

.delBtn {
  cursor: pointer;
}
</style>
输入的 tableData 格式如下。
 tableData: [
   {
     enable: true,
     key: "sdsd",
     value: "sdssds3",
   },
   {
     enable: false,
     key: "sdsd",
     value: "sdssds3",
   },
 ],
XHR 请求
HTTP 请求的核心自然是 XMLHttpRequest(); 的使用。必须要高度订制化,而不是复用某个 xhr 组件。写原生 xhr 实际也很简单,参见我的 xhr.js 源码。
// XHR 发送组件
export default {
data() {
return {
loading: false,
response: {
readyState: 0,
status: 0,
elapsed: 0,
},
};
},
methods: {
doRequest(method, url, params, cfg) {
let el = new Date();
let xhr = new XMLHttpRequest();
xhr.open(method, url);
xhr.timeout = 5000; // 设置超时时间为5秒
xhr.ontimeout = () => this.loading = false;// 请求超时后的处理
xhr.onreadystatechange = () => {
this.loading = true;
this.response.readyState = xhr.readyState;
this.response.status = xhr.status;
if (xhr.readyState === 4) {
try {
if (!xhr.responseText) {
this.$Message.error('服务端返回空的字符串');
this.loading = false;
return;
}
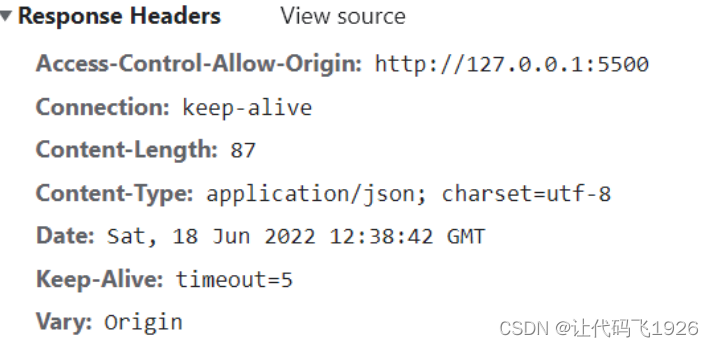
// 跨域可能不能获取完整的响应头 https://qzy.im/blog/2020/09/can-not-get-response-header-using-javascript-in-cors-request/
let heads = xhr.getAllResponseHeaders();
heads = heads.split(';').join('\n');
this.responseHead = heads;
let parseContentType = cfg && cfg.parseContentType;
switch (parseContentType) {
case "text":
data = responseText;
break;
case "xml":
data = xhr.responseXML;
break;
case "json":
default:
this.responseBody = JSON.stringify(JSON.parse(xhr.responseText), null, 2);
}
} catch (e) {
alert("HTTP 请求错误:\n" + e + "\nURL: " + url); // 提示用户 异常
} finally {
this.loading = false;
this.response.elapsed = new Date() - el;
}
}
};
let requestAll = 'HEAD \n' + method.toUpperCase() + ' ' + url + '\n';
if (cfg && cfg.header) {
for (let i in cfg.header) {
requestAll += i + " : " + cfg.header[i] + '\n';
xhr.setRequestHeader(i, cfg.header[i]);
}
}
if (params)
requestAll += 'BODY:\n' + params;
this.requestAll = requestAll;
xhr.send(params || null);
},
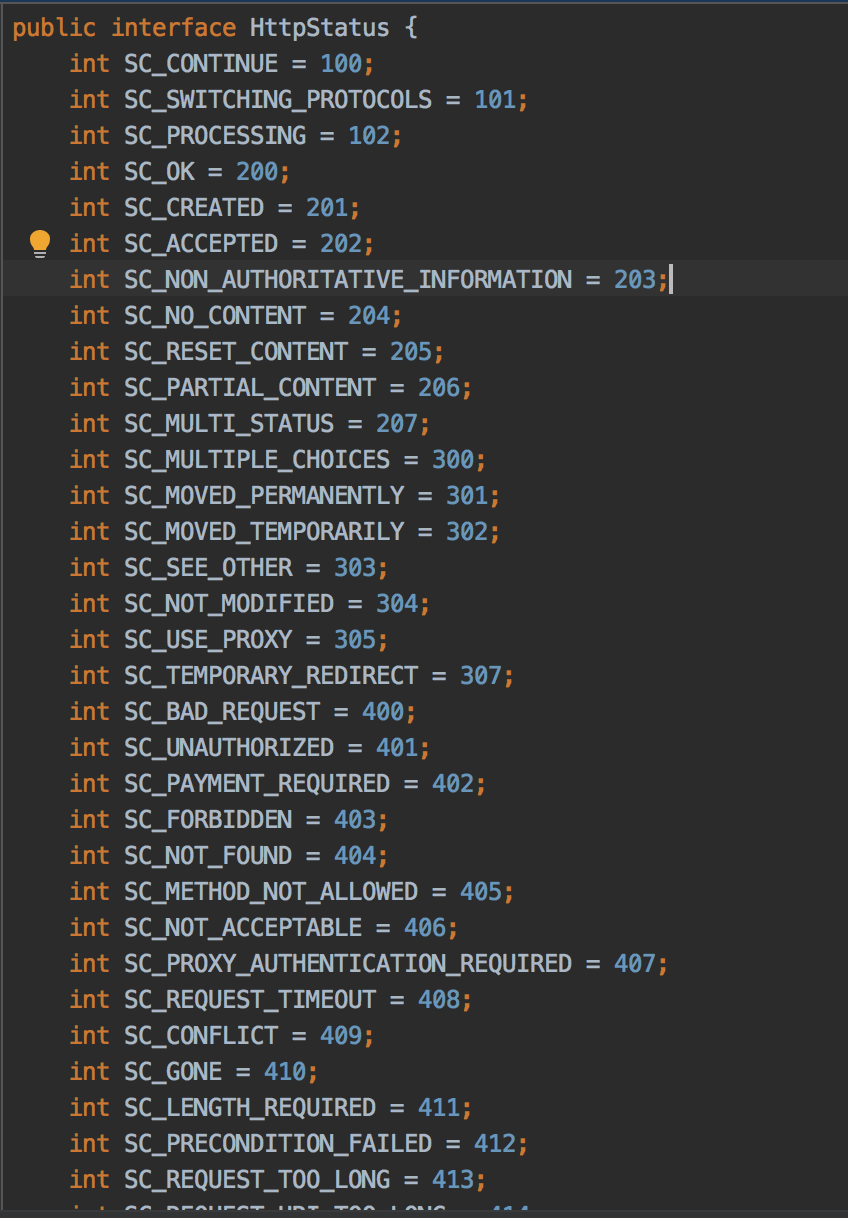
formatStatusCode() {
let code = this.response.status;
let str = code + '';
if (str[0] === '2')
return `<span style="color:green">${code}</span>`;
else if (str[0] === '4' || str[0] === '5')
return `<span style="color:red">${code}</span>`;
else
return str;
}
},
};
它基于 vue 的 mixins 特性进行分离。主意是控制一些请求状态之类的,已经返回特定的数据给前端显示。
工具函数
还有一些小的工具函数值得说下。
格式化 JSON
格式化 JSON,利用 JSON.stringify(),指定第三个参数即可加入缩进(indent)。
formatJs() {
    let json = this.requestParams.raw.json;
    json = JSON.stringify(JSON.parse(json), null, 4);
    this.requestParams.raw.json = json;
}
读写剪贴板
用 Javascript 的 navigator.clipboard 对象来复制文本或图片到剪贴板,但运行时会遇到以下错误:
navigator.clipboard undefined
这个错误的原因是 navigator.clipboard 对象只能在安全网络环境中才能使用,换言之,localhost、127.0.0.1 或者 https 中才能正常使用,否则用 http 或 IP 地址不允许访问。
最终的读取方法:
// 读取粘贴板
try {
    navigator.clipboard.readText().then((v) => {
        console.log("获取剪贴板成功:", v);
        this.requestParams.head.unshift({
            enable: true,
            key: "Authorization",
            value: "Bearer " + v,
            desc: "认证用的 token",
        });
    }).catch((v) => {
        console.log("获取剪贴板失败: ", v);
    });
} catch (e) {
    console.log(e);
    this.$Message.error('不支持读取粘贴板');
}
写入剪切板却有兼容方法。
/**
* 复制文字到剪切板
*
* @param {*} text
*/
aj.copyToClipboard = function (text) {
    if (navigator.clipboard) {
        // clipboard api 复制
        navigator.clipboard.writeText(text);
    } else {
        var textarea = document.createElement('textarea');
        document.body.appendChild(textarea);
        // 隐藏此输入框
        textarea.style.position = 'fixed';
        textarea.style.clip = 'rect(0 0 0 0)';
        textarea.style.top = '10px';
        // 赋值
        textarea.value = text;
        // 选中
        textarea.select();
        // 复制
        document.execCommand('copy', true);
        // 移除输入框
        document.body.removeChild(textarea);
    }
}
小结
虽然这只是个小工具,但仍有不少的想象空间。不一定都把功能加到这个组件里面,但可能跟其他组件有更多的联动。希望我有时间,能够进一步丰富各种功能,也希望你们用户能提出多的宝贵意见!