1,下载cesium包
(当然,使用npm install cesium安装也是可以的,不过在这里选择下载包放到本地)
官方下载地址
笔者的cesium版本为1.101
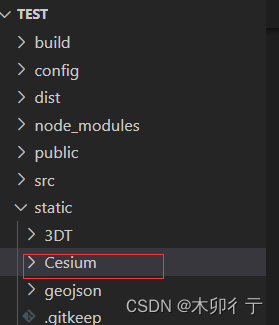
2,将下载的Cesium文件夹放到项目里某个位置
这里,笔者将其放在static文件夹中
3,引入cesium
在index.html里引入cesium文件
  <!-- 引入cesium -->
    <script src="./static/Cesium/Cesium.js"></script>
    <link rel="stylesheet" href="./static//Cesium/Widgets/widgets.css" />
4,实例化地球方法
新建一个CesiumMap.js文件
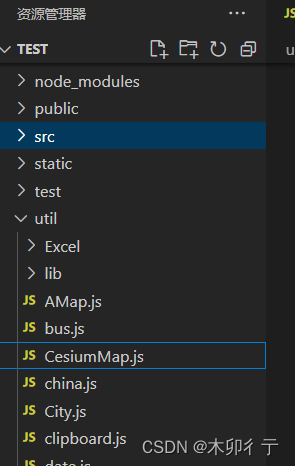
initEarth就是地球初始化的方法,里面是一些常用的基础配置
export default {
  viewer: null,
  /**
   * 实例化球及加载地图
   */
  initEarth: function(divobj) {
    //cesium密钥
    Cesium.Ion.defaultAccessToken = "**********";
    // 实例化地球
    let viewerOption = {
      geocoder: false, // 地名查找,默认true
      homeButton: false, // 主页按钮,默认true
      sceneModePicker: false, //二三维切换按钮
      baseLayerPicker: false, // 地图切换控件(底图以及地形图)是否显示,默认显示true
      navigationHelpButton: false, // 问号图标,导航帮助按钮,显示默认的地图控制帮助
      // animation: false, // 动画控制,默认true .
      shouldAnimate: true, // 是否显示动画控制,默认true .
      shadows: true, // 阴影
      timeline: true, // 时间轴,默认true .
      CreditsDisplay: false, // 展示数据版权属性
      fullscreenButton: false, // 全屏按钮,默认显示true
      infoBox: true, // 点击要素之后显示的信息,默认true
      selectionIndicator: true, // 选中元素显示,默认true
      contextOptions: {
        webgl: {
          preserveDrawingBuffer: true //cesium状态下允许canvas转图片convertToImage
        }
      }
    };
      //视角默认定位到中国上空
      Cesium.Camera.DEFAULT_VIEW_RECTANGLE = Cesium.Rectangle.fromDegrees(
        75.0, // 东
        0.0, // 南
        140.0, // 西
        60.0 // 北
     );
    let viewer = new Cesium.Viewer(divobj, viewerOption);
    viewer._cesiumWidget._creditContainer.style.display = "none"; // 去掉版权信息(logo)
    viewer.scene.globe.enableLighting = false; //开启场景光照阴影
    //设置初始化球体遮挡
    viewer.scene.highDynamicRange = !1;
    viewer.scene.globe.depthTestAgainstTerrain = true; // 深度检测
    viewer.scene.postProcessStages.fxaa.enabled = false; //抗锯齿
    viewer.screenSpaceEventHandler.setInputAction(function() {},
    Cesium.ScreenSpaceEventType.LEFT_DOUBLE_CLICK); //禁用双击
    viewer.clock.currentTime = Cesium.JulianDate.fromIso8601(
      "2023-02-01T00:00:08"
    );
    // 显示帧率
    viewer.scene.debugShowFramesPerSecond = false;
  }
  }
Cesium.Ion.defaultAccessToken = "**********";
可以看出,cesium也是需要密钥的
5,申请密钥
注册或登录cesium
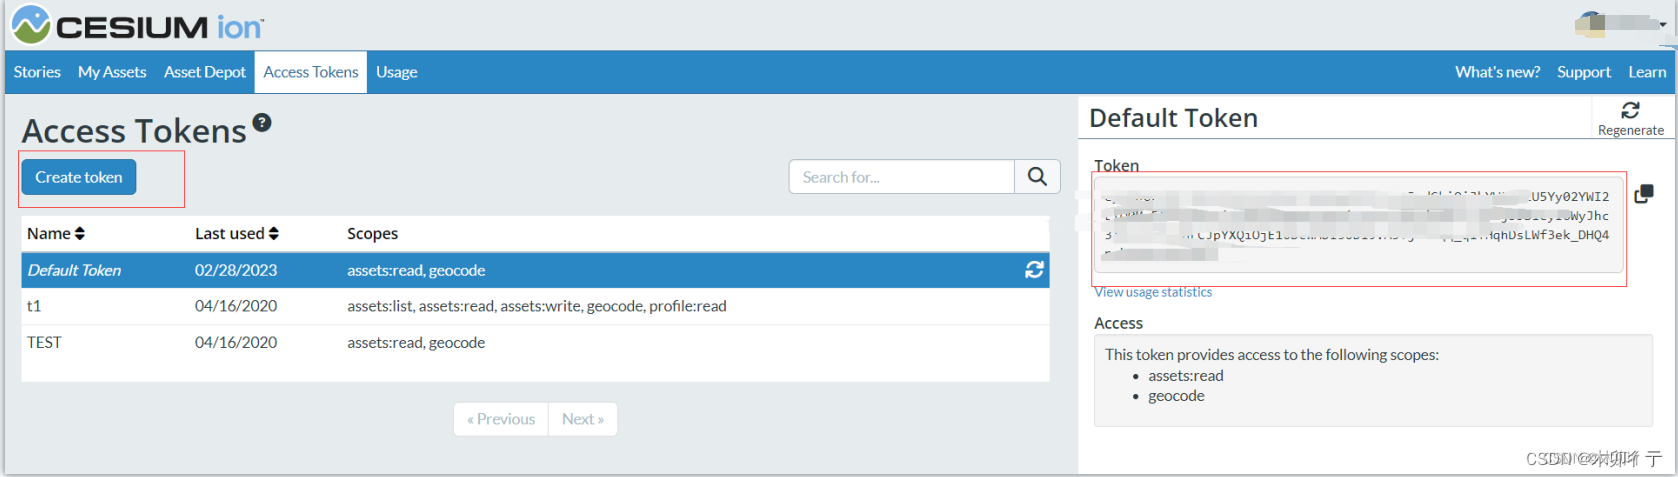
点击按钮创建token,右边框内的内容就是需要的密钥,放到""里
Cesium.Ion.defaultAccessToken = "**********";
6,cesium全局化
在main.js中引入并定义全局
import cesiumEarth from "../util/CesiumMap.js"
Vue.prototype.$cesiumEarth = cesiumEarth;
7,地球初始化
新建一个map.vue文件,用来放置地球,调用initEarth方法
<!--cesium地球-->
<template>
  <div class="home">
    <div id="cesiumContainer" ref="cesiumContainer">
  </div>
  </template>
  <script>
export default {
  data() {
  return {}
  },
   mounted() {
    // 初始化地球
    this.$nextTick(() => {
      this.$cesiumEarth.initEarth(this.$refs.cesiumContainer);
    })
  }
};
</script>
<style scoped>
.home {
  height: 100%;
  width: 100%;
  overflow-y: auto;
}
#cesiumContainer {
  display: flex;
  height: 100%;
  width: 100%;
}
</style>
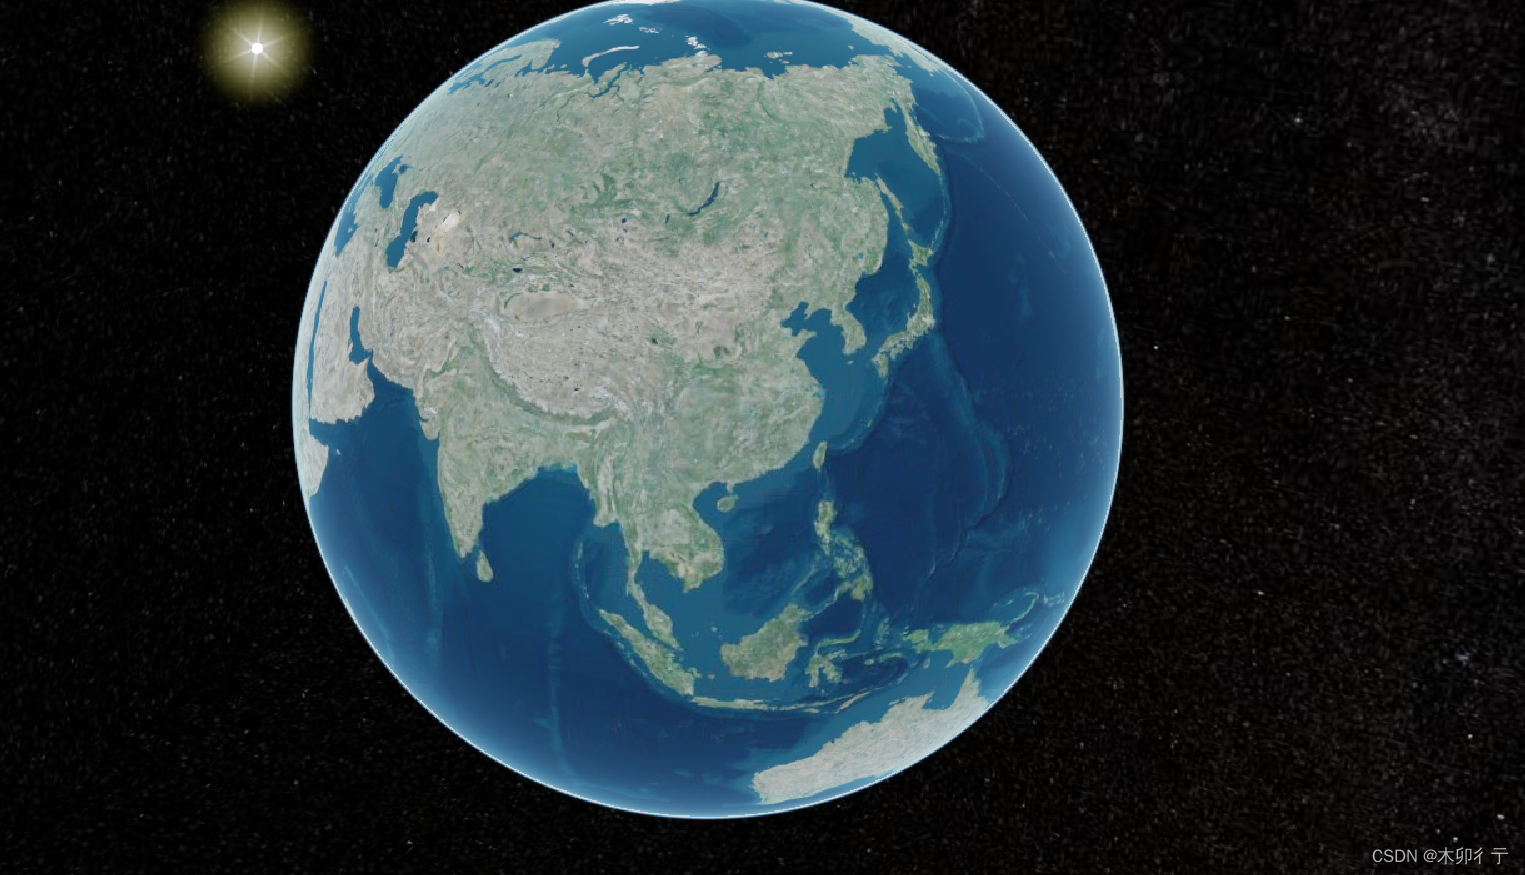
8,运行访问一下吧
9,之后的方法就可以在CesiumMap.js里写,在其他地方调用了
SVN代码地址(用户名:liu 密码:123)